Enable Malicious User Detection and Mitigation
Objective
This guide provides instructions on how to enable malicious user detection and mitigation for your applications using the security options in the HTTP load balancer. To know more about security and load balancing concepts, see Security and Load Balancer.
Enabling this feature includes enabling detecting malicious activities and associated mitigation steps. The mitigation steps include issuing a JavaScript Challenge or Captcha Challenge or temporary blocking of the user. Using the instructions provided in this guide, you can enable malicious user detection and set mitigation steps as per your choice.
Prerequisites
The following prerequisites apply:
-
An F5 Distributed Cloud Account. If you do not have an account, see Getting Started with Console.
-
An HTTP Load Balancer advertising your application. For instructions on how to set up a primary DNS zone for a load balancer, see Create Primary Zone. For help setting up a load balancer, see HTTP Load Balancer. See the vK8s Deployment guide for deploying your applications on the F5 Distributed Cloud's Network Cloud or Edge Cloud.
Configuration
You can enable detection using one of the following methods:
-
Using a single load balancer Machine Learning (ML) configuration: In this method, the detection is enabled using the default configuration as part of the load balancer configuration. If you prefer to customize the malicious user detection settings, use method 2.
-
Using a multi-load balancer ML configuration: In this method, detection is enabled as part of the app type configuration, which also allows customization of the malicious user detection settings.
You can enable mitigation also in one of the following ways:
- Using the load balancer security monitoring, malicious user IP addresses can be added to allow/deny lists.
- Using the load balancer advanced security configuration, automatic mitigation of malicious users is configured.
Note: When malicious user mitigation is enabled and malicious user behavior is tracked, the system tags the users into threat levels
High,Medium, andLow. The system automatically reduces the score when there is no malicious behavior detected for the user for a period of time. This is known as theCooling Off Period. This period indicates how long it takes to reduce fromHighthreat level toNone. The system executes a score decay mechanism over a period of time for this to happen. The default Cooling Off Period is 20 minutes. This period can be changed only when the detection method is using multi-load balancer configuration. In case of single load balancer, the Cooling Off Period cannot be changed.
The instructions provided in this guide show all the options for enabling malicious user detection and mitigation.
Enable Malicious User Detection
Log into F5® Distributed Cloud Console (Console) and perform one of the following methods:
Using Single Load Balancer Configuration
For a single load balancer configuration, detection is enabled only for that load balancer.
Step 1: Start editing the load balancer configuration.
- Select the
Web App & API Protectionworkspace on the home page.
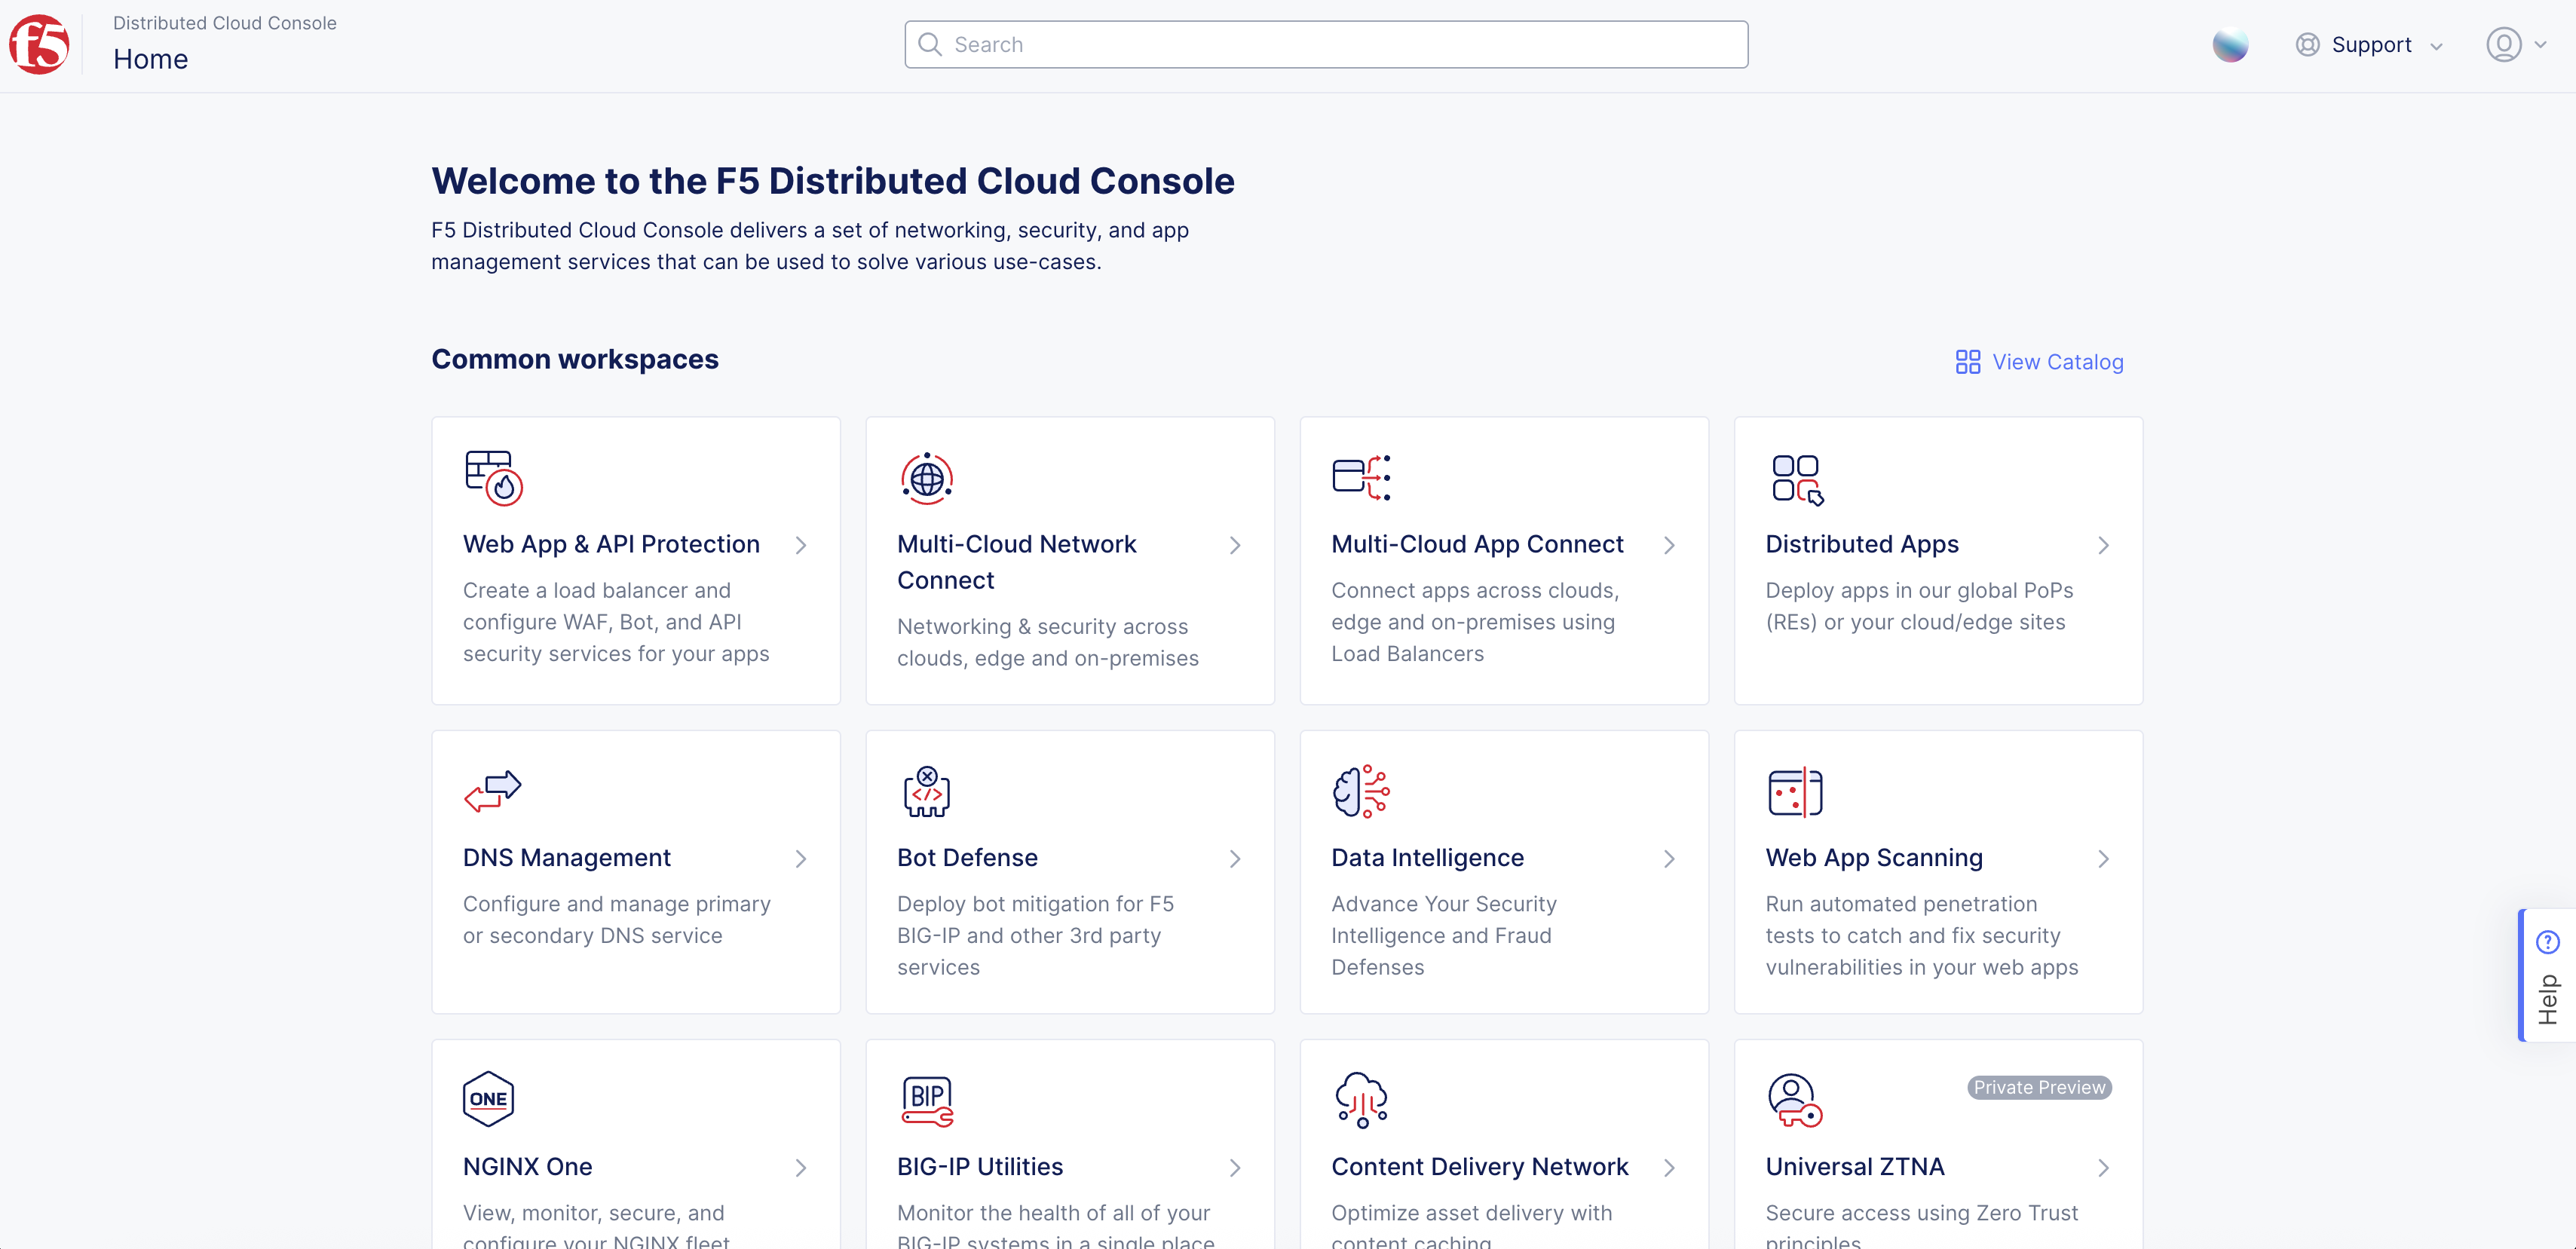
Figure: Home Page
Note: Alternatively, you can search for load balancers in the search located on top of the home page.
-
Select
Manage>Load Balancers>HTTP Load Balancers. A list of load balancers is presented. -
Select
...>Manage Configurationfor your load balancer and selectEdit Configurationon the loaded form.
Step 2: Enable malicious user detection.
-
Go to the
Common Security Controlssection. -
From the
Malicious User Detectionmenu, selectEnable. -
Select
Save HTTP Load Balancer.
Using Multi-Load Balancer Configuration
For a multi-load balancer configuration, the detection is based on the malicious user configuration derived from the app type and app settings objects. The mitigation is applied to all load balancers applied with the app type label.
Step 1: Create app type object.
-
Select the
Shared Configurationworkspace. -
Navigate to
Security>AI & ML>App Types. SelectAdd App Type. -
Enter a name for the app type in the
Metadatasection. -
Select
Add Itemfor theAI/ML Feature Typefield in theFeaturessection. -
Use the
AI/ML Feature Typedrop-down menu and selectMalicious User Detection. -
Select
Add App Type.
Step 2: Apply app type label to the load balancer.
-
Switch to the
Web App & API Protectionworkspace and change to the desired namespace. -
Select
Manage>Load Balancers>HTTP Load Balancers. A list of load balancers is presented. -
Select
...>Manage Configurationfor your load balancer and selectEdit Configurationon the loaded form. -
Select
Add Labelin theLabelsfield in theMetadatasection. -
Select
ves.io/app_typeas the key and name of the app type you created in previous step as the value. -
Select
Save HTTP Load Balancer.
Step 3: Start creating app settings object.
-
From the
Web App & API Protectionworkspace, navigate toManage>AI & ML>App Settings. -
Select
Add App Setting. -
Enter a name.
-
In the
Customize AppType For This Namespacesection, selectAdd Item. -
From the
AppTypedrop-down menu, select the app type created in Step 1.
Step 4: Optionally, make changes to malicious user detection parameters.
This form shows the different problem categories used to identify a malicious user, sometimes including thresholds or sensitivity settings. By default, most methods of detecting malicious users are enabled. Based on a user's activities with respect to these problem categories, their threat level rises. Adjusting these parameters affects how much of an activity is required to raise their threat level. If the user stops activities in the problem categories for a period of time, their threat level is reduced. You can adjust that period of time by changing the Cooling Off Period at the bottom of the form.
- In the
Malicious User Detectionsection, selectConfigureto see theMalicious User Detectionform. This form is pre-populated with the default settings. Modify these settings as per your needs. Then, clickApply.
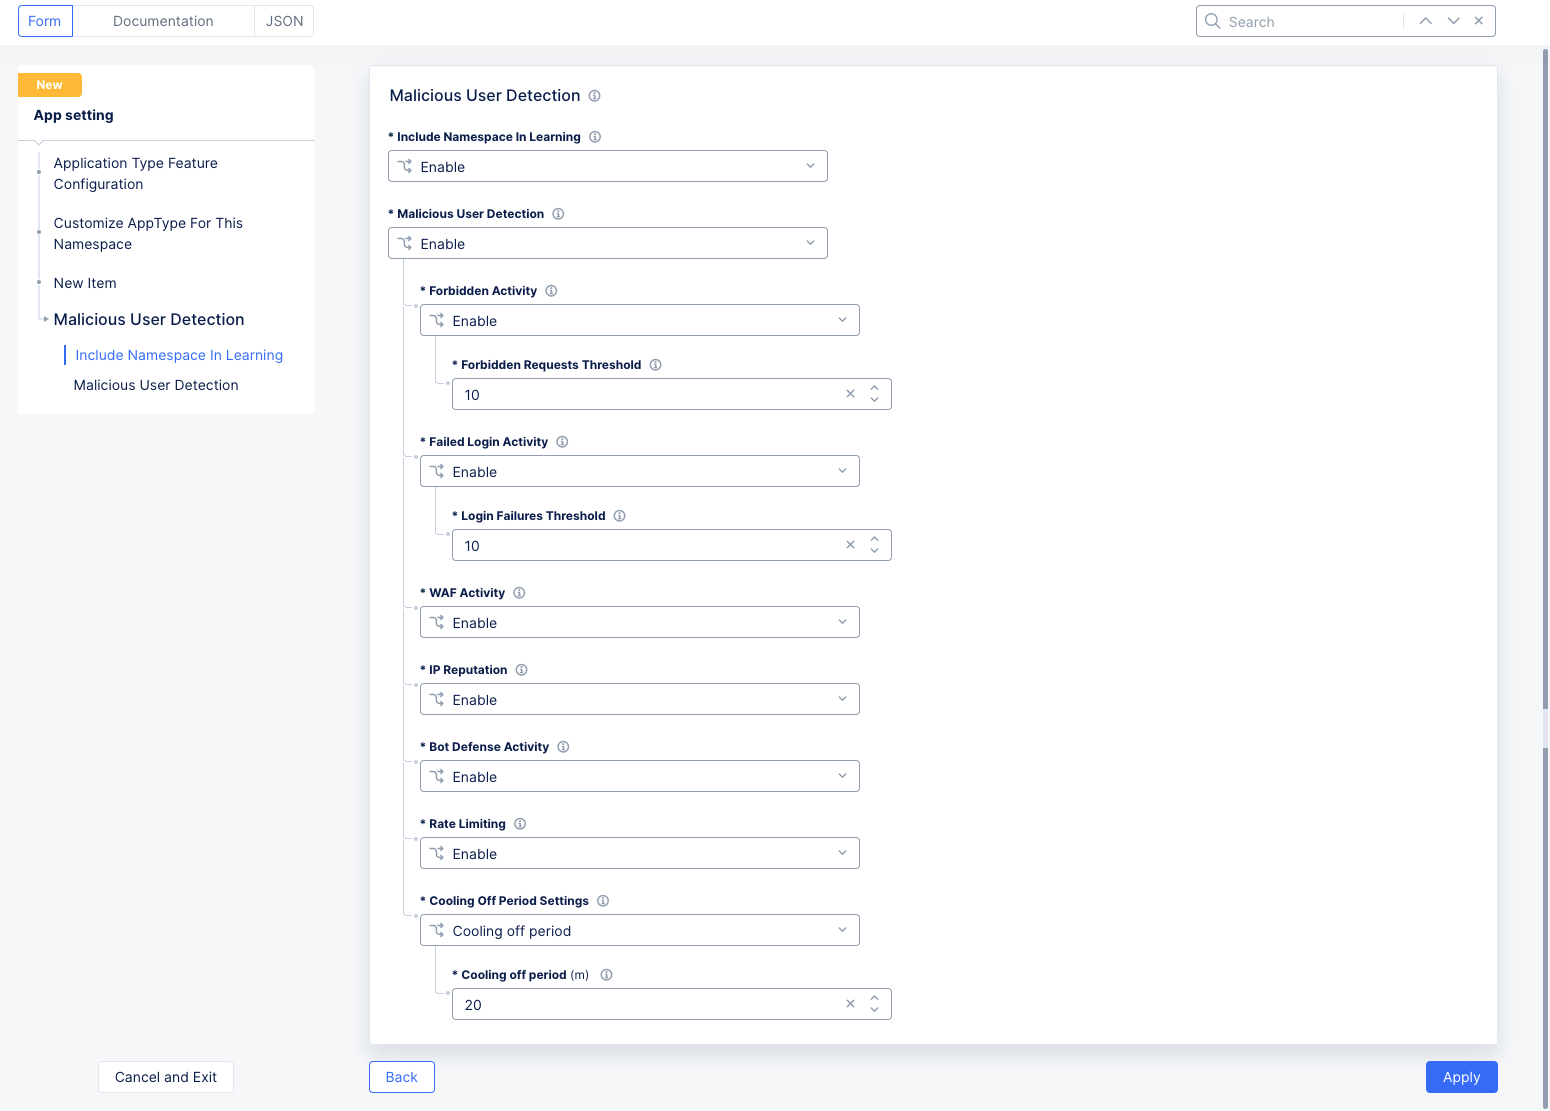
Figure: Malicious User Parameters
-
Include Namespace In Learning: The Distributed Cloud AI engine learns user behavior from traffic generated from all namespaces where virtual hosts and vK8s services are labeled with a valid apptype. SelectDisable learning from this namespaceto remove this capability for this namespace only. -
Malicious User Detection: This field enables or disables malicious user detection. If you disable the feature, no traffic will be flagged as coming from a malicious user. The various methods for malicious user detection are shown below. You can adjust how malicious user detection works using the following fields:-
Forbidden Activity: A forbidden activity is any request that is denied through the service policy. This could be IP threat categories; forbidden domains and/or clients; HTTP methods, paths, query parameters, header; or more advanced matches. See Service Policy for more details. A user that exceeds theForbidden Requests Thresholdwill be classified as malicious. -
Failed Login Activity Choice: This feature keeps track of the number of login attempts that failed (specifically 401 Unauthorized response codes). When the number of login failures from a user exceeds the limit entered in theLogin Failures Threshold, the user will be classified as malicious. A successful login will not reset the login failure count. Only the cooling off period (discussed below) will reset the malicious user status. -
WAF Activity: WAF activity looks for known attack types and signatures, threat campaigns, malformed requests, and more. See Application Firewall for more details. -
IP Reputation: This uses a database of IP addresses with questionable reputations. IP addresses earn their reputations by performing exploits or attacks, or these addresses might represent proxy servers, scanners, or systems that have been infected. The database contains IP addresses that—- Are considered malicious Botnets,
- Have launched Denial of Service (DoS) attacks,
- Host illegal material or activity,
- Are associated with phishing websites or web proxies,
- And other malicious activities.
-
Bot Defense Activity: When this feature is enabled and the Bot Defense product is successfully configured on the load balancer, bot defense events will be included in the malicious user activity risk score calculation. -
Rate Limiting: When this feature is enabled and the rate-limiting product is successfully configured on the load balancer, users who exceed the configured rate limits will be included in the malicious user activity risk score calculation. -
Cooling Off Period Setting: TheCooling off period (minutes)field specifies the number of minutes required to pass with no malicious activity in order to reduce a user's threat assessment. As each cooling off time period passes, a user's threat level will drop from high to medium, medium to low, and finally low to none. The cooling off period setting is used for all malicious user detection categories. The maximumCooling off periodis 120 minutes.
-
Step 5: Finish creating app setting object.
Select Apply and to save the settings.
Enable Malicious User Mitigation
Using the load balancer advanced security configuration, you can enable automatic mitigation of malicious users. The platform will apply the corresponding configured mitigation action for the specific threat levels.
Step 1: Start editing the load balancer configuration.
-
Switch to the
Web App & API Protectionworkspace and change to the desired namespace. -
Select
Manage>Load Balancers>HTTP Load Balancers. A list of load balancers is presented. -
Select
...>Manage Configurationfor your load balancer and selectEdit Configurationon the loaded form.
Step 2: Start configuring malicious user mitigation.
-
Go to the
Common Security Controlssection. -
From the
Malicious User Mitigation And Challengesdrop-down menu, selectEnable. -
Select one of the options from the
Malicious User Mitigation Settingsdrop-down menu. TheDefaultoption is selected. This default mitigation action is applied in the following manner:- For activity with low threat level, a JavaScript challenge with default configuration will be issued.
- For activity with medium threat level, a Captcha challenge with default configuration will be issued.
- For activity with high threat level, the user will be temporarily blocked.
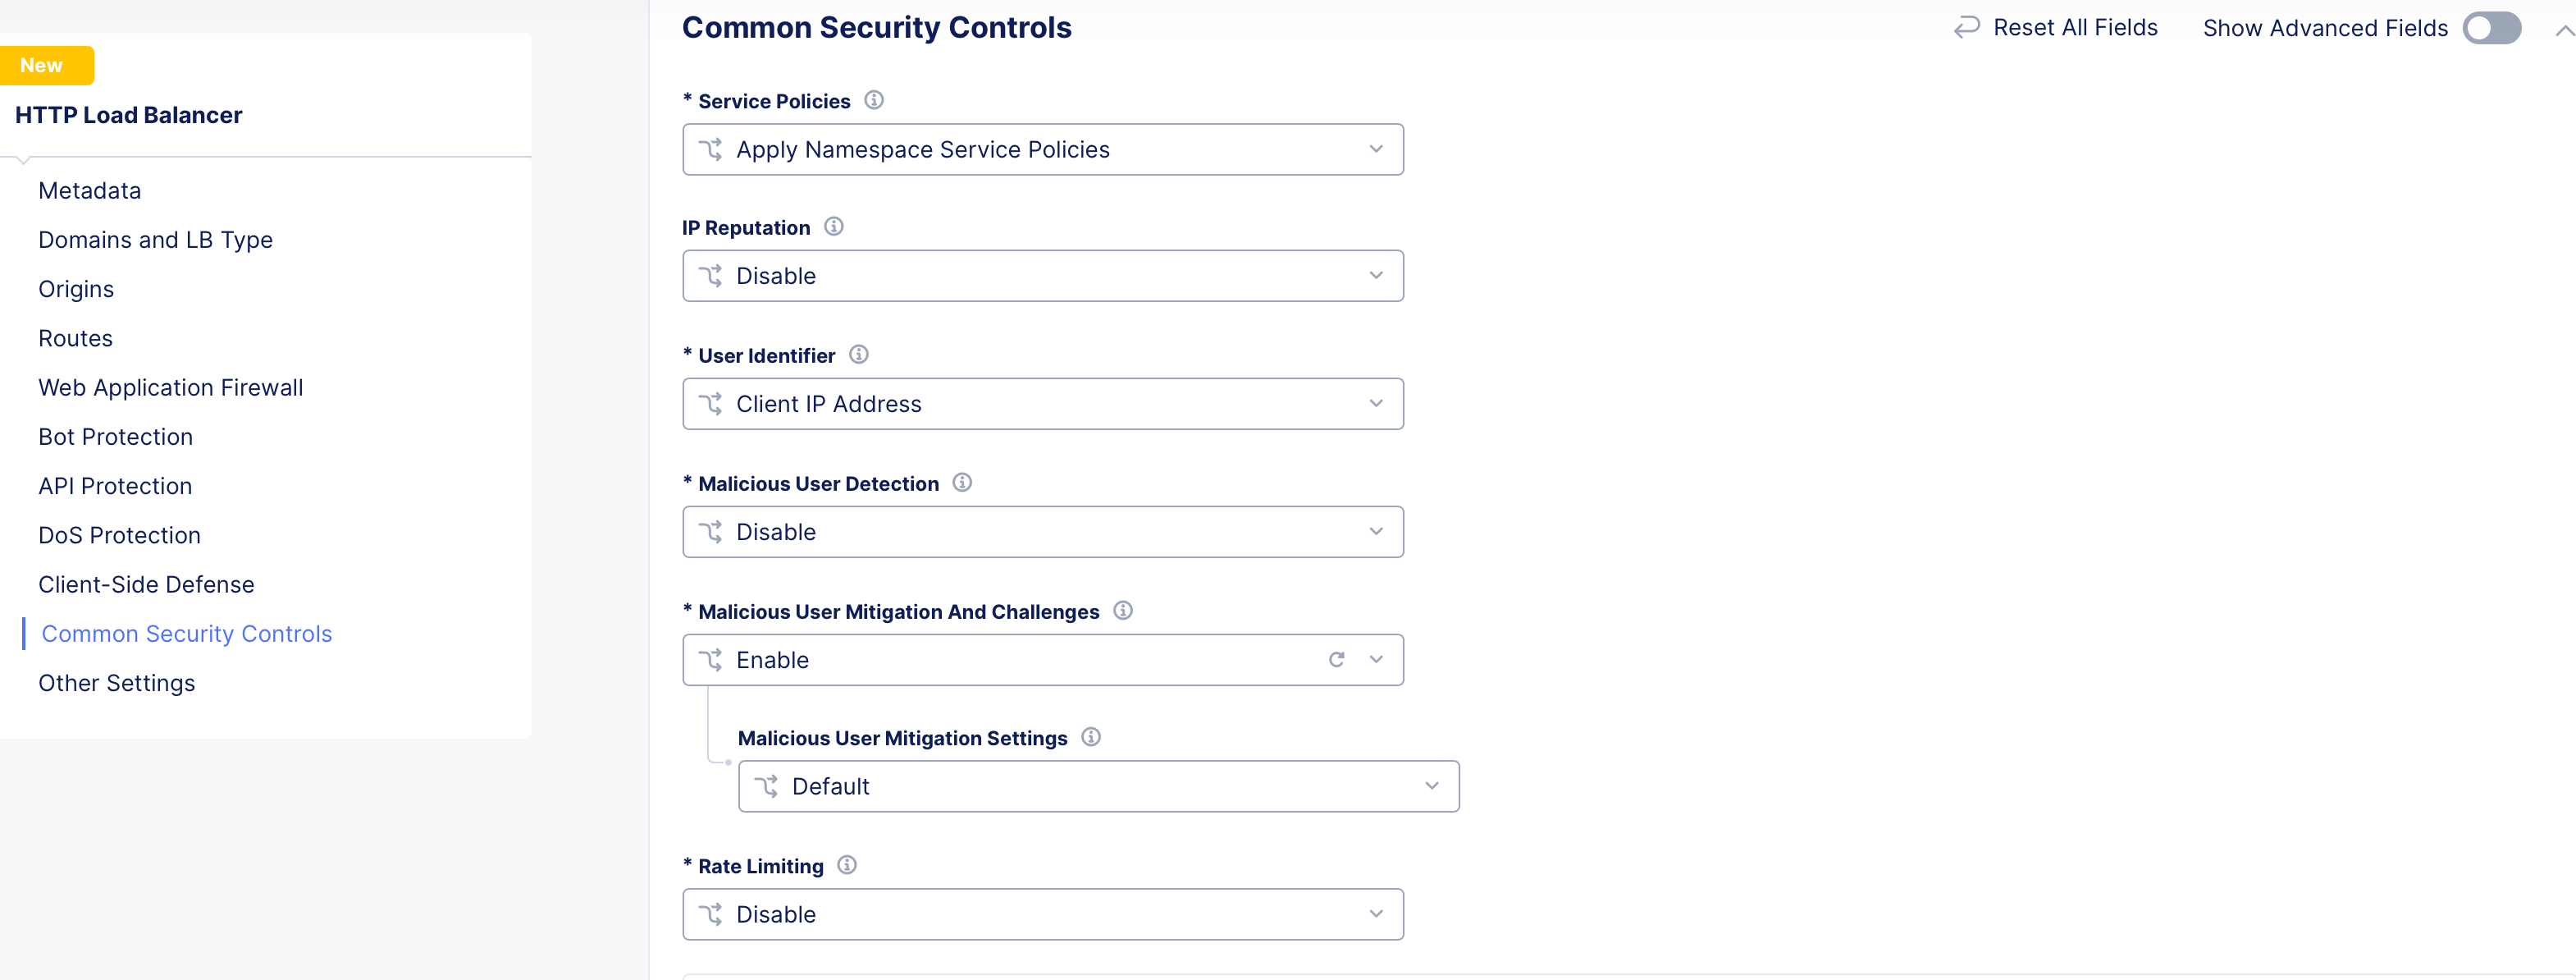
Figure: Default Malicious User Mitigation
-
Select
Customand select a malicious user mitigation object from theCustomdrop-down menu. You can also use theAdd Itemoption to create a new object and in case of creating a new object, perform the following:-
Enter a name for this malicious user mitigation object. In the
Rulessection, selectAdd Item. -
Select a threat level for the
Threat Levelfield and an associated mitigation action for theActionfield. By default,LowandJavascript Challengeare populated.
-
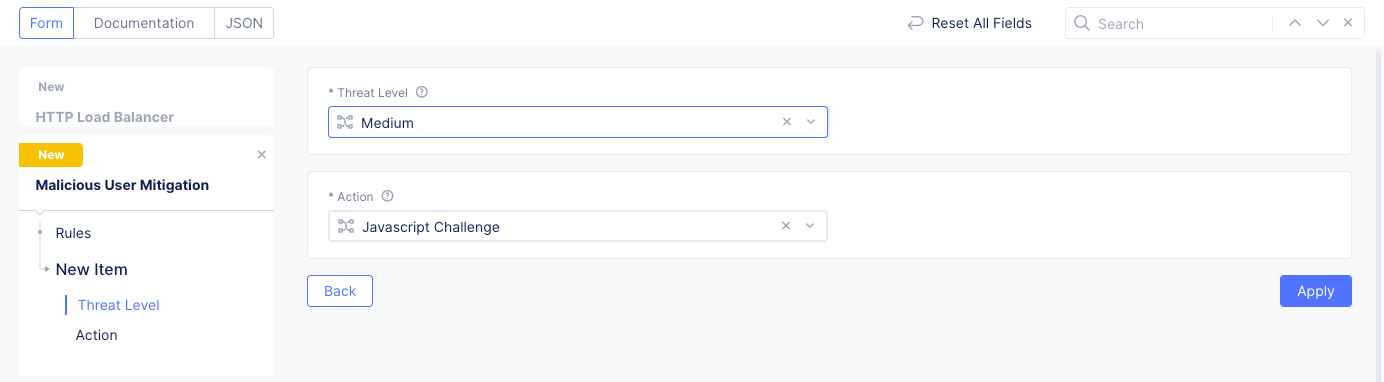
Figure: Threat Level and Action Configuration
-
Select
Applyto save the rule. -
Use the
Add Itemin theRulessection to add more rules.
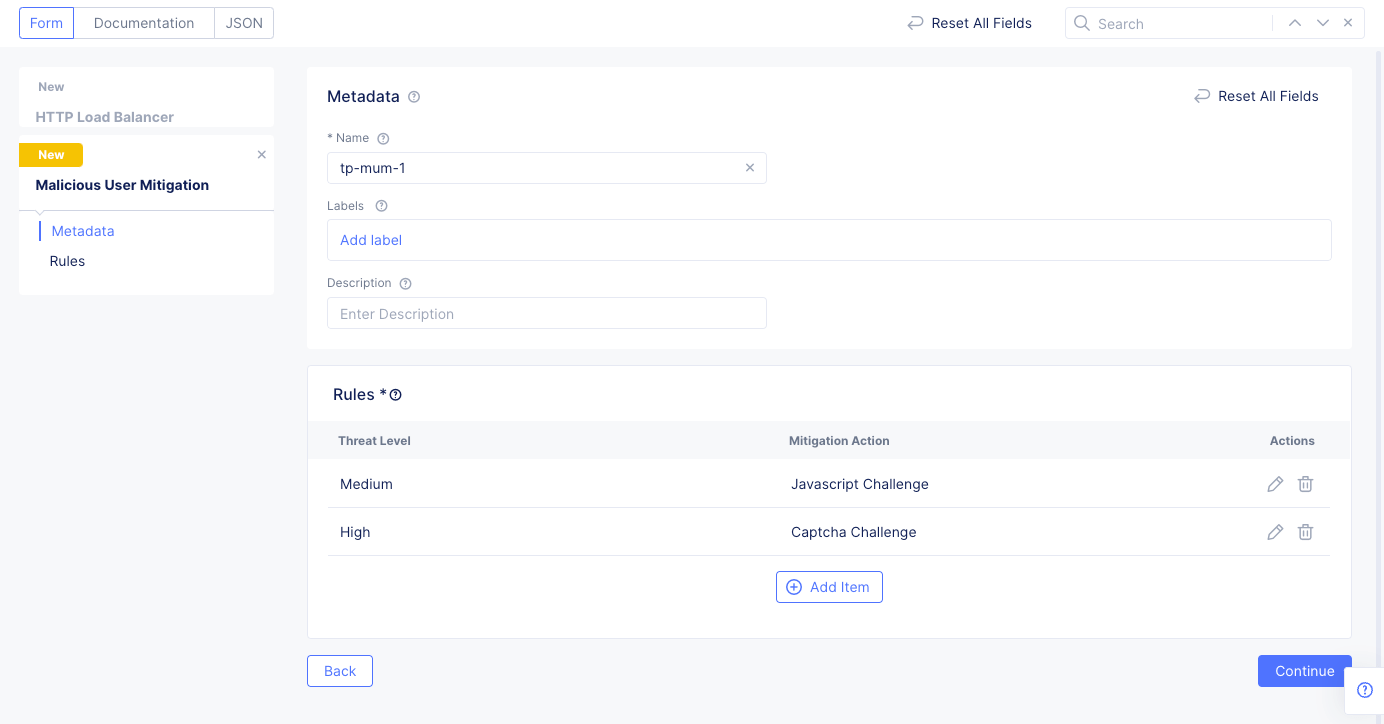
Figure: Custom Malicious User Mitigation Rules
-
When finished adding rules, select
Add Malicious User Mitigationto add the malicious user mitigation object to the malicious user mitigation configuration. -
Scroll down and select
Save HTTP Load Balancerto save changes to the load balancer.
Note: The instructions shown in this guide apply default settings for challenges, such as JavaScript. Enable the
Show Advanced Fieldsoption to view more options, such as policy-based challenges to customize the configuration. By default, the identifier for a malicious user is the client's IP address. To change the user identifier, go to the security configuration of load balancer, enable advanced fields, and selectUser Identification Policyfor theUser Identifierfield, and select an existing identifier object or create new one using the create option in the drop-down list. For instructions, see Configure User Identifier. You can specify a cookie name, header name, query parameter, or ASN for user identification.
Monitor Malicious User Activity
You can verify and monitor malicious user activities in the Web App & API Protection (WAAP) workspace. For more information, see Monitor Web App & API Protection.