Create Service Policy
Objective
This document provides instructions on how to configure an application-level policy using a service policy.
Using the instructions provided in this document, you can create service policies with specific policy rules to secure your applications.
Prerequisites
The following prerequisites apply:
-
F5® Distributed Cloud Services Account. If you do not have an account, see Getting Started with Console.
-
A load balancer. If you do not have a load balancer, see HTTP Load Balancer.
-
Optionally, one or more cloud or edge locations with a Distributed Cloud Services site. Install the node or cluster image using the Site Management guides.
Configuration
A service policy can be configured in three different namespaces: system, shared, and app. The following section shows configuration of a service policy for an app namespace.
Configure Service Policy
Log into F5® Distributed Cloud Console (Console) and perform the following steps to create and apply a service policy to your application:
Step 1: Select or create a desired namespace.
- From the Console homepage, select
Multi-Cloud App Connect.

Figure: Console Homepage
- Select an existing namespace from the top-left
Namespacedrop-down menu.
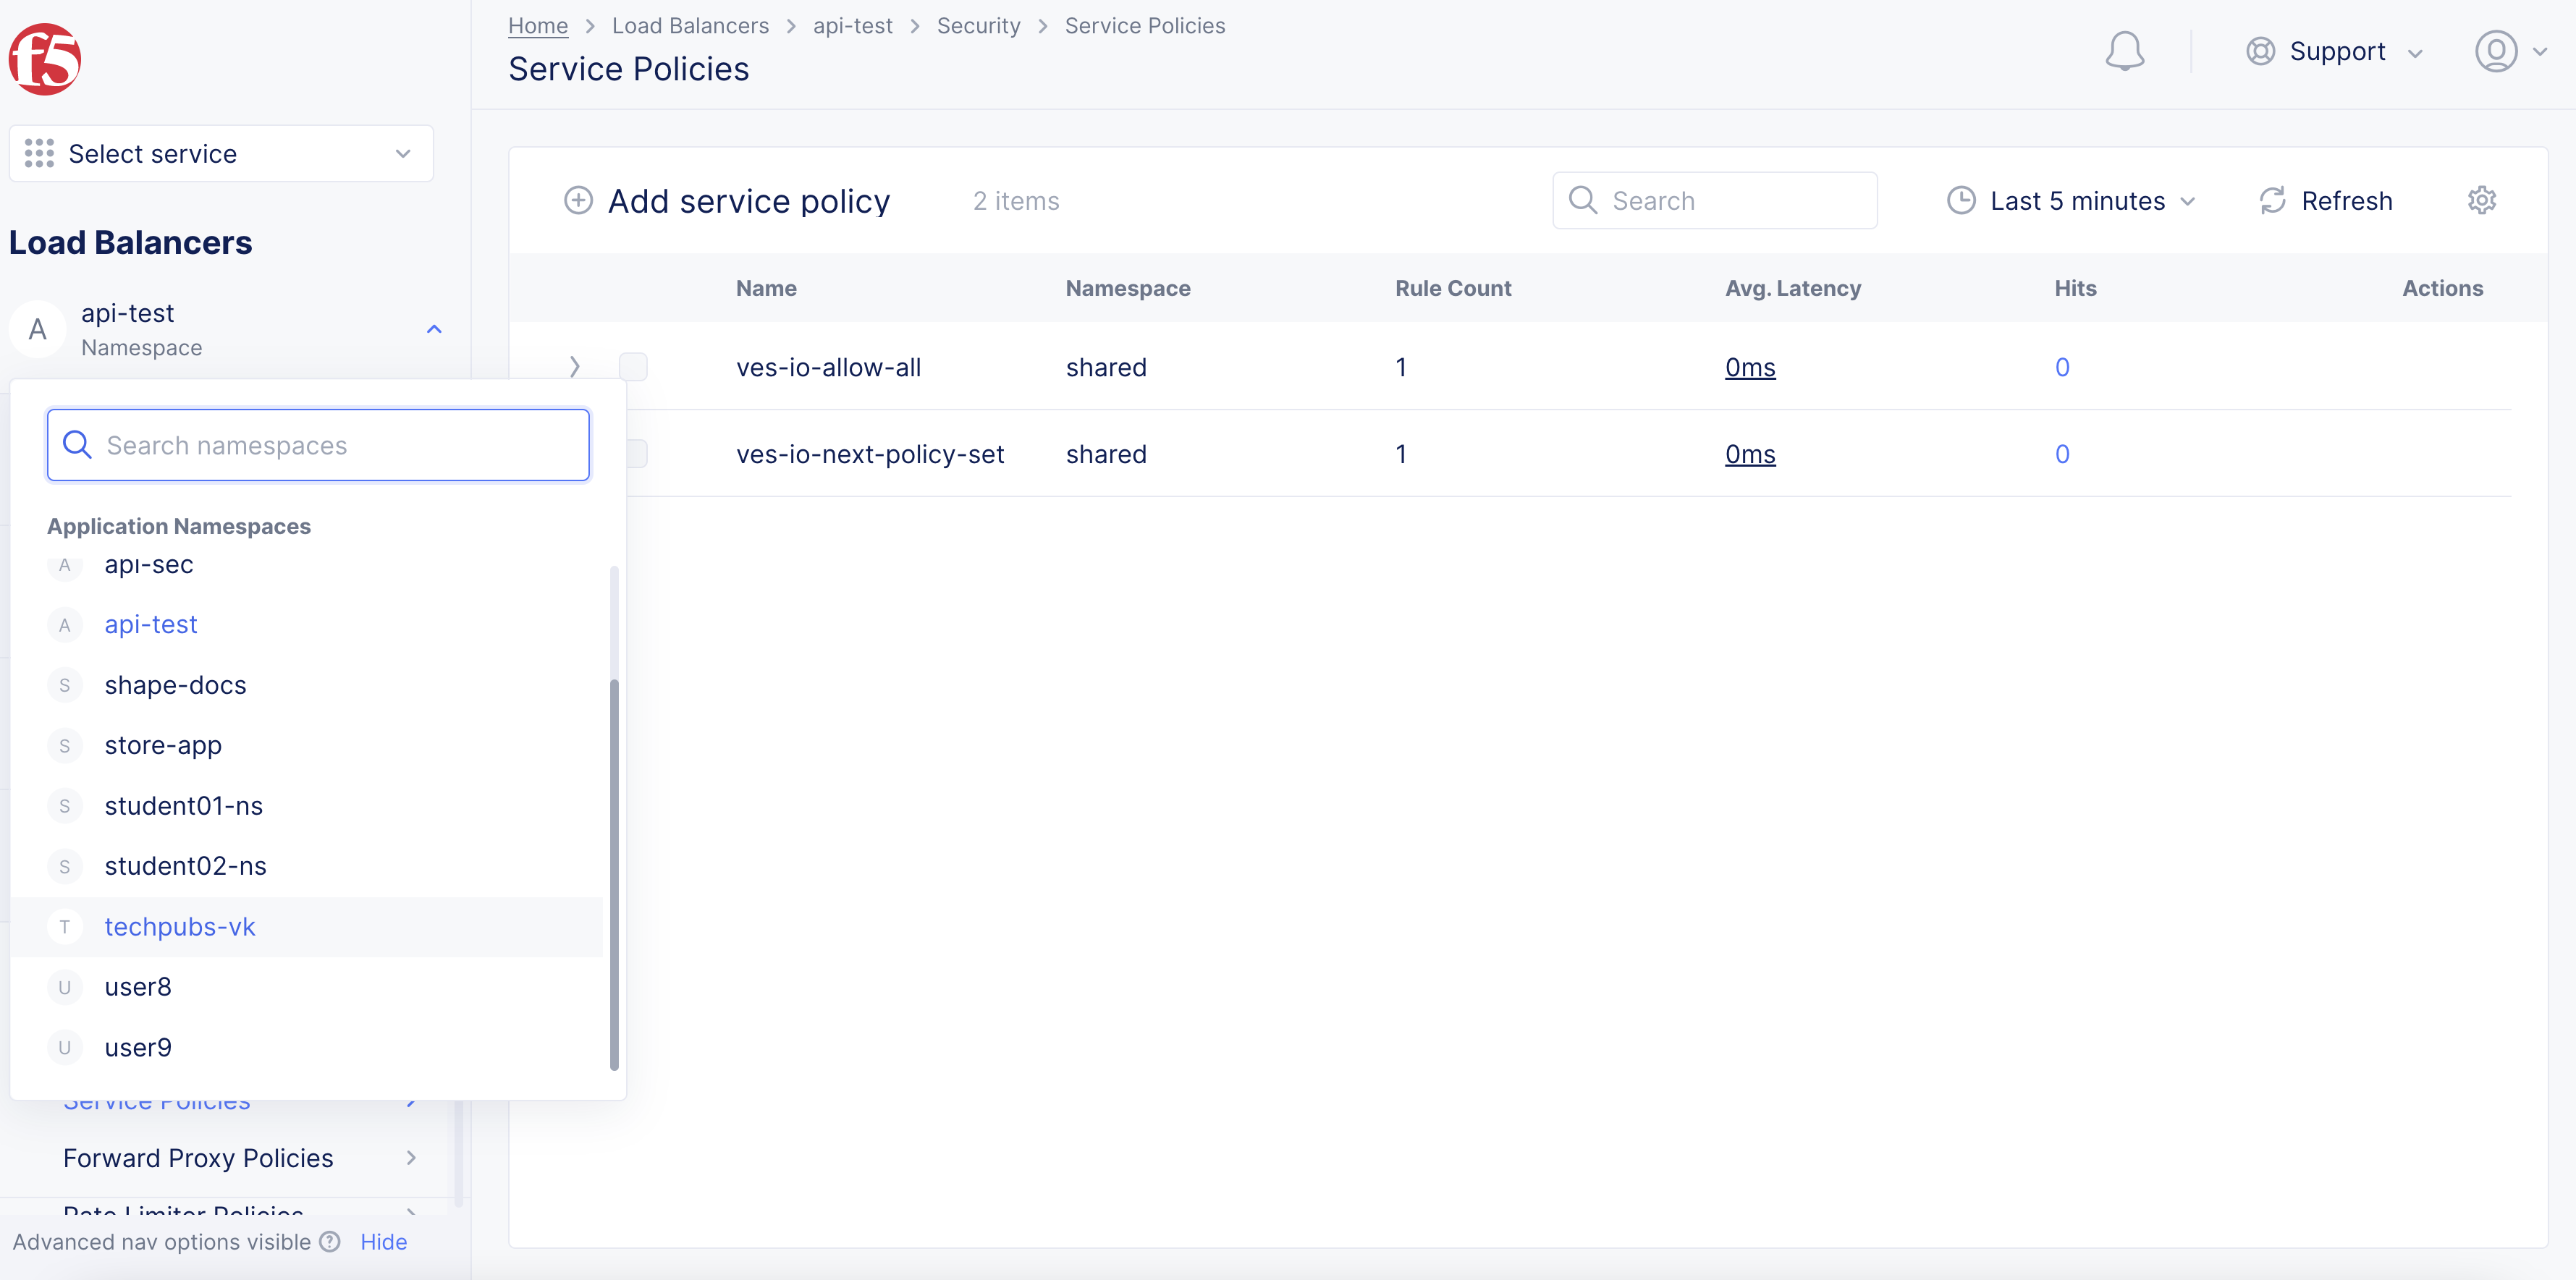
Figure: Application Namespace Selection
-
To create a new namespace:
-
From the Console homepage, select
All Services>Administration>My Namespaces. -
Select
Add namespace.
-
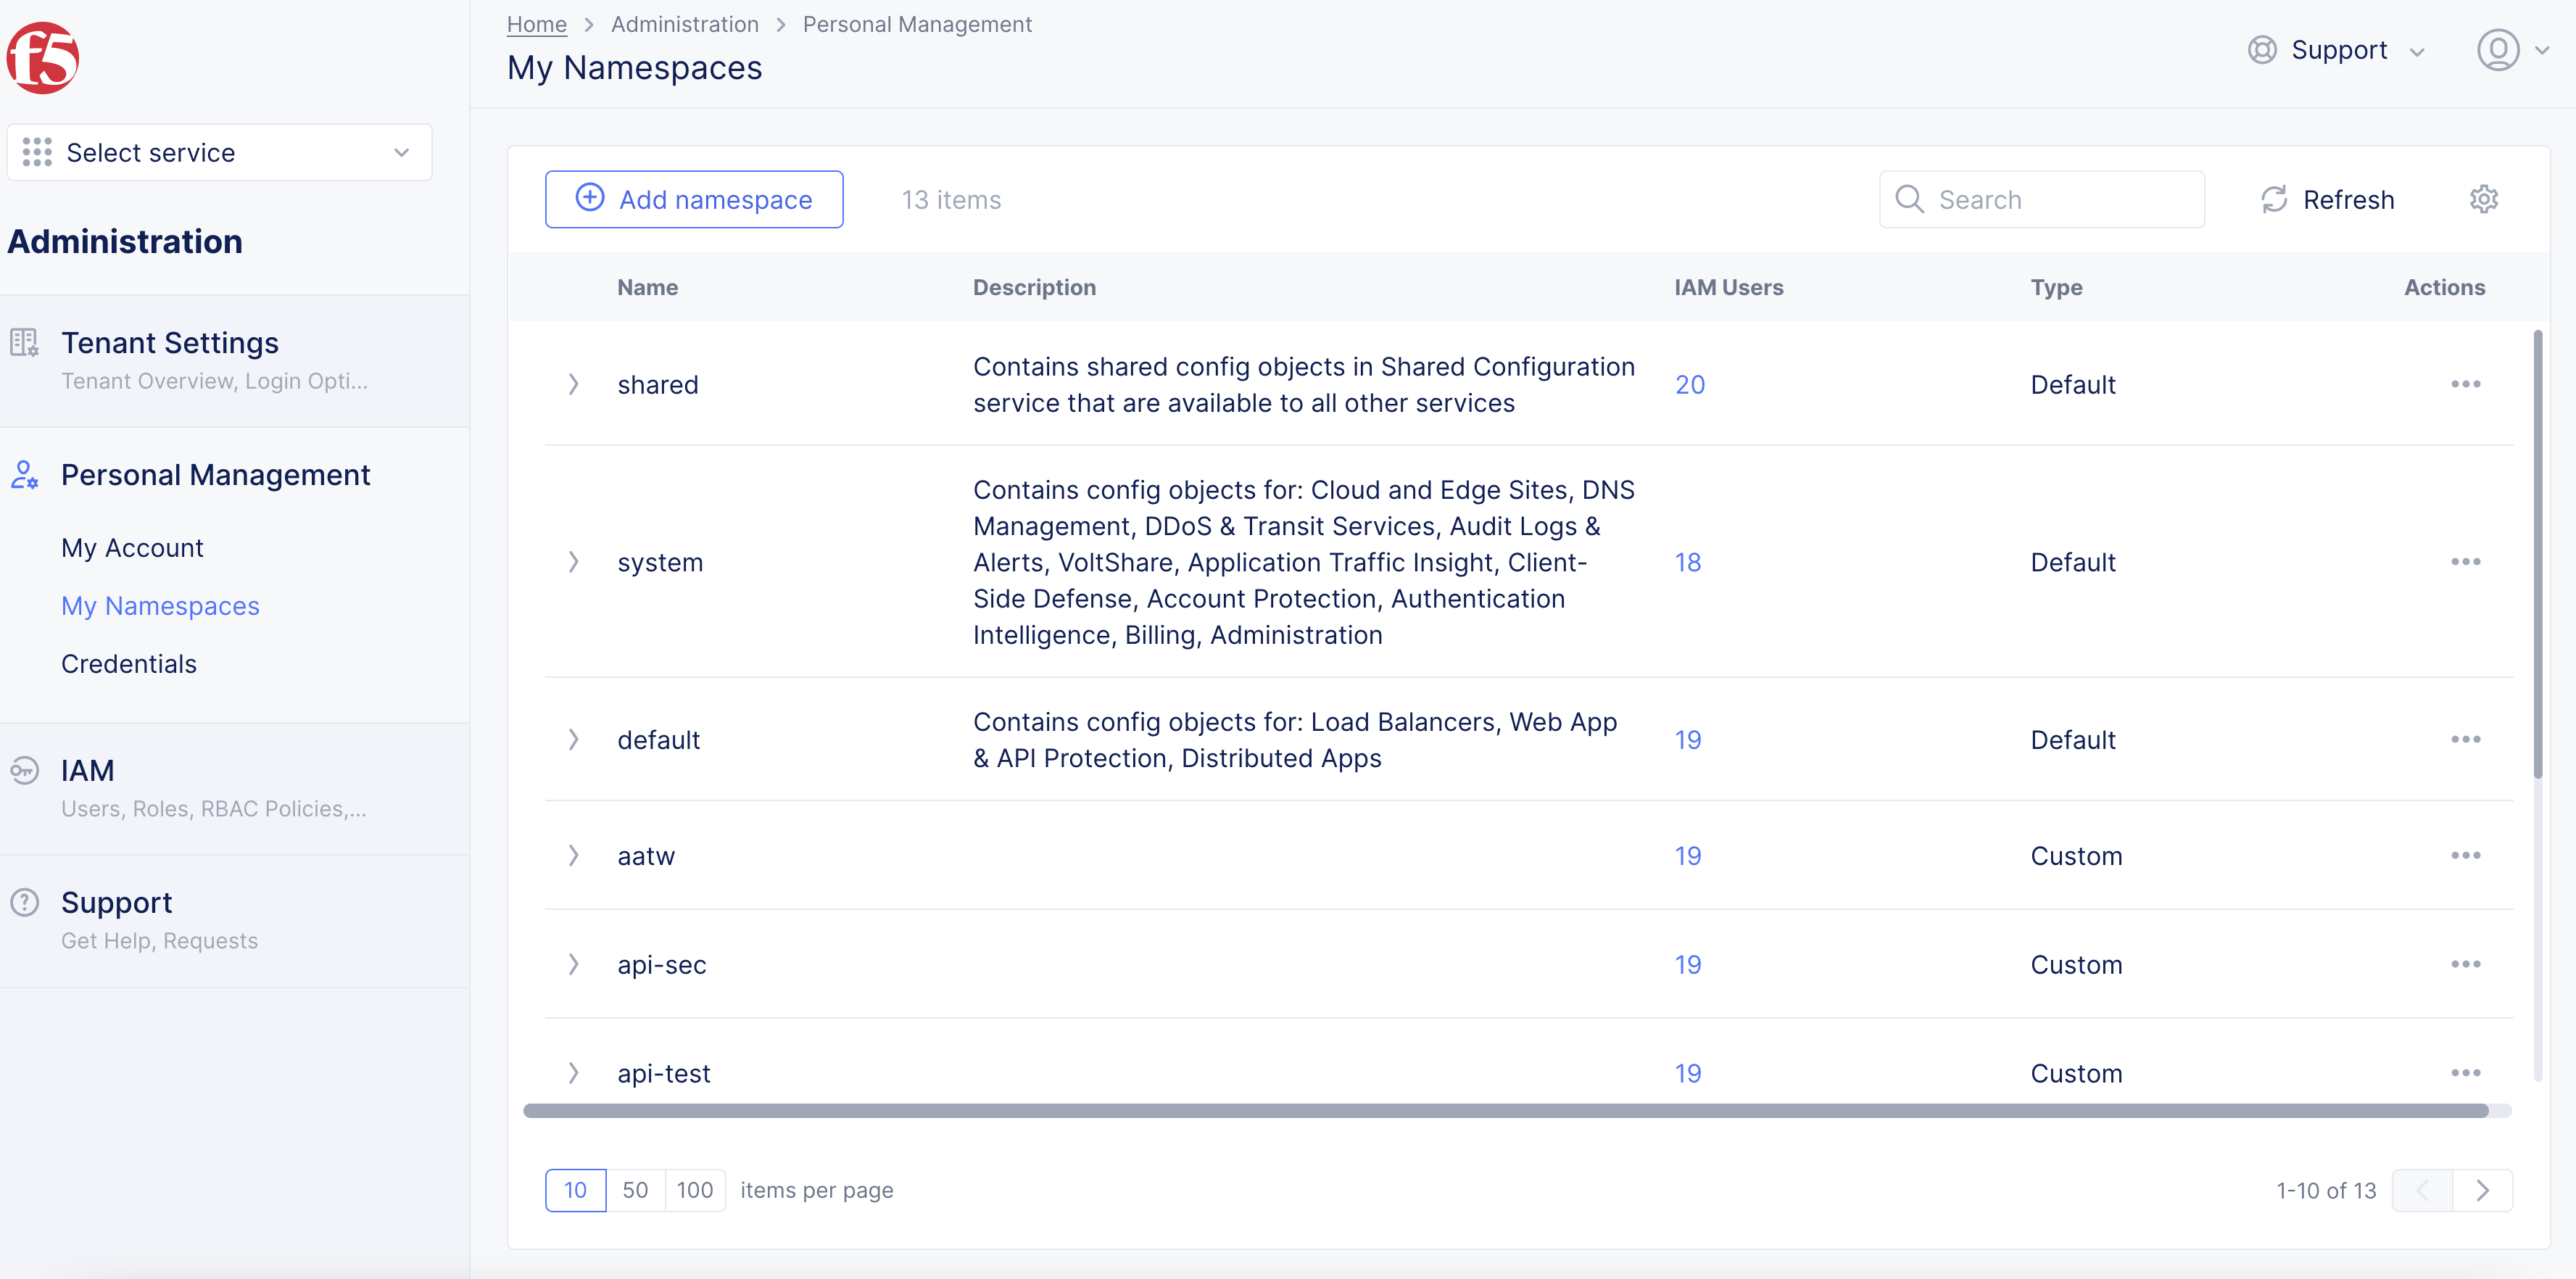
Figure: Create a Namespace
-
In the form that appears, enter a name for your namespace.
-
Optionally, add a description.
-
Select
Save changes. -
Select the
Load Balancerservice and select the service you just created.
Note: You can create a service policy in the following namespaces:
- System
- Shared
- Configured namespace
Step 2: Start creating service policy.
-
Select
Security>Service Policies>Service Policies. -
Select
Add Service Policy.
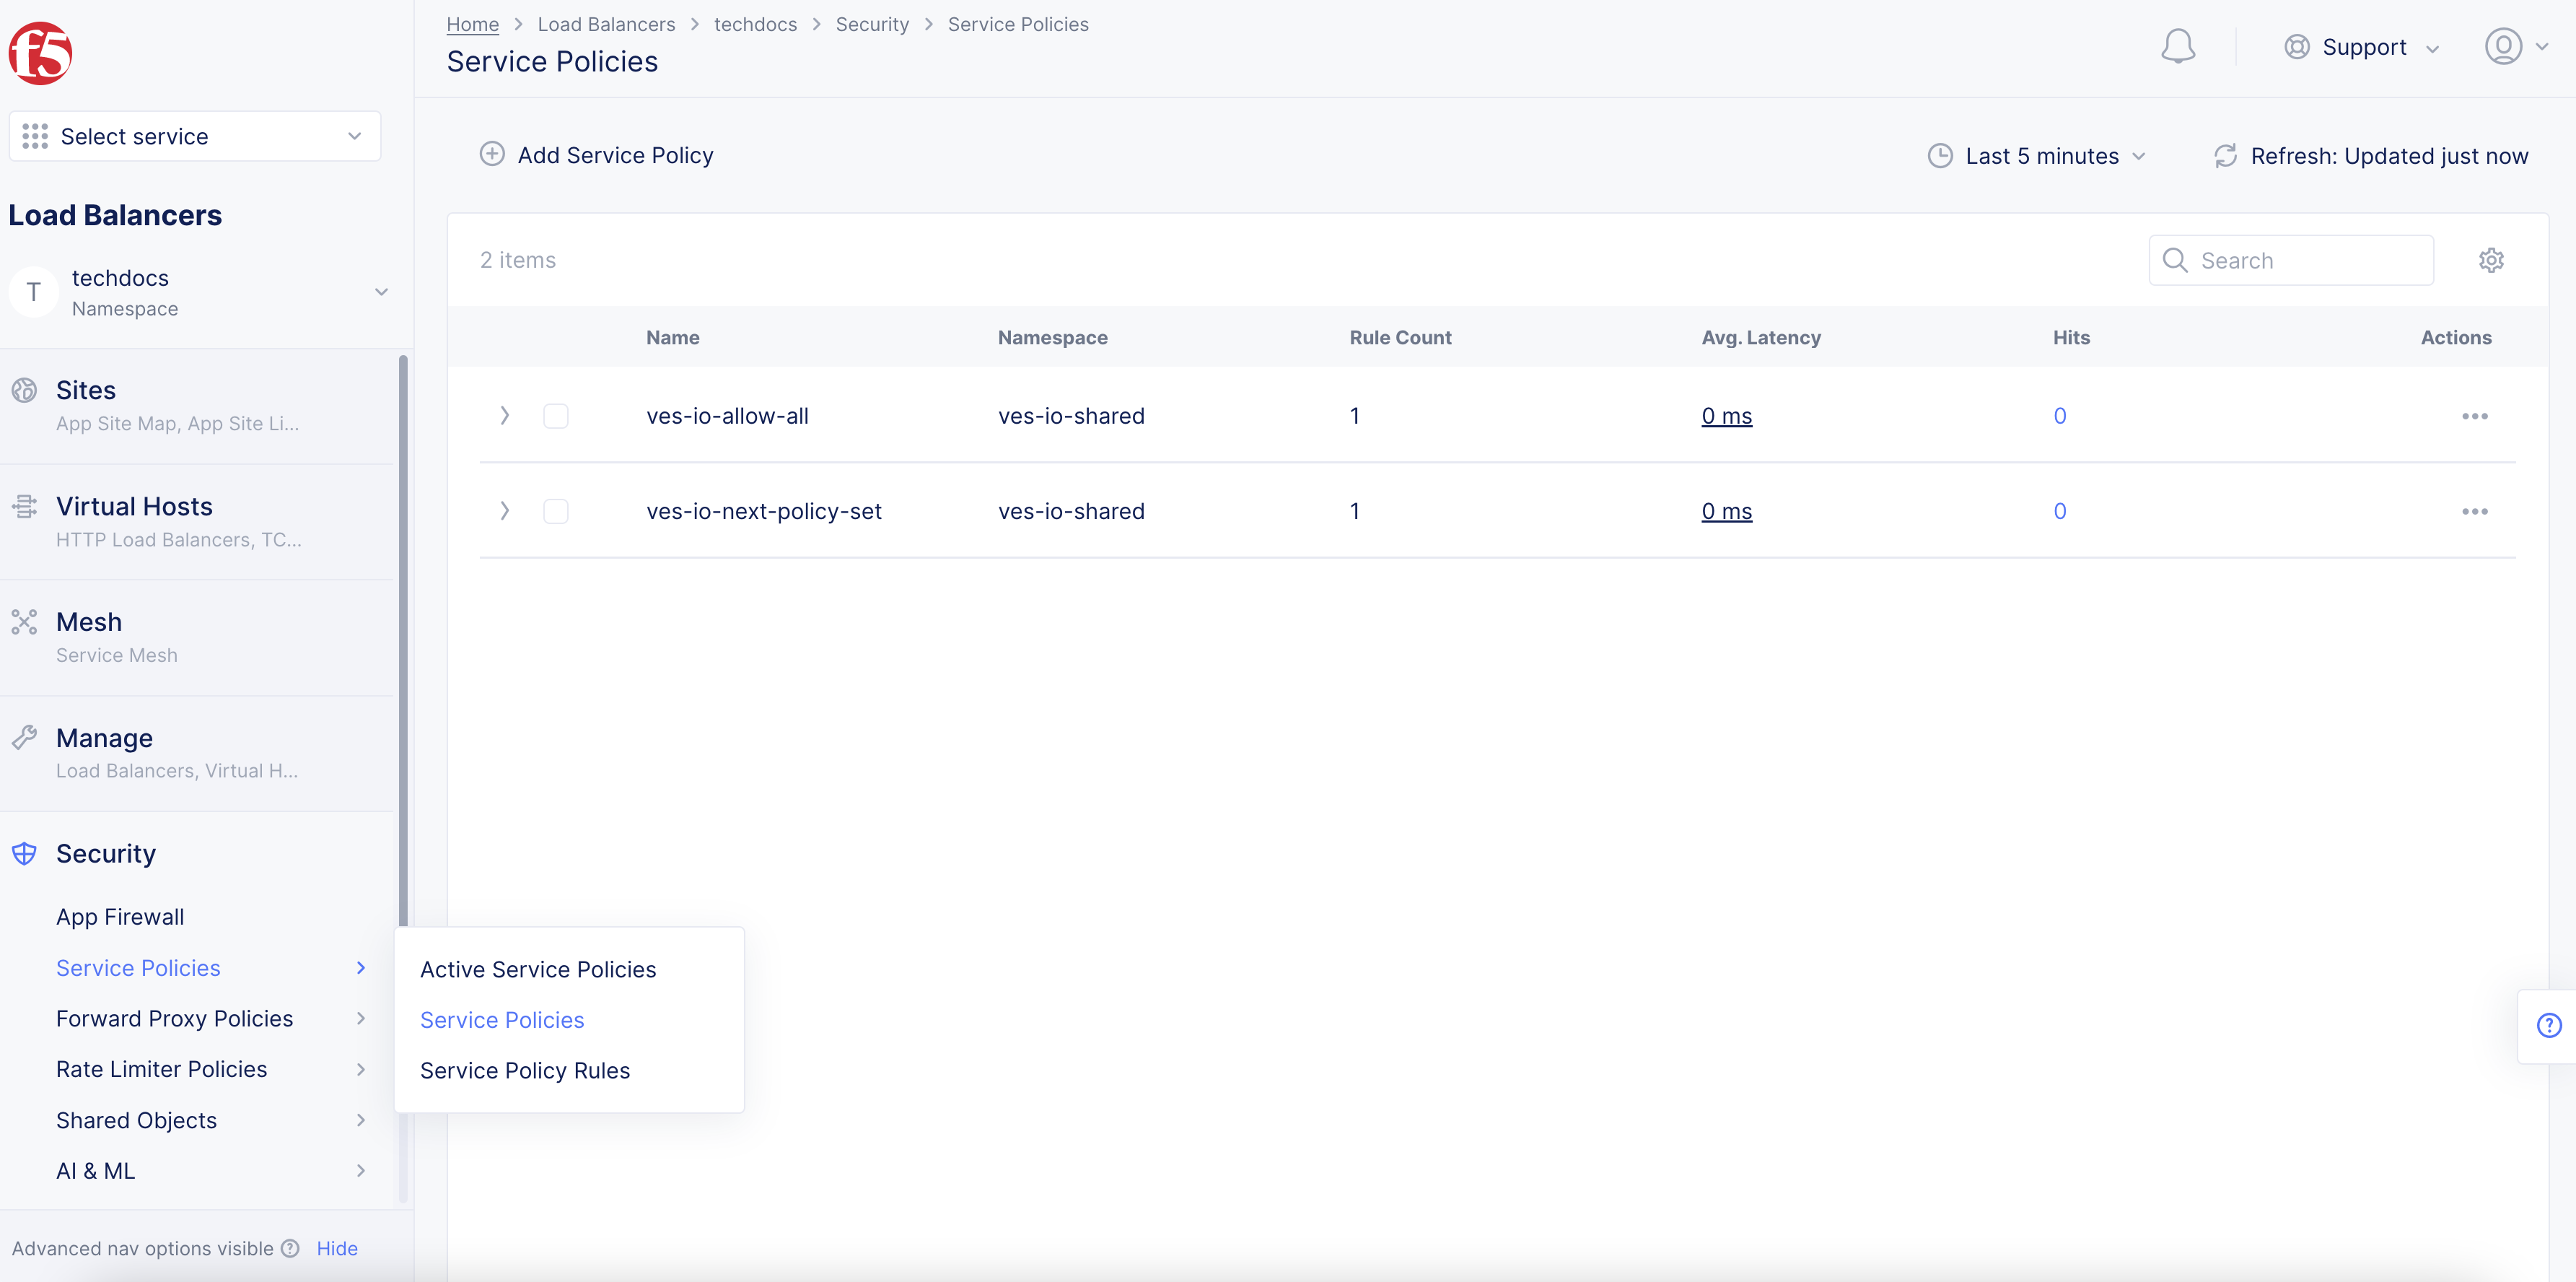
Figure: Service Policy
-
In the form that appears, perform the following:
-
In the
Namefield, enter a name for the new service policy. This name must be unique within the namespace and entered in RFC 1035 format (like a domain name, for example,acmecorp-web). -
Optionally, select one or more labels. For each label, select a key and corresponding value.
-
Optionally, enter a description for the new policy.
-
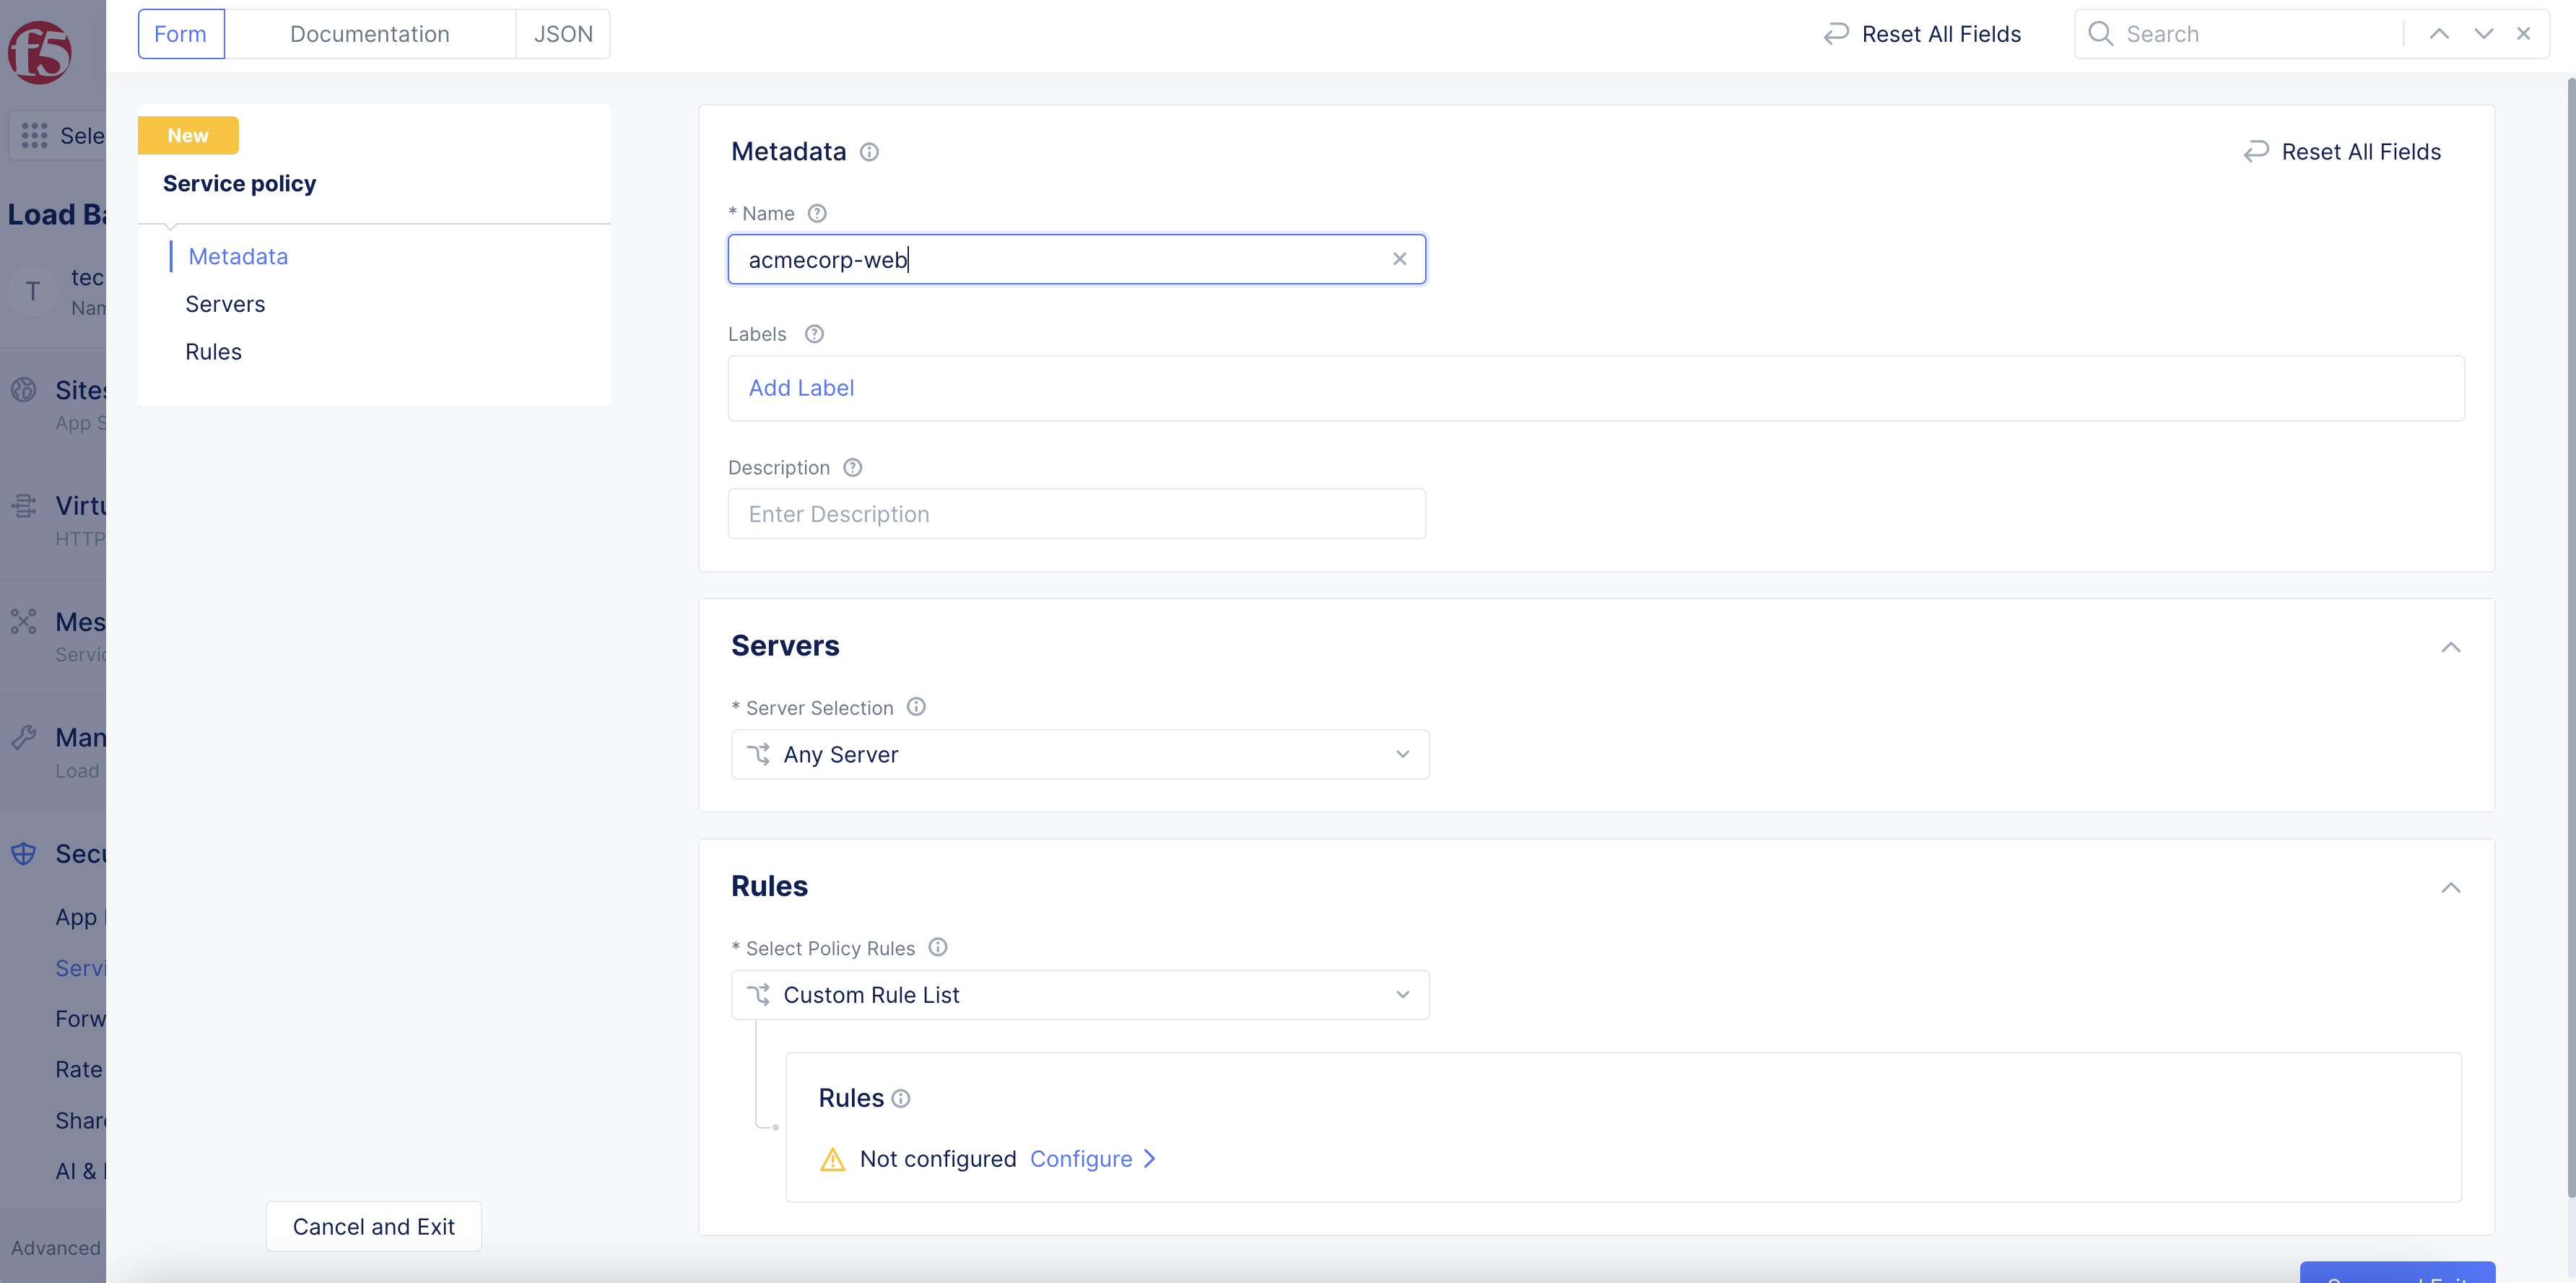
Figure: Add Name and Metadata
Step 3: Set the server attachment.
-
From the
Server Selectionfield under theServerssection, choose one of the following:-
Any Server: Applies the policy to any server. -
Server Name: Name of the server to which a request is made. Enter the name of the server in theServer Namefield. -
Group of Servers by Name: List of server names for which requests are made. You can specify them usingExact Valuesand/orRegex Values. SelectAdd itemand enter exact values or regular expressions for server names. Continue to selectAdd itemin either section to build your list. -
Group of Servers by Label Selector: Specifies the labels associated with the servers to which the requests are made. To add labels, selectAdd Labelin theSelector Expressionfield, and then for each label you want to add:-
Select a key from the drop-down list.
-
Select a displayed operator.
-
Select a displayed value or enter a custom value.
-
Select
Apply. If this is the last label, select outside theSelector Expressionfield or press thetaboresckey.
-
-
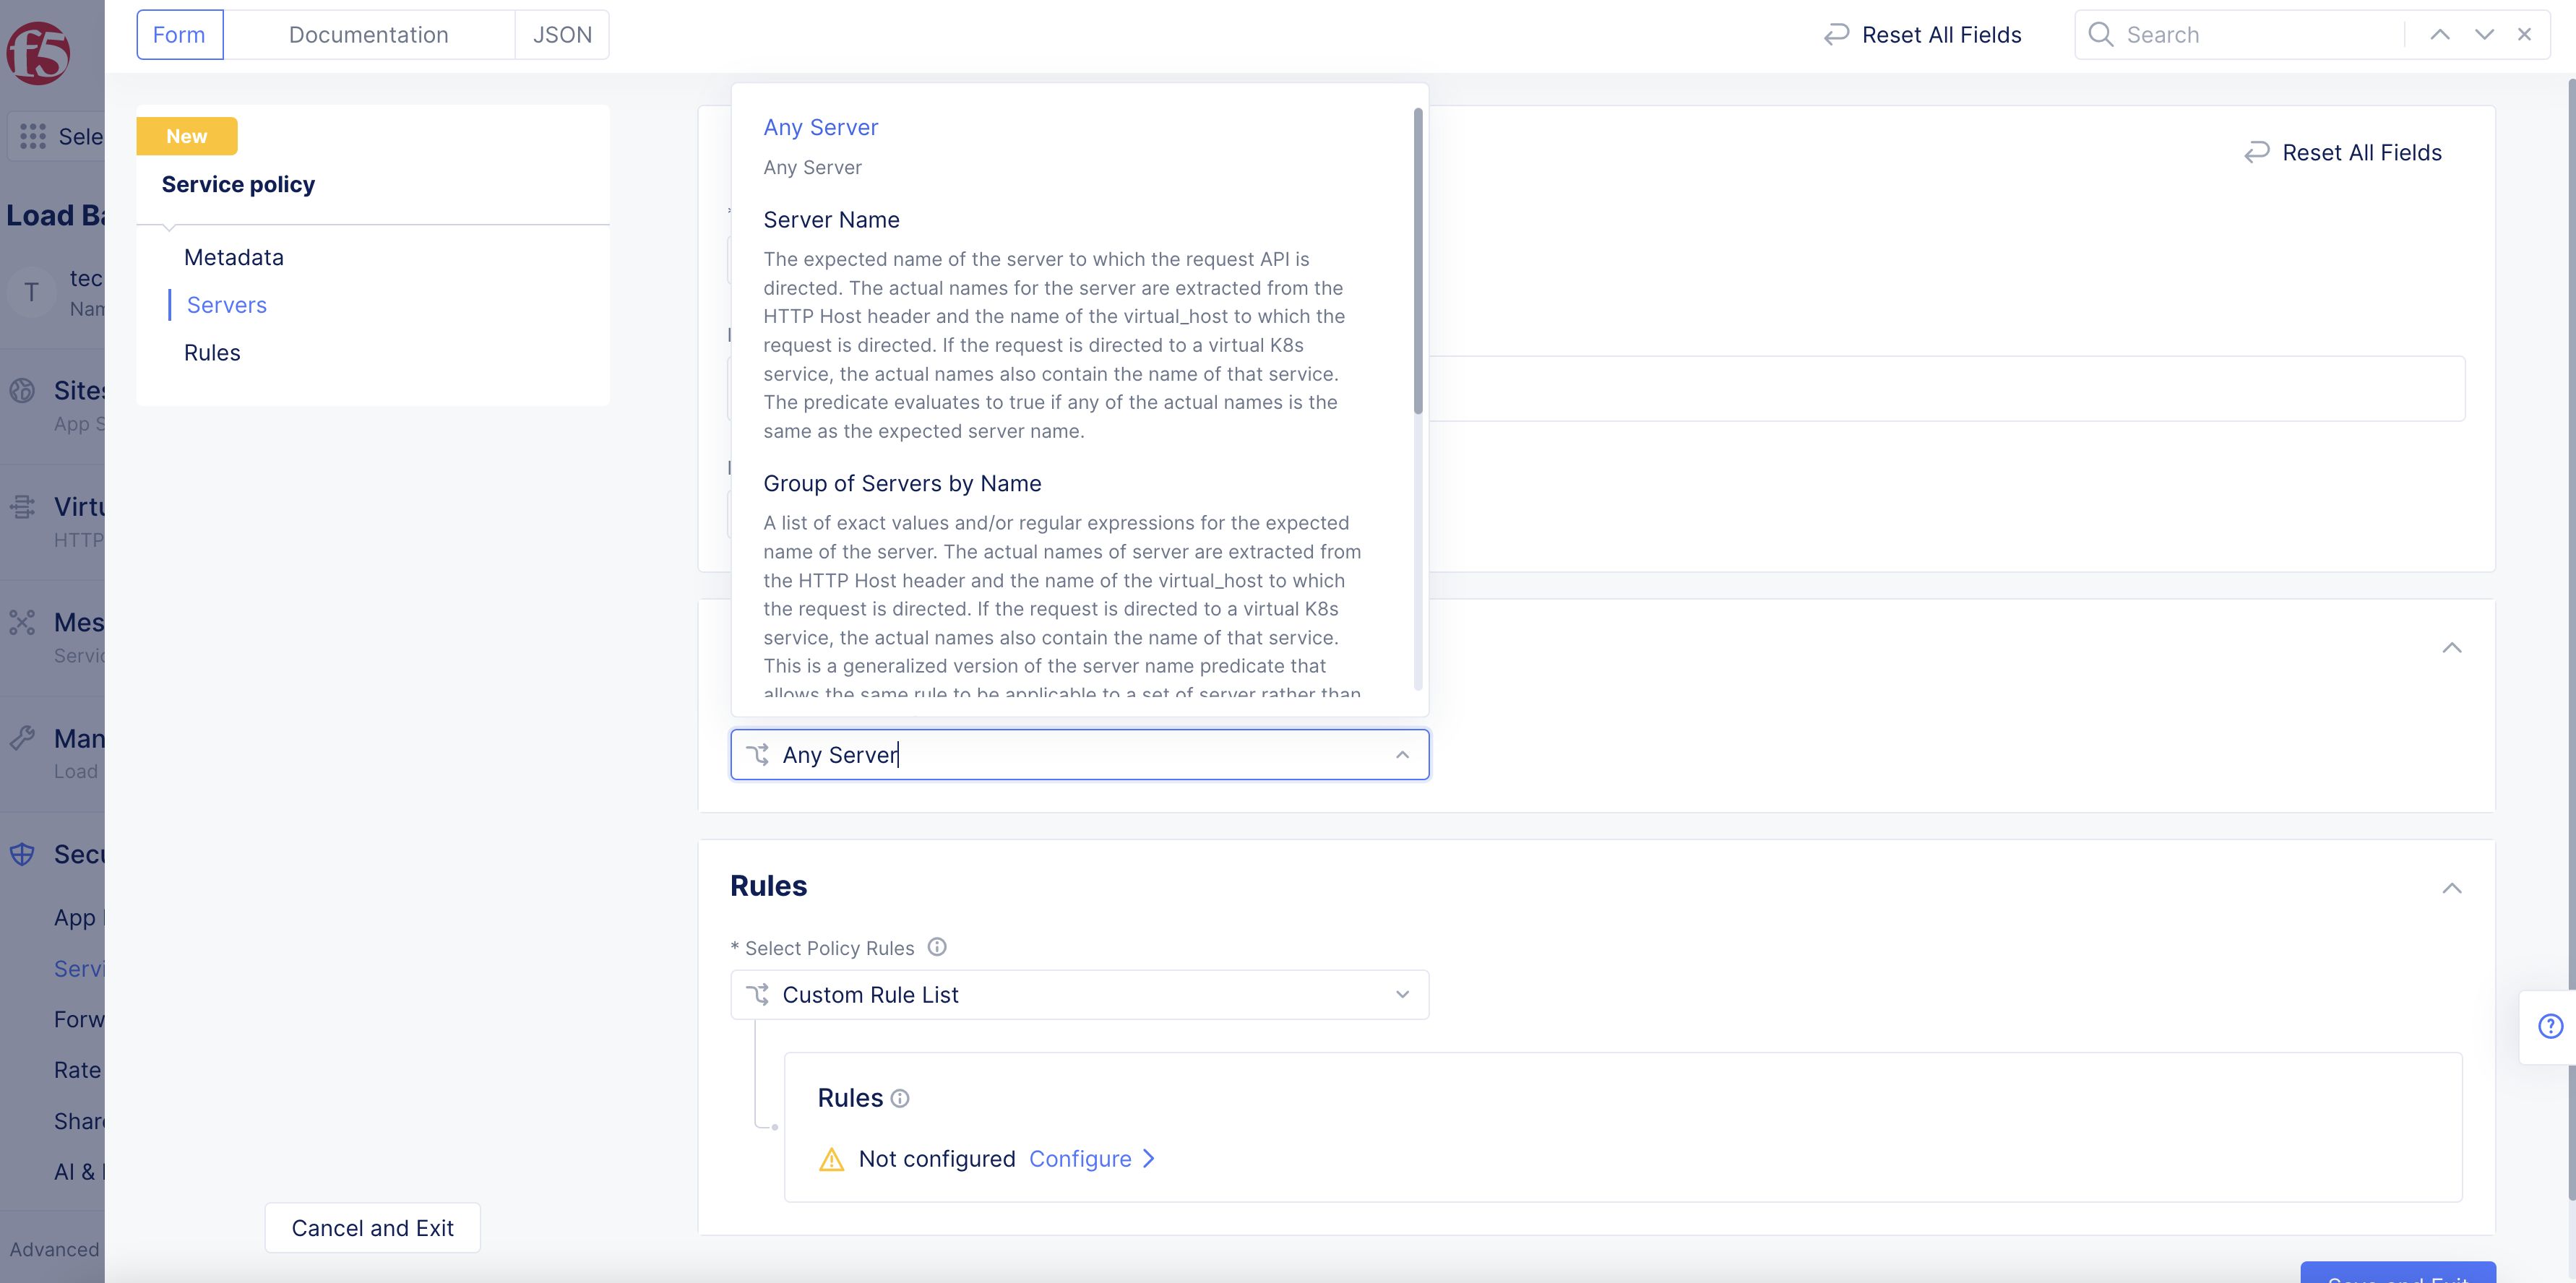
Figure: Server Selection Menu
Note: Custom labels are currently not supported for this field. In the case of a client request coming from the public Internet, implicit labels like Geo-IP Country, Geo-IP City, and Geo-IP Region can be used. The Geo-IP data is sourced from the Digital Elements database. Geo-IP label can be used with the keys
geoip.ves.io/country,geoip.ves.io/city, orgeoip.ves.io/regionas well as the value as selected from the choices. Geo-IP labels can also be set using a custom rule list and in theAdvanced Matchsection.
Step 4: Create service policy rules.
In the Rules section, you will set rules that apply to requests sent to the servers selected in the Servers section (Step 3).
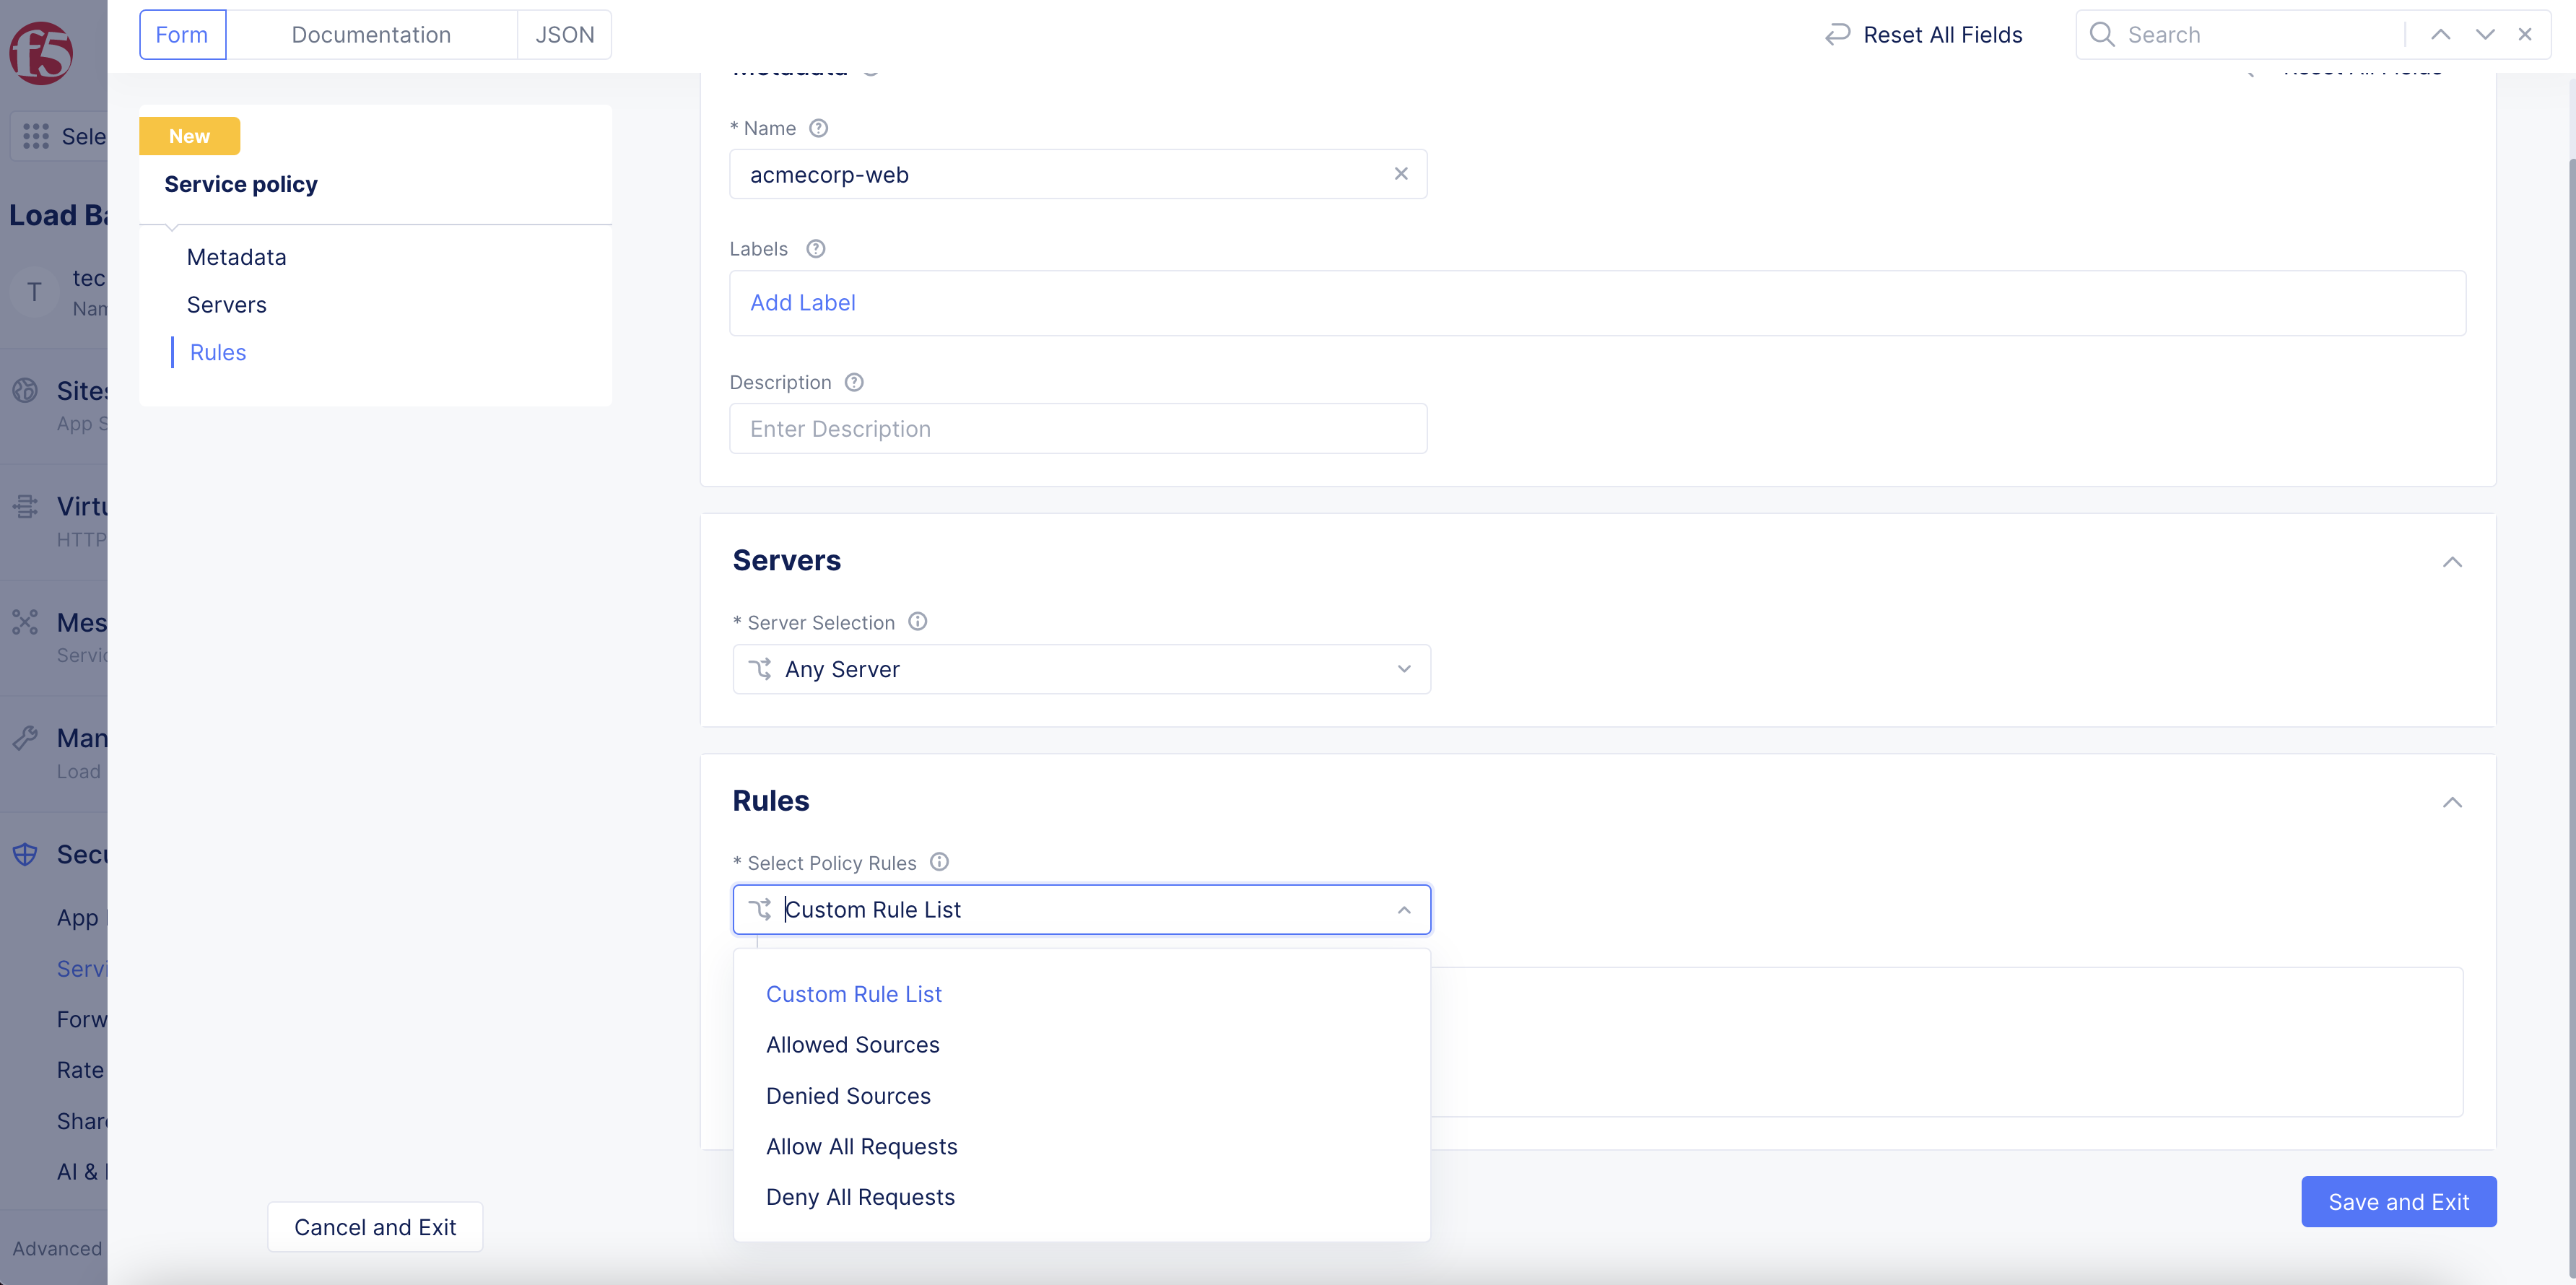
Figure: Request Rules
-
To create rules, choose one of the following options from the
Select Policy Rulesmenu:-
Allow All RequestsorDeny All Requests. Simply allows or denies all requests. -
Allowed SourcesorDenied Sources: Defines a list of sources whose requests will all be allowed or denied. SelectConfigurefor a category to start building your list. You may include multiple categories in your list. For example, you can useAllowed Sourcesand have both theIPv4 Prefix Listand aCountry List. The result allows any request from any of the IPv4 addresses or any of the countries listed.-
IPv4 Prefix ListandBGP ASN List: These options let you enter a list of respective server identifiers. SelectConfigureto enter the list, usingAdd itemto enter additional servers, and selectApplyto keep the list and return to the policy rules. If you need to make changes, useEdit Configurationfor the category you want to change. -
IP Prefix SetandBGP ASN Set: These options let you select an existing set of IPv4 prefixes or BGP ASNs or create a new set. SelectAdd itemand then use the drop-down menu to either select an existing set or selectAdd Itemto create a new set. Repeat the process to add more sets. -
Country List: This option allows you to create a list of countries. Use this drop-down menu to select a country. You may use select multiple countries from the drop-down menu to create a list. You can delete a country from your list by hovering over the country name in your list and then selecting thexnext to the country name. -
Order TLS Fingerprint Values: This option allows you to compare a request's TLS JA3 fingerprint to a list of fingerprints you create. SelectAdd itemand enter a fingerprint value (use theSee Common Valuesto select from a list of common TLS values). -
Use the
Default Actionmenu to specify what to do for a source request that does not match any of the rules configured above:-
Next Policy: allows your load balancer to evaluate the source request using the next service policy. -
AlloworDeny: allows or denies the source request.
-
-
-
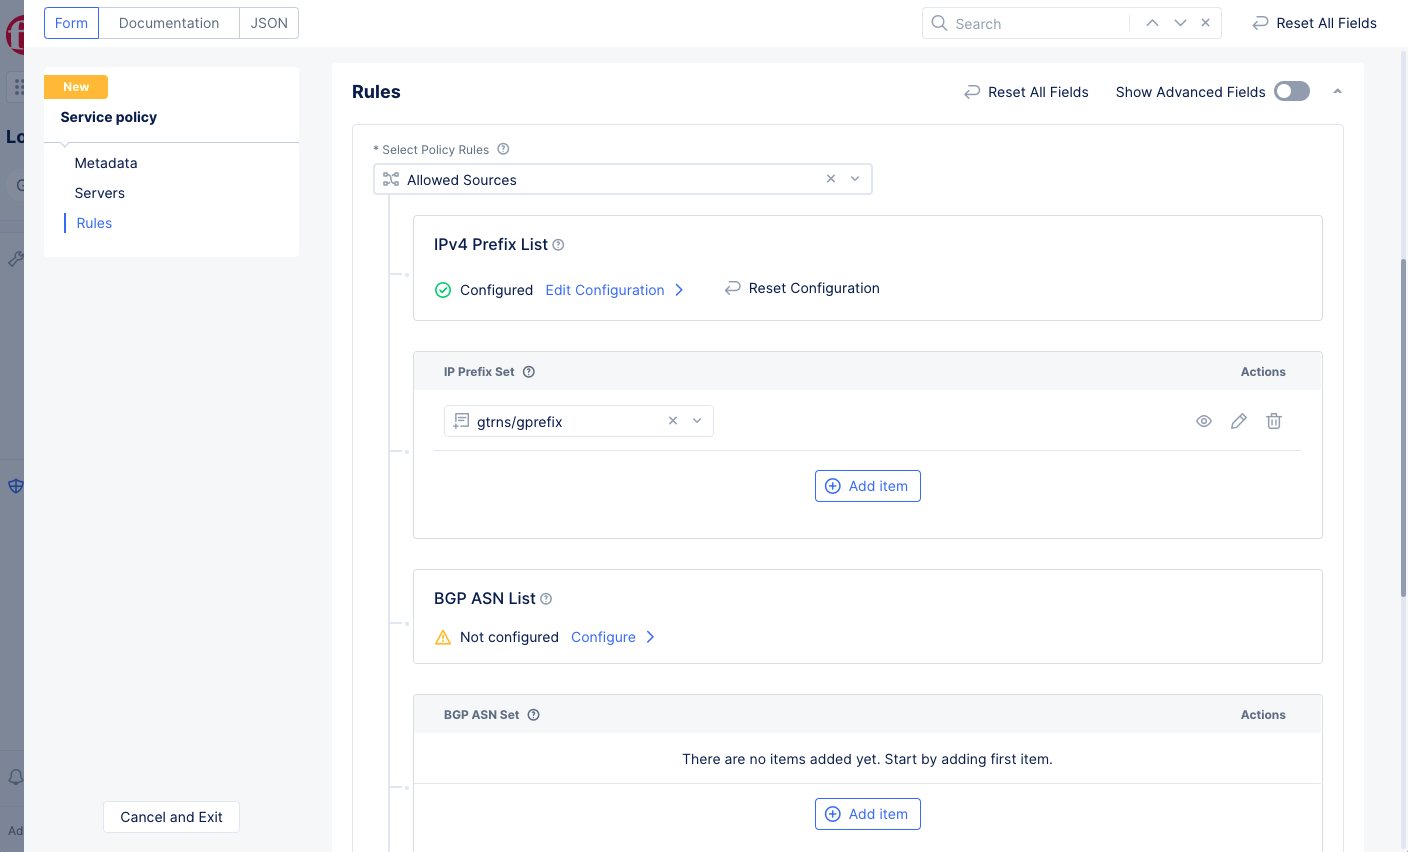
Figure: Allowed Sources
Custom Rule List: This option allows you to create a list of custom rules.
4.1 Build a custom rule list.
- Select
Custom Rule List.

Figure: Custom Rule List
-
Select
Configure. -
Select
Add Item. -
Enter a rule name and optionally a description.
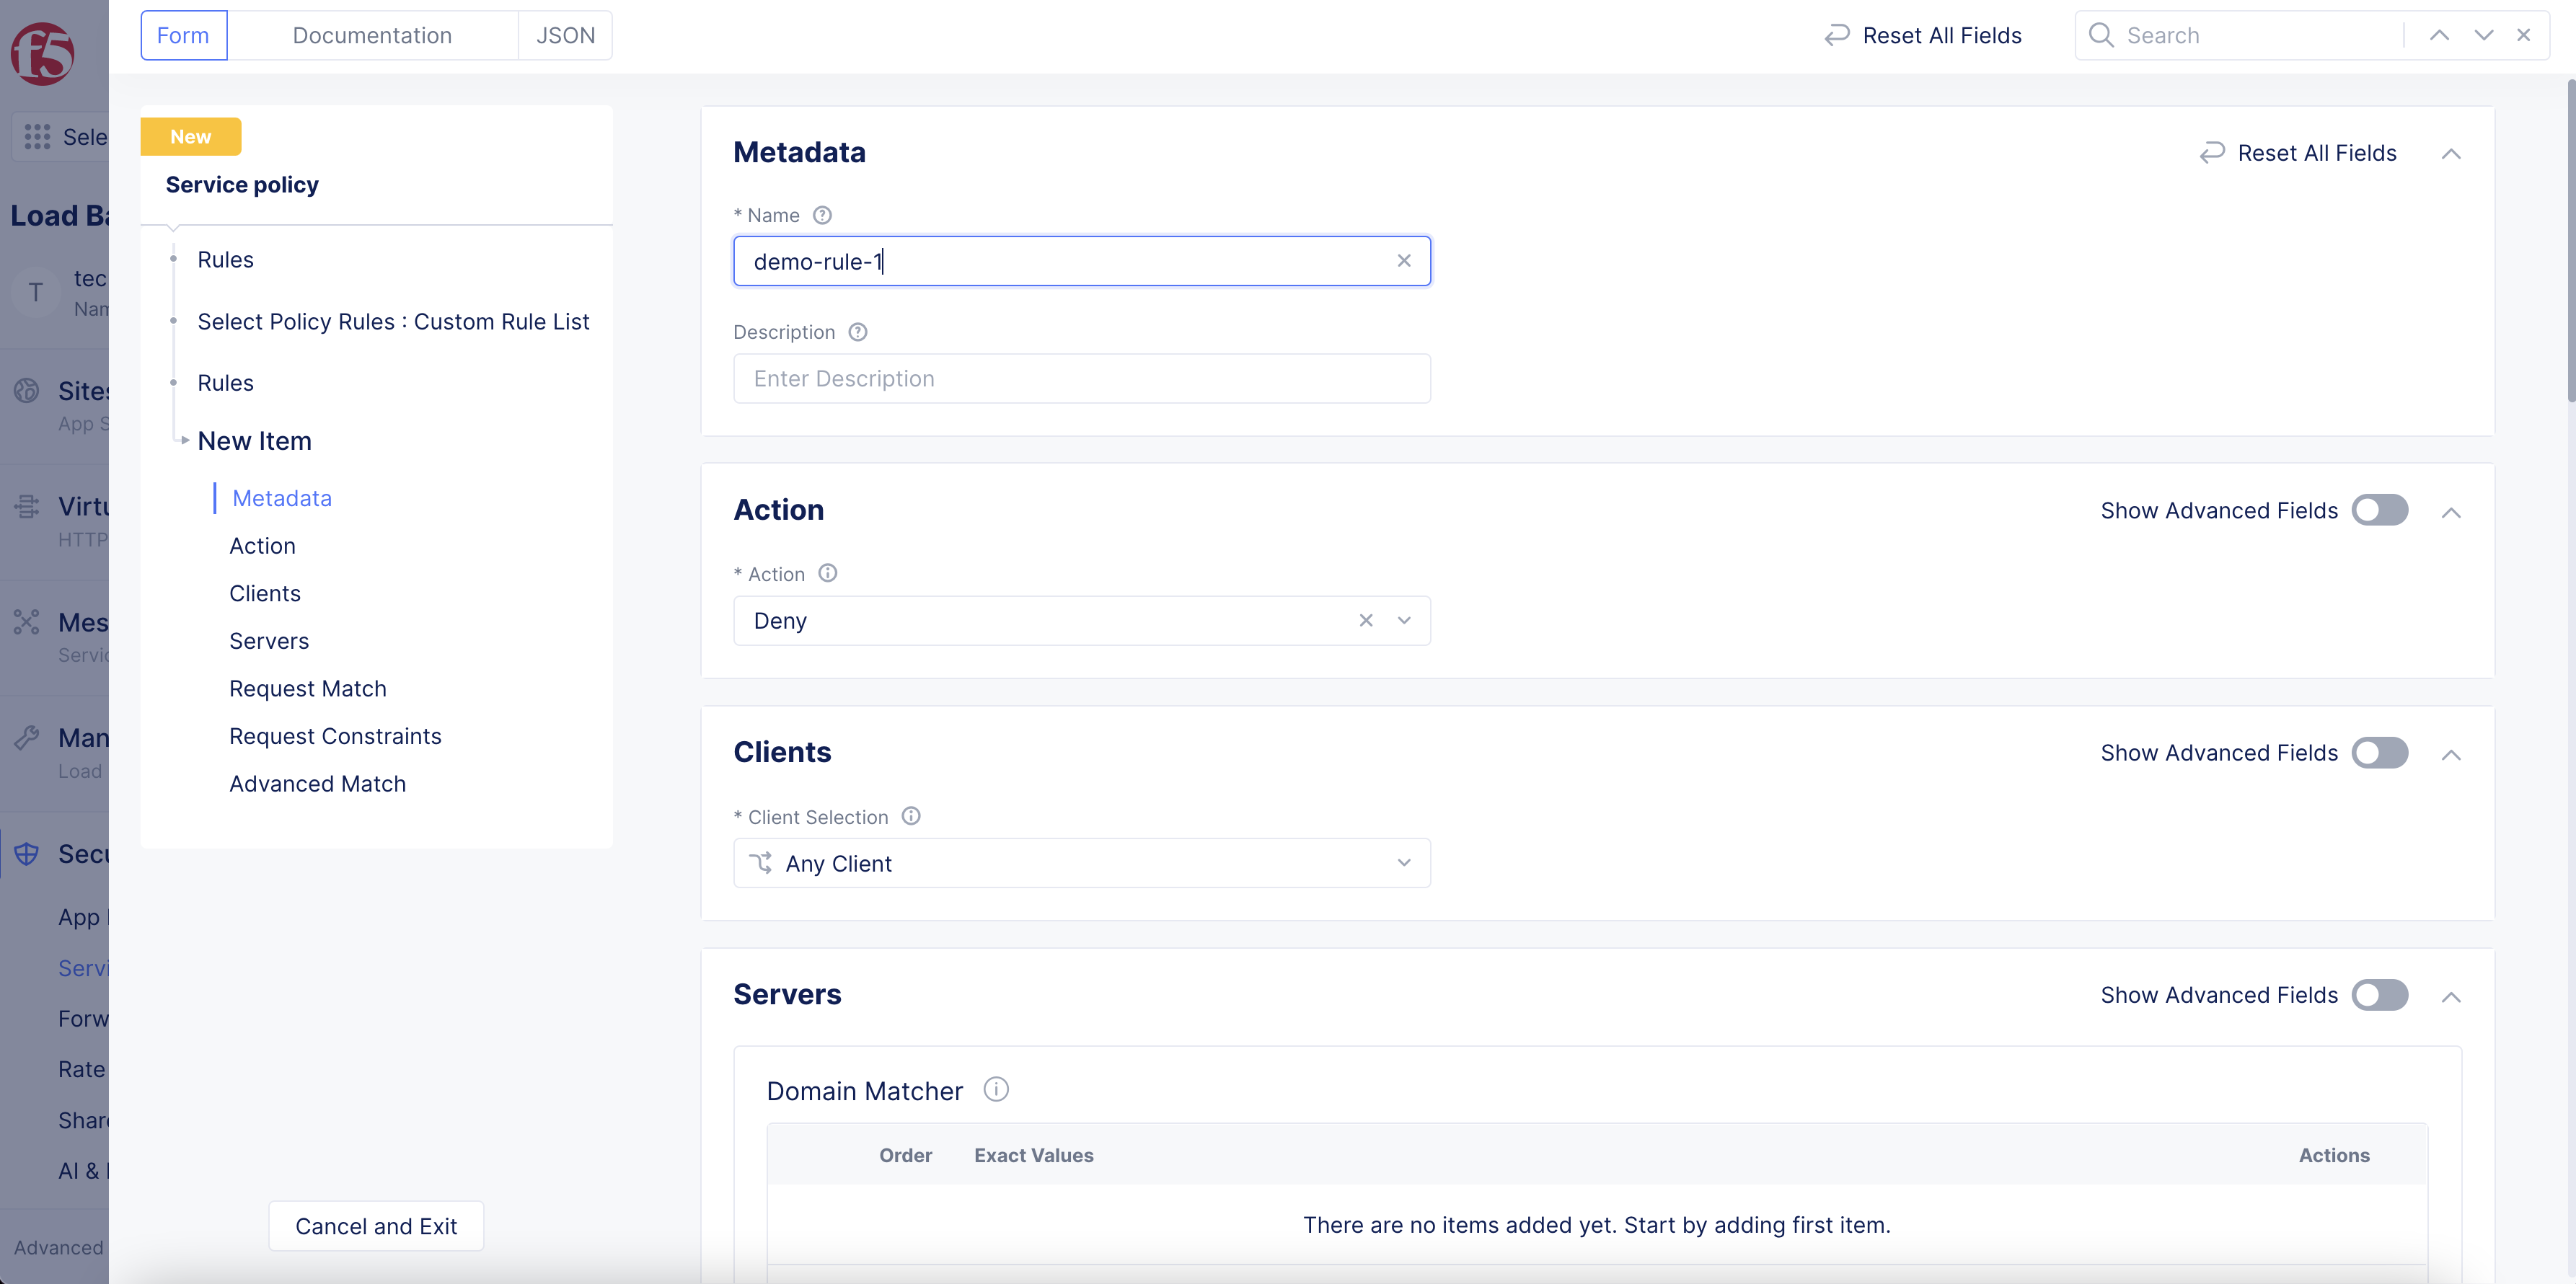
Figure: Custom Rule Creation
-
In the
Actionsection, select an action to be enforced (Allow,Deny, orNext Policy) if the input request matches the rule.Next Policywill take no action, but it will allow the service to match the input against the next policy. -
In the
Clientssection, choose how you want to specify one or more clients to match against this rule, and then enter the client(s):-
Any Client: This will match all clients. -
Client Name: Enter the client name for this rule. -
Group of Clients by Name: SelectAdd Itemand enter exact values or regular expressions for client names. SelectAdd itemto continue to build your list. -
List of IP Threat Categories: Select one or more categories from the menu provided. -
Group of Clients by Label Selector: Select a label key, an operator, and a value if required, and then selectApply. You will have something likeves.io/country In (ves-io-can) AND(which will match if for any client in Canada, and whatever criteria you add after this). You can add additional match criteria by selecting another label key and repeating the process. When your expression is complete, press thetabkey or click outside the area to complete the expression (and the trailingANDwill be removed).
-
-
In the
Serverssection, selectAdd Itemand enter exact values or regular expressions for the server names. Continue to selectAdd Itemto build your list. -
In the
Request Matchsection, enter the types of requests that you want to match with this policy rule. You can specify the request type in a number of different ways:-
HTTP Method: Select the HTTP methods from theMethod Listdrop-down. Using the drop-down menu multiple times will allow you to select multiple methods. -
HTTP Path: SelectConfigureand enter prefix values, exact values, regular expressions, or suffix values for an HTTP path. Continue to selectAdd itemto build your list. Use theTransformersfield to modify the path for easier matching (e.g. convert the string to lower case). SelectApplyafter you finish.
-
This image provides a regex example:
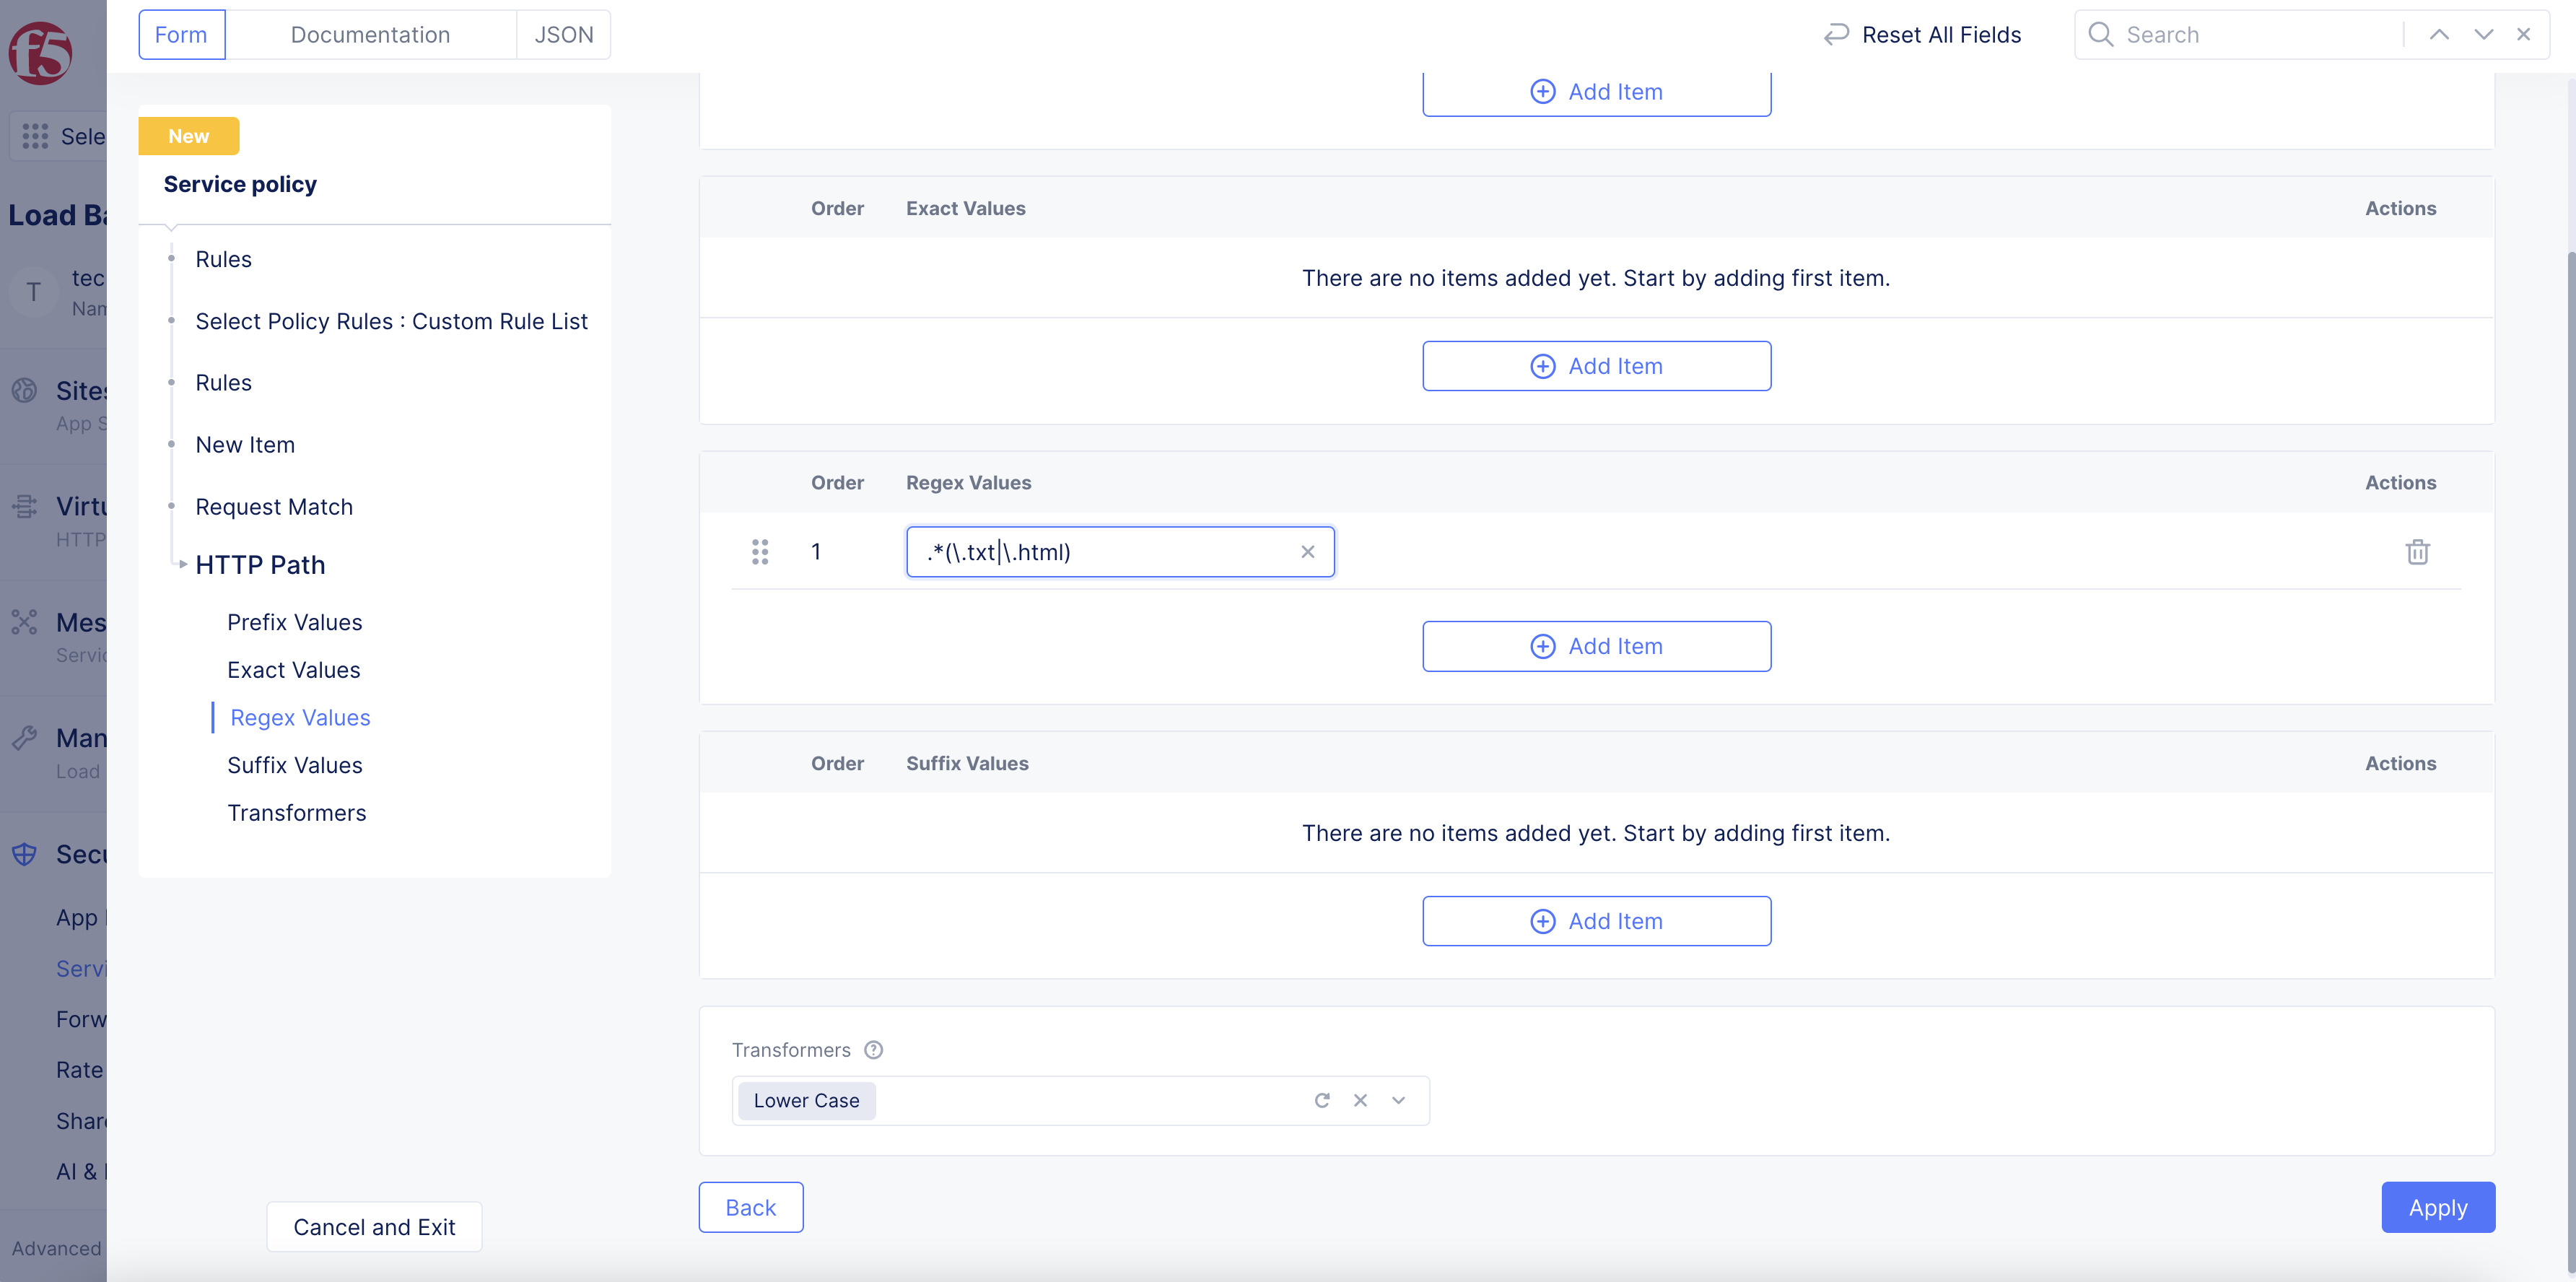
Figure: Custom Rule for HTTP Path - Regex
This image provides a suffix example:
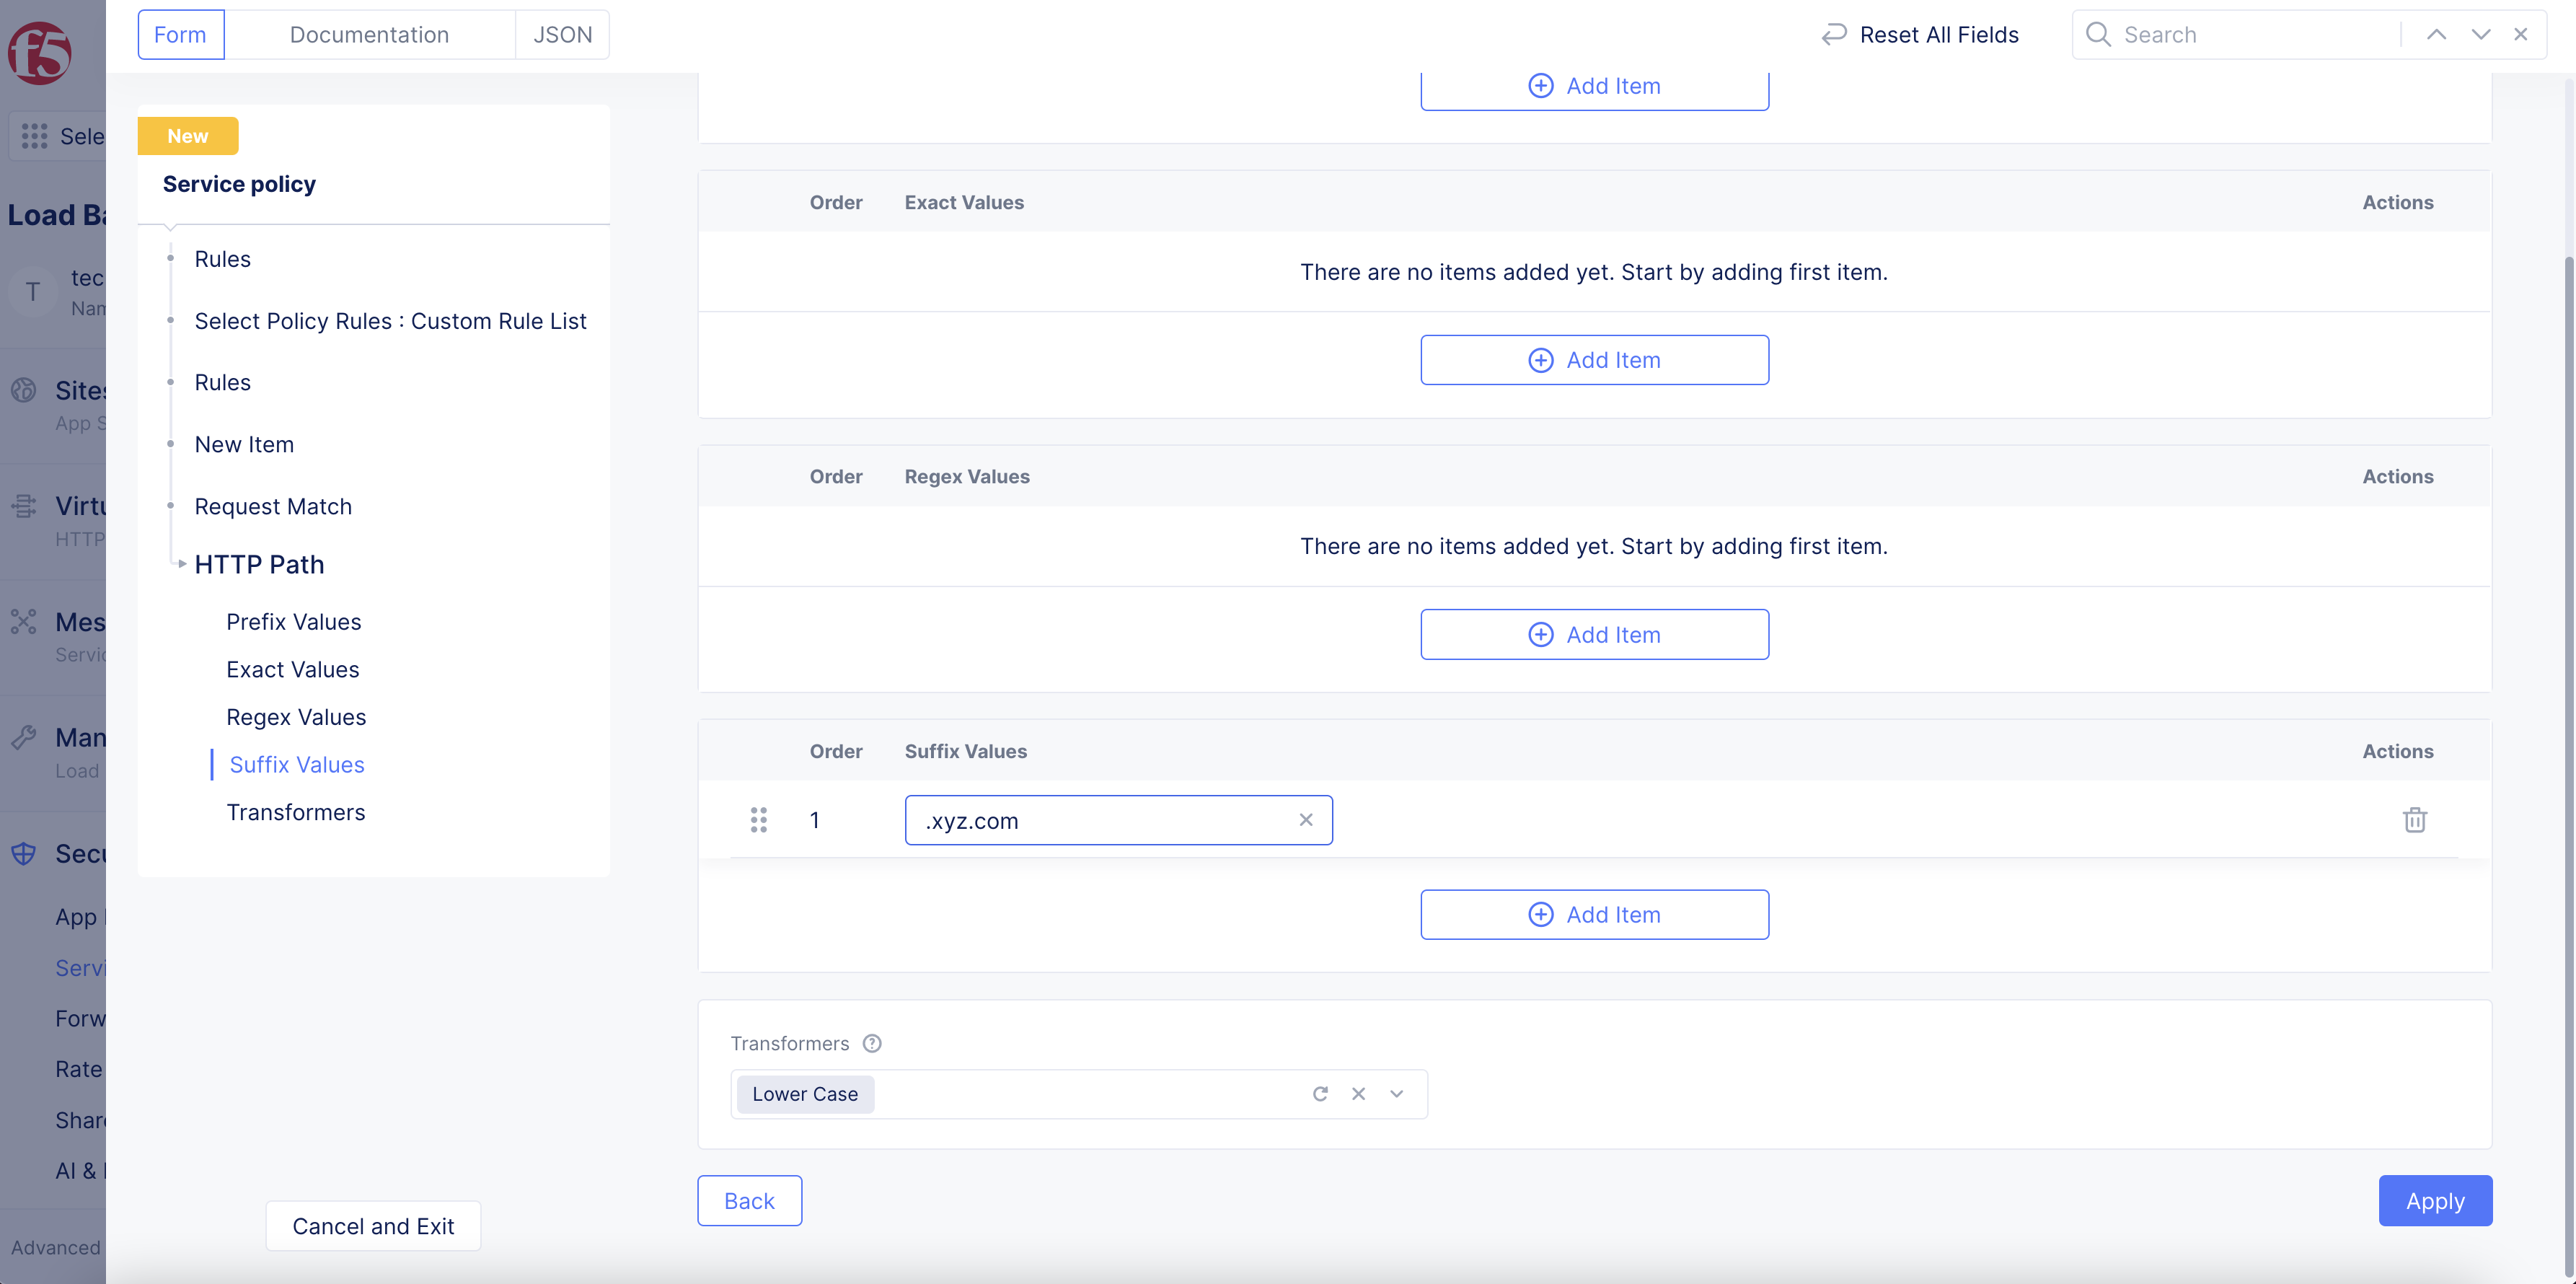
Figure: Custom Rule for HTTP Path - Suffix
-
HTTP Query Parameters: SelectAdd Itemand then enter a parameter name in theQuery Parameter Namefield. Use theMatch Optionsdrop-down menu to select a match value.Present/Not Presentmatches if that parameter name is/is not in the request.Match Valuesallows you to enter exact values and/or regular expression for values to match against. -
HTTP Headers: SelectAdd Itemand then enter a header name in theHeader Namefield. Use theMatch Optionsdrop-down menu to select a match value.Present/Not Presentmatches if that parameter name is/is not in the request.Match Valuesallows you to enter exact values and/or regular expression for values to match against. -
JWT Claims: SelectAdd Itemand then enter a parameter name in theJWT Claim Namefield. From theMatch Optionsmenu, select an option to match the claim with. You can choose to match on values present in the claim, simply check if the claim is present, or match if the claim is not present. After you finish, clickApply. -
To optionally configure limits on client requests, perform the following:
-
In the
Request Constraintssection, clickConfigure. -
In the
Cookie Constraints,Header Constraints,Parameter Constraints, andOther Constraintssections: To enable any option, from any desired drop-down menu, first selectMatch If Exceedsto have the recommended value populated by Console. You can also change the value by entering your own value.
-
Note: For
Cookie Constraints, internal cookies are included in the count and processed per the configuration options. ForHeader Constraints, internal headers are included in the count and processed per the configuration options. The body of each POST request is parsed for parameters when theContent-Typeisapplication/x-www-form-urlencoded. For theMax Request Sizeoption, the match is on the size of the request (as inRequest LineplusHTTP Request Headers). This does not include the request body.
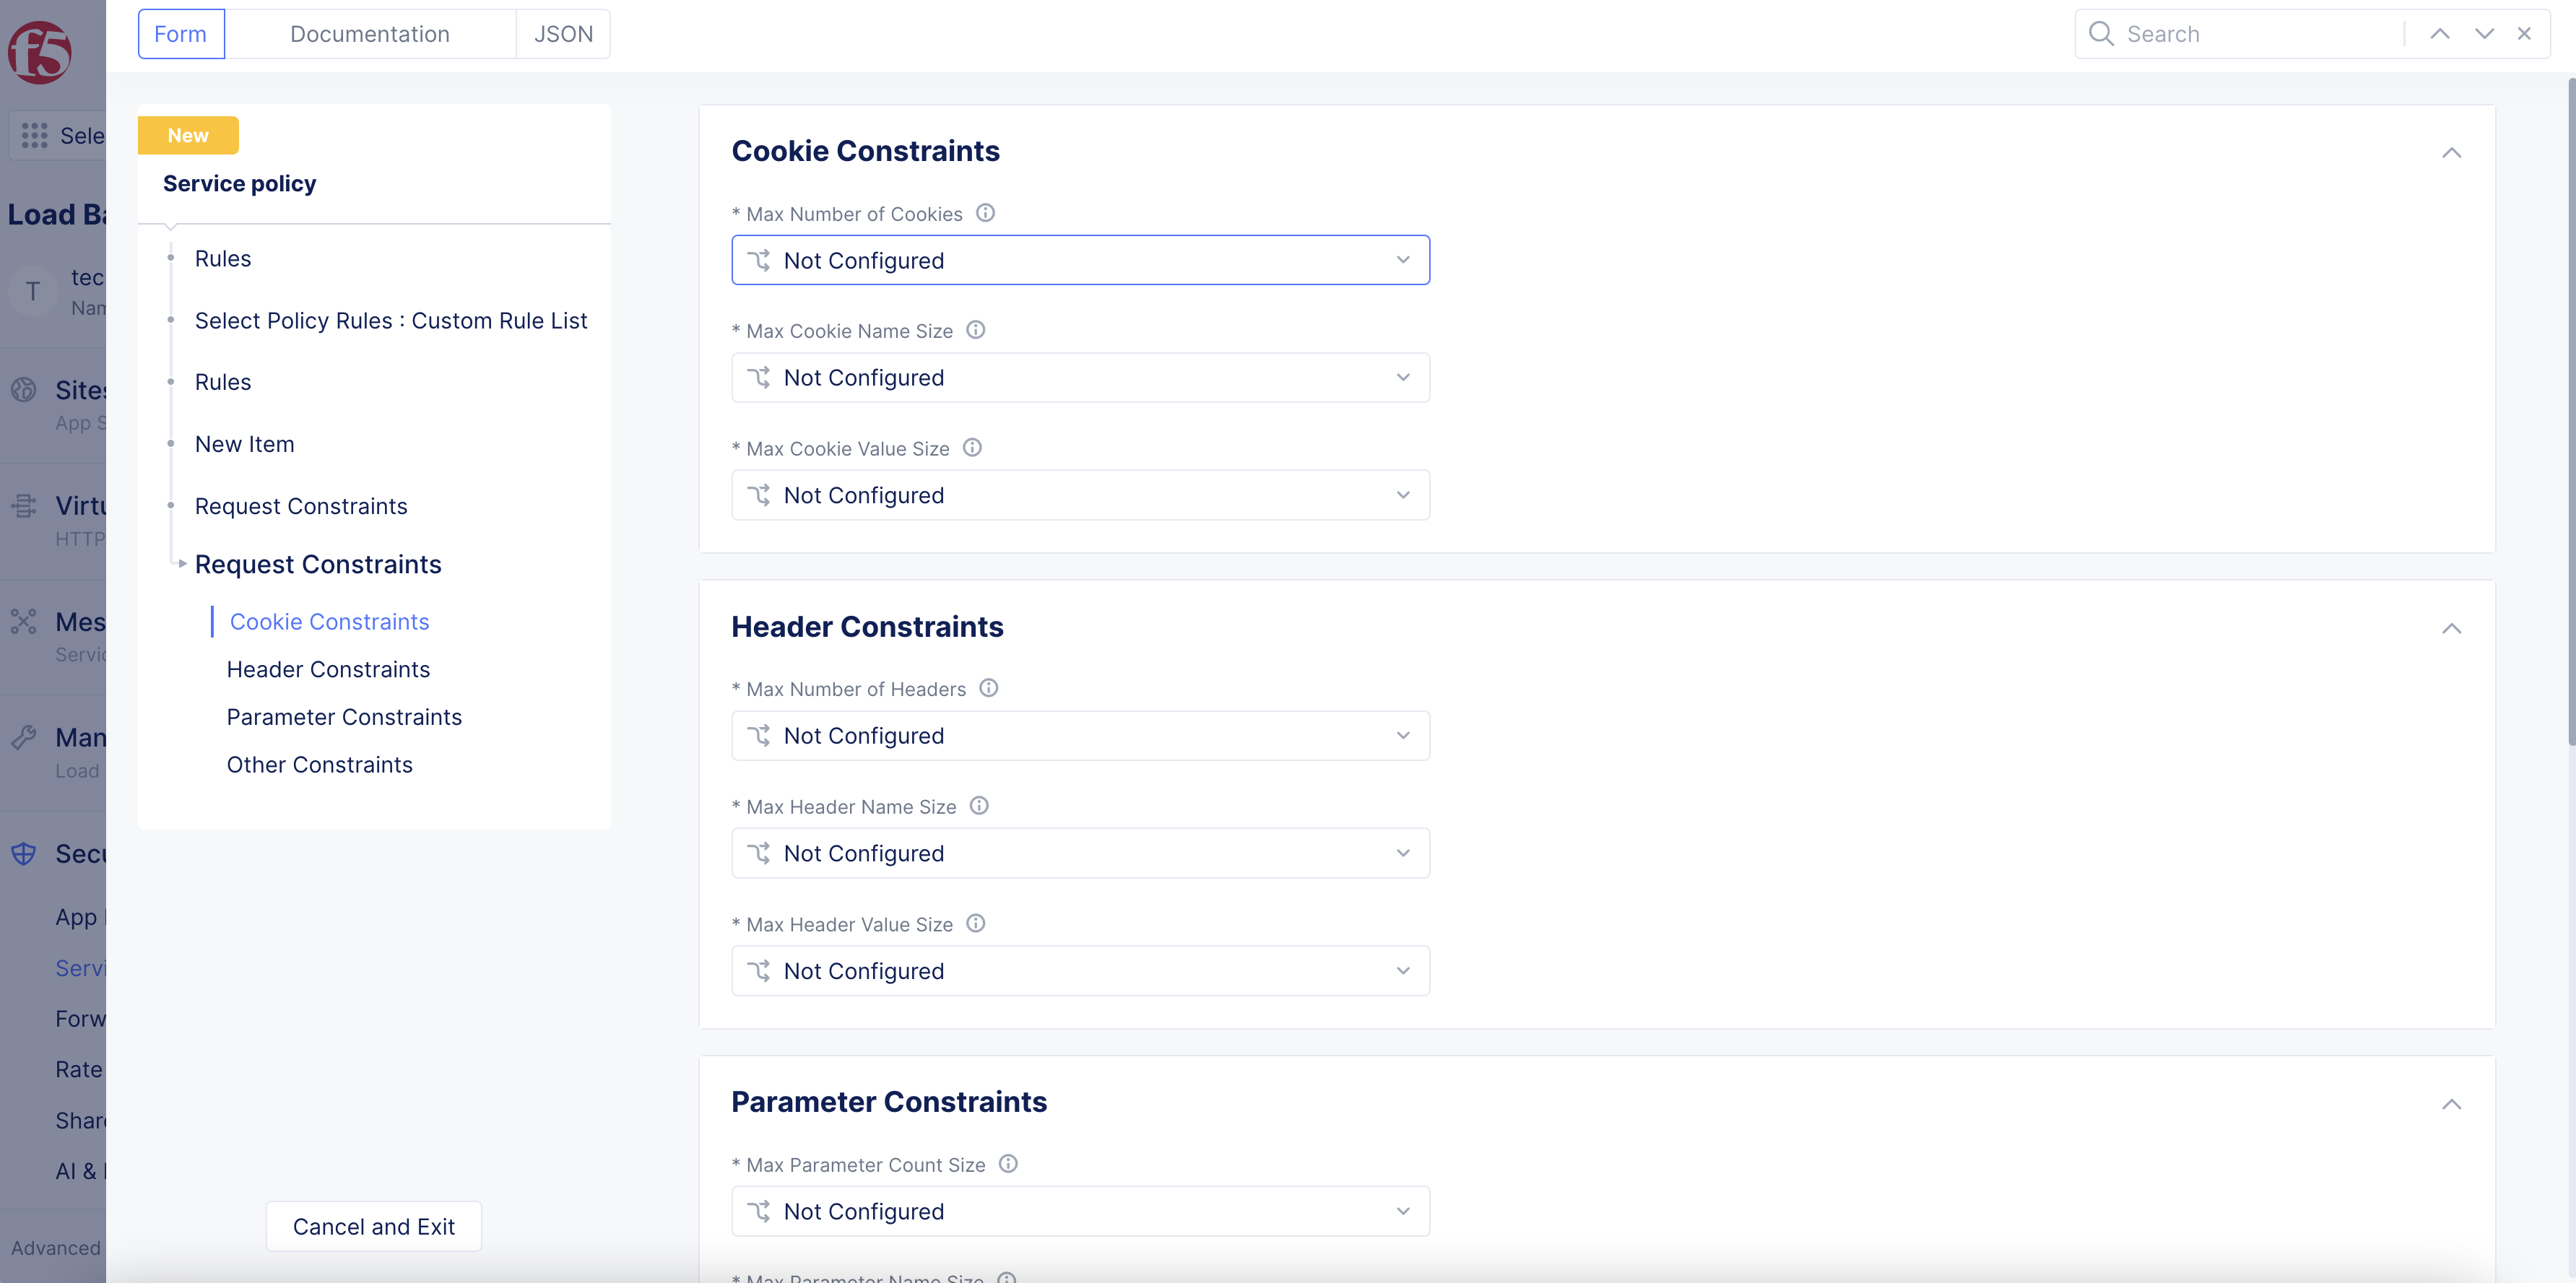
Figure: Client Request Cookie Configuration
-
In the
Advanced Matchsection, optionally perform the following:-
Select
Add Itemto configure label keys that need to be the same for the clients and servers. -
Select
Configureto set up the API group matching for requests. -
Select
SegmentsforSource Segmentsto specify source segments that must match for requests. -
In the
Destination Segmentsdrop-down menu, selectIntra Segmentto match traffic against source and destination on the same segment or selectSegmentsand specify the segment(s) to match against. -
In the
User Identity Matchersection, select theAdd Itembuttons to specify user identities either by exact values or regex values.
-
-
After you complete the custom rule specification, select
Apply. -
Select
Applyto add the rule to the rules list. -
Select
Applyto save the custom rule.
4.2 Configure the order of custom rules.
After you create your custom rules, you can choose the order in which the service policy evaluates them. If you have multiple service policies enabled on the same load balancer, you can order the custom rules in each of them.
Step 5: Complete service policy creation.
Select Save and Exit to create the service policy.
Apply Service Policy
Service policies can be made active for your application namespace and then applied to your load balancer. Or you can simply apply a specific service policy instead. If you select Apply Namespace Service Policies in your load balancer configuration, all active service policies will be enabled on it. If you select Apply Specified Service Policies, then only a specific service policy can be applied.
The order of service policies and the order of rules within a service policy matters. It is also important to plan the ordering of your service policies to get the intended effect. When a request comes in, its characteristics are evaluated based on the match criteria in each service policy starting at the top. If there is a match in the first policy, then the policy takes effect and no more policies are evaluated. Otherwise, the next policy is evaluated. If all policies are evaluated and none match, then the request will be blocked by default.
For example, consider the policy list below. The last policy, ves-io-allow-all, allows all traffic through, so this setup will rely on matches to prior policies to deny undesired traffic. In the case below, all policies above ves-io-allow-all deny a request for some reason, except allowed-ips. The service policy allowed-ips is intended to allow certain IP addresses through without enforcing any of the following service policies. If you were to move allowed-ips below method-enforcement, then allowed-ips would still be subject to blocking if the request used a disallowed HTTP method.
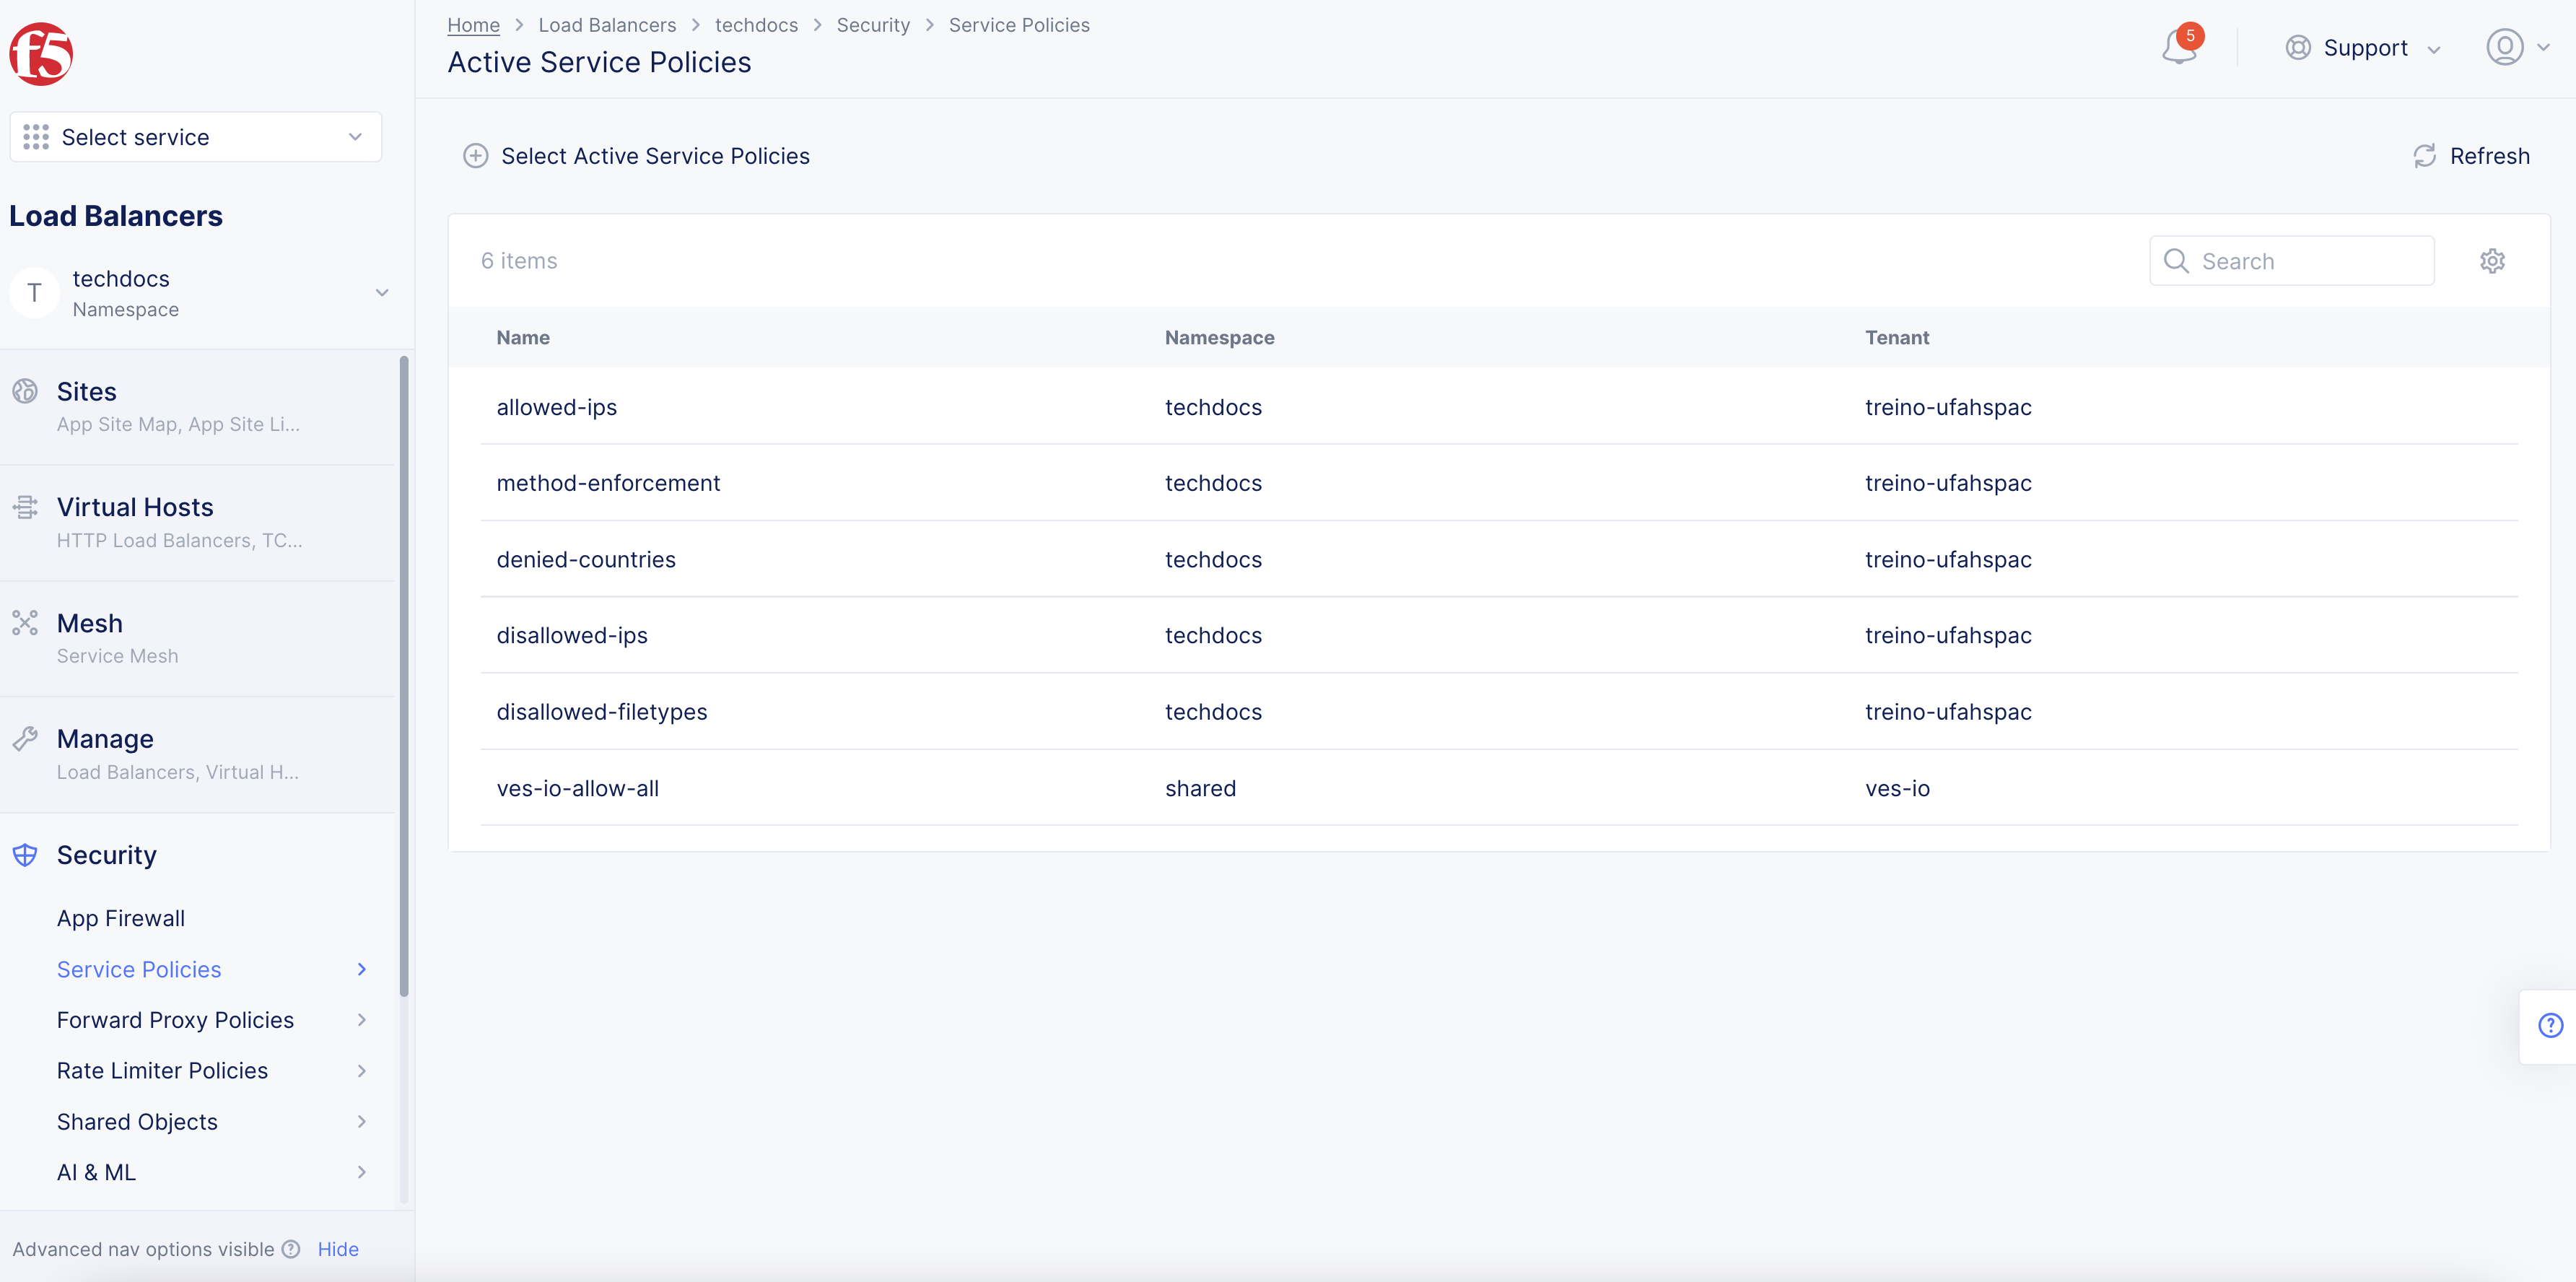
Figure: List of Service Policies
Step 1: Set active service policy.
To apply all active namespace service policies to a load balancer, select the Multi-Cloud App Connect service and your namespace, and then perform the following:
- Select
Security>Service Policies>Active Service Policies.
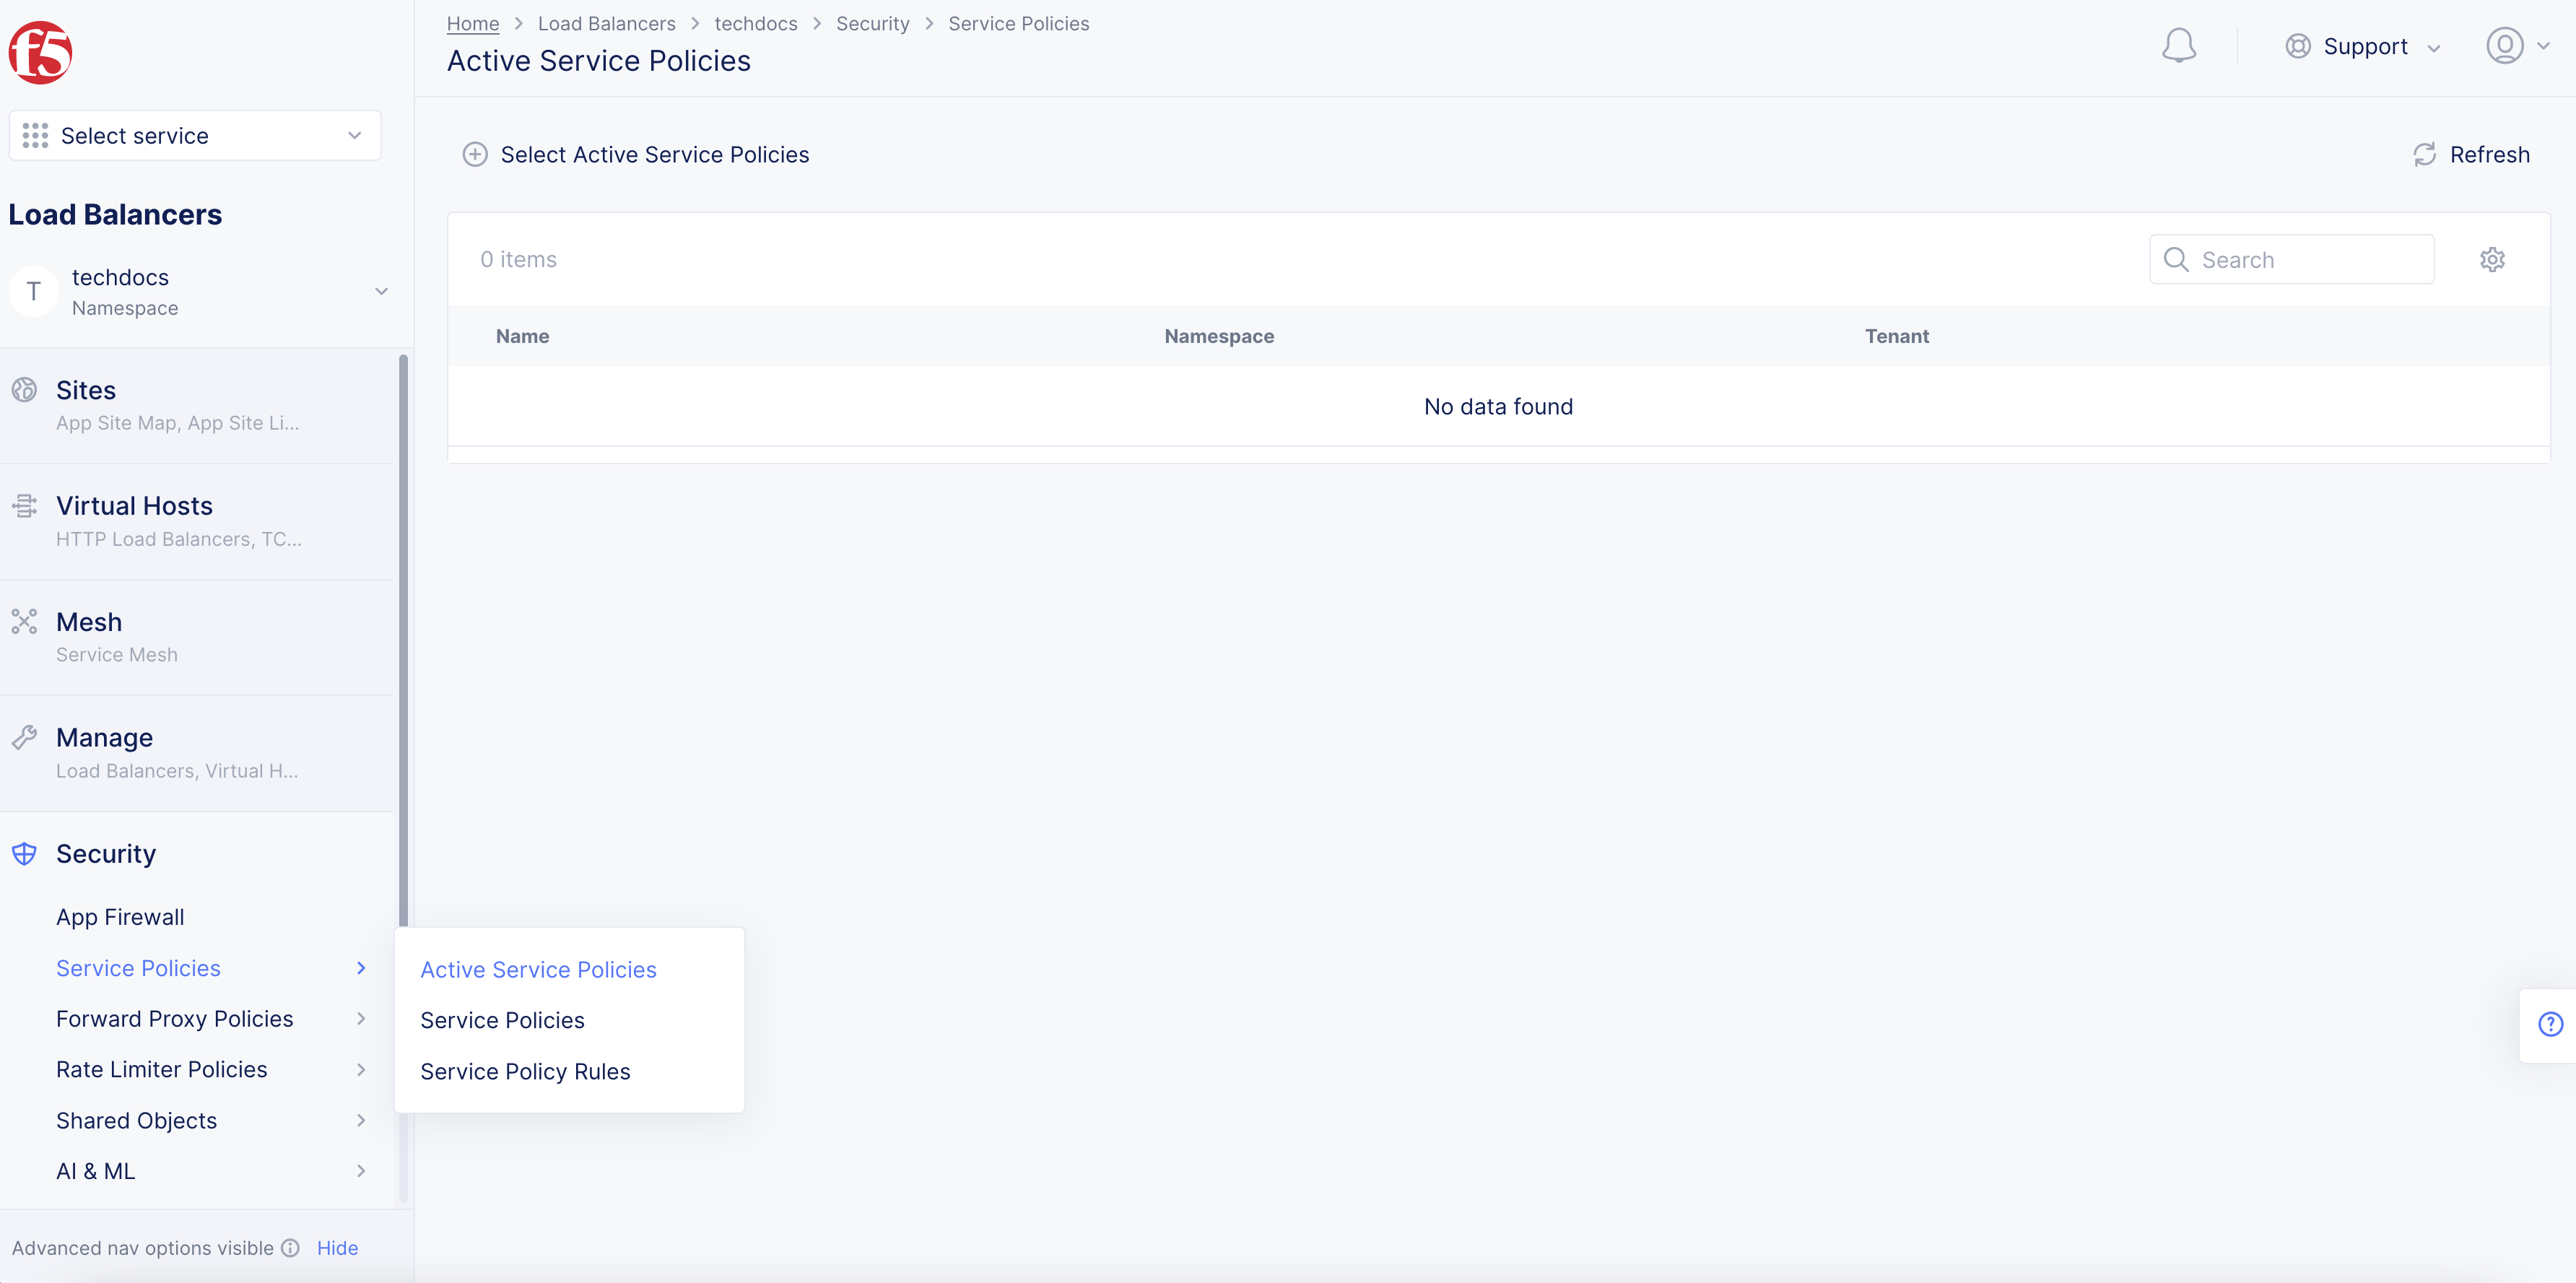
Figure: Active Service Policies
-
Select
Select Active Service Policies. This will show a list of active service policies available for the given namespace, which may be empty. -
Select
Add Itemto add a new service policy to the active list. -
Select your service policy from the drop-down menu.
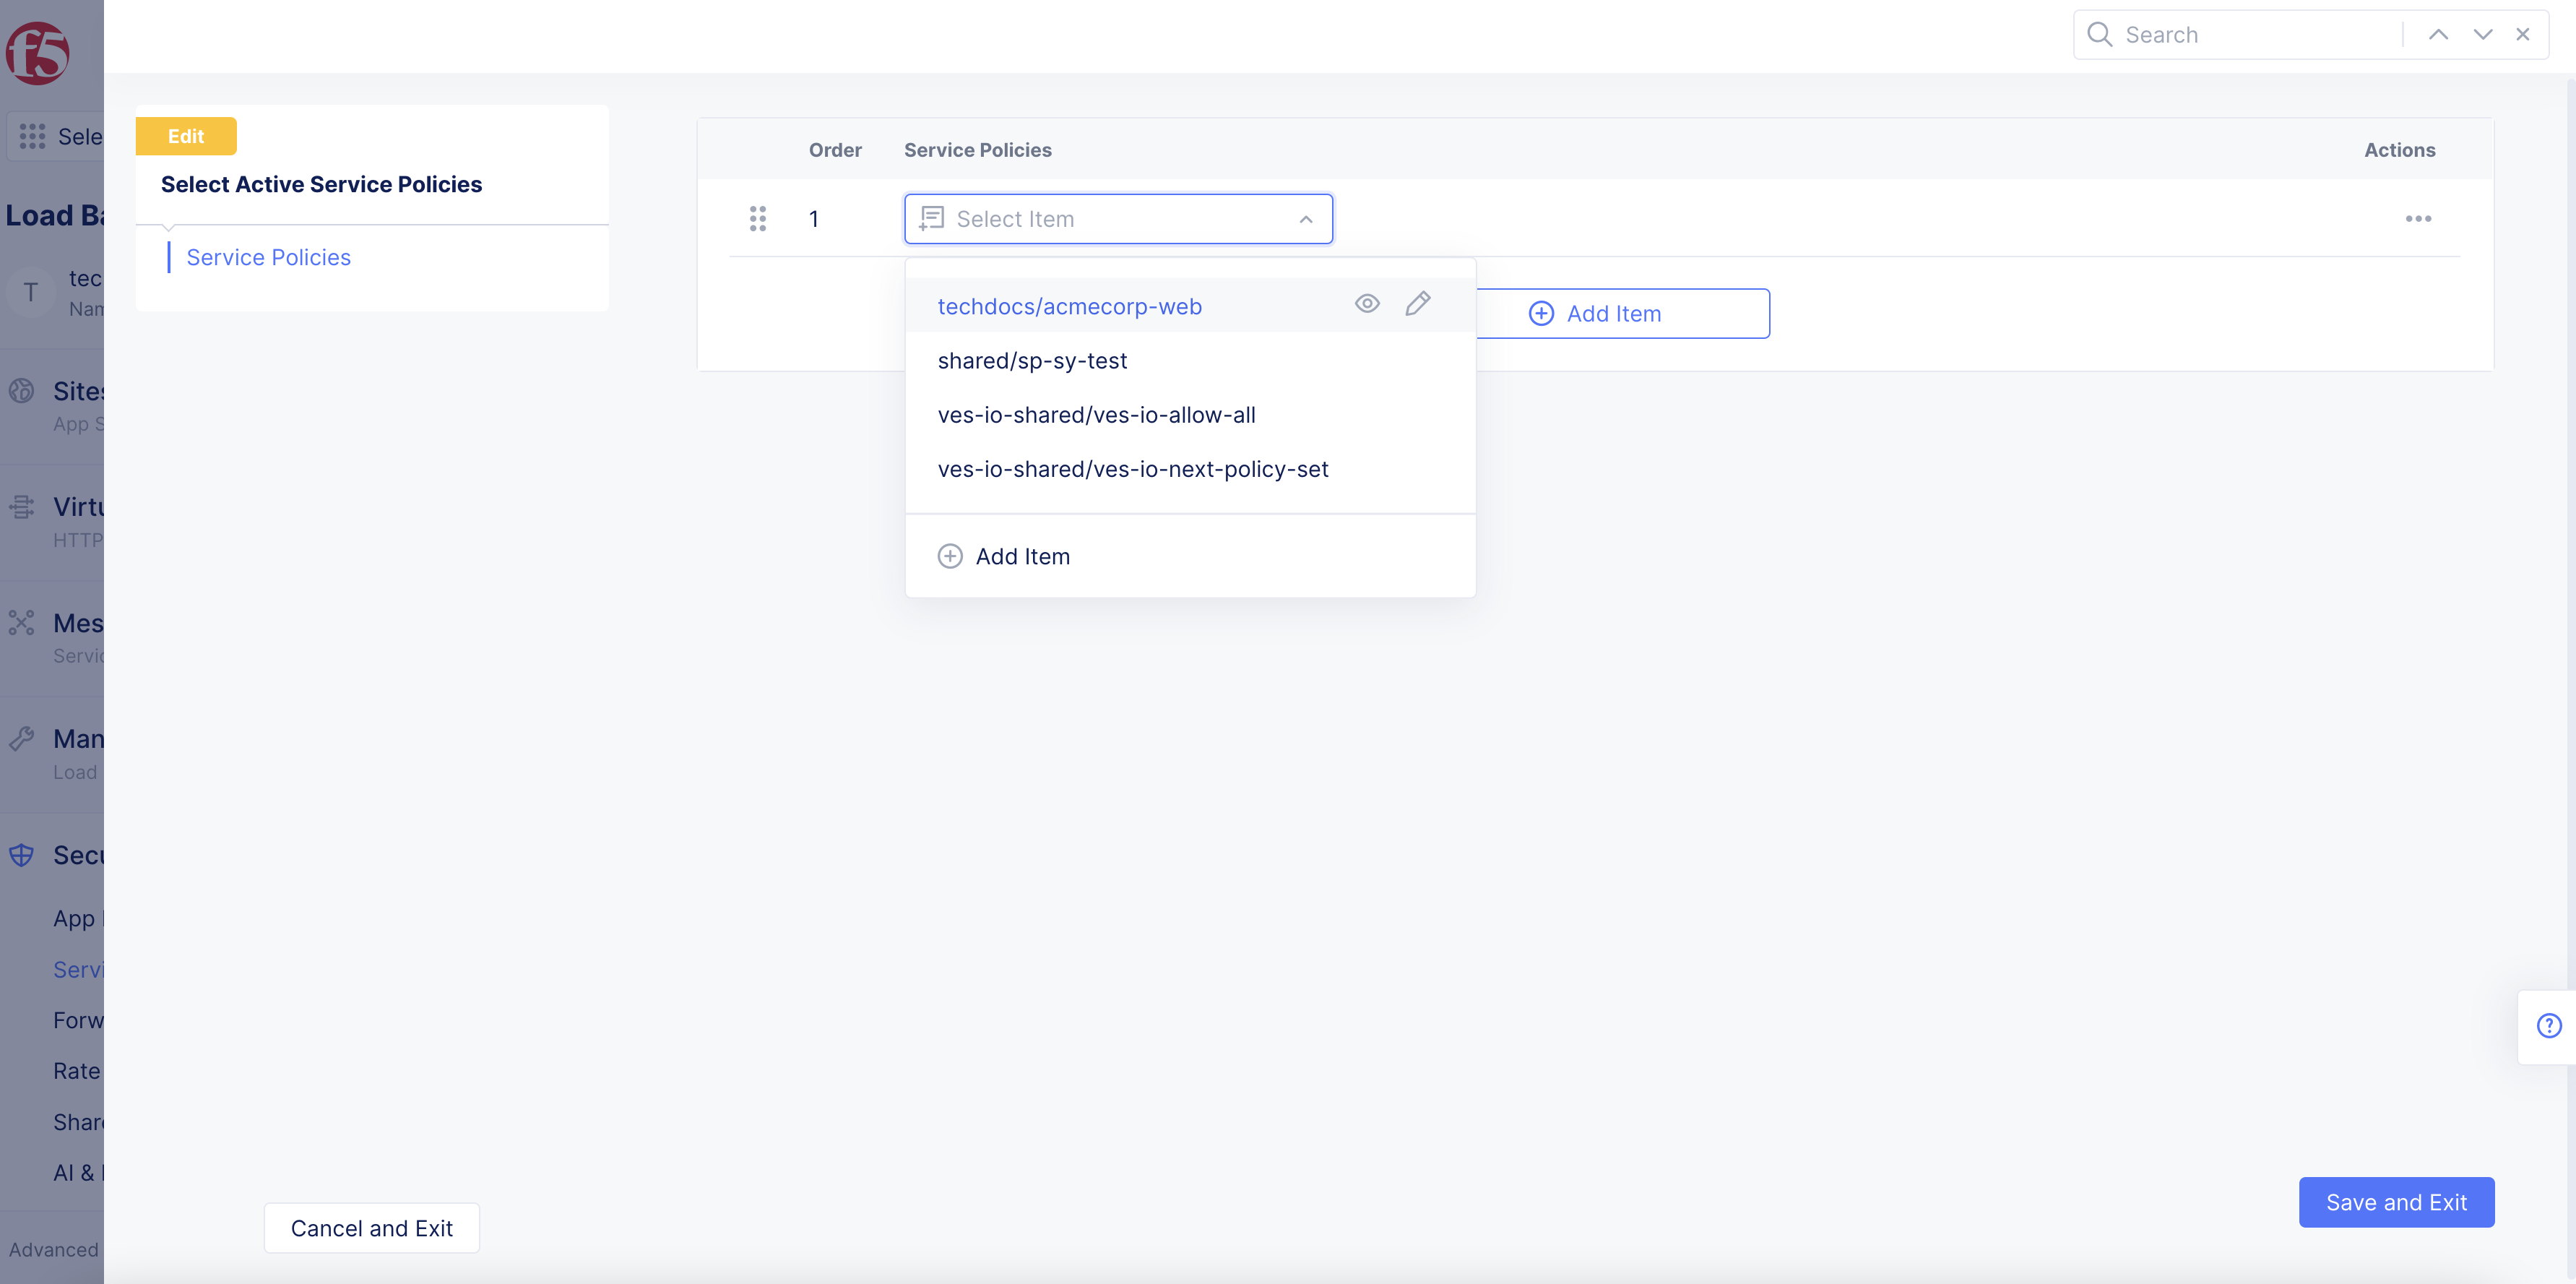
Figure: Select Active Service Policy
- Select
Save and Exit.
Step 2: Set active service policy order of evaluation.
You have the option to set the order of evaluation for the active service policies configured in a given namespace.
-
Select your namespace that contains the active service policies.
-
Select
Security>Service Policies>Active Service Policies. -
Select
Select Active Service Policies. -
Change the order of these rules by using the drag handle to drag and drop the rules in the order you see fit. You can also select
...>Move to another spot, and then use the arrows to move the rule up or down the list. -
Select
Save and Exit.
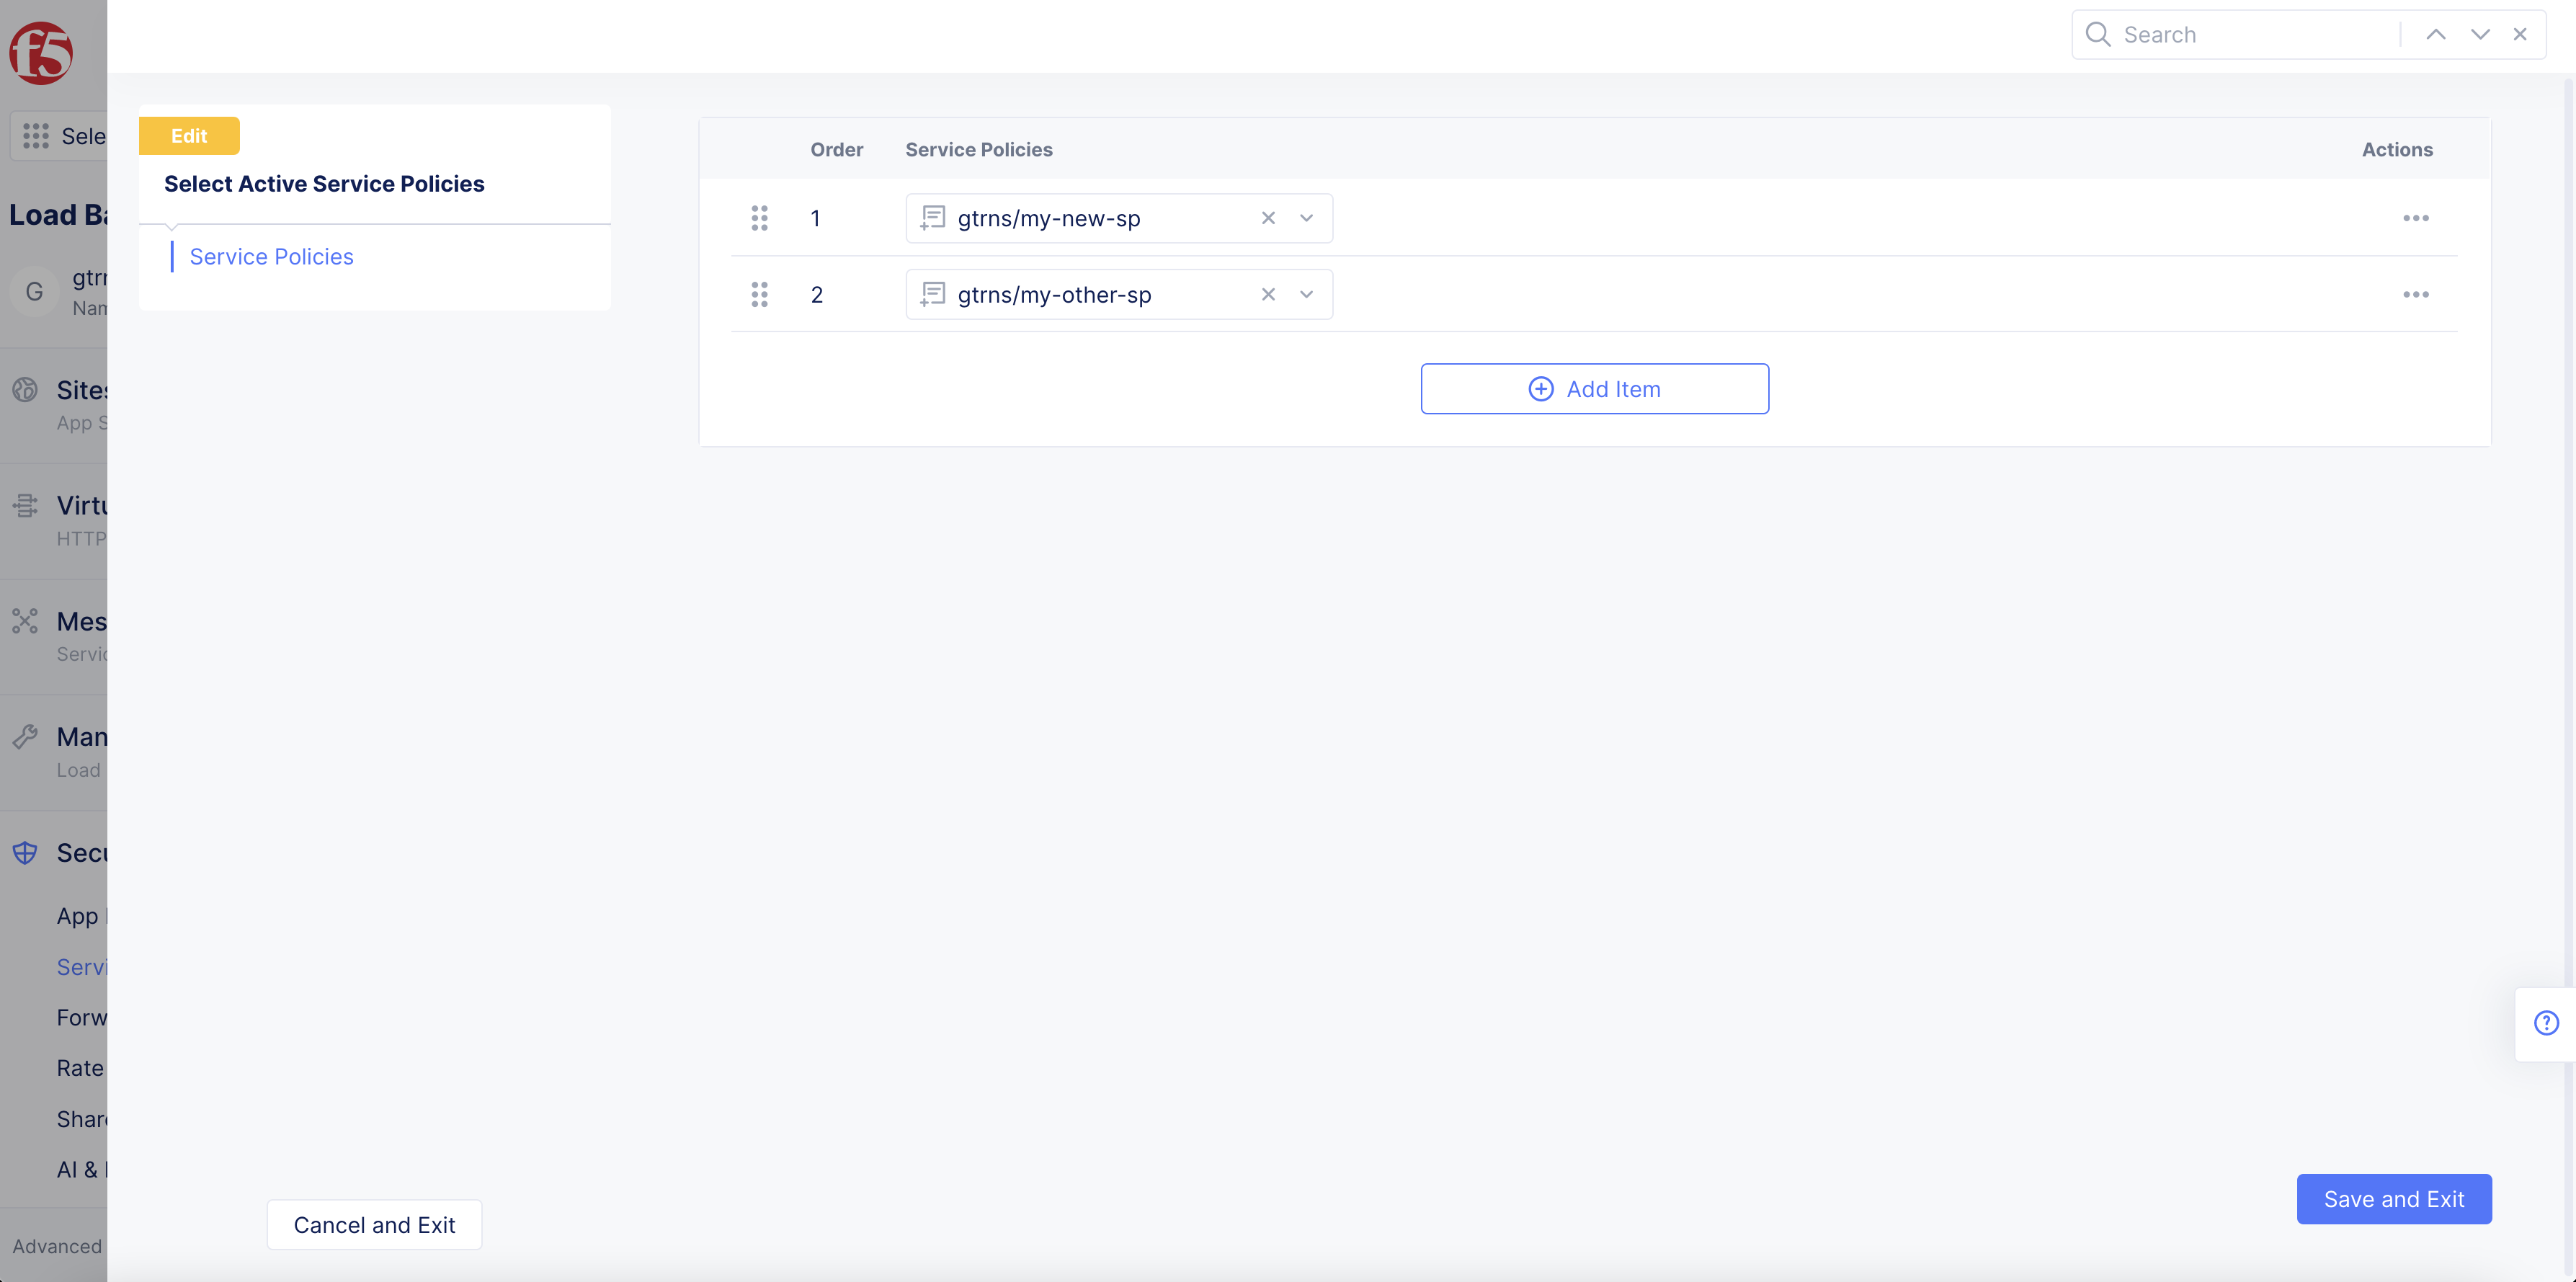
Figure: Order of Evaluation
Step 3: Apply specific service policy to a load balancer.
You can apply a specific service policy to your load balancer using the Apply Specified Service Policies option. You can apply as many specific service policies as needed.
To apply specific service policies, perform the following:
-
Open your load balancer for editing:
-
Select
Manage>Load Balancers>HTTP Load Balancers. -
For your load balancer, select
...>Manage Configuration. -
Select
Edit Configurationin the upper right corner.
-
-
Navigate to the
Common Security Controlssection in load balancer configuration. -
From the
Service Policiesmenu, select theApply Specified Service Policiesoption.

Figure: Apply Specified Service Policy
-
Select
Configure. -
Select
Configureagain. -
From the
List of Policiesmenu, select a service policy.
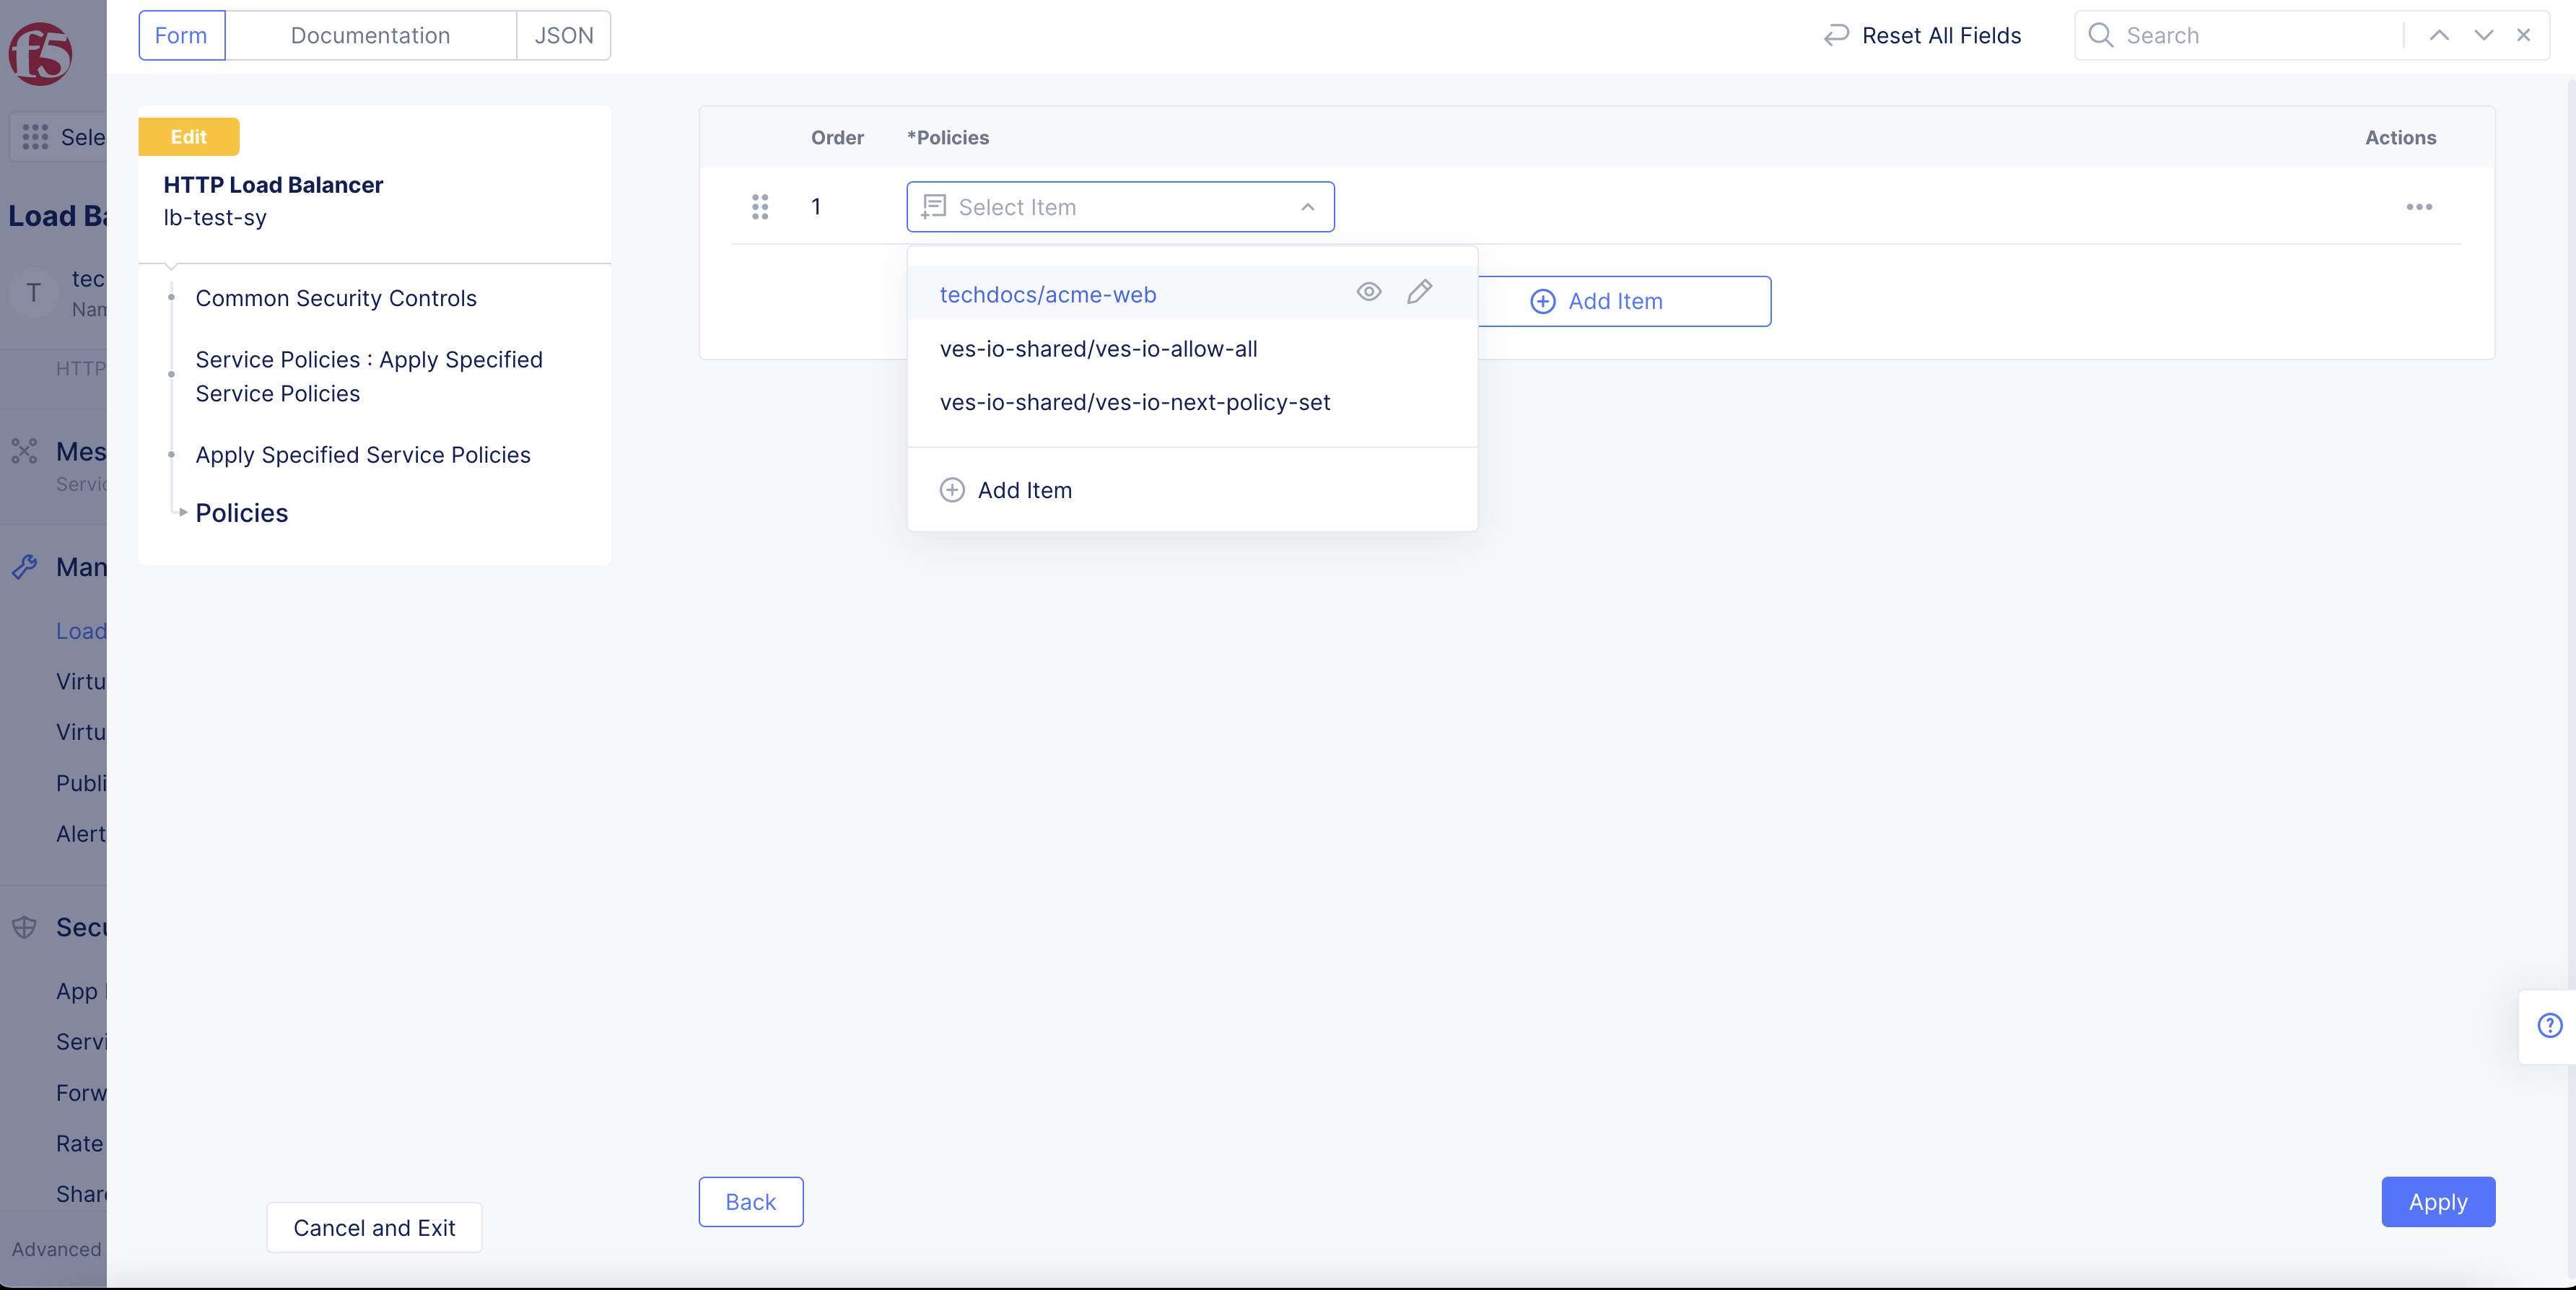
Figure: Menu Options
-
Select
Add Itemto add more service policies. -
Use the drag handles to the left of the service policy to re-arrange the order of the service policies.
-
Select
Apply. -
If you are finished with load balancer configuration, select
Save and Exit.