Tenant Overview
Objective
This guide provides instructions on how to manage general settings for your tenant, and personal account settings in F5® Distributed Cloud Services. The tenant-level settings allow you to control user access, and define policies around it and user-level personal account settings allow you to configure settings such as notification preferences, Multi-Factor Authentication (MFA), etc. To know more information about supported user access management, see User Access Management.
Using the instructions provided in this guide, you can configure tenant policies such as password policy and personal settings such as MFA and notification preferences.
Prerequisites
The following prerequisites apply:
Note: If you do not have an account, see Get Started with Console.
- Tenant settings such as
Login Optionsrequire theTenant Ownerrole.
Note: See Access Policies and Rules for more information.
Configure Tenant Settings
The information provided in this chapter covers tenant-level settings, and some of these settings may require you to have the Tenant Owner role.
Log into F5 Distributed Cloud Console, go to Tenant Settings
- Select
Tenant Settingsin left-menu > selectTenant Overview.

Figure: Tenant Settings Page
Configure Custom Logo
- Select
Change LogoinCustom Logosection to load custom logo form.
- Select
Upload Image, and upload image for your logo.
Note: Ensure that the image complies with the requirement displayed on the form.

Figure: Custom Logo
- Select
Save.
Set Tenant Policies
- Select
Set Up PoliciesinTenant Policiessection to load tenant policy configuration form.

Figure: Tenant Settings - Tenant Policies
- Enter
Display Namefor your tenant in the basic Tenant Details section.
Note: This name gets displayed in the tenant login screen.
Configure Session Timeout
- Configure session timeouts in
User Session Expirationsection. The Session Management settings enable administrators to configure "Idle" and ""Absolute" time out. Refer to the below table for more details about these settings.
| Timeout Type | Description | Range | Default |
|---|---|---|---|
| Idle | Period of inactivity before re-authentication is required (cookie expiry). | 5 minutes - 30 days | 15 minutes |
| Absolute | Maximum session duration regardless of activity (session expiry). | 5 minutes - 30 days | 24 hours |
Note: For meeting the PCI DSS 8.2.8 requirement, set idle timeout at maximum 15 minutes.
Please note that changes to timeout settings will be recorded in audit logs. After applying changes, it may take up to 5 minutes to take effect.
Brute Force Detection
-
This system uses algorithms to temporarily lock accounts for a specified time period after detecting an attack. The lockout duration increases with longer persisting attack attempts. Set number of times before login delay is triggered. Login delay wait time can increment to 15 minutes maximum.
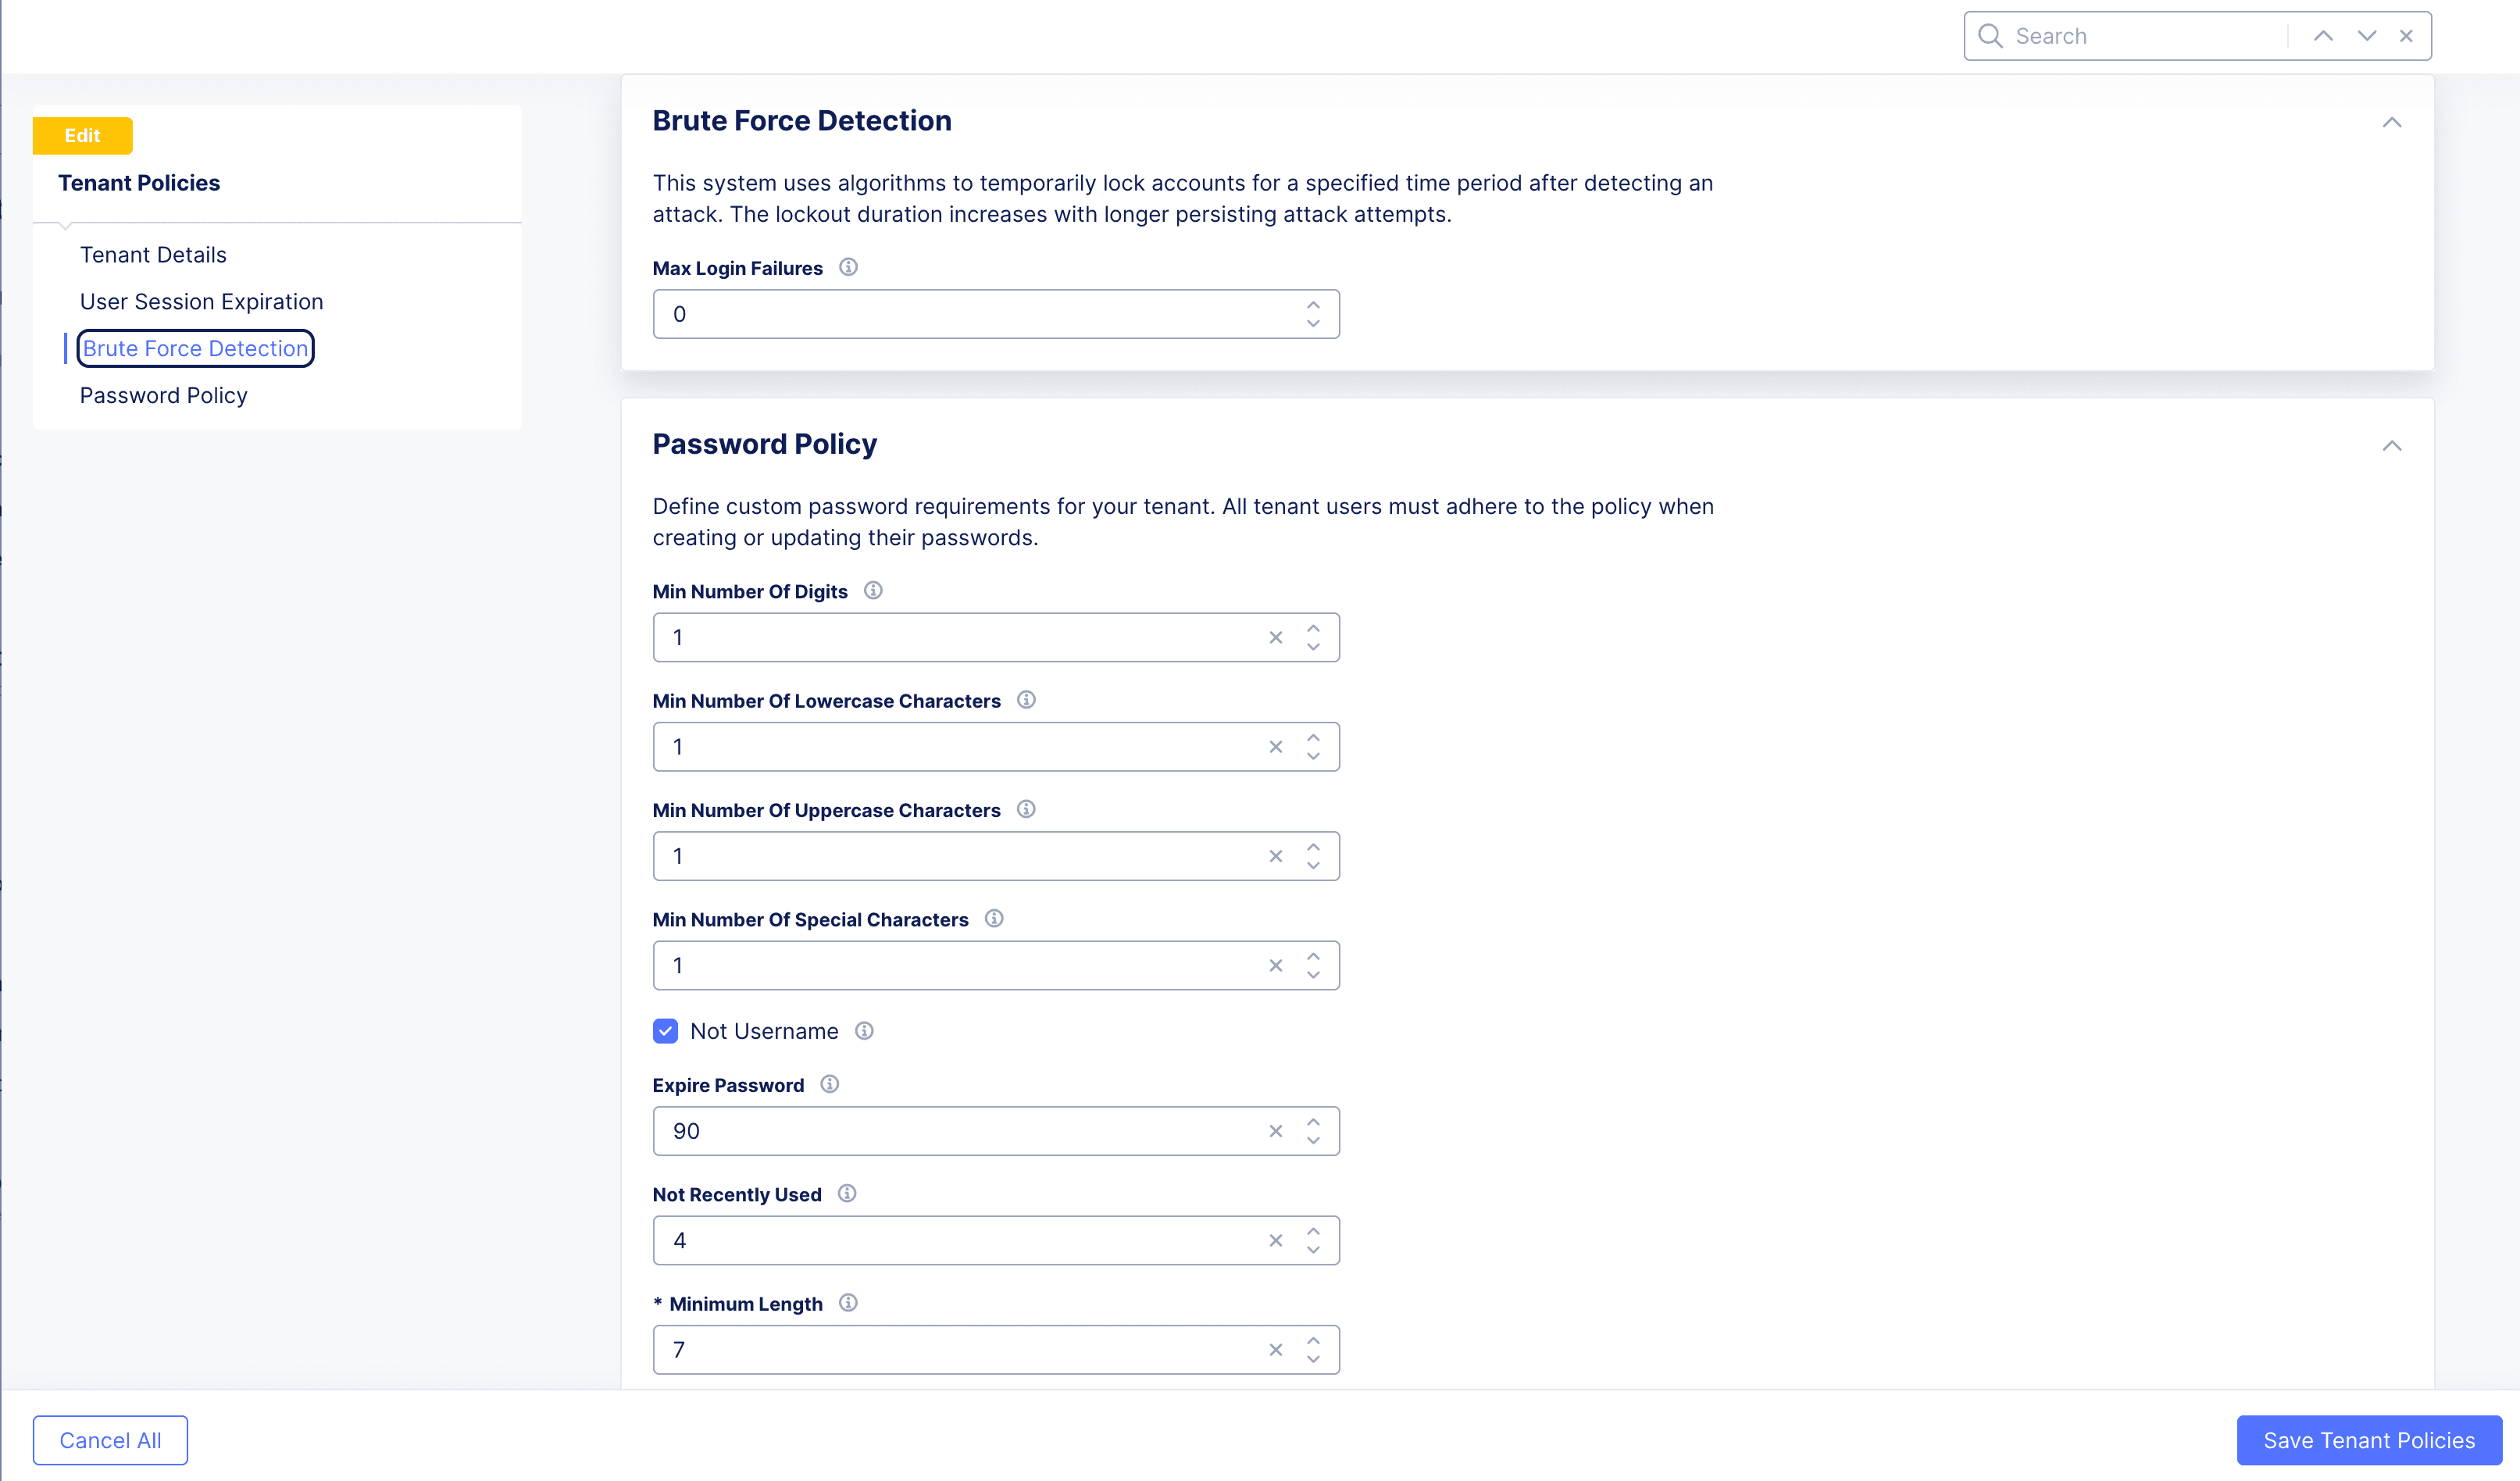
Figure: Basic and Brute force Detection Settings

Password Policy
-
Define custom password requirements for your tenant. All tenant users must adhere to the policy when creating or updating their passwords.
In
Password Policysection:-
Min Number Of Digits: Enter value in box to specify minimum number of required digits in password. -
Min Number Of Lowercase Characters: Enter value in box to specify minimum number of lower case characters in the password. -
Min Number Of Uppercase Characters: Enter value in box to specify minimum number of upper case characters in the password. -
Min Number Of Special Characters: Enter value in box to specify minimum number of special characters in the password.Note: Special characters are characters such as
?!#%$. -
Check
Not Usernamebox to ensure password is not the same as username. -
Expire Password: Enter value to set a password expiry time period. -
Not Recently Used: Enter value to restrict the user from using a number of previously used passwords when changing password. -
Minimum Length: Enter value to specify minimum length for the password length (string).
Figure: Tenant Password Policy Settings
Select
Save and Exitbutton. -

Configure Expiry Policy for Credentials
- Select
Setup Expiration PreferencesinCredential Expiry Policysection to load the expiry configuration form.
- Enter maximum expiry duration in number of days for your
API certificate,kubeconfig, andAPI tokenin boxes.

Figure: Set Credentials Expiry
- Select
Save.
Note: The default expiry is 90 days. See Credentials guide for information on how to create credentials.
Set Support Access
Allowing F5 support access, adding read write access to all namespaces, within customer tenants results in faster resolution times as the support team can access configurations, directly observe the issue, identify the cause, and troubleshoot issues more efficiently. Granting access leads to faster resolution times.
-
Select
Administrationbox in F5 Distributed Cloud home page. -
Select
Tenant OverviewinTenant Settingssection. -
Select
Manage Accessbutton inSupport Accesssection.
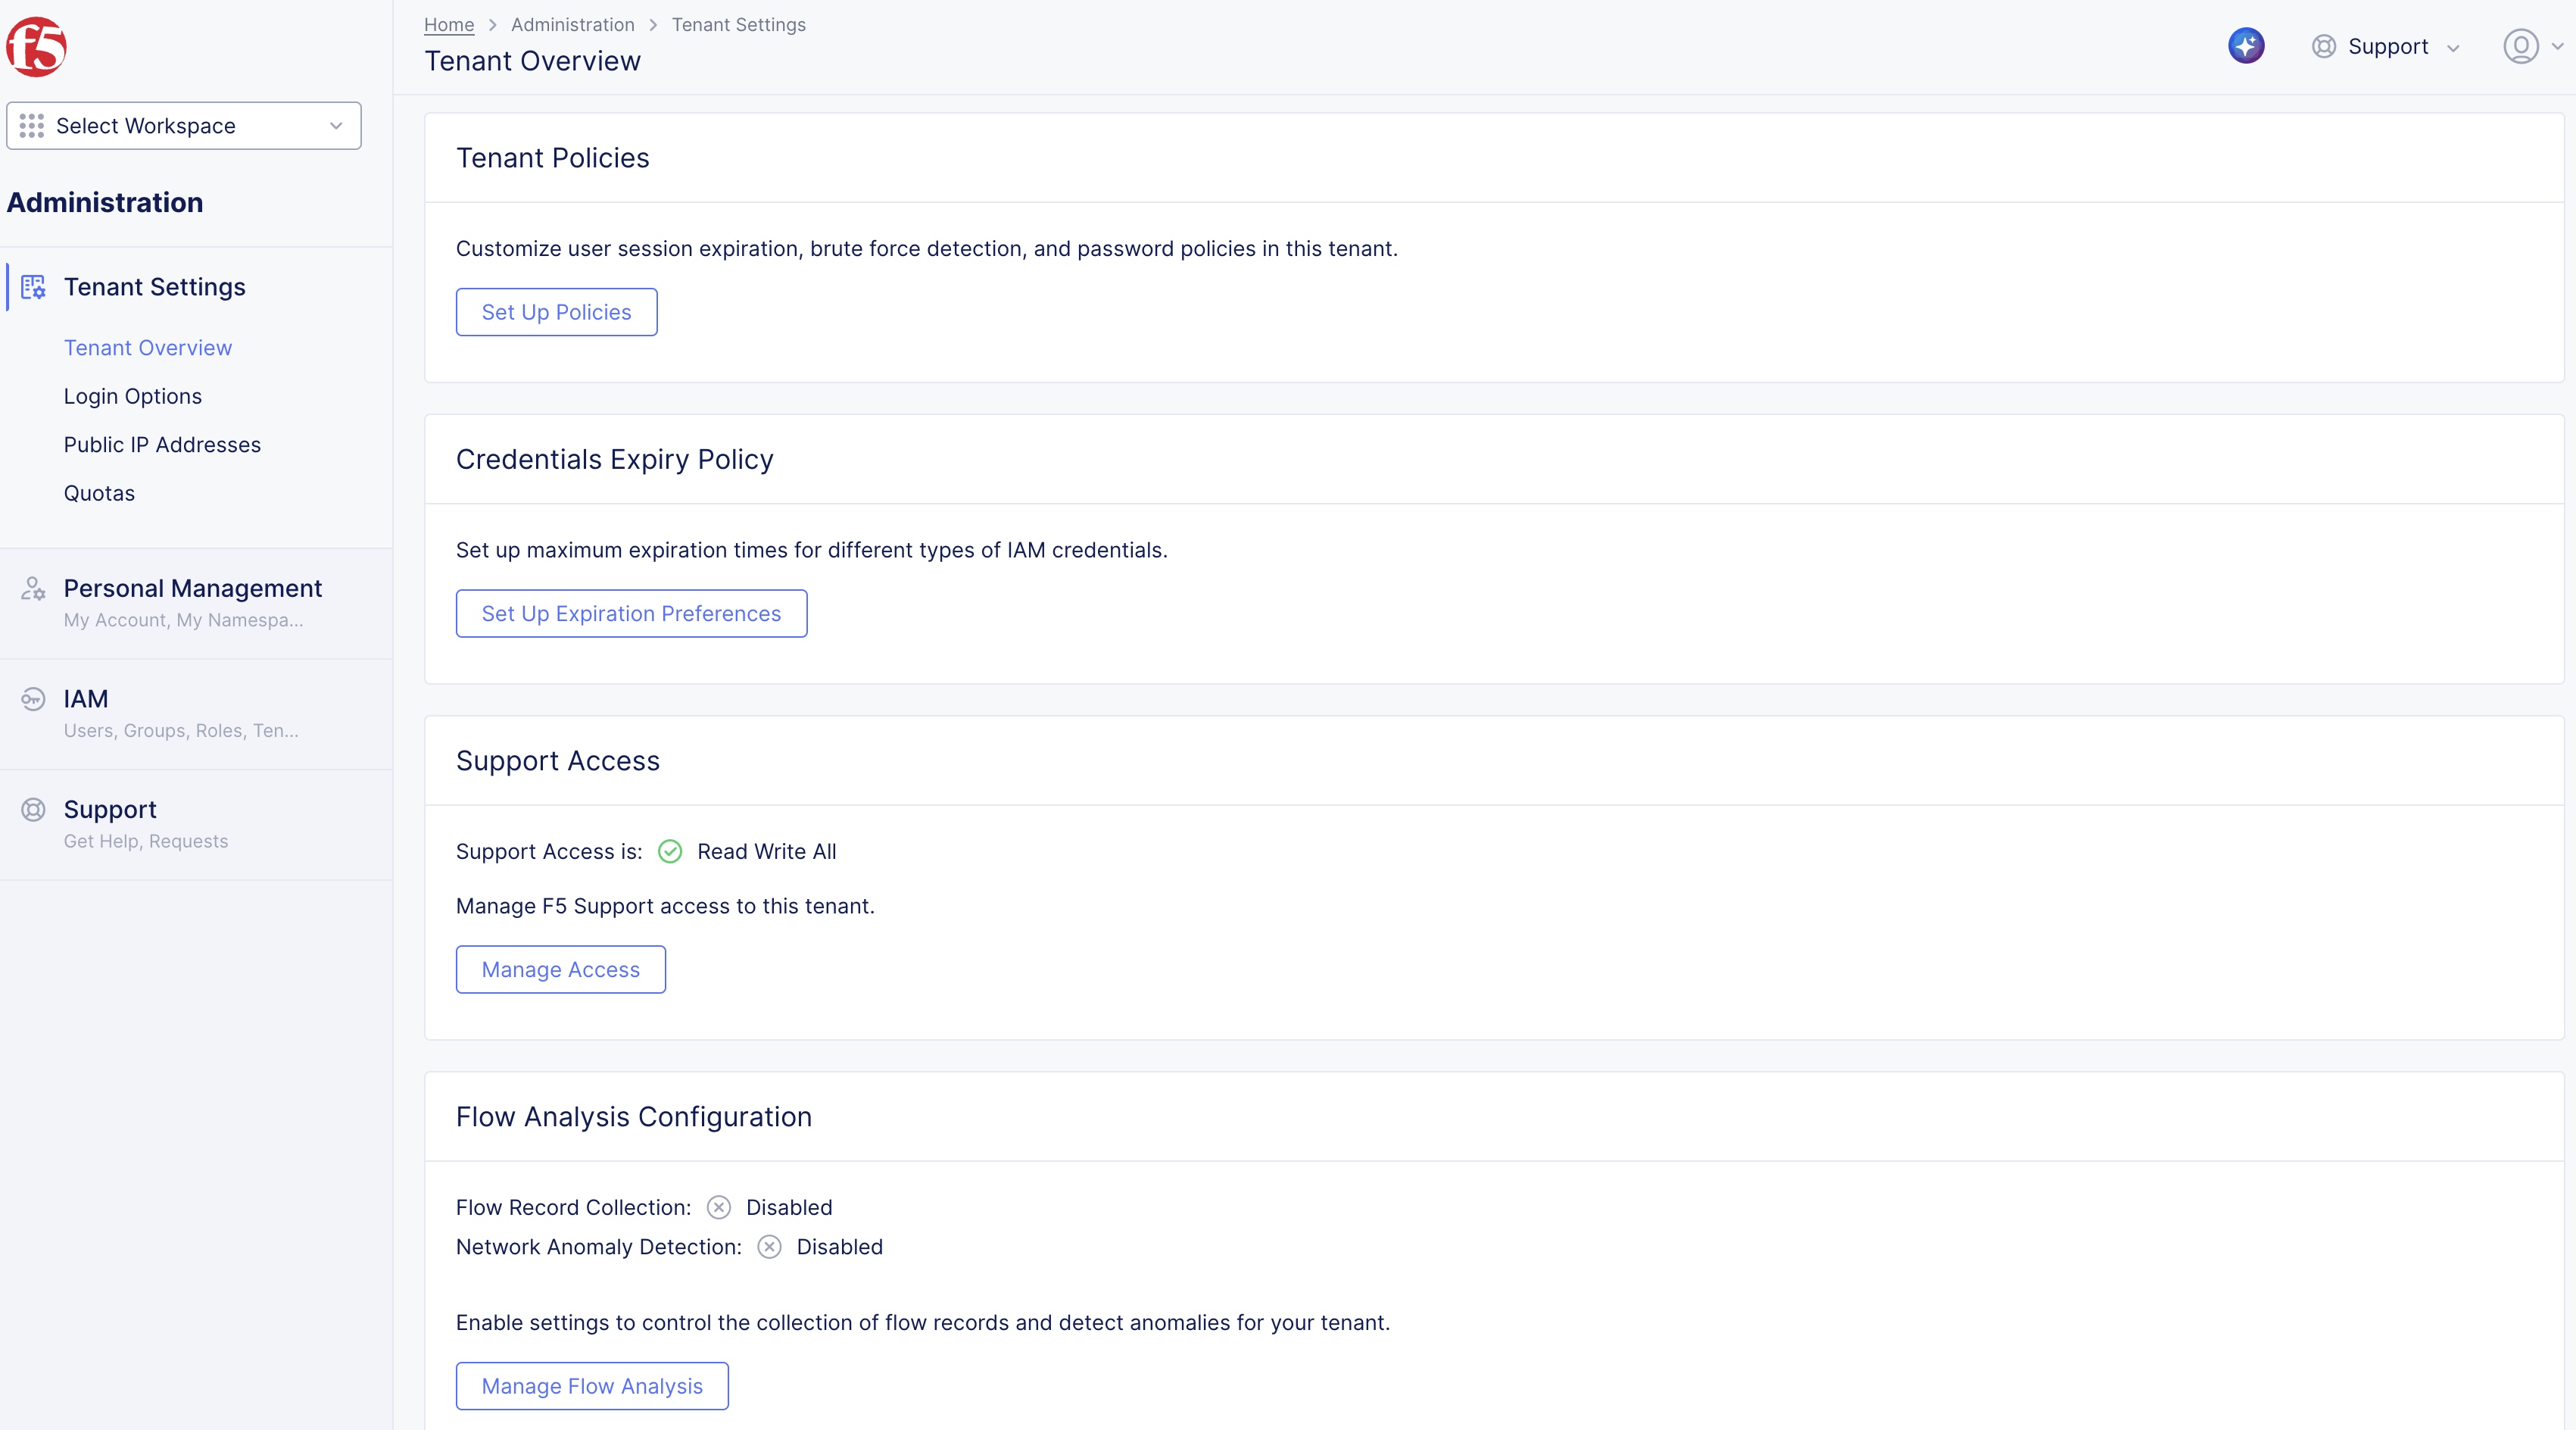
Figure: Support Access
-
Select
Access Leveldrop-down menu.
Figure: Support Access Form
-
Read Only All: Allows support personnel to view, but not modify, all namespaces in customer tenant. -
Read Write All(default setting): Allows support personnel to view and modify all namespaces in customer tenant. -
Read Write Specific Namespaces: Allows support personnel to view and modify specific namespaces in customer tenant.-
Select
Namespacesdrop-down menu. -
Select
+ Add Itembutton to add additionalNamespacesoptions.
-
-
Check
Pause Accessif needed.
Note: Allows for temporary suspension of support access to a customer tenant.
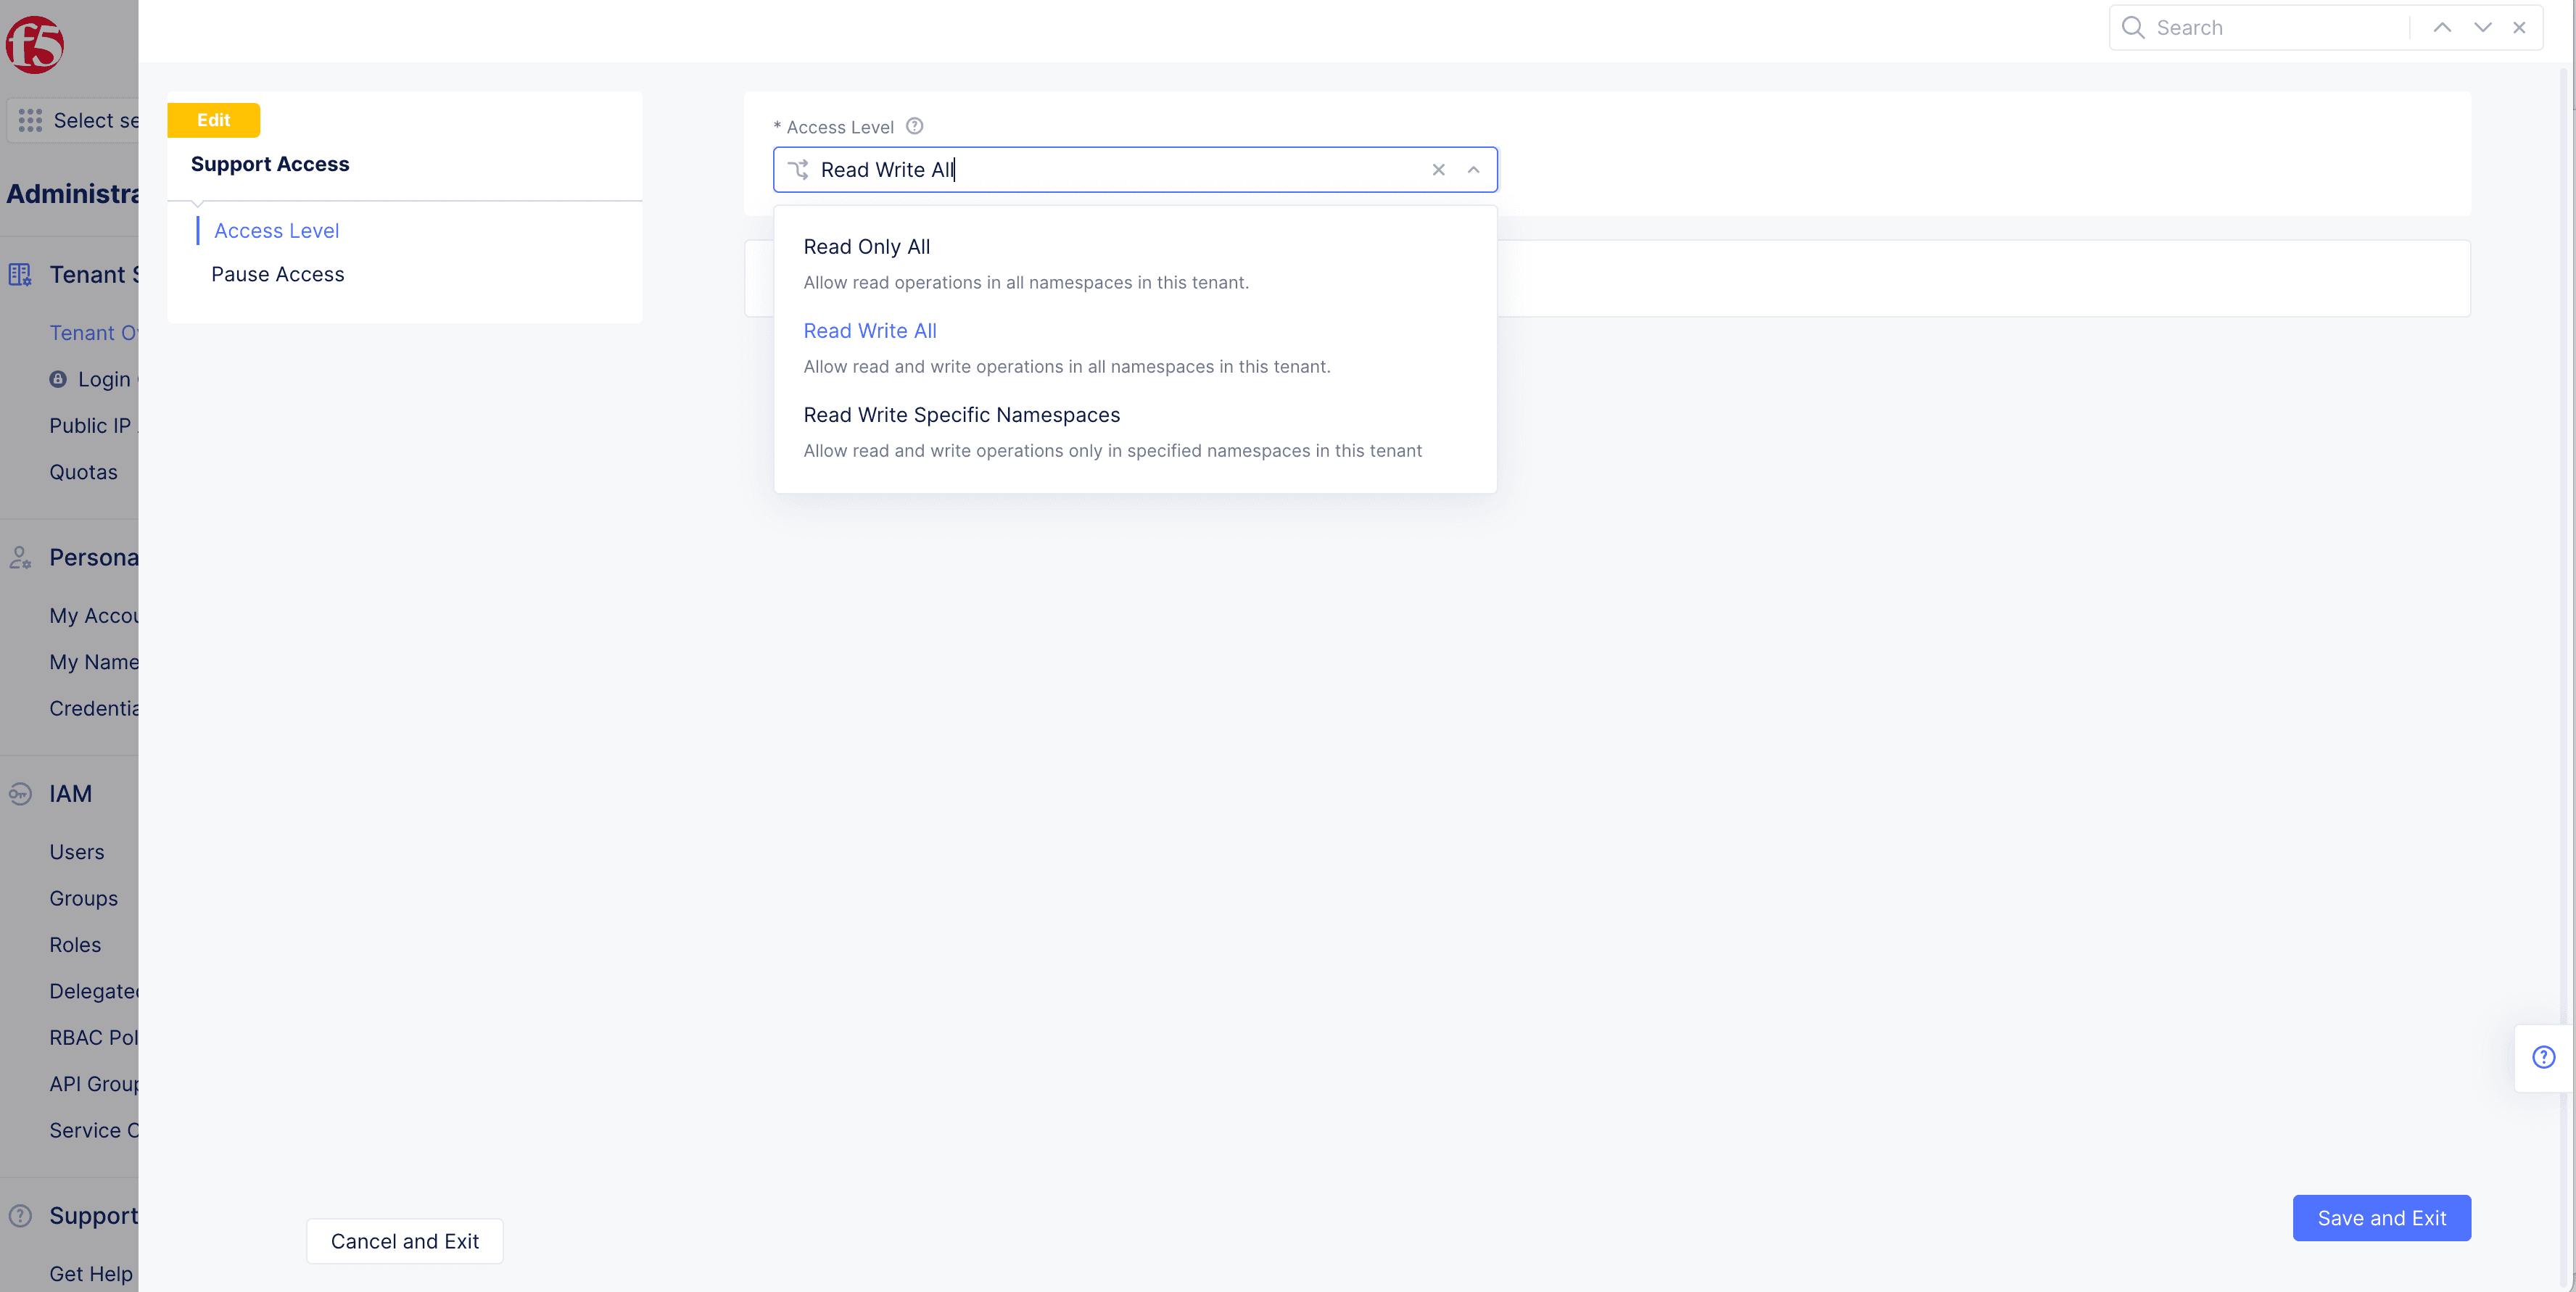
Figure: Support Access Form
-
-
Select
Save and Exitbutton.


Configure Login Options
See below SSO guides for instructions on configuring SSO for your enterprise.
In addition to SSO, we also provide tenant-wide two-factor authentication (2FA).

Figure: Configure Login Options
Public IP Address
- Refer to F5 Distributed Cloud Services Public VIPs for the Public IP Address.
Quotas
- Refer to Default Quota Reference for information on the default quotas for various resources consumed while using F5® Distributed Cloud Services.
Incident Procedures
The Incident Procedures section provides a built-in text editor for managing Real-Time Incident Procedures (RTIP). Users can Add, View, and Modify procedures directly within the tenant administration console. All changes are saved immediately upon clicking Save.
Access and visibility to this section are controlled through Role-Based Access Control (RBAC), ensuring only authorized users can view or edit incident procedures.
To access Incident Procedures, navigate to Administration > Tenant Settings > Incident Procedures.
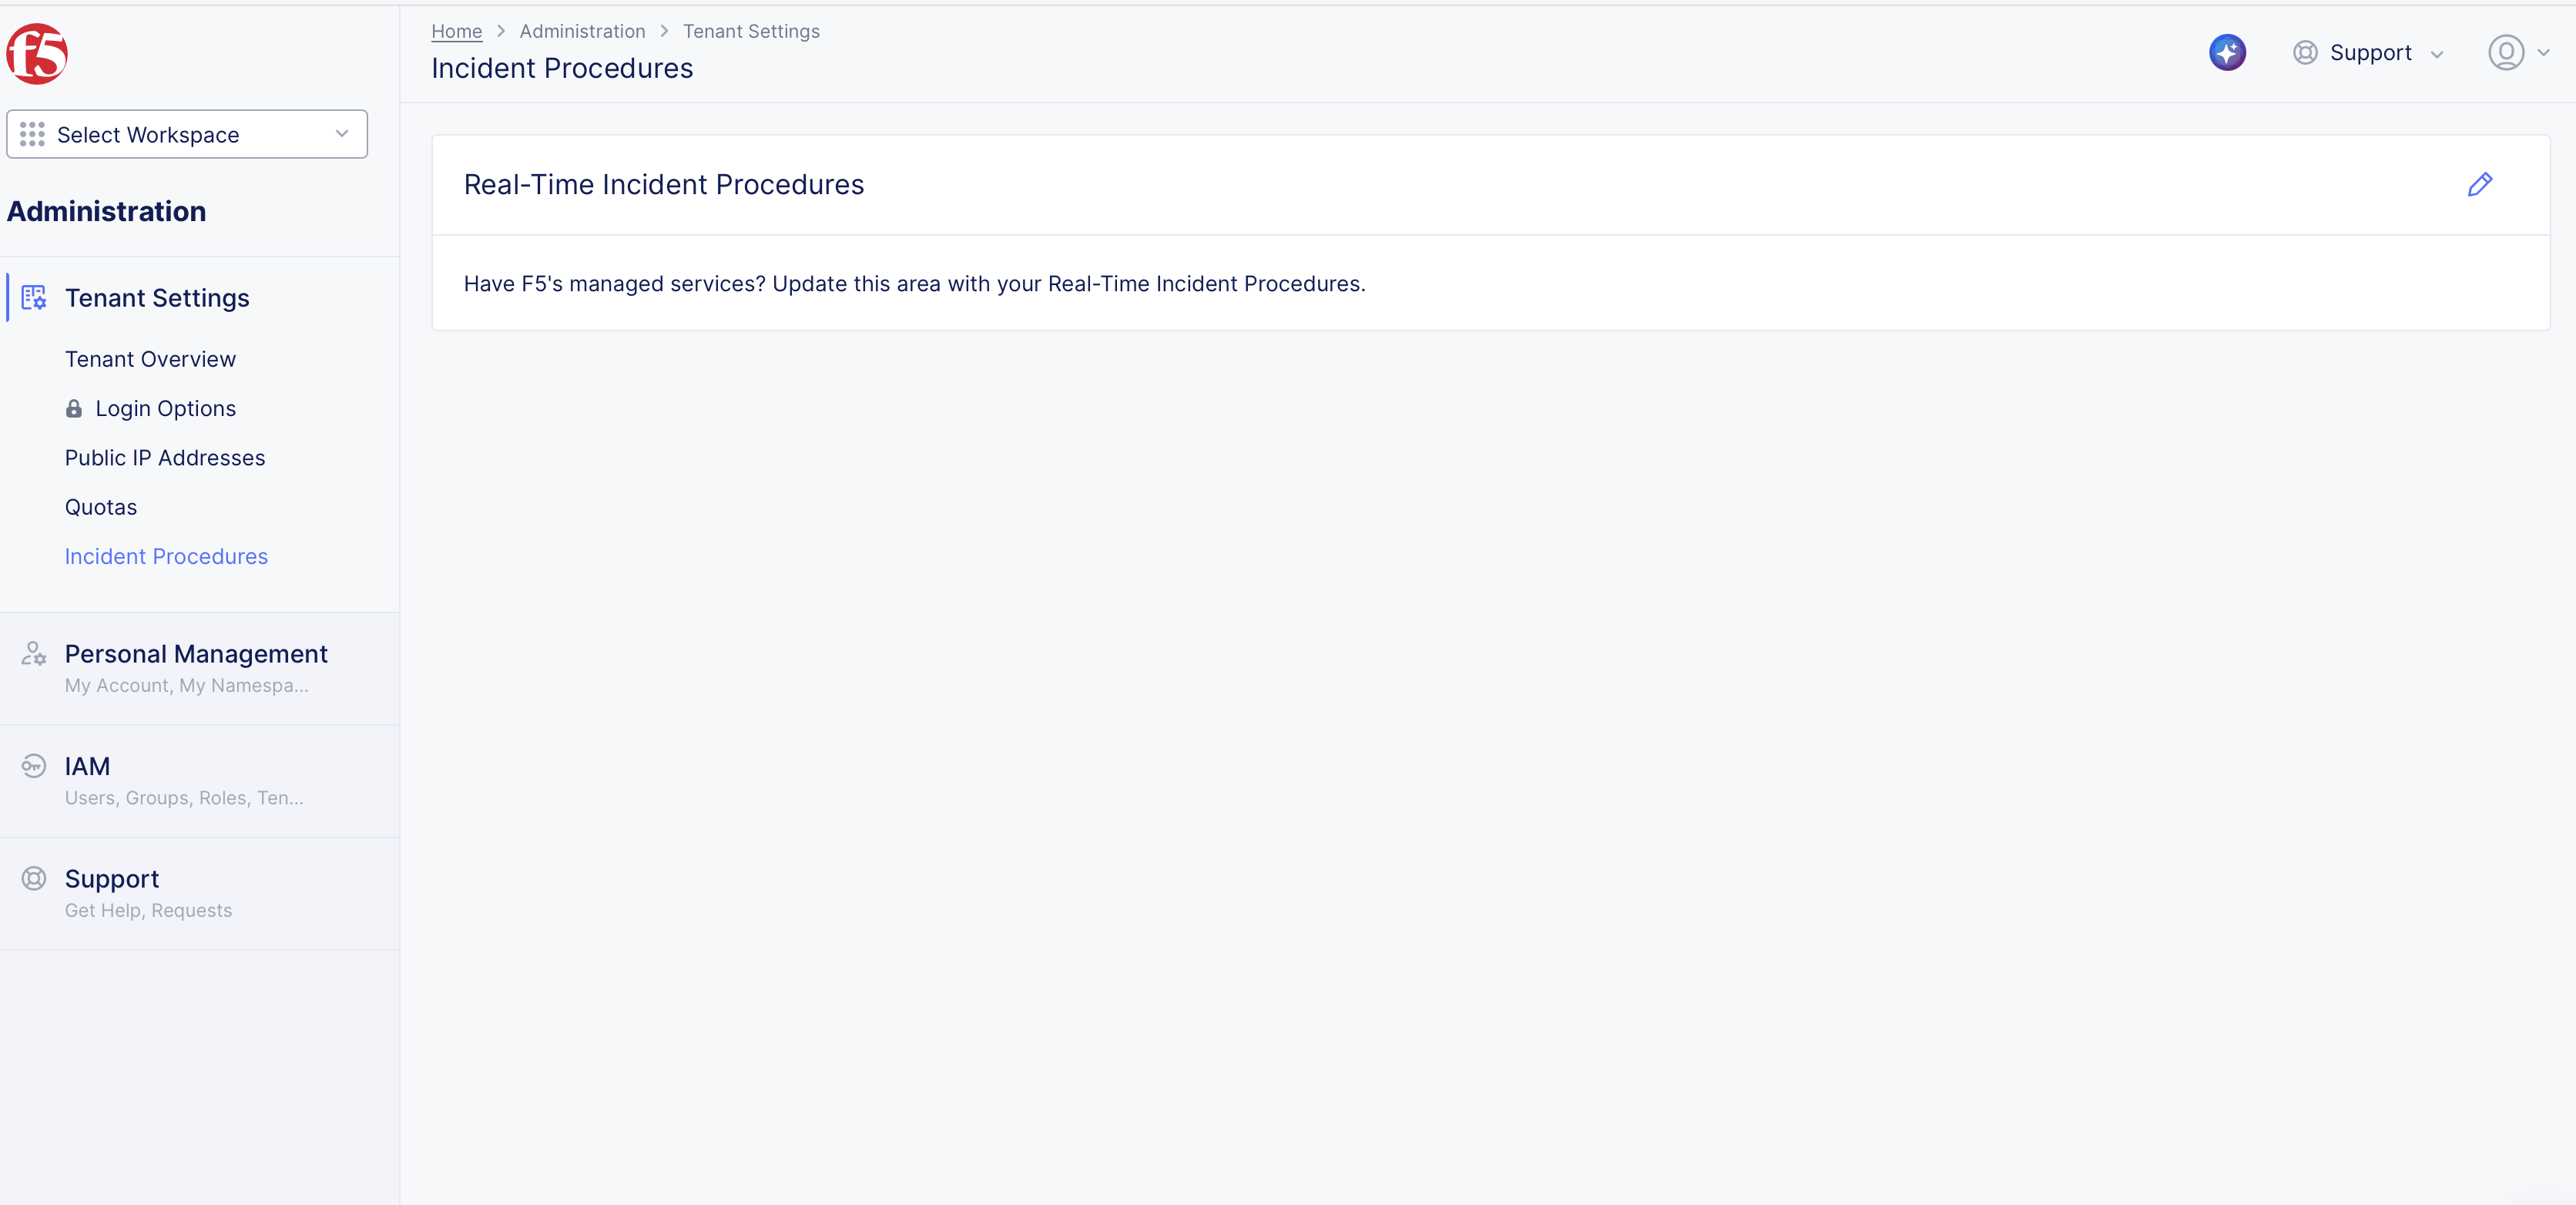
Figure: Real-Time Incident Procedures
To edit an RTIP, click the Edit icon in the top-right corner, update the details in the description box, and click Save to apply your changes.
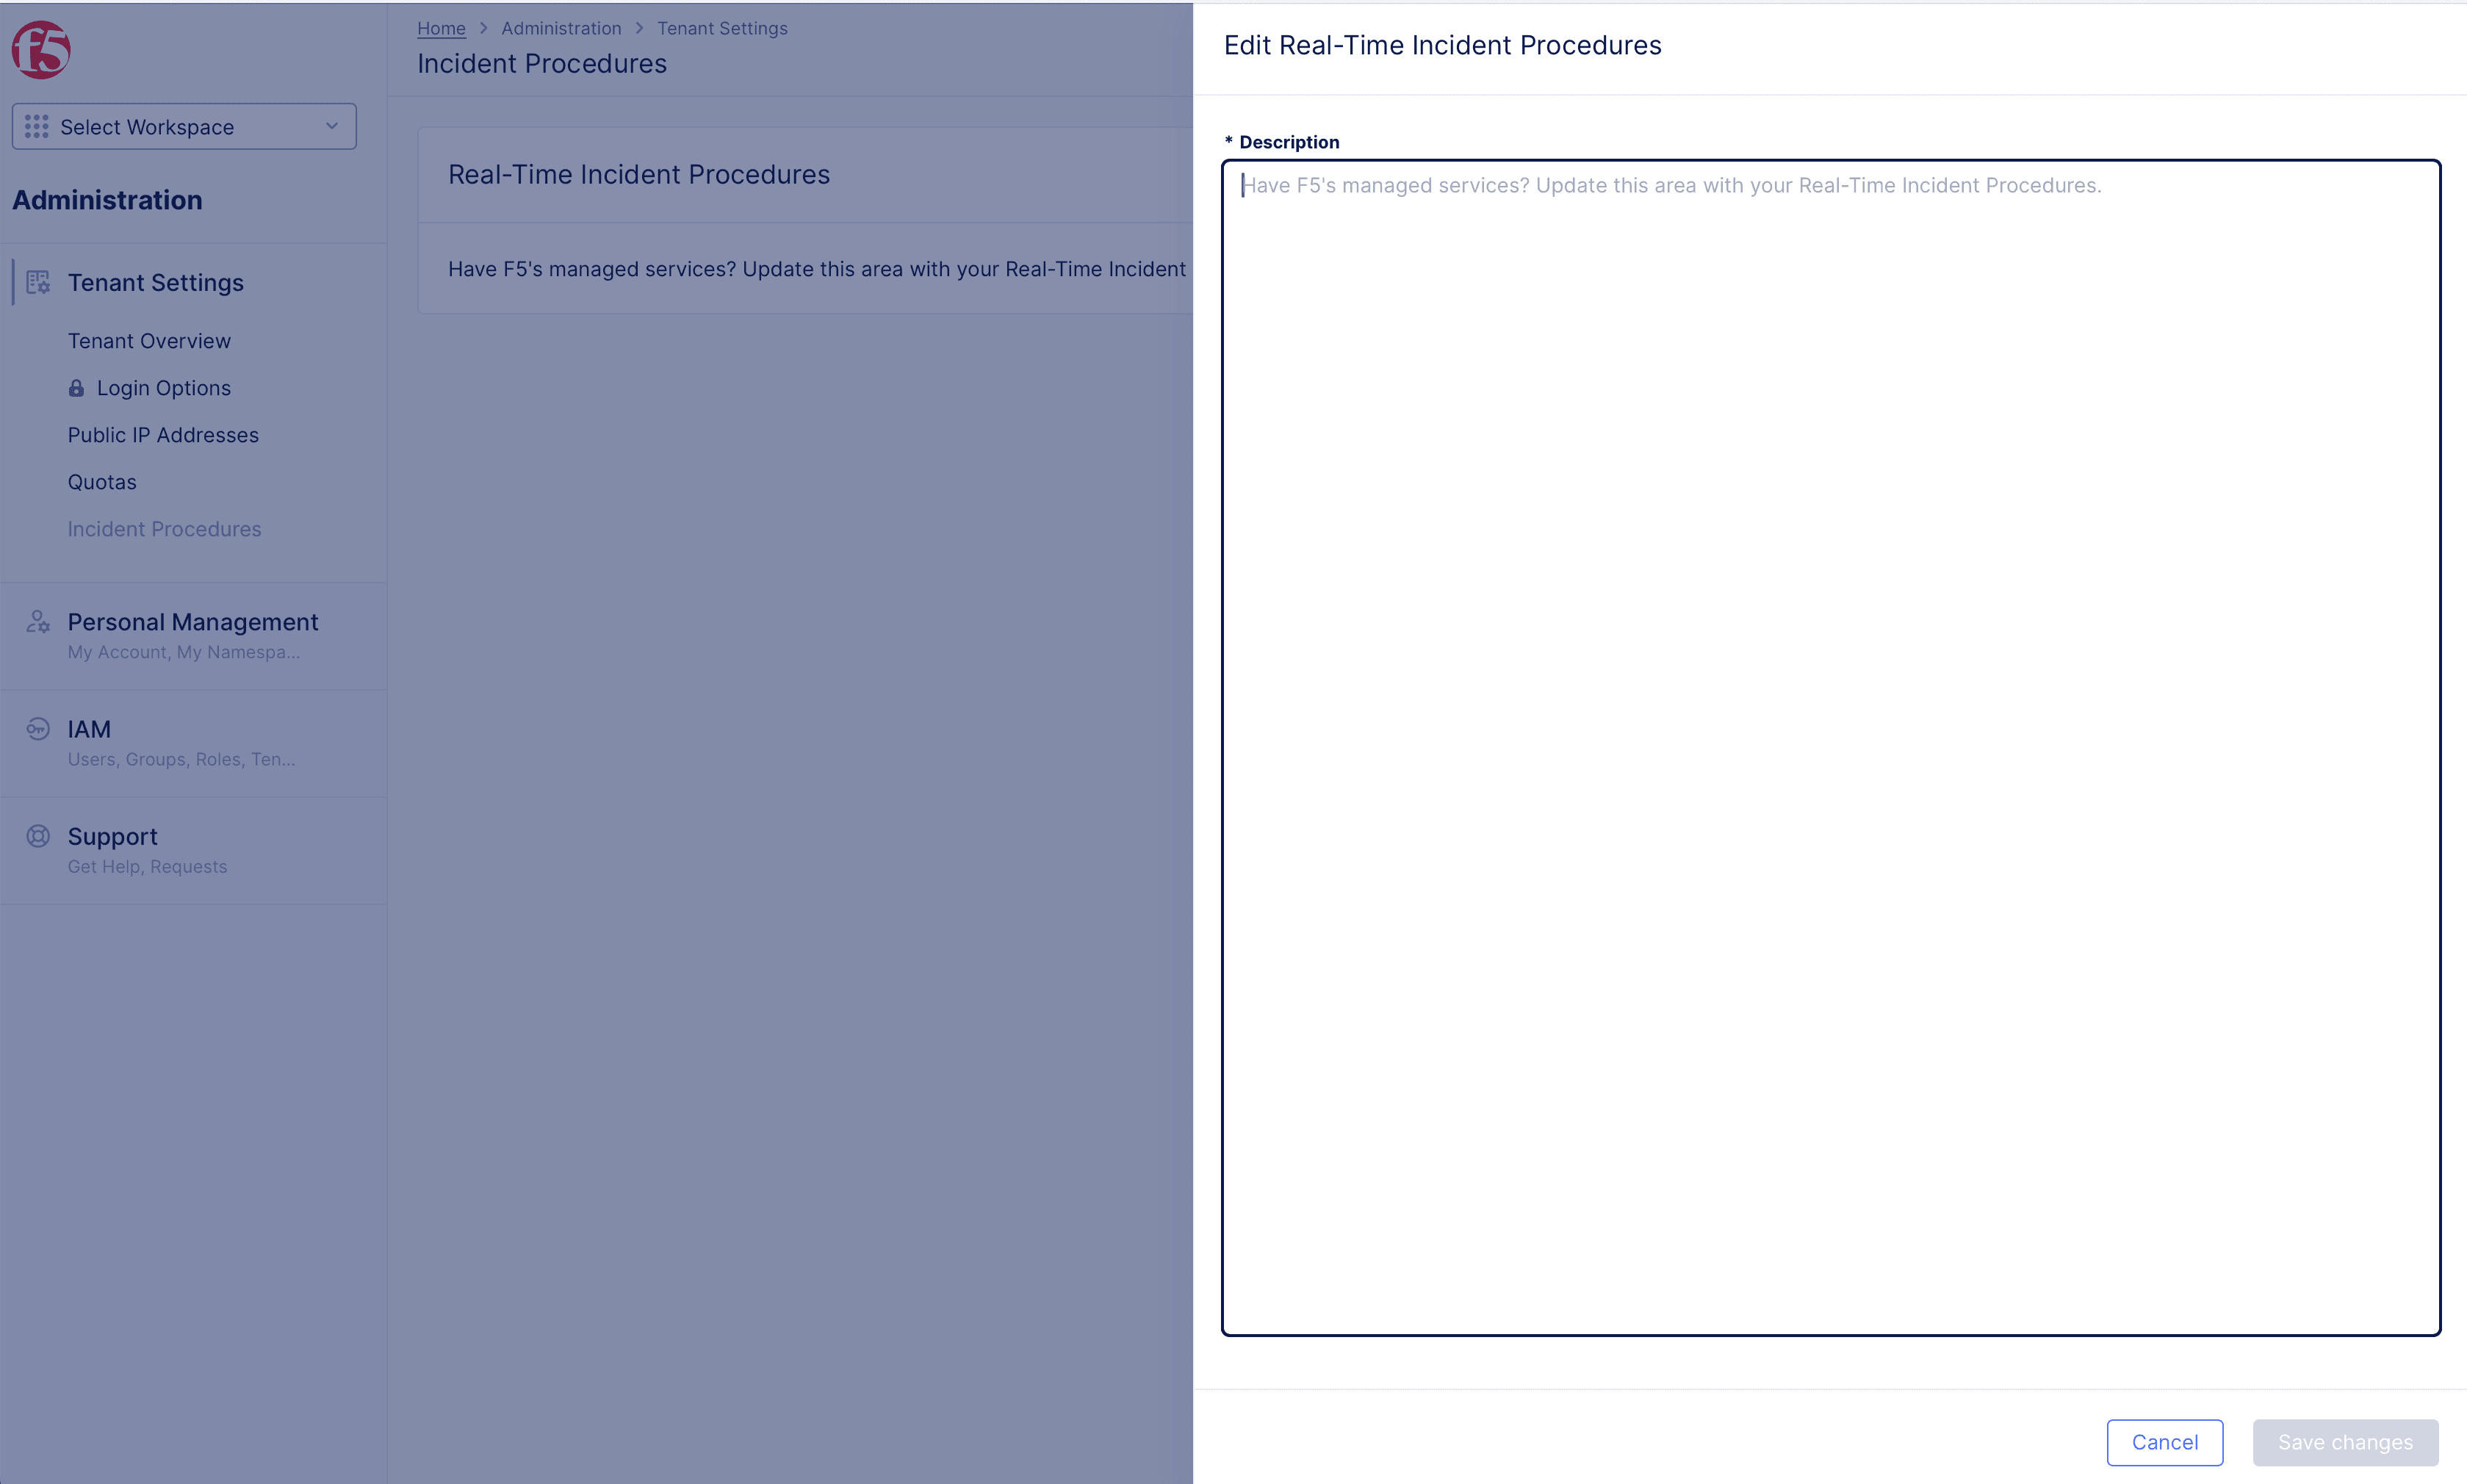
Figure: Edit Real-Time Incident Procedures
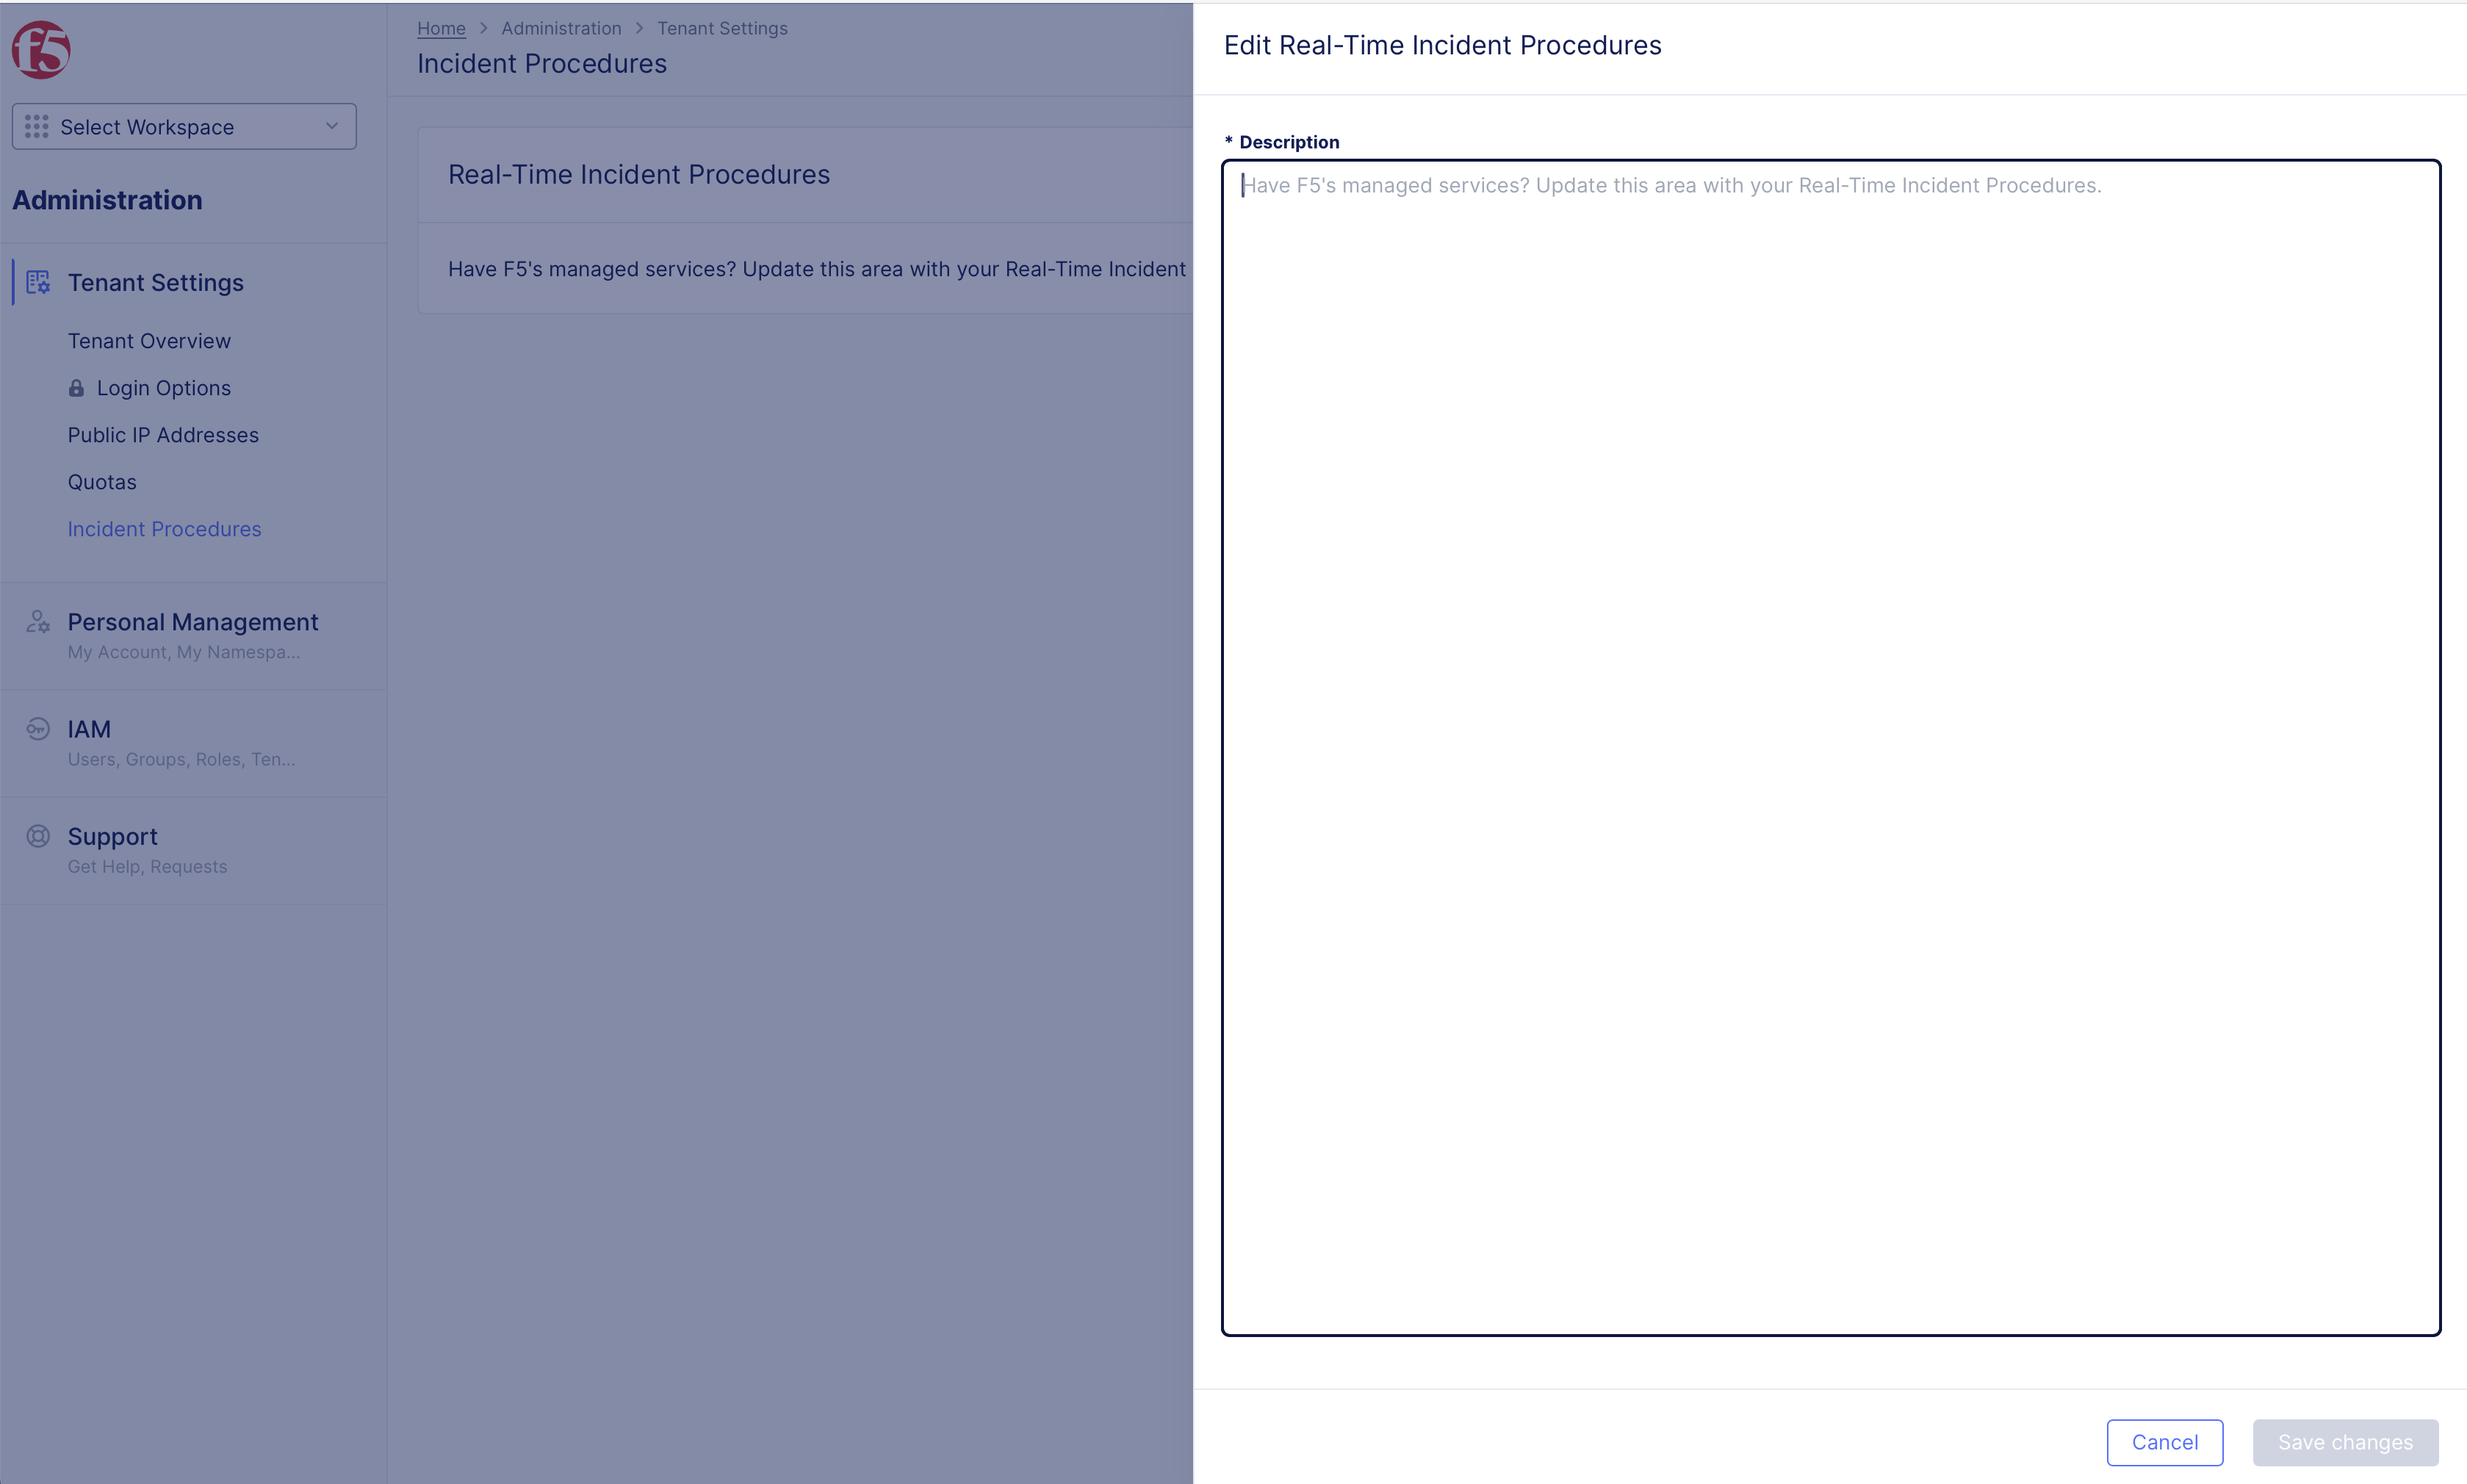
Figure: Edit Real-Time Incident Procedures
Concepts
API References
On this page:
- Objective
- Prerequisites
- Configure Tenant Settings
- Log into F5 Distributed Cloud Console, go to Tenant Settings
- Configure Custom Logo
- Set Tenant Policies
- Configure Session Timeout
- Brute Force Detection
- Password Policy
- Configure Expiry Policy for Credentials
- Set Support Access
- Configure Login Options
- Public IP Address
- Quotas
- Incident Procedures
- Concepts
- API References