Enable SSO - Okta
Objective
This document provides instructions on how to configure Okta Single Sign-on (SSO) integration to F5® Distributed Cloud Services for your enterprise account. For an overview of F5® Distributed Cloud Console, see About.
Note: SSO setup requires you to be of the
tenant ownertype user. Navigate toGeneral>IAM>Users. Select on theShow/hide column, select theTypefield, and selectApplyto display theTypecolumn. For the tenant owner, theTypecolumn displaysTenant Ownerand others, it displaysUser.
Prerequisites
The following prerequisites apply:
- A valid Enterprise account.
- Note: If you do not have an account, see Getting Started with Console.
-
Okta Account.
-
A configured identity provider such as Google.
Configuration Steps
Configuring SSO using Okta in F5® Distributed Cloud Console includes performing the following actions:
-
Configure the OIDC authentication application in Okta.
-
Enable SSO using Okta in the Console.
Configure OIDC Authentication Application in Okta
Configuring OIDC authentication application in Okta includes creating an identity provider type and an application for your SSO in Okta. Also, it requires you to allowlist the redirect URI in your identity provider.
This example shows configuring Okta with Google as the identity provider.
Note: Creating OAuth credentials in Google is required for this step. For more information, see SSO-Google guide.
Perform the following actions to configure the OIDC app in Okta:
Note: Skip to step 4 if you have Okta user accounts created.
Step 1: Log into Okta and start new identity provider configuration.
-
Log into Okta portal with your administrator access.
-
Select
Admin, if available.
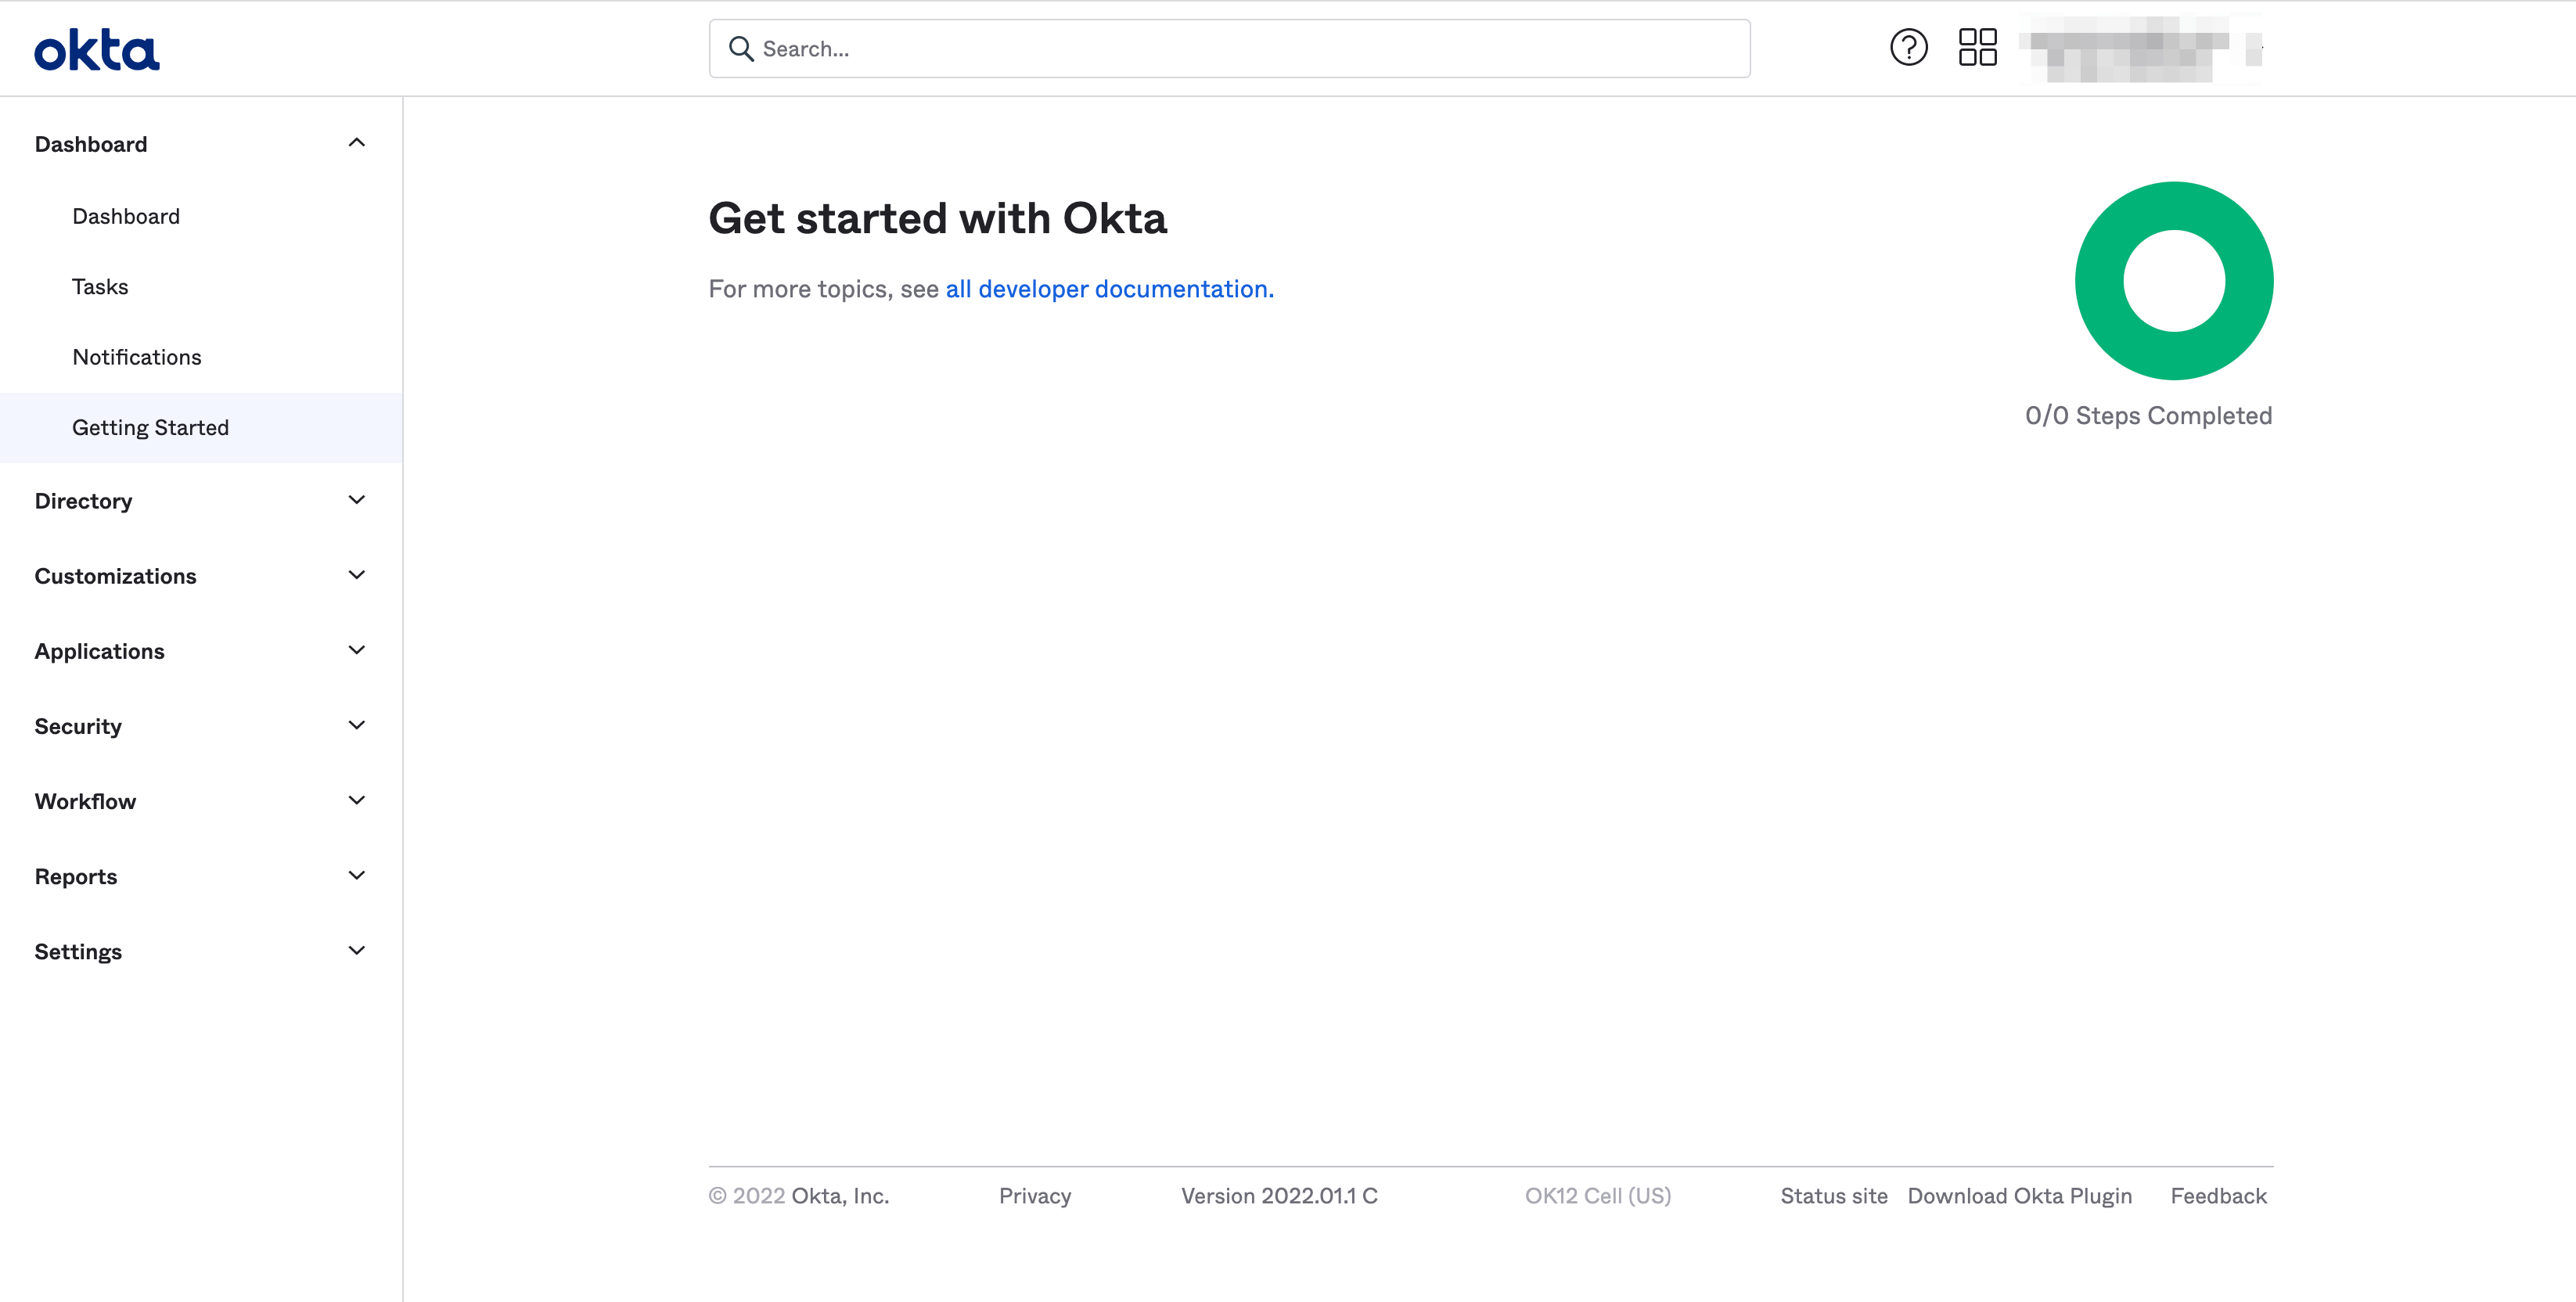
Figure: Okta Login View
- Select
Security>Identity Providers.
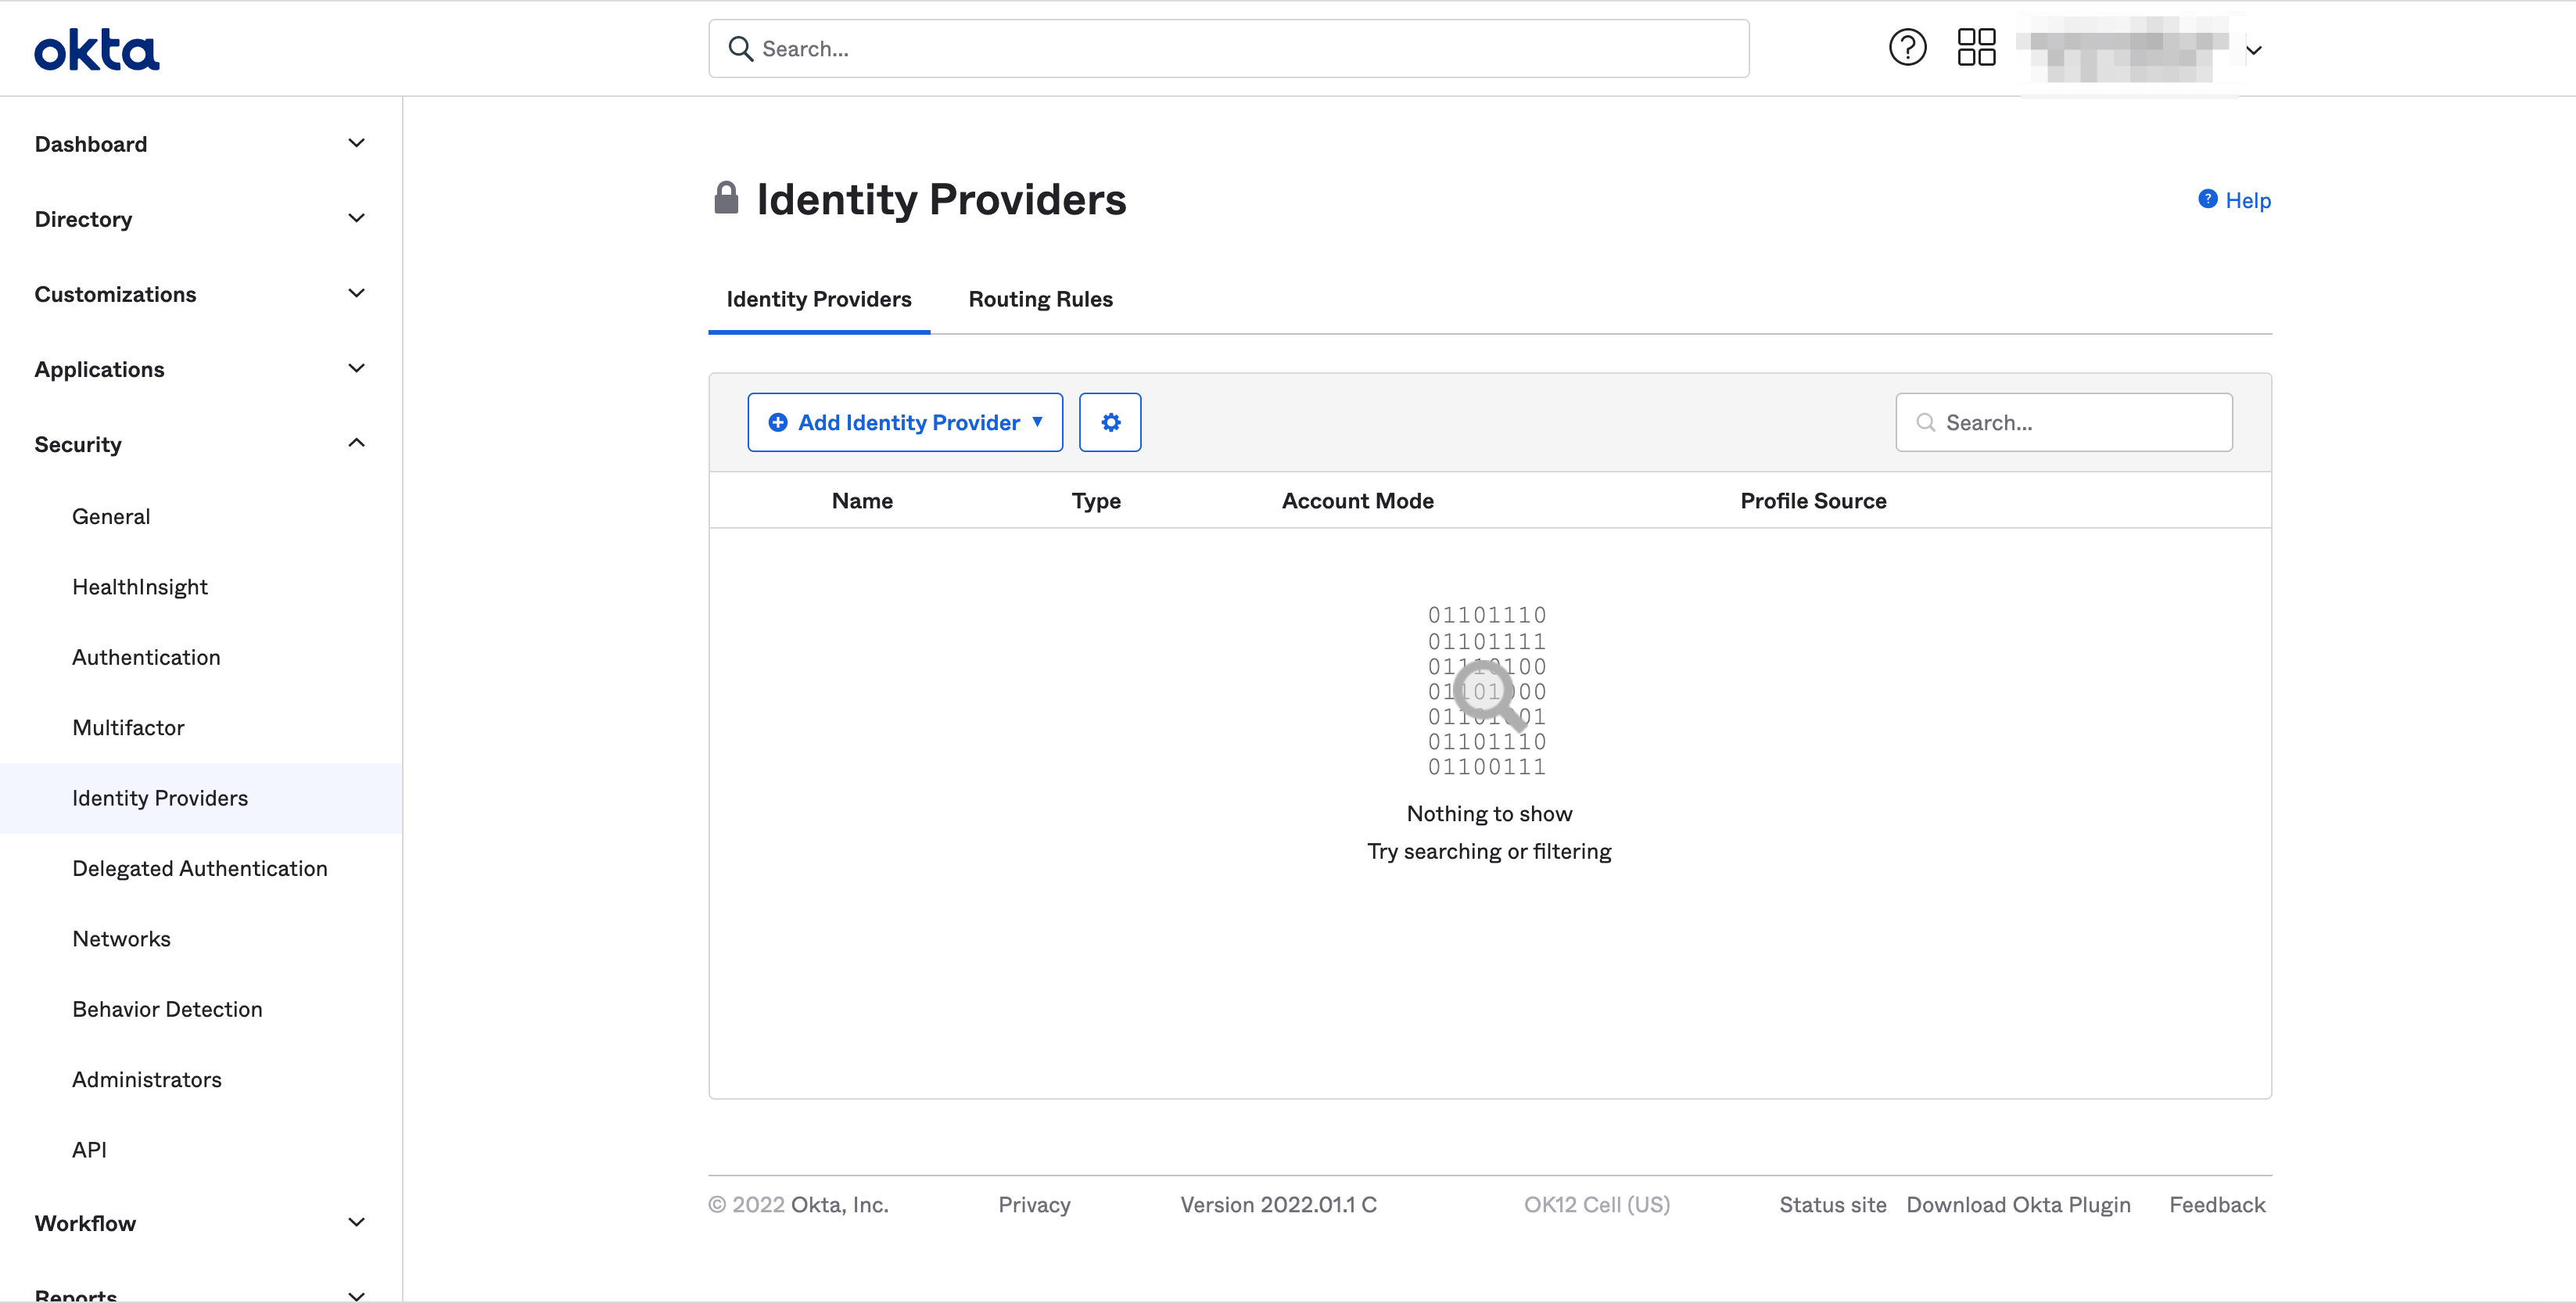
Figure: New Identity Creation
-
Select
+ Add Identity Providerbutton. -
Select
Add GoogleinAdd Identity Providerdrop-down menu.
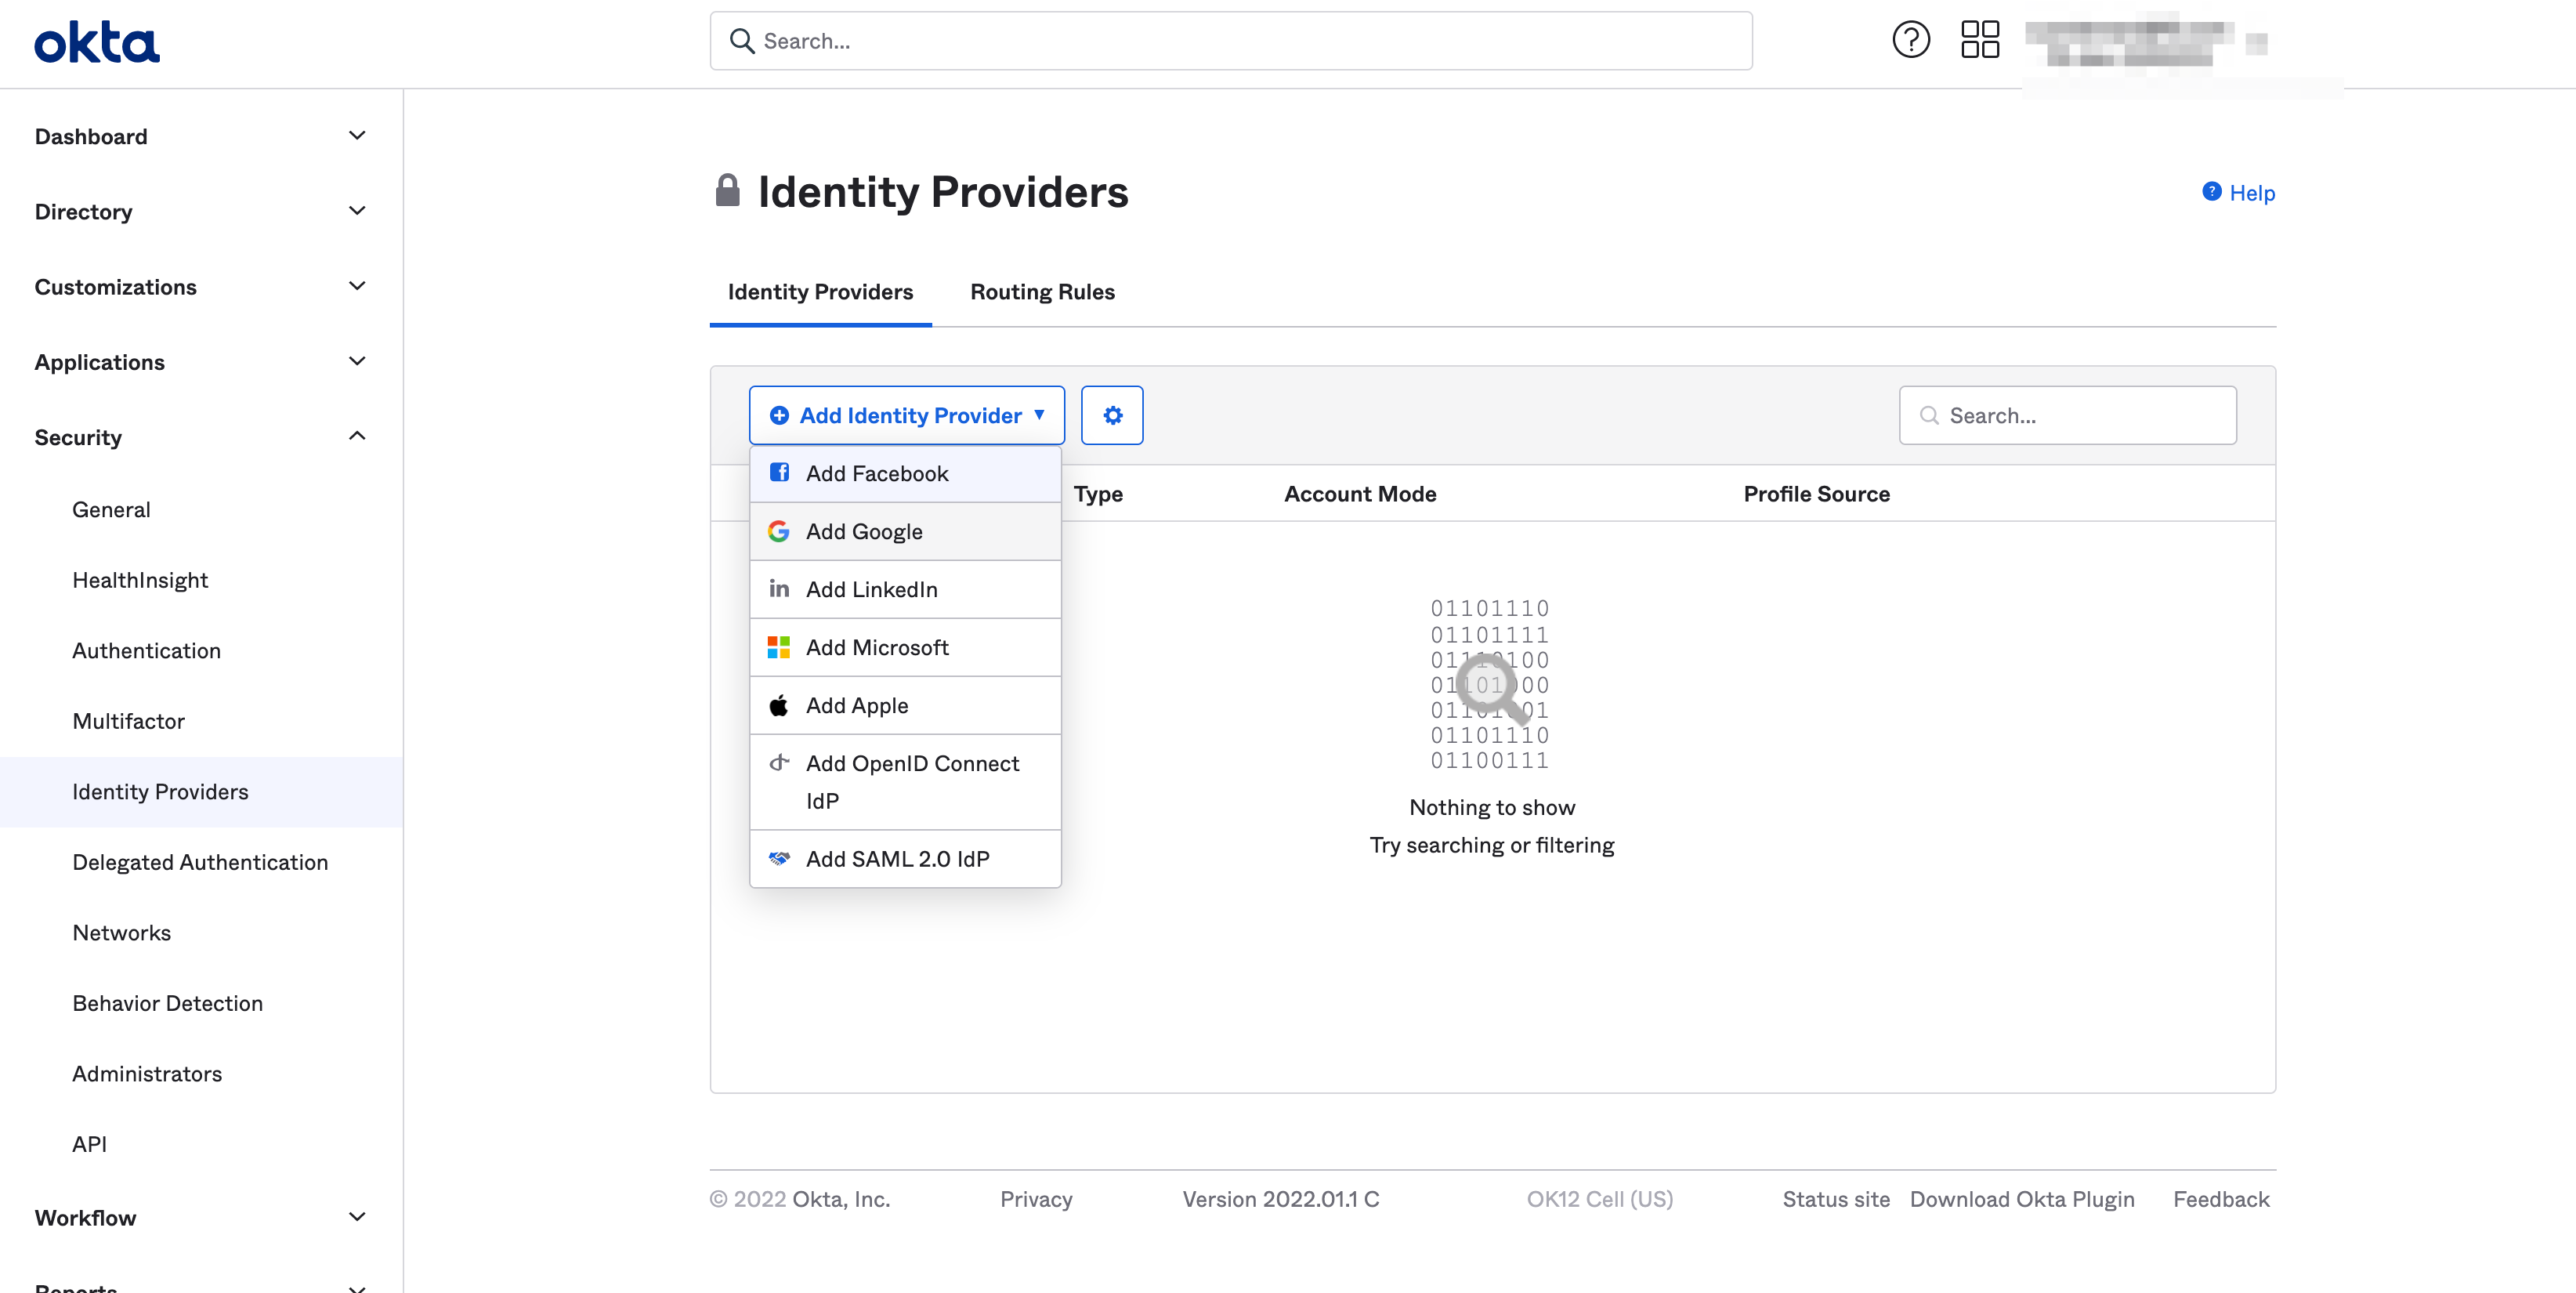
Figure: Select Google As the Identity Provider
Step 2: Obtain the OAuth information from the identity provider and add to the Okta identity provider configuration.
-
Obtain the OAuth details from the identity provider.
-
Add the details in the
GENERAL SETTINGSof the Okta identity provider configuration.
Note: This example sets name, client ID, and client secret obtained from Google OAuth settings.
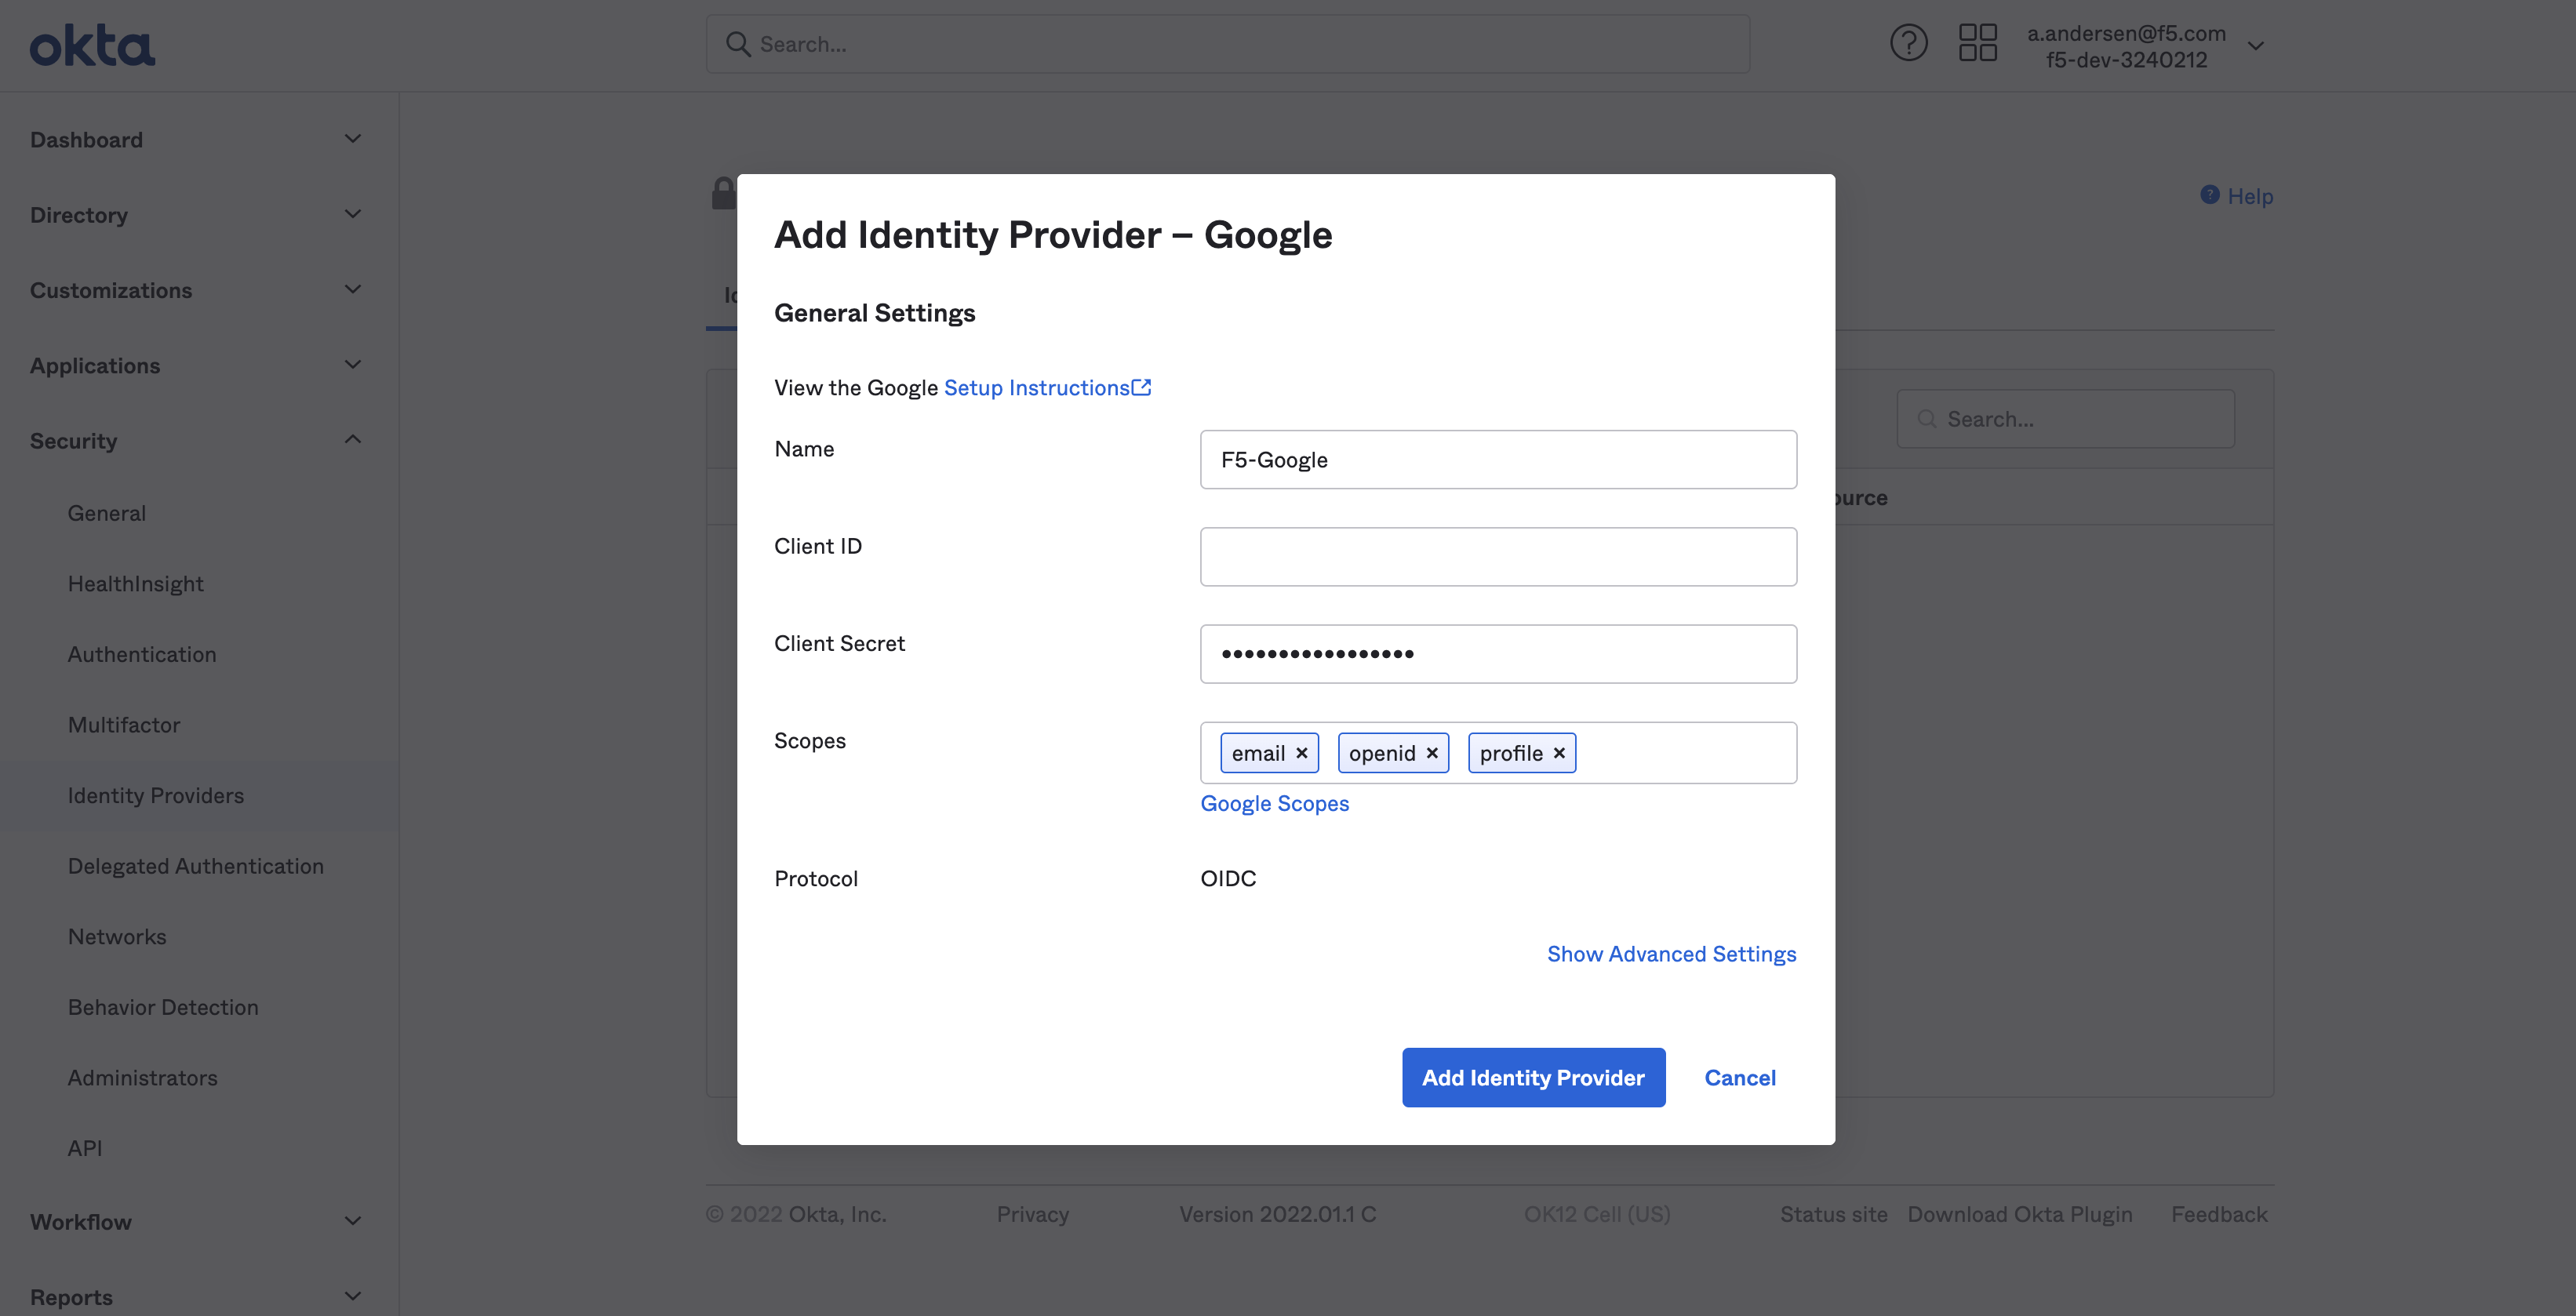
Figure: Identity Provider Client and Secret Settings
-
Select
Add Identity Providerbutton. -
Copy URL in
Redirect URIbox.
Step 3: Add the redirect URI to the allowlist of the identity provider OAuth client configuration.
This example shows adding redirect URI to the Google client ID configuration:
-
Log into Google credentials app.
-
Select
client IDconfiguration. -
Enter
redirect URIobtained in previous step inAuthorized redirect URIsbox.
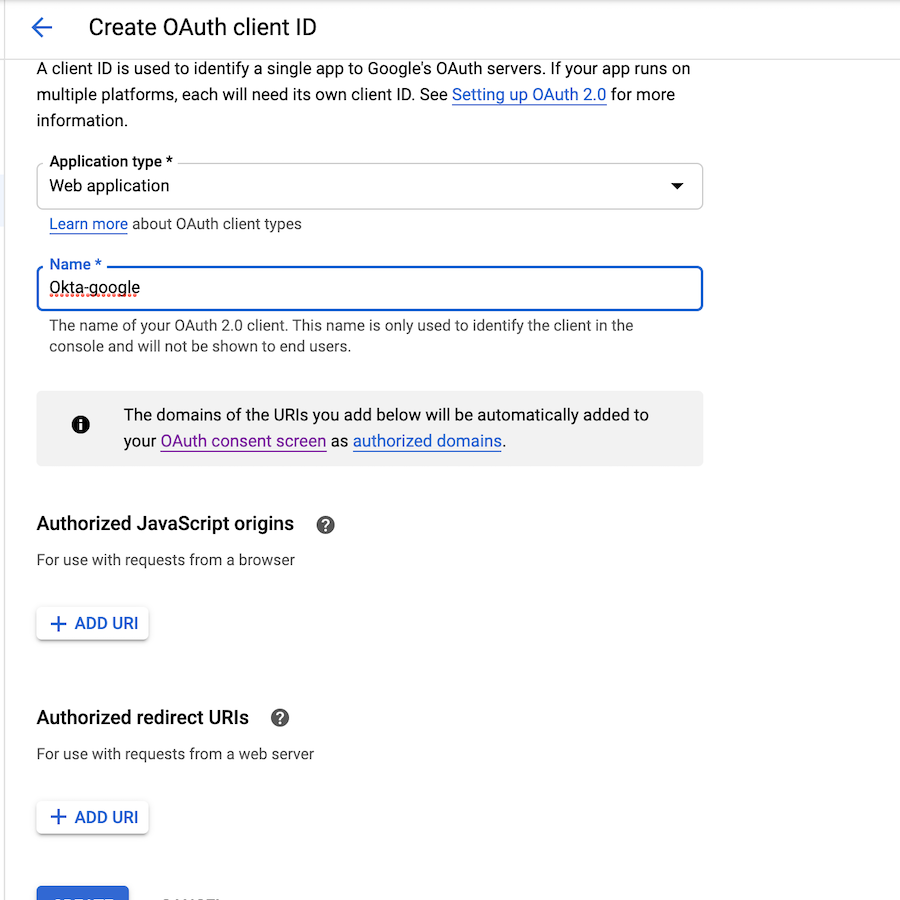
Figure: Redirect URI Option in Google
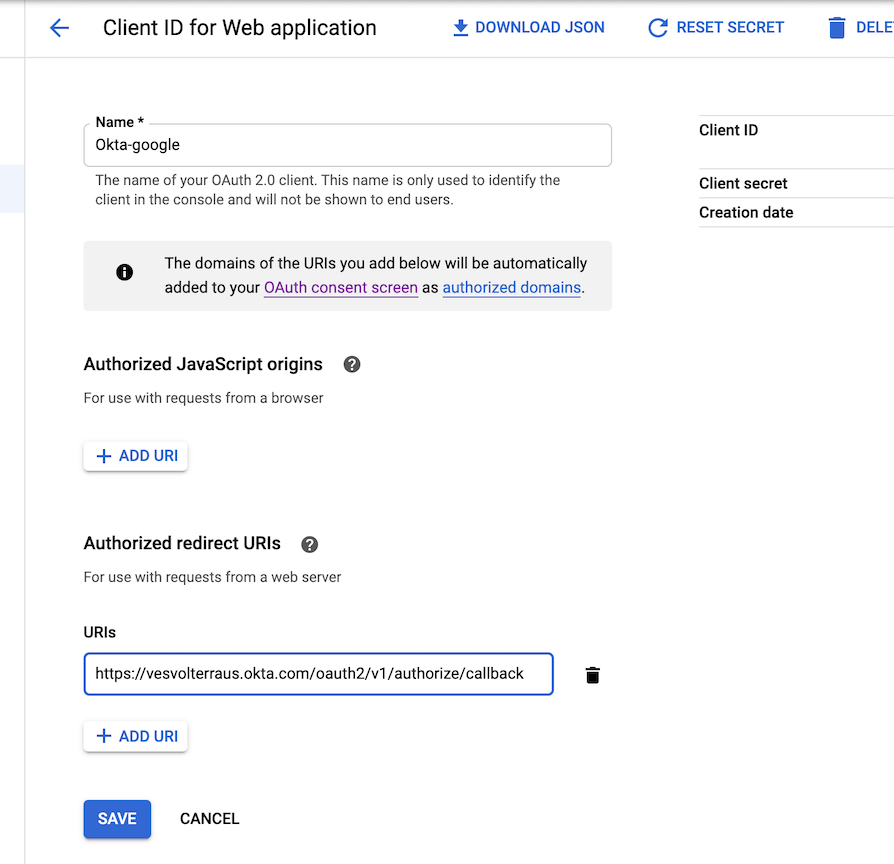
Figure: Redirect URI Addition to Google
- Select
Save.
Note: Above steps assumes Okta account is ready and user can login. If your Okta account needs integration with other identity providers, or if Okta is being used as broker, admin can refer at Okta Integration Guide or OpenID Connect for (SAML) to connect to external identity providers.
Step 4: Create application for SSO in Okta.
-
Select
Applications>Applications. -
Select
Create App Integrationbutton.
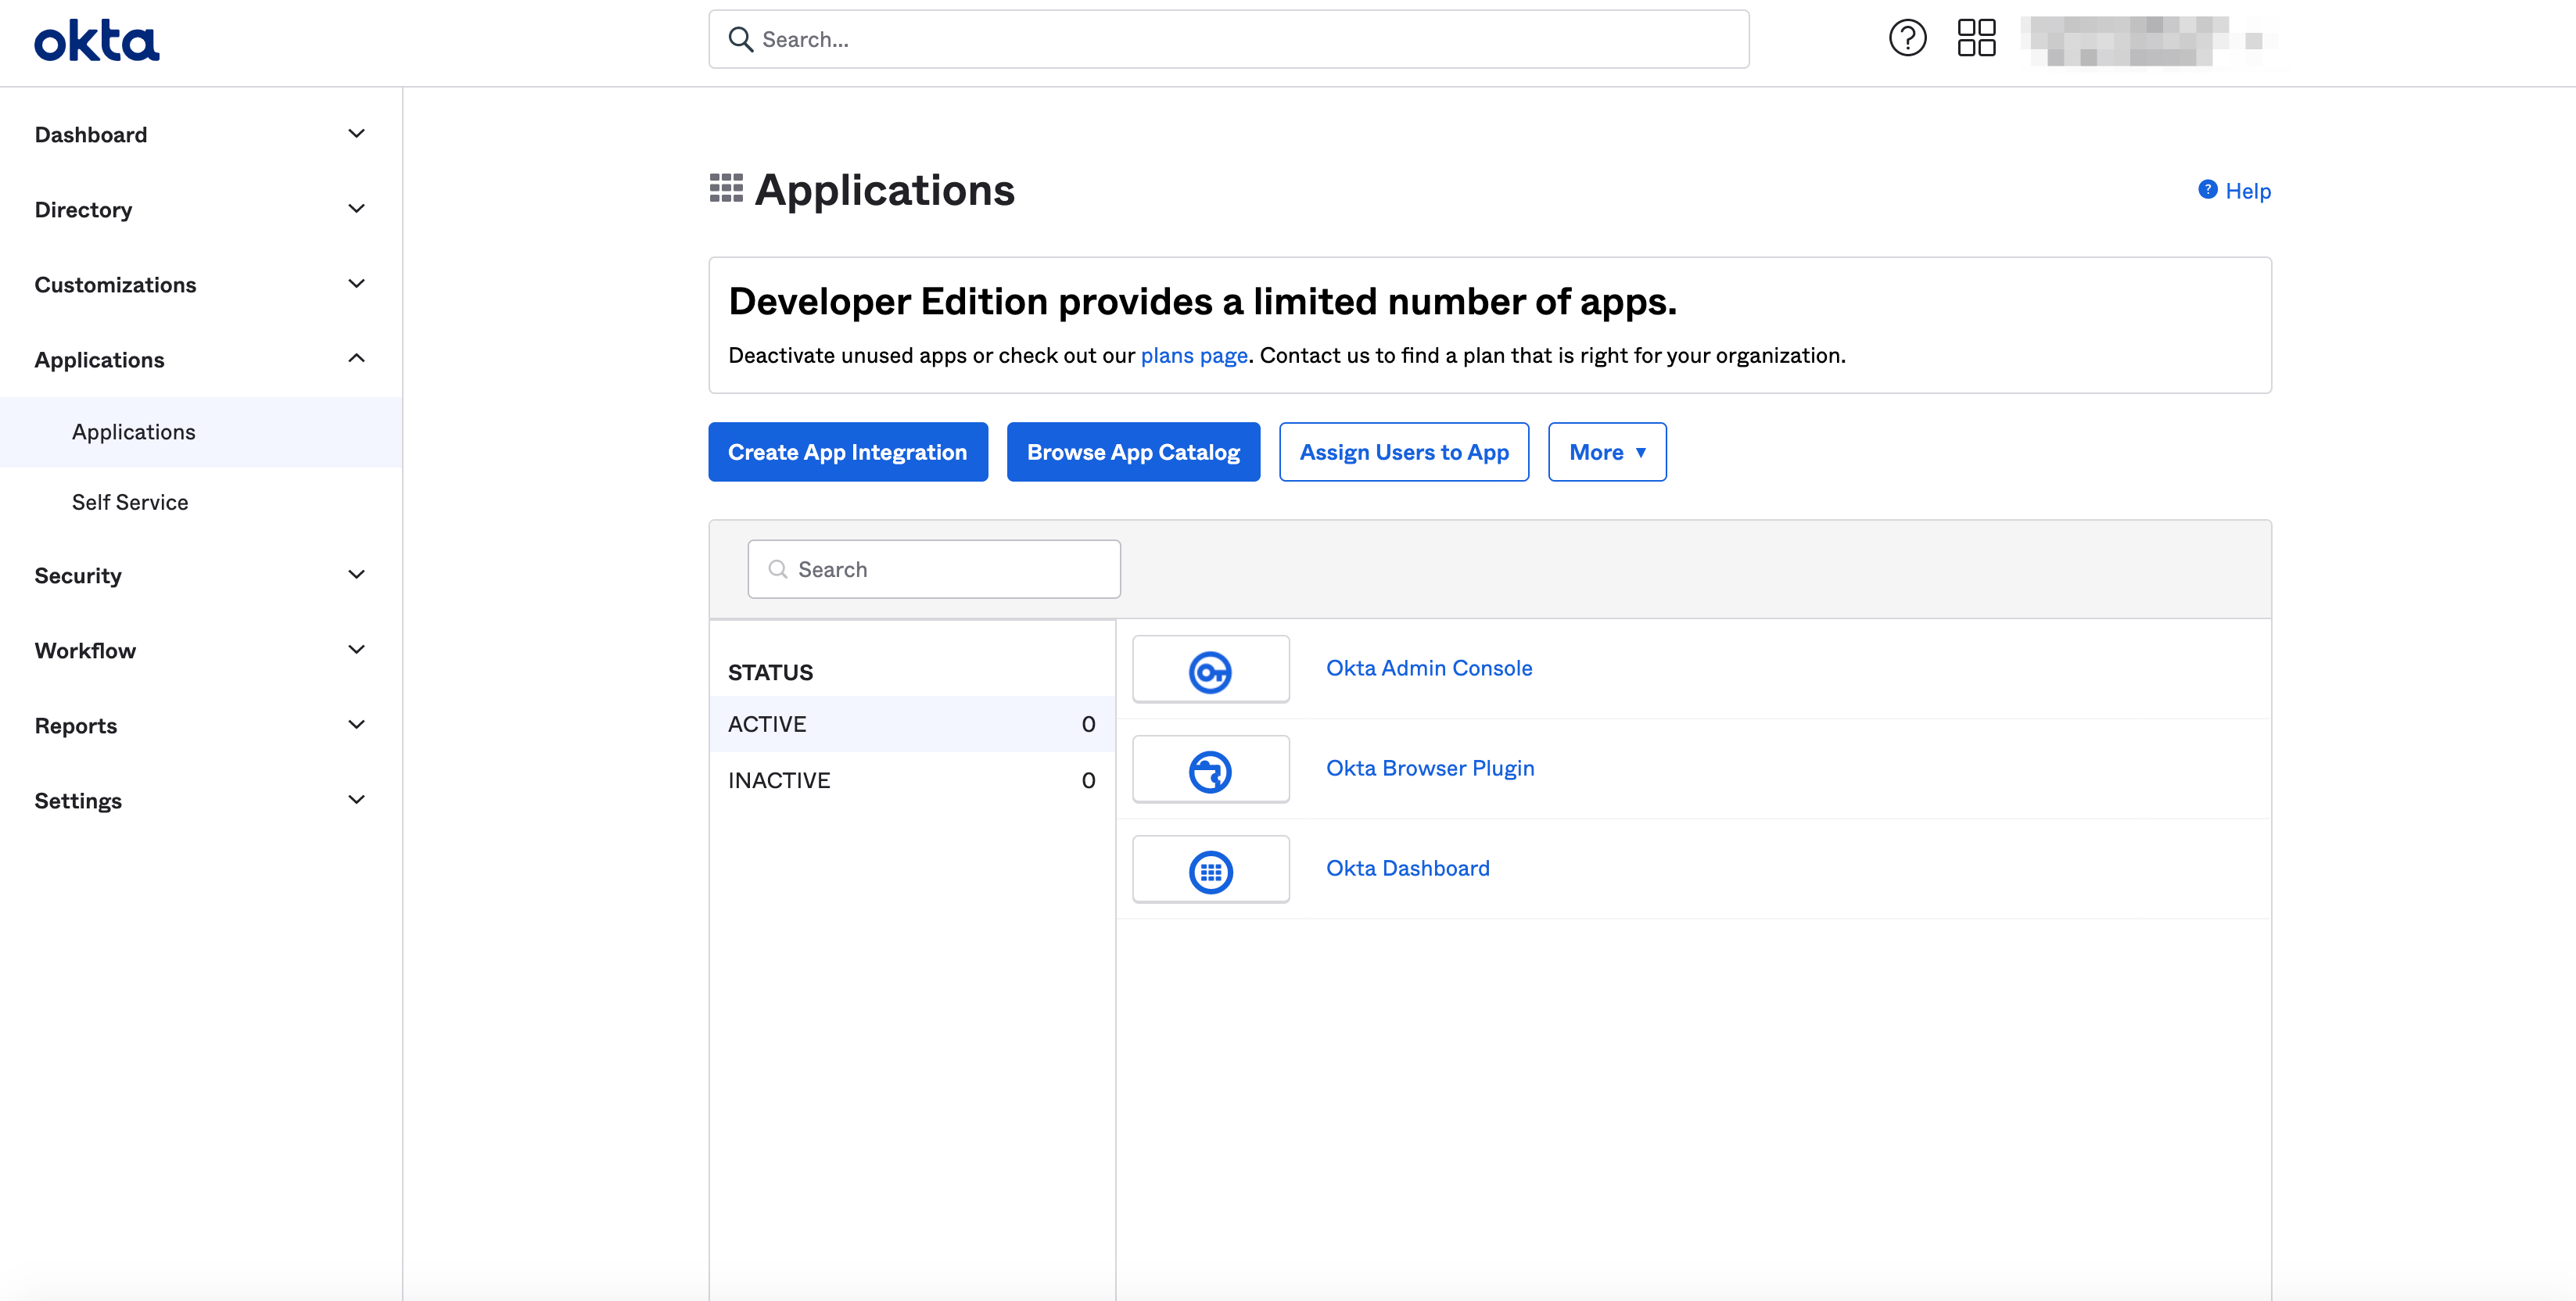
Figure: User Assignment
- Select
OICD - Open ID ConnectinSign-in methodsection.
Note:
Appsection appears below whenSign-in methodselection is made.
-
Select
Web ApplicationinApplication Typesection. -
Select
Nextbutton.
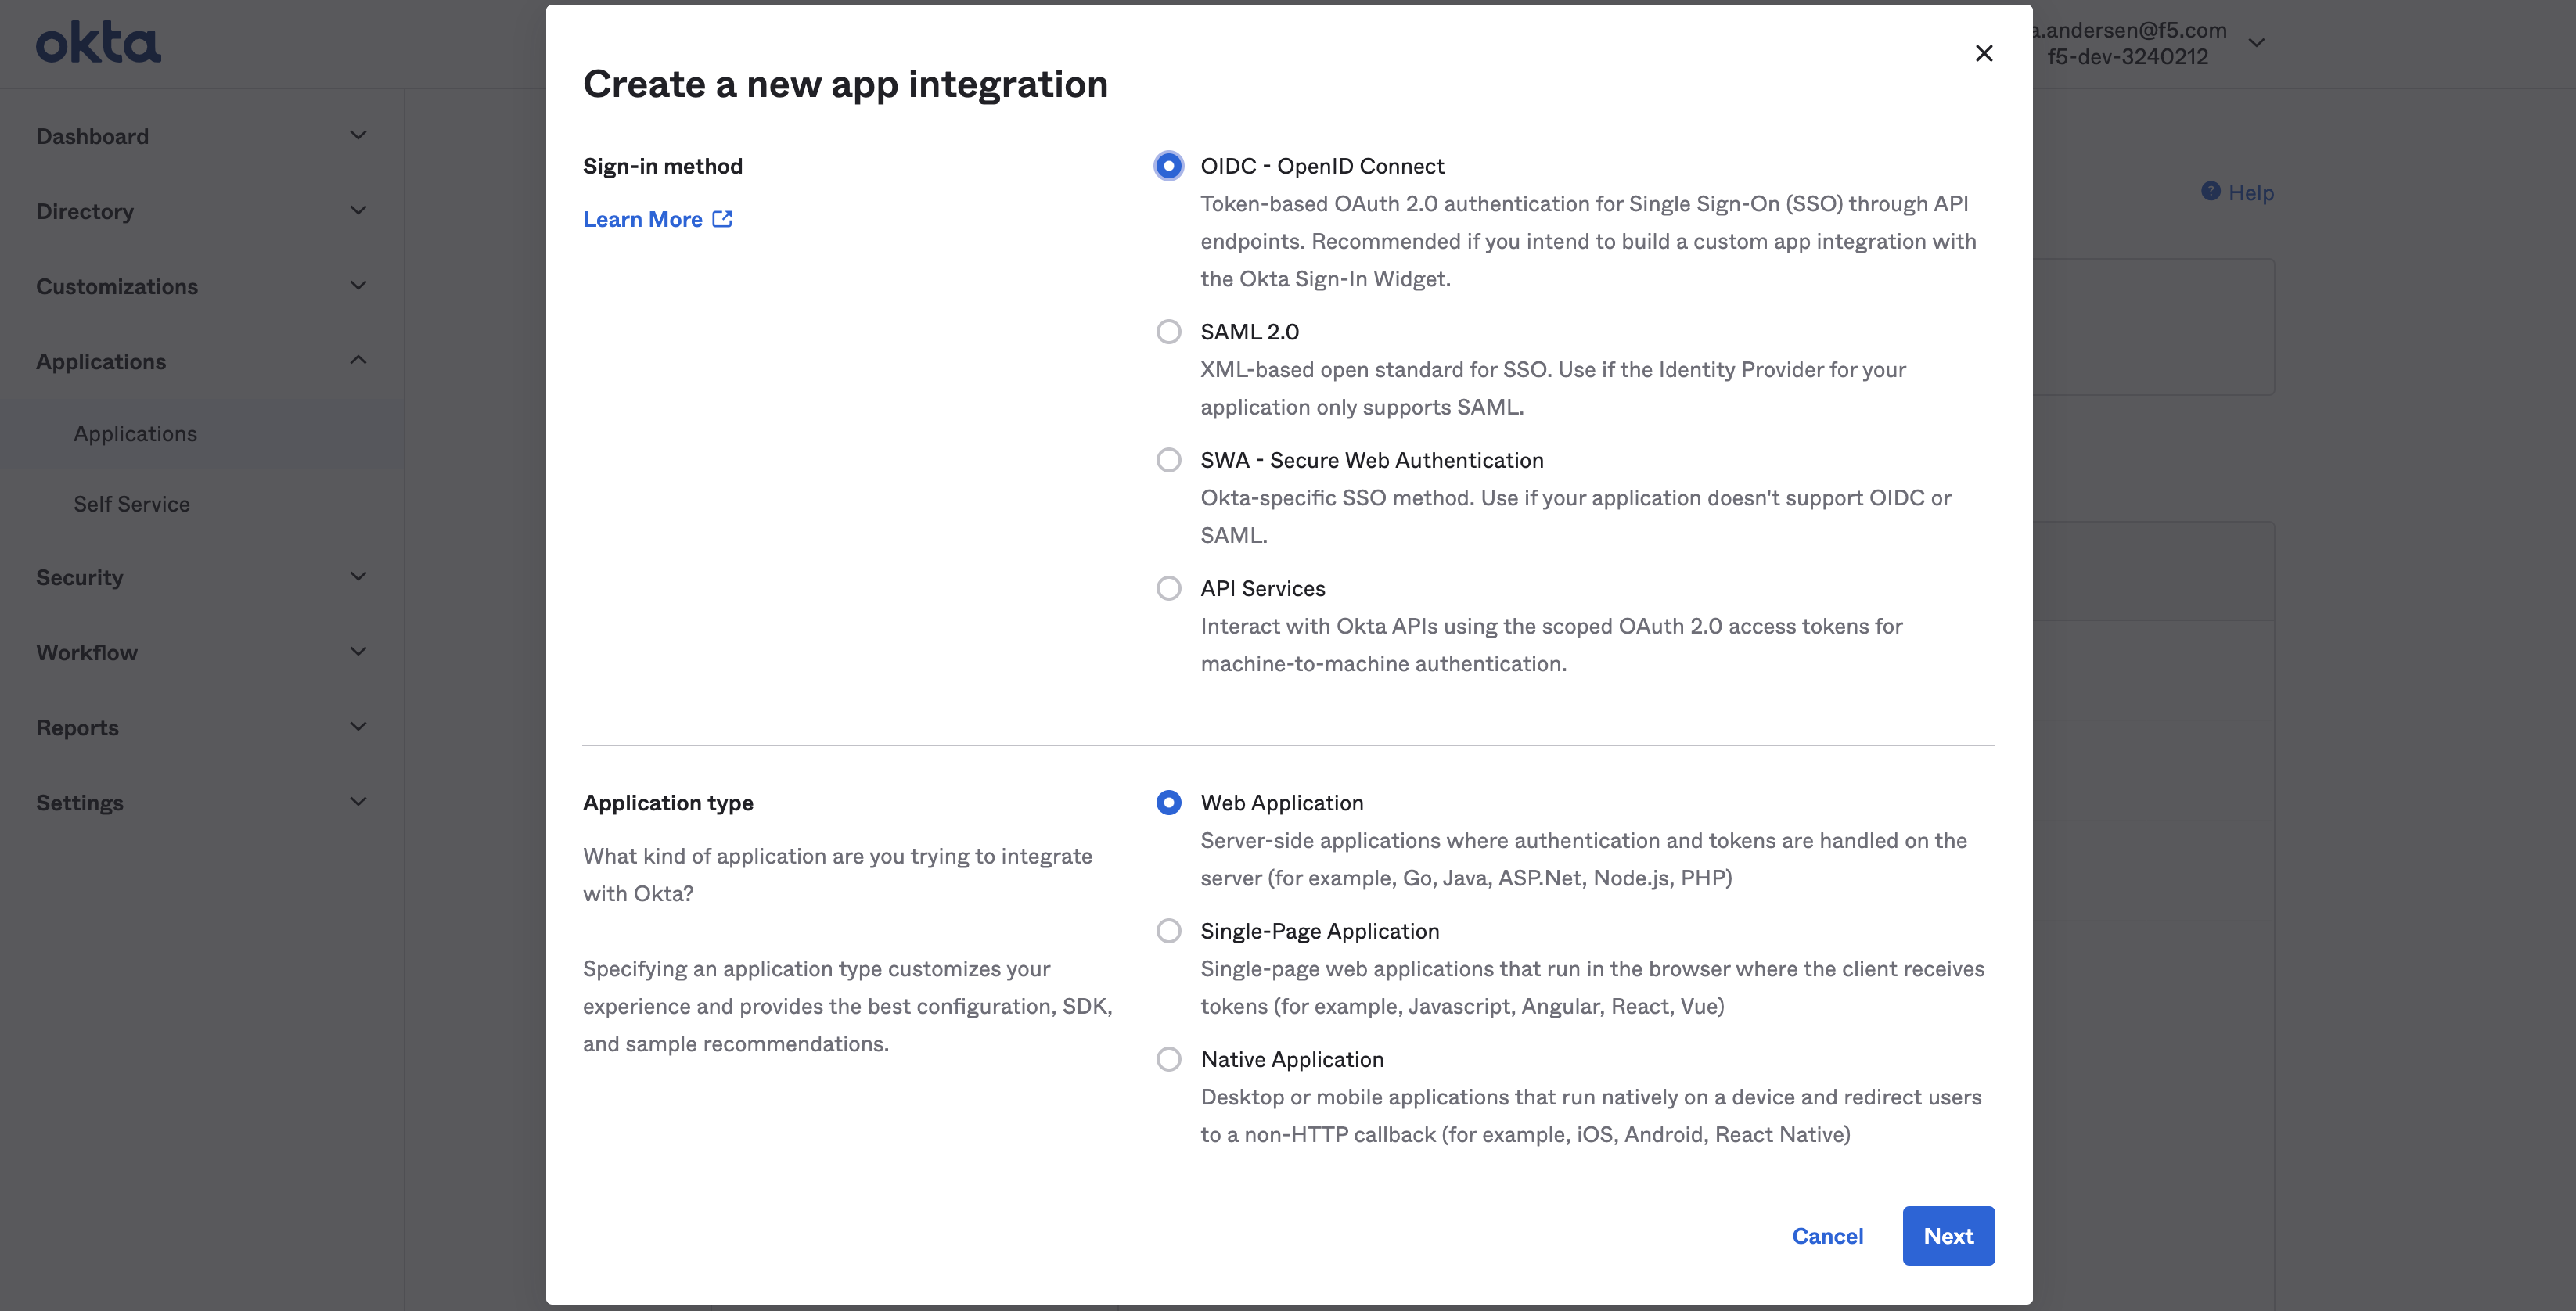
Figure: OIDC Integration Creation
-
Enter an application
name. -
Enter
URLinLogin redirect URIsbox. -
Select
Save.
Note: The application gets created.
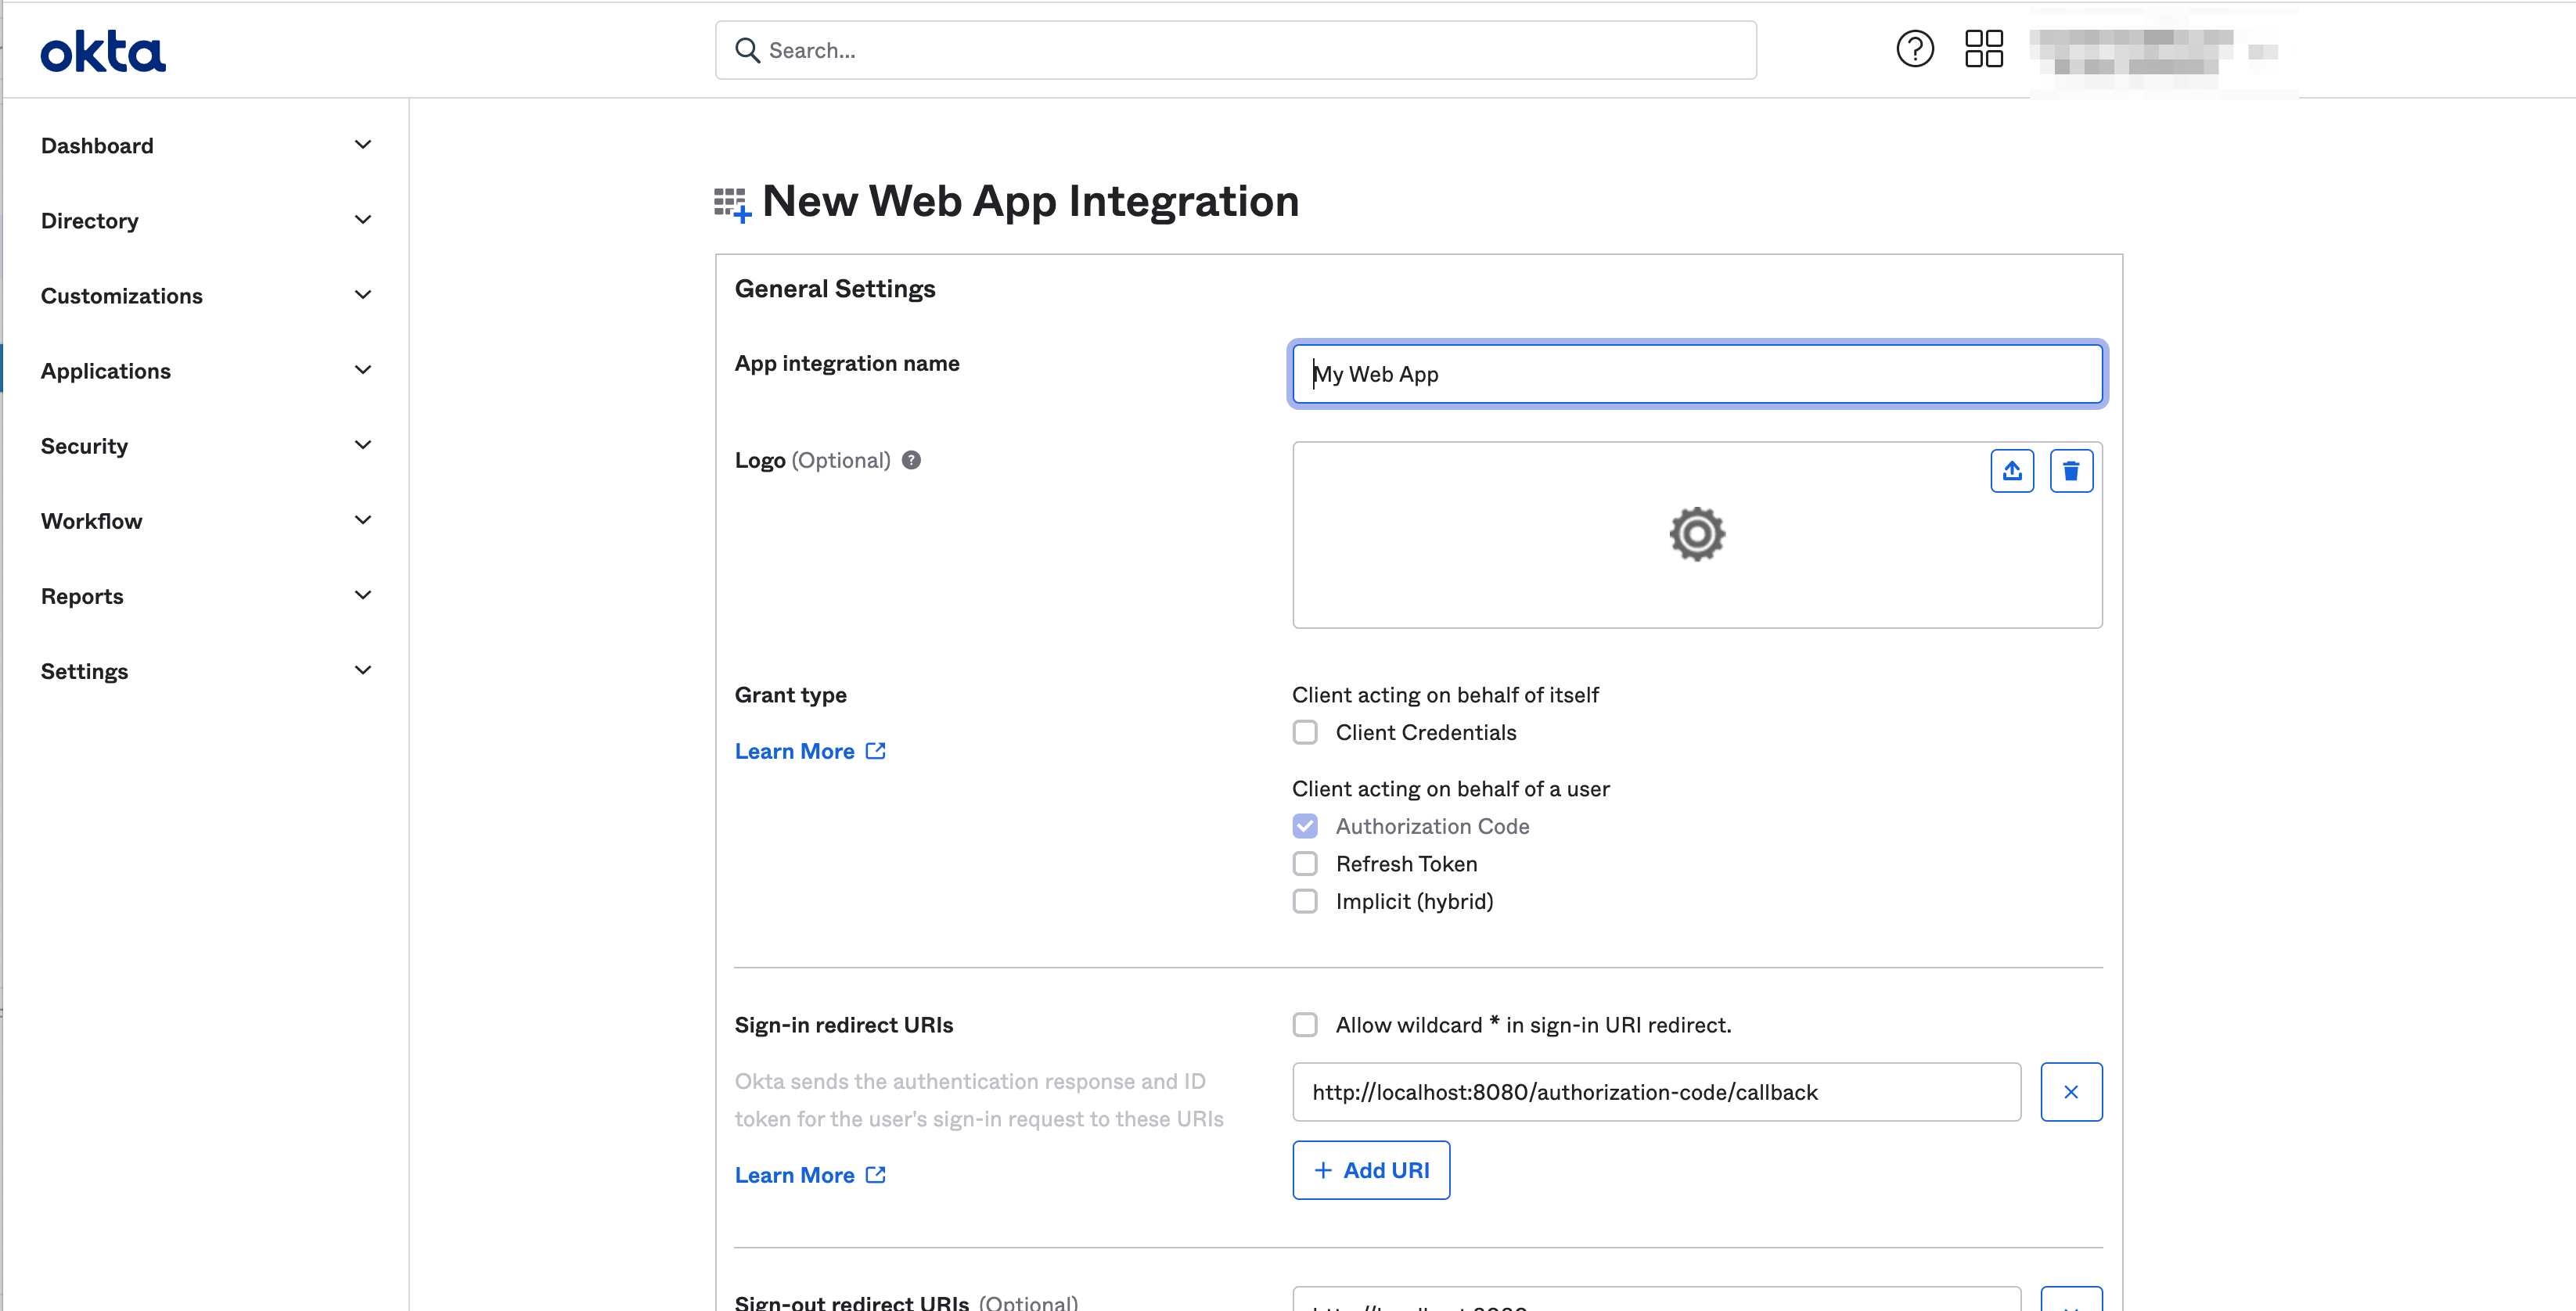
Figure: OIDC Integration Creation
-
Select
Generalsettings tab of created application. -
Scroll down to
Client Credentialsbox. -
Note down the values of the
Client IDandClient secretboxes.
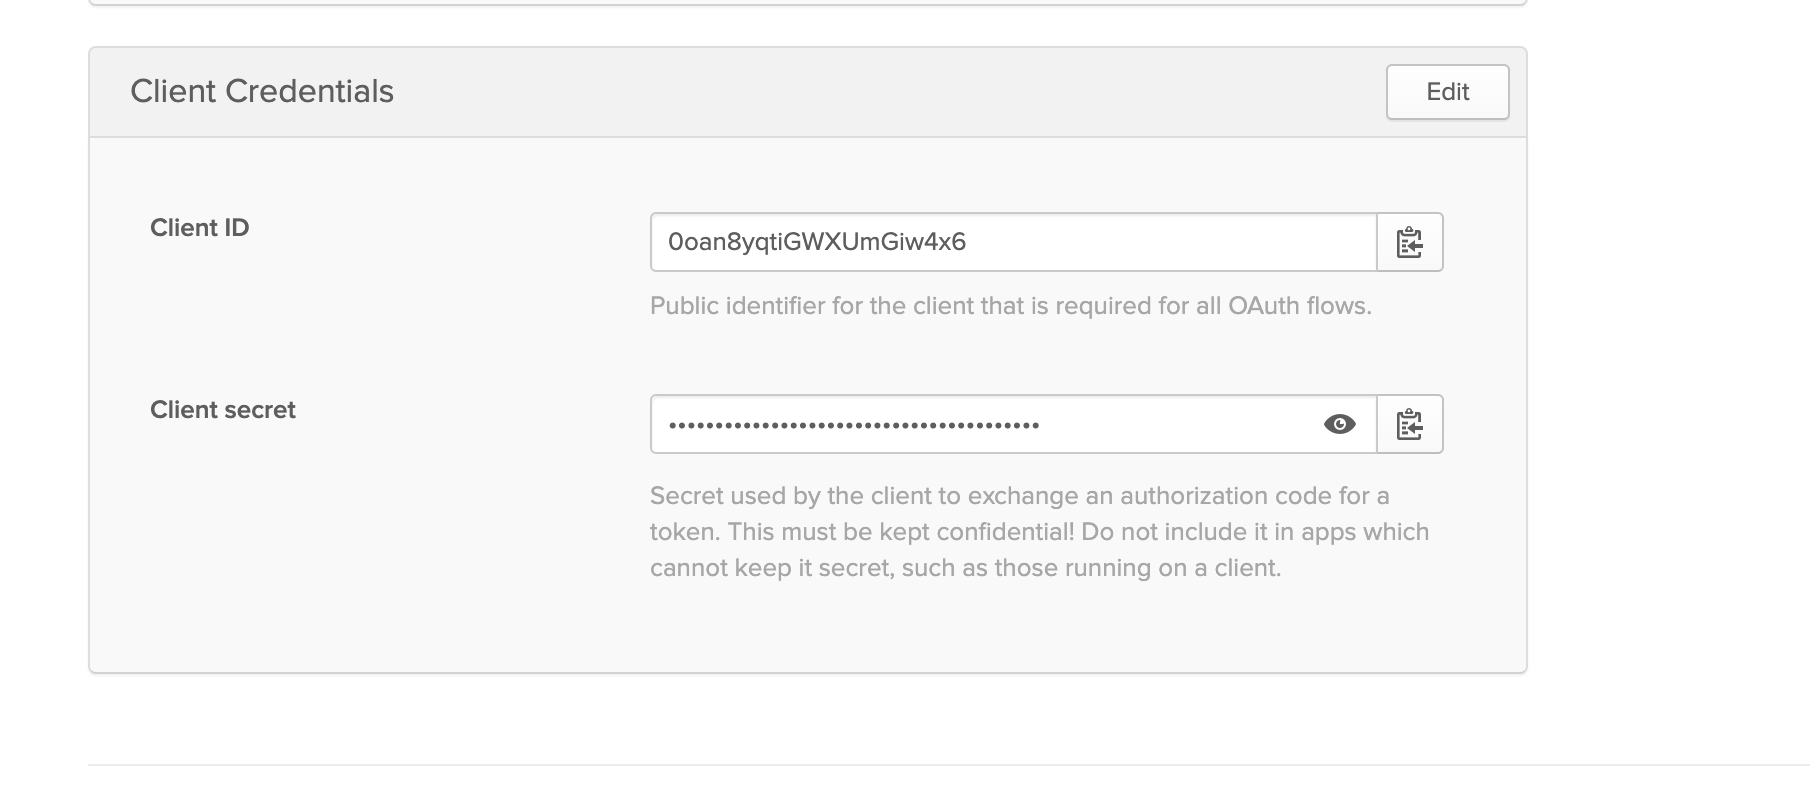
Figure: Client ID and Secret Values
- Obtain the well-known URL for your Okta account.
Note: The following is an example well-known URL for Okta where the
vesvolterrausrepresents the subdomain part for a sample account.
https://vesvolterraus.okta.com/.well-known/openid-configuration
Note: The client ID, client secret, and well-known URL fields are required in SSO configuration in F5® Distributed Cloud Console.
Step 5: Configure user and group settings in Okta.
-
Select
Security>Identity Providers. -
Select the
Routing Rulestab. -
Select
Add Routing Ruleand configure rules for users. -
Select the identity provider you created in the
THENfield. -
Select
Create Rulebutton. -
Select
Activaterule in pop-up window.
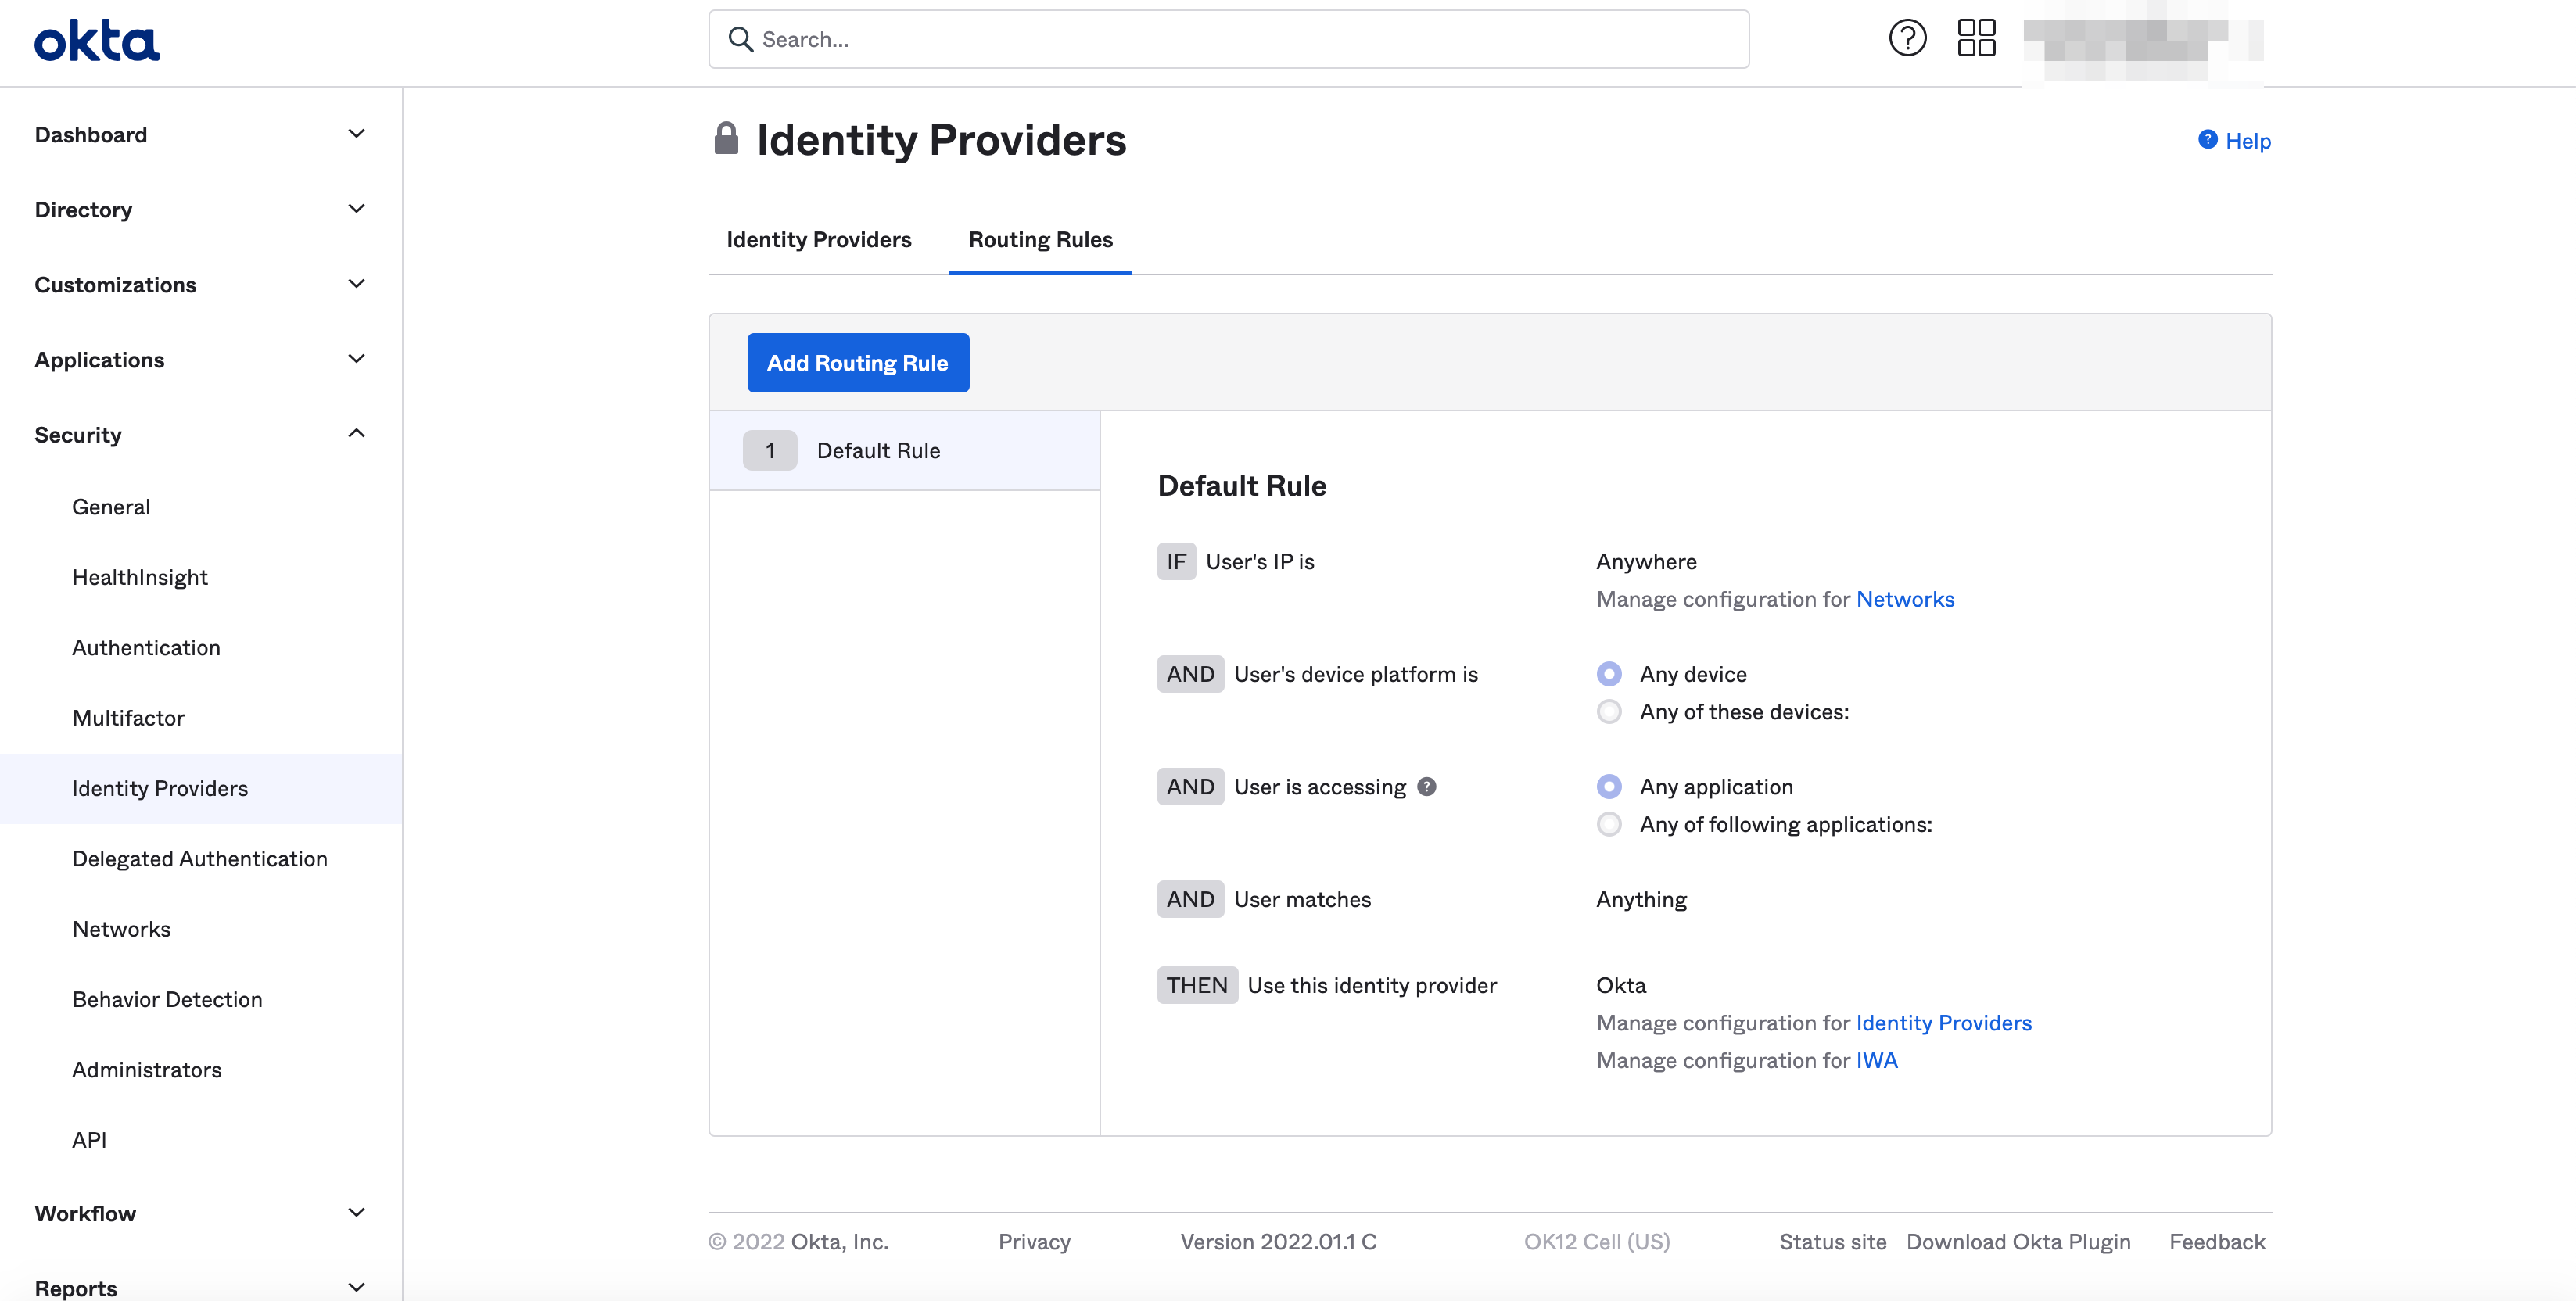
Figure: Rule Creation
-
Optionally, specify users and groups for which Okta-based SSO needs to be enabled. Perform the following:
-
Select
Applications>Applications. -
Select
Assign Users to Appbutton.
Figure: User Assignment
-
Check box in
Applicationsoptions as needed. -
Check box in
Peopleoptions as needed.
Figure: User Assignment
-
Select
Nextbutton. -
Complete setup process.
-
Enable SSO Using Okta in Console
Step 1: Start SSO setup in the F5 Distributed Cloud Console.
Features can be viewed, and managed in multiple services.
This example shows SSO setup in Administration.
- Open
F5 Distributed Cloud Consolehomepage, selectAdministrationbox.
Note: Homepage is role based, and your homepage may look different due to your role customization. Select
All workspacesdrop-down menu to discover all options. Customize Settings:Administration>Personal Management>My Account>Edit work domain & skillsbutton >Advancedbox > checkWork Domainboxes >Save changesbutton.
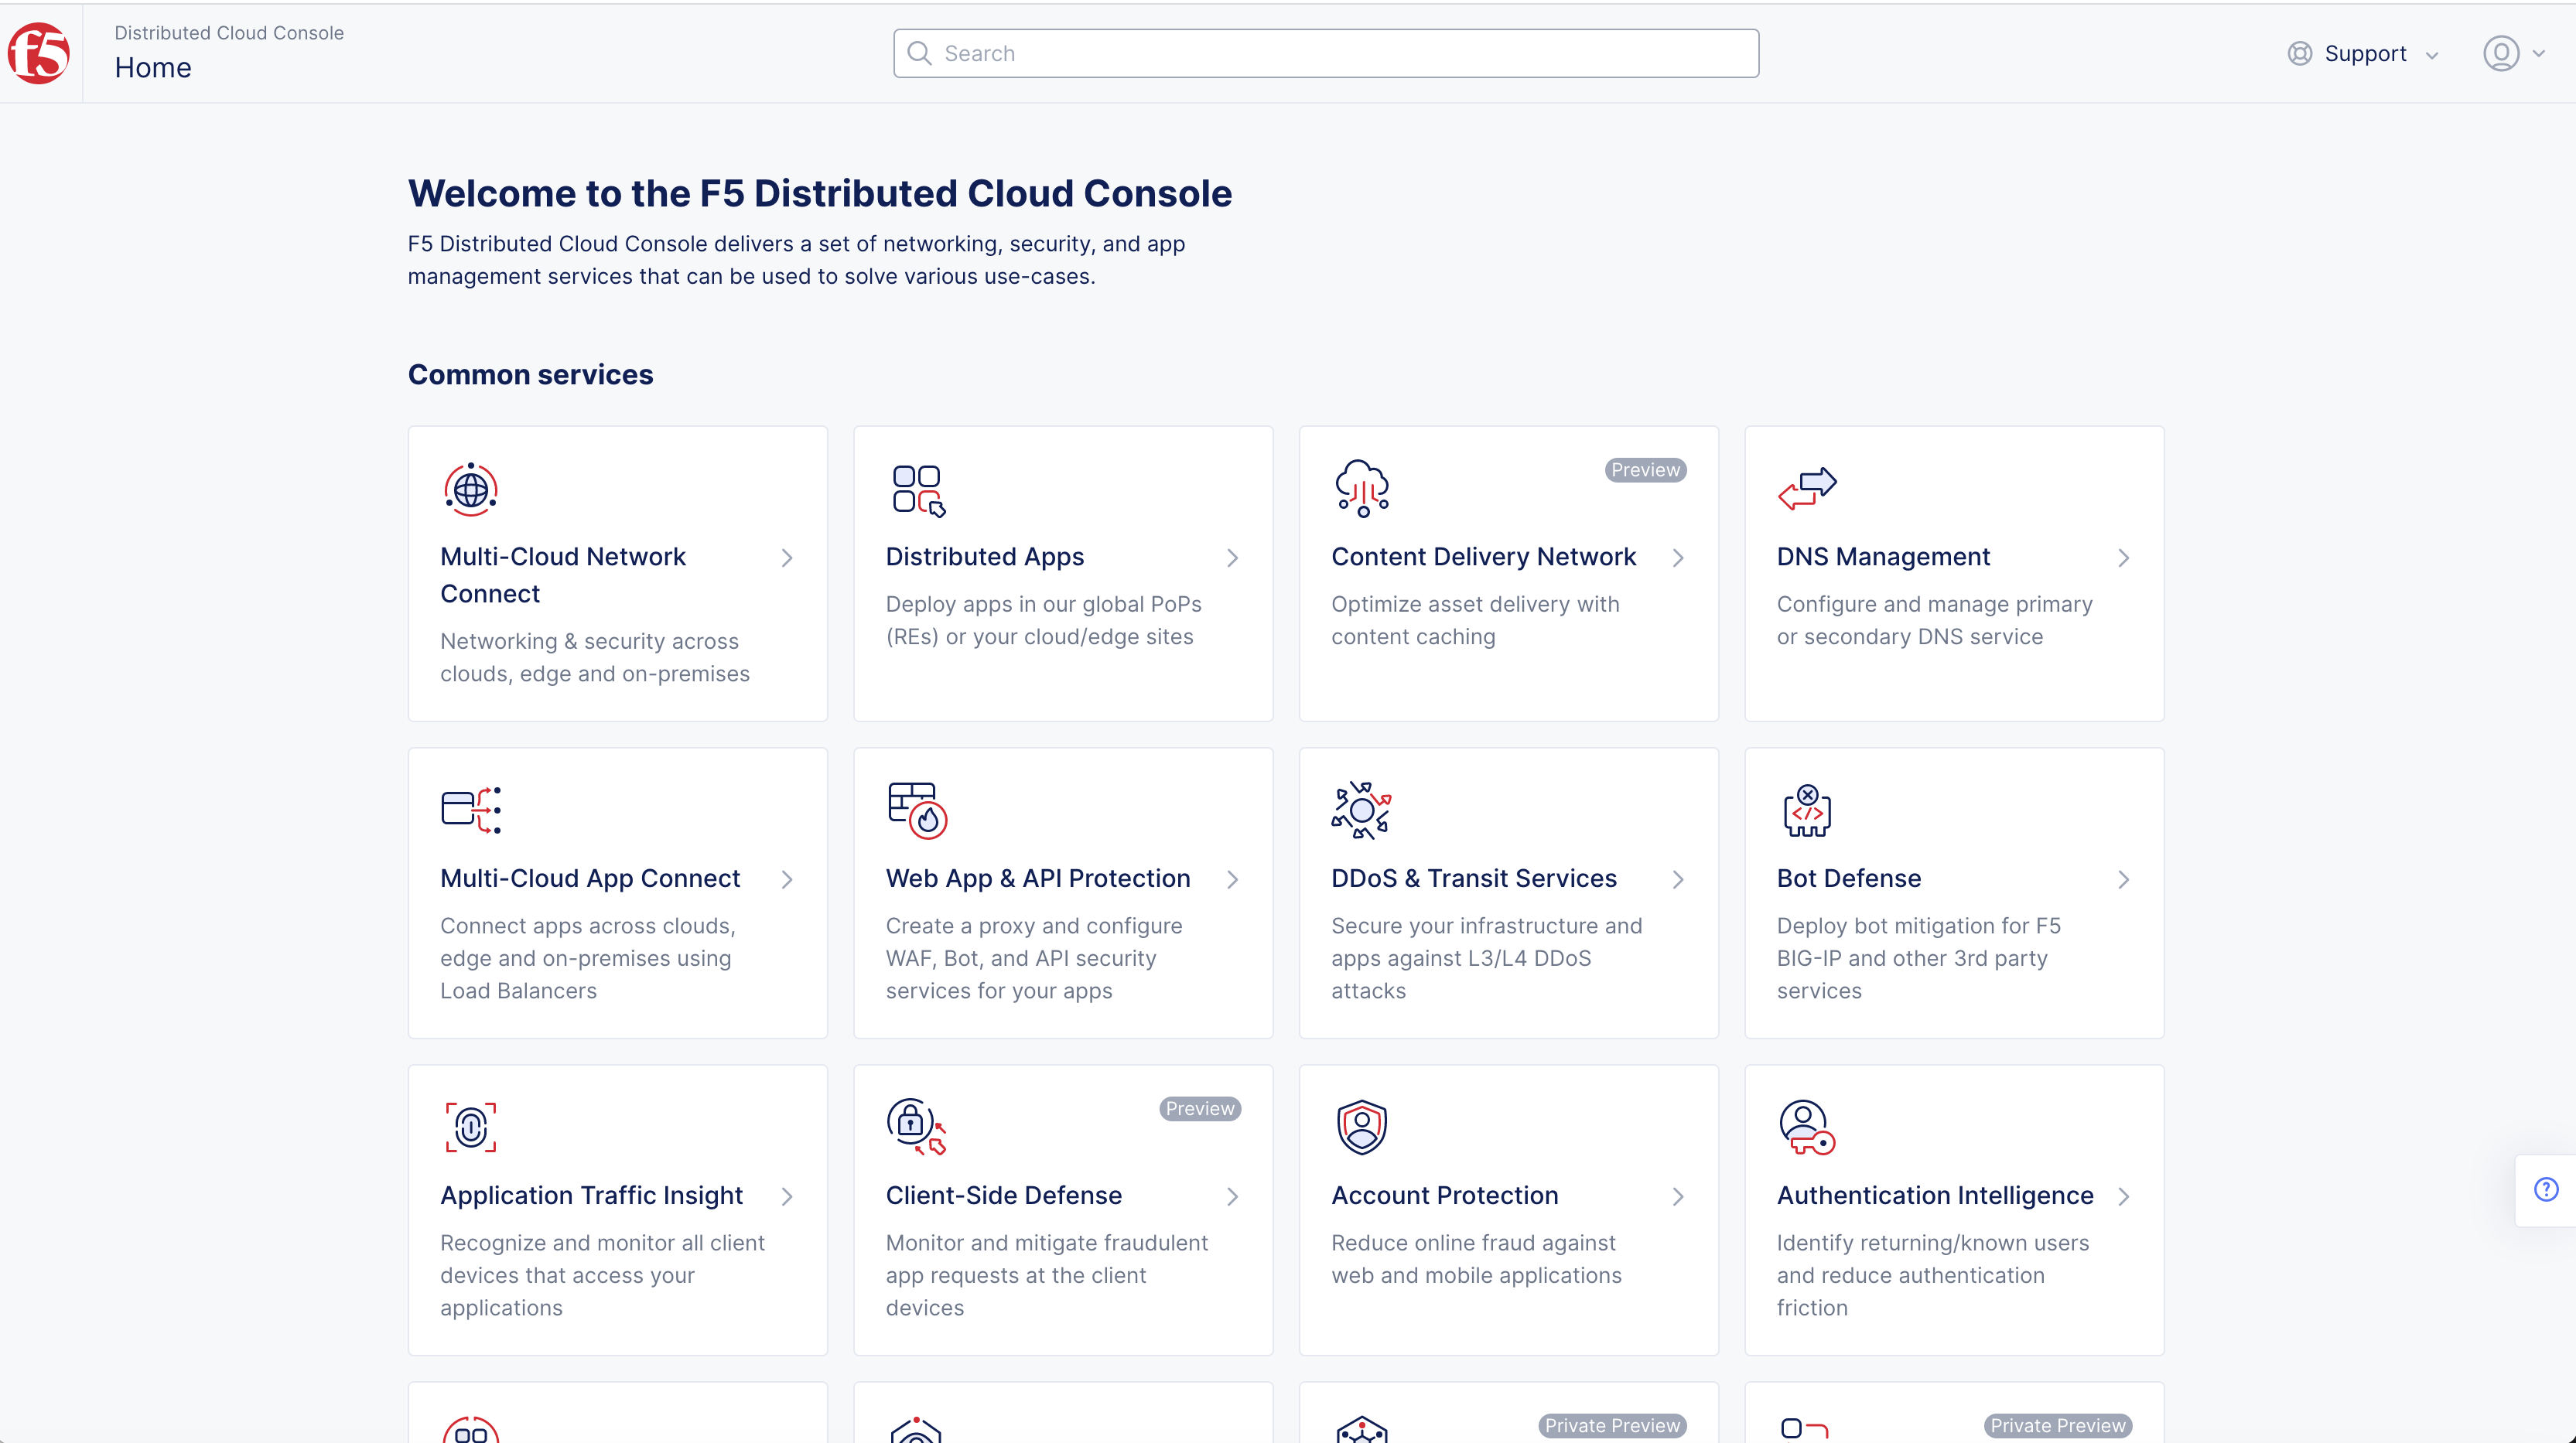
Figure: Homepage
Note: Confirm
Namespacefeature is in correct namespace, drop-down selector located in upper-left corner. Not available in all services.
- Select
Tenant Settingsin left column menu > selectTenant Options.
Note: If options are not showing available, select
Showlink inAdvanced nav options visiblein bottom left corner. If needed, selectHideto minimize options from Advanced nav options mode.
- Select
Set up SSObutton.
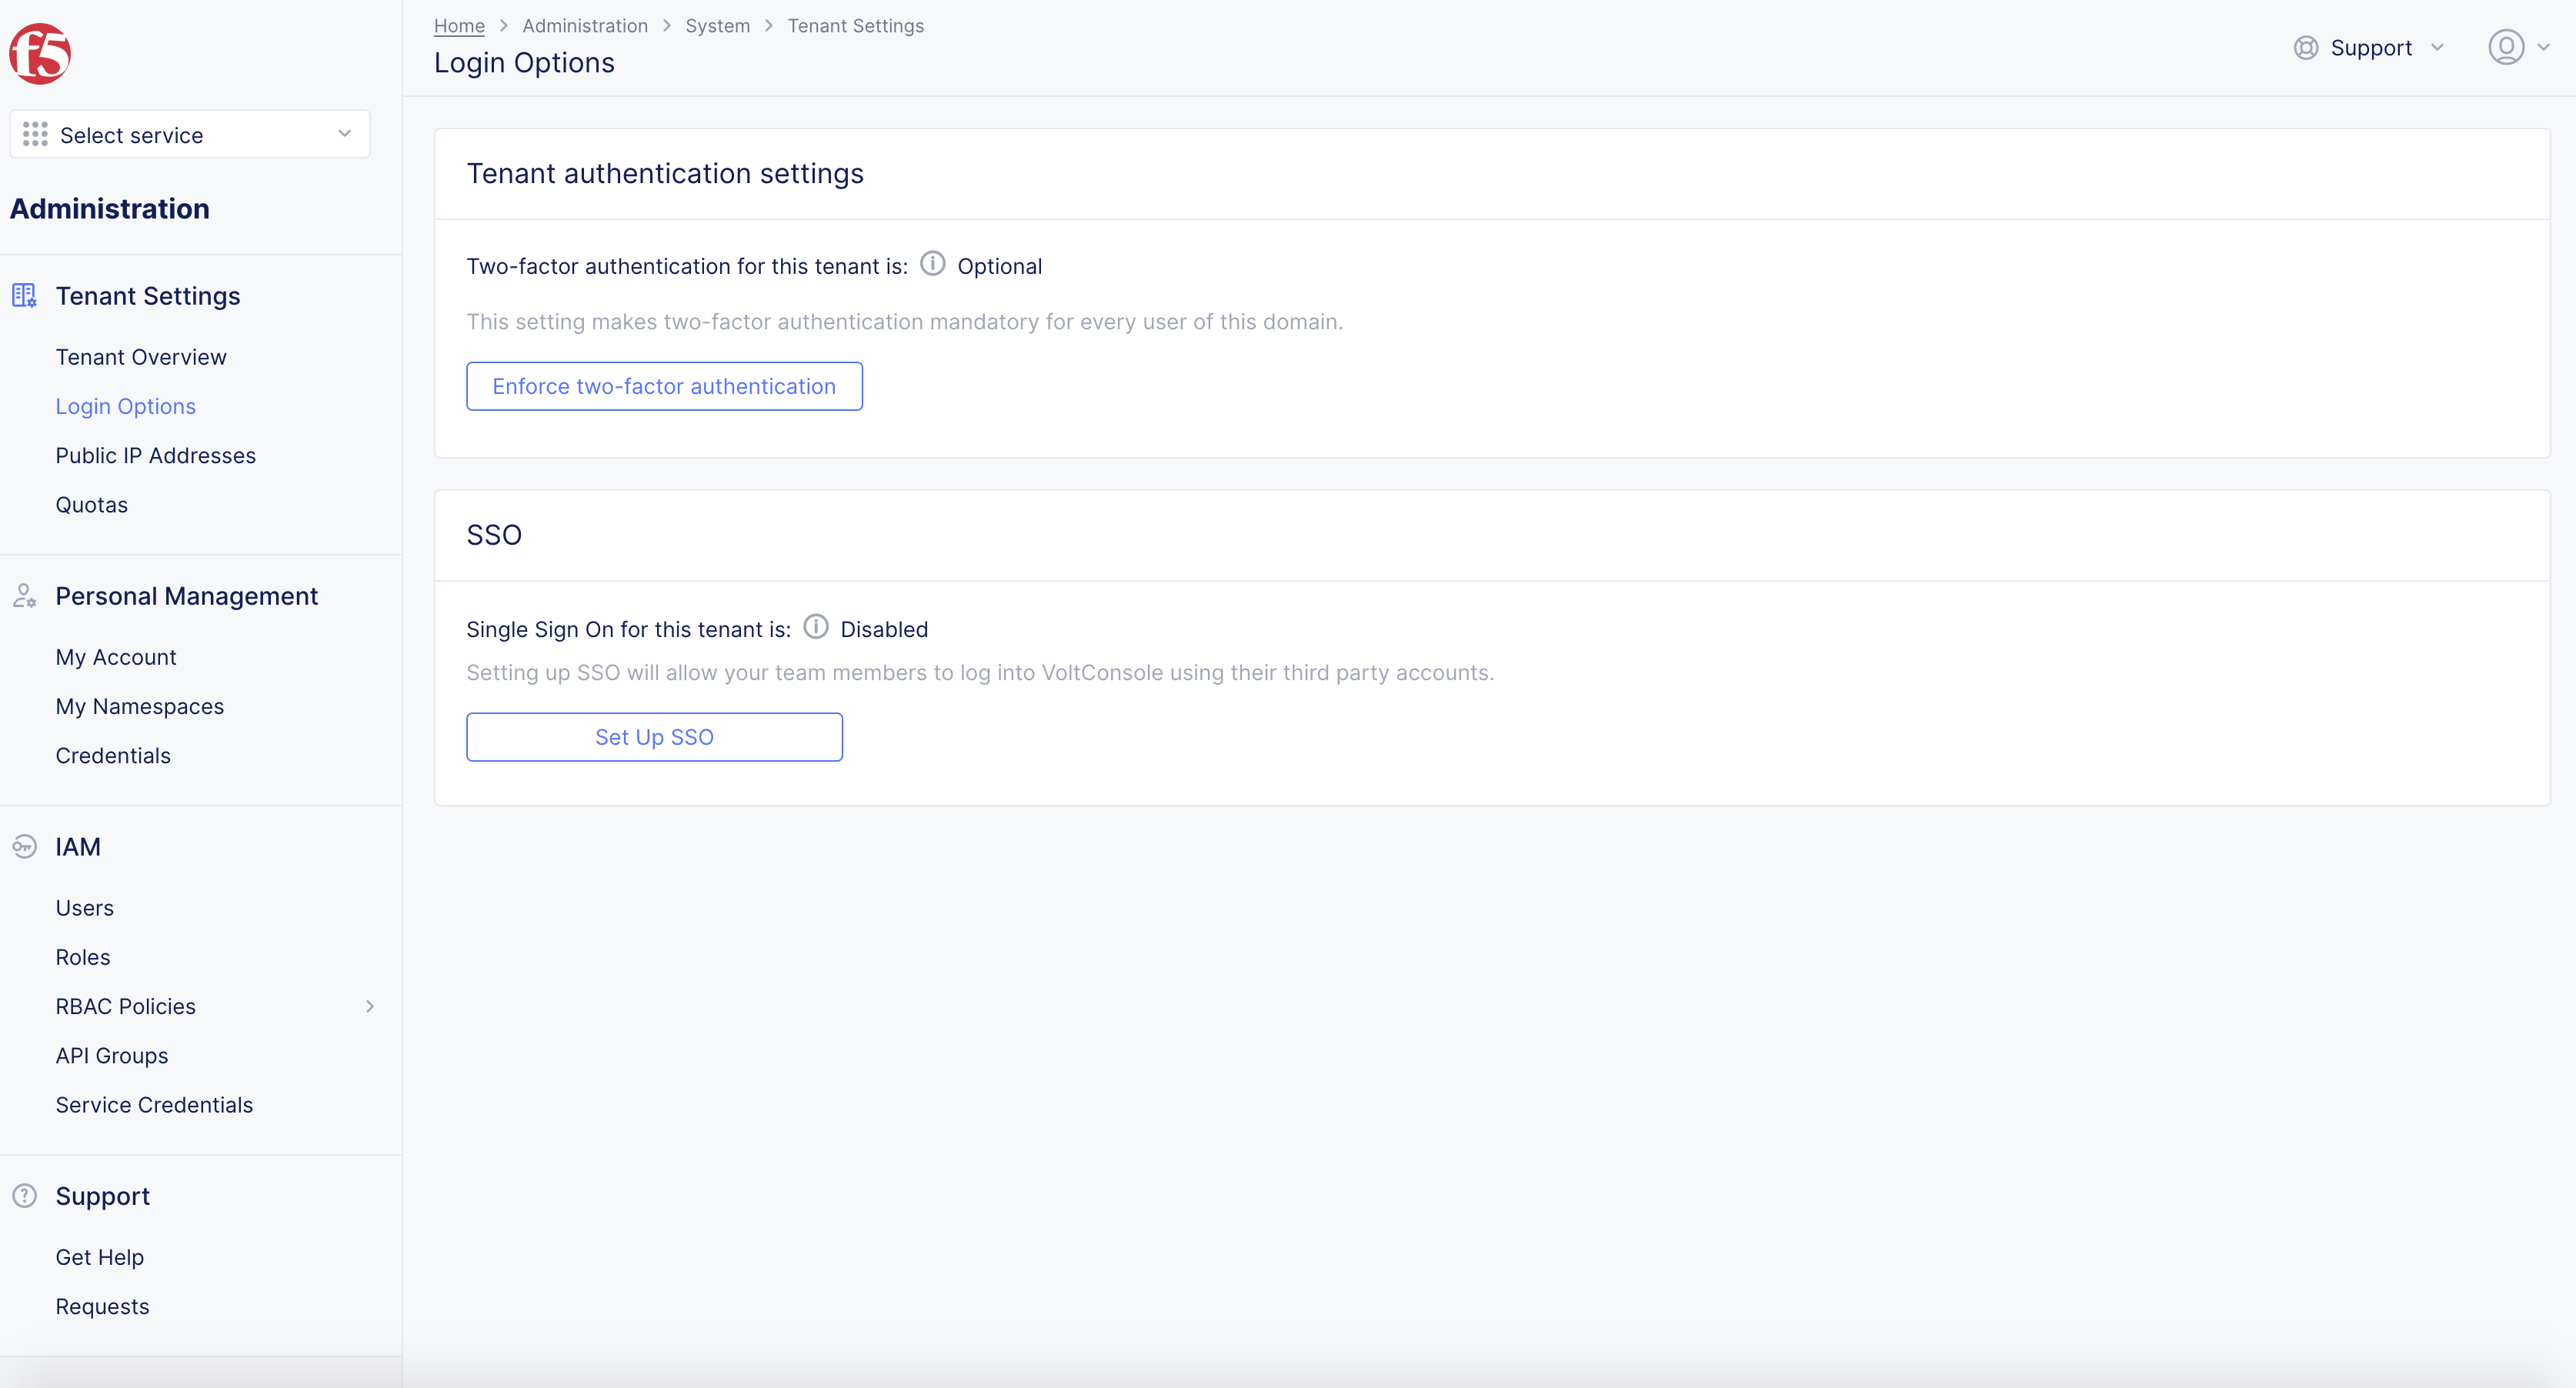
Figure: SSO
-
Select
OktainPlease choose a service Providerin pop-up window. -
Select
Continuebutton.
Step 2: Configure clients identity.
In the Create Clients ID screen, configure client ID and client secret.
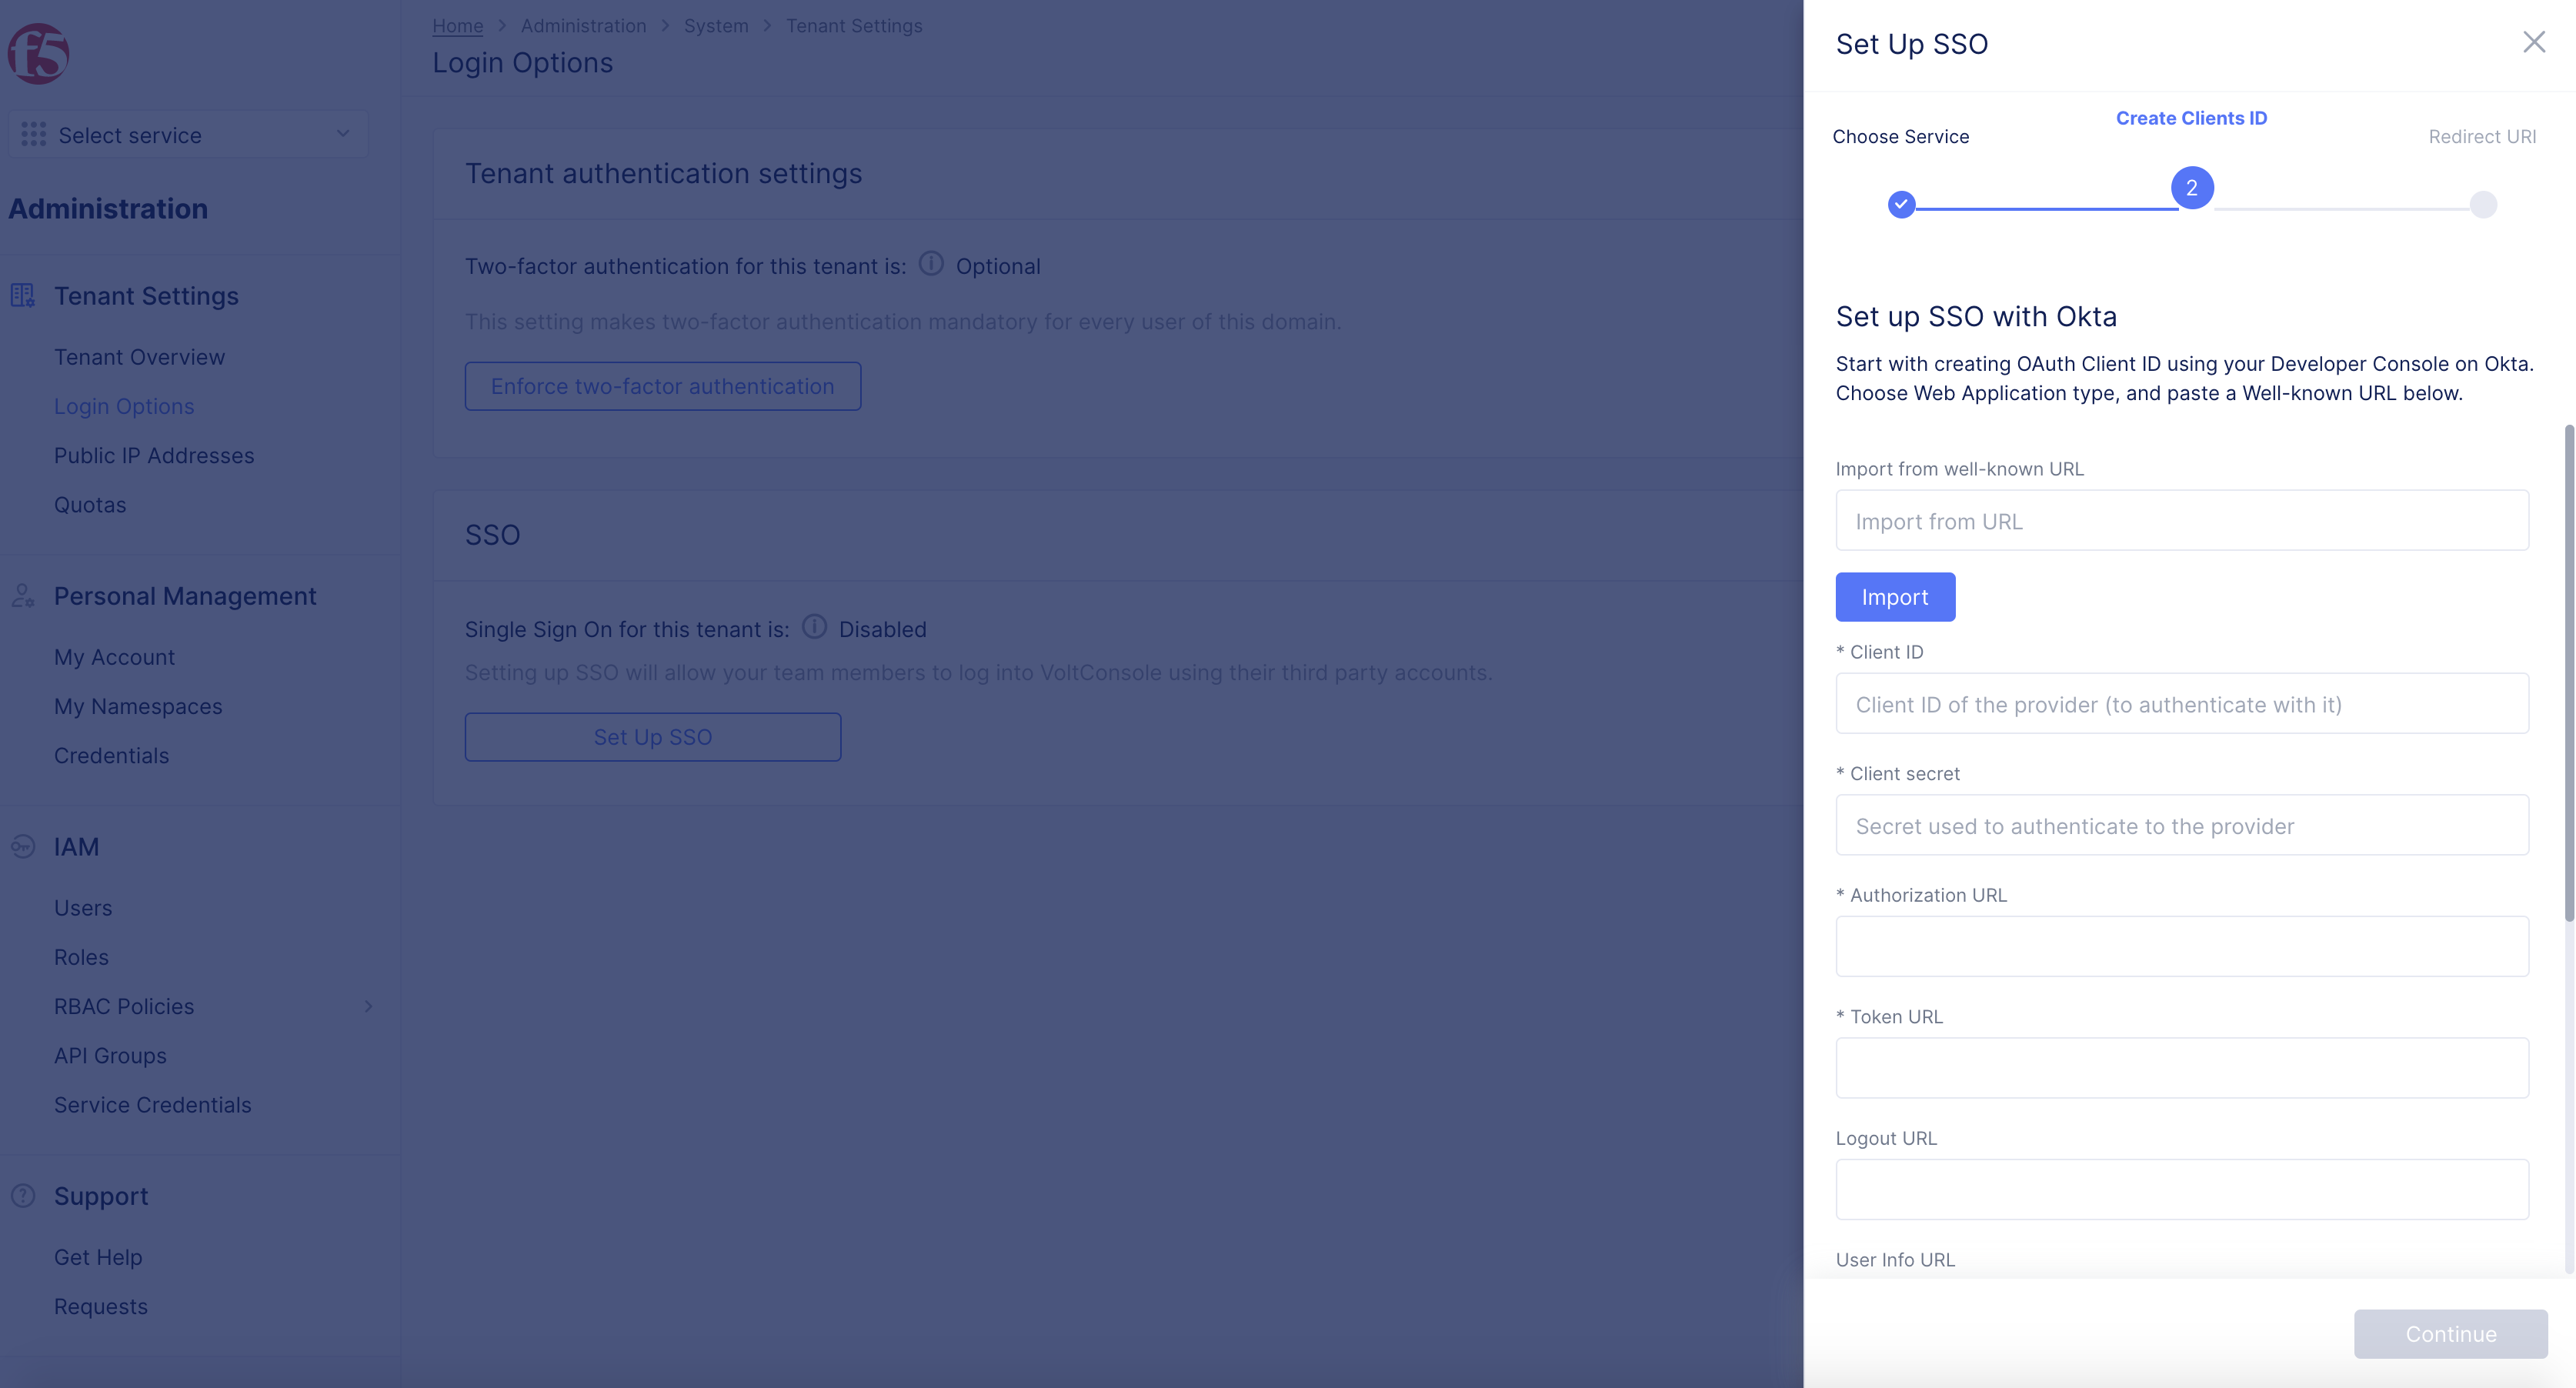
Figure: SSO Create Clients ID
-
Enter the client ID and secret obtained in Step 4 of the Configure OIDC Authentication Application in Okta chapter in the
Client IDandClient Secretfields respectively. -
Enter the well-known URL obtained in Step 4 of the Configure OIDC Authentication Application in Okta chapter in the
Import from well-known URLfield. -
Selection
Import. The fields such asAuthorization URLandToken URLget populated. -
Select
Continuebutton.
Step 3: Copy Redirect URL.
- Copy the displayed values of the
Redirect URLfield in theRedirect URIscreen.
Note: This is used in next step.
- Select
Done.
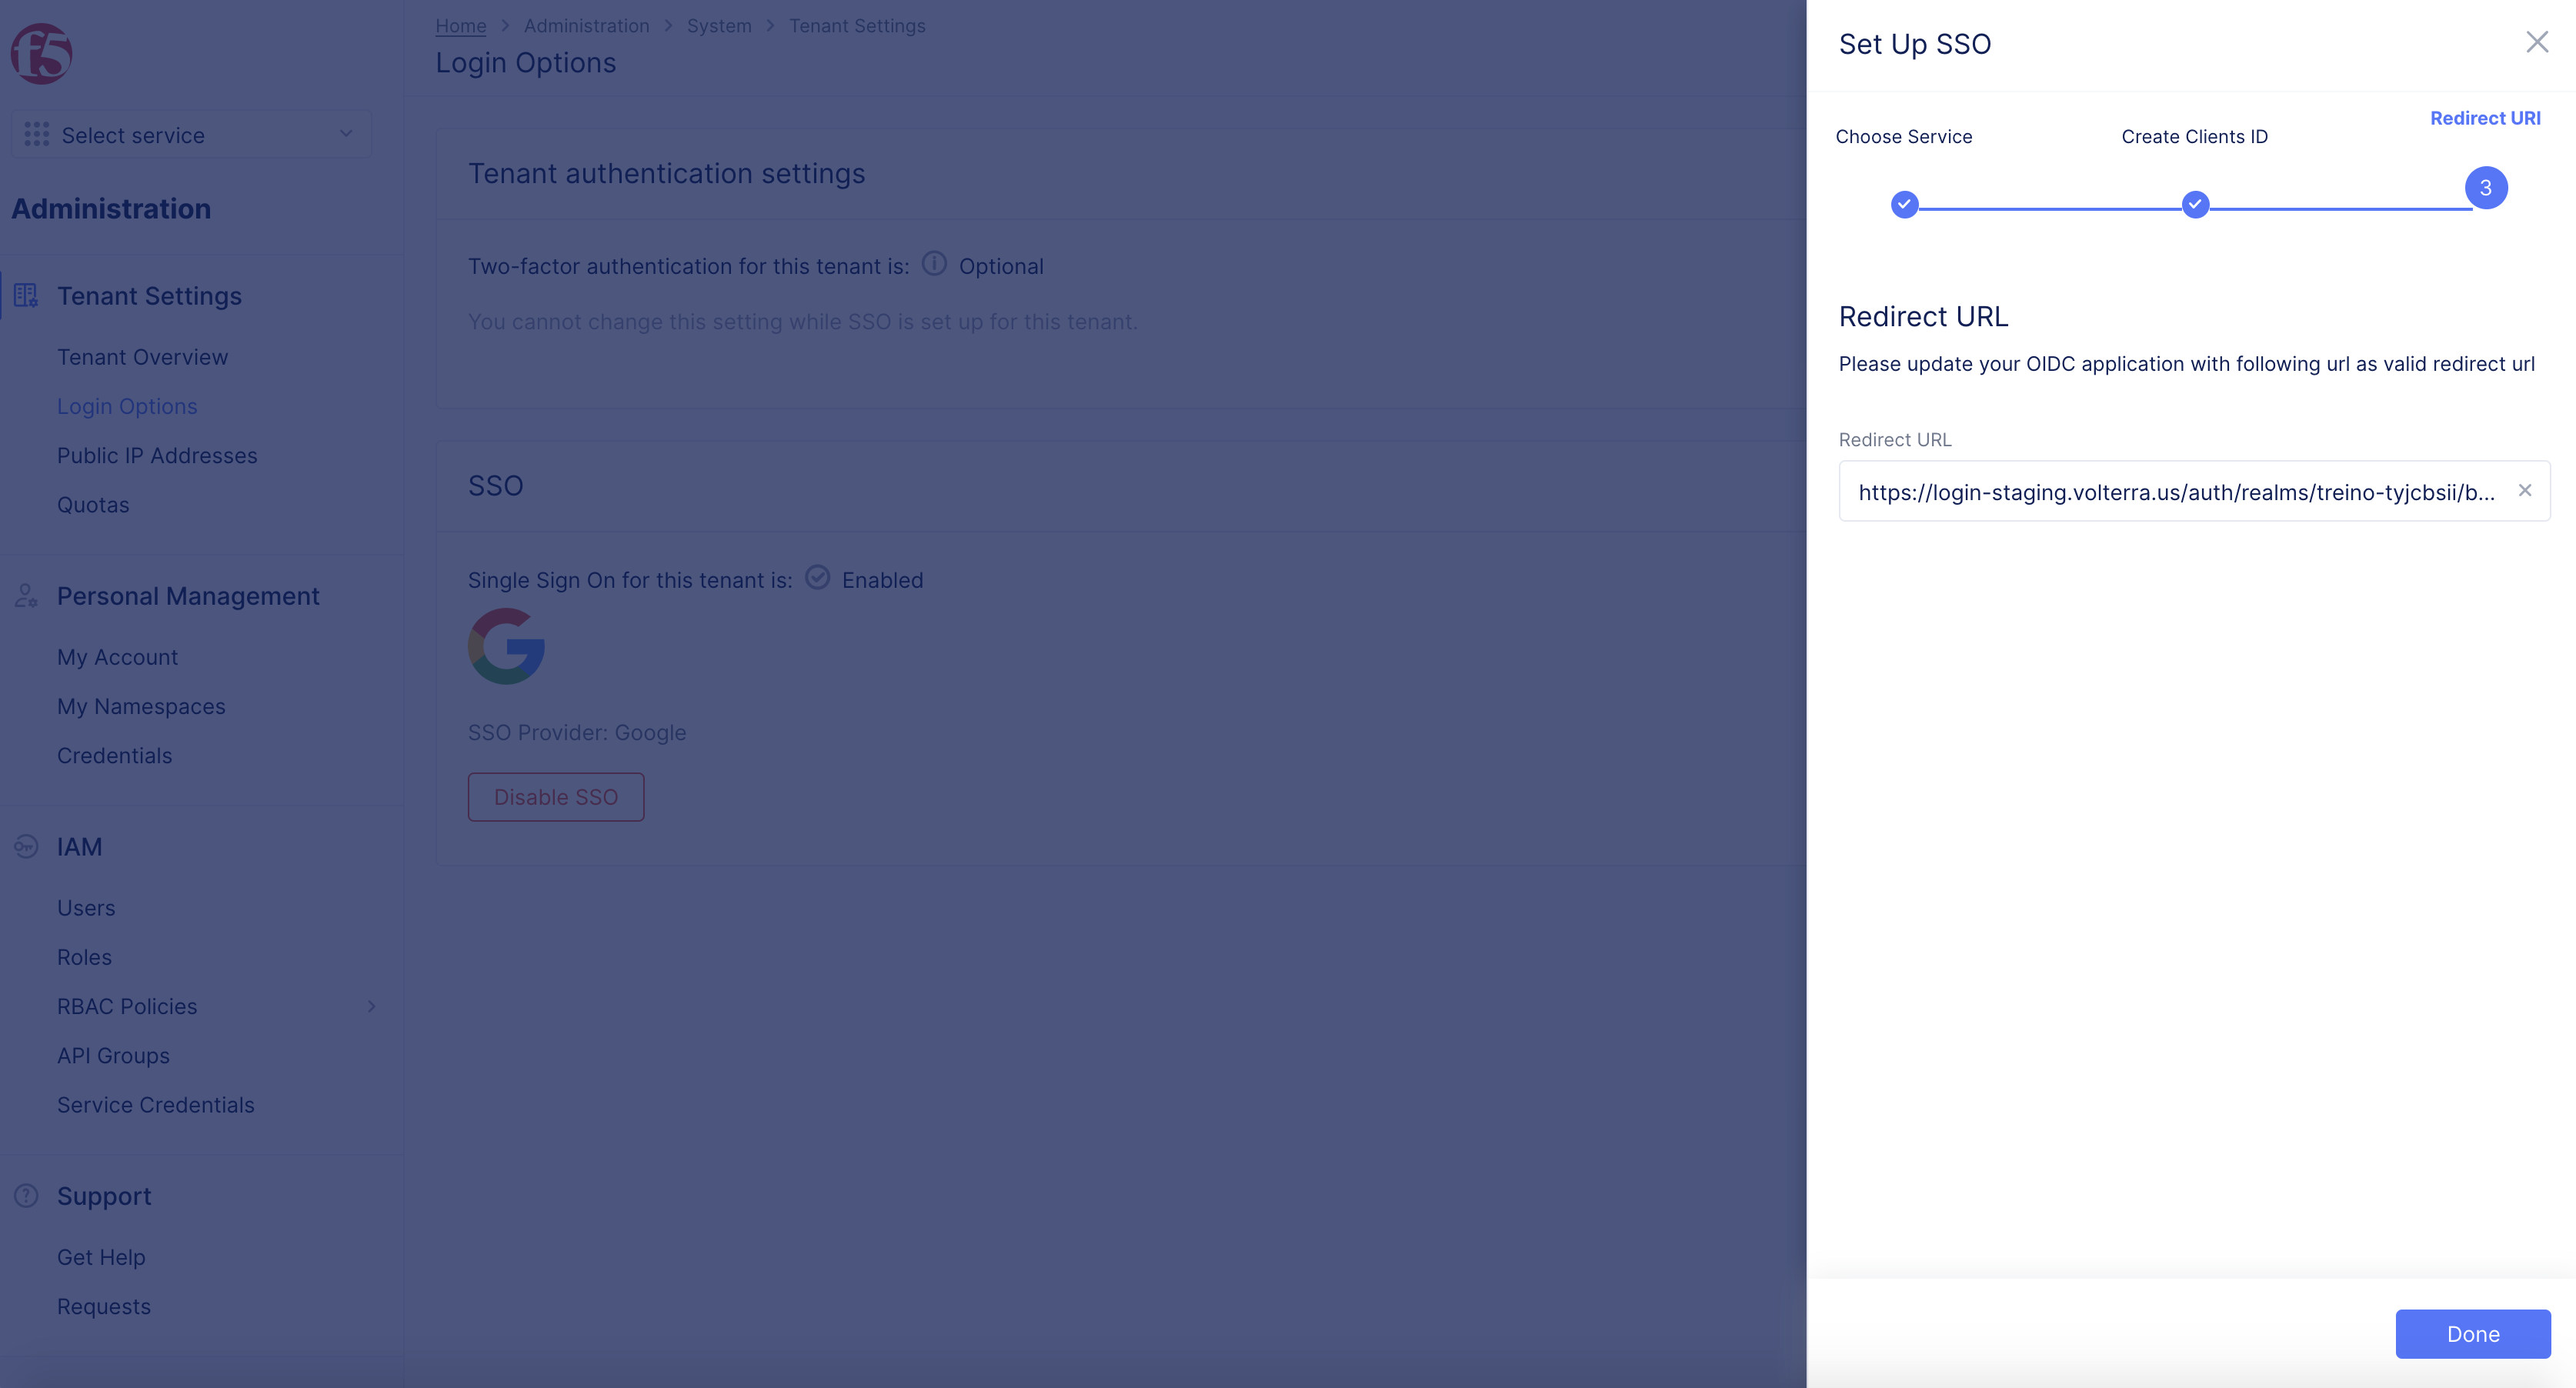
Figure: Redirect URL
Step 4: Add Redirect URL in Okta Application Settings.
-
Log into Okta, open
Generaltab of your application settings. -
Select
Edit.
Figure: Okta Application General Settings
-
Navigate to
LOGINsection in, enter the redirect URL copied in previous step to theLogin redirect URIsbox. -
Add the value of
call back urltoInitiate login URIbox.
Note: You can obtain this from the settings of your identity provider by navigating to
Security>Identity Providers.
-
Confirm Okta configuration that you have the same customer login link in the following fields:
Sign-in Redirect URIs,Sign-out Redirect URIsandInitiate Login URI. -
Confirm Login initiated is set as
App Only.
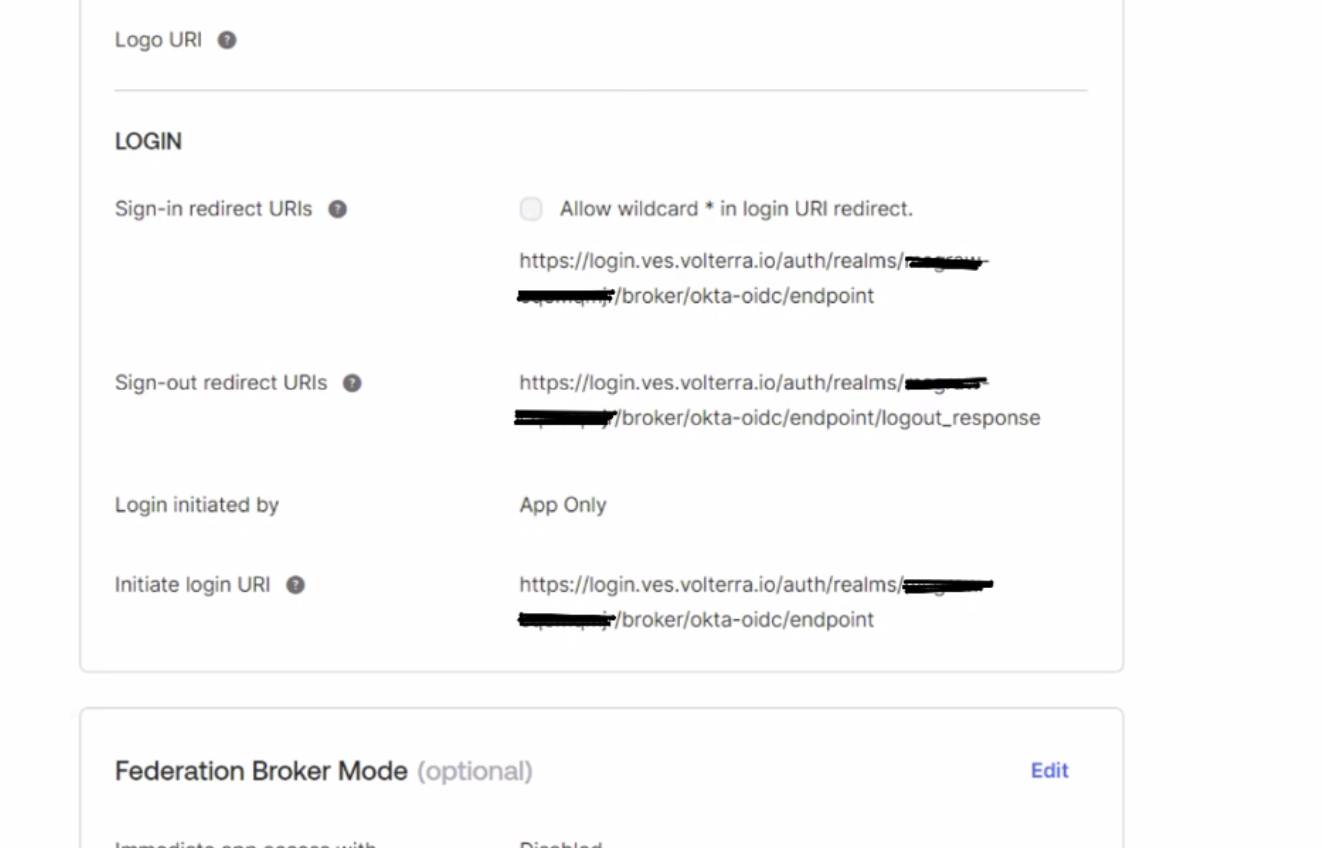
Figure: Redirect URI from Identity Provider Creation
- Save the settings.
Note: The field
Logout redirect URIsgets automatically populated.
Step 5: Complete SSO Setup.
Log out of F5 Distributed Cloud Console.
Note: The subsequent logins get serviced through Okta.

