Create Web Application Firewall
Objective
This document provides instructions on how to create a web application firewall (WAF) and deploy it on a load balancer. The WAF consists of technology that enables you to allow or block requests and responses based on the configuration. To learn more about a WAF, see Application Firewall.
Using the instructions provided in this document, you can create a WAF with default or custom attack types, enable threat campaigns, define bot protection settings, and attach that WAF to an HTTP load balancer to protect the app that the load balancer serves. These instructions also include information on how to control responses from origin servers.
Prerequisites
-
F5® Distributed Cloud Services Account. If you do not have an account, see Getting Started with Console.
-
An HTTP/HTTPS load balancer in your edge/cloud site or in the F5 global network cloud. If you do not have a load balancer, see HTTP Load Balancer for instructions to create one.
Configuration
Protecting your applications using the WAF requires you to create a WAF object in F5® Distributed Cloud Console (Console) and enable it by attaching it to an HTTP/HTTPS load balancer that serves the application for which you want to protect (with the WAF).
Create a WAF
Perform the following to create and configure a WAF:
Step 1: Log into Console and start creating WAF object.
- From the Console homepage, click
Web App & API Protection.
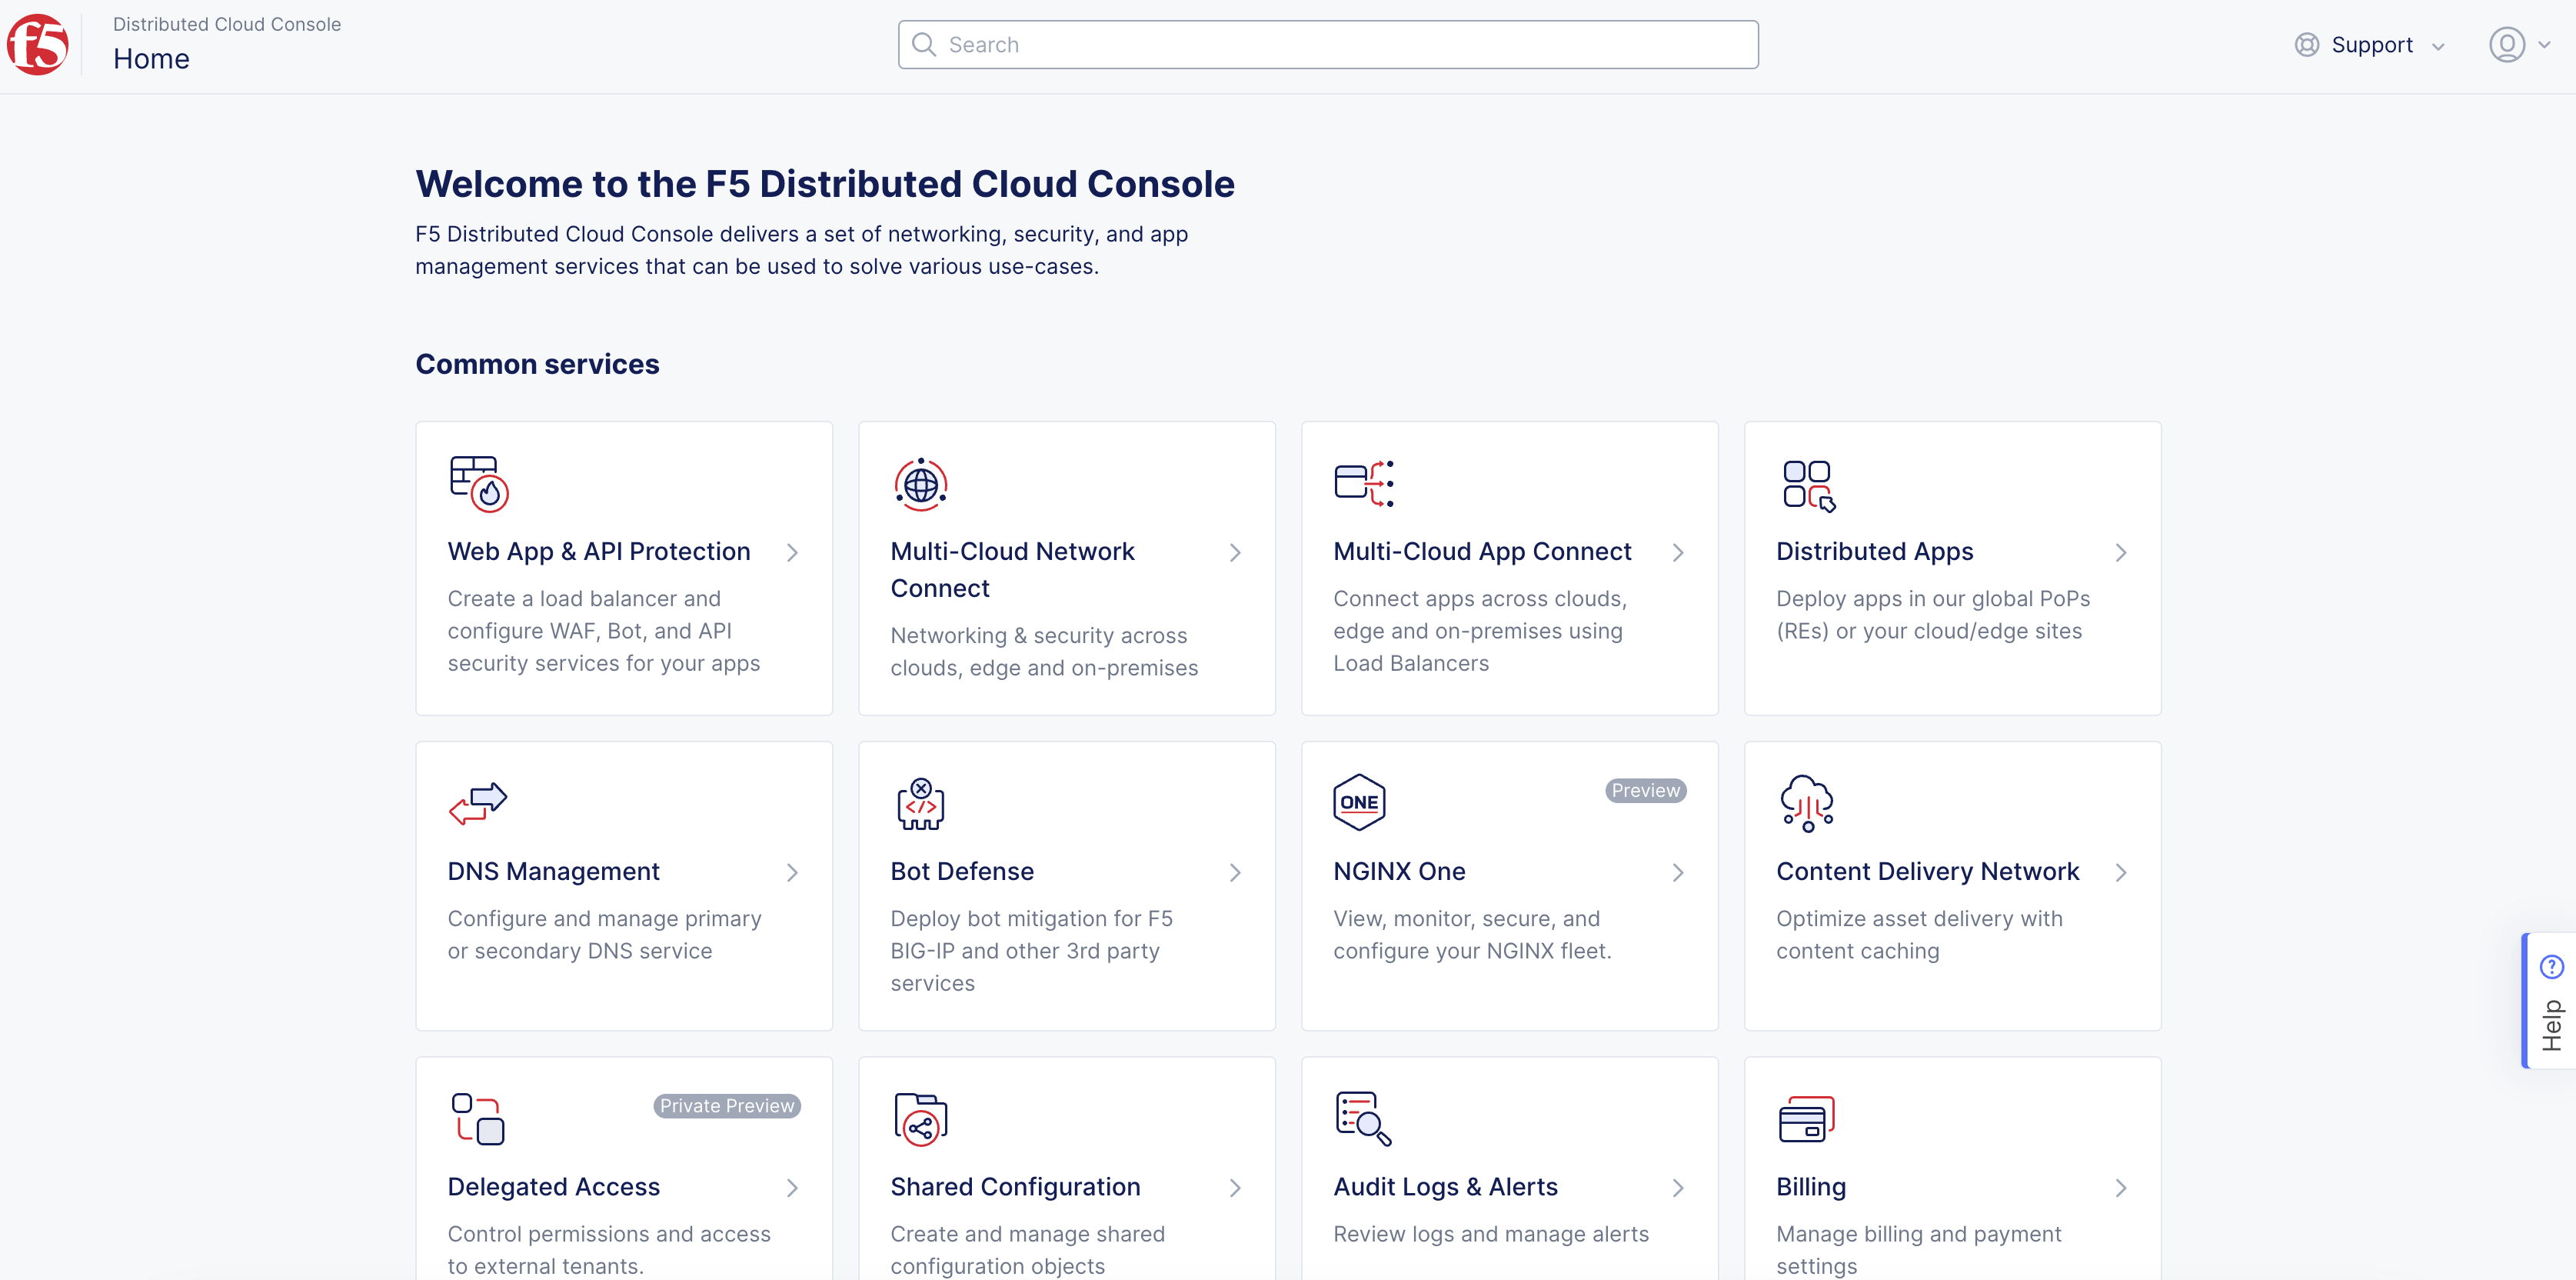
Figure: Console Homepage
- Select the desired namespace from the
Namespacedrop-down menu.
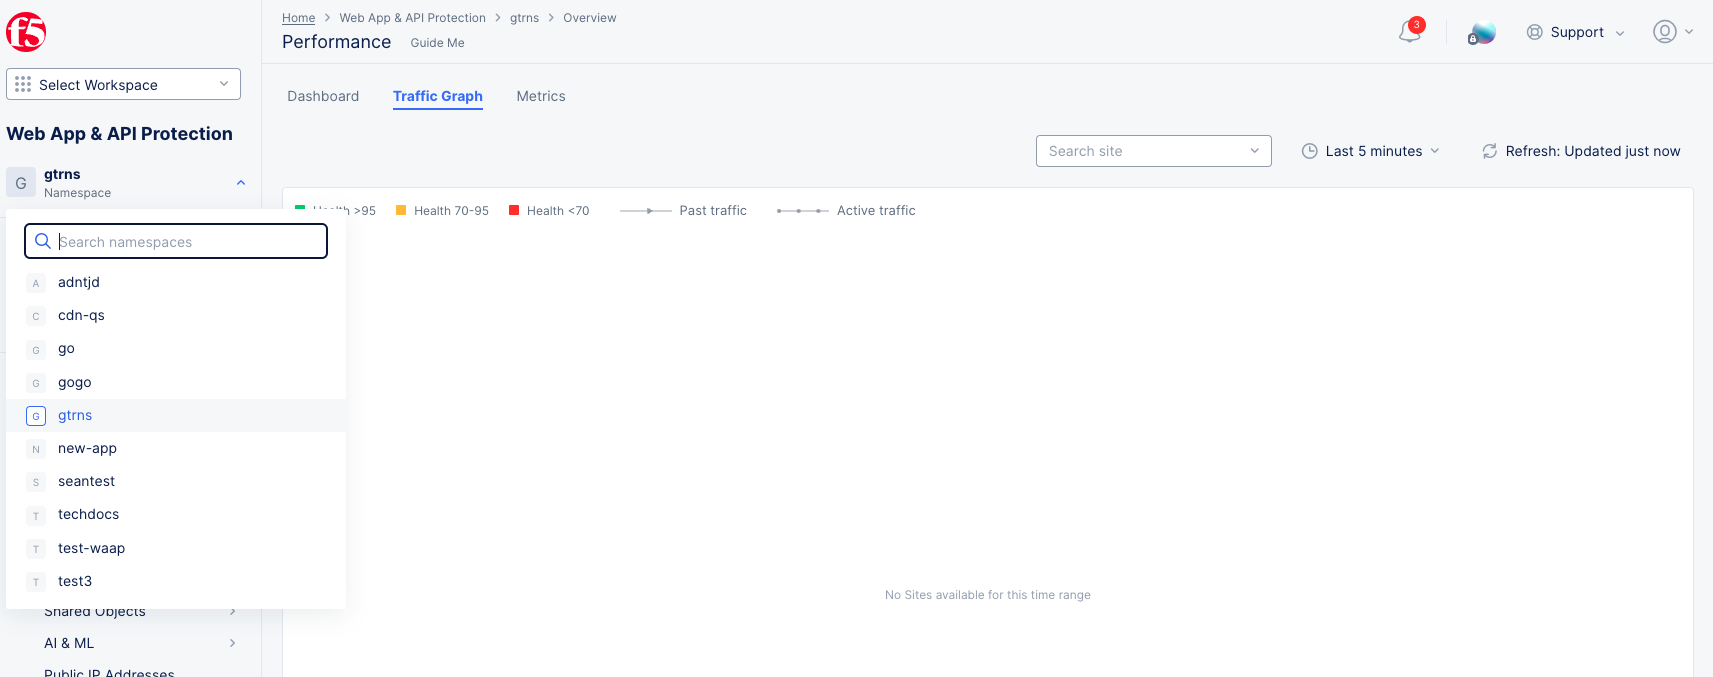
Figure: Application Namespace
Note: You can also create a namespace where the application firewall needs to be created in. From the Console homepage, Select the
Administrationservice, and then selectPersonal Management>My Namespaces. ClickAdd namespace, add a name, and then clickSave.
-
Click
Manage>App Firewall. -
Click
Add App Firewallto load the WAF creation form.
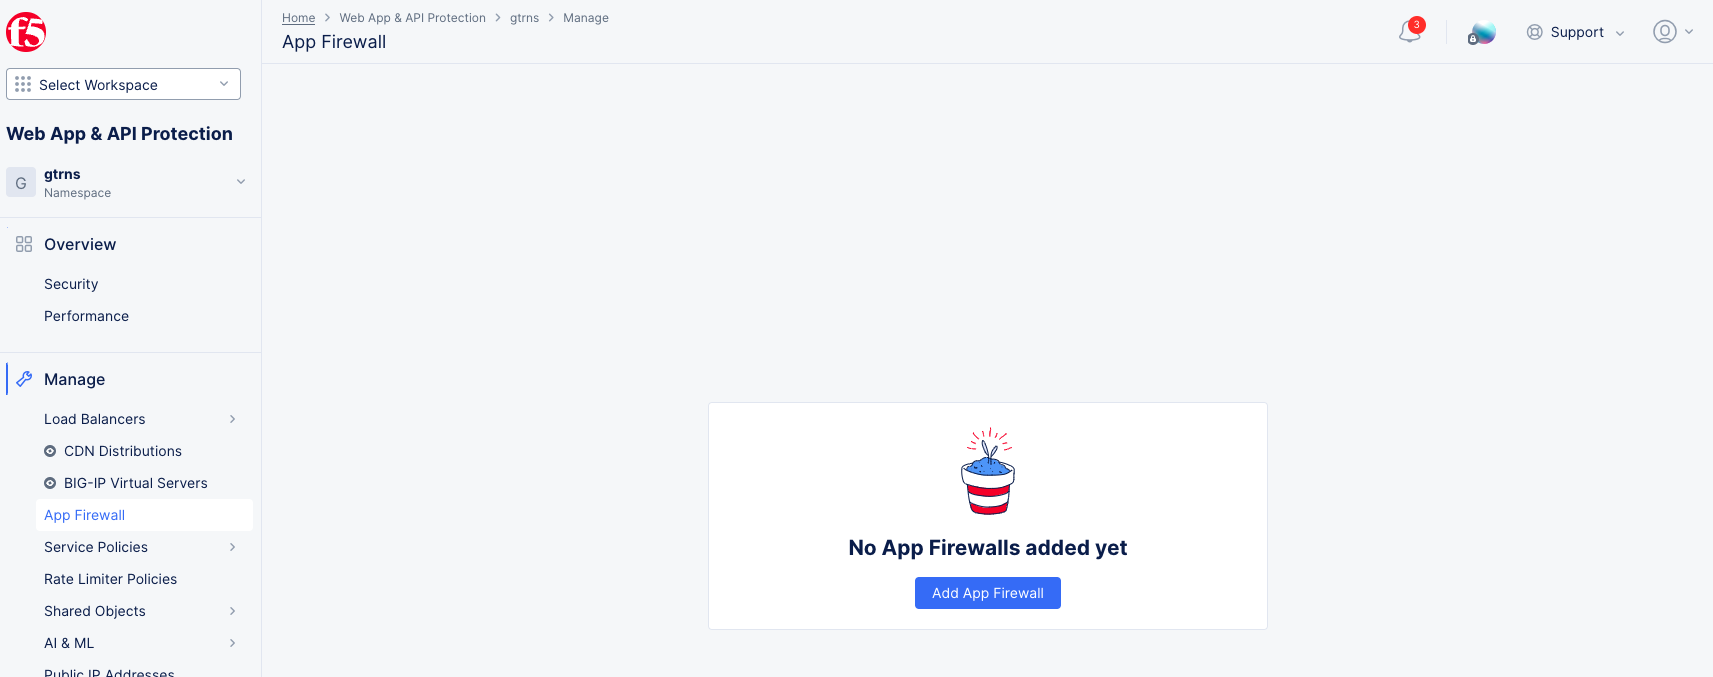
Figure: Create App Firewall
Step 2: Set metadata and WAF mode.
Fill in the required information marked with an asterisk (*) symbol:
-
In the
Namefield under theMetadatasection, enter a name for the WAF object. -
From the
Enforcement Modedrop-down menu under theEnforcement Modesection, select whether you want the WAF to only monitor or block traffic:-
Blocking: Malicious traffic is both logged and blocked. -
Monitoring: Traffic is not blocked, but any malicious and suspicious traffic generates security events (logs).
-
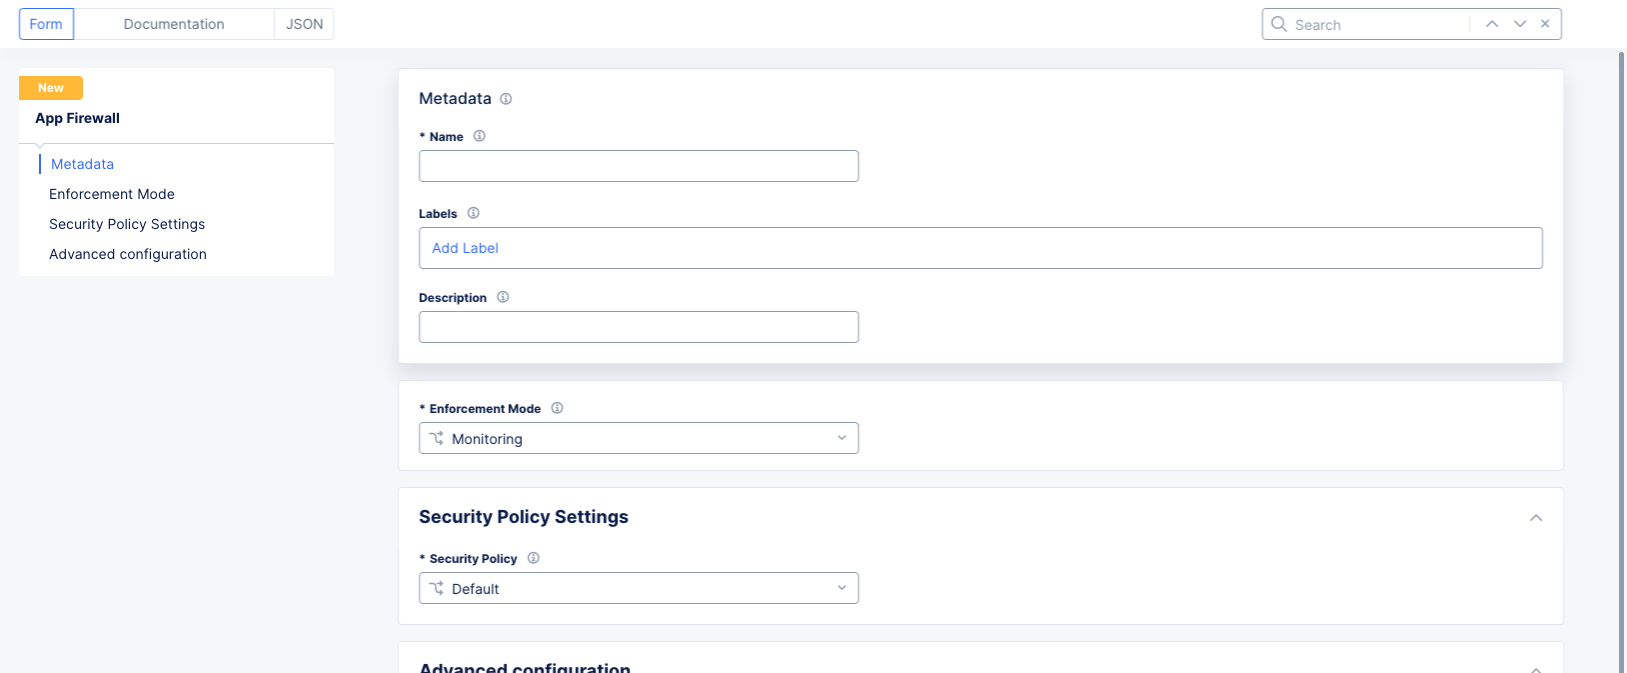
Figure: WAF Metadata and Mode
Note: The
Enforcement Modeoption is with respect to your load balancer. It overrides your load balancer settings for all traffic.
Step 3: Configure Security Policy settings.
-
From the
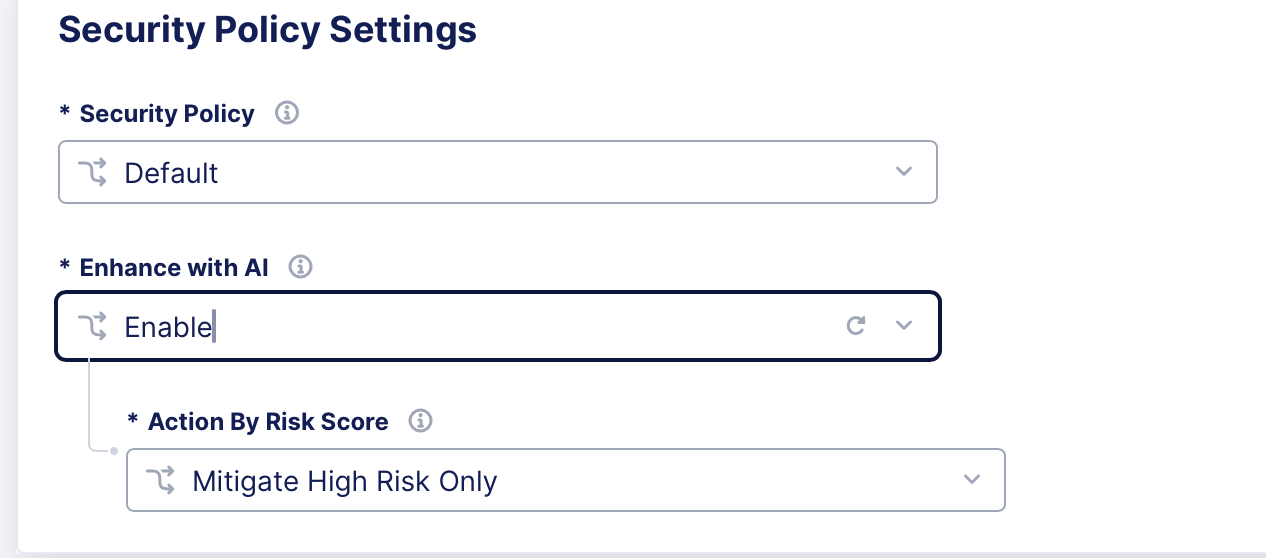
Security Policydrop-down menu, select which type of policy to use:-
Default: This setting applies a broad mix of high and medium accuracy signatures, threat campaigns, and all violations.-
Enhance with AI: AI-powered risk scoring in F5 Distributed Cloud WAF simplifies WAF configuration by improving detection accuracy and reducing manual tuning. It evaluates multiple detection signals—such as signatures, attack indicators, and ML-based analysis—and assigns each request a High, Medium, or Low risk score. These risk scores enable consistent enforcement decisions and faster threat mitigation.
- Action by Risk Score: The assessment assigns a risk level to each request. By default, only high-risk requests are blocked. Blocking for medium-risk requests can be enabled using the corresponding drop-down menus.
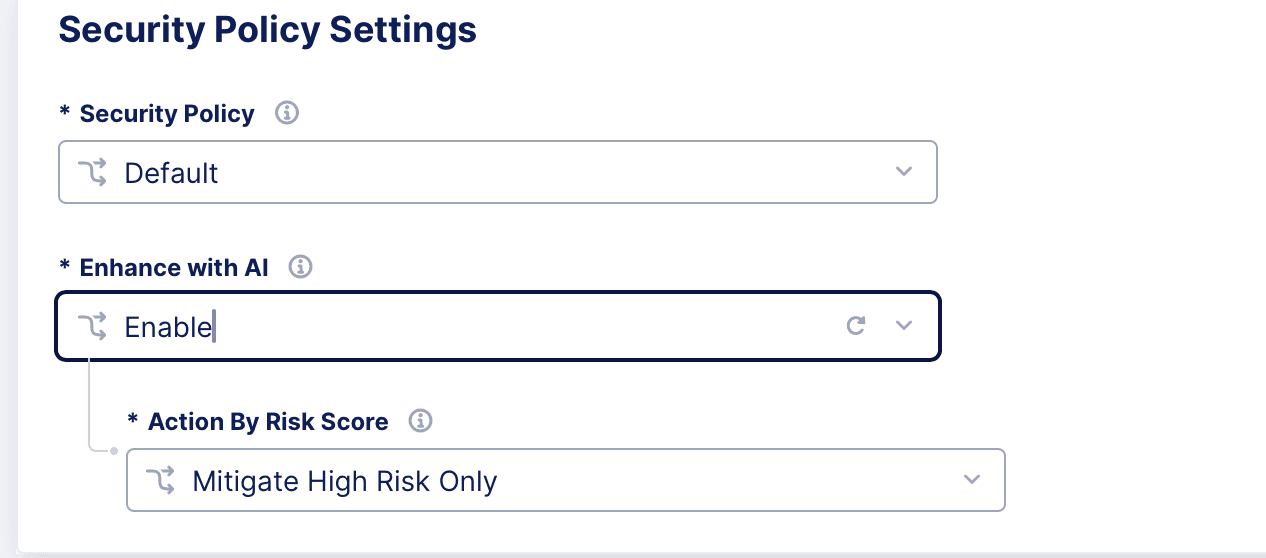
Figure: Default Secure Policy Settings
-
-
Custom: This setting enables you to apply specific configurations for attack types, signature selections, automatic attack signatures, threat campaigns, and violations. You can change one or all of the configurations.
-
-
If you choose the
Customoption, perform the following:- Attack types: The
Defaultsetting detects all attack types. To configure this option to disable a specific attack type, selectCustom. Select the attack type from theDisabled Attack Typesdrop-down menu. You can use the drop-down menu to select additional attack types to disable.

Figure: Attack Types
-
From the
Signature Selection by Accuracymenu, select from one of the available accuracy options. TheHigh and Mediumsignatures are enabled by default. -
From the
Automatic Attack Signatures Tuningmenu, enable or disable the automatic attack signature tuning. This option is enabled by default and the WAF suppresses false positive triggers based on its probabilistic learning model. -
From the
Attack Signatures Stagingmenu, choose whether new and updated signatures are treated differently from the firewall enforcement mode. When signatures are staged, those signatures will be in monitoring mode, even if your firewall is set to blocking mode. Choose one of the following options:-
Disable: All signature updates will be enforced. -
Stage new attack signatures: New signatures will be in monitoring mode for theStaging Period, meaning the new signature will not cause a request to be blocked, but you will see signature trigger details in the security event. Existing signatures that have been updated will still be enforced. -
Stage new and updated attack signatures: New and updated signatures will be in monitoring mode for theStaging Period, meaning the new/updated signature will not cause a request to be blocked, but you will see signature trigger details in the security event.
-
-
From the
Threat Campaignsmenu, enable or disable the threat campaign detection. When enabled, the WAF detects specific threat campaigns and takes action per the enforcement mode settings. -
From the
Violationsmenu, selectCustomto disable one or more violations. From theDisabled Violationsmenu, select a violation to disable.
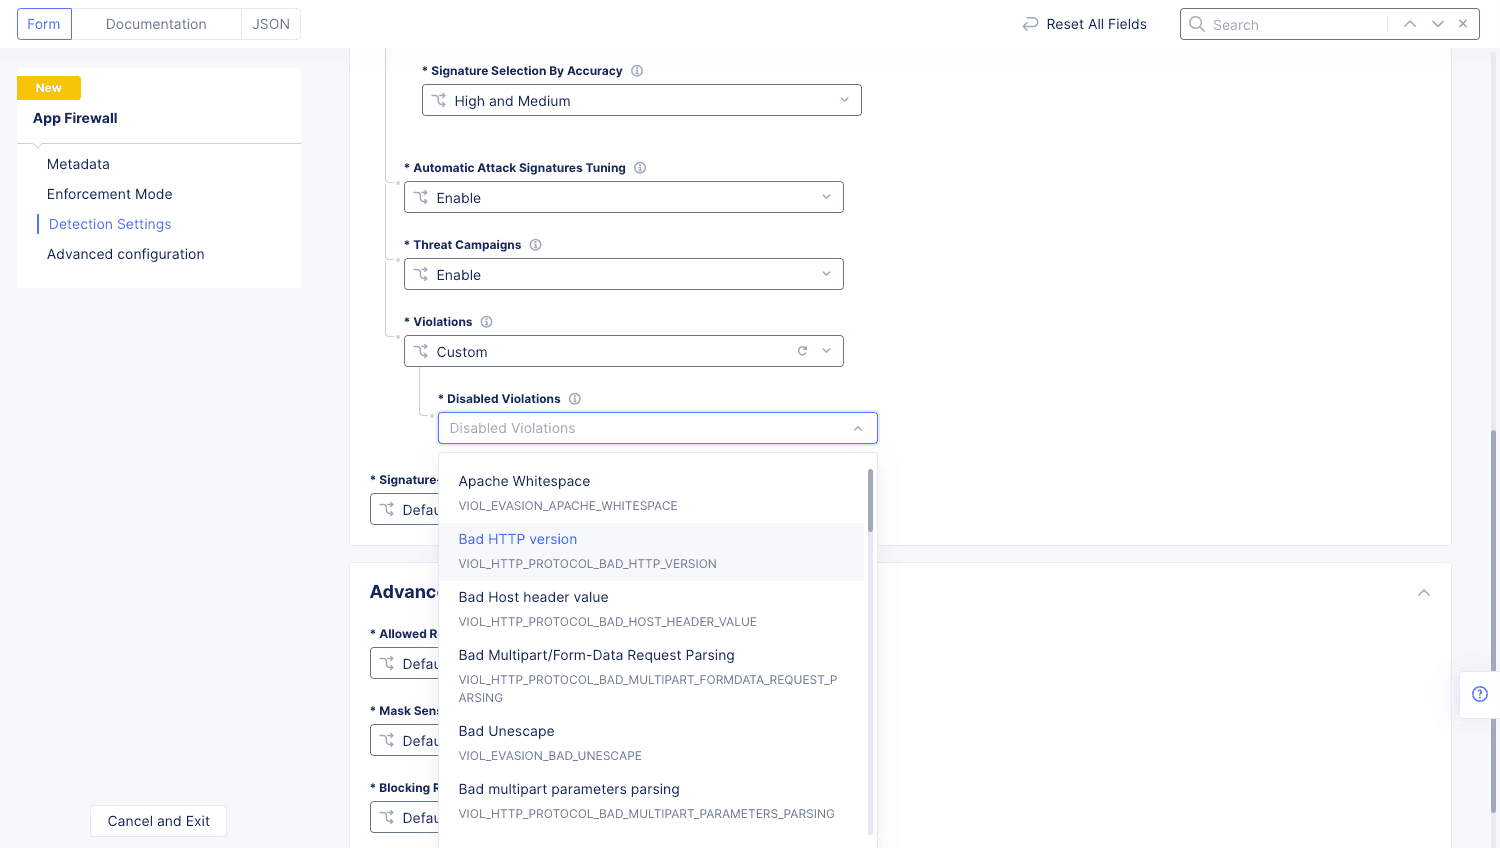
Figure: Disable Violation Types
- Attack types: The


File Types: A File Type in App Firewall is regarded as any file extension found at the end of the URL path, such as .html, .aspx, .php, etc. The following file types are disallowed by default:
{bak, bat, bck, bin, bkp, cer, cfg, cgi, cmd, com, conf, config, crt, dat, der, dll, eml, exe, hta, htr, htw, ida, idc, idq, ini, key, log, msi, nws, old, p12, p7b, p7c, pem, pfx, pol, printer, reg, sav, save, shtm, shtml, stm, sys, temp, tmp, wmz}
To customize the list of file types disallowed, disable Illegal filetype (VIOL_FILETYPE) using the Violations menu option and use a custom rule in Service Policy to disallow specific file types.
Note: For a list of supported attack types, signatures, and violations, see the following guides:
-
Enhance with AI: When Enhance with AI is enabled in a Custom security policy, the system applies AI-powered risk scoring to evaluate incoming requests and improve threat detection.
- Action by Risk Score: This option is available when
Enhance with AIis enabled in a Custom security policy. The assessment assigns a risk level to each request. By default, onlyhigh-risk requestsare blocked. Blocking for medium-risk requests can be enabled using the corresponding drop-down menus.
- Action by Risk Score: This option is available when
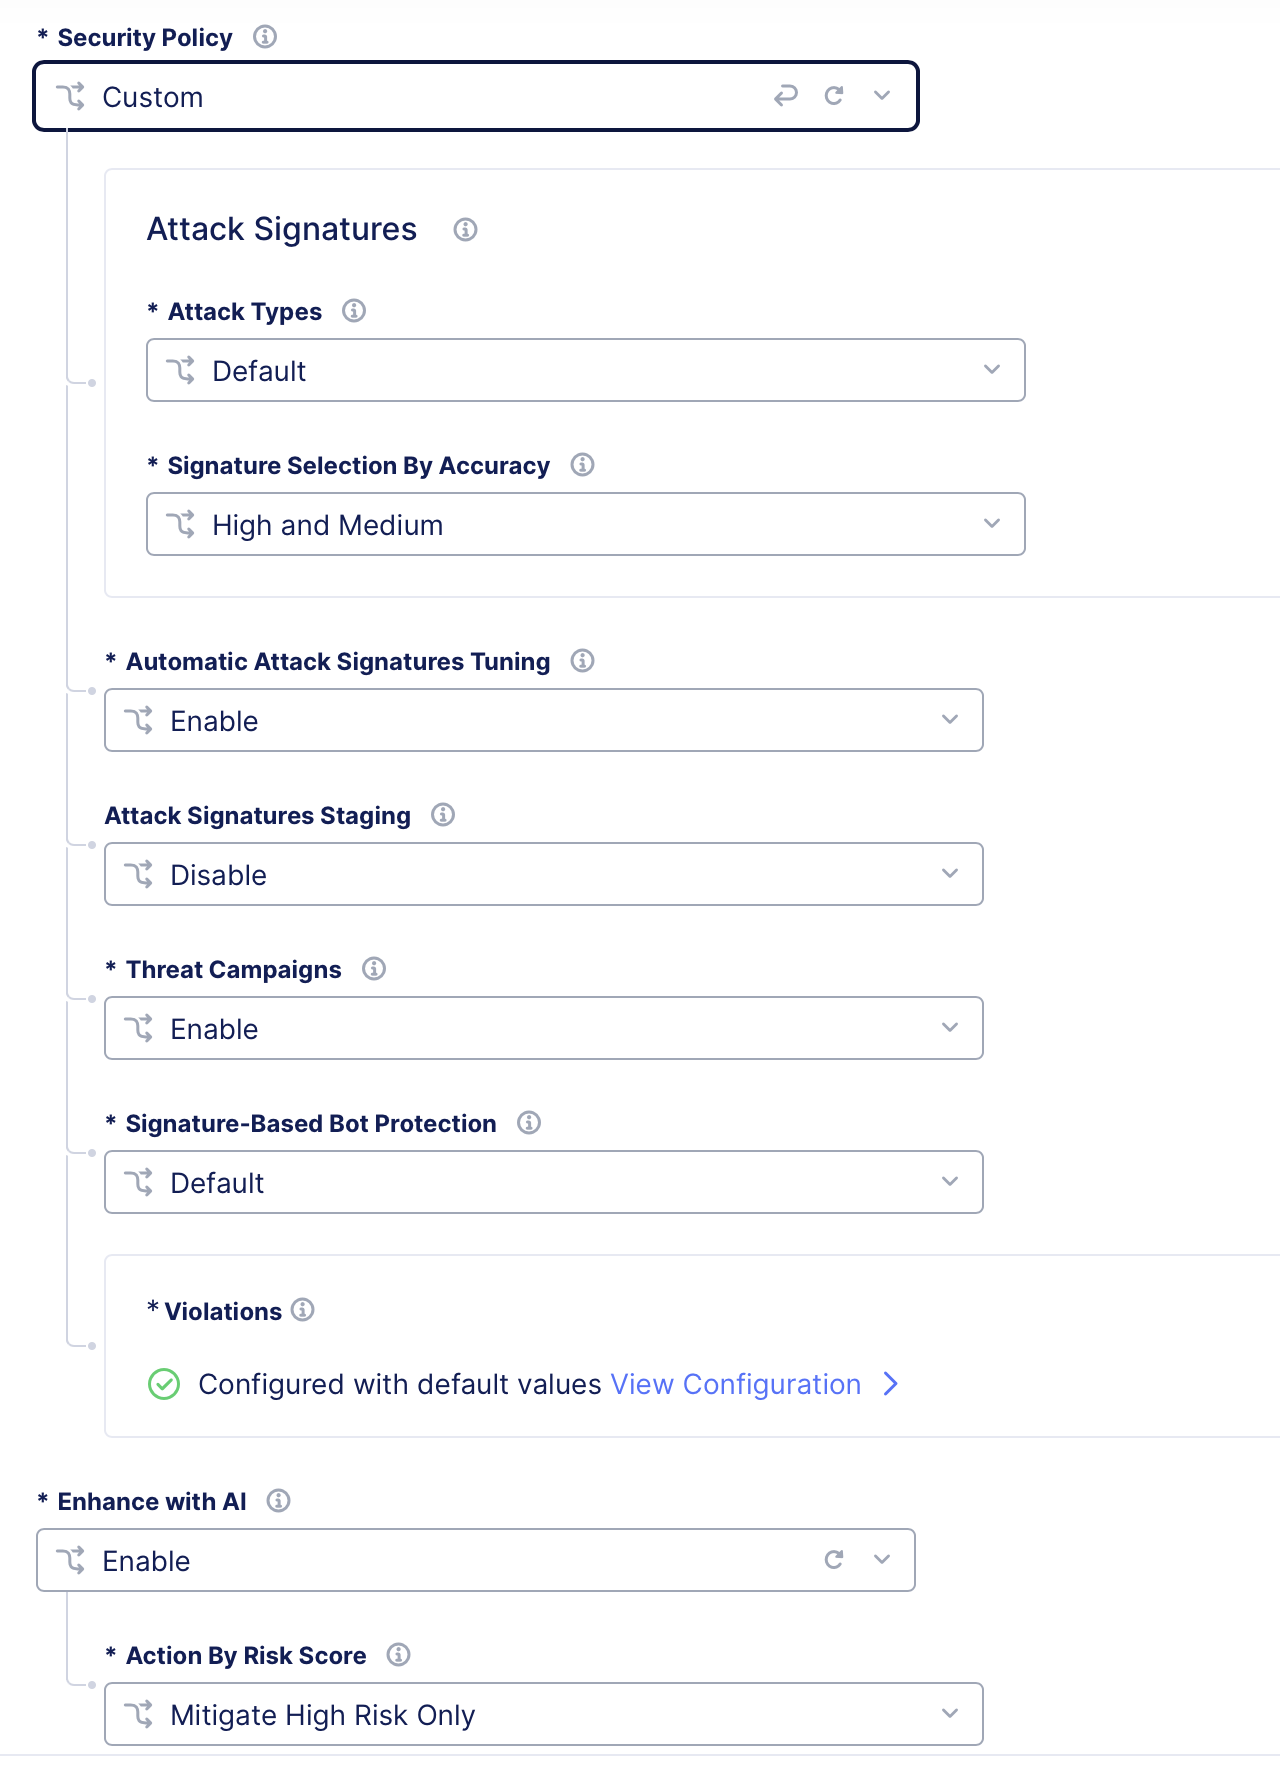
Figure: Custom Security Policy- Enhance with AI
Important: You must enable AVX (Advanced Vector Extensions) on hardware where your CEs are deployed if you are using F5 Distributed Cloud WAF. If you do not enable AVX, you cannot use the AI features for F5 Distributed Cloud WAF.
Step 4: Configure signature bot protection settings.
From the Signature-Based Bot Protection drop-down menu, select an option for bot defense:
-
Default: By default, a malicious bot is blocked and generates a security event. Good and suspicious bot activity generates only security events, and the WAF does not block the activity. -
Custom: Custom protection enables you to specify what action (Block,Report, orIgnore) to take when the WAF detects a malicious bot, suspicious bot, or a good bot. Set the action in theMalicious Bot,Suspicious Bot, andGood Botmenus.
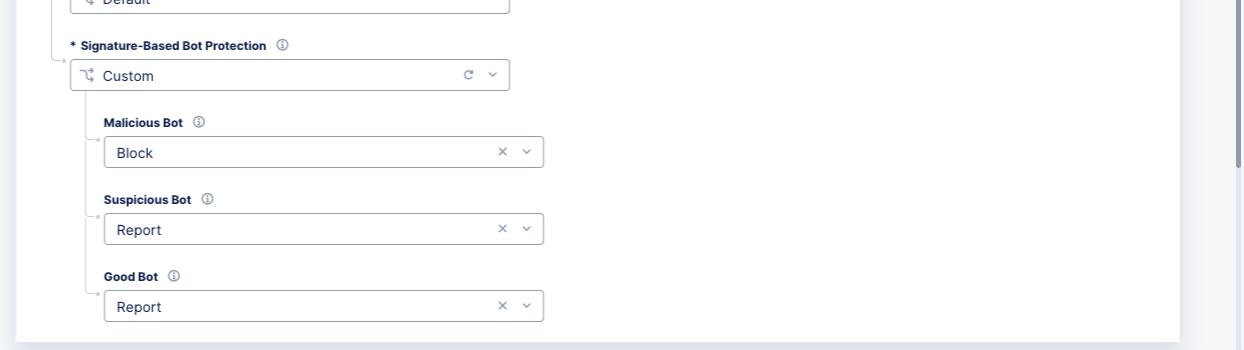
Figure: Signature Bot Protection Settings
Step 5: Configure advanced settings.
-
Allowed Response Status Codes: SelectCustomto specify a list of HTTP response status codes that are allowed for the client. Any HTTP responses other than these are not allowed. -
Mask Sensitive Parameters in Logs: TheDefaultoption will mask the values of sensitive parameters (like credit card numbers) in request logs. You can disable this feature or useCustomto set parameters of your choice, to be masked. For theCustomoption, clickAdd Itemand choose anHTTP Header,Query Parameter, orCookieand enter the name accordingly. After you finish, clickAdd Item. You can add more than one item using theAdd Itemoption. -
Blocking Response Page: TheDefaultoption returns an HTML response page with system settings to the client. To configure a custom response page, selectCustomand perform the following:-
From the
Response Codemenu, select a response that will be sent for blocked requests. -
In the
Custom Blocking Response Page Bodyfield, enter a response string of your choice. You can specify the string in ASCII format or Base64 format.
-
Note: Use the
base64command to encode the response in Base64 format.
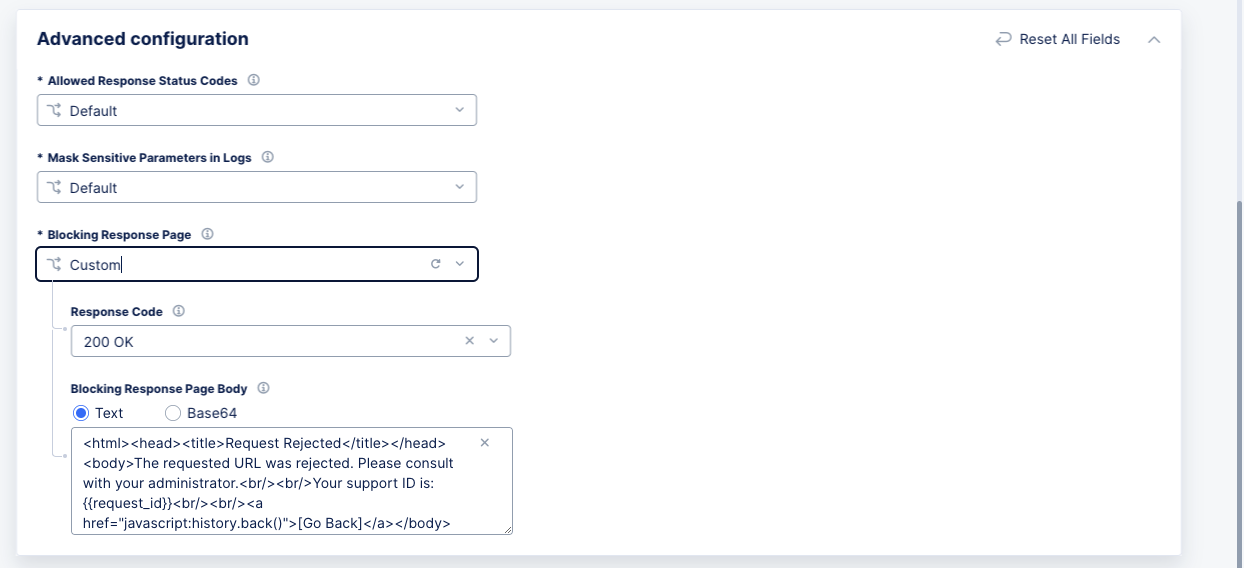
Figure: HTTP Blocking Response Settings
Step 6: Complete creating the WAF object.
Click Save and Exit.
Attach the WAF to a Load Balancer
After creating a WAF object, you can attach it to your load balancer. Once this attachment is done, you can monitor WAF operations on Console.
The WAF policy configured at the load balancer level applies to all domains configured on the load balancer. If you would like to configure a different WAF policy than the one configured on the load balancer for specific match criteria (method, path, etc.), you can do so by configuring the WAF policy per route. Both methods are provided below.
Step 1: Start editing your load balancer.
-
From the Console homepage, click
Multi-Cloud App Connect. -
Select the desired namespace from the
Namespacedrop-down menu. -
Click
Manage>Load Balancers>HTTP Load Balancers. -
Find your load balancer and click
...>Manage Configuration. -
Click
Edit Configurationto open the edit form.
Figure: Load Balancer Edit Configuration
Step 2: Attach WAF to the load balancer.
In the Web Application Firewall section, perform the following:
-
From the
Web Application Firewall (WAF)menu, selectEnable. -
From the
Enabledrop-down menu, select the WAF object you created in the previous section.
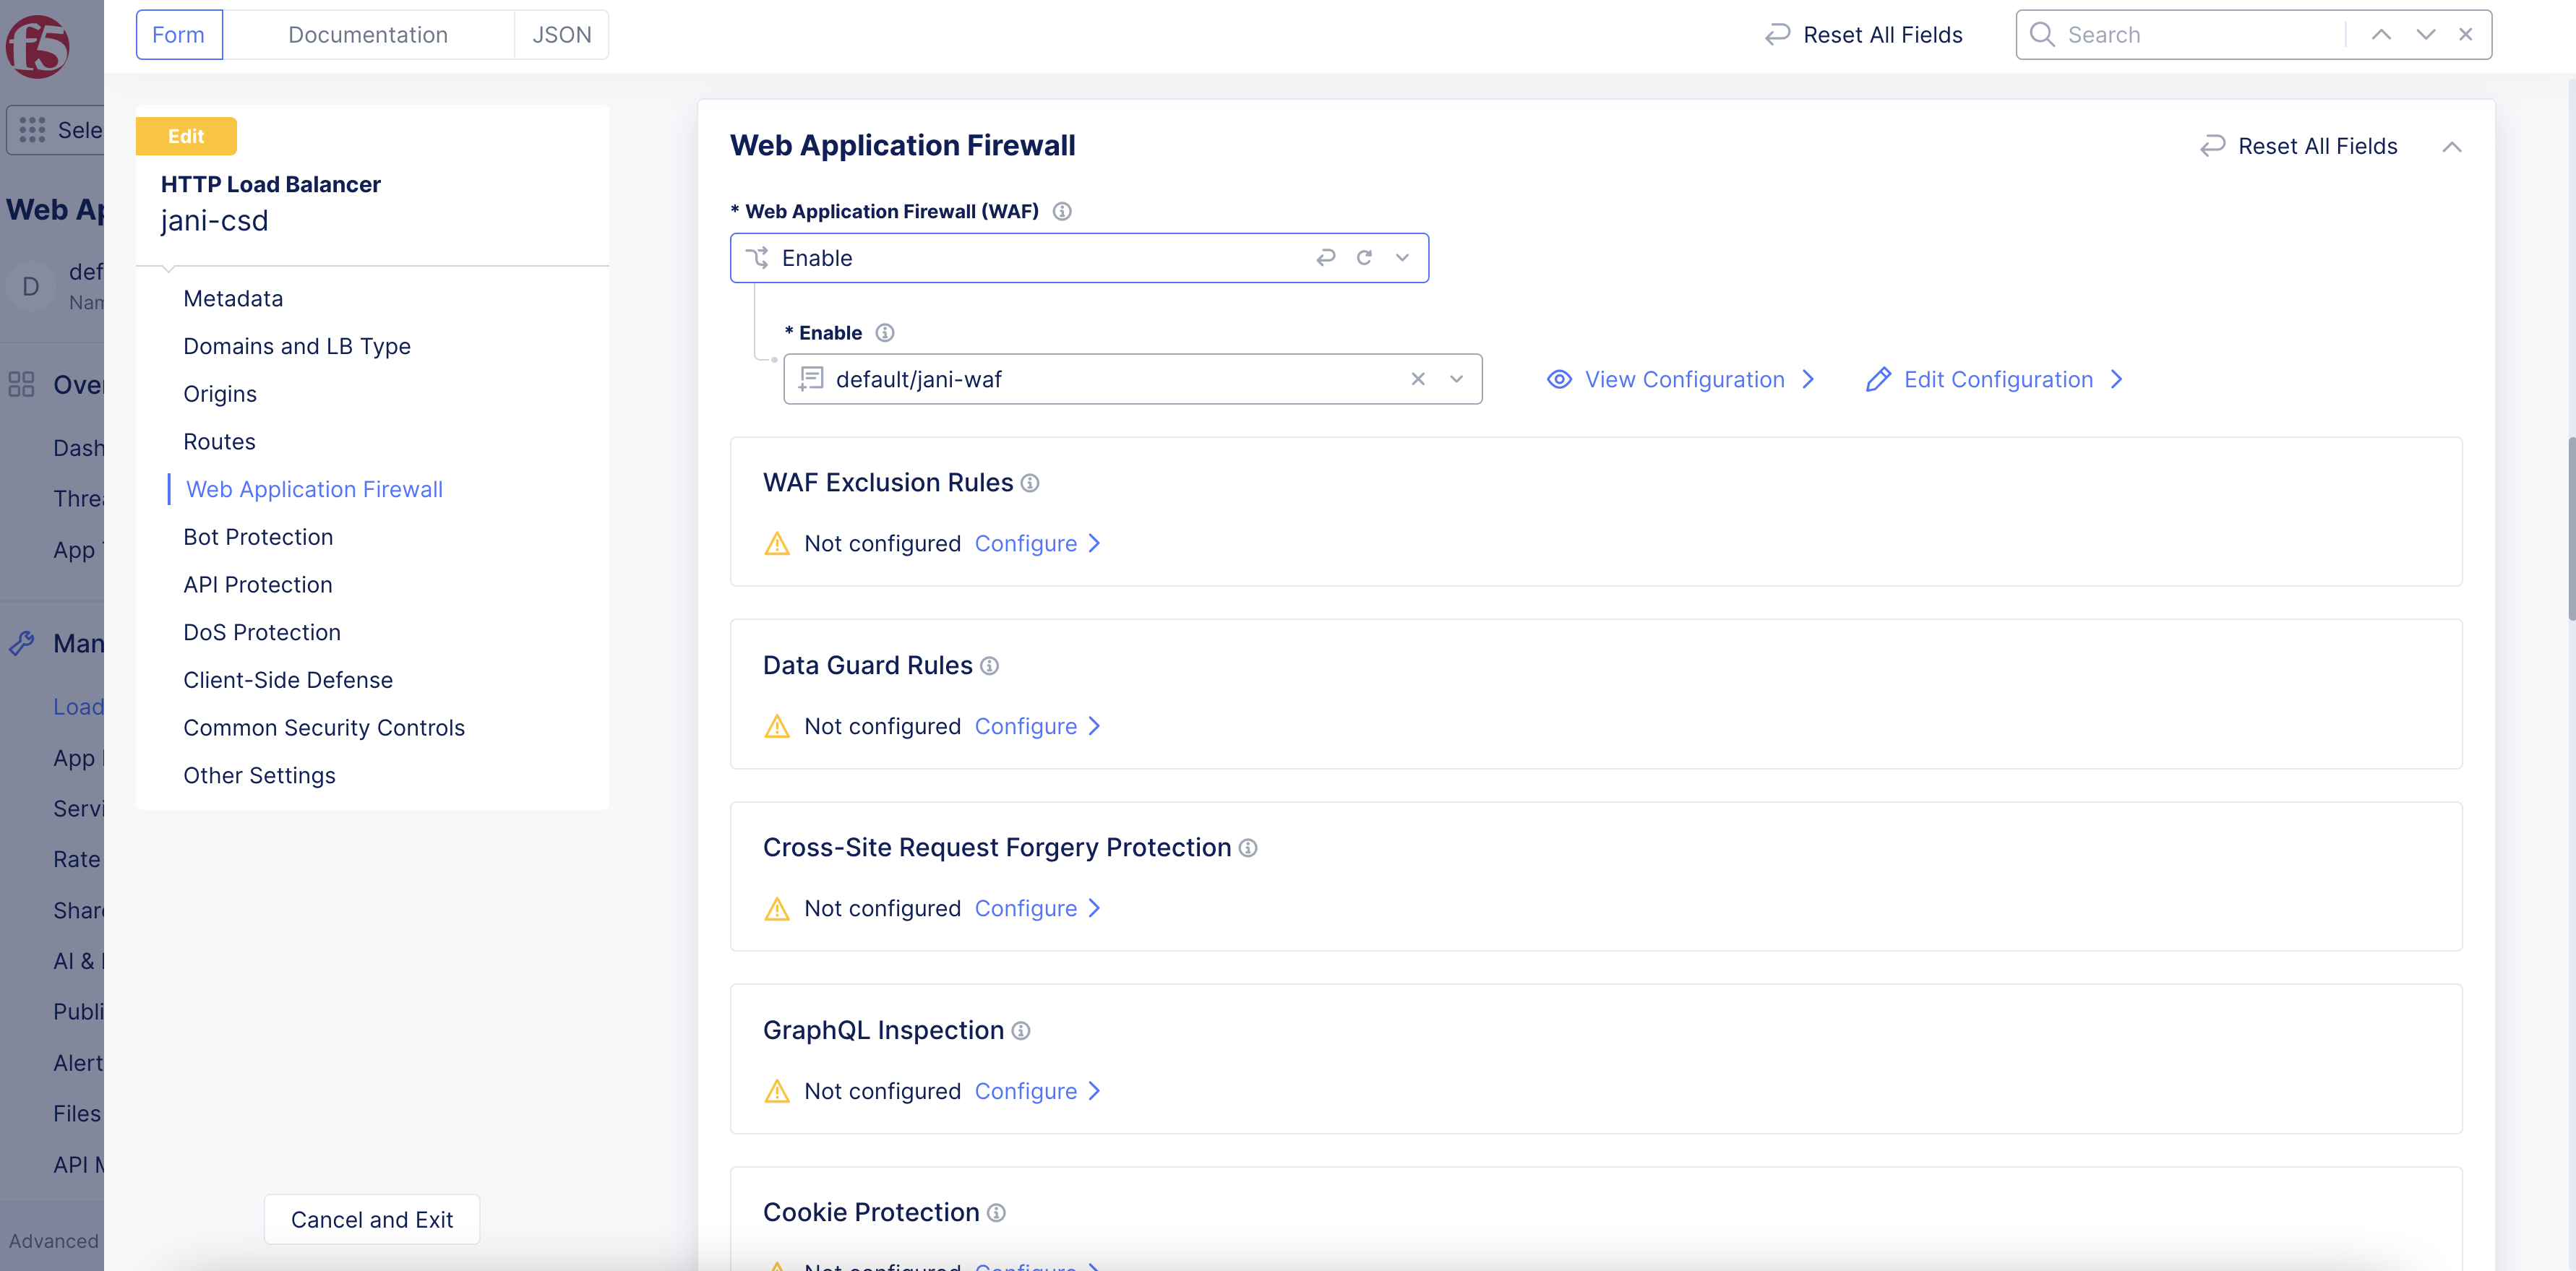
Figure: Select WAF Object
Step 3: Optionally, attach WAF to a specific route.
- Configure your routes per the instructions in the HTTP Load Balancer guide, if not yet configured.
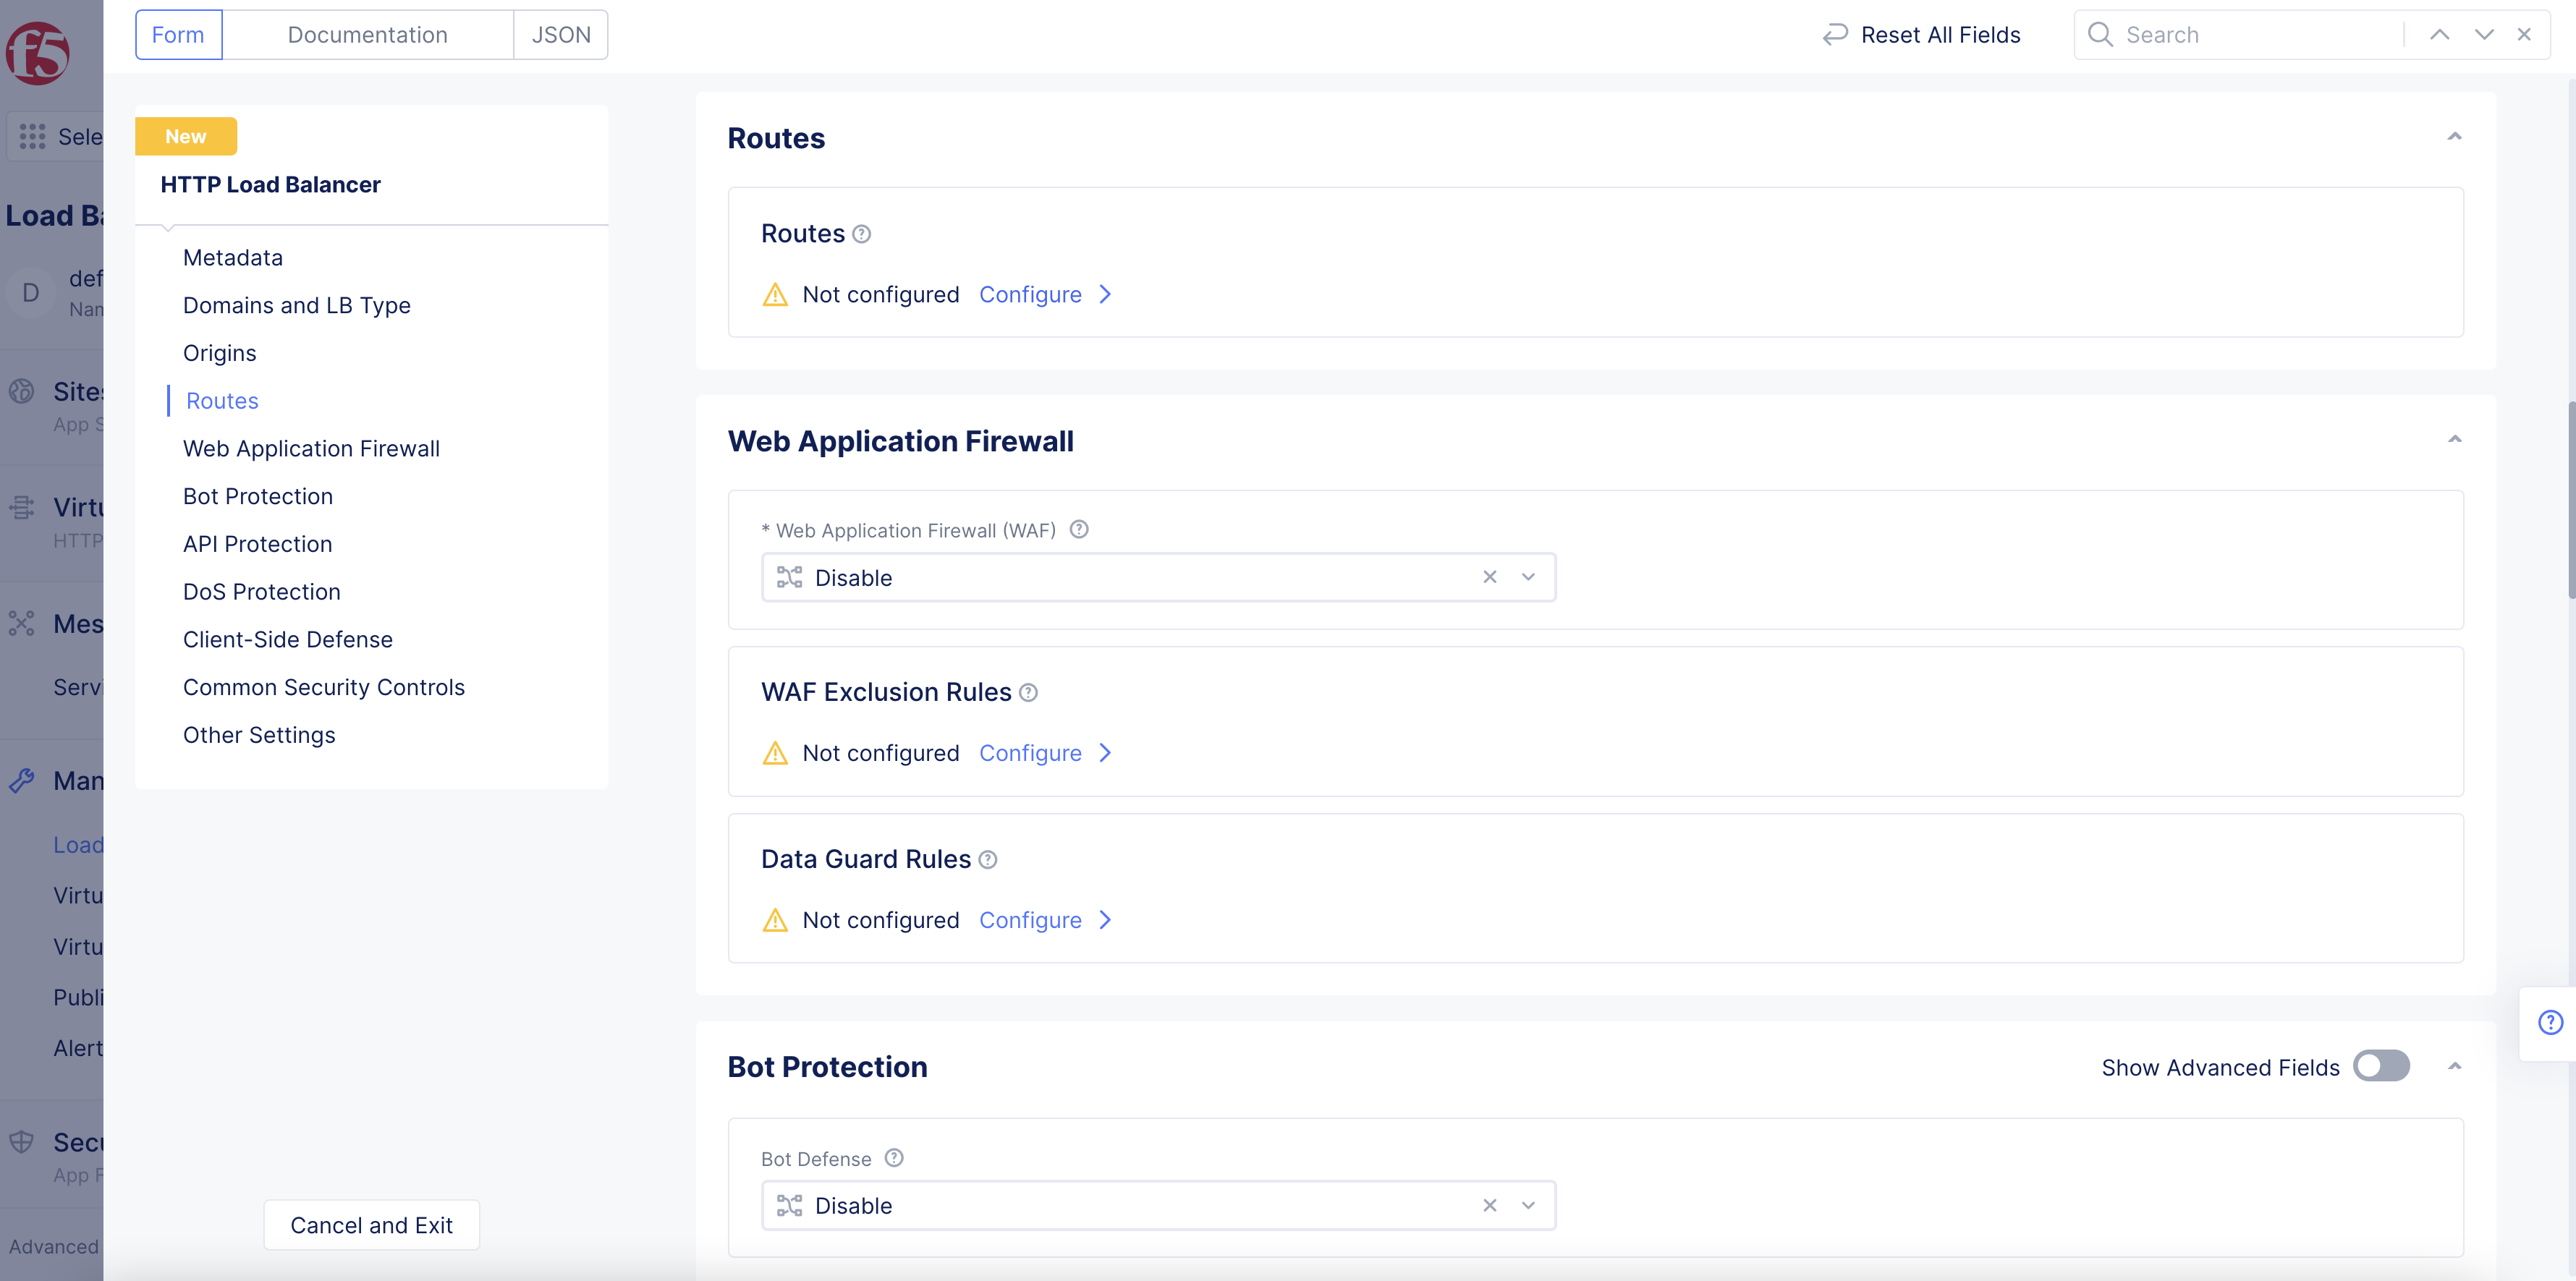
Figure: Route Configuration
- In the
Advanced Optionsfield, clickConfigure.
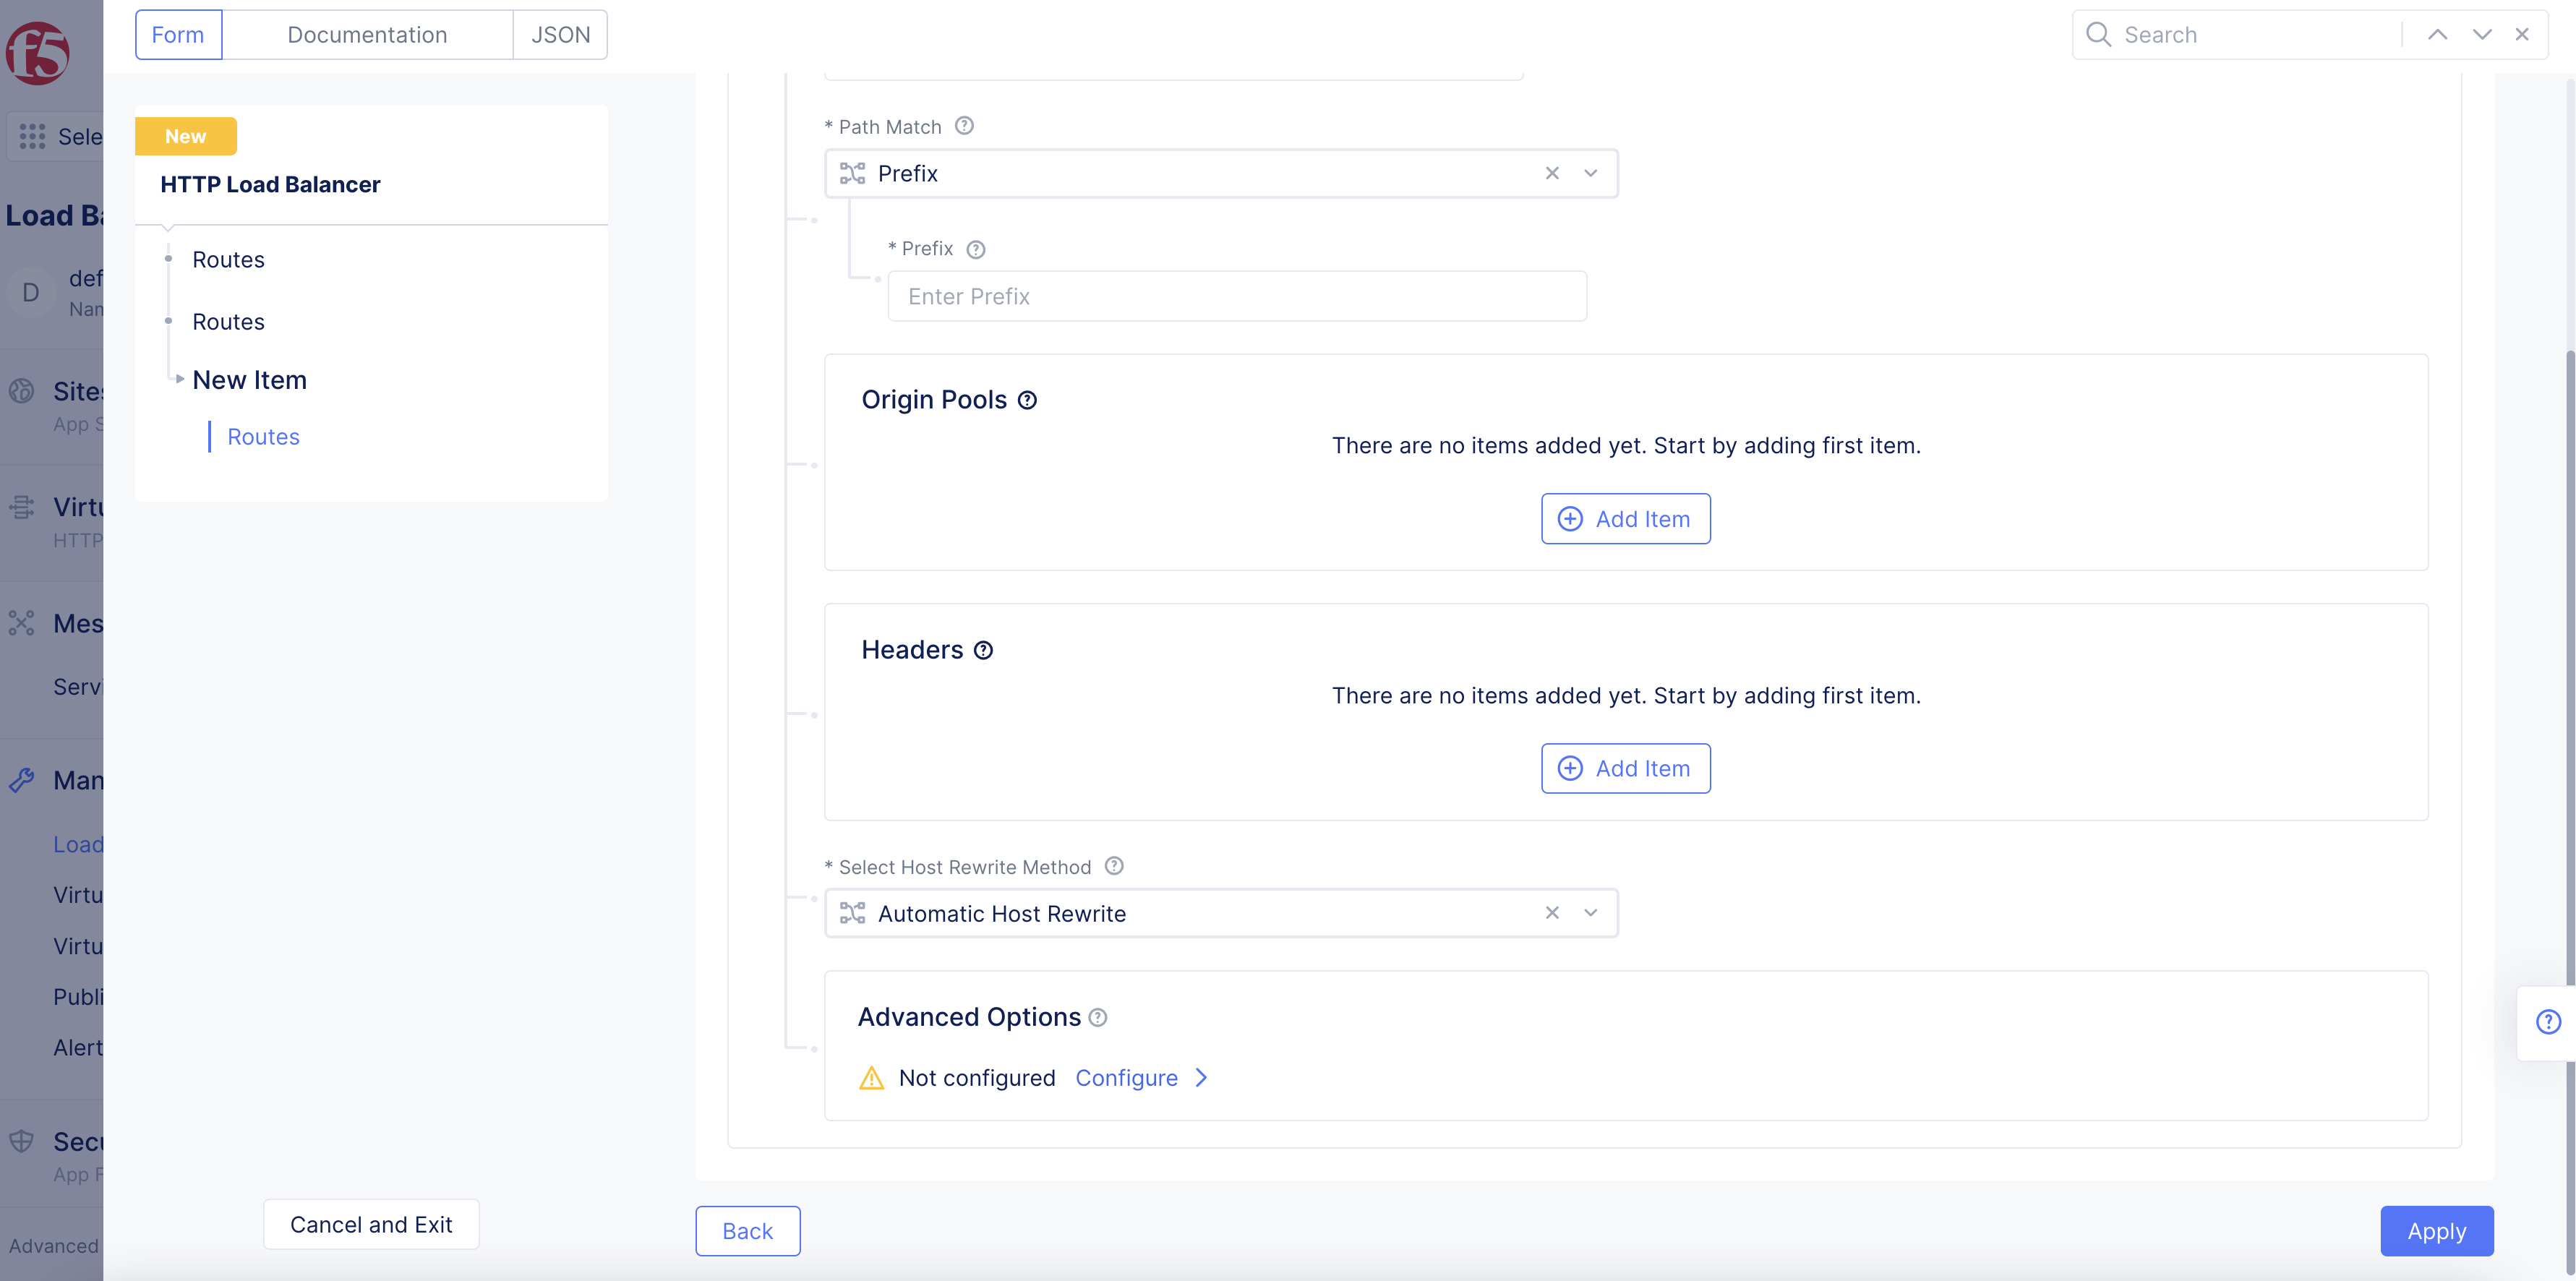
Figure: Route Advanced Options
-
In the
Securitysection, perform the following:- From the
Web Application Firewall (WAF)drop-down menu, selectApp Firewall.
- From the
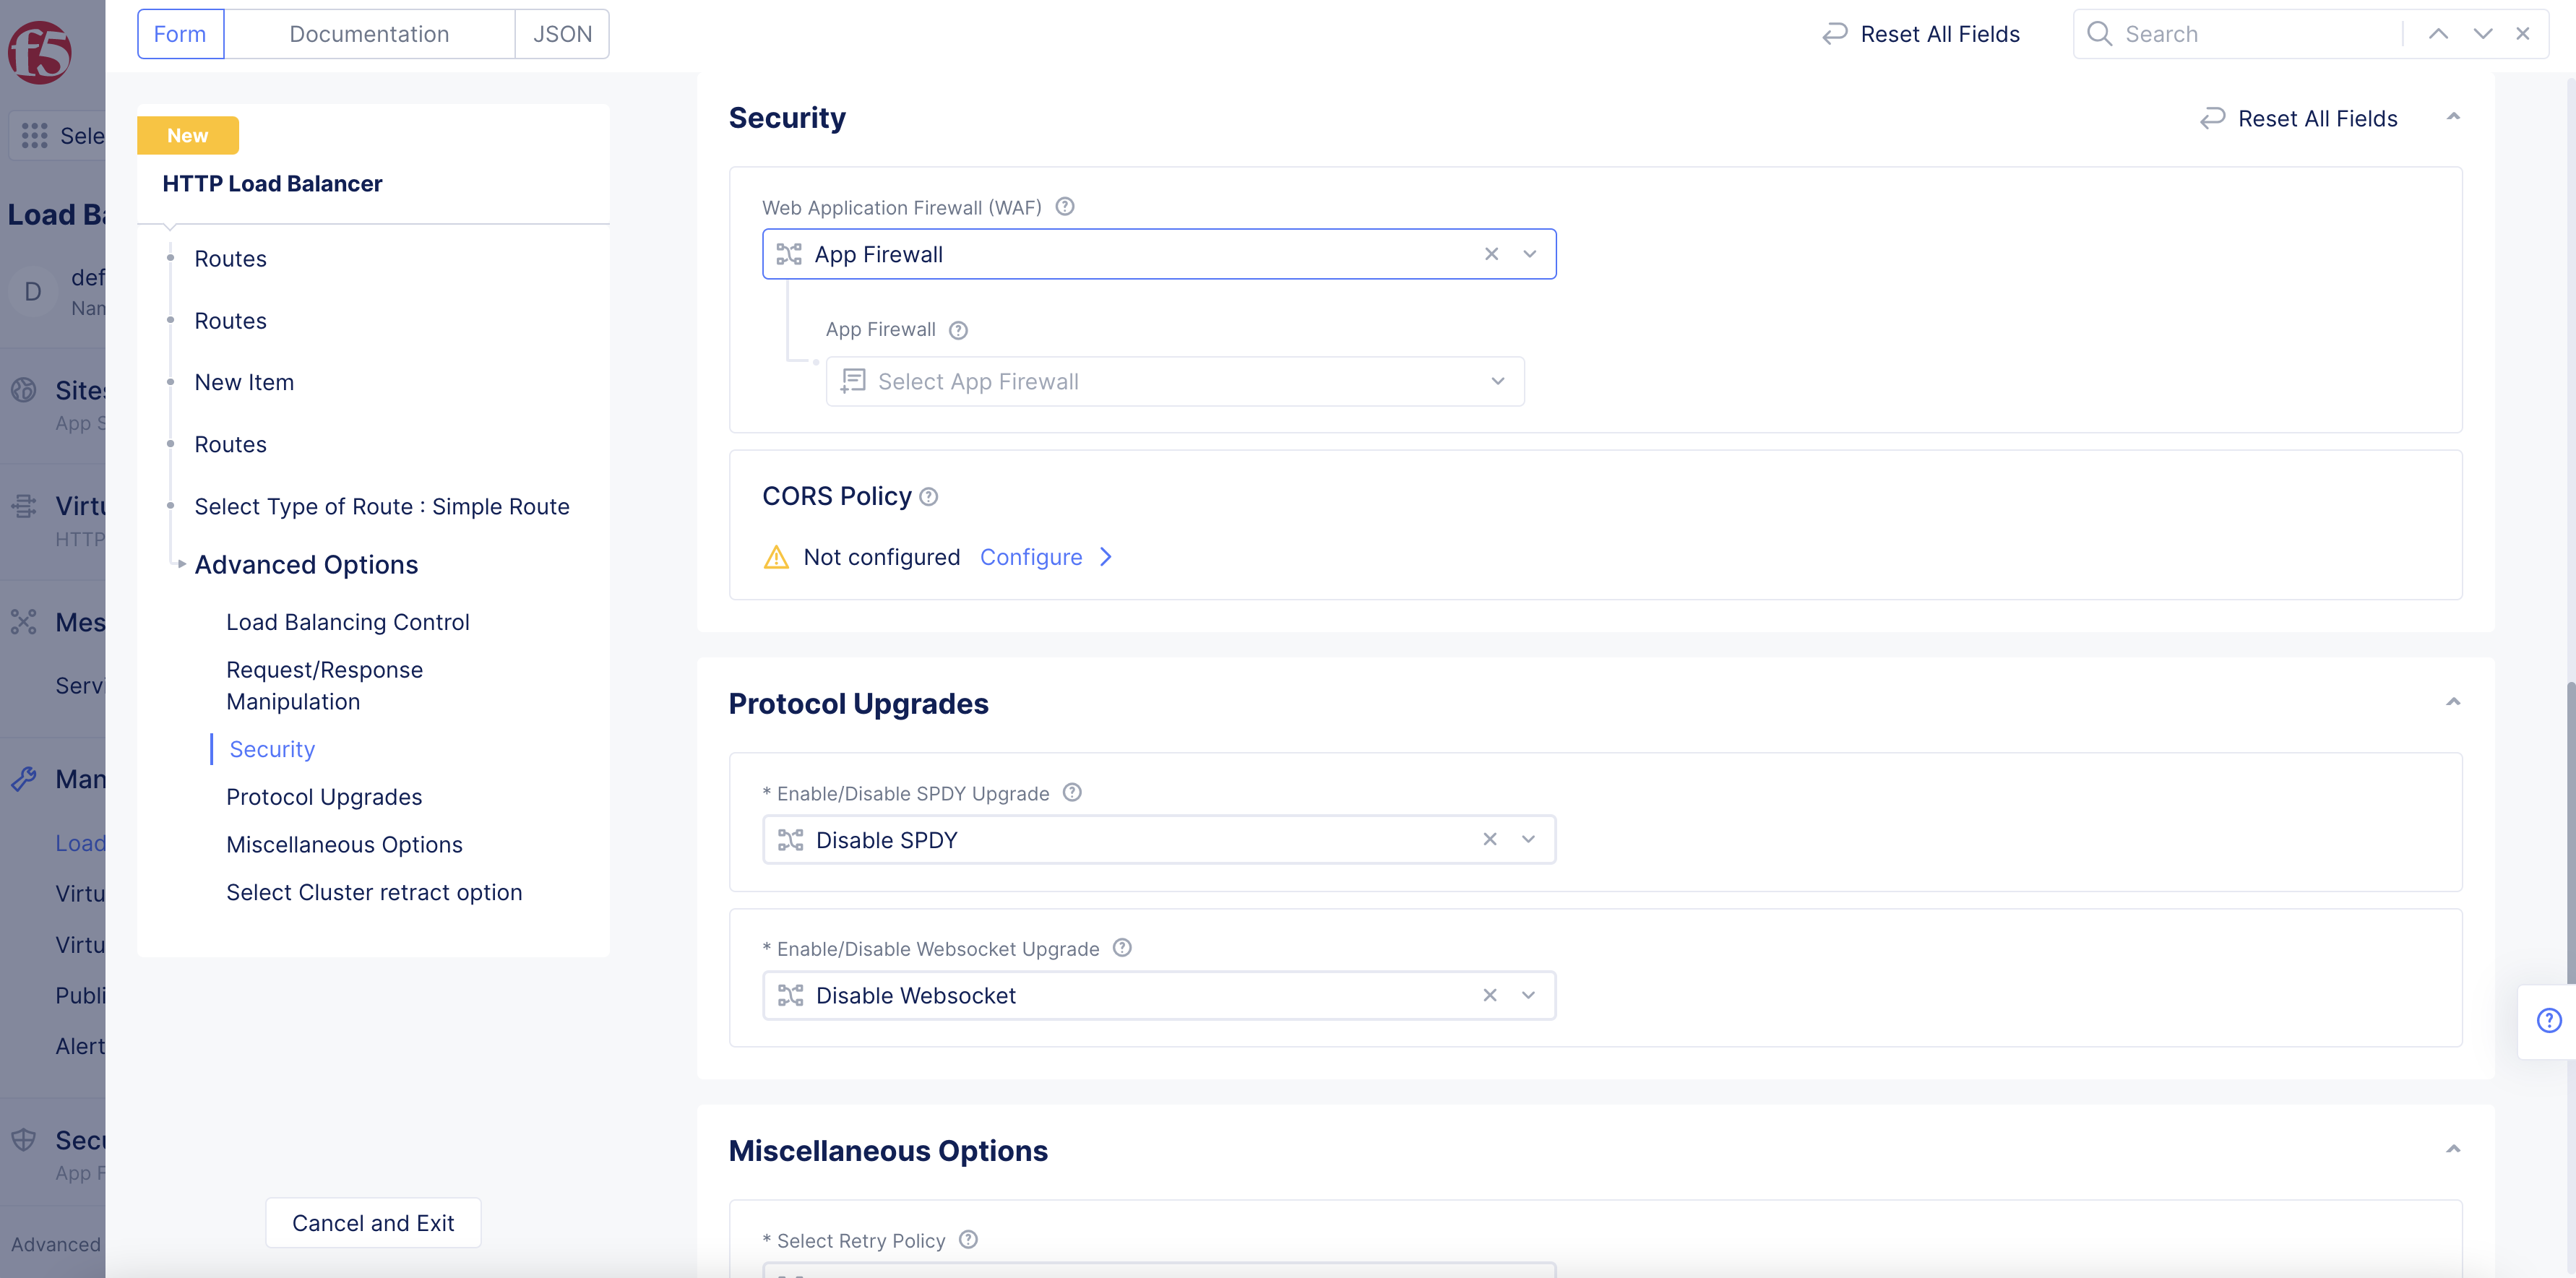
Figure: Select WAF Option
- From the
App Firewalldrop-down menu, select the WAF policy for the route you configured.
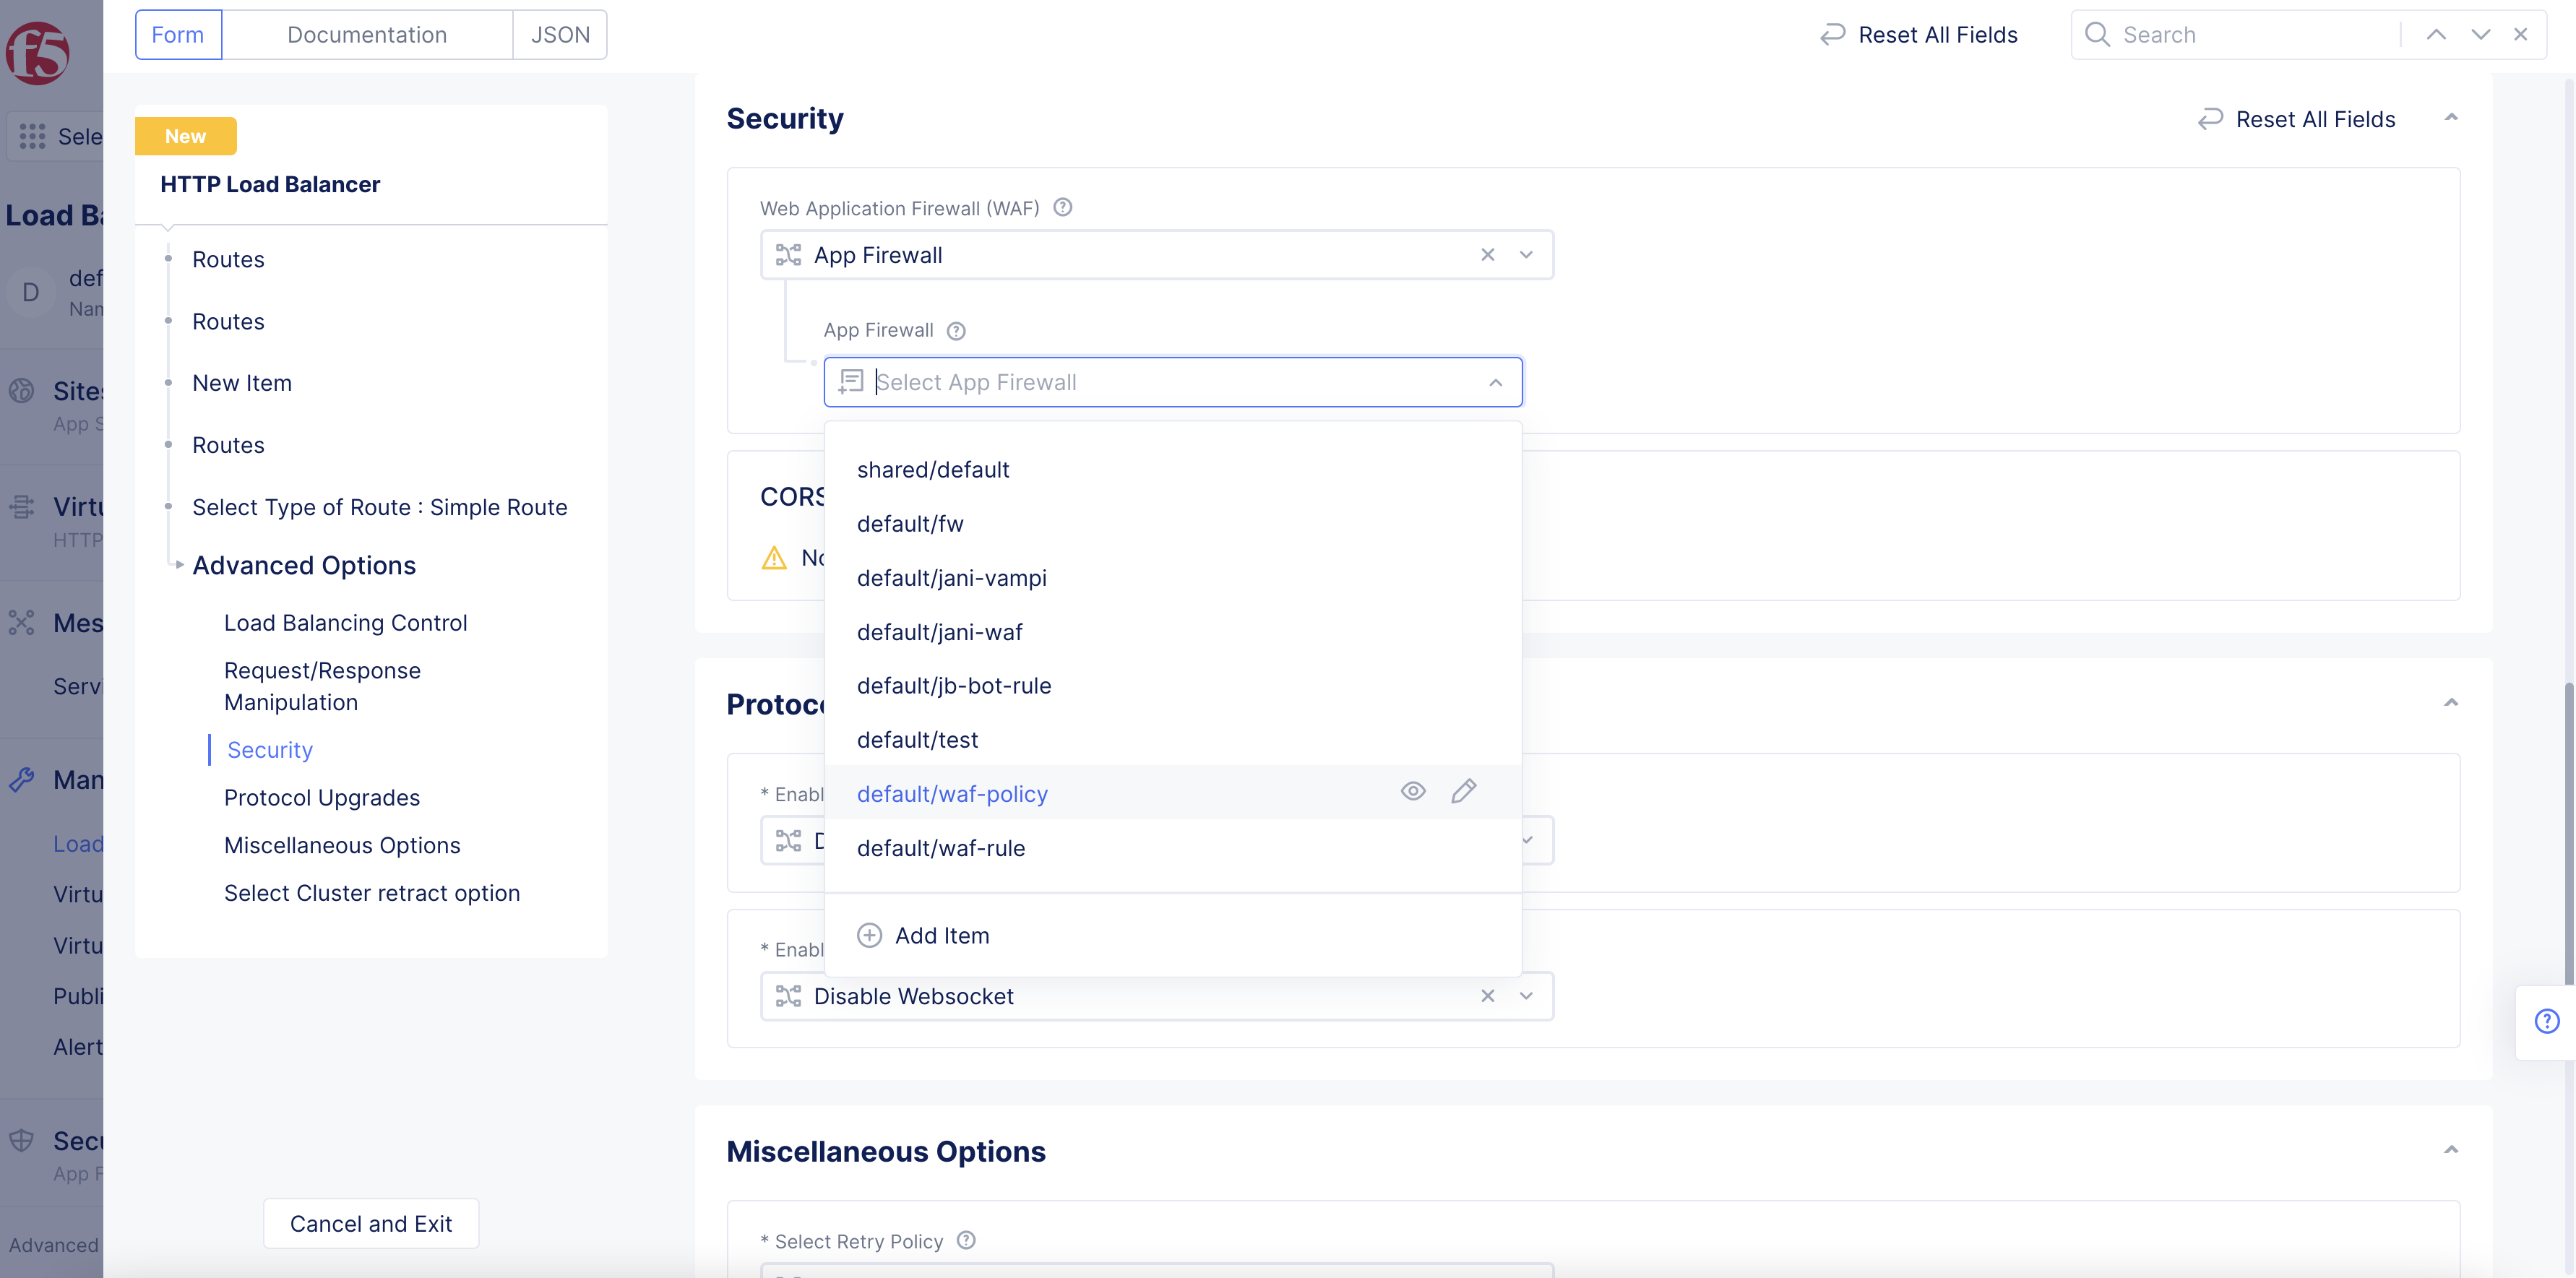
Figure: Select WAF Option For Route
-
Select
Apply. -
Select
Applyto complete route configuration. -
Select
Applyto close the route configuration form.
Step 4: Save settings.
Click Save and Exit.
Configure Data Guard
Data Guard prevents HTTP/HTTPS responses from exposing sensitive information, like credit card numbers and social security numbers, by masking the data. If an application leaks this sensitive data in the HTTP/HTTPS responses, then Data Guard will mask that data with a string of asterisks (*). You can configure and enable the Data Guard feature on your WAF using rules. You can have the Data Guard rules set to apply or skip processing for the criteria configured in the rules.
Step 1: Confirm WAF enabled on load balancer.
Confirm that the Enable option is set in the load balancer configuration.
Figure: WAF Enabled on Load Balancer
Step 2: Configure Data Guard rules.
-
Under the
Data Guard Rulesfield, clickConfigure. -
Click
Add Item.
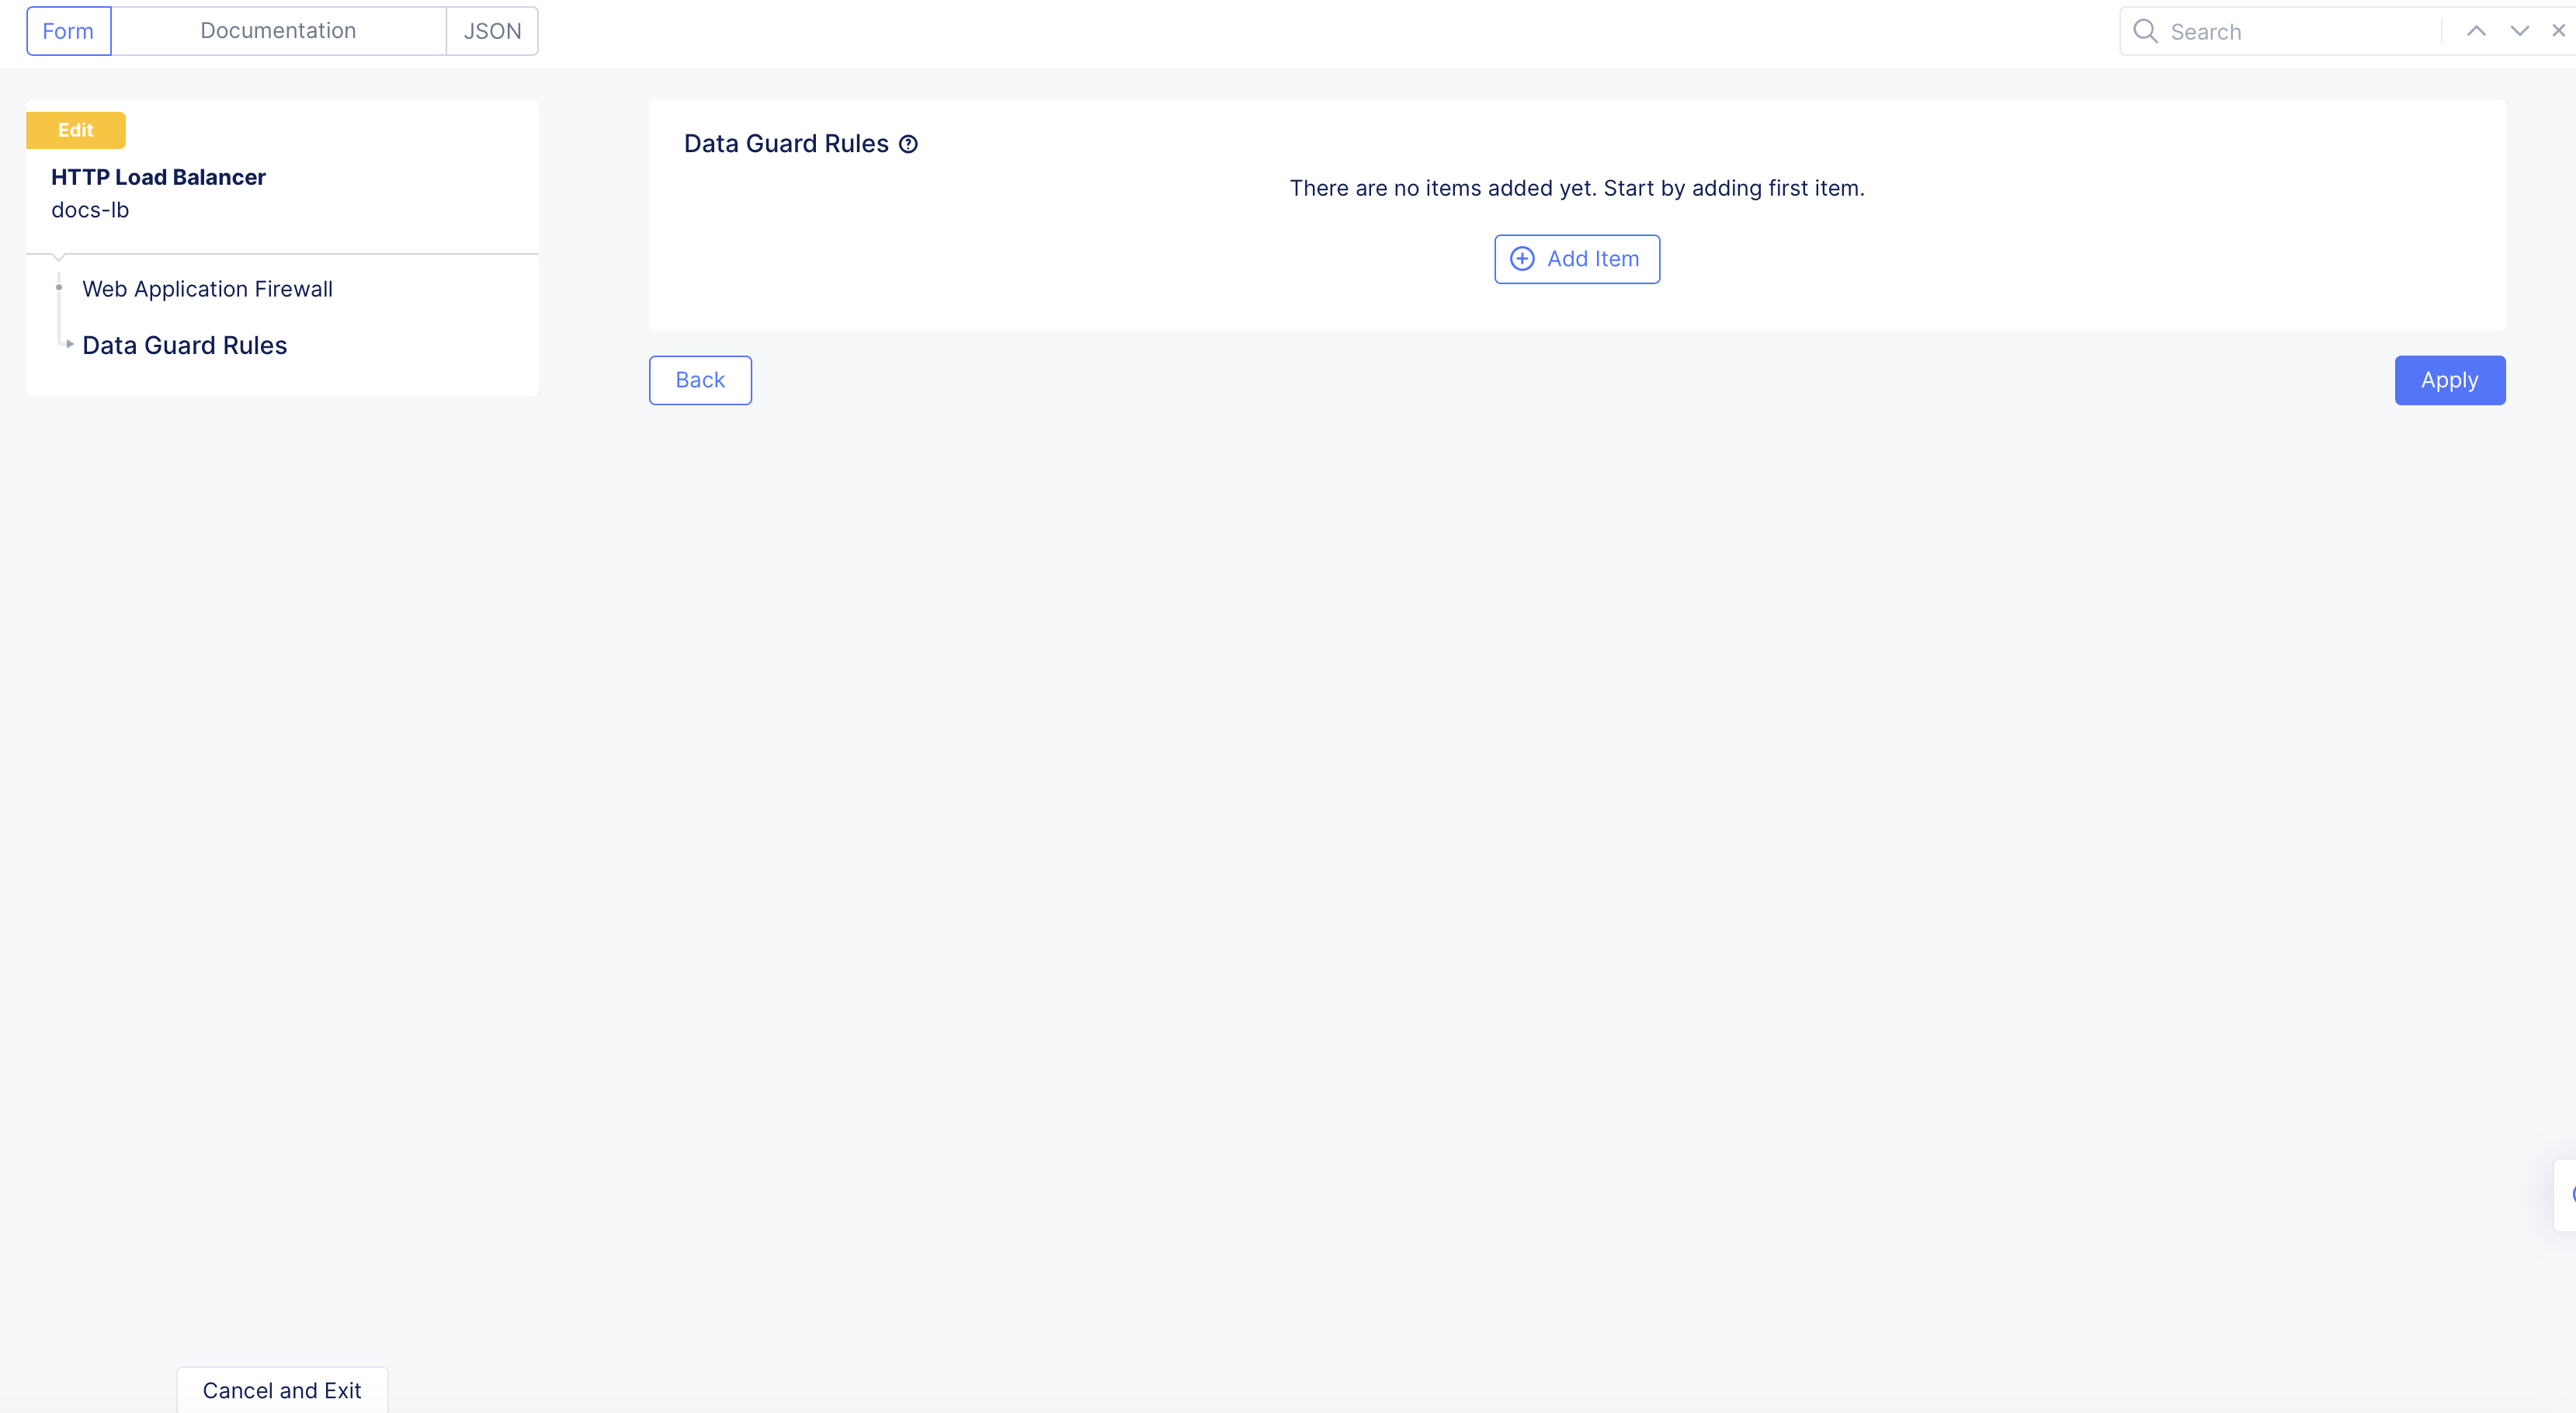
Figure: Add Item
-
In the
Namefield, add a name for this match rule. -
From the
Actionmenu, select an option for Data Guard to take if the request matches the domain and path configured from theDomainandPath Matchmenus below, respectively:-
Apply: Applies Data Guard processing for the matching criteria. -
Skip: Skips Data Guard processing for the matching criteria.
-
-
From the
Domainmenu, select whether the request is from any domain, an exact domain, or domains with suffixes. -
From the
Path Matchmenu, select an option:-
Prefix: Match paths using a prefix. -
Path: Match an exact path. -
Regex: Match paths using regular expressions (regex).
-
-
Click
Add Item.
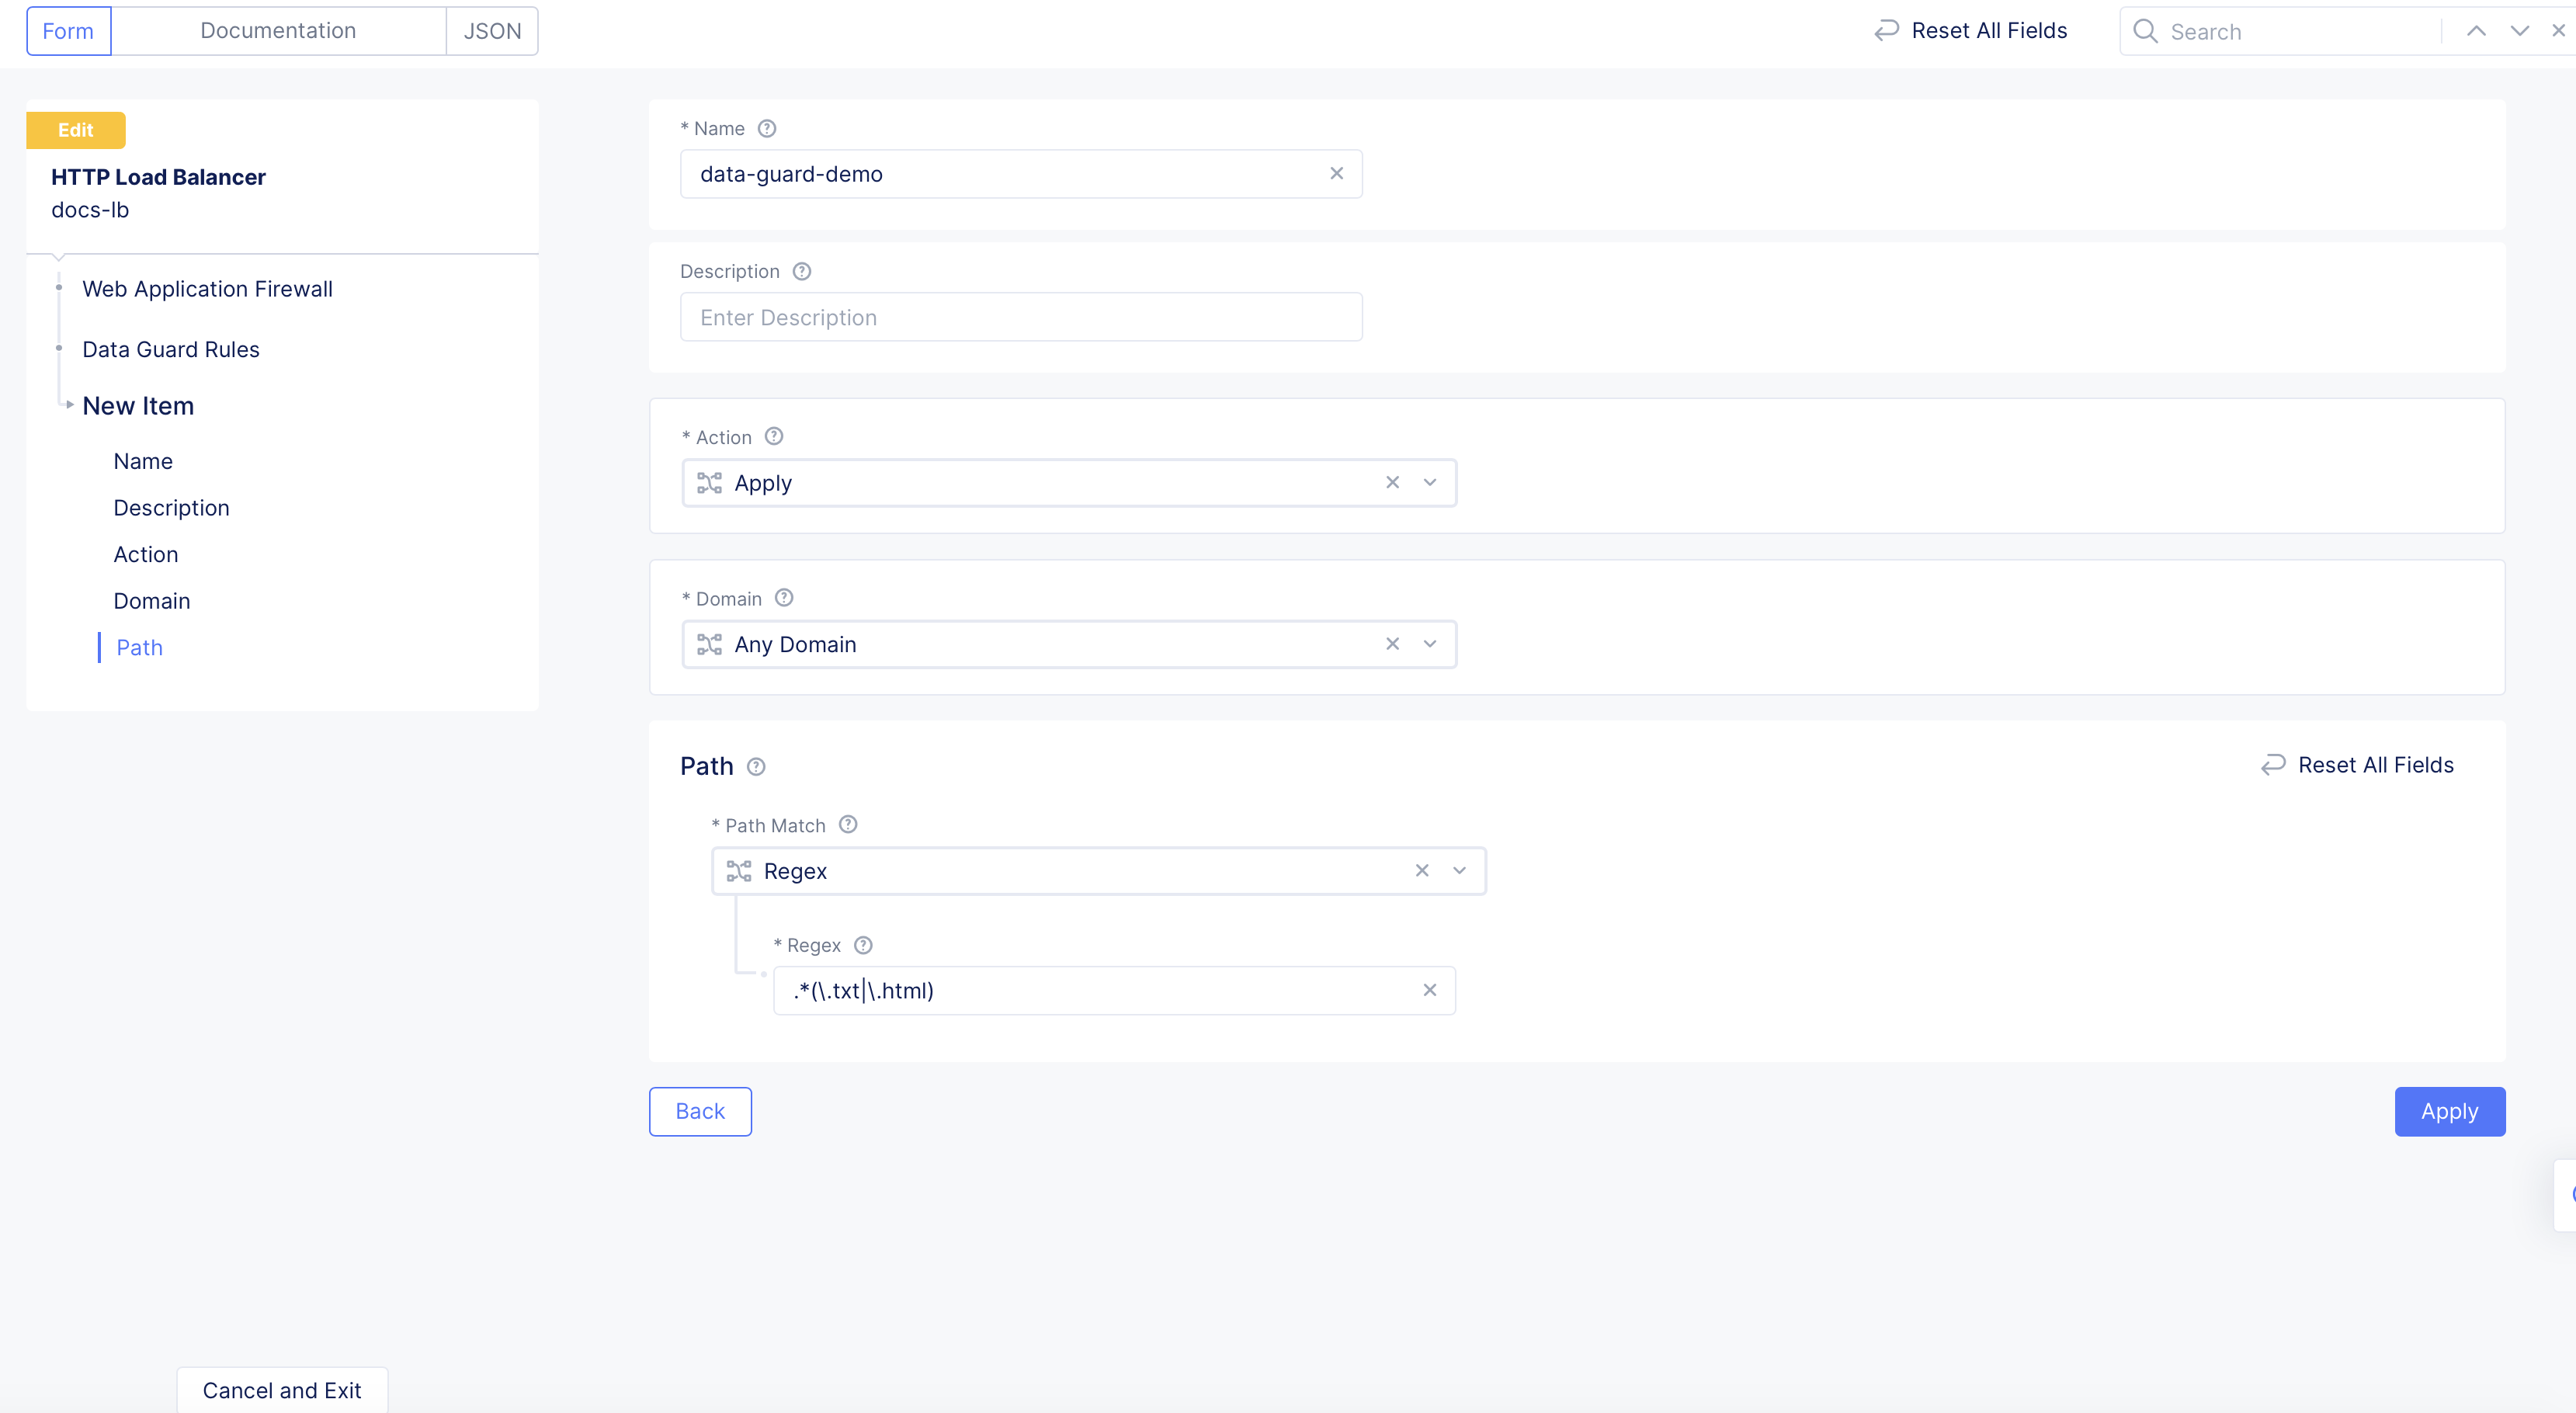
Figure: Add Data Guard Rules
Step 3: Apply Data Guard rules.
Click Apply.
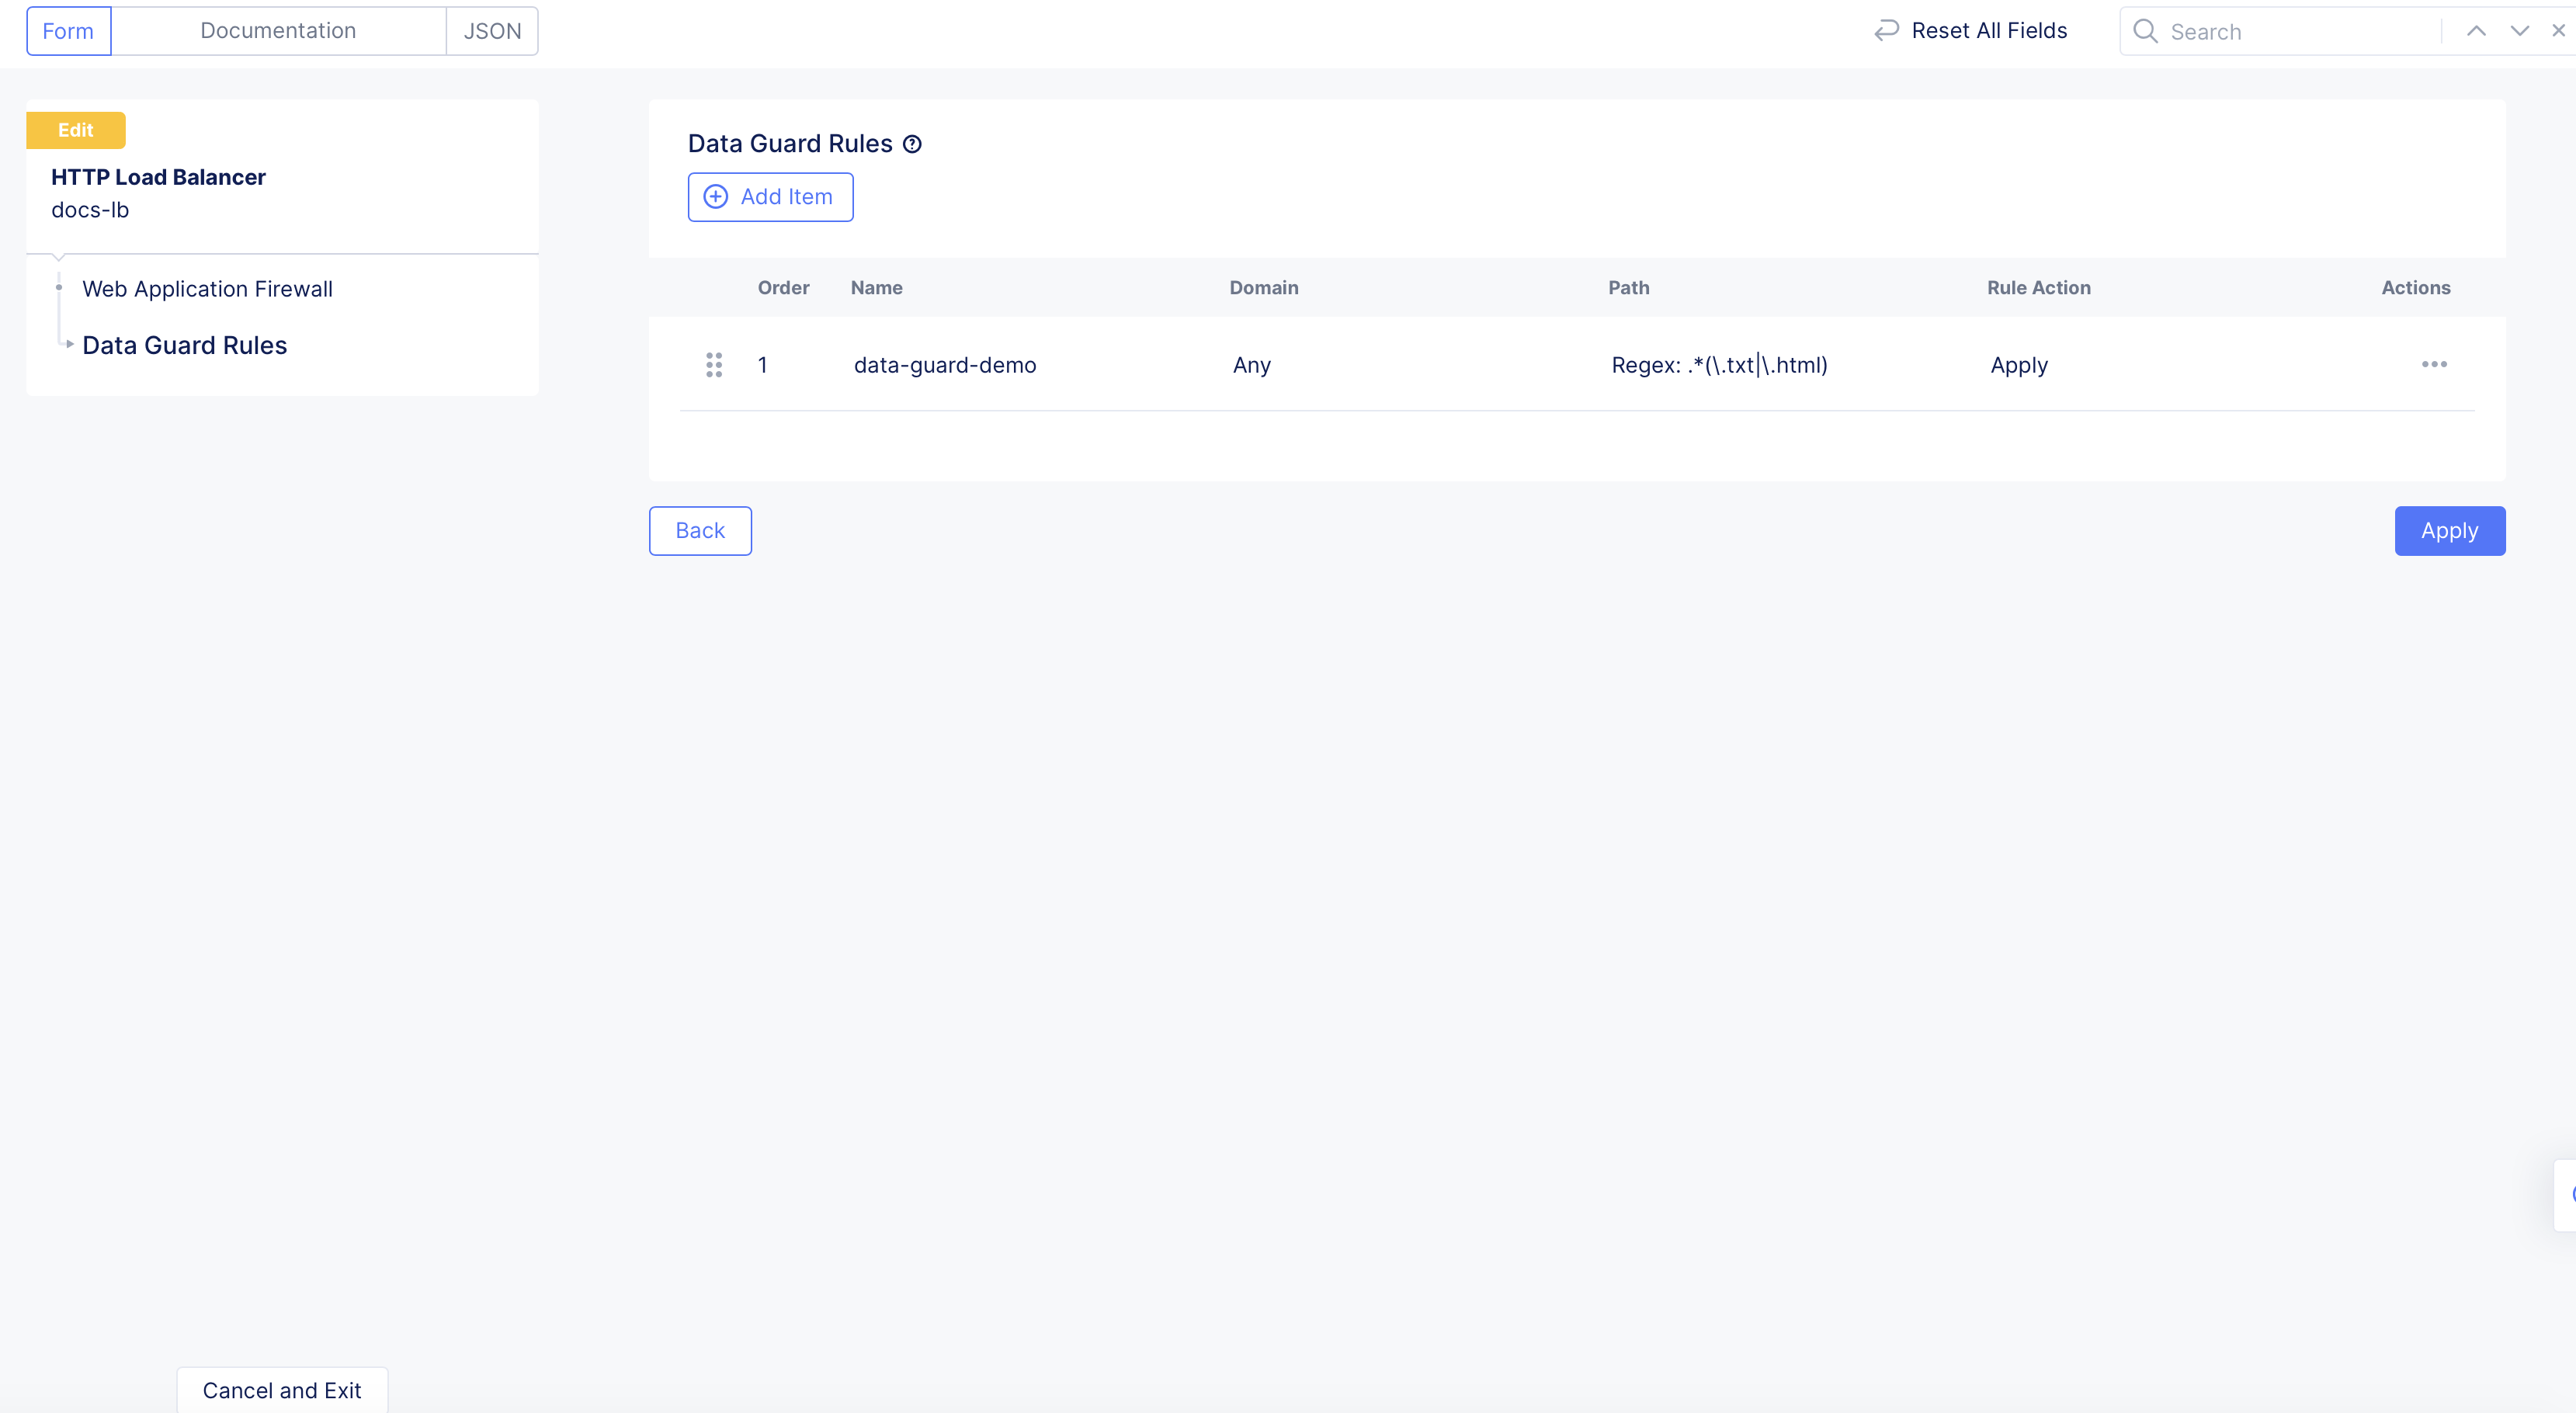
Figure: Apply Data Guard Rules
Create WAF Exclusion Rules
These rules define the signature IDs and violations/attack types that should be excluded from WAF processing on specific match criteria. The specific match criteria include domain, path, and method. If the client request matches on all these criteria, then the WAF will exclude processing for the items configured in the detection control.
The WAF exclusion rules are configured and applied during load balancer configuration.
Note: When creating WAF exclusion rules, you must not create two identical rules that have the same match criteria for easier maintenance. Instead, it is recommended to update an existing rule.
For the Signature IDs, enter a signature ID to exclude from WAF processing. You can also supply a context to it by selecting a context from the Context drop-down and specifying a value in the Context Name field. Use the Add Item button to add more than one entry. Setting Signature ID to 0 will skip all the signature checks for the specified context.
Step 1: Build a custom rule list.
-
From the Console homepage, click
Multi-Cloud App Connect. -
Select
Manage>Load Balancers>HTTP Load Balancers. -
Select the desired namespace.
-
Find your existing load balancer to edit its configuration, or click
Add HTTP load balancerto create a new load balancer. -
Go to
Web Application Firewallsection. Under theWAF Exclusion Rulesfield, clickConfigure. -
Click
Add Item. -
In the
Namefield, enter a name for the WAF exclusion rule. Optionally, add a description. -
From the
Domaindrop-down menu:- Select whether this rule applies to all domains, an exact domain, or a particular domain suffix.
Any Domainis the default value. If you selectExact Value, enter a value in the field provided. If you selectSuffix Value, enter a value with a suffix (for example,xzy.com).
- Select whether this rule applies to all domains, an exact domain, or a particular domain suffix.
-
Configure the
Pathas per the following:- Select
Any Pathto match all paths. - Select
Prefixand enter a prefix value in thePrefixfield to match all paths that have the specified prefix. - Select
Path Regexand in thePath Regexfield, enter a directory path with regular expressions (regex) to match patterns to exclude from WAF processing.
- Select
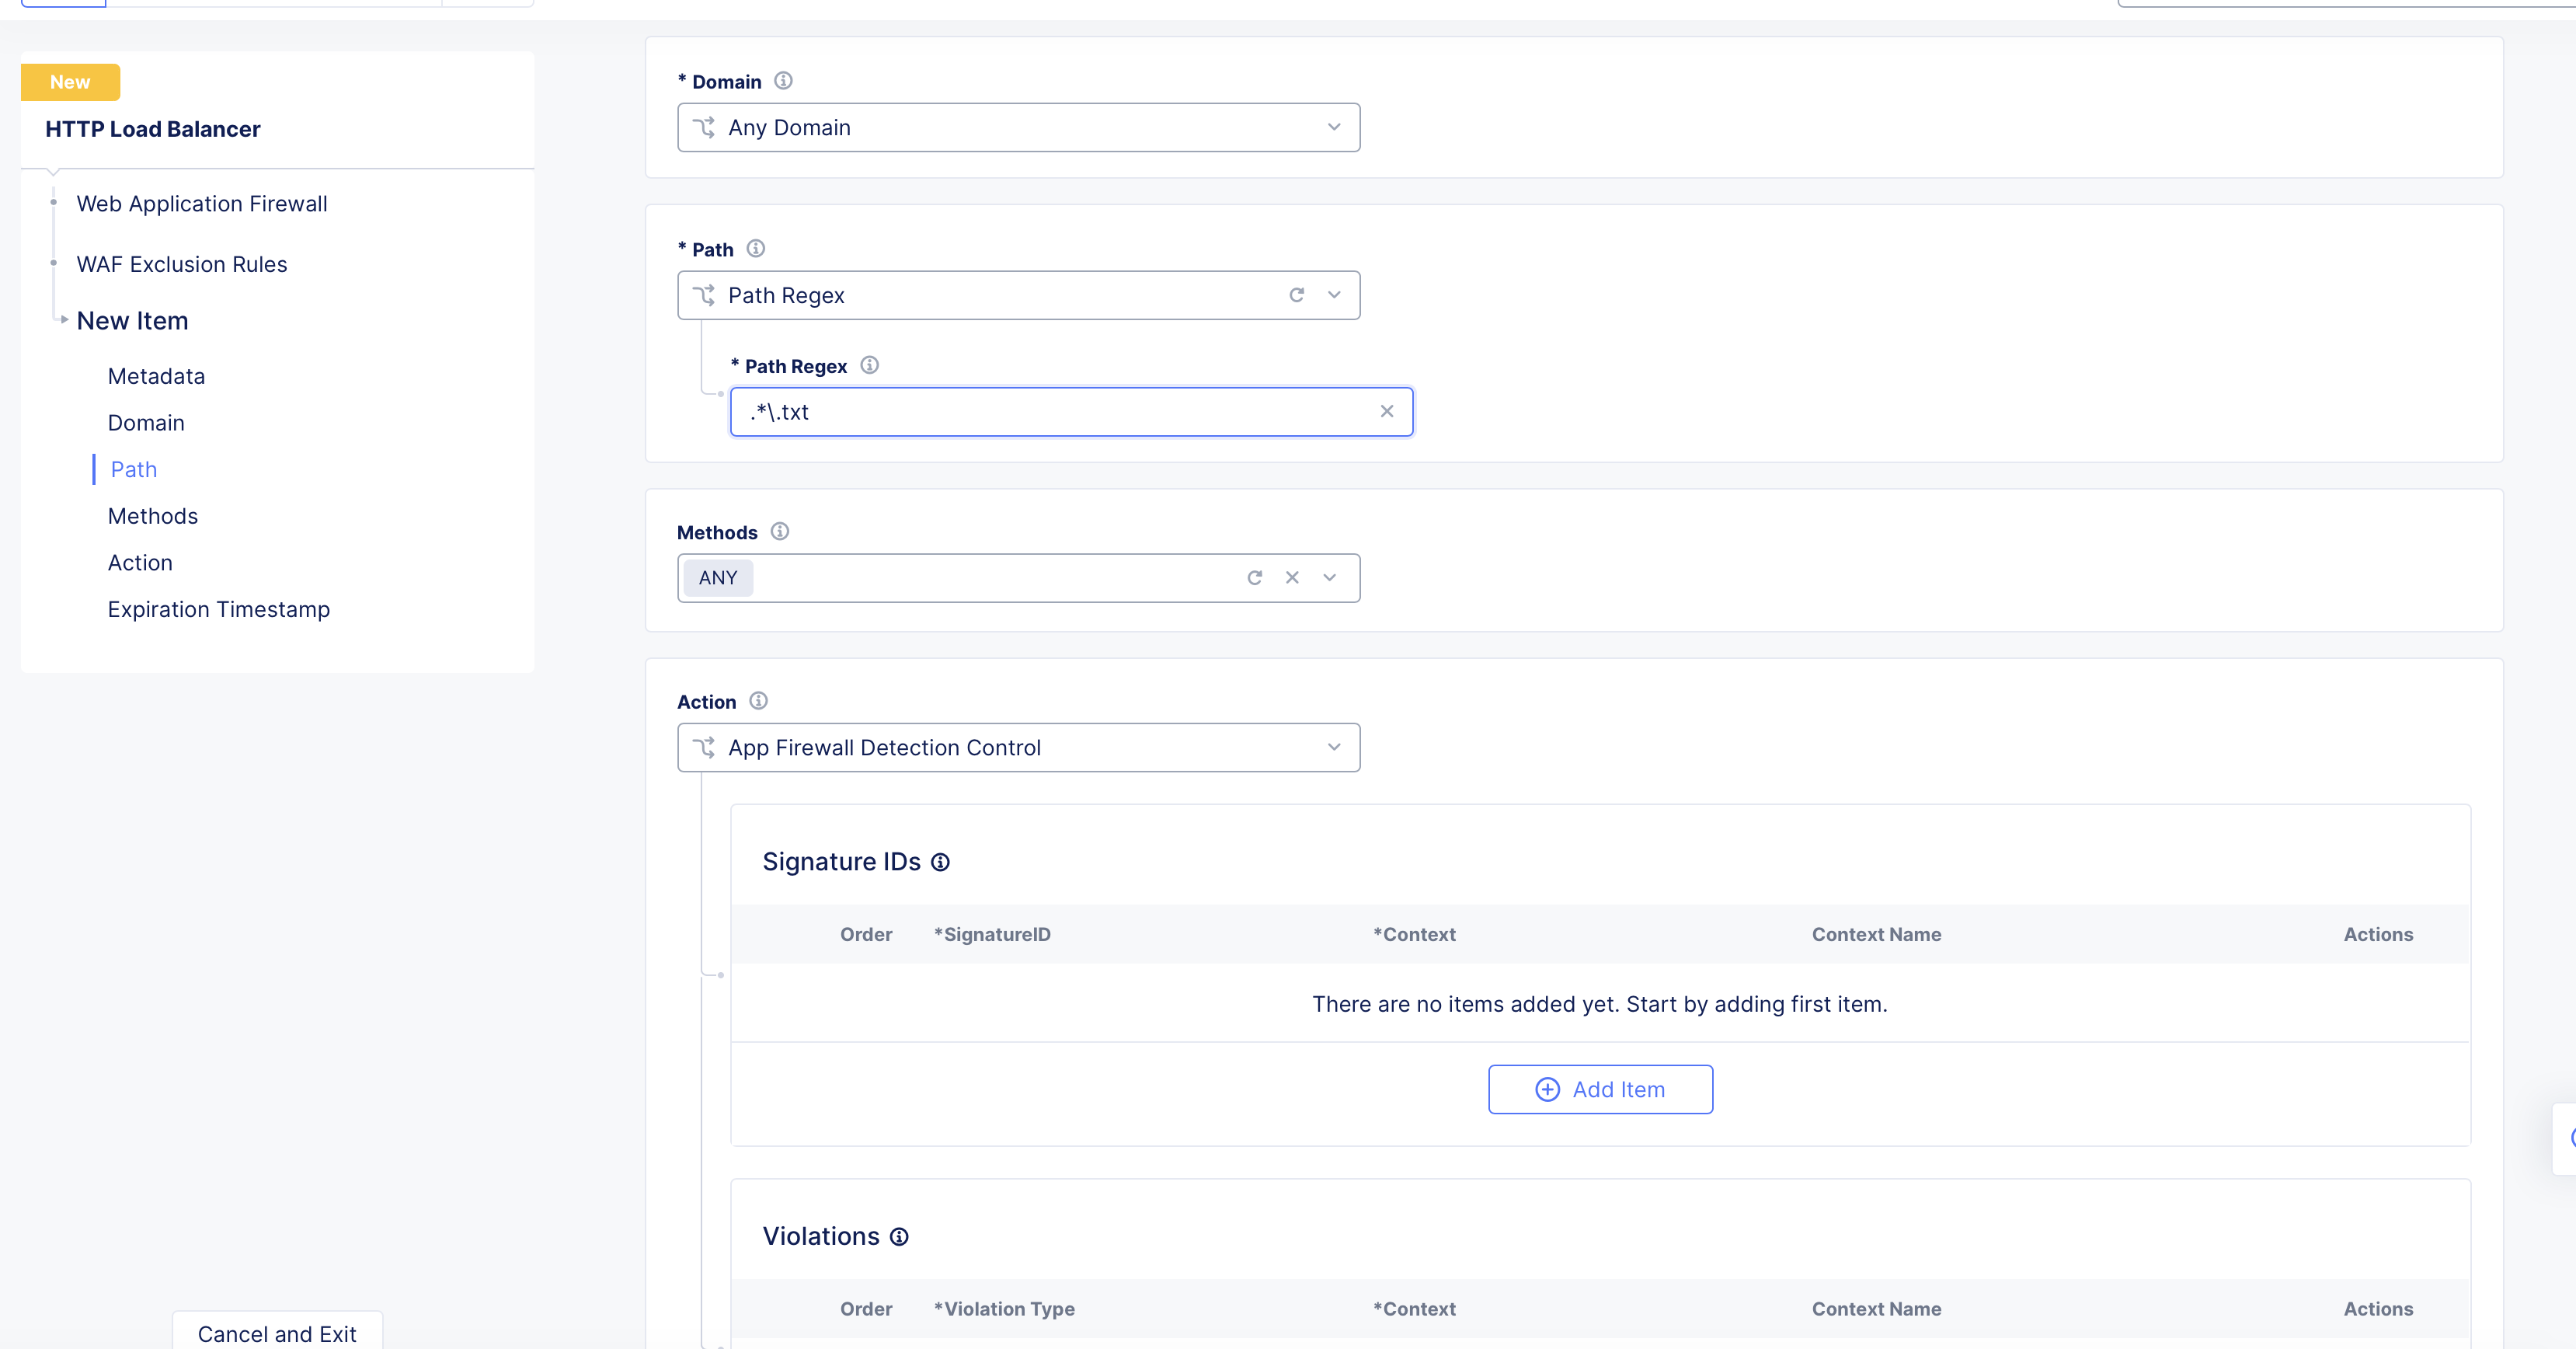
Figure: Match Pattern with Regex
-
Optionally, select request methods to match from the
Methodsmenu. -
Configure detection control from the
Actionsection. SelectSkip App Firewall Processingto skip processing or selectApp Firewall Detection Controland do the following:-
For the
Signature IDs, enter a signature ID to exclude from WAF processing. You can also supply a context to it by selecting a context from theContextdrop-down and specifying a value in theContext Namefield. Use theAdd Itembutton to add more than one entry. -
For the
Violations, select a violation from the menu to exclude from WAF processing. You can also supply a context to it by selecting a context from theContextdrop-down and specifying a value in theContext Namefield. Use theAdd Itembutton to add more than one entry. -
For the
Attack Types, select a type of attack to exclude from WAF processing. Use theAdd Itembutton to add more than one entry. -
For the
Bot Names, enter the name of the bot that should not be affected by the WAF. Use theAdd Itembutton to add more than one entry.
-
-
Enter a timestamp in the
Expiration Timestampfield if you want this rule to stop being used after the entered timestamp expires.
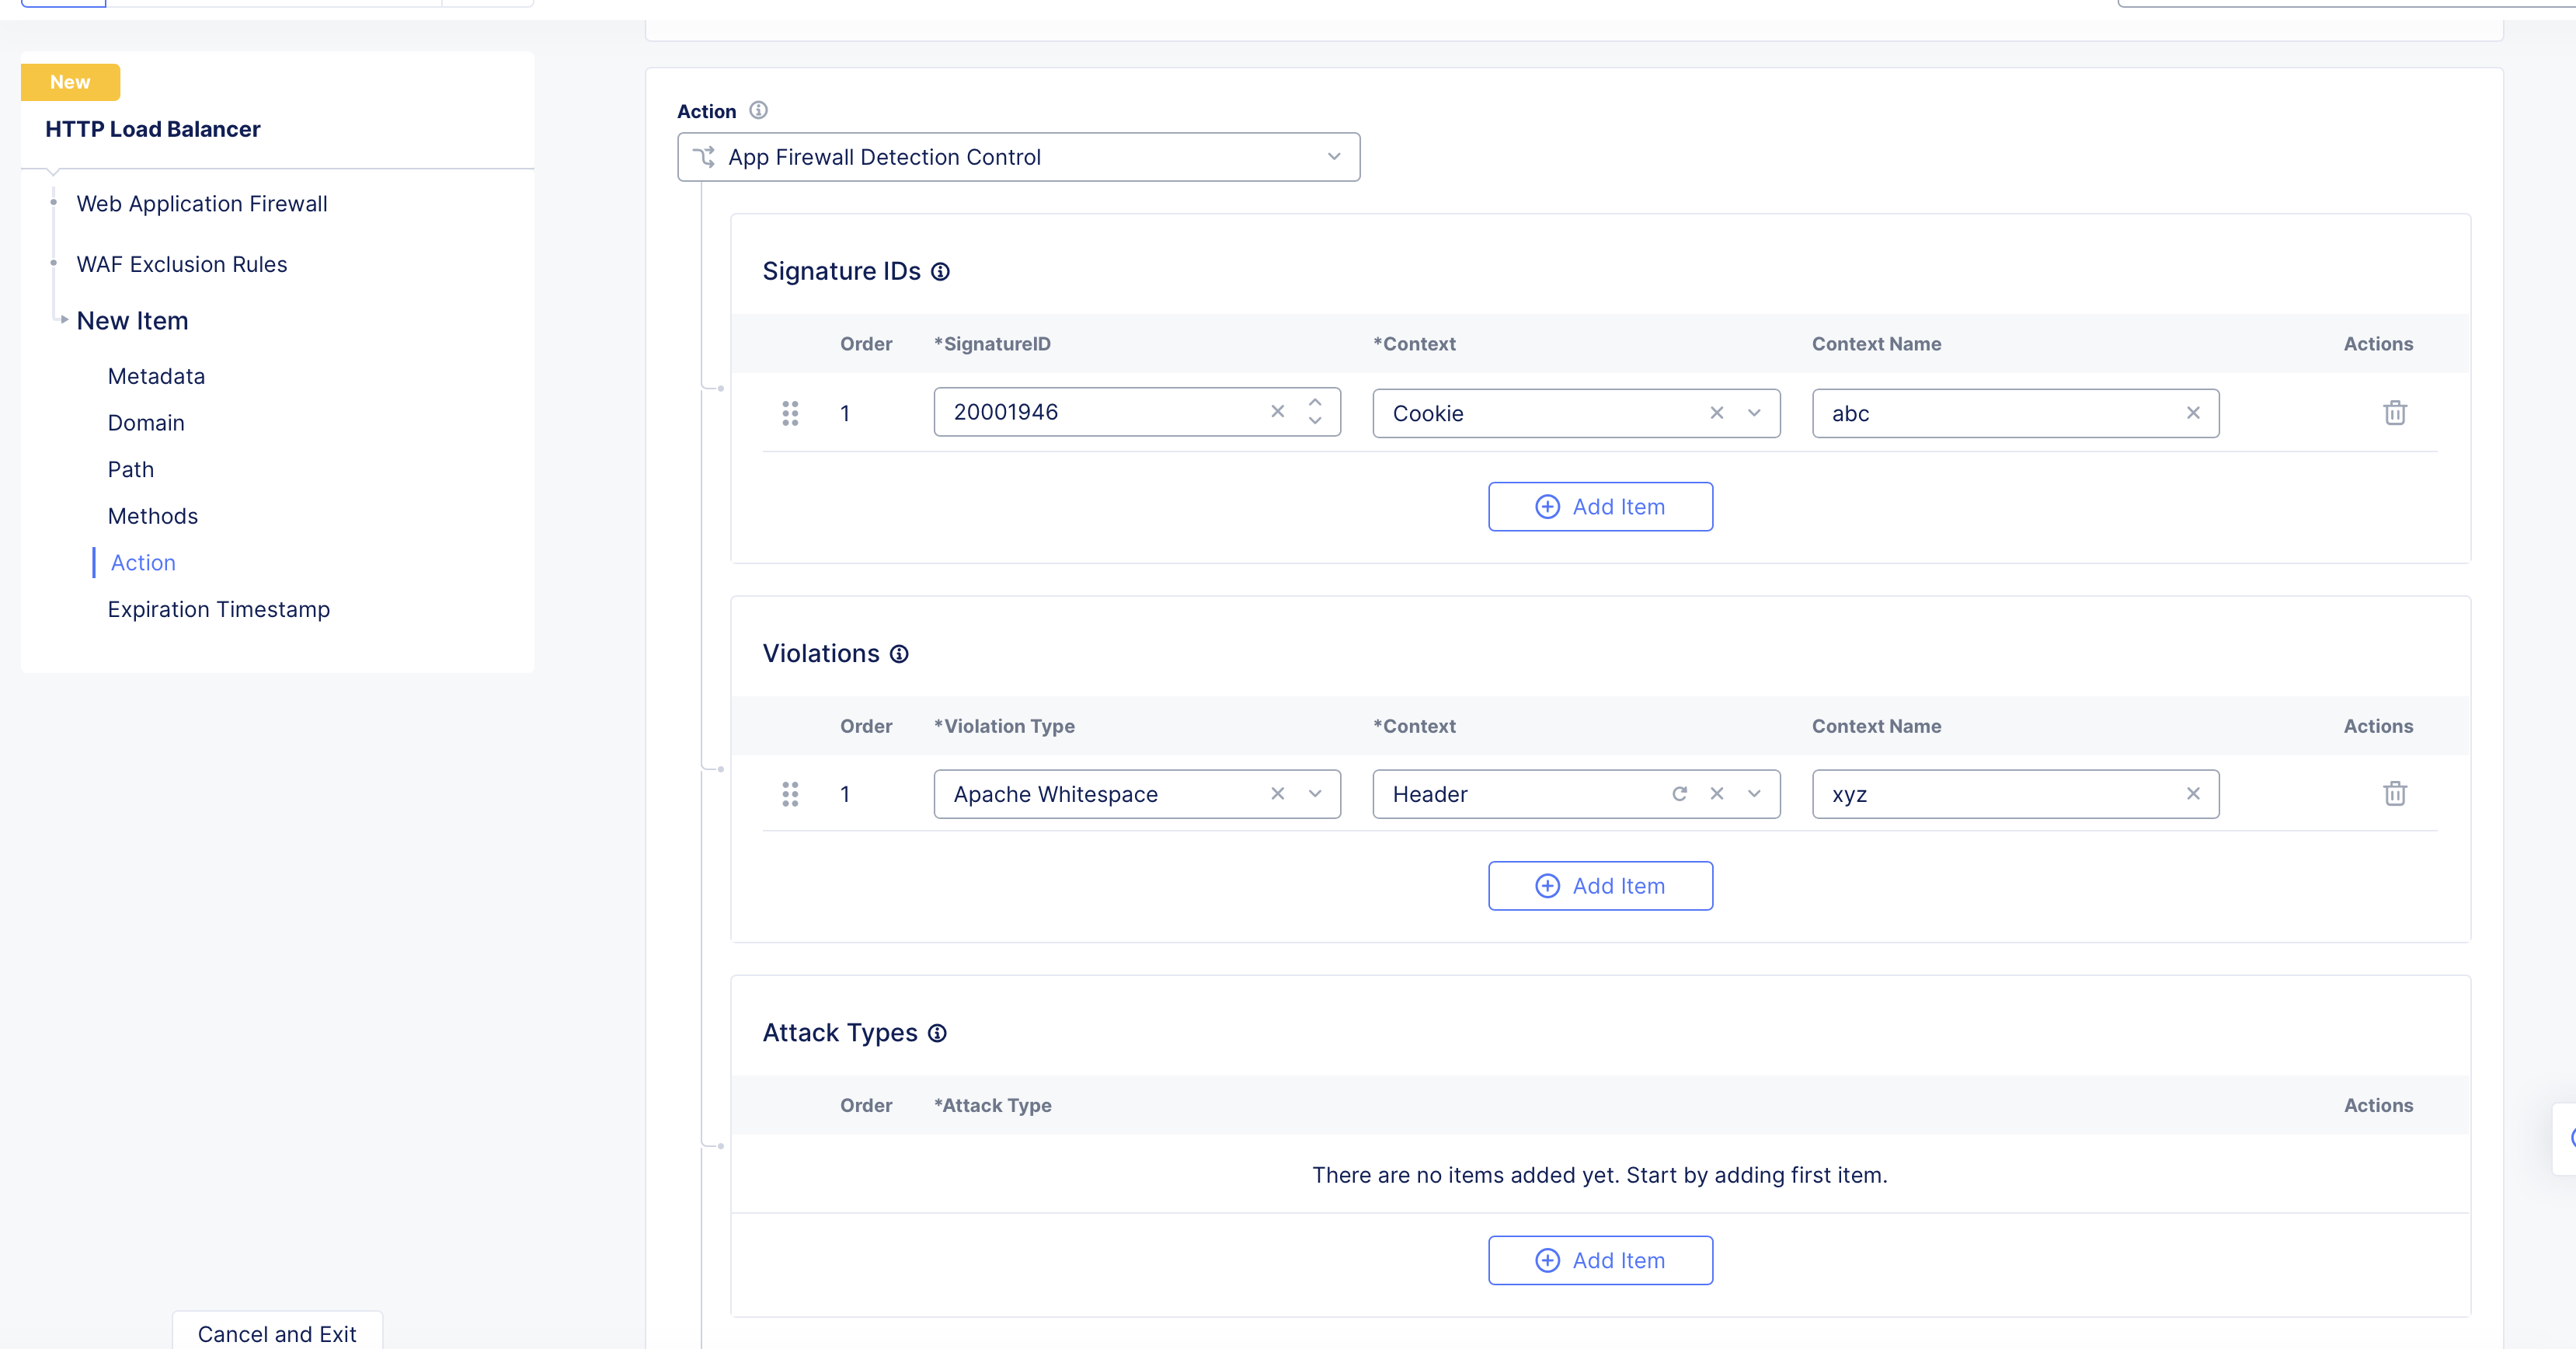
Figure: Match Criteria for WAF Exclusion
Note: You can exclude an attack type instead of excluding individual signatures. If you are excluding a particular attack type, you do not need to add signature IDs that belong to that attack type. When you exclude an attack type, this action automatically excludes all signatures under that attack type.
-
After you finish, click
Add Item. -
Click
Apply.
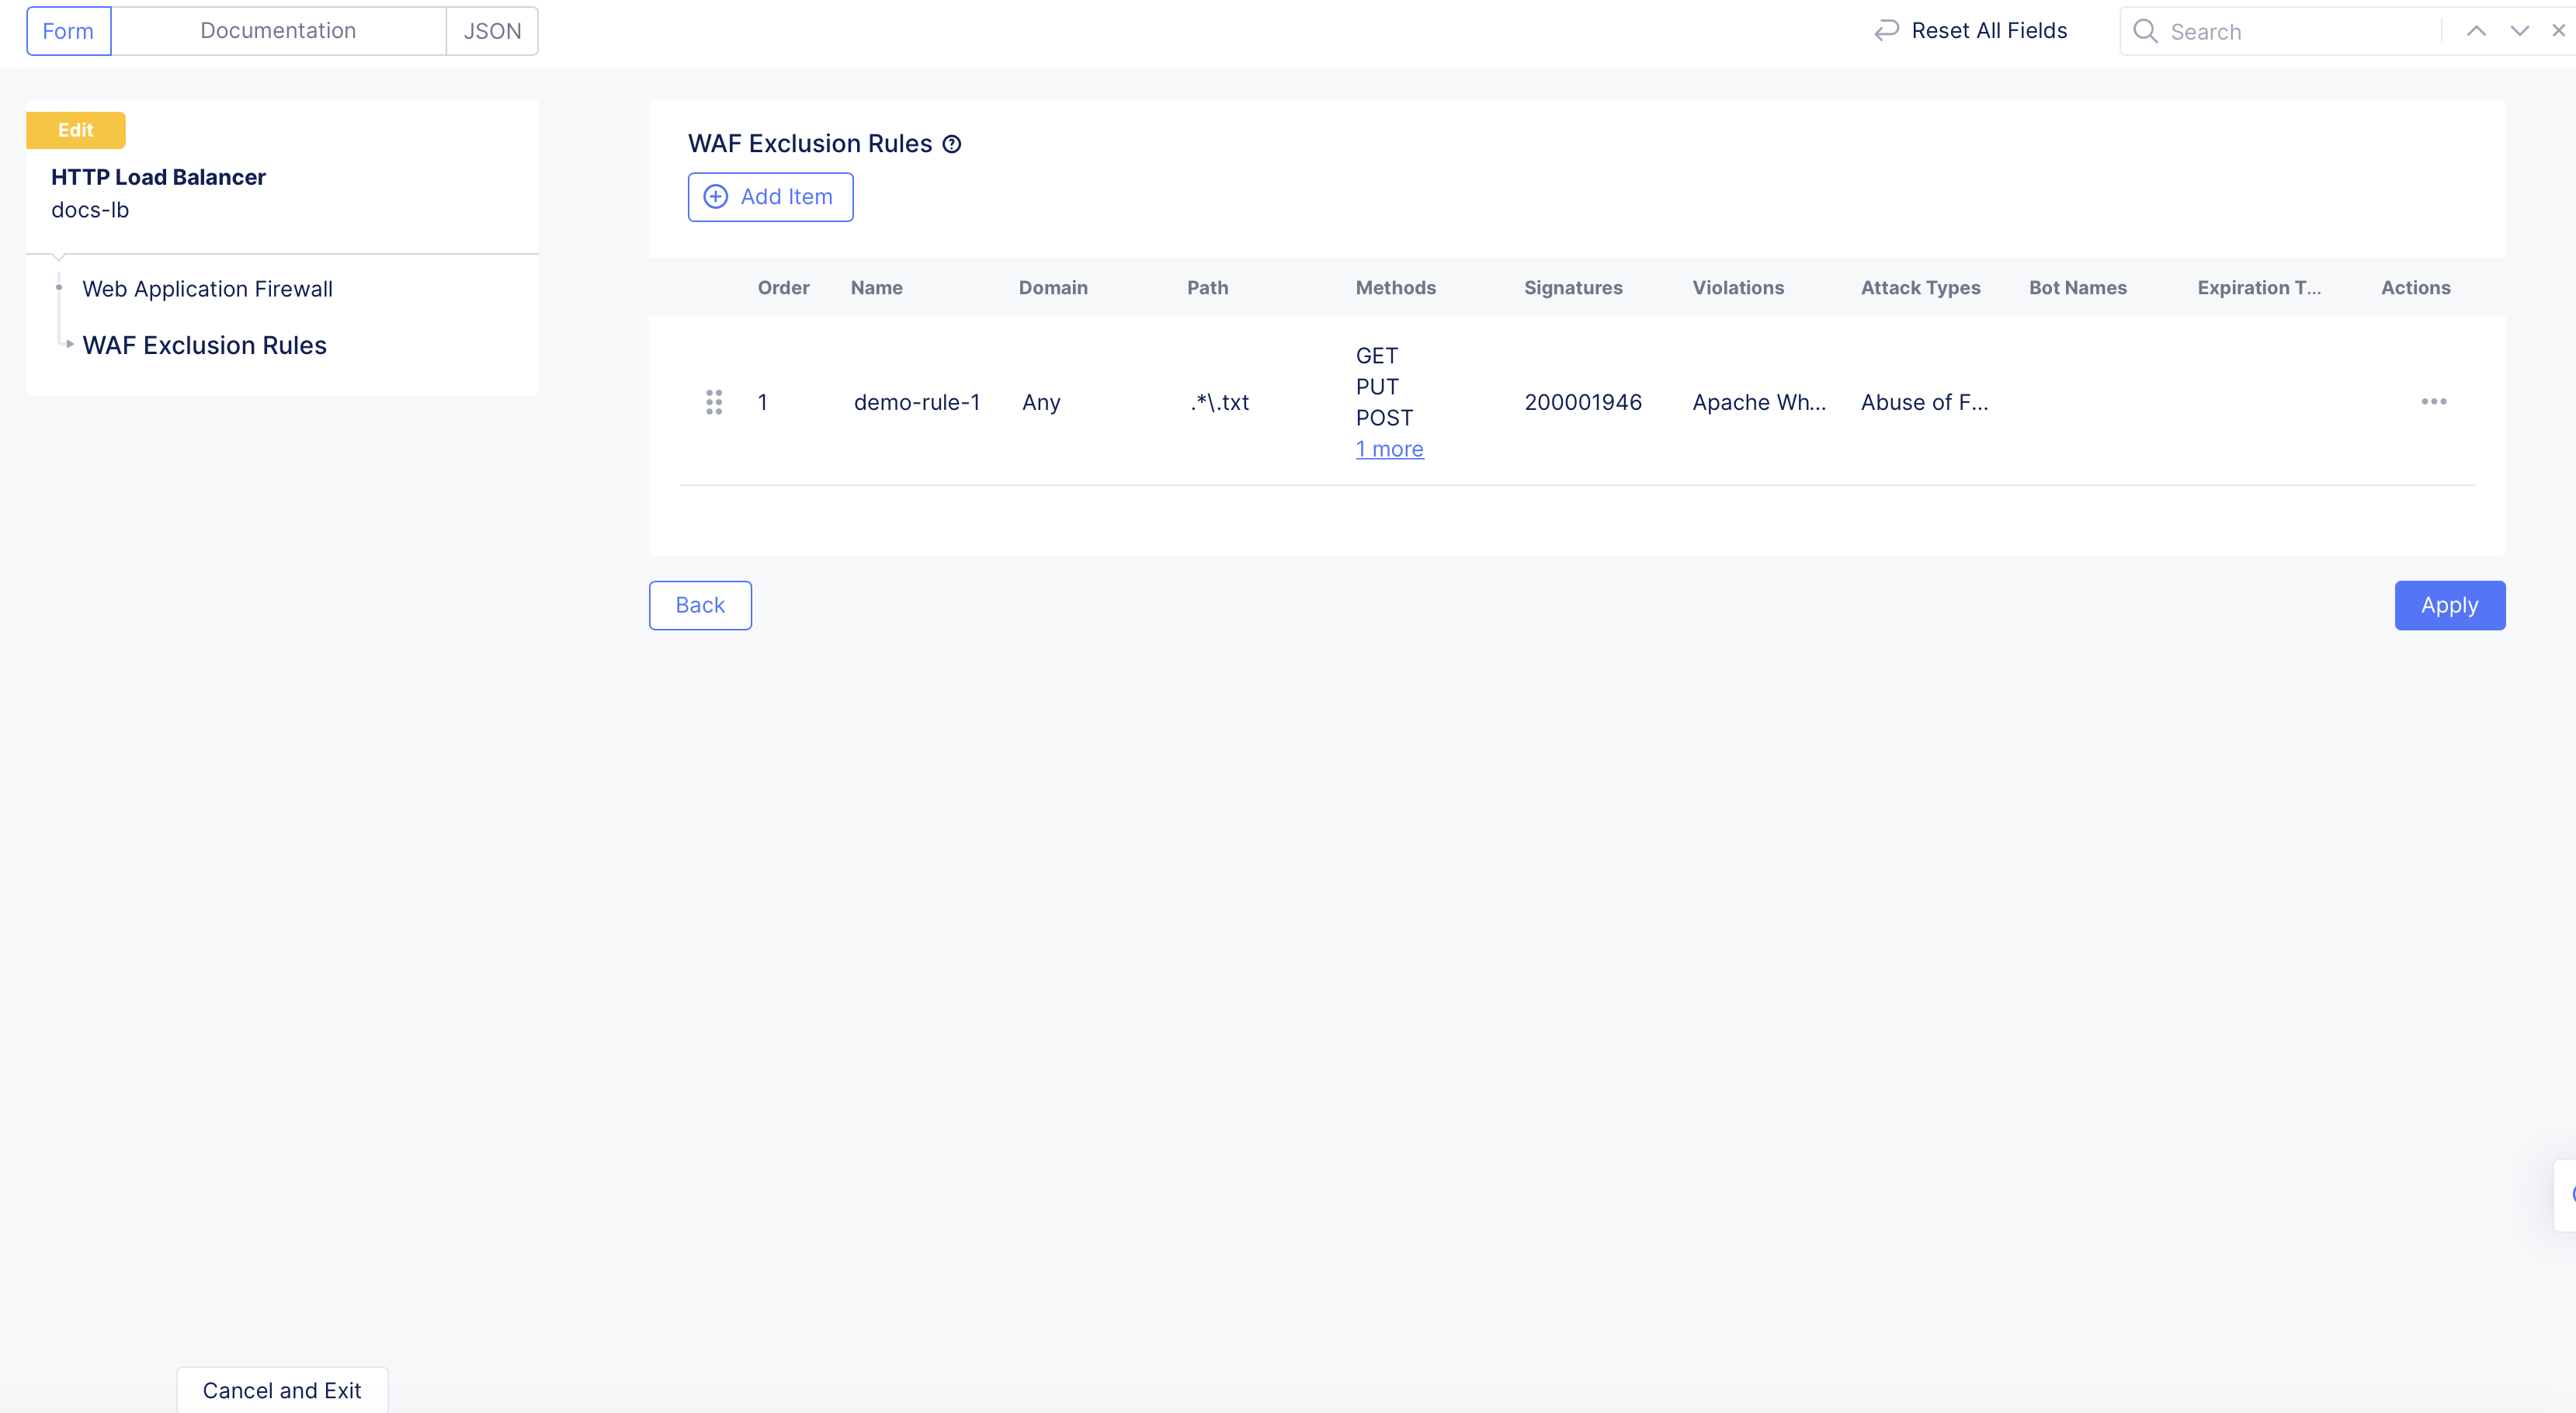
Figure: Apply WAF Exclusion Rule
Note: The order of the WAF exclusion rules matter. The WAF will process the rules starting from the top and work its way down. If there is a match on one rule, then the execution process stops and the subsequent rules are not evaluated. You can change the order of these rules by simply dragging and dropping the rules in the order you see fit. You can also click
...>Move to another spot, and then use the arrows to move the rule up or down the list.
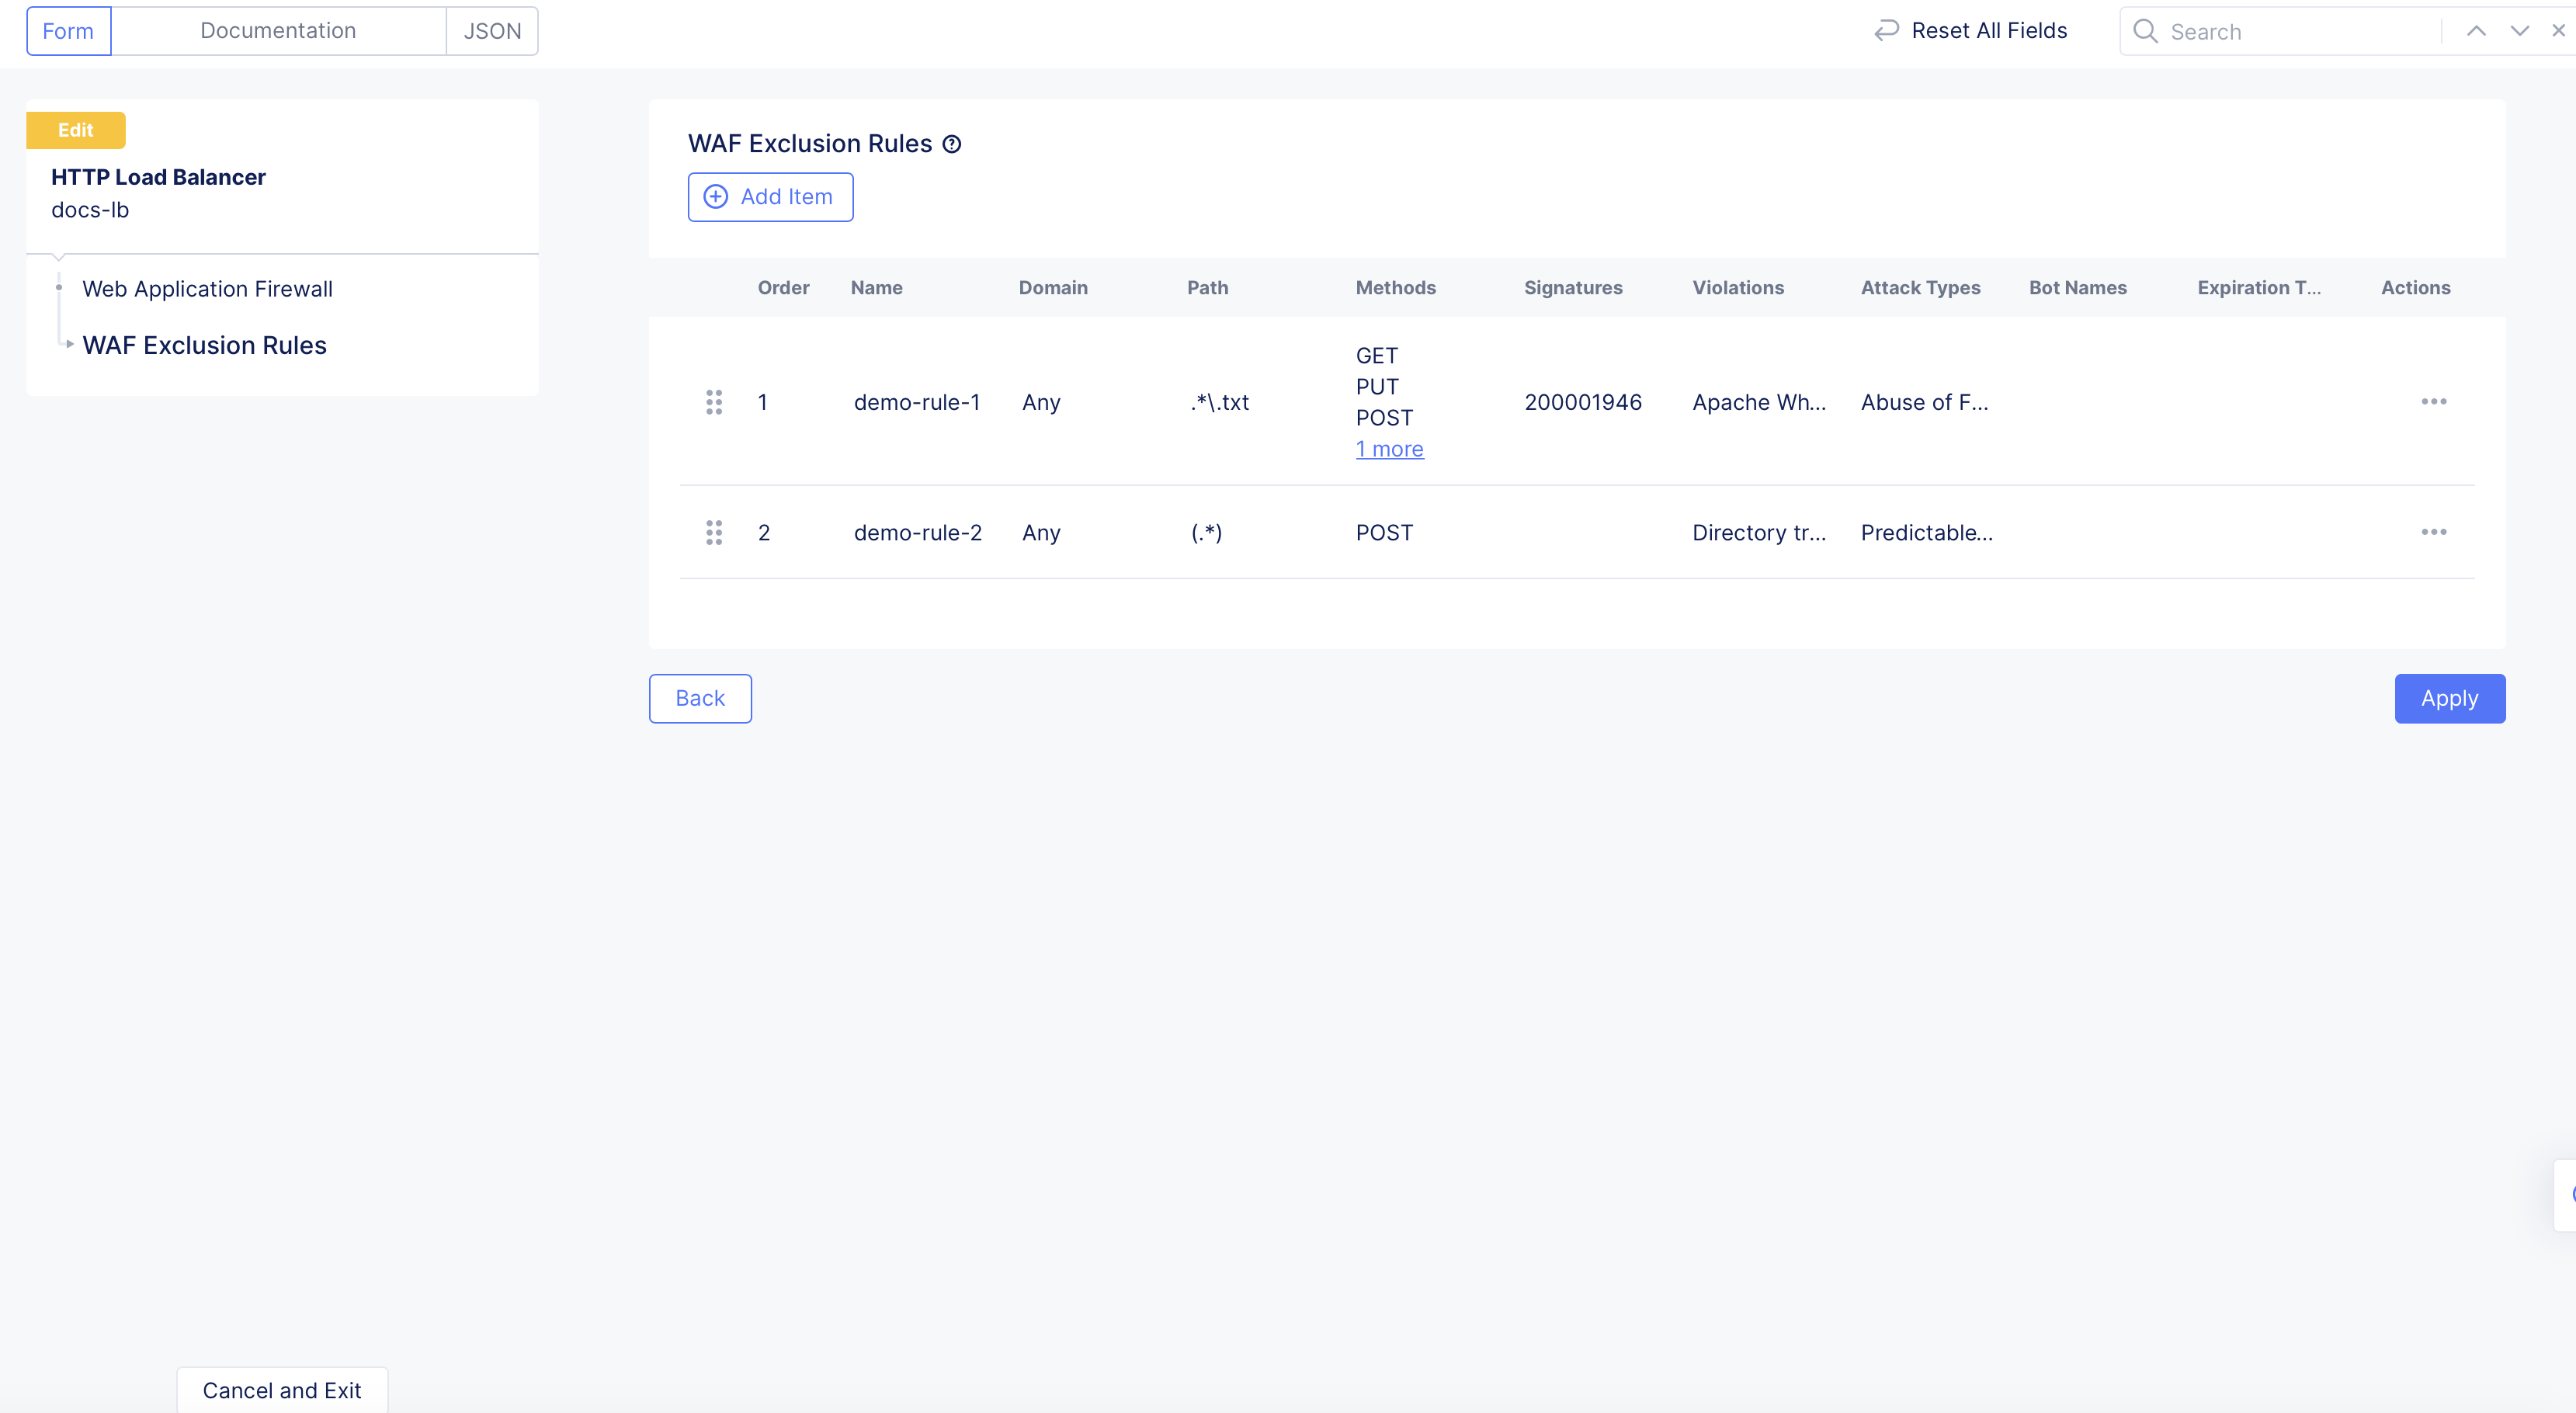
Figure: WAF Exclusion Rule Order
Step 2: Save and complete.
-
Continue to configure your load balancer, as needed.
-
After you finish, click
Save and Exit.
Note: For more information about creating or editing a load balancer, see HTTP Load Balancer.
Skip WAF Processing for Specific Match Criteria
If you want to entirely skip WAF processing for specific match criteria, you need to enable this feature in the load balancer configuration. The match criteria are a combination of domain, method, and path.
Step 1: Navigate to your load balancer.
-
From the Console homepage, click
Multi-Cloud App Connect. -
Select the application namespace.
-
Click
Manage>Load Balancers>HTTP Load Balancers. -
From the displayed list, find your load balancer and select
...>Manage Configuration.
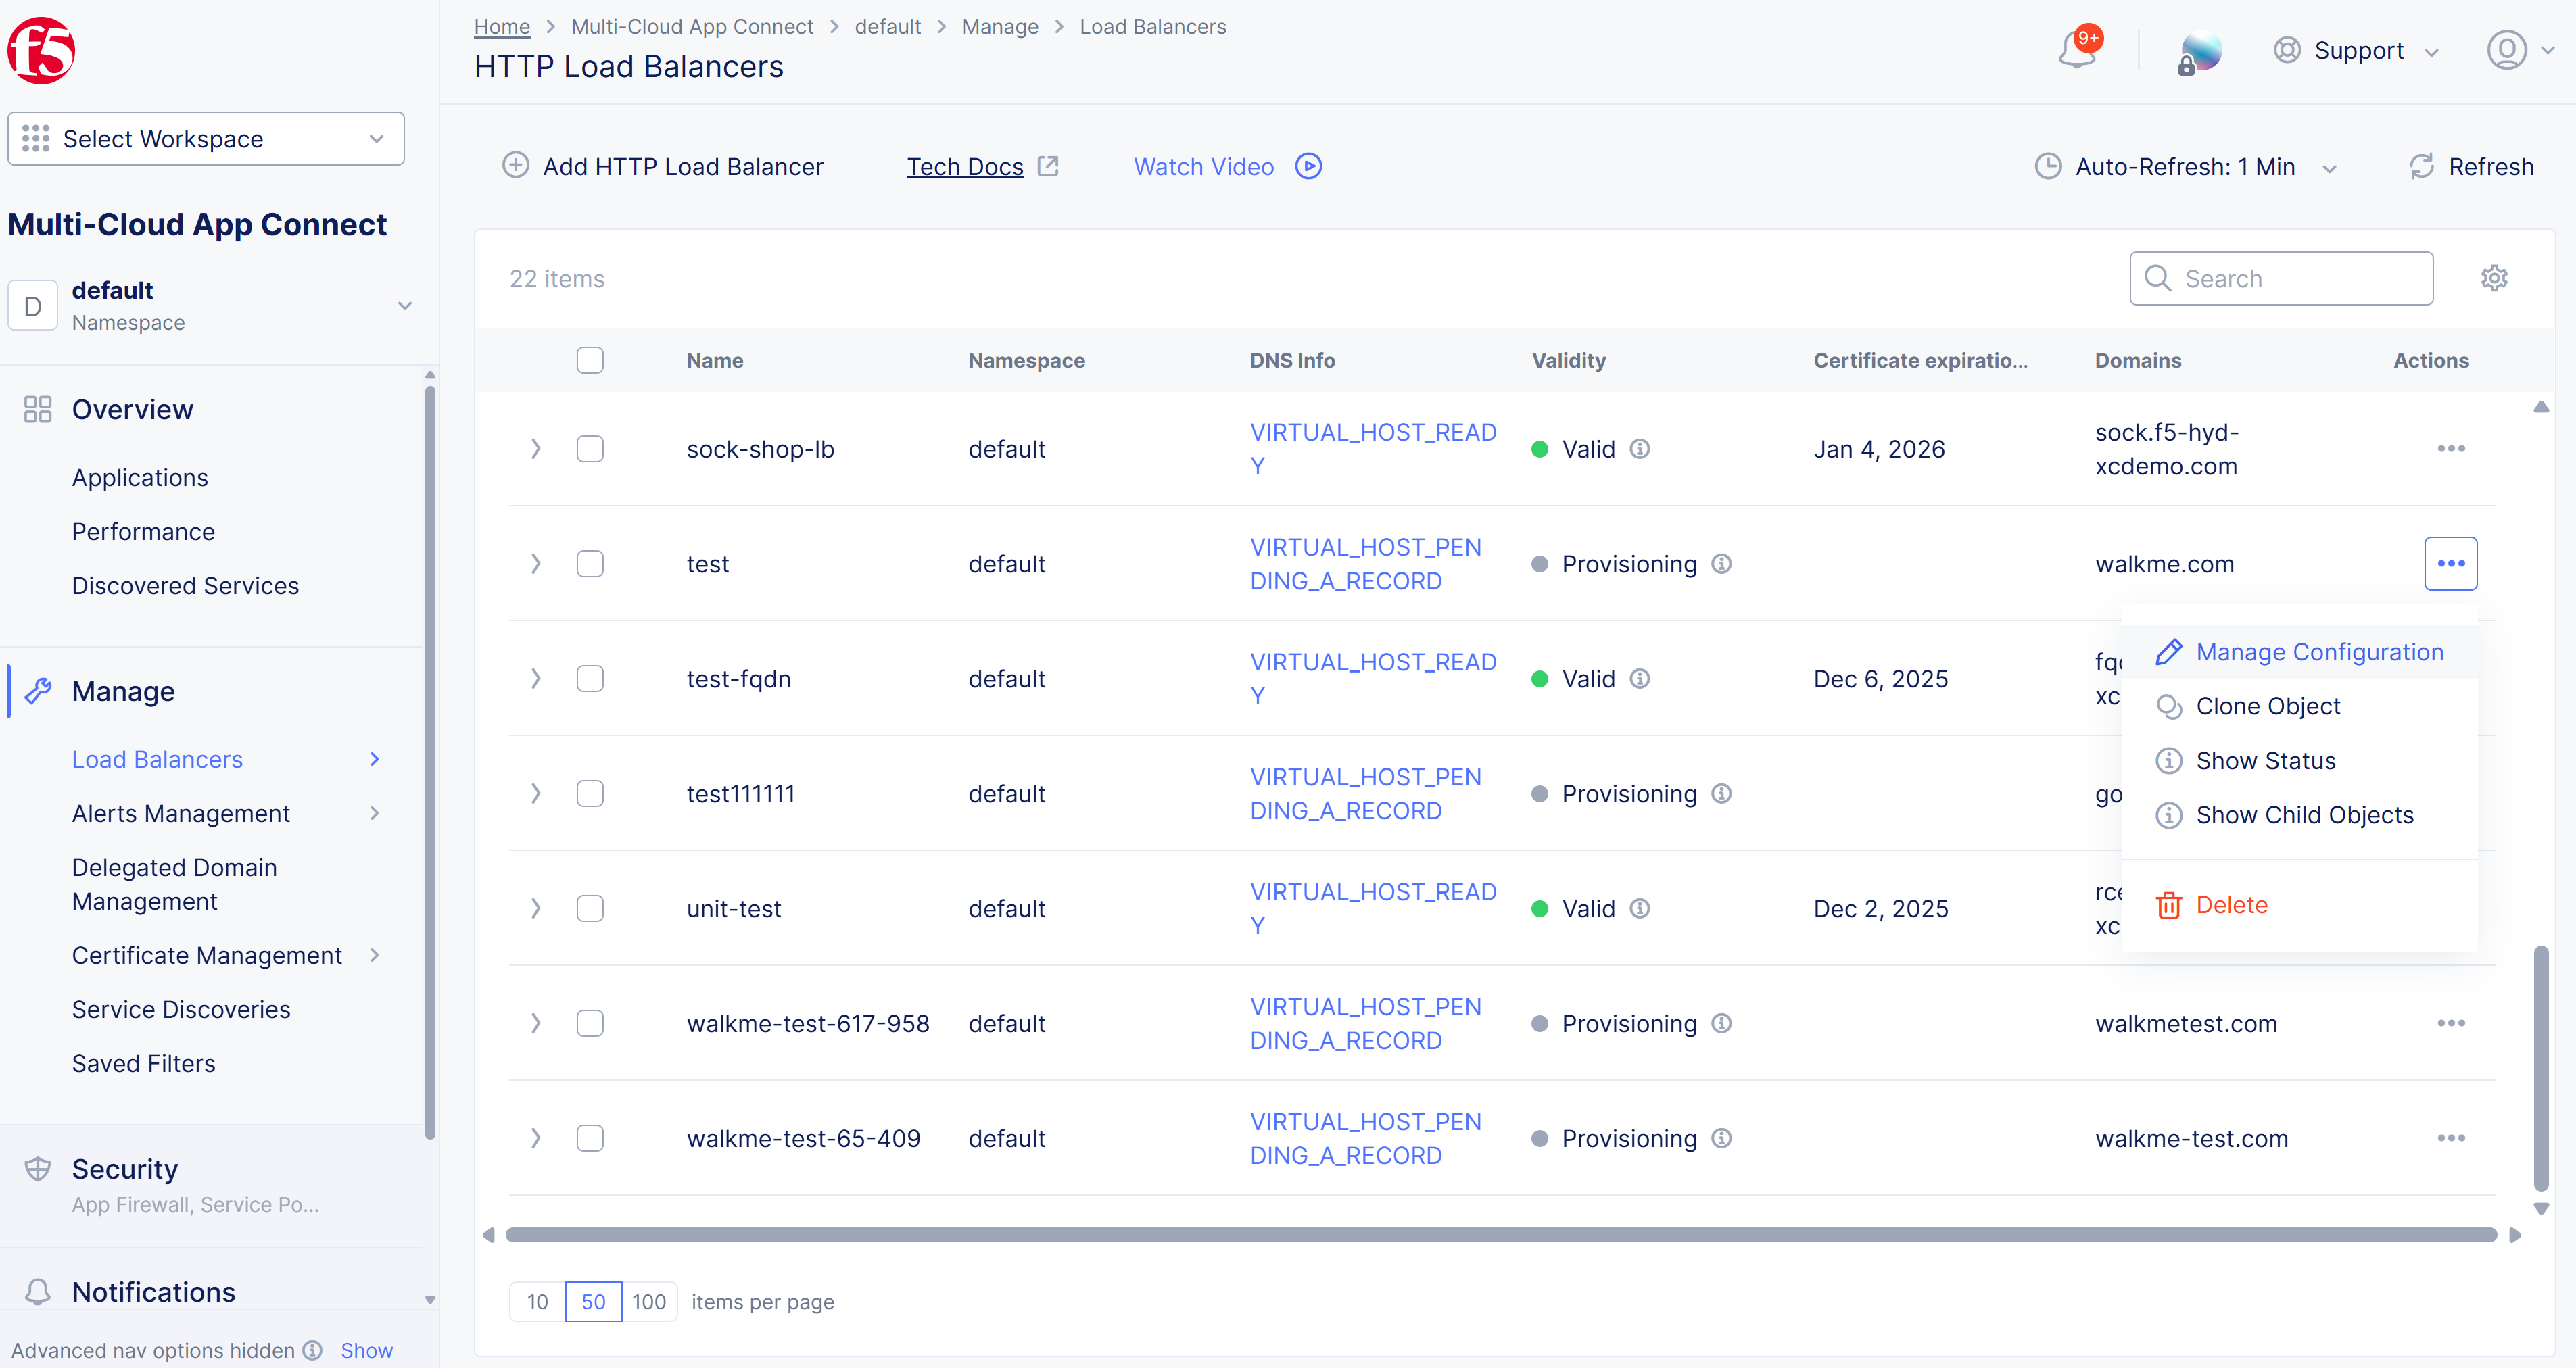
Figure: List of Load Balancers
- Select
Edit Configuration.
Step 2: Edit load balancer configuration.
-
From the left pane menu, select
Web Application Firewall. -
Under the
WAF Exclusion Rulessubsection, clickConfigure.
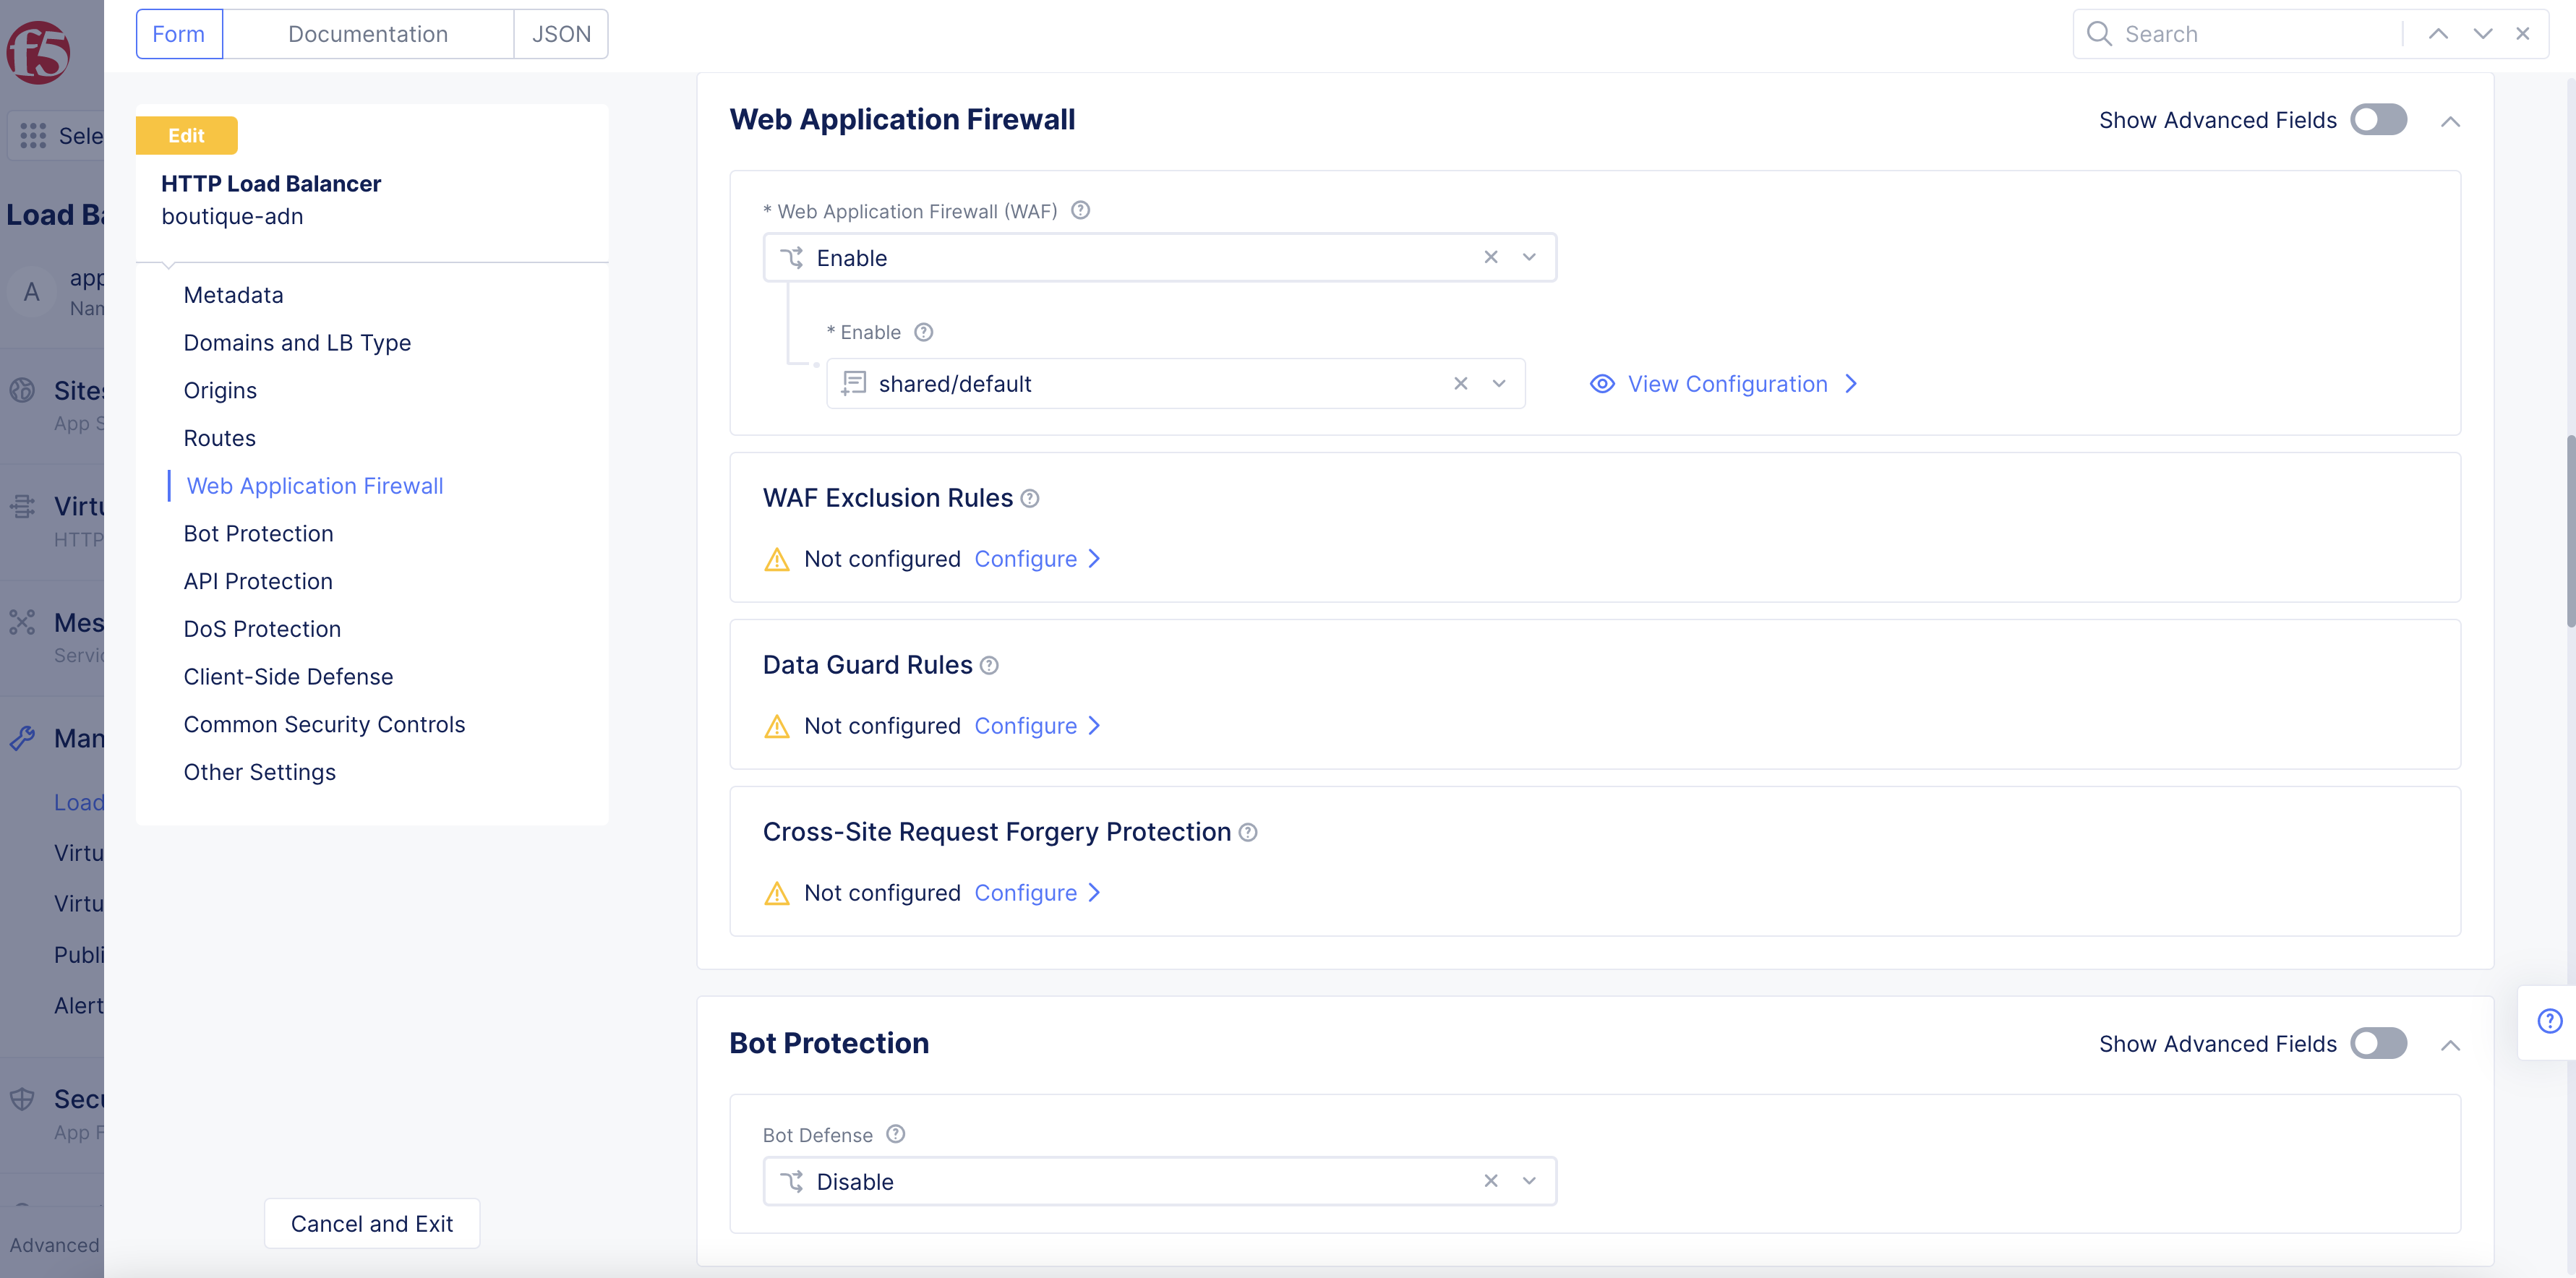
Figure: WAF Section
- Select
Add Item.
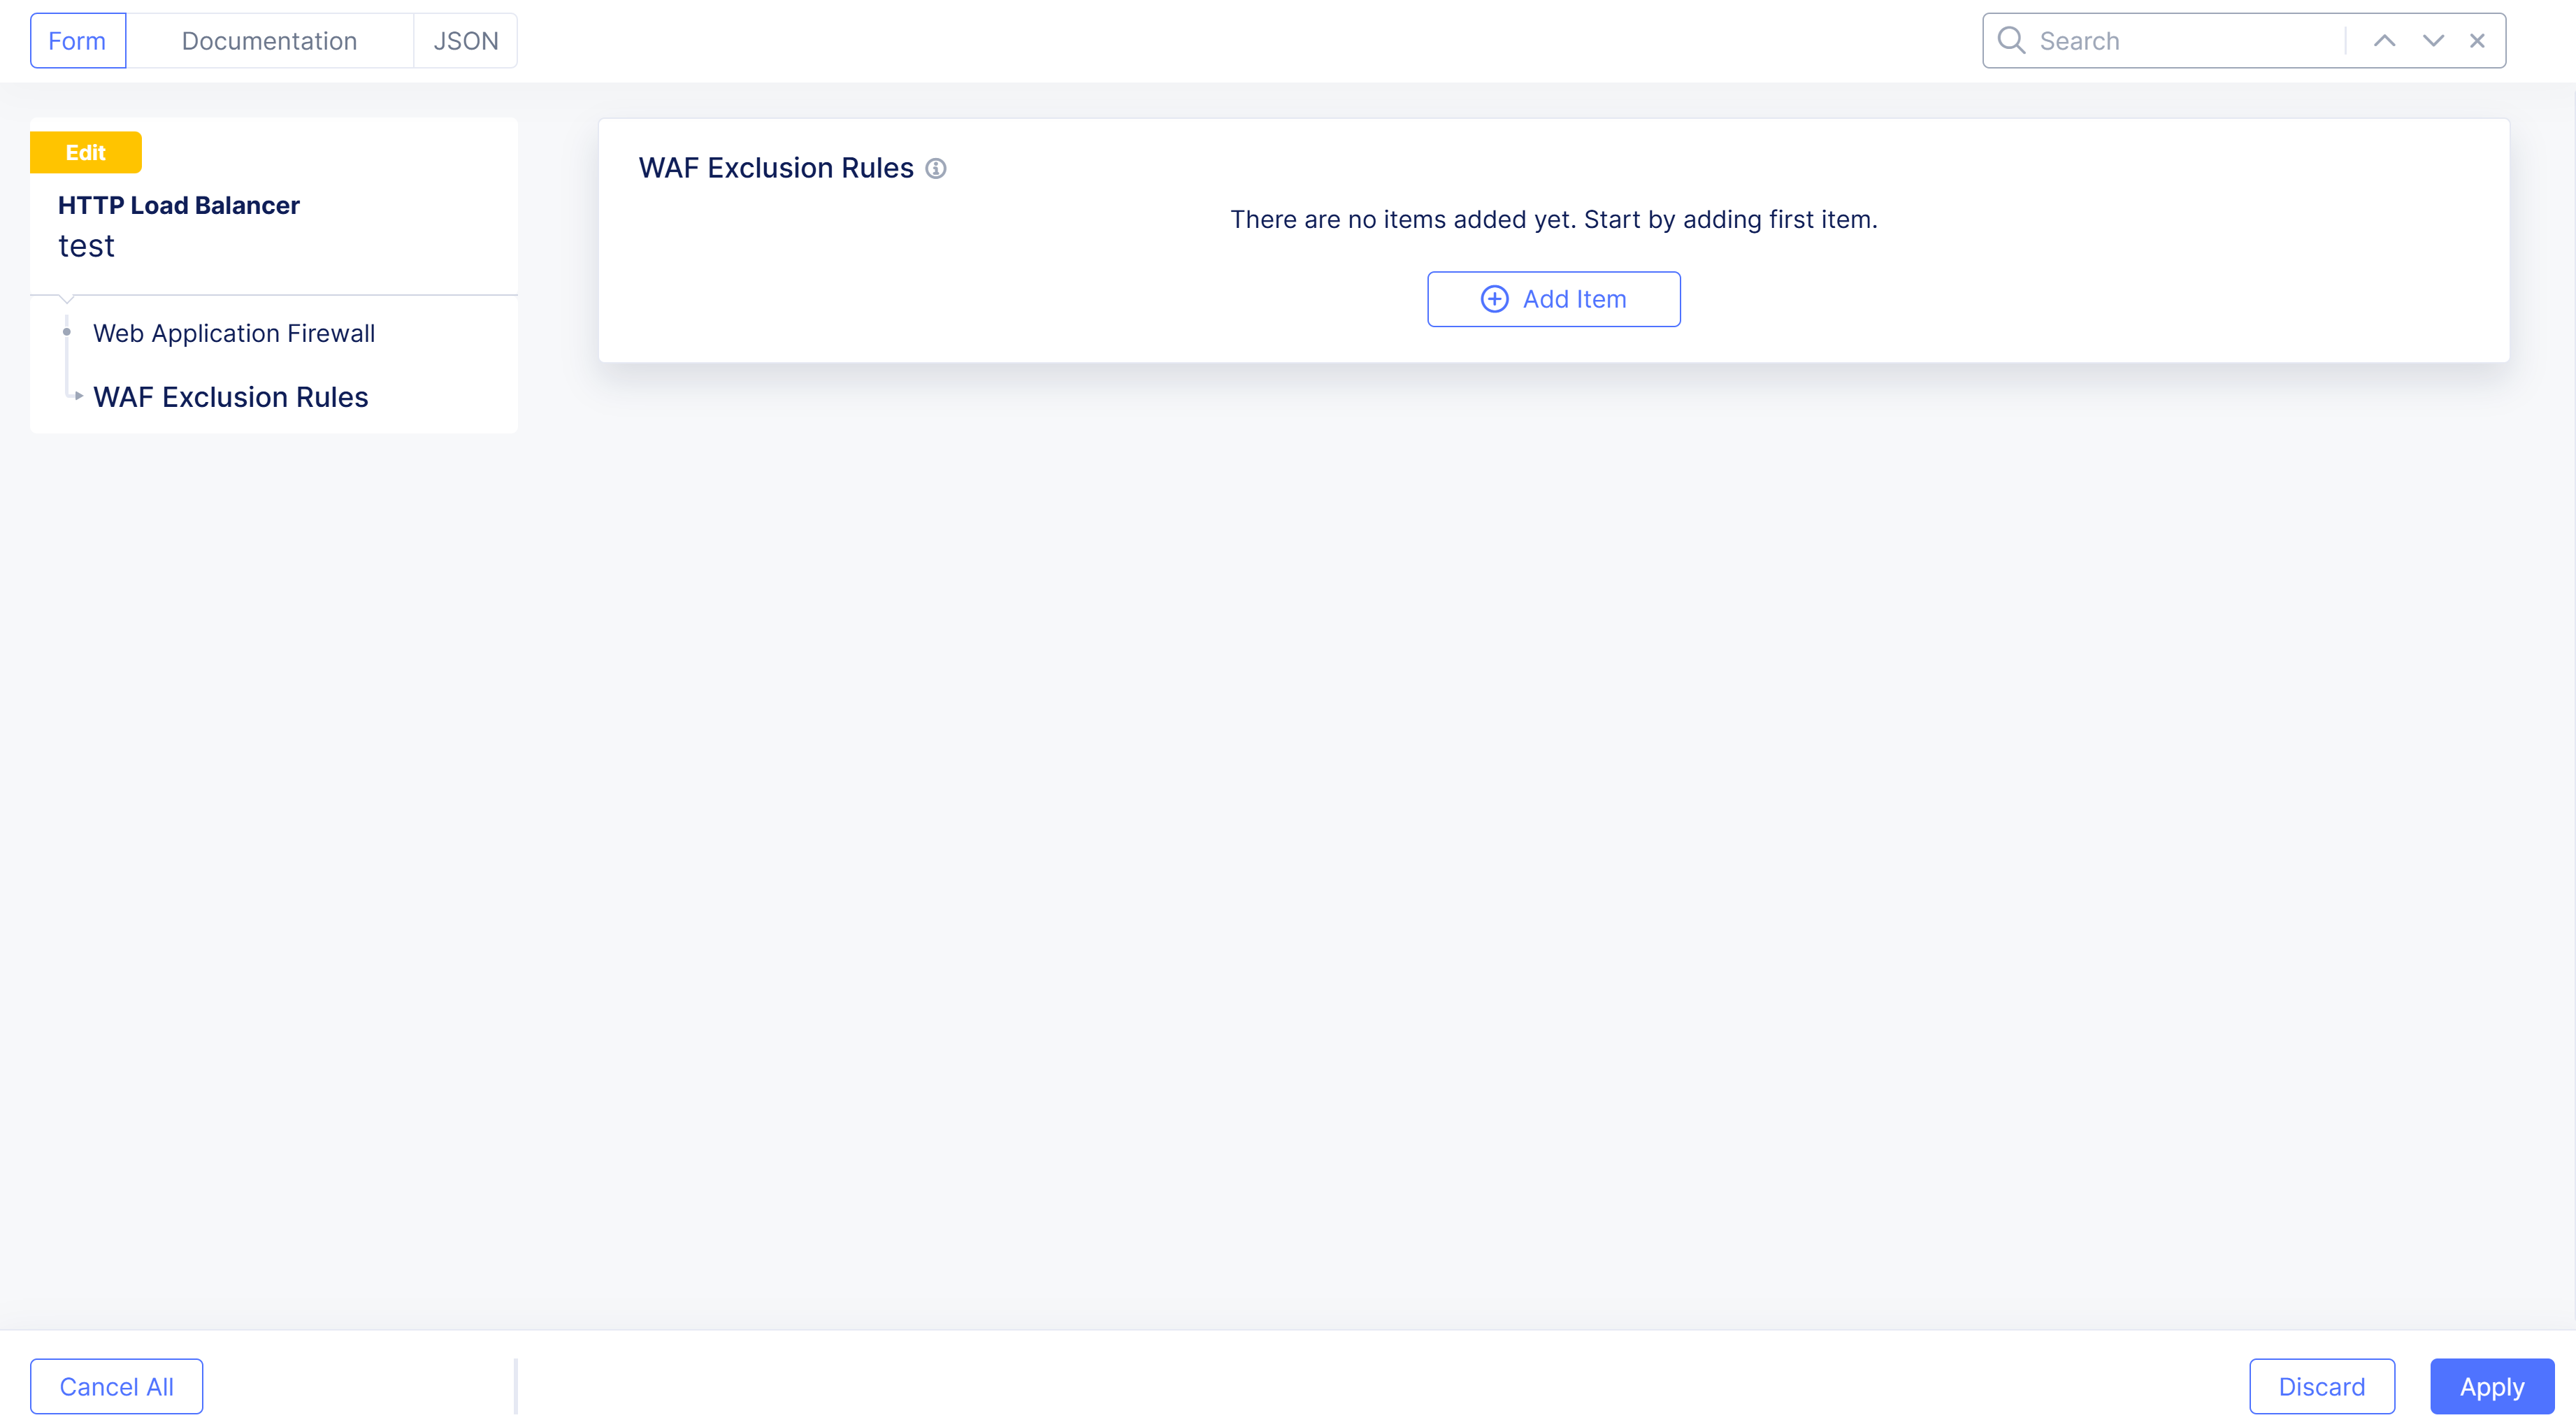
Figure: Add Item
Step 3: Add rule name, metadata, and exclusion criteria.
- In the
Namefield, add a rule name.
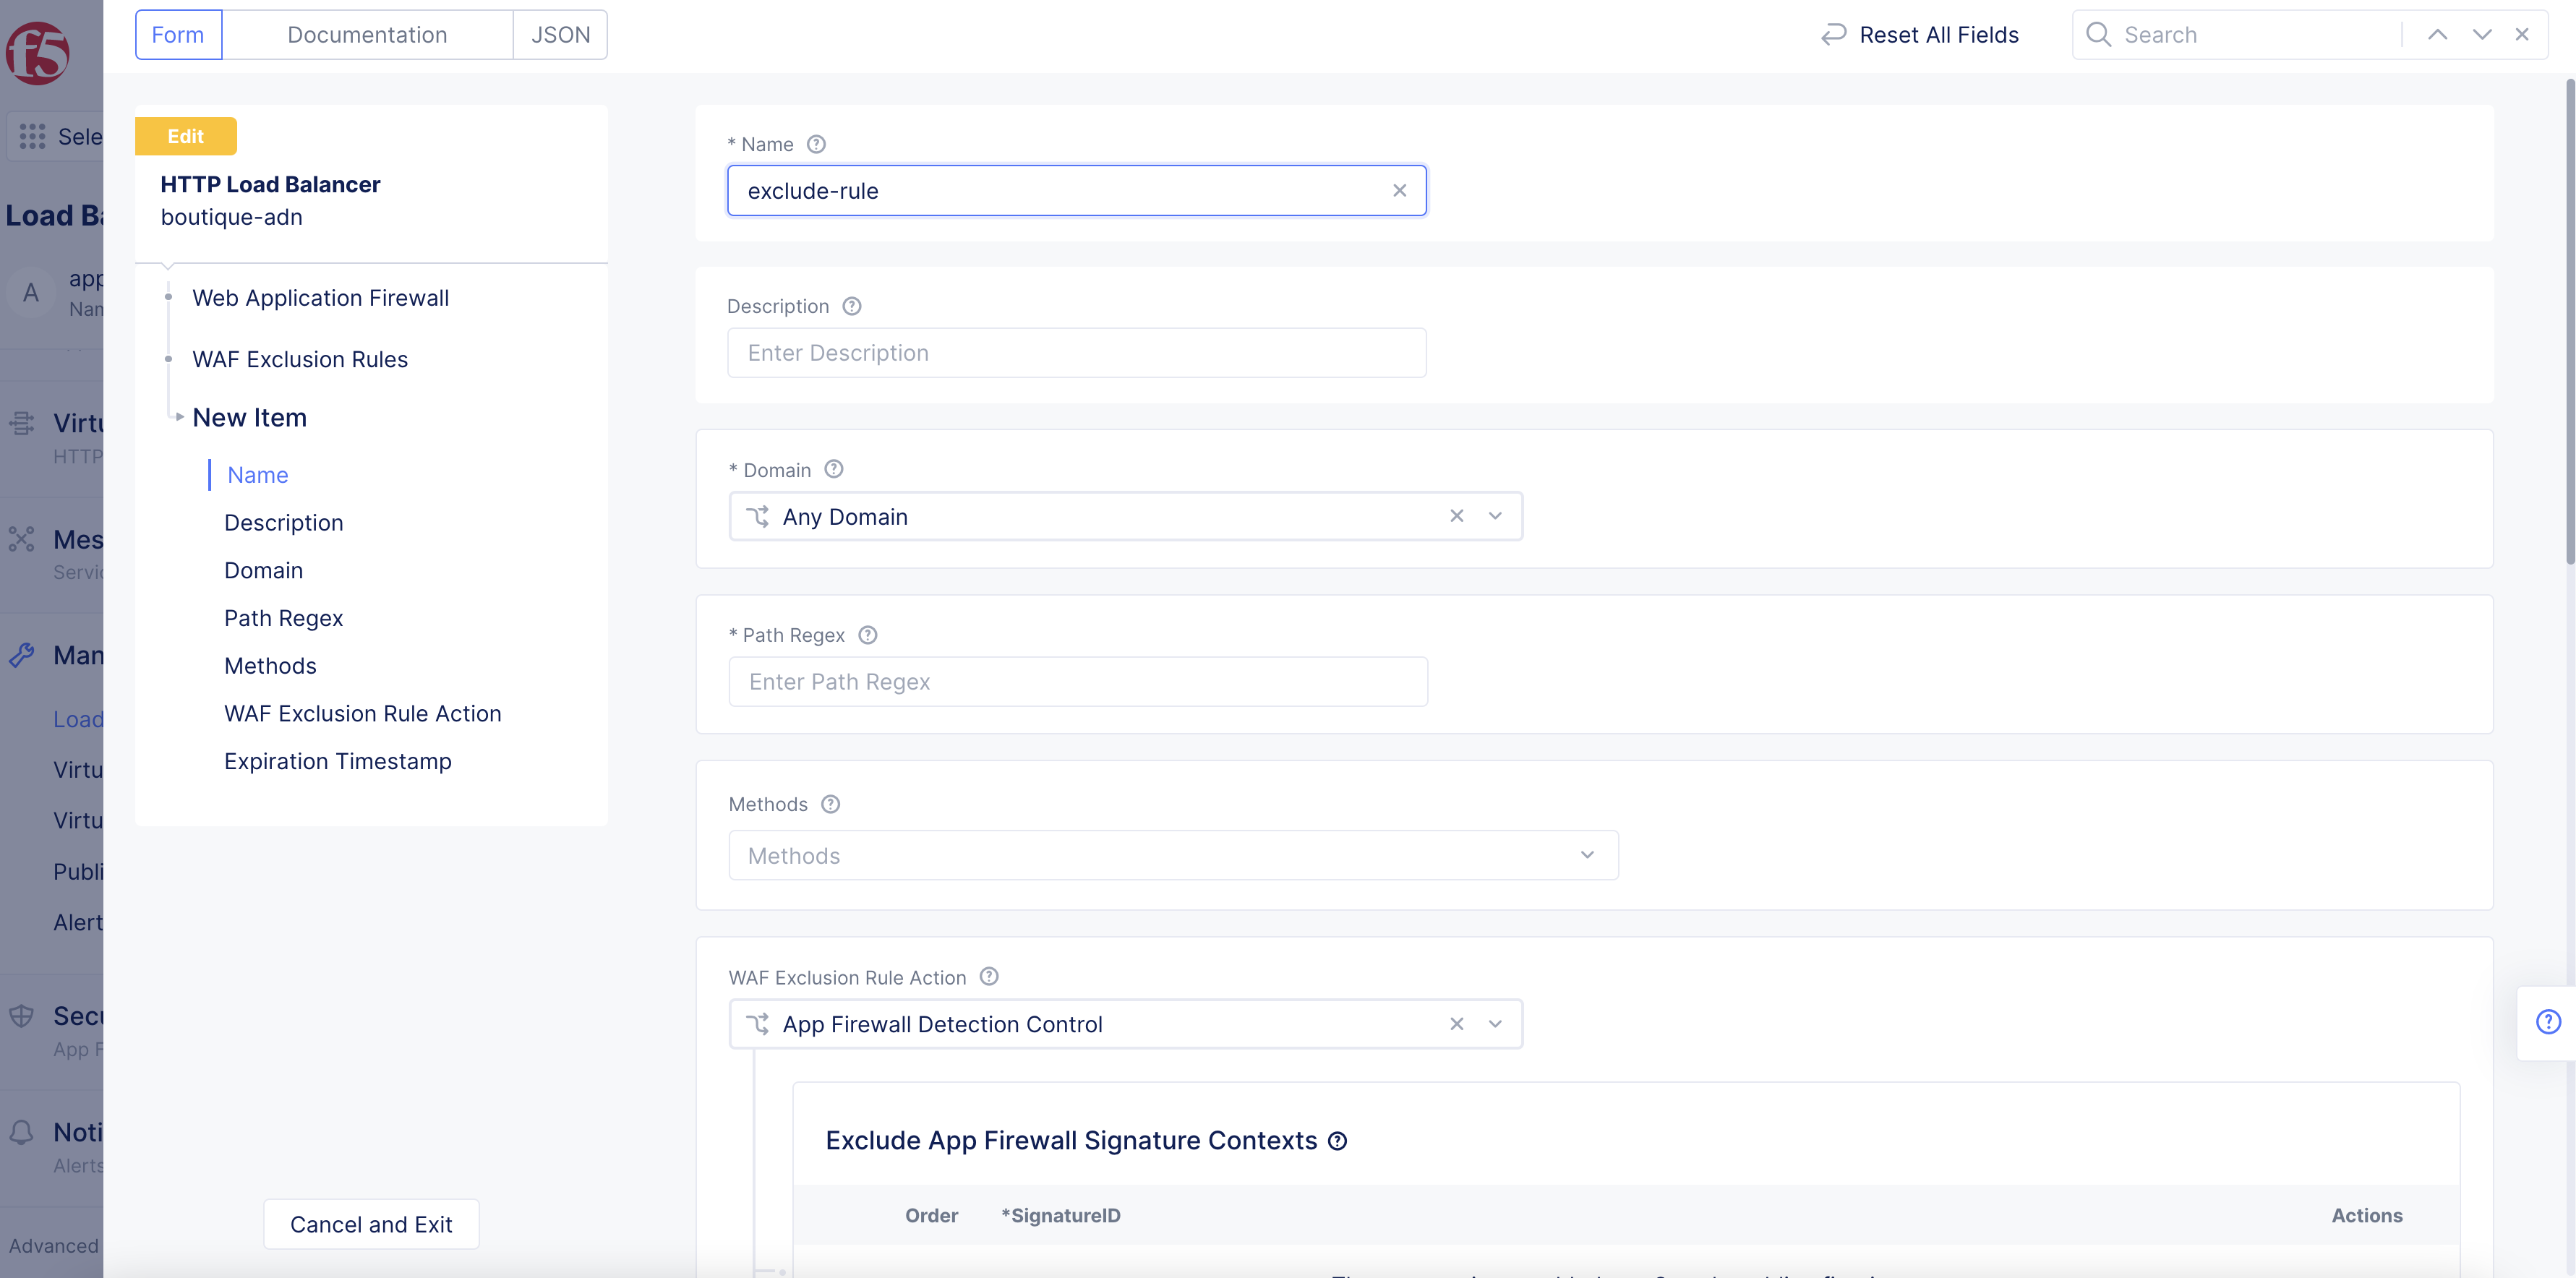
Figure: Add Rule Name
-
From the
Domainmenu, select whether this exclusion rule and match criteria will apply to all domains, a specific domain, or a grouping of domains. For a specific domain, selectExact Valueand then enter the domain name. For a grouping of domains, selectSuffix Valueand then enter the value. -
In the
Path Regexfield, enter a regular expression to match incoming requests.
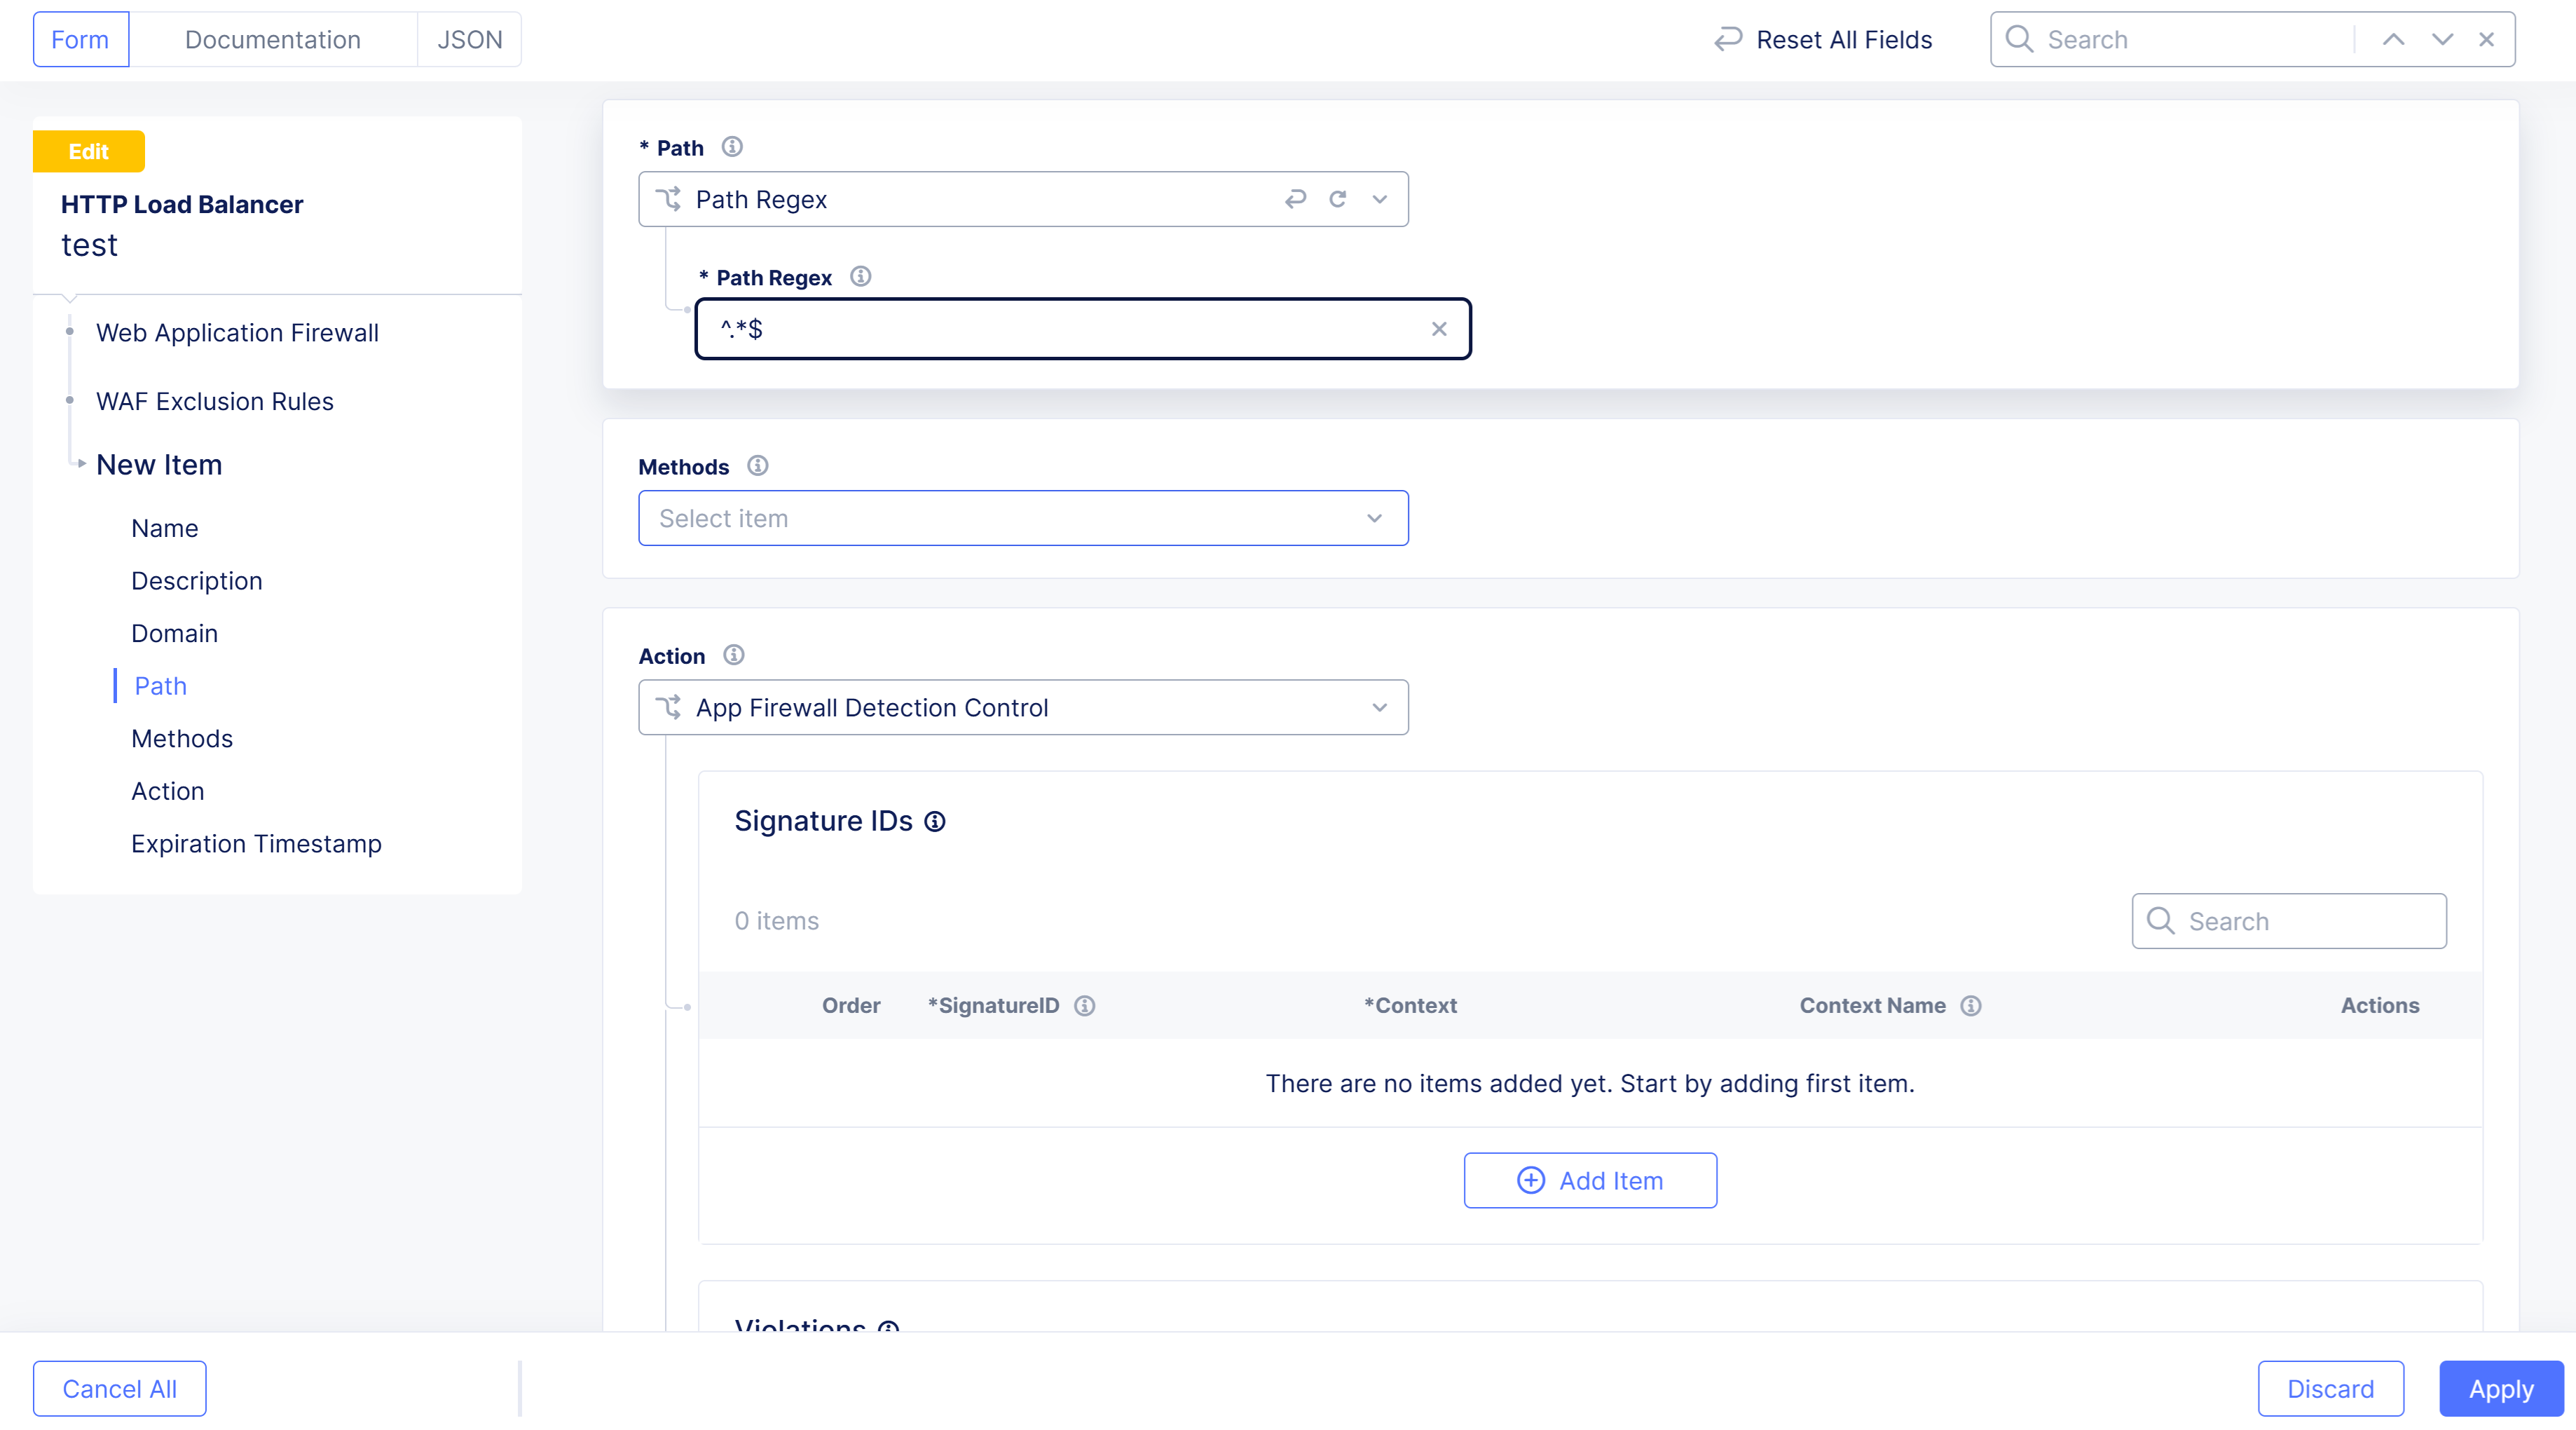
Figure: Path Regex
-
From the
Methodsmenu, select the type of request methods to be matched. -
From the
WAF Exclusion Rule Actionmenu, selectSkip App Firewall Processing.
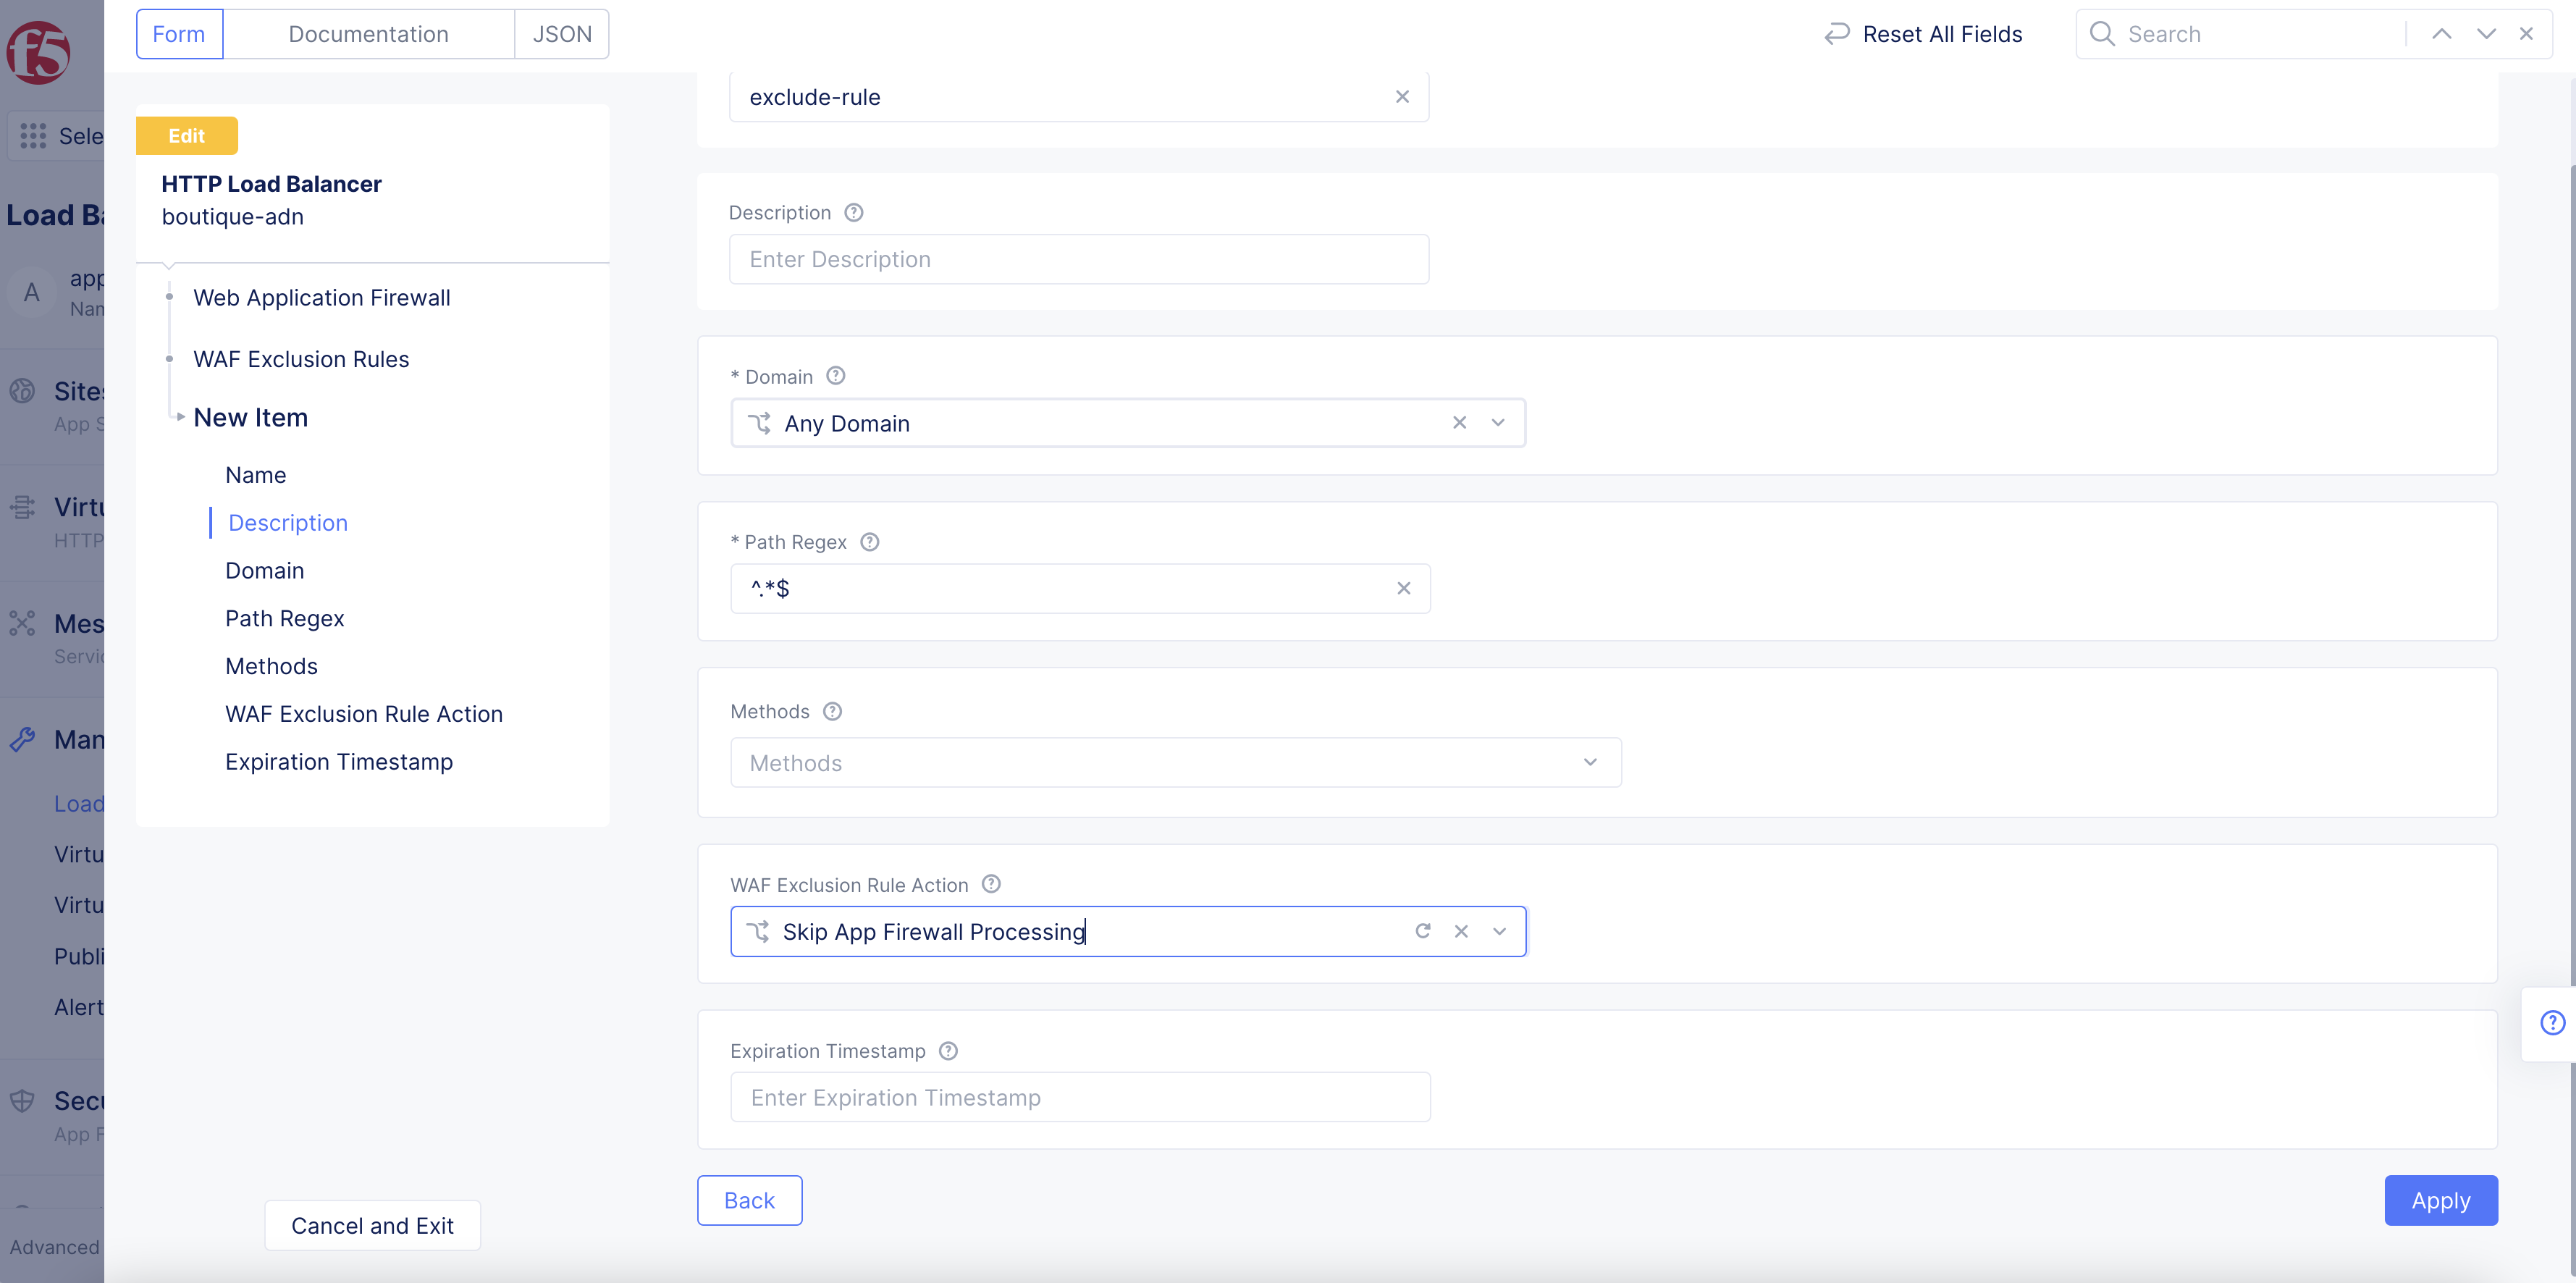
Figure: Enable Skip WAF Processing
-
Select
Applyto save the exclusion rule. -
Select
Applyagain to apply the exclusion rule.
Step 4: Save and complete.
Select Save and Exit to save the new configuration.
Monitor WAF Operation
You can verify and monitor the WAF activities in the Web App & API Protection (WAAP) service. For more information see Monitor Web App & API Protection.