Enable with Cloudflare
To enable F5 Bot Defense Standard on Cloudflare, you must complete the following high-level tasks:
- Configure Bot Defense Cloudflare connector settings.
- Download a configuration file and template from the Distributed Cloud Console.
- Create a Cloudflare Worker and deploy the connector in Cloudflare.
Prerequisites
- You must have an active F5 Distributed Cloud account. If you do not have an account, see Getting Started with Distributed Cloud Console.
- You must have Bot Defense Standard enabled in the Distributed Cloud Console. See Enable Distributed Cloud Bot Defense Standard.
- You must have a functioning Cloudflare environment.
- You must know how to configure and maintain your Cloudflare environment, including how to create and configure Cloudflare Workers. See your Cloudflare documentation for information.
Configure Bot Defense Cloudflare Connector Settings.
To enable Bot Defense on Cloudflare, you must first configure the Cloudflare connector in the Distributed Cloud Console.
-
On the Distributed Cloud Console Dashboard, select Bot Defense.
-
Select Manage > Applications > Add Application. If no applications exist, you are prompted to add a protected application.
-
Add a Name and Description for the new application.
The name must be unique in the namespace and must follow DNS-1035 format.
-
Select an Application Region (US, EU, or Asia). This is the region where the origin server for the application is located.
-
From the Connector Type drop-down menu, select Cloudflare and then select Configure.

Figure: Connector Type
Protected Endpoints
Configure the endpoints you want to protect with Bot Defense.
-
In the Protected Endpoints section, select Configure and then select Add Item.
-
Enter a Name and Description for the new endpoint.
-
Specify the Domain Matcher. The same Cloudflare website can be served from multiple domains. You can choose any domain or specify a specific host value. Enter an exact value, a suffix value, or a regex value.
-
Specify the Path to the endpoint. For example, enter
/login. The path can include the wildcards,*and?. -
If you want Bot Defense to ignore capitalization when searching paths, select Case insensitive.

Figure: Case Sensitivity Setting
-
(Optional) In the Query field, if you want to protect specific sections of a page, enter the criteria for the section you want to protect.
For example, if the query string of a URI you want to protect is:
<yourdomain>/account.do/issue?account=moneytransfer, enter the parameter name and parameter valueaccount=moneytransferto protect themoneytransferfunction.When you enter criteria in the Query field, Bot Defense looks at the Query parameters in addition to the Path. The Query field is regex matched.
-
Choose the HTTP Methods that are protected on this endpoint by Bot Defense:
- GET (XHR/Fetch): Use when the protected application makes an XHTTPRequest or Fetch API call to get the content of the page.
- POST: The most commonly attacked method. F5 recommends that you protect all POST requests. Bot Defense analyzes POST requests to determine if they are part of a bot attack such as credential stuffing or form submission abuse.
- PUT: Use to protect PUT requests and prevent data uploads or modifications from bots.
You can select multiple methods.
-
Select the type of client that accesses this endpoint (Web Client, Mobile Client, or Web and Mobile Client).
Note: For endpoints that receive requests from both web and mobile clients, F5 recommends that you add a single endpoint and select Web and Mobile Client, rather than two separate endpoints for Web Client and Mobile Client.
-
Select the mitigation action for this endpoint when automation is detected. If you selected the Web and Mobile Client type, select a mitigation action for each type:
-
Continue. This allows traffic to continue to the origin. You can choose to add a header that enables you to monitor traffic in reporting and analytics dashboards. You can change the header name in the Header Name for Continue Mitigation Action field in the More Options section.
-
Redirect. This redirects automated traffic to a different page. You provide the appropriate Status Code and URI where you want to redirect the bot. Use this option to deceive bots into thinking their request successfully went through. You can also redirect to a page with more information for human users that may have been incorrectly redirected.
-
Block. This blocks automated traffic from proceeding to the origin. You can customize the Status Code, Content Type, and Body of the response message.
Note: Mobile clients only allow Continue and Block. If you select Web and Mobile Client, you can select mitigation actions for each client type.
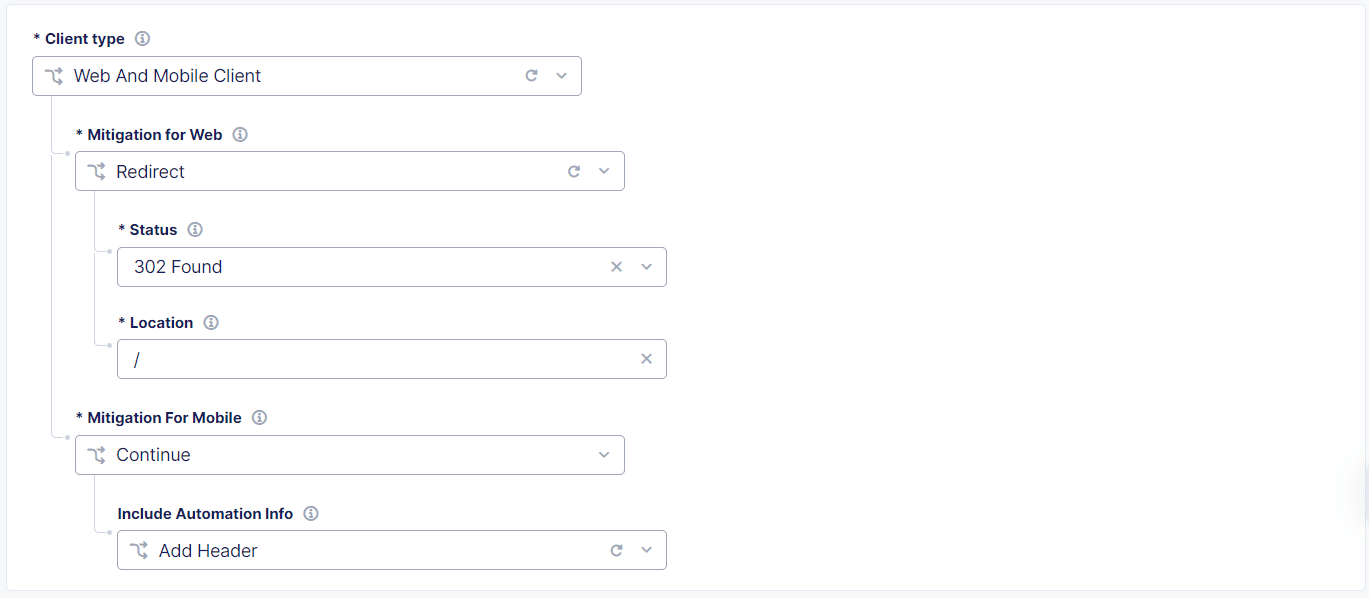
Figure: Client Type
Note: If you select Web and Mobile Client, you must enter a Mobile Request Identifier Header when you enable F5 Distributed Cloud Mobile SDK Settings. For instructions, see Mobile Settings.
-
-
When you finish configuring the endpoint, select Apply.
-
To add an additional endpoint, select Add Item and repeat steps 2-10.
-
When you finish adding endpoints, select Apply.
Web Client JavaScript Settings
After you add web-protected endpoints, you must configure how the Bot Defense JavaScript is injected into the web pages you want to protect.
Note: If you only protect mobile endpoints, then select Disable JavaScript Insertion and go to Mobile Settings.
Note: To manually insert the Bot Defense Javascript, see Manual JavaScript Insertion
-
From the Web Client JavaScript Insertion Settings drop-down menu, select Specify JavaScript Insertion Rules and select Configure.
-
Add the Web Client JavaScript Path. The web client fetches the Bot Defense JavaScript from this path. F5 recommends that you choose a URL or path that is similar to your existing JavaScript files, but that does not include “F5,” “Bot Defense” or other indications that it is used for security purposes. Enter a simple path that starts with
/or a complete URL such ashttps://example.com/customer1.js. The URL or path you choose cannot conflict with your existing JavaScript files. -
From the JavaScript Location drop-down menu, choose the location where you want to insert the Bot Defense JavaScript in the application pages:
After <head>tagAfter </title>tagBefore <script>tag
F5 recommends that you select
After <head>so that the Bot Defense JavaScript is executed early. This allows time for the Bot Defense JavaScript to be fetched and executed while the rest of page is rendered.Note: If you select
After </title>, be sure your application pages have the<title>tag. -
In the JavaScript Insertion Paths section, select Add Item.
-
Enter a Name, Description, Domain Matcher, and Path for each page in your application where you want to insert the Bot Defense JavaScript.
Note: Be sure to select paths to HTML pages that end users are likely to visit before they browse to any protected endpoint. In Bot Defense, these are called “entry pages.”
Note: F5 recommends that you use wildcards to select JavaScript insertion paths for HTML pages to which end users are likely to go, such as
/index.htmand/login/*.JavaScript insertion path examples:
/login/*/catalog
-
Select Apply. The JavaScript Insertion Path is added to the table. Select Add Item to add additional JavaScript Insertion Paths.
-
-
(Optional) To exclude the Bot Defense JavaScript from specific web pages, in the JavaScript Exclude Paths section, select Add Item.
- Enter a Name, Description, Domain Matcher, and Path to exclude.
- Select Apply. This adds an item to the table. Select Add Item to add additional exclusion paths.
Note: F5 recommends that you carefully add JavaScript insertion paths to minimize the number of false positive results.
JavaScript exclusion path examples:
/login/images/catalog/soldout/*
-
When you finish configuring JavaScript Insertion Rules, select Apply.
Manual JavaScript Insertion
Important: F5 recommends that you allow Bot Defense to automatically insert the Bot Defense JavaScript in your application pages. Only use manual insertion if it is required for Bot Defense to work in your IT environment.
To manually insert the Bot Defense JavaScript in your application pages:
-
In the Web Client JavaScript Settings section, from the Web Client JavaScript Insertions drop-down menu, select Disable JavaScript Insertion.
-
Manually add the JavaScript tags below to one of the following recommended locations:
- Immediately After
<Head> - Immediately After
</title> - Before
<script>(first script tag on the page).
Endpoint Matcher JavaScript:
<script type='text/javascript' src='INJECTION_PATH?matcher'></script>I/O Hook JavaScript:
<script type='text/javascript' src='INJECTION_PATH?single'></script>Replace
INJECTION PATHwith the value you specified for Web Client JavaScript Path.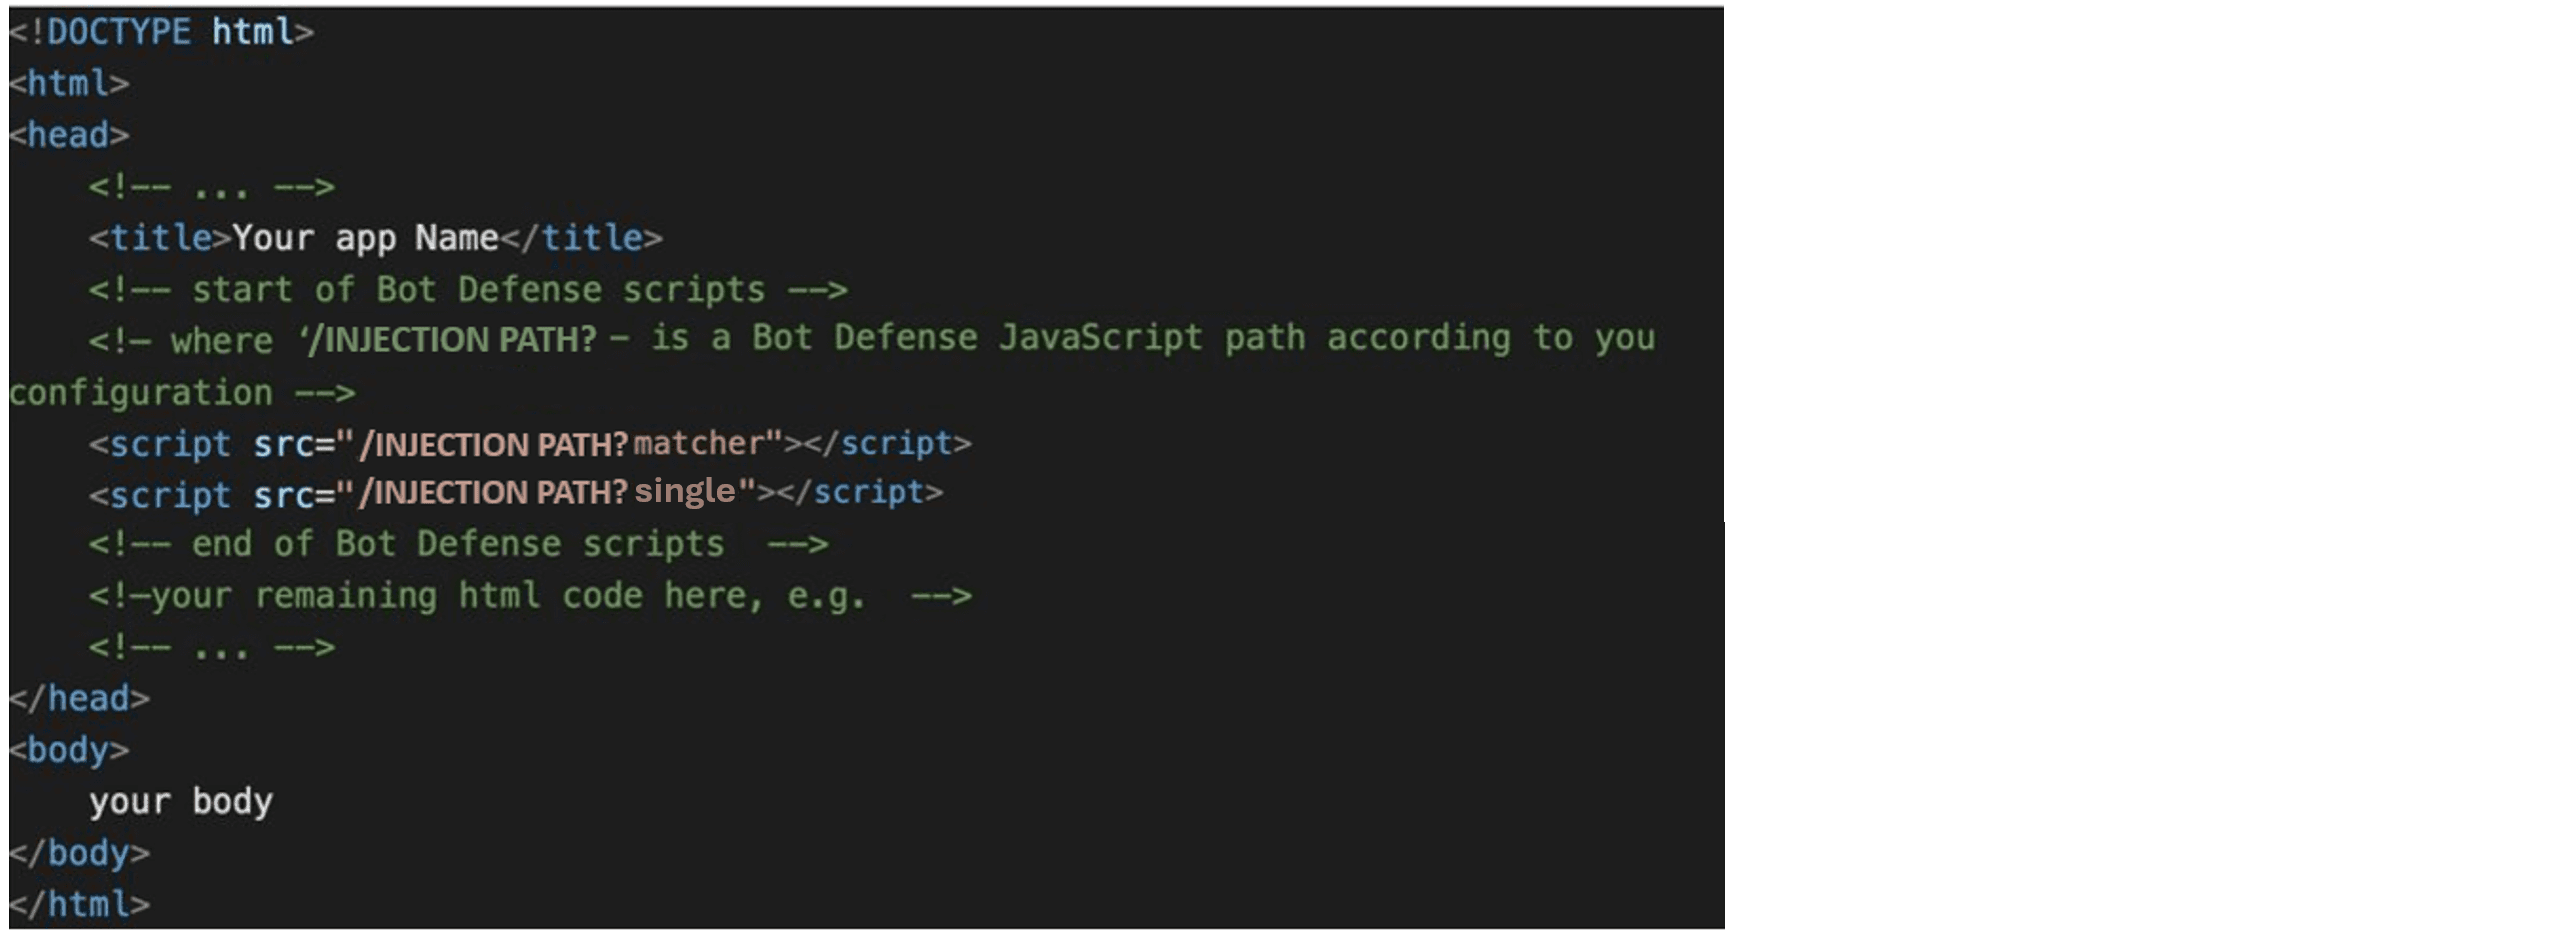
Figure: Manual Javascript insertion
- Immediately After
Mobile Settings
Important: Before you configure mobile settings, see Protect Mobile Endpoints for important best practices, required configuration, and information about integrating the F5 Distributed Cloud Mobile SDK with your mobile endpoints.
-
If you added mobile endpoints to your configuration, select Enable Mobile SDK.
-
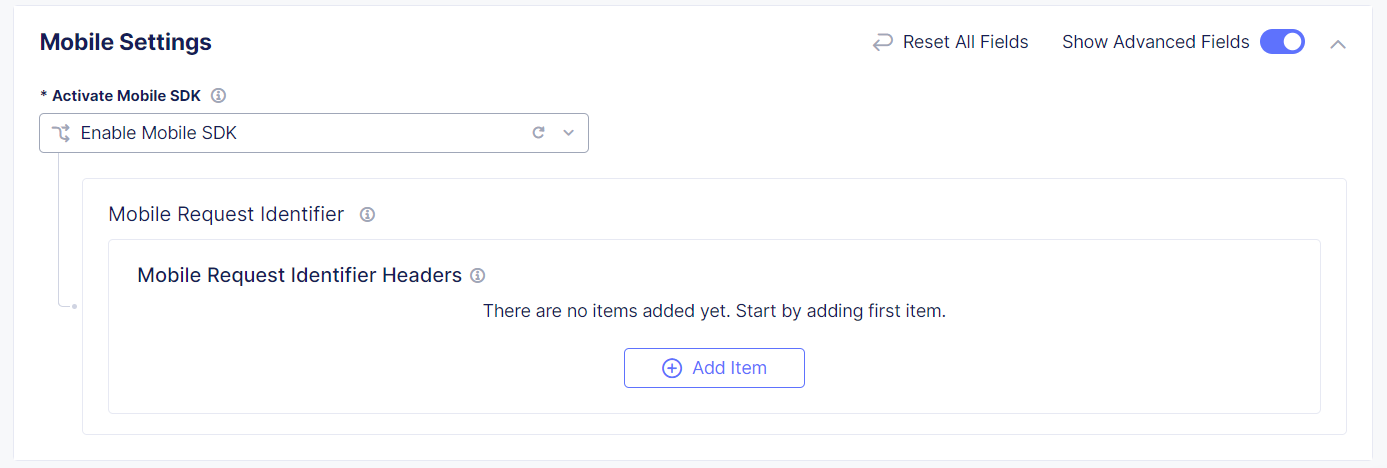
If you selected Web and Mobile Client as your client type during endpoint configuration, add a mobile header to distinguish the endpoints. This is not required if you selected only Web Client or Mobile Client.
-
Enable Show Advanced Fields.
-
In the Mobile Request Identifier Headers section, select Add Item.
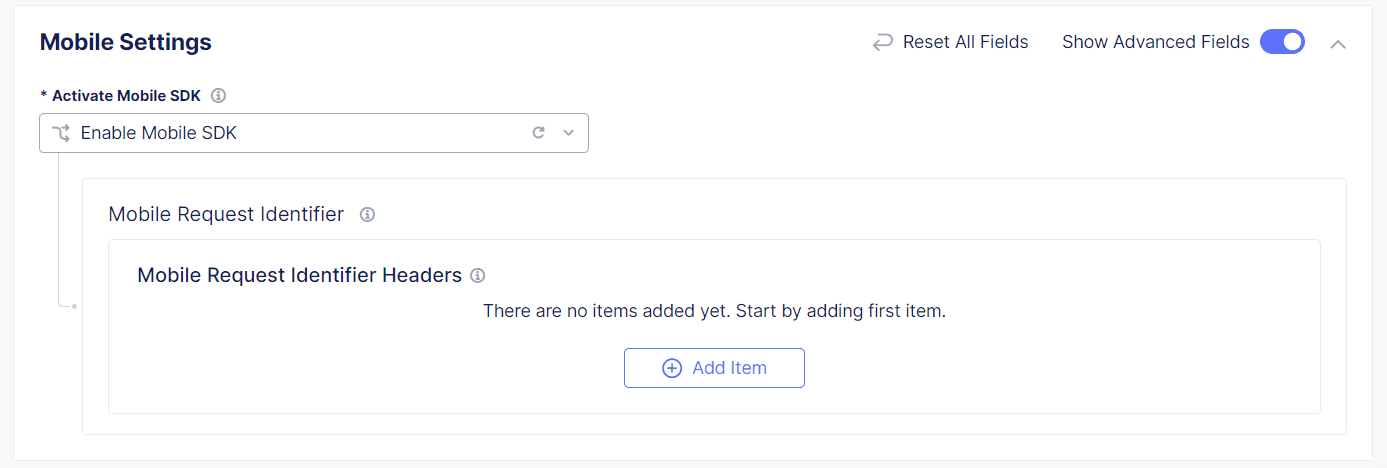
Figure: Mobile Settings
-
-
Enter a Name and the corresponding Value. Specify if the value must be exact or if it can be regex.

Figure: Header Configuration
-
Select Apply.
More Options
Important: Enable Show Advanced Fields to see all options.
Trusted Client Rules (Allow List)
Trusted Client Rules add headers and IPv4 addresses to an Allow List. Incoming HTTP requests from the allowed IPs or requests that contain allowed header name/value pairs bypass Bot Defense engine for evaluation and proceed directly to the origin. There is no logging for pages on the Allow List.
-
In the Trusted Client Rules section, select Configure and then select Add Item.
-
Enter a Name and specify the Client Identifier. Choose either IP Prefix or HTTP Headers.
- For IP Prefix, enter a string.
- For HTTP Header, select Add Item, enter a Name and Value and then select Apply.
Note: You can add multiple headers to the table at the same time. You must add IP addresses individually.
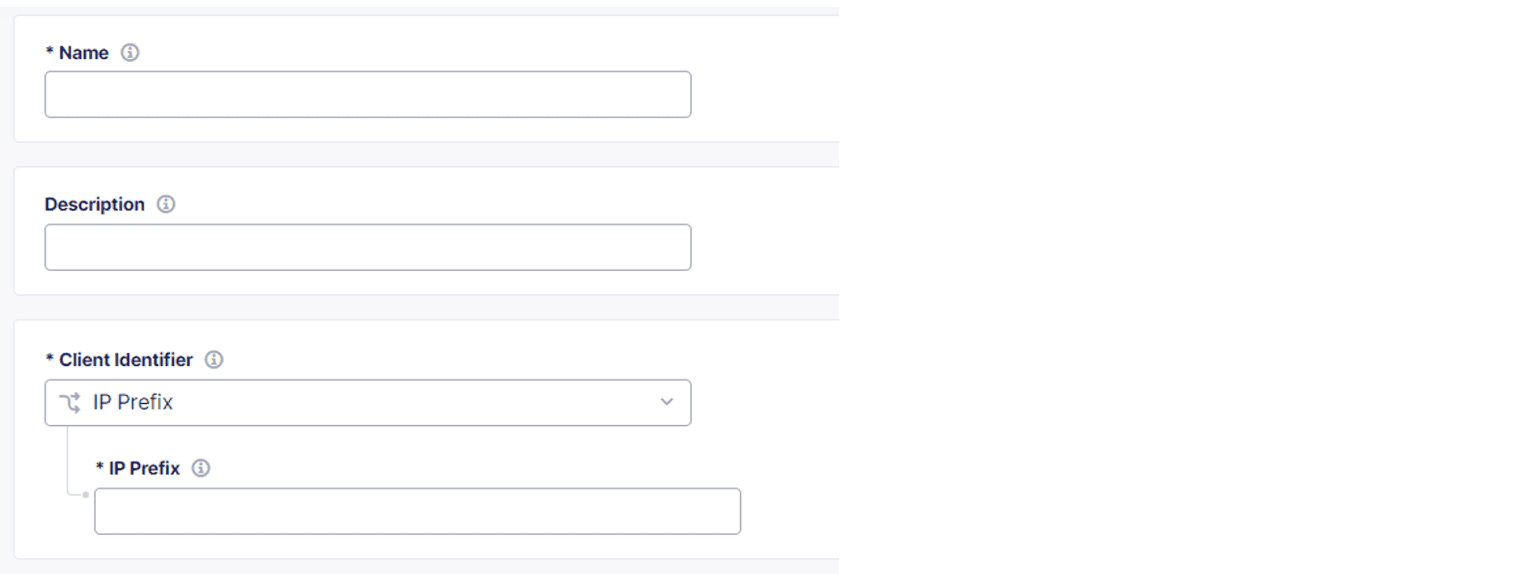
Figure: Trusted Client Rules
-
Select Apply when you finish adding Trusted Client Rules and then select Apply again to configure More Options.
Set Logging Level
- In the More Options section, select Show Advanced Fields.
- Select one of the following logging levels to determine the verbosity of the logging data collected by the system:
- Error – Includes connection and network errors. Does not include transaction errors.
- Warning – Includes information about malicious transactions. The Warning level also includes all Error-level log information.
- Informational – Includes information about both human and malicious transactions. The Informational level also includes all Warning-level log information.
- Debug – Full transaction logs that include all available log data, including all data from Error, Warning and Informational levels.
Define Continue Mitigation Header
In the More Options section, select Show Advanced Fields.
The Header Name for Continue Mitigation Action field is the header that is added to a request when automation is detected and you have set the mitigation action to Continue. You made this selection when you configured your protected endpoints. For information, see Protected Endpoints.
Timeout and Body Sample Size Limit
- In the More Options section, select Show Advanced Fields.
- Specify the Timeout value. This value defines the maximum wait time for the Bot Defense engine to run the analysis and return the inference. If the timeout is exceeded, the request continues to the origin. By default, the field is set to 700 ms based on performance efficiency.
Download the Cloudflare Connector Configuration and Worker Files
When you finish configuring the Cloudflare connector in the Distributed Cloud Console, you must download Worker and configuration files that you use to deploy the connector in Cloudflare.
-
In the Bot Defense dashboard, select Manage > Applications.
-
From the Actions column in the list of applications, next to the application you just added, select the Action Menu (…).

Figure: Action Menu
-
Select Download Config File and save the
<app_name>.jsonfile in a location you can access later. -
Select Download Worker File and save the
<app_name>.jsfile in a location you can access later.
Note:
<app_name>is the name of the application you added to Bot Defense earlier. You can decide to save the.jsand.jsonfiles with different names.
Configure the Connector in Cloudflare
Important: In Cloudflare, DNS must be in proxy mode.
Important: In Cloudflare, check your Worker rate-limiting settings. Depending on your traffic volume, you might need to disable rate limiting. To disable rate limiting, contact Cloudflare support.
To deploy the Bot Defense Connector in Cloudflare, you must create a new Cloudflare Worker and then insert the connector code in the Worker.
- In Cloudflare, create a new Worker to deploy the Bot Defense connector.
- Navigate to the Worker you created.
- Edit the Worker so you can replace the default Worker code with the code from the files that you downloaded from the Distributed Cloud Console.
- On the Worker edit page, clear the default Worker code and enter the entire contents of the
<app_name>.jsfile you downloaded. - After you enter the code from the
.jsfile, on the lineconst CONFIG = “__Config__”, replace“__Config__”(including the quotes) with the entire contents of the.jsonfile that you downloaded from the Distributed Cloud Console. - Assign a route to the Worker you created for Bot Defense. Enter a wildcard or
/*so the route matches all HTML pages and endpoints. - Save and deploy your changes in Cloudflare.
Confirm that Bot Defense is Functioning Properly
Perform the following steps to help ensure that Bot Defense is properly configured and evaluating traffic correctly.
- F5 recommends that you enable stream logging in Cloudflare to confirm that requests are being evaluated by Bot Defense correctly.
- On your website, inspect a protected endpoint to confirm that Bot Defense inserted the Bot Defense JavaScript.
- Review the Bot Defense dashboard to see the types of traffic identified by Bot Defense
Next Steps
Make sure you have configured Bot Defense correctly. For information, see Test your Bot Defense configuration.
On this page:
- Prerequisites
- Configure Bot Defense Cloudflare Connector Settings.
- Protected Endpoints
- Web Client JavaScript Settings
- Manual JavaScript Insertion
- Mobile Settings
- More Options
- Trusted Client Rules (Allow List)
- Set Logging Level
- Define Continue Mitigation Header
- Timeout and Body Sample Size Limit
- Download the Cloudflare Connector Configuration and Worker Files
- Configure the Connector in Cloudflare
- Confirm that Bot Defense is Functioning Properly


