Configure Bot Defense on an HTTP Load Balancer
Important: Bot Defense Self-Service Policy Management is an Early Access feature.
You can enable Bot Defense Advanced on one or more HTTP load balancers that you have configured in the F5 Distributed Cloud Console in either the Web App & API Protection workspace or the Multi-Cloud App Connect workspace.
Complete the following tasks on each HTTP load balancer where you want to enable Bot Defense:
- Enable Bot Defense on one or more HTTP load balancers.
- Configure how you want Bot Defense to inject JavaScript tags in the HTTP pages in your application. To detect automation, Bot Defense adds JavaScript, which runs in users' browsers and collects data that distinguishes between human visitors and automation.
- If you are protecting mobile endpoints, enable the F5 Distributed Cloud Mobile SDK. The F5 Mobile SDK collects telemetry that is then inspected by Bot Defense to determine if requests initiated from legitimate mobile devices.
When you enable Bot Defense on an HTTP load balancer in Web App & API Protection, you can view the Bot Defense dashboard from the load balancer. For information, see Bot Defense Dashboard.
Before you begin:
- You must purchase Bot Defense. You must have an active F5 Distributed Cloud account. If you do not have an account, see Getting Started with Distributed Cloud Console.
- Configure your Bot Endpoint Policies and Bot Allowlist Policies.
- Configure your Bot Defense infrastructure or work with your F5 Operations team to help them configure your infrastructure. If you plan to configure protection for both mobile and web endpoints, you must have separate infrastructures for each type.
- You must have an HTTP load balancer created in Web App & API Protection or Multi-Cloud App Connect. For information about how to create an HTTP load balancer, see Step 2 of the Web App Security & Performance Quick Start.
Enable Bot Defense on an HTTP Load Balancer
The following steps explain how to enable Bot Defense on an HTTP load balancer that you the configured in the Distributed Cloud Console. You can enable Bot Defense on multiple load balancers.
-
From the Distributed Cloud Console Homepage, select Web App & API Protection or Multi-Cloud App Connect.
-
From the navigation menu, confirm that you selected the correct namespace.
-
Select Manage > Load Balancers > HTTP Load Balancers.
-
From the Actions column, select the Action (…) menu next to the load balancer where you want to configure Bot Defense and then select Manage Configuration.
-
Select Edit Configuration and then select Bot Protection.
-
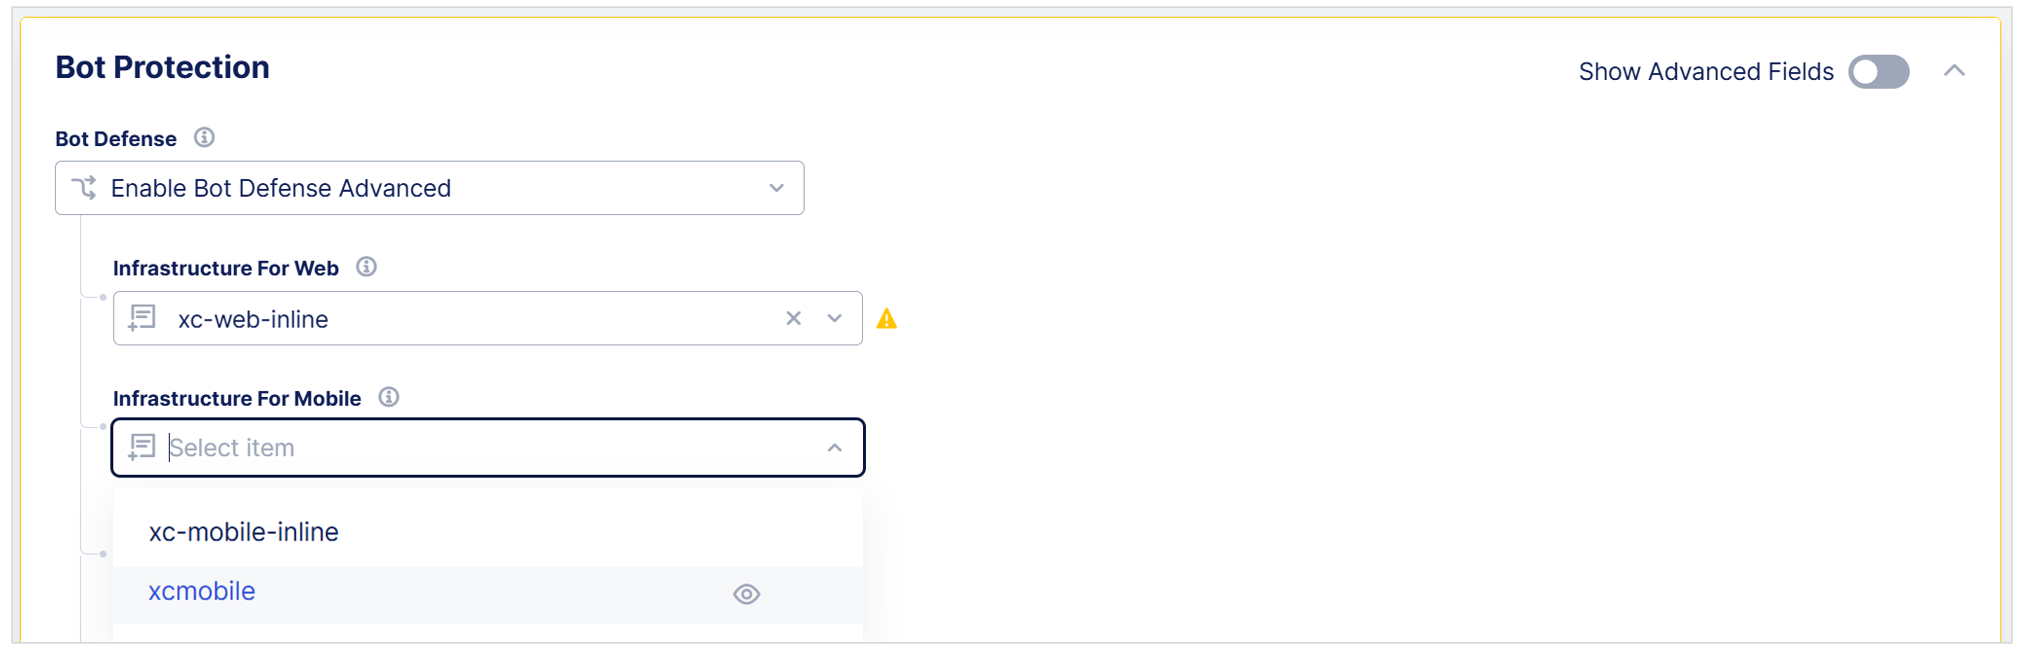
In the Bot Protection section, from the Bot Defense drop-down menu, select Enable Bot Defense.
-
Configure one or both of the following:
- Select the Bot Defense infrastructure that you want to use to process your web-based traffic.
- Select the Bot Defense infrastructure that you want to use to process your mobile traffic.
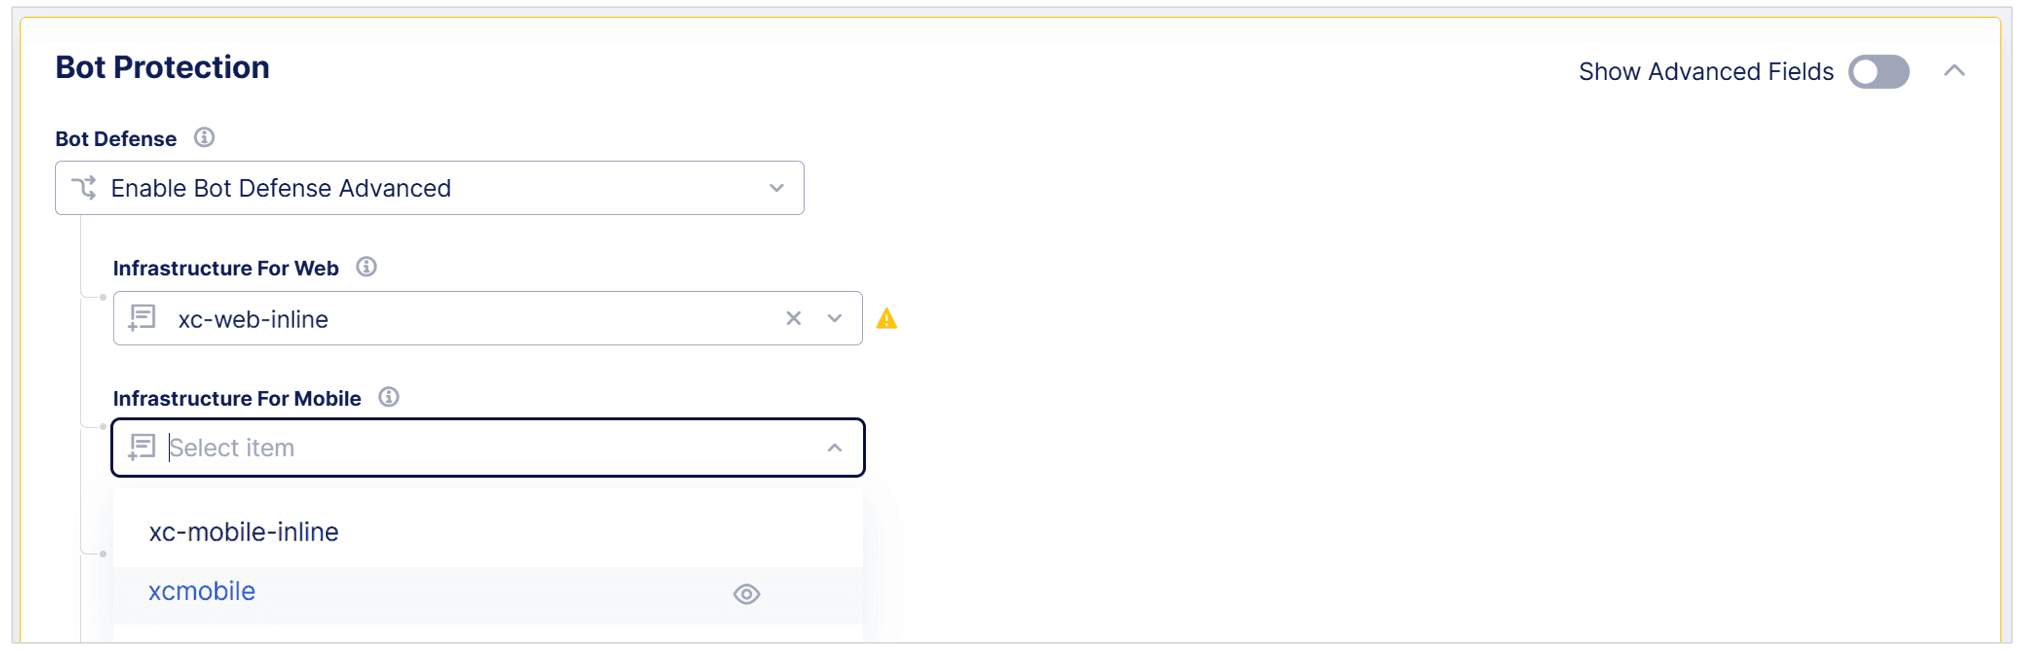
Figure: Enable Bot Defense on an HTTP Load Balancer
Next Steps
Configure how Bot Defense injects JavaScript tags in your HTML pages. See Configure Web JavaScript Settings.
Configure Web JavaScript Settings
If you you plan to protect web-based endpoints, you must configure how you want Bot Defense to inject JavaScript tags in the HTML pages that make calls to the endpoints you want to protect. To detect automation, Bot Defense adds JavaScript, which runs in users' browsers and collects environmental, behavioral and other data, that distinguishes between human visitors and automation.
Note: If necessary, you can disable JavaScript tag insertion at any time. For information, see Disable JavaScript Insertion.
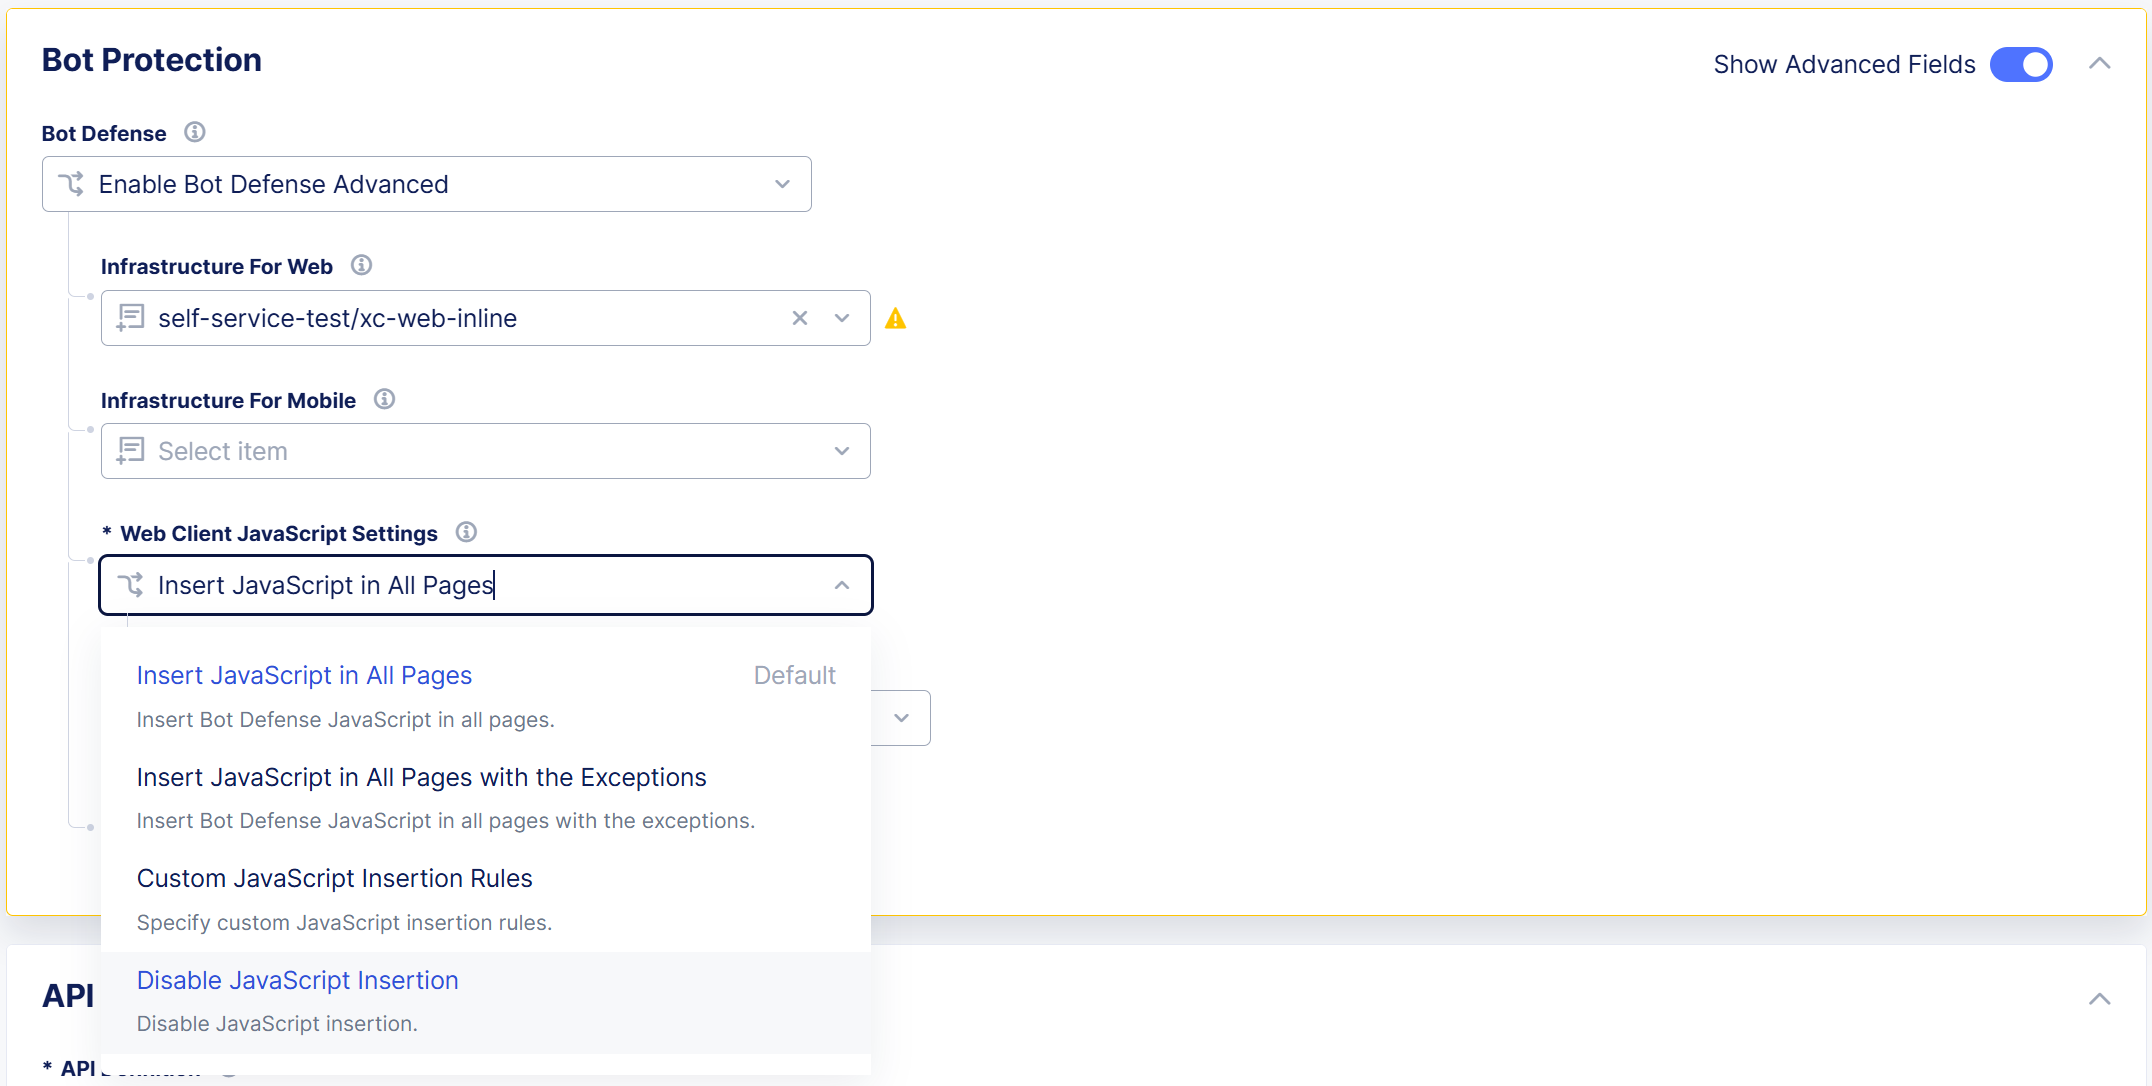
To configure how you want Bot Defense to inject JavaScript tags, from the Web Client JavaScript Settings drop-down menu, select one of the following options:
-
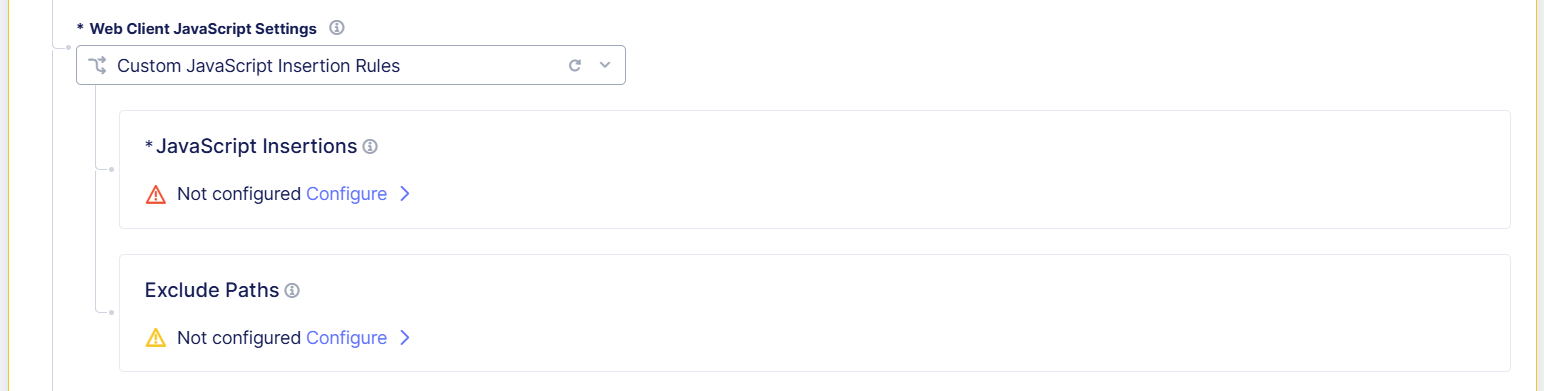
Custom JavaScript Insertion Rules: Configure matches for HTML pages in which Bot Defense inserts JavaScript tags, and then configure matches for a subset of those pages that you want to exclude.
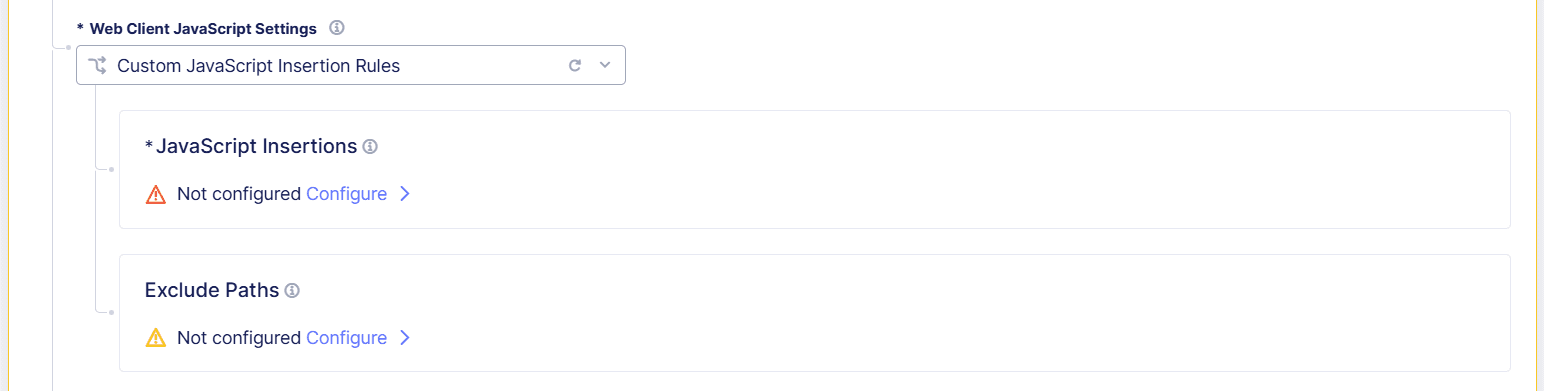
Figure: Configure Custom JavaScript Insertion Rules
-
To configure matches for pages in which you want to insert Bot Defense JavaScript tags, in the JavaScript Insertions section, select Configure.
-
Select Add Item and then enter the following information for each page in which you Bot Defense to insert JavaScript tags:
- Name: A name to identify the included page. The name must follow DNS-1035 format.
- Description: A human-readable description of the included page.
- Domain Matcher: Specify domains you want to include. Enter an Exact Value, a Suffix Value, or a Regex Value. If you select, Any Domain, then Bot Defense injects JavaScript tags in HTML pages from all domains.
- Path: Specify protected paths, such as
/login. Enter a Prefix, Exact path, or Regex value.
-
In the JavaScript Location drop-down menu, specify where in your HTML pages you want Bot Defense to inject JavaScript tags:
After <head>After </title>Before <script>
F5 recommends that you select
After <head>so that the JavaScript is executed early in the page loading process. This helps to avoid conflicts with other scripts and allows time for the Bot Defense JavaScript to be executed while the rest of page renders.If you select
After </title>, be sure your application pages have the<title>tag. -
Select Apply. Then select Apply again.
-
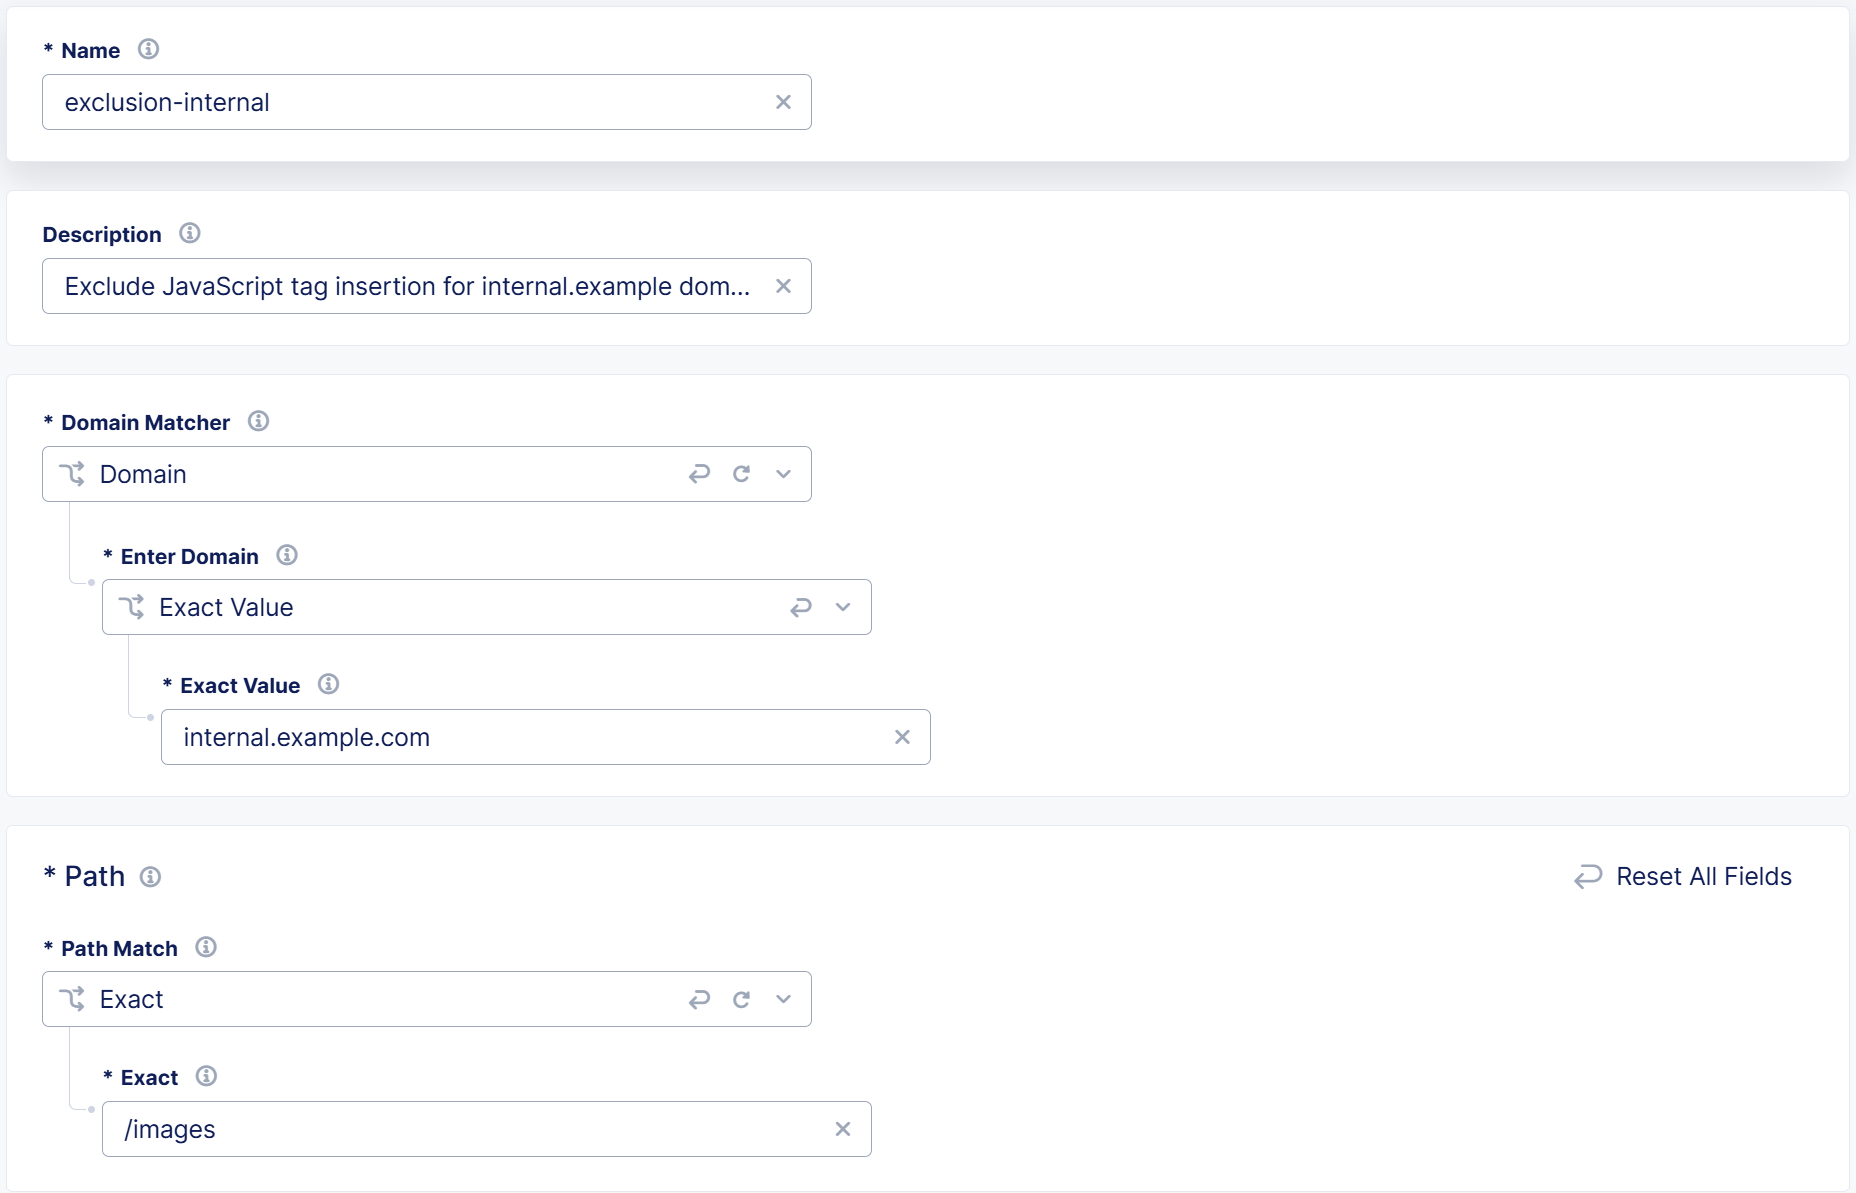
To configure matches for a subset of pages in which you do not want to insert JavaScript tags, in the Exclude Pages section, select Configure.
-
Select Add Item and then enter the following information for each page in which you do not want Bot Defense to insert JavaScript tags:
- Name: A name to identify the excluded page. The name must follow DNS-1035 format.
- Description: A human-readable description of the excluded page.
- Domain Matcher: Specify domains you want to exclude. Enter an Exact Value, a Suffix Value, or a Regex Value. If you select, Any Domain, then Bot Defense does not inject JavaScript tags in HTML pages from any domain.
- Path: Specify excluded paths, such as
/about. Enter a Prefix, Exact path, or Regex value.
-
Select Apply. Then select Apply again.
-
-
Insert JavaScript in All Pages with Exceptions: Bot Defense injects JavaScript tags in all of your HTML pages except for the ones you explicitly exclude.
-
In the JavaScript Location drop-down menu, specify where in your HTML pages you want Bot Defense to inject JavaScript tags:
After <head>After </title>Before <script>
F5 recommends that you select
After <head>so that the JavaScript is executed early in the page loading process. This helps to avoid conflicts with other scripts and allows time for the Bot Defense JavaScript to be executed while the rest of page renders.If you select
After </title>, be sure your application pages have the<title>tag. -
In the Exclude Pages section, select Configure and then select Add Item.
-
Enter the following information for each page in which you do not want to insert the Bot Defense JavaScript.
- Name: A name to identify the excluded page. The name must follow DNS-1035 format.
- Description: A human-readable description of the endpoint.
- Domain Matcher: Specify domains you want to exclude. Enter an Exact Value, a Suffix Value, or a Regex Value. If you select, Any Domain, then Bot Defense does not inject JavaScript tags in HTML pages from any domain.
- Path: Specify protected paths here. Enter a Prefix, Exact path, or Regex value.
-
Select Apply.
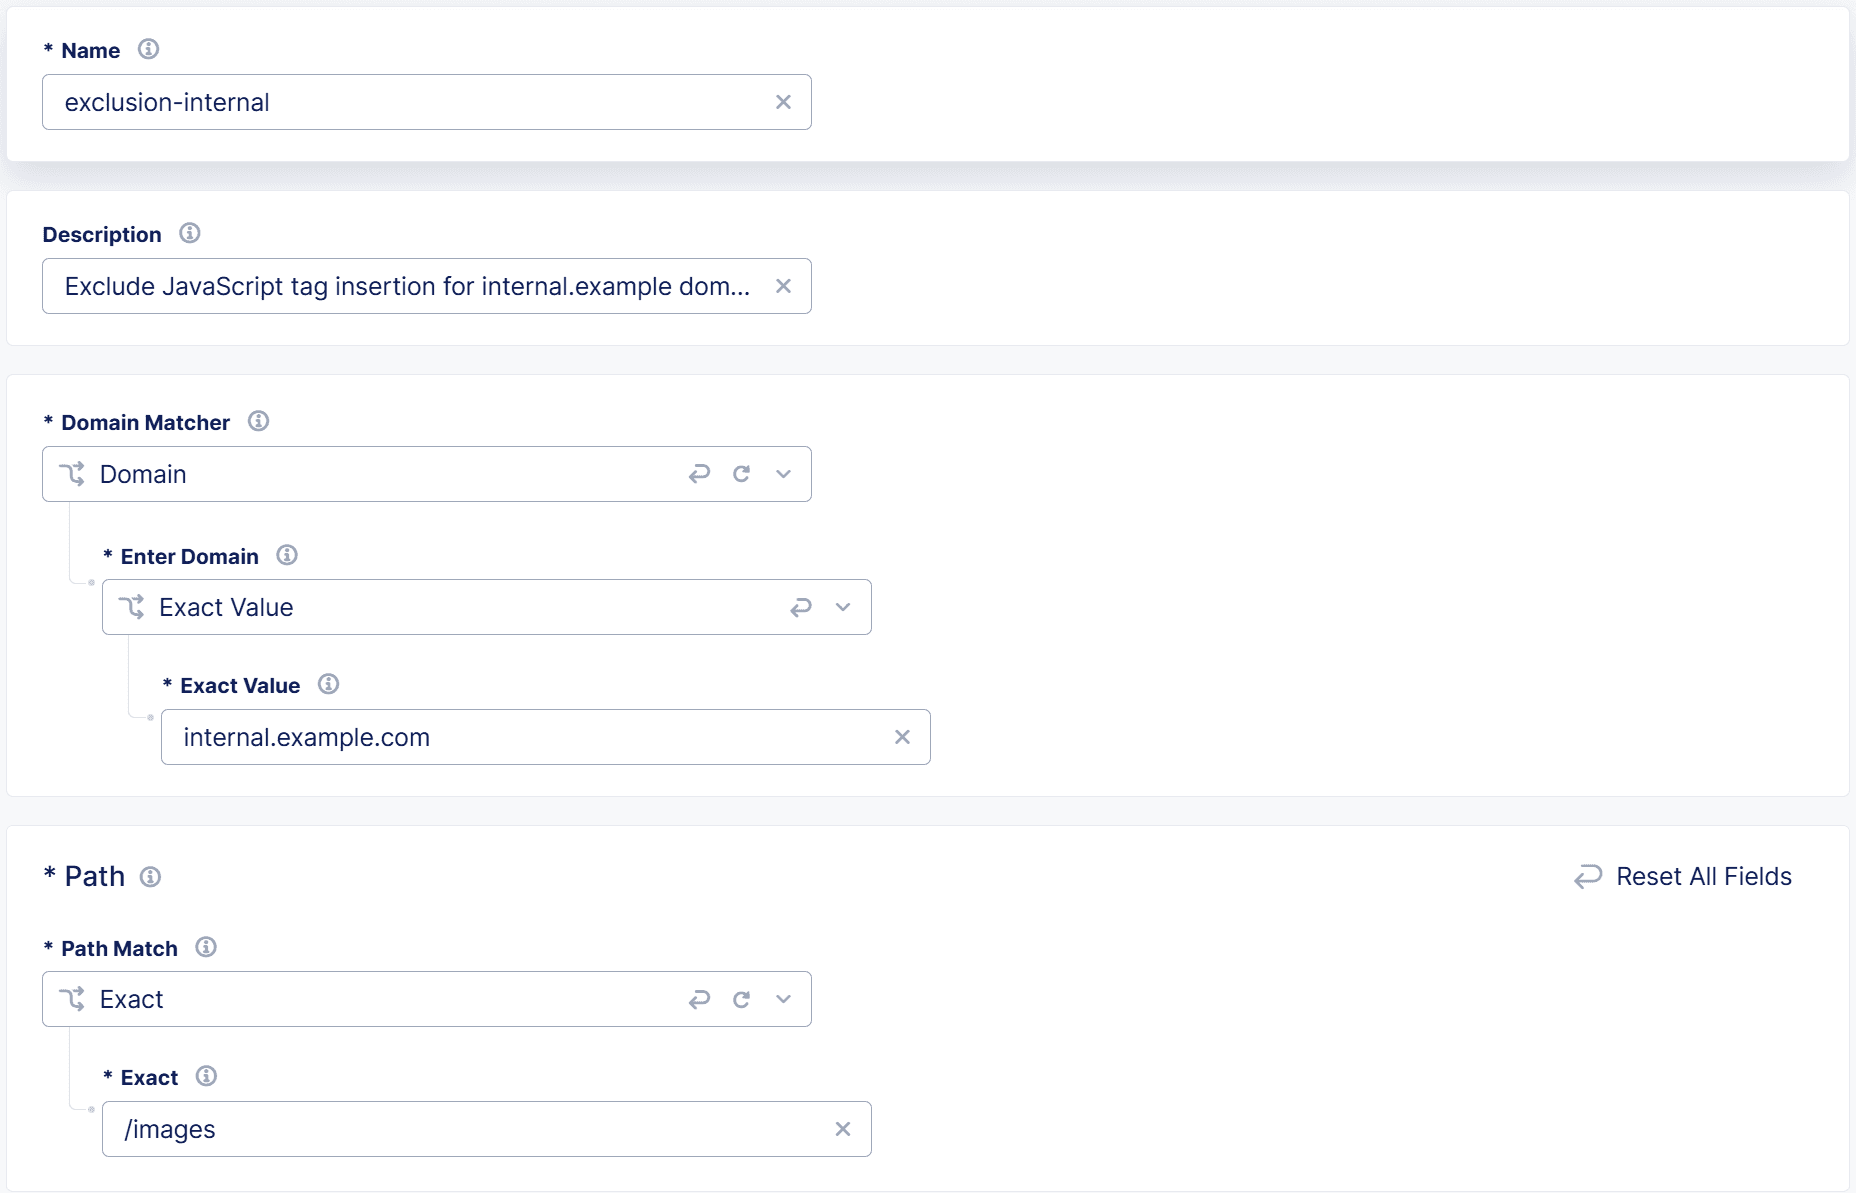
Figure: Insert JavaScript Tag in All Pages with Exceptions
-
-
Insert JavaScript in All Pages: Bot Defense injects JavaScript tags in all of your HTML pages.
-
Enable Show Advanced Fields.

Figure: Enable Show Advanced Fields
-
From the Web Client JavaScript Settings drop-down menu, select Insert JavaScript in All Pages.
-
In the JavaScript Location drop-down menu, specify where in your HTML pages you want Bot Defense to inject JavaScript tags:
After <head>After </title>Before <script>
F5 recommends that you select
After <head>so that the JavaScript is executed early in the page loading process. This helps to avoid conflicts with other scripts and allows time for the Bot Defense JavaScript to be executed while the rest of page renders.If you select
After </title>, be sure your application pages have the<title>tag.Note: If necessary, you can disable JavaScript tag insertion at any time. For information, see Disable JavaScript Insertion.
-

Next Steps
If you plan to protect mobile endpoints, enable the F5 Distributed Cloud Mobile SDK. See Enable the F5 Mobile SDK. Otherwise select Save HTTP Load Balancer and see Next Steps.
Enable the F5 Mobile SDK
To protect mobile endpoints, you must enable F5 Distributed Cloud Mobile SDK settings and then configure the header values that Bot Defense uses to distinguish mobile requests from web requests. The Mobile SDK collects telemetry and adds headers to requests, which are then inspected by Bot Defense to determine if the requests initiated from legitimate mobile devices.
-
From the Activate Mobile SDK drop-down menu, select Enable Mobile SDK.
-
In the Mobile Request Identifier Headers section, select Add Item.
-
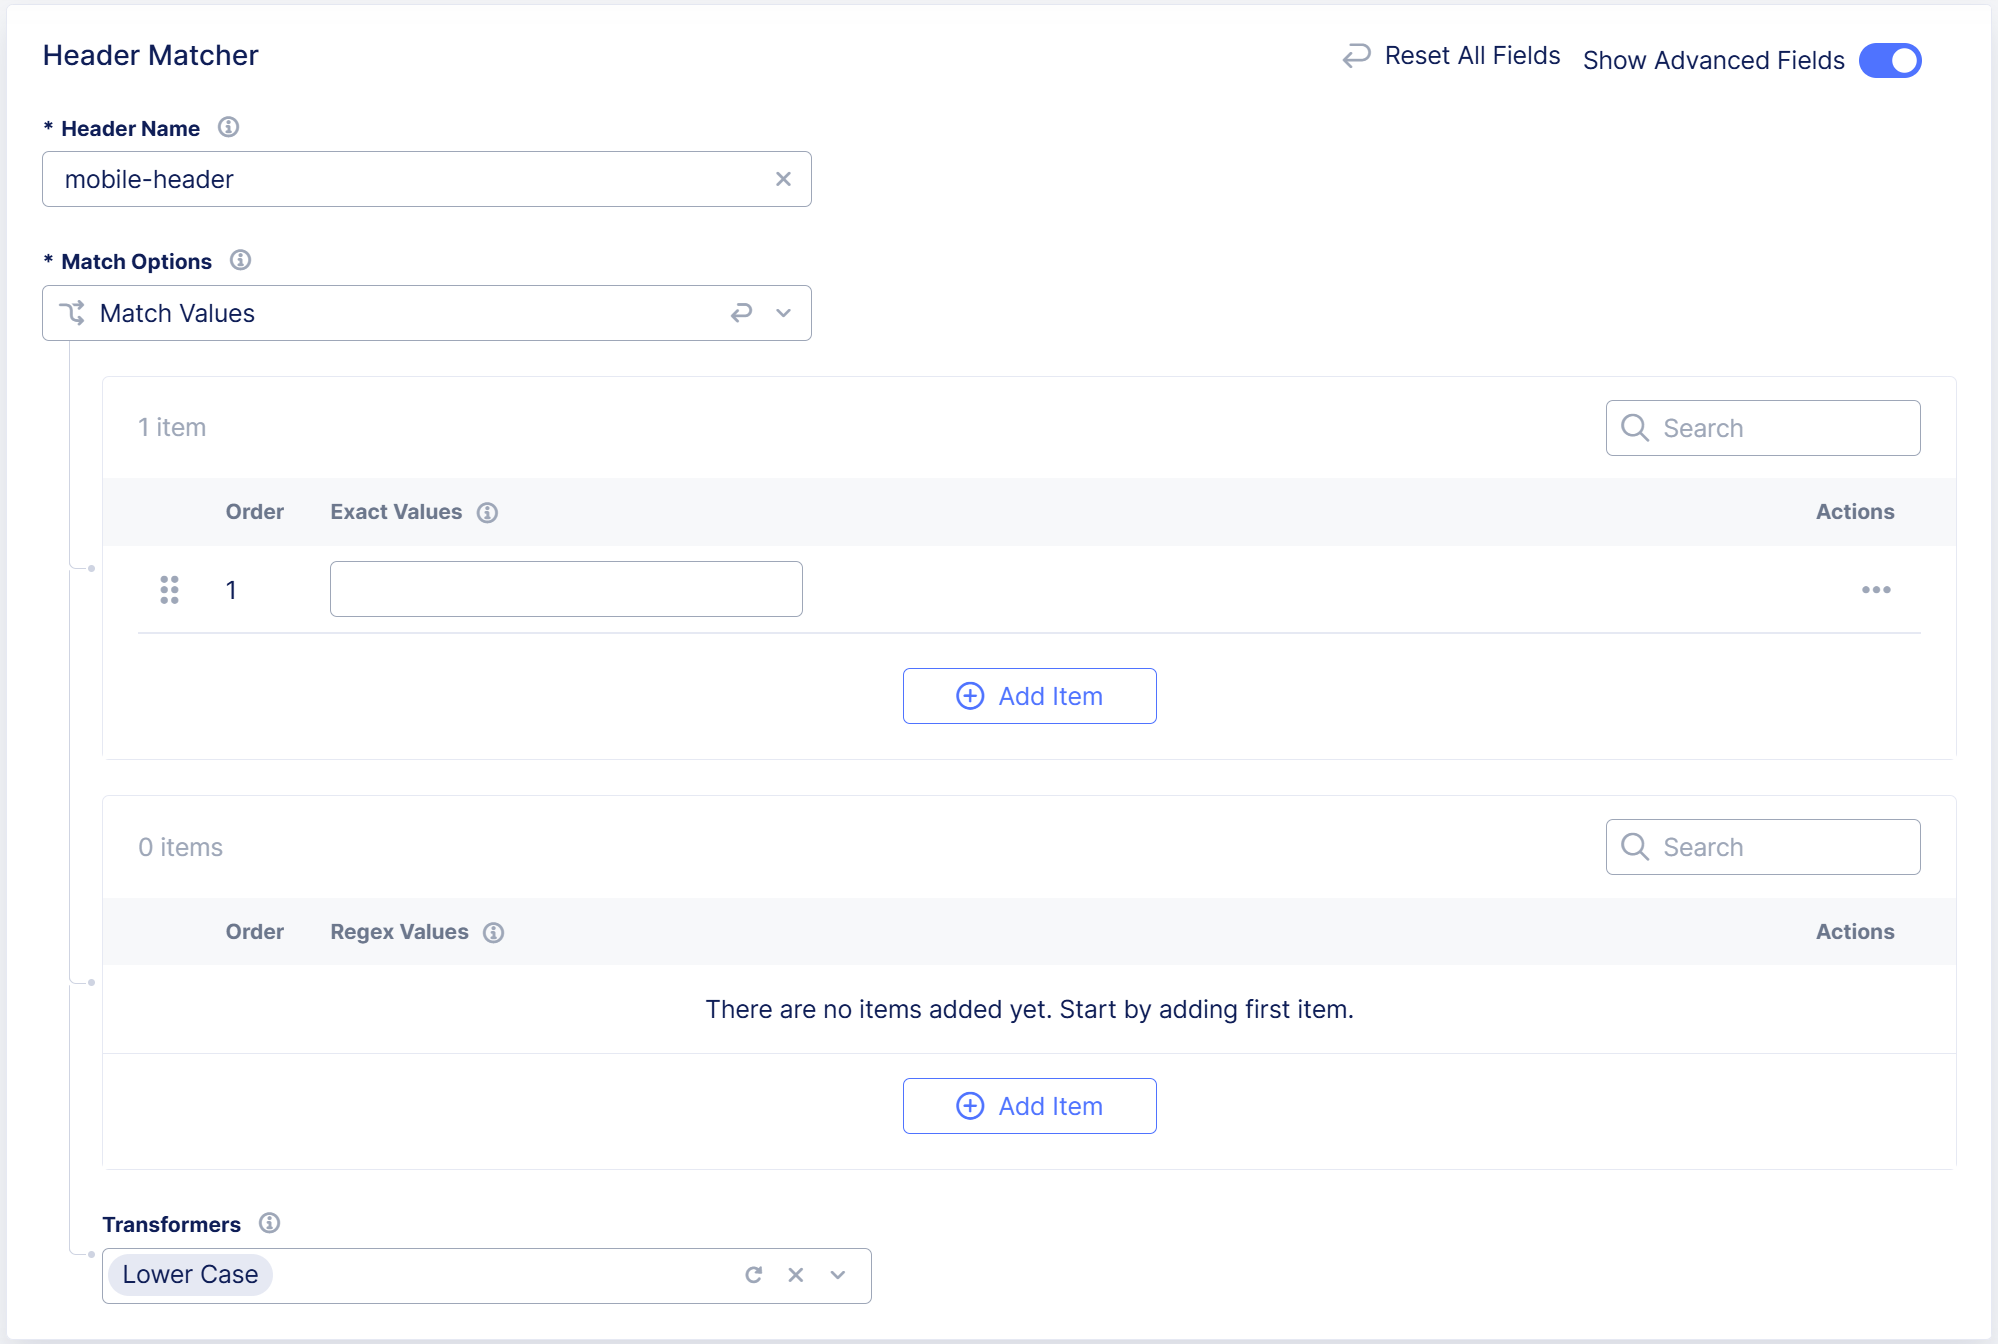
In the Header Matcher section, enter the Header Name to identify the header you want Bot Defense to use to distinguish mobile requests from web requests.
-
From the Match Options drop-down menu, select one of the following options:
- Match Values: Enter the Exact Values and Regex Values for the header that Bot Defense can use to identify mobile requests.
- Present: Bot Defense checks that the header name you entered is present.
- Not Present: Bot Defense checks that the header name you entered is not present.
-
Optionally select Transformers to apply to the match values you entered. To display this option, enable Show Advanced Fields.
-
Select Apply, and then select Save HTTP Load Balancer.
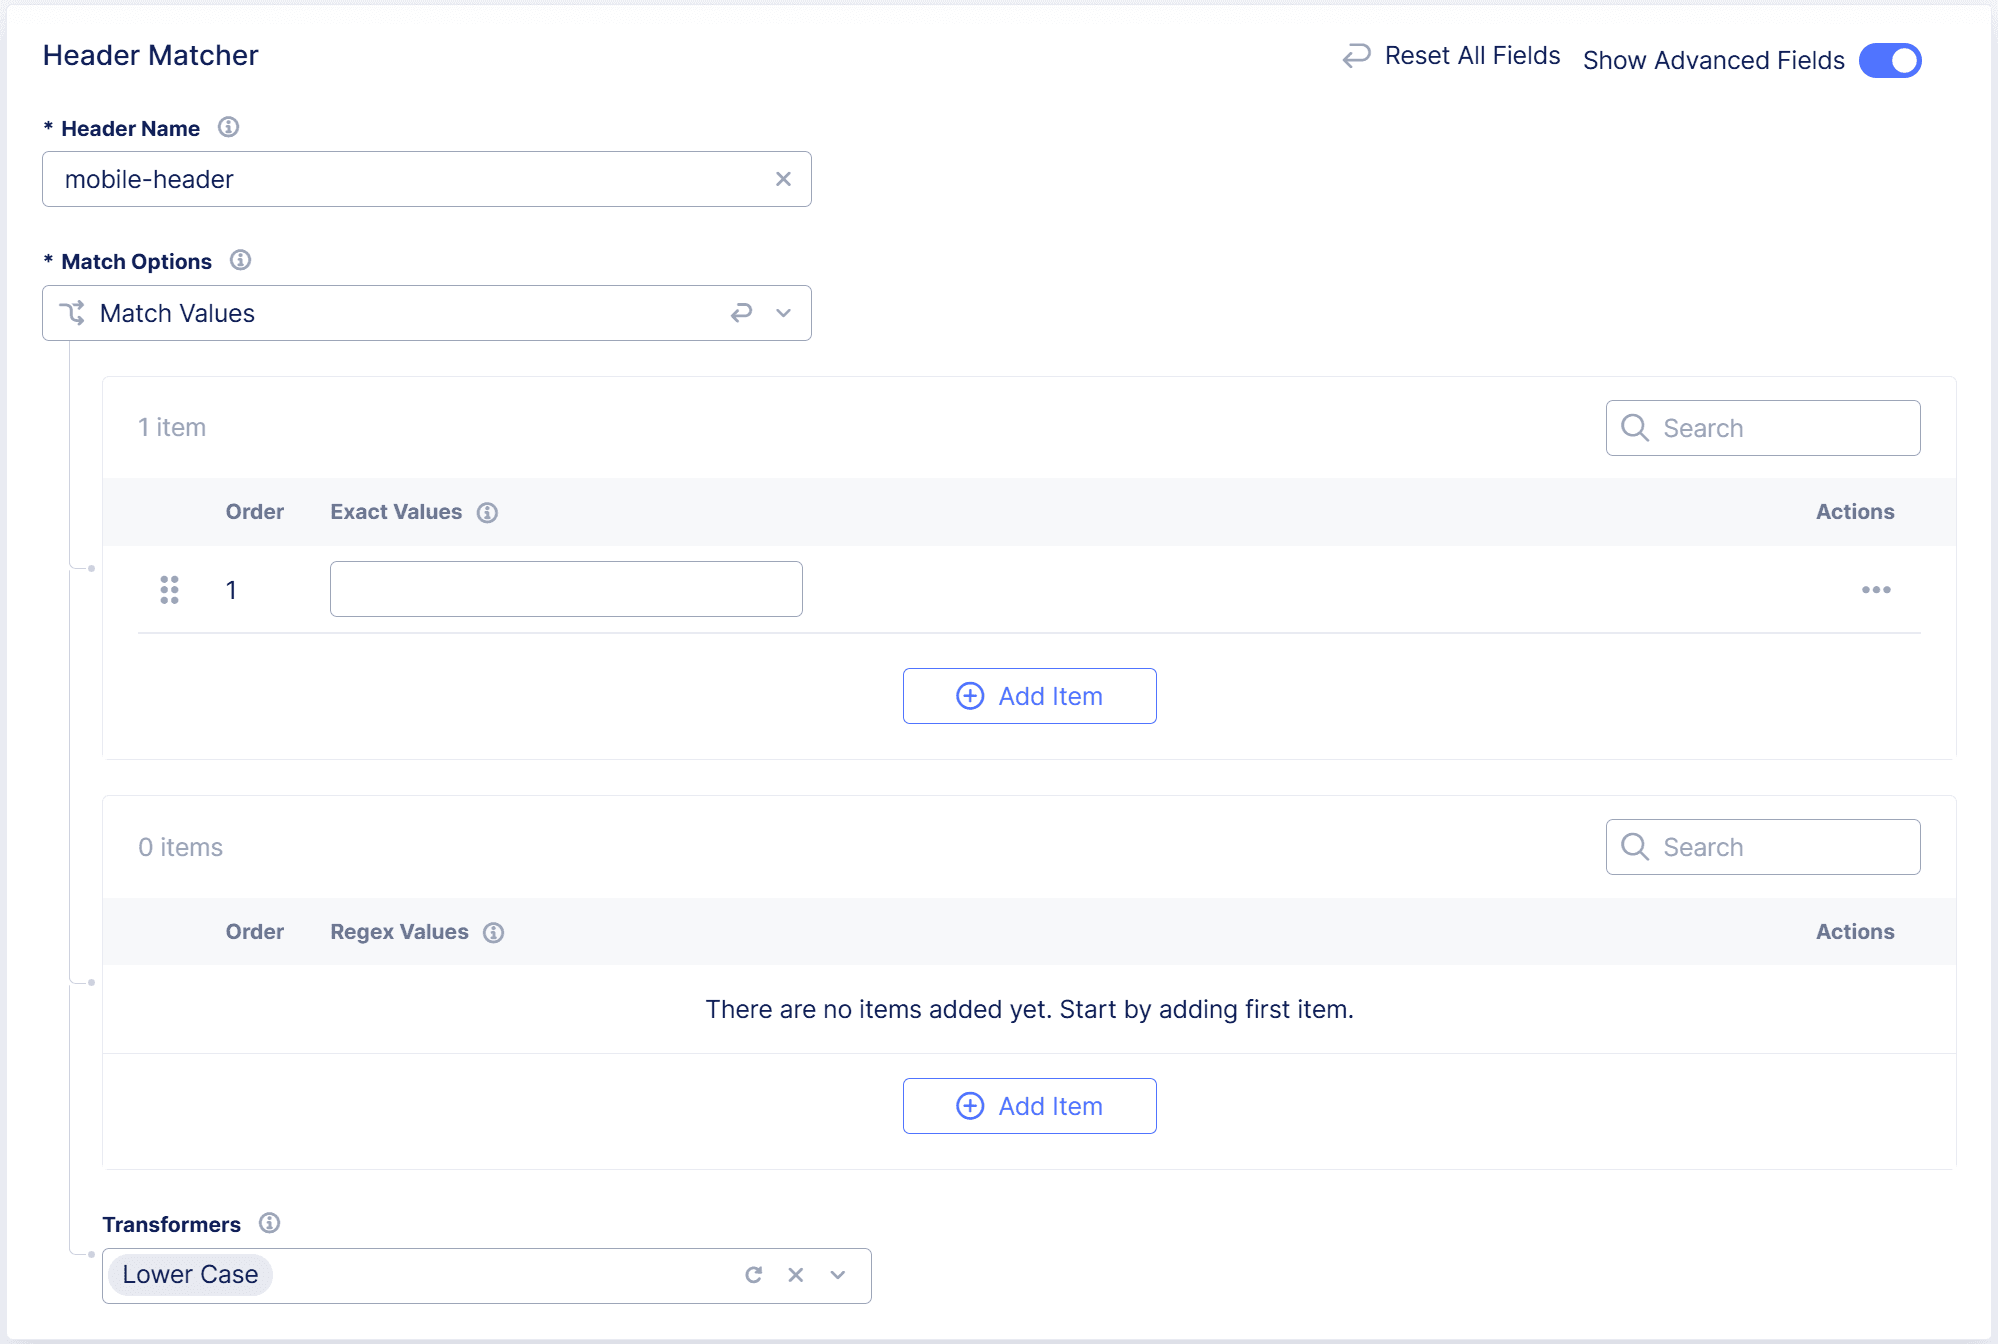
Figure: Configure Mobile SDK
Next Steps
When you finish enabling Bot Defense on your HTTP load balancers, go to the Distributed Cloud Console to perform the following tasks:
- Add the hostnames of the HTTP load balancers where you enabled Bot Defense to either the Upstream Routing section or Manual Routing section of your Bot Network Policy. For example, enter
lb.example.com. If you enabled Bot Defense on multiple load balancers, add an entry for each hostname. - Review your Bot Endpoint Policies and Bot Allowlist Policies to confirm your settings are correct.
- Test Bot Defense to ensure that Bot Defense is properly configured, that it is injecting JavaScript tags in your HTML pages correctly, or that you have correctly integrated the F5 Distributed Cloud Mobile SDK with your mobile application.
Optional Tasks
Use Trusted Client Rule Settings to Allowlist Requests
When you configure Bot Defense on an HTTP load balancer, you can optionally use Trusted Client Rules in F5 Distributed Cloud to selectively allowlist requests that meet the criteria in the rule. These allowlisted requests are not evaluated by Bot Defense.
For information, see the knowledgebase article, K000146814: How do I skip Bot Defense and/or WAF for a trusted client?
Disable JavaScript Insertion
The following steps explain how to optionally disable JavaScript tag insertion in environments where you have enabled Bot Defense through an HTTP load balancer.
Important: For maximum effectiveness, Bot Defense requires you to enable JavaScript insertion. F5 recommends that you do not disable JavaScript insertion.
To disable JavaScript tag insertion in Bot Defense on an HTTP load balancer:
-
From the Distributed Cloud Console Homepage, select Web App & API Protection.
-
From the navigation menu, confirm that you selected the correct namespace.
-
Select Manage > Load Balancers > HTTP Load Balancers.
-
From the Actions column, select the Action (…) menu next to the load balancer on which you want to disable JavaScript tag insertion and then select Manage Configuration.
-
Select Edit Configuration and then select Bot Protection.
-
In the Bot Protection section, enable Show Advanced Fields.
-
From the Web JavaScript Settings drop-down menu, select Disable JavaScript Insertion.
-
To save your changes, select Save HTTP Load Balancer.
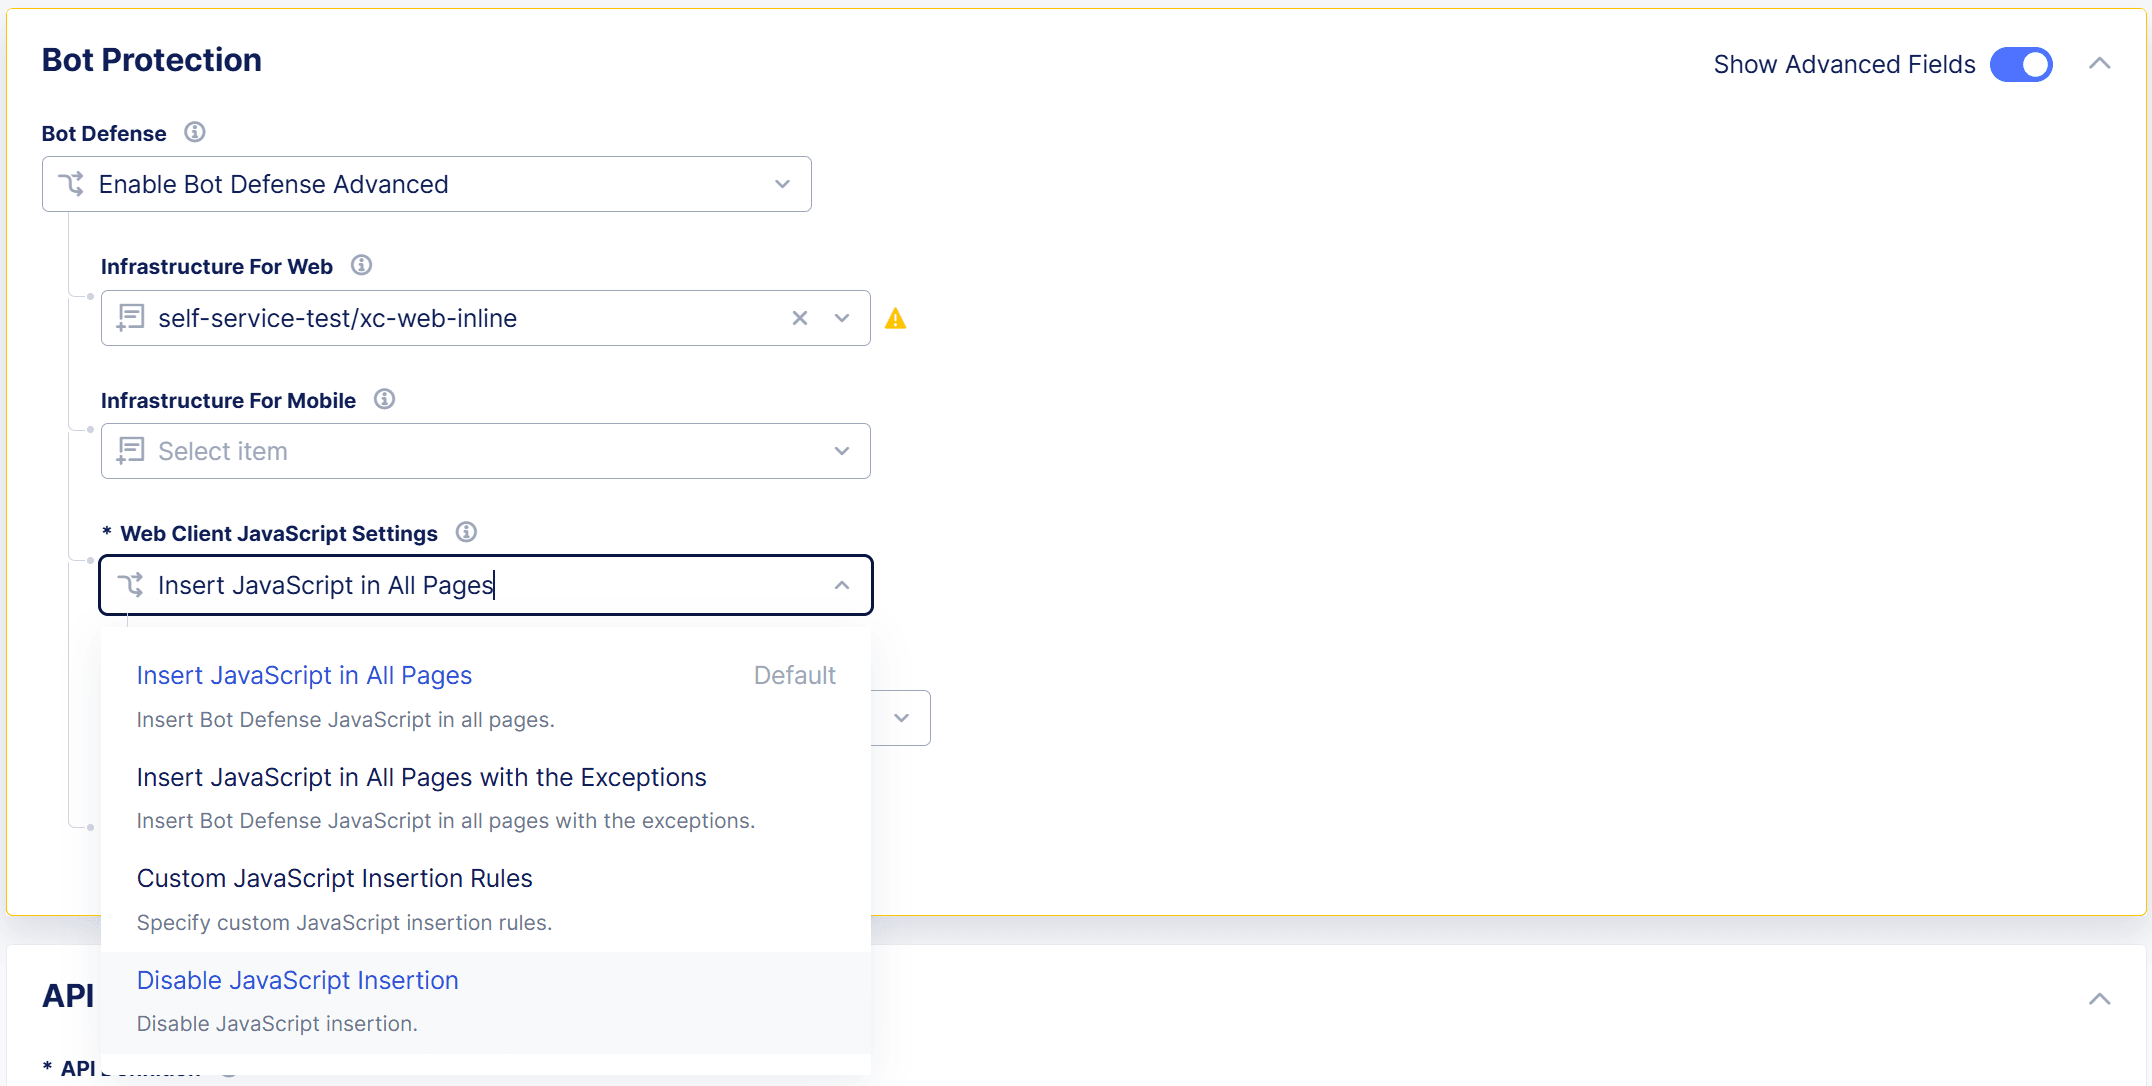
Figure: Disable JavaScript Tag Insertion