Configure the Bot Endpoint Policy
Important: Bot Defense Self-Service Policy Management is an Early Access feature.
The Bot Endpoint Policy defines the endpoints you want to protect with Bot Defense and the mitigation actions that Bot Defense takes when it detects automated traffic. Before you configure your Bot Endpoint Policy, you should perform a site analysis and compile a list of endpoints that you need to protect. You must configure different Bot Endpoint Policies for web-based traffic and for mobile traffic.
Important: If you protect mobile endpoints, configure the Bot Endpoint Policy for your mobile traffic before you download your base configuration file so that the base configuration file contains all the endpoints you want to protect.
Note: You can only edit the most recent version of the policy.
-
From the Bot Defense navigation menu, select Manage > Bot Policies and then select Bot Endpoint Policy.
-
From the list of saved Bot Endpoint Policies, in the Actions column, select the Action menu (…) next to the most recent policy version. If you plan to protect mobile endpoints, then the type of policy you select must be Mobile. If you plan to protect web-based endpoints, then the type of policy you select must be Web.
If you are configuring a Bot Endpoint Policy for the first time, it is likely that you only have one saved policy version.
-
Select Manage Configuration and then select Edit Configuration.
-
To add a new protected endpoint, in the Protected Endpoints section, select Add Item and then configure the endpoint settings.
-
Enter a Name and Description for the new endpoint.
-
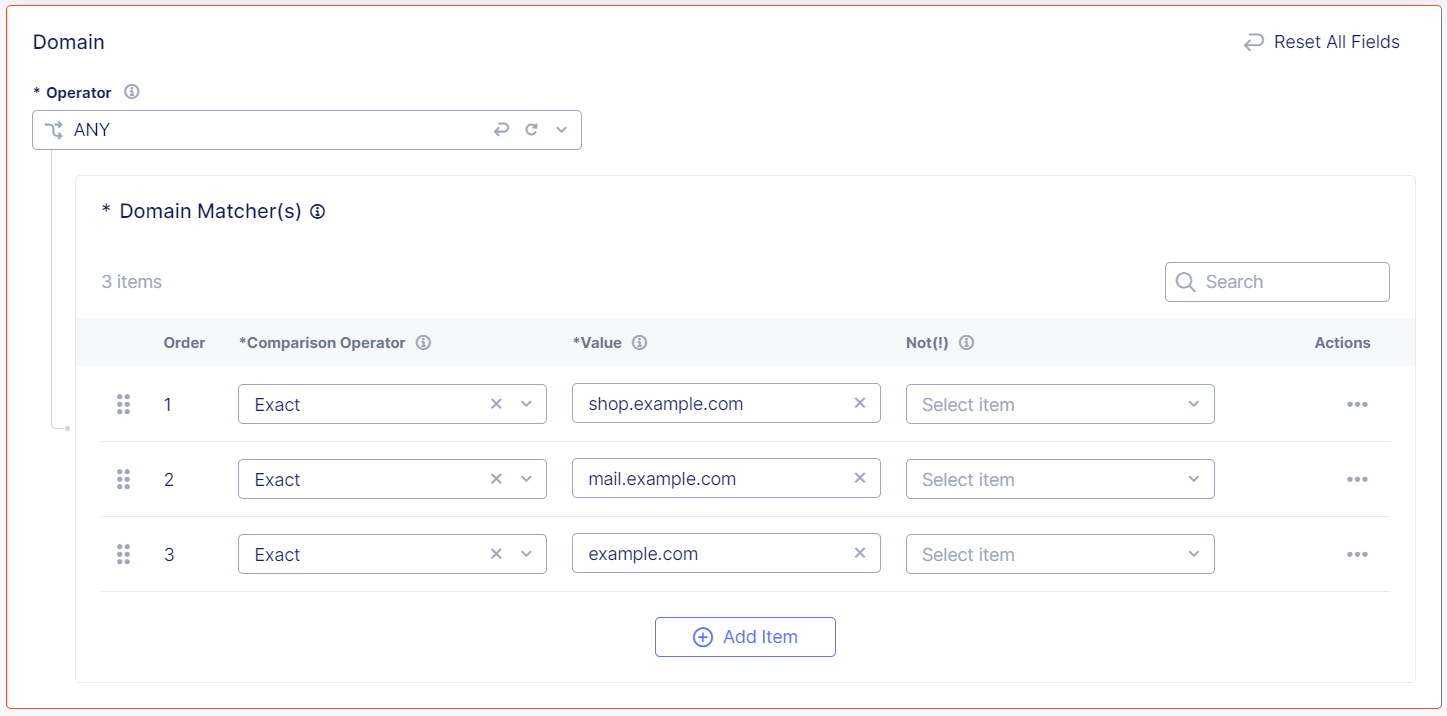
Specify the Domain from which you accept traffic on this endpoint. You can add more than one domain.
-
From the Operator drop-down menu, decide how you want to match the domain:
- ALL: Match only if all the domain matchers match the domain in the request.
- ANY: Match if any of the domain matchers match the domain in the request.
- ANYTHING: No match is necessary. The endpoint accepts traffic from any domain.
- NONE: Match only if none of the domain matchers match the domain in the request.
-
Enter a Comparison Operator, either Exact, Contain, Start With or End With, and then enter the value you want to match.
-
(Optional) From the Not (!) drop-down menu, select Yes or No. The default selection is No. Change the setting to Yes if you want Bot Defense to match values that are the opposite of the values you entered above.
-
(Optional) To protect another domain, select Add Item.

Figure: Domain Matchers
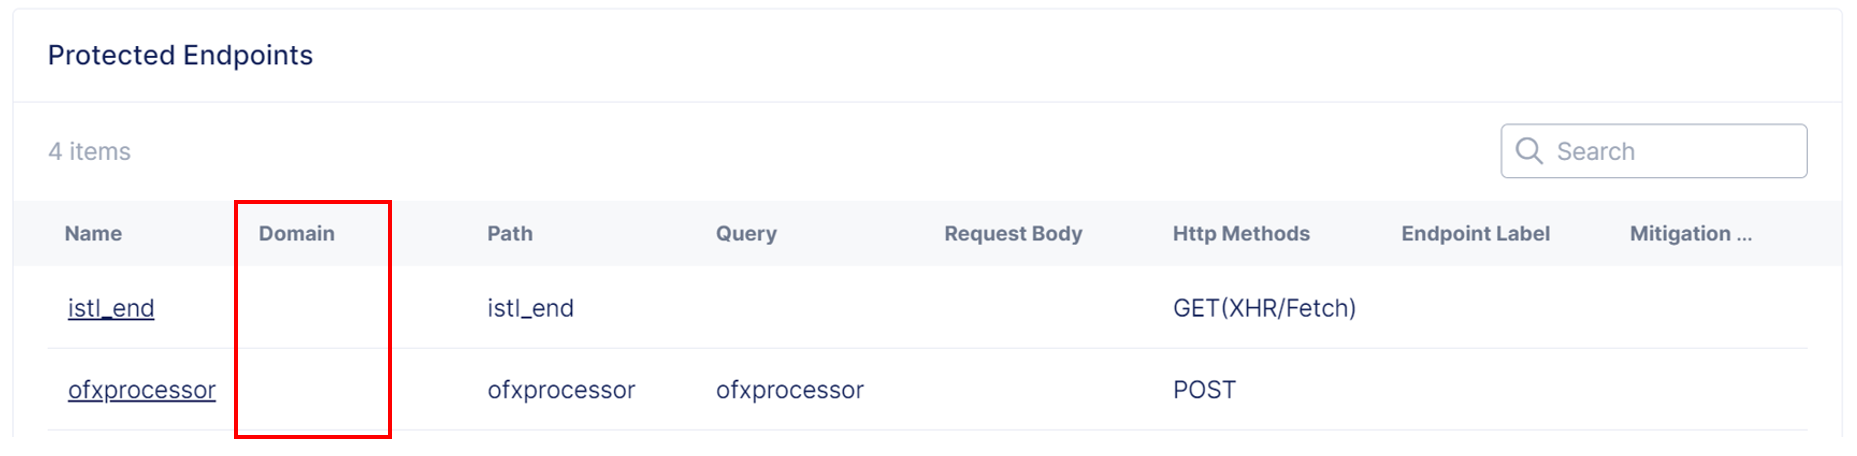
Note that if you do not specify a domain, the domain column is blank, and the endpoint accepts traffic from any domain.

Figure: No Domain Specified
-
-
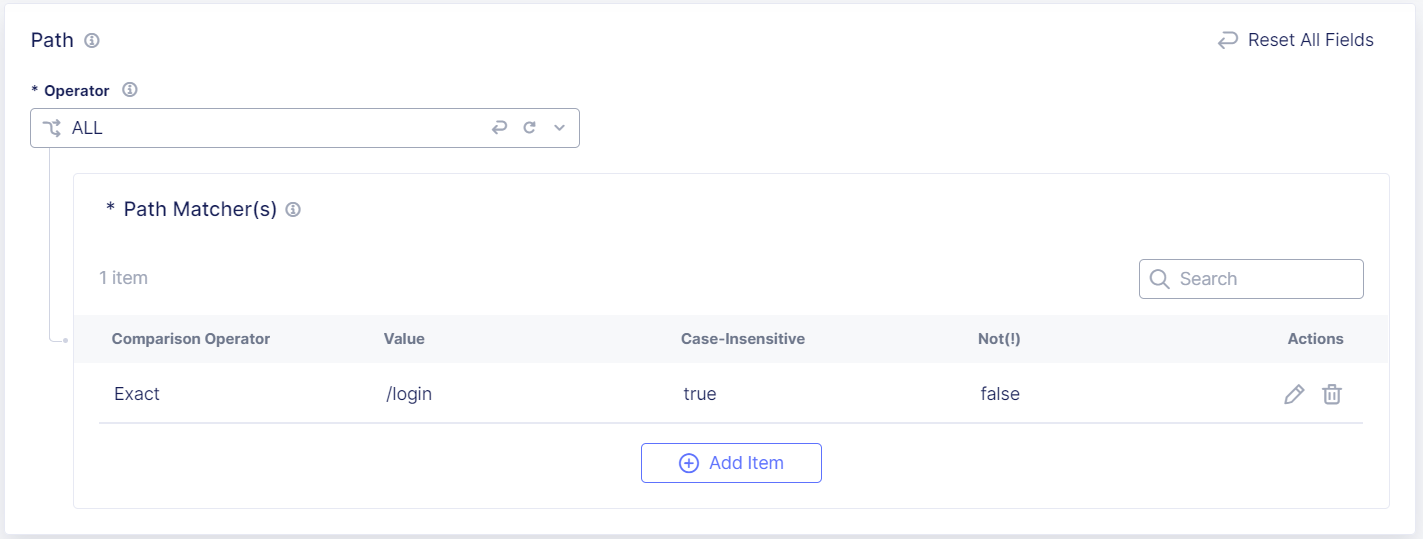
Enter the Path for the endpoints you want to protect. For example, enter
/login.-
From the Operator drop-down menu, decide how you want to match the path:
- ALL: Match only if all the path matchers match the path targeted by the request.
- ANY: Match if any of the path matchers match the path targeted by the request.
- ANYTHING: No match is necessary. Match regardless of the path targeted by the request.
- NONE: Match if none of the path matchers match the path targeted in the request.
-
Select Add Item.
-
Select a Comparison Operator, either Exact, Contain, Start With or End With, and then enter the value you want to match.
-
(Optional) If you want Bot Defense to match values that are the opposite of the values you entered above, select Not (!).
-
Select Apply.

Figure: Path Matchers
-
-
To protect URI query parameters, enter Query match criteria.
For example, if the query parameter of a URI is
<yourdomain>/account.do/issue?account=moneytransfer, enter the parameter name and parameter valueaccount=moneytransferto protectmoneytransfer.When you enter a Query parameter, Bot Defense looks at both the Path and Query values.
-
From the Operator drop-down menu, decide how you want Bot Defense to match query strings:
- ALL: Match only if all the query matchers match the functionality targeted by the request.
- ANY: Match if any of the query matchers match the functionality targeted by the request.
- ANYTHING: No match is necessary. Match regardless of the functionality targeted by the request.
- NONE: Match if none of the path matchers match the functionality targeted in the request.
-
Select Add Item.
-
Select a Comparison Operator, either Exact, Contain, Start With or End With, and then enter the value you want to match.
-
(Optional) If you want Bot Defense to match values that are the opposite of the values you entered above, select Not (!).
-
Select Apply.
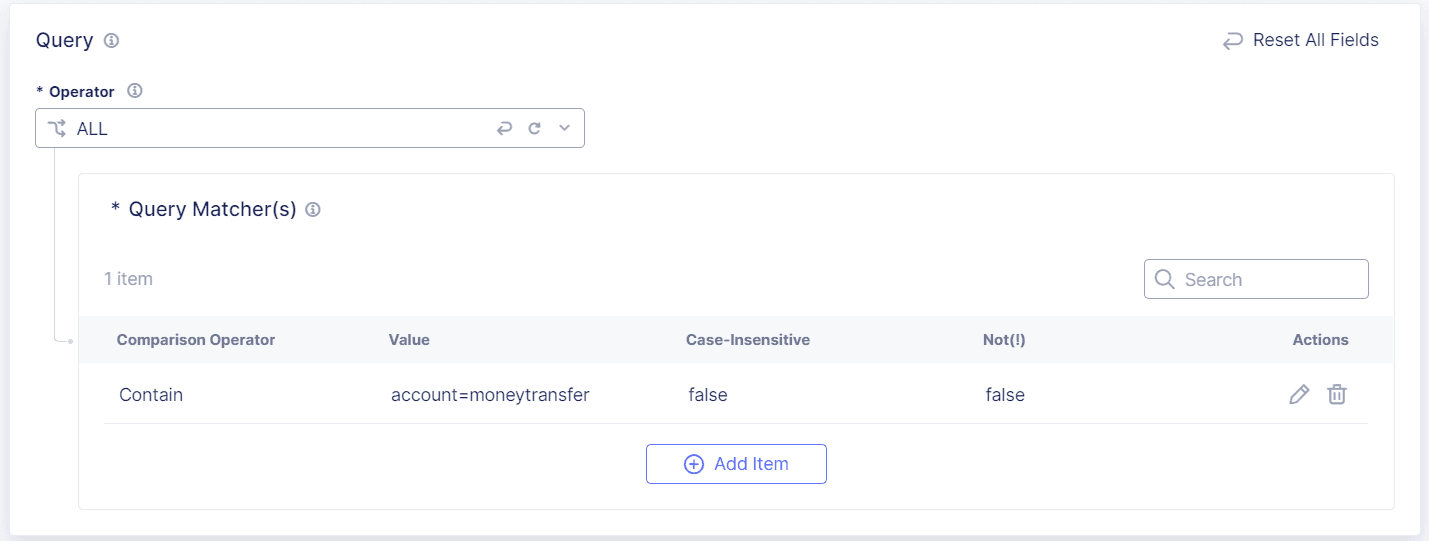
Figure: Query Matcher
-
-
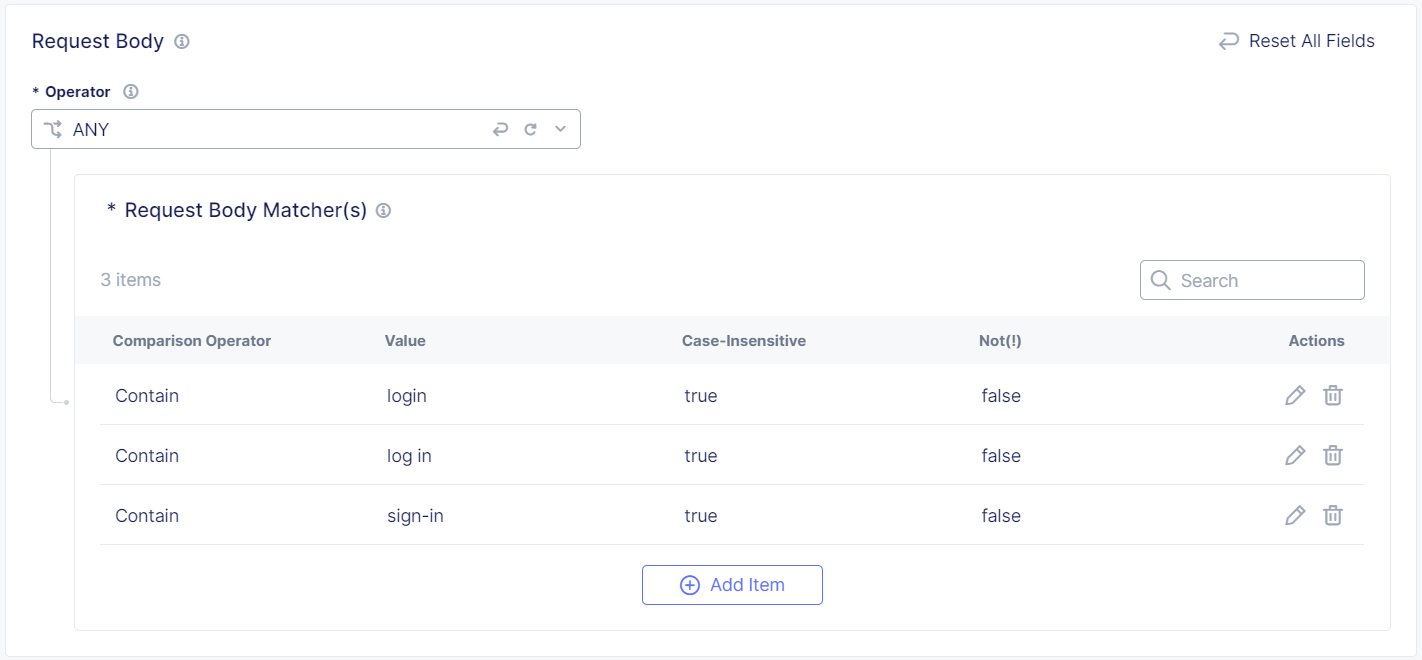
Configure matches for content in the Request Body of a protected endpoint request.
-
From the Operator drop-down menu, decide how you want Bot Defense to match the body content:
- ALL: Match only if all the request body matchers match content in the request body.
- ANY: Match if any of the request body matchers match content in the request body.
- ANYTHING: No match is necessary. Match regardless of the content of the request body.
- NONE: Match if none of the request body matchers match content in the request body.
-
Select Add Item.
-
Select a Comparison Operator, either Exact, Contain, Start With or End With, and then enter the value you want to match.
-
(Optional) If you want Bot Defense to match values that are the opposite of the values you entered above, select Not (!).
-
Select Apply.
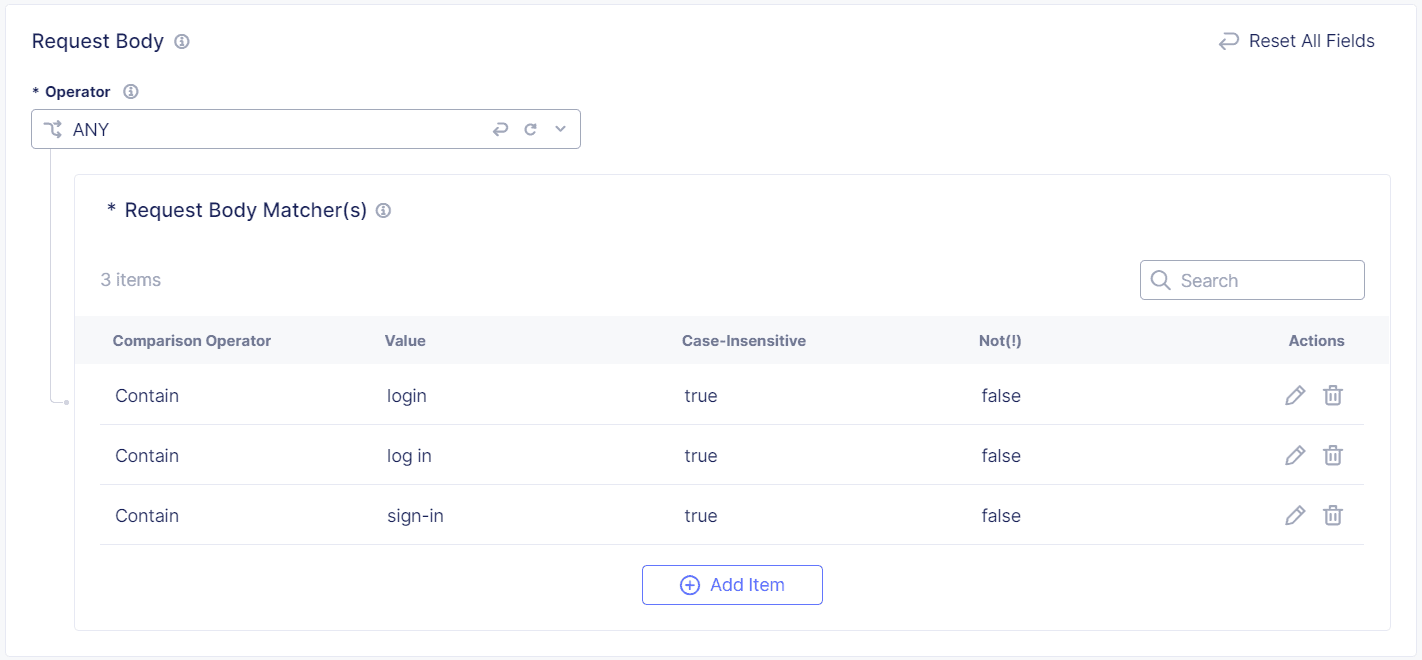
Figure: Request Body Matcher
-
-
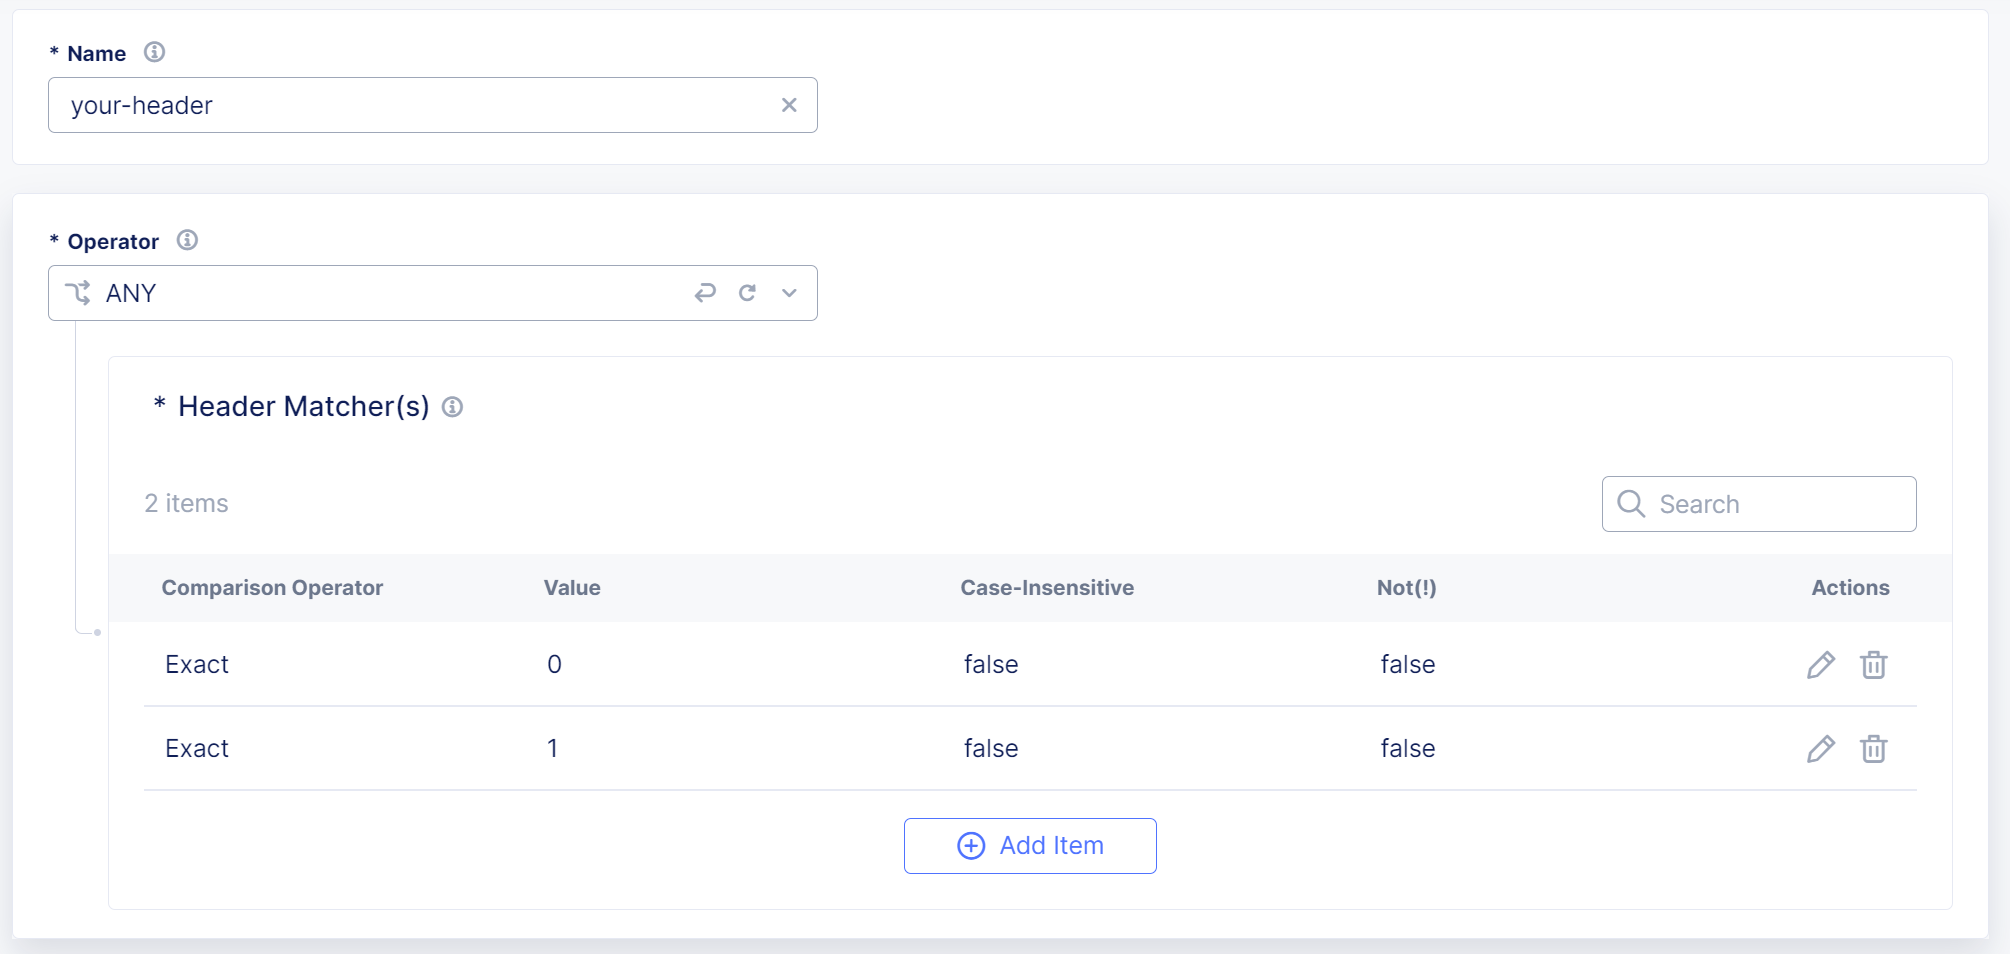
Match a Header that either must be present or must not be present in a request for the request to be evaluated by Bot Defense.
-
In the Header section, select Add Item.
-
Add a Name for the set of header matchers and then from the Operator drop-down menu, select one of the following options:
- ANYTHING: No match is necessary. Matches even if no headers match.
- ANY: Match if any of the header matchers match a header in the request.
- ALL: Match only if all the header matchers match a header in the request.
- NONE: Match if none of the header matchers match a header in the request.
- NOT PRESENT: Match only if no headers are present in the request.
-
Select Add Item.
-
Select a Comparison Operator, either Exact, Contain, Start With or End With, and then enter the value you want to match.
-
(Optional) If you want Bot Defense to match values that are the opposite of the values you entered above, select Not (!).
-
Select Apply and then select Apply again.
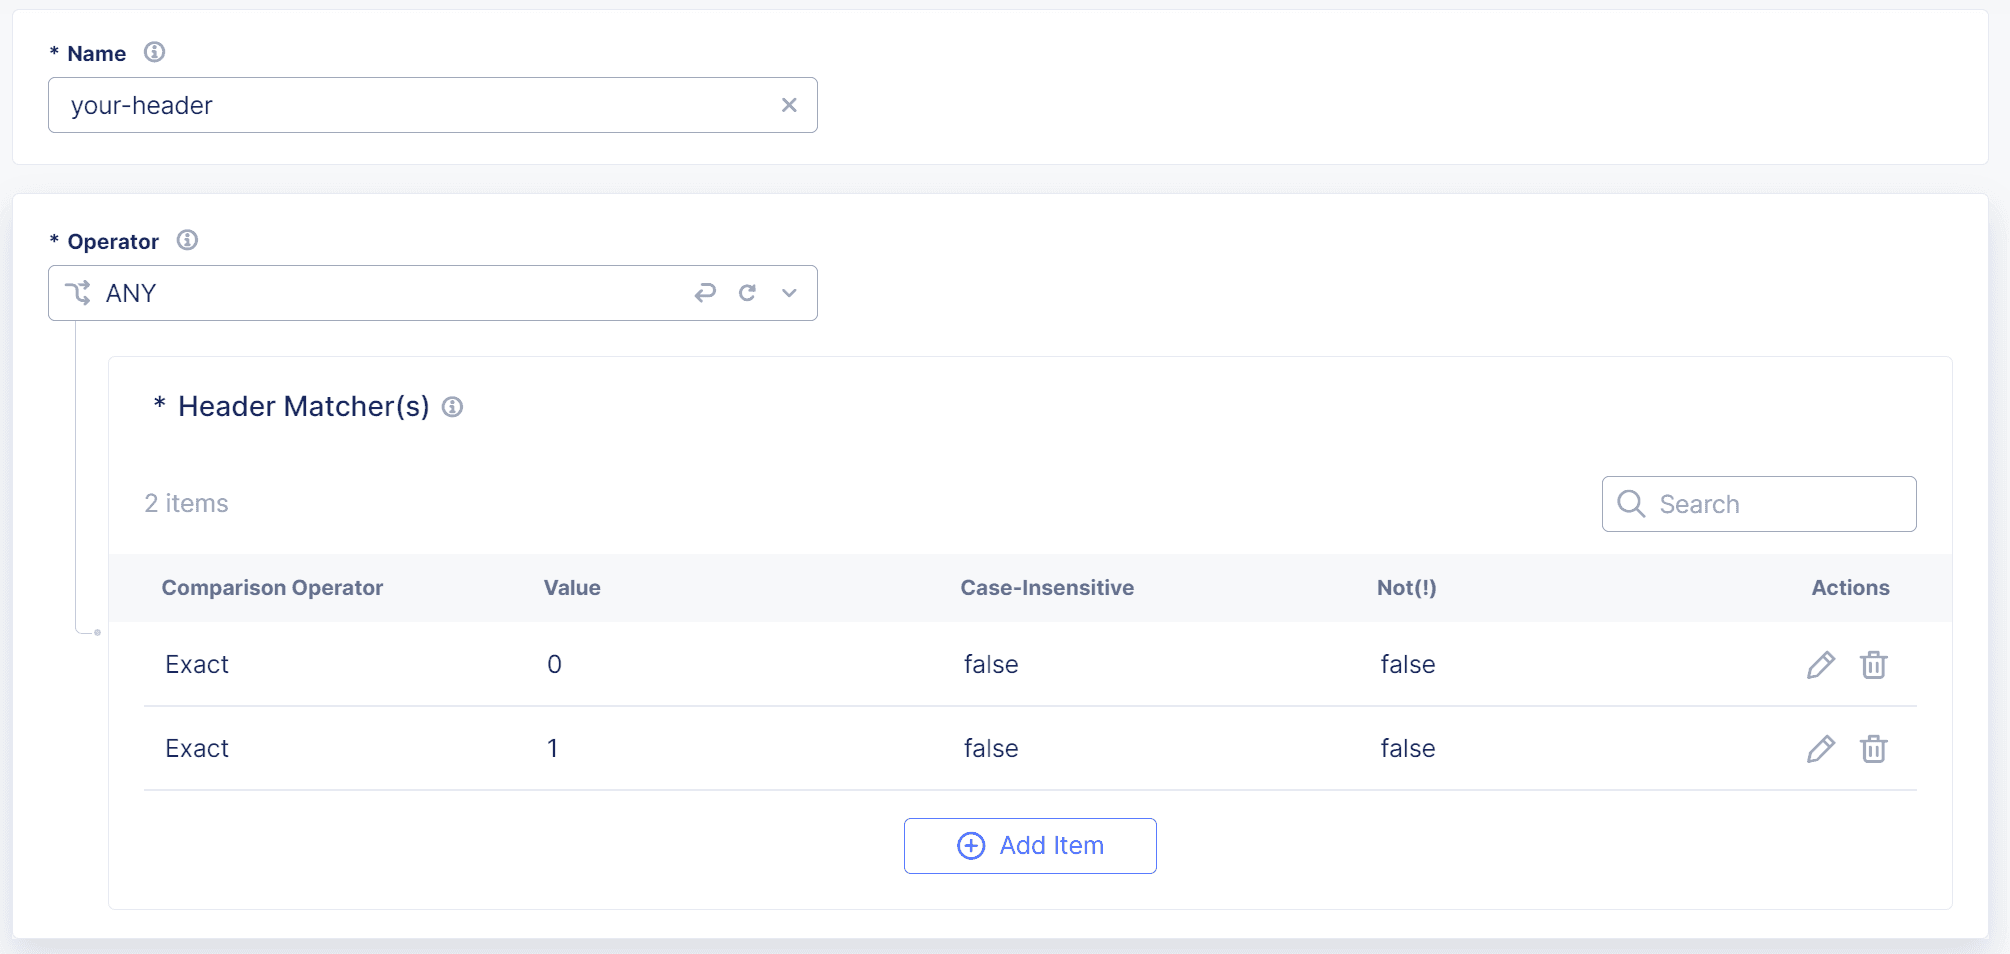
Figure: Header Matcher
-
-
Configure the HTTP Methods you want to protect with Bot Defense:
-
GET(XHR/Fetch): Use when the protected application makes an XHTTPRequest or Fetch API call to get the content of the page. GET requests are protected only if they are sent by XHTTPRequest from a page with Bot Defense JavaScript injected, not from direct navigation using the address bar or link.
-
POST: The most commonly attacked method. F5 recommends that you protect all POST requests. Bot Defense analyzes POST requests to determine if they are part of a bot attack such as credential stuffing or form submission abuse.
-
PUT: Use to protect PUT requests and prevent data uploads or modifications from bots.
-
PATCH: Use to protect PATCH requests and prevent bots from altering resource data.
-
DELETE: Use to protect DELETE requests and prevent bots from deleting content or resources.
-
GET(Document): Use to protect pages on a web site that can be accessible by GET requests without visiting the main page. When you configure an endpoint using GET(Document), Bot Defense displays an interstitial page that is transparent to the user but that allows it to collect telemetry data about the requests. Note that you cannot use GET(Document) with mobile endpoints.
-
HEAD: Use to protect HEAD requests and to prevent bots from repeatedly pinging a server to check metadata.
-
OPTIONS: Use to protect OPTION requests and to prevent bots from checking to find out what CORS options are supported by a server.
-
TRACE: Use to protect TRACE requests to and prevent bots from repeatedly pinging a server with diagnostic requests.
Note: If you select both GET(XHR/Fetch) and GET(Document), only GET(XHR/Fetch) requests are protected. To protect both methods for the same endpoint, add the endpoint separately for each method.
-
-
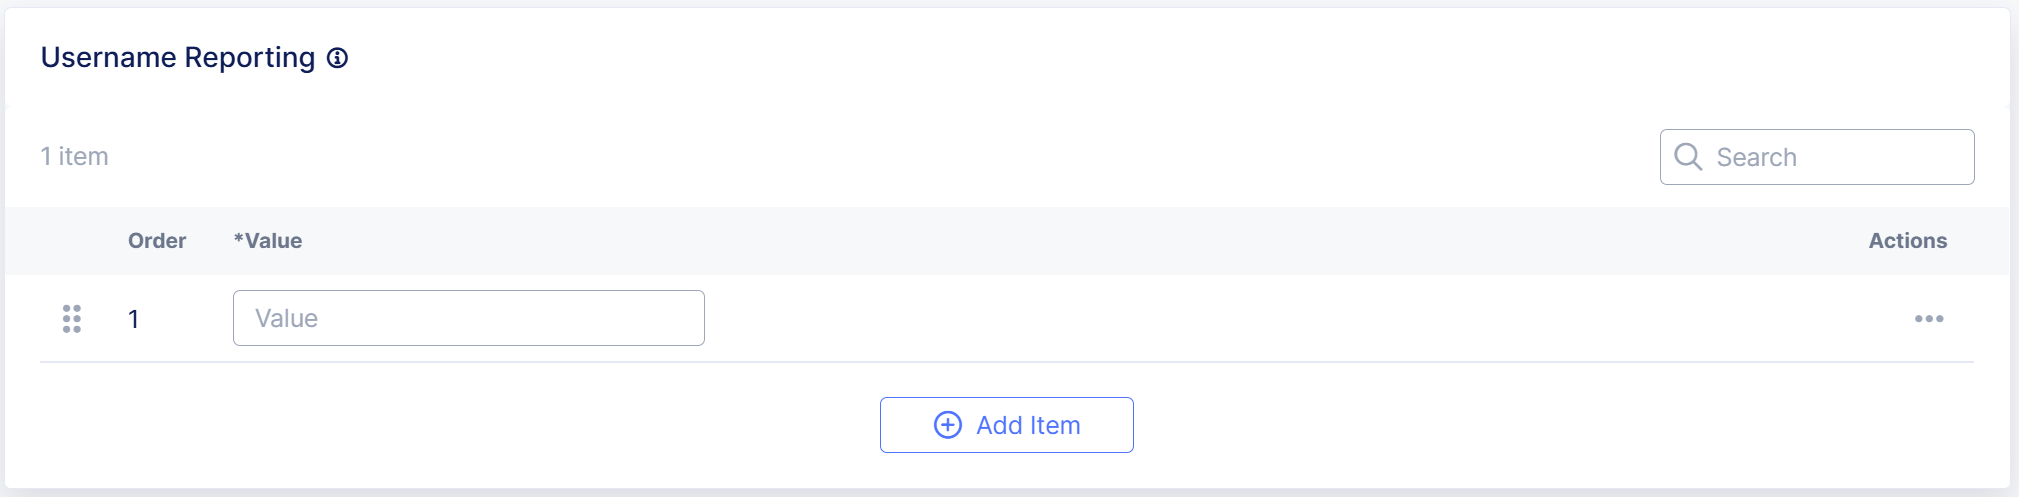
In the Username Reporting section, select Add Item to enter a request body parameter that Bot Defense can use to identify the username associated with a request. To encrypt the stored username data, select Hashed. Otherwise, select Plain Text.
For example, to use a parameter called "username," enter
username.
Figure: Username Reporting
Username information helps you identify and respond to individuals or accounts impacted by automated attacks. You can add multiple name-value pairs.
Note that Username Reporting is not available with Bot Defense in API mode.
-
In the Transaction Results Criteria section, select Configure to configure success and failure conditions that replicate the success and failure behavior for requests that Bot Defense allows to reach the origin endpoint. Configure conditions using any of the following criteria:
-
Response code
-
Response header
-
Response body
-
Cookie
Note: Response header name and Cookie name cannot contain spaces.
For example, if a valid request reaches the origin and the response code is 300, you can enter the following Response Code criteria in the Success Conditions section to replicate that condition:
- Operator: ALL or ANY
- Comparison Operator: Equals
- Value: 300

Figure: Transaction Results Criteria
When configured, these conditions help improve bot detection by detecting failures on requests that are allowed to pass to the origin. This additional information helps Bot Defense better identify future attacks.
Note: Configuring transaction results criteria does not block or allow requests but helps improve the ability of Bot Defense to detect bots.
Note that Transaction Results Criteria settings are not available with Bot Defense in API mode.
-
-
Select an Endpoint Category and Flow Label to help identify the endpoint and to allow more granular attack intent identification and reporting when Bot Defense detects automation.
For example, to identify a multi-factor authentication flow on an endpoint, select Authentication > Login MFA.
For a full list of available endpoint labels, see Endpoint Labels.
Important: Bot Defense considers the flow label of the target endpoint when it processes traffic. Make sure to label endpoints with the correct flow labels so that Bot Defense can process traffic correctly.
-
Select how you want Bot Defense to process requests from known bots, such as web crawlers, search engine optimization bots or AI bots. From the Known Bot Controls drop-down menu, select one of the following options:
-
Treat Known Bots as Regular Requests: Requests from known bots are processed according to the mitigation actions you define. Only requests with valid telemetry are allowed to reach the origin.
-
Allow and/or Deny Specific Known Bots:
- From the Allow Known Bots drop-down list, select specific known bots from which you want to allow requests to reach the origin.
- From the Deny Known Bots drop-down list, select specific known bots from which you want to block requests from reaching the origin.

Figure: Allow or Deny Specific Known Bots
Note: You cannot add the same known bot to both the Allow and Deny lists.
Bot Defense processes requests from bots not explicitly allowed or denied the same as requests from regular bots.
Note: When you add a known bot to both your Bot Allowlist Policy and to the list of Denied known bots, the list of Denied known bots takes precedence. Bot Defense does not allow requests from known bots on the Deny list to continue to the origin.
To view information about requests from known bots processed by Bot Defense on your network, see Known Bot Report.
-
-
Specify the Mitigation Action to take when a bot is detected. F5 recommends that you configure mitigation actions to mimic the normal behavior of the application so that an attacker does not know their request was intercepted:
- Continue: Allows requests to continue to the origin. A log record is created. You can optionally add headers to the request.
- From the Include Mitigation Headers drop-down menu, select Add Headers if you want to add a header to automated requests that Bot Defense allows to continue to the origin.
- From the Automation Type Header Name drop-down menu, select the header that you want to add. You create the headers when you configure the protected endpoint.
- Block: The endpoint returns a status code and message that you configure.
- From the Status drop-down menu, select the status code you want to display when Bot Defense blocks a request.
- Enter a Header Name and corresponding Value to add to the blocked request. You can add multiple headers.
- Enter the Body of the message you want to display when Bot Defense blocks a request.
- Redirect: The endpoint forwards the browser to the URL that you specify. You can only select Redirect for web endpoints.
- In the Status field, enter the status code that you want to display when Bot Defense redirects a request.
- In the Location field, enter the URL where you want to send requests redirected by Bot Defense.
- Transform: Allows the request to continue to the origin. Headers are added to the request for inference and automation type. Use transform when you want to allow the request to continue and use a system other than Bot Defense to mitigate.
-
In the Add Header(s) to Request drop-down menu, select whether you want to add a header name and value pair to the request.
-
If you choose to add a header, select Add Item and then add a Header Name and Value to add to requests.
-
Note: If you configured Bot Defense in API mode, you must configure mitigation at your connector.
- Continue: Allows requests to continue to the origin. A log record is created. You can optionally add headers to the request.
-
When you finish configuring the protected endpoint, select Apply
-
When you finish adding protected endpoints, select Save Bot Endpoint Policy.
-
When you finish reviewing the changes, choose one of the following options:
- Save Final: The policy version is saved and added to the list of policy versions that you can deploy in your Bot infrastructure.
- Save as Draft: You or another administrator can review and finalize this policy version later.
Important: Other administrators can make changes that overwrite your saved draft. Before you deploy your policy update, review the policy settings to make sure they are correct.


Next Steps
When you finish configuring your Bot Endpoint Policy version and are ready to deploy the version, see Deploy Policy Updates.
If you configured a Bot Endpoint Policy to protect mobile endpoints, F5 recommends that you download and bundle a new version of the base configuration file with your mobile app. For information, see Protect a New Mobile Endpoint.
Important: F5 recommends that you first deploy and test new policy versions in your test environment to make sure the system behaves as you intended before you deploy in a production environment. For information, see Test Bot Defense.