Enable SCIM
Objective
This guide provides instructions on how to enable SCIM (System for Cross Domain Identity Management) in F5 Distributed Cloud. To learn more about users, see Users. SCIM is an open standard designed to manage user identity information. SCIM provides the ability to sync users and groups from one system to another.
After enabling SCIM in the F5 Distributed Cloud console, changes made in your Identity Management provider will be synced to Distributed Cloud.
The instructions in this document will demonstrate how to perform user management via SCIM in Distributed Cloud Console.
SCIM Overview
As your company grows, new users onboard, and old users leave. This burdens administrators because they have to update many Identity Management systems. A better solution is for administrators to maintain a single group. A common scenario is an administrator that needs to update many users' permissions. For example, removing admin privileges from all users in a specific group.
The F5 Distributed Cloud Services SCIM offers the following for ease of managing various user identity operations:
Externally Managed/SCIM Enabled Entities: Objects that are marked to be sourced by Azure.
Synced Entities: Objects that have successfully been sourced from Azure.
Note: Objects synced: Users and User Groups (name, email, user < - > group associations).
Dashboard (non-SCIM synced) Entities: Objects that are solely managed (CRUD) by F5 dashboard.
Note: Info managed: Group creation/deletion/role assignment etc.
Prerequisites
- F5 Distributed Cloud Account is required.
Note: If you do not have an account, see Getting Started with Console.
-
SSO Azure.
-
Azure Subscription.
-
Resources required per node: Minimum 4 CPUs and 14 GB RAM.
Enable SCIM
Steps to enable and sync SCIM.
Note: SCIM enabled for Azure SSO user group management only in F5 Distributed Console.
Step 1: Open F5 Distributed Cloud Console, enable Tenant SSO.
Enable SSO for the tenant.
- Open
F5® Distributed Cloud Console> selectAdministrationbox.
Note:
Account Settingsin profile icon in dashboard upper-right corner accesses Administration settings.
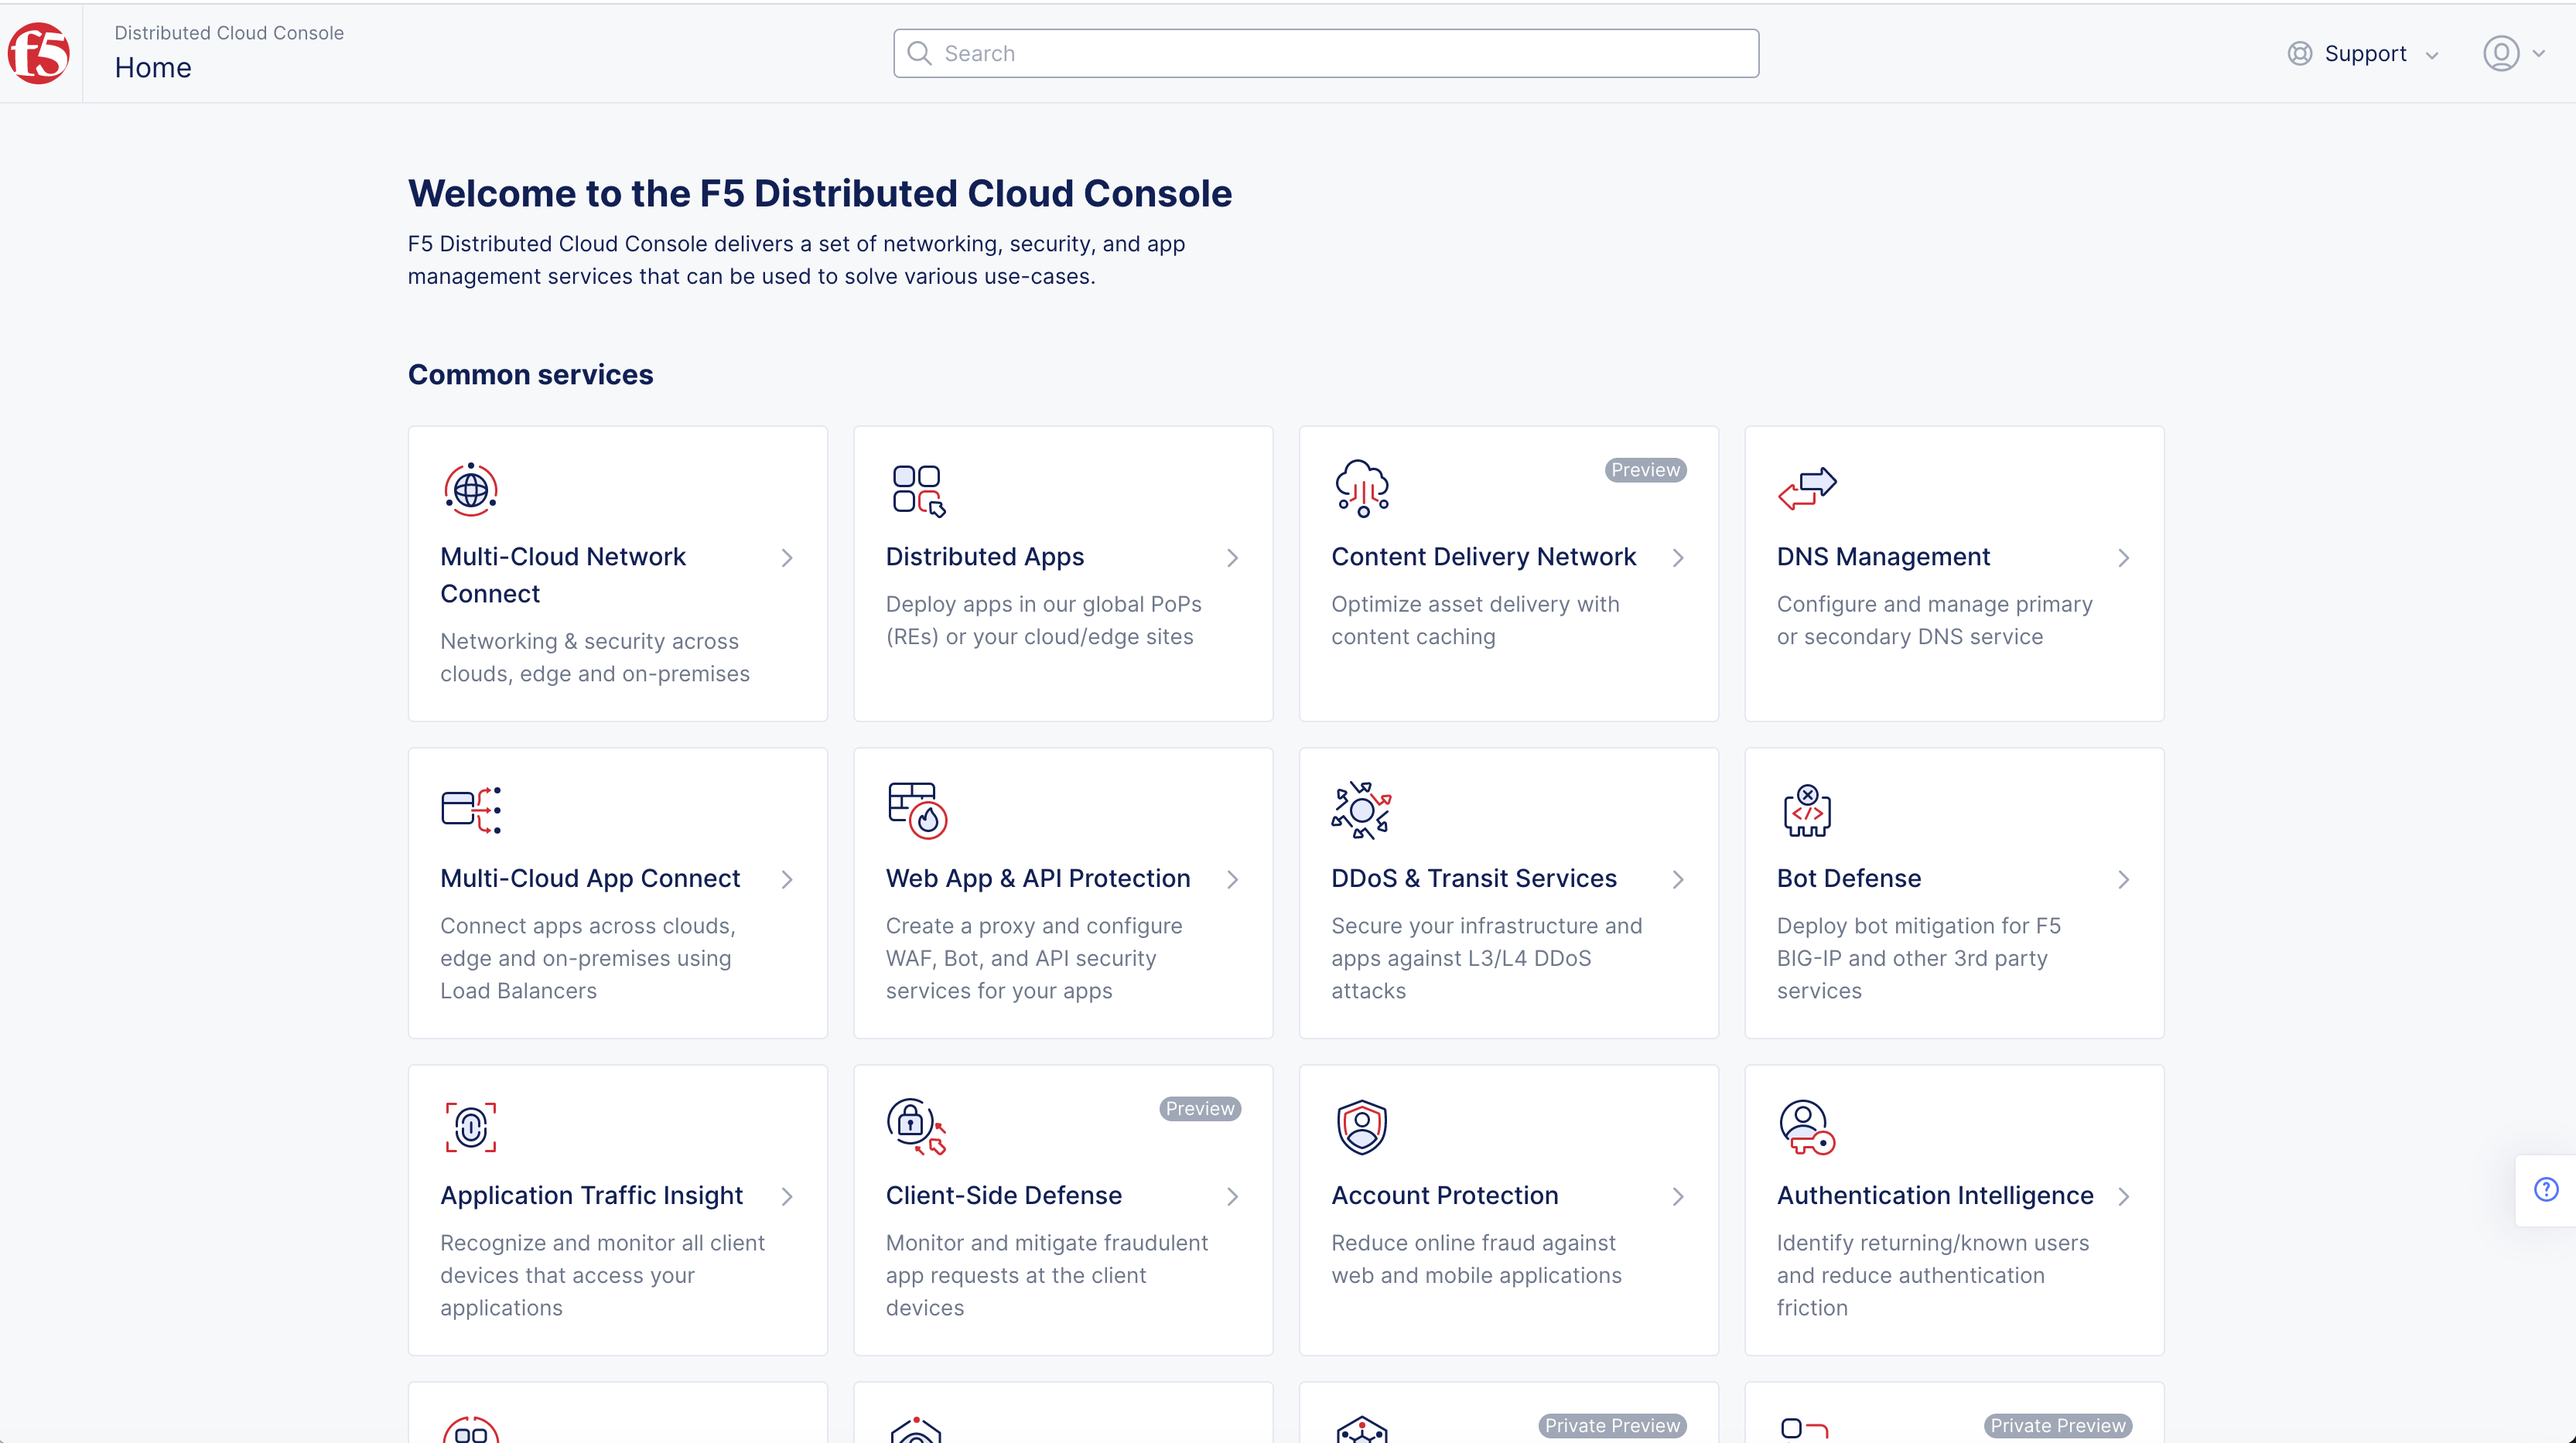
Figure: Homepage
Note: Homepage is role based, and your homepage may look different due to your role customization. Select
All workspacesdrop-down menu to display all options. Customize Settings:Administration>Personal Management>My Account>Edit work domain & skillsbutton >Advancedbox > checkWork Domainboxes >Save changesbutton.
- Select
Tenant Setttingsin left-menu > selectLogin Options.
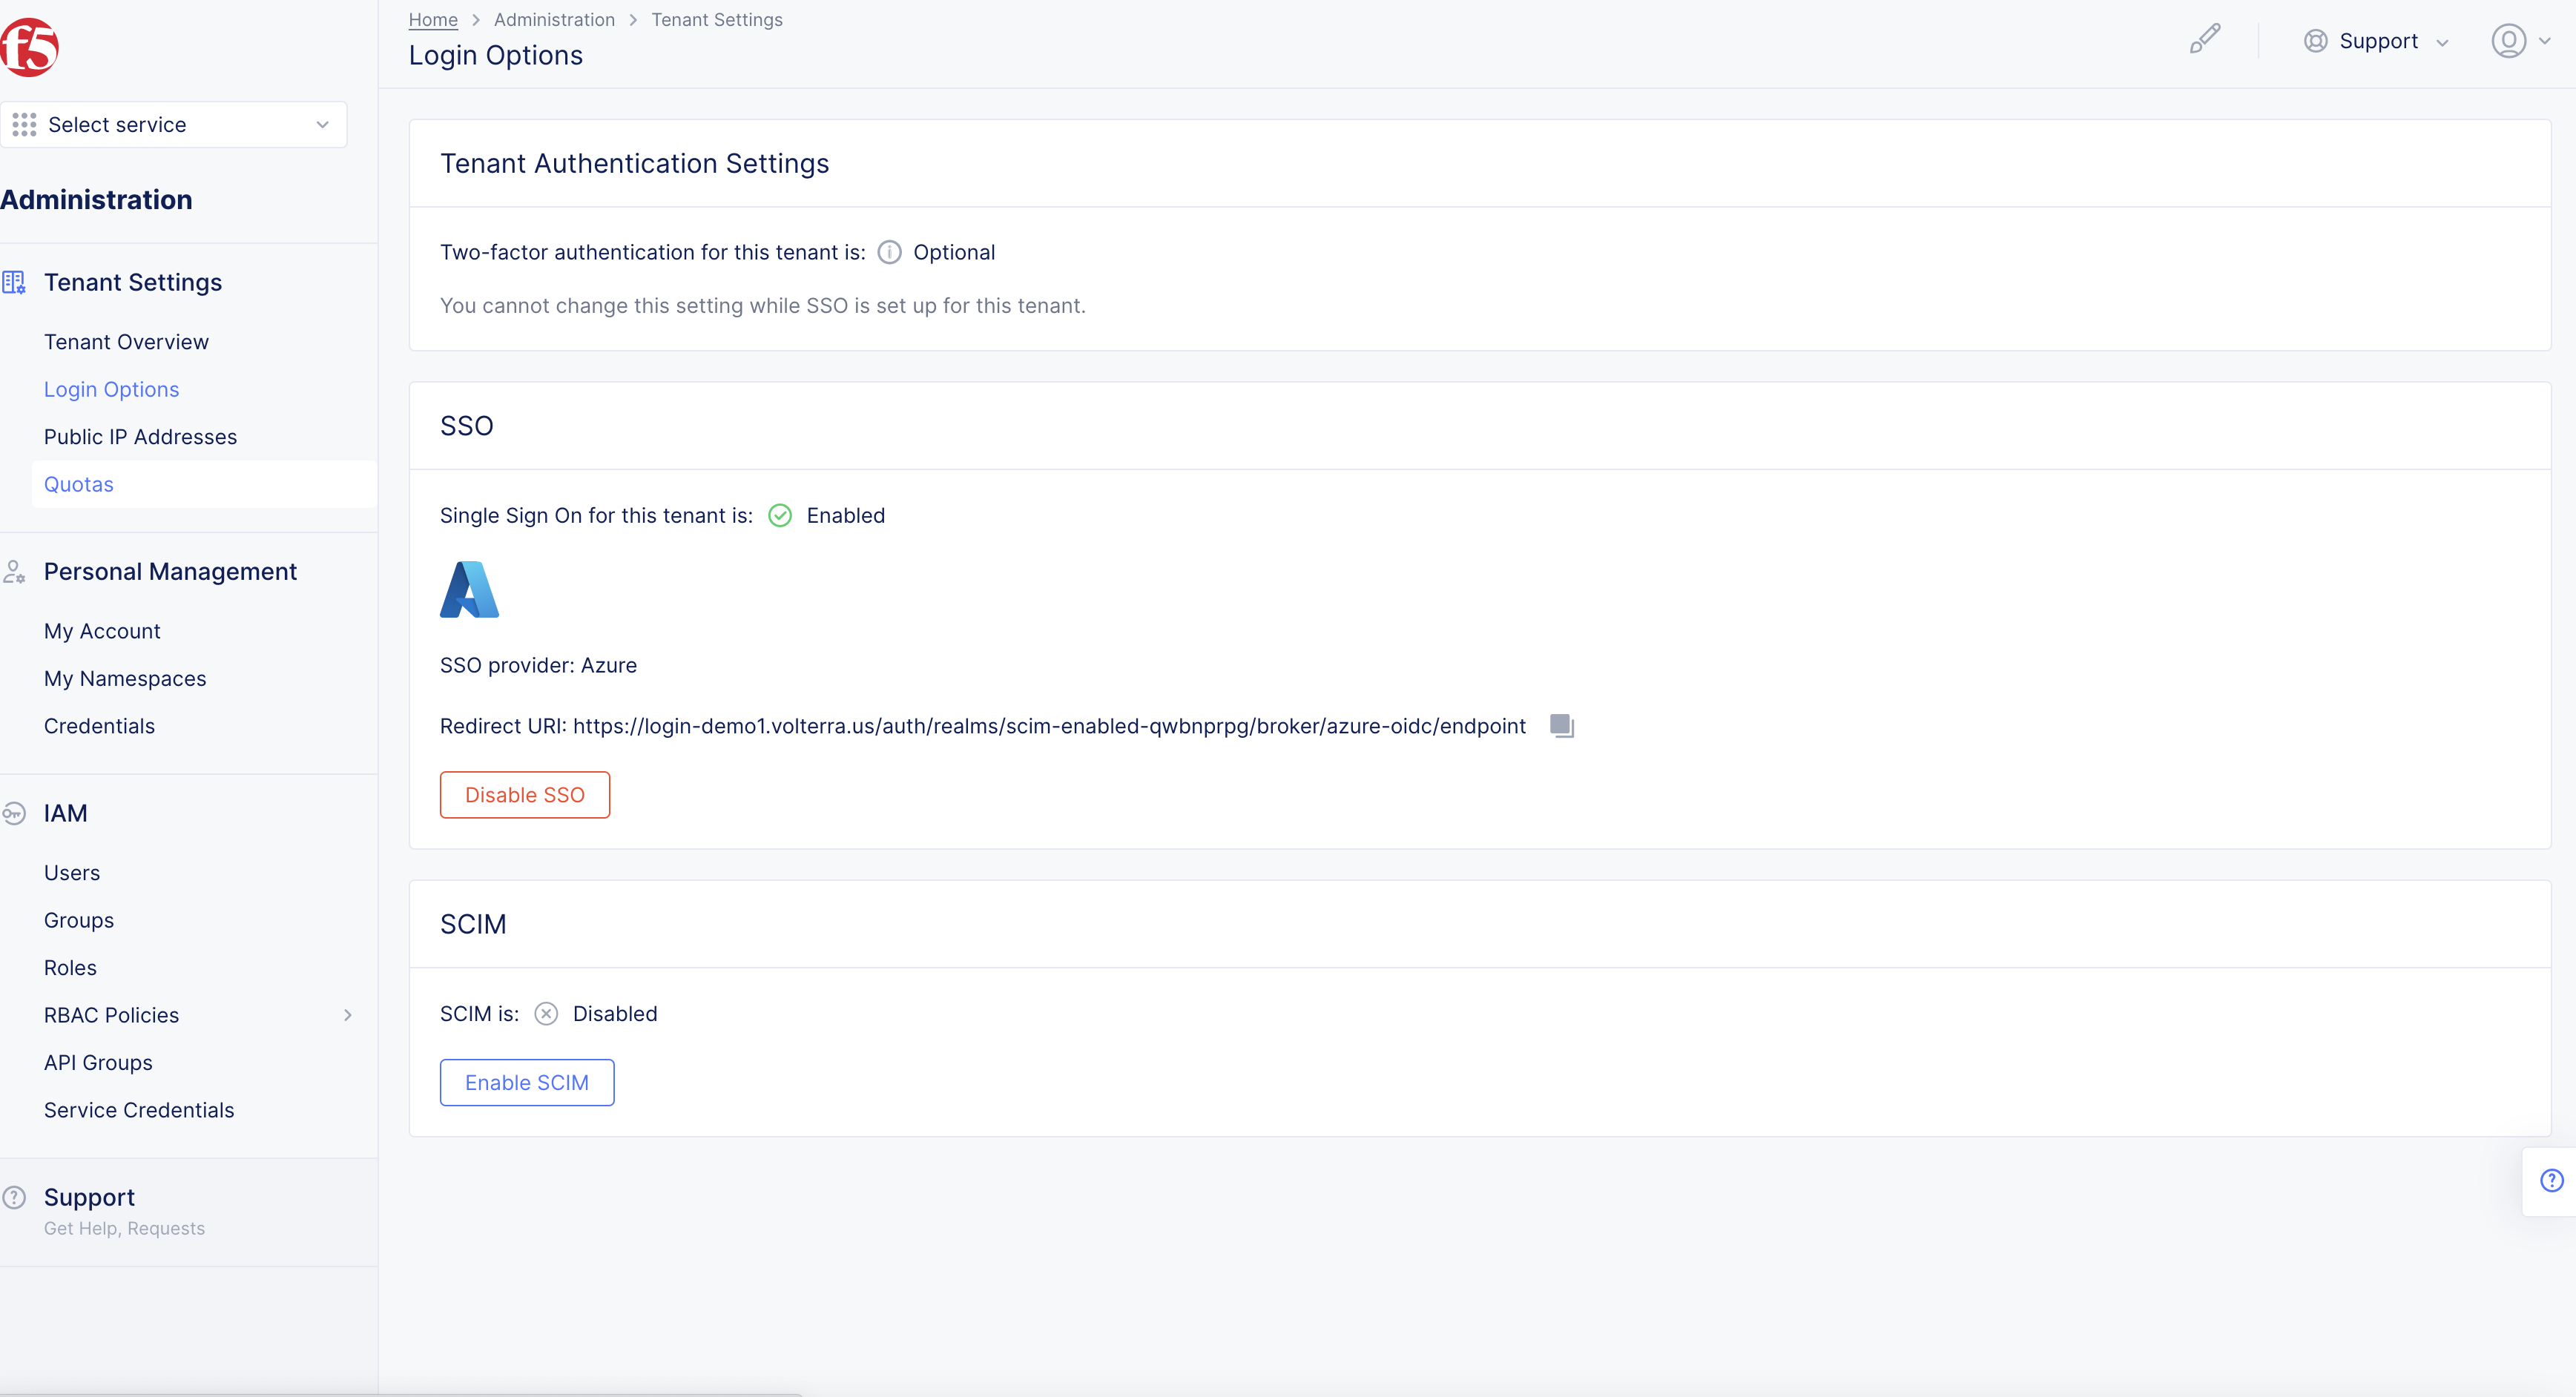
Figure: Tenant Settings
Note: If options are not showing available, select
Showlink inAdvanced nav options visiblein bottom left corner. If needed, selectHideto minimize options from Advanced nav options mode.
Step 2: Enable SCIM.
Enable SCIM for the tenant.
- Select
Enable SCIMbutton inSCIMsection.
Figure: Enable SCIM
- Select token validity length in
Enable SCIMpop-up.
Note: Options are 3 months, 6 months, or 12 months.
- Select
Nextbutton.
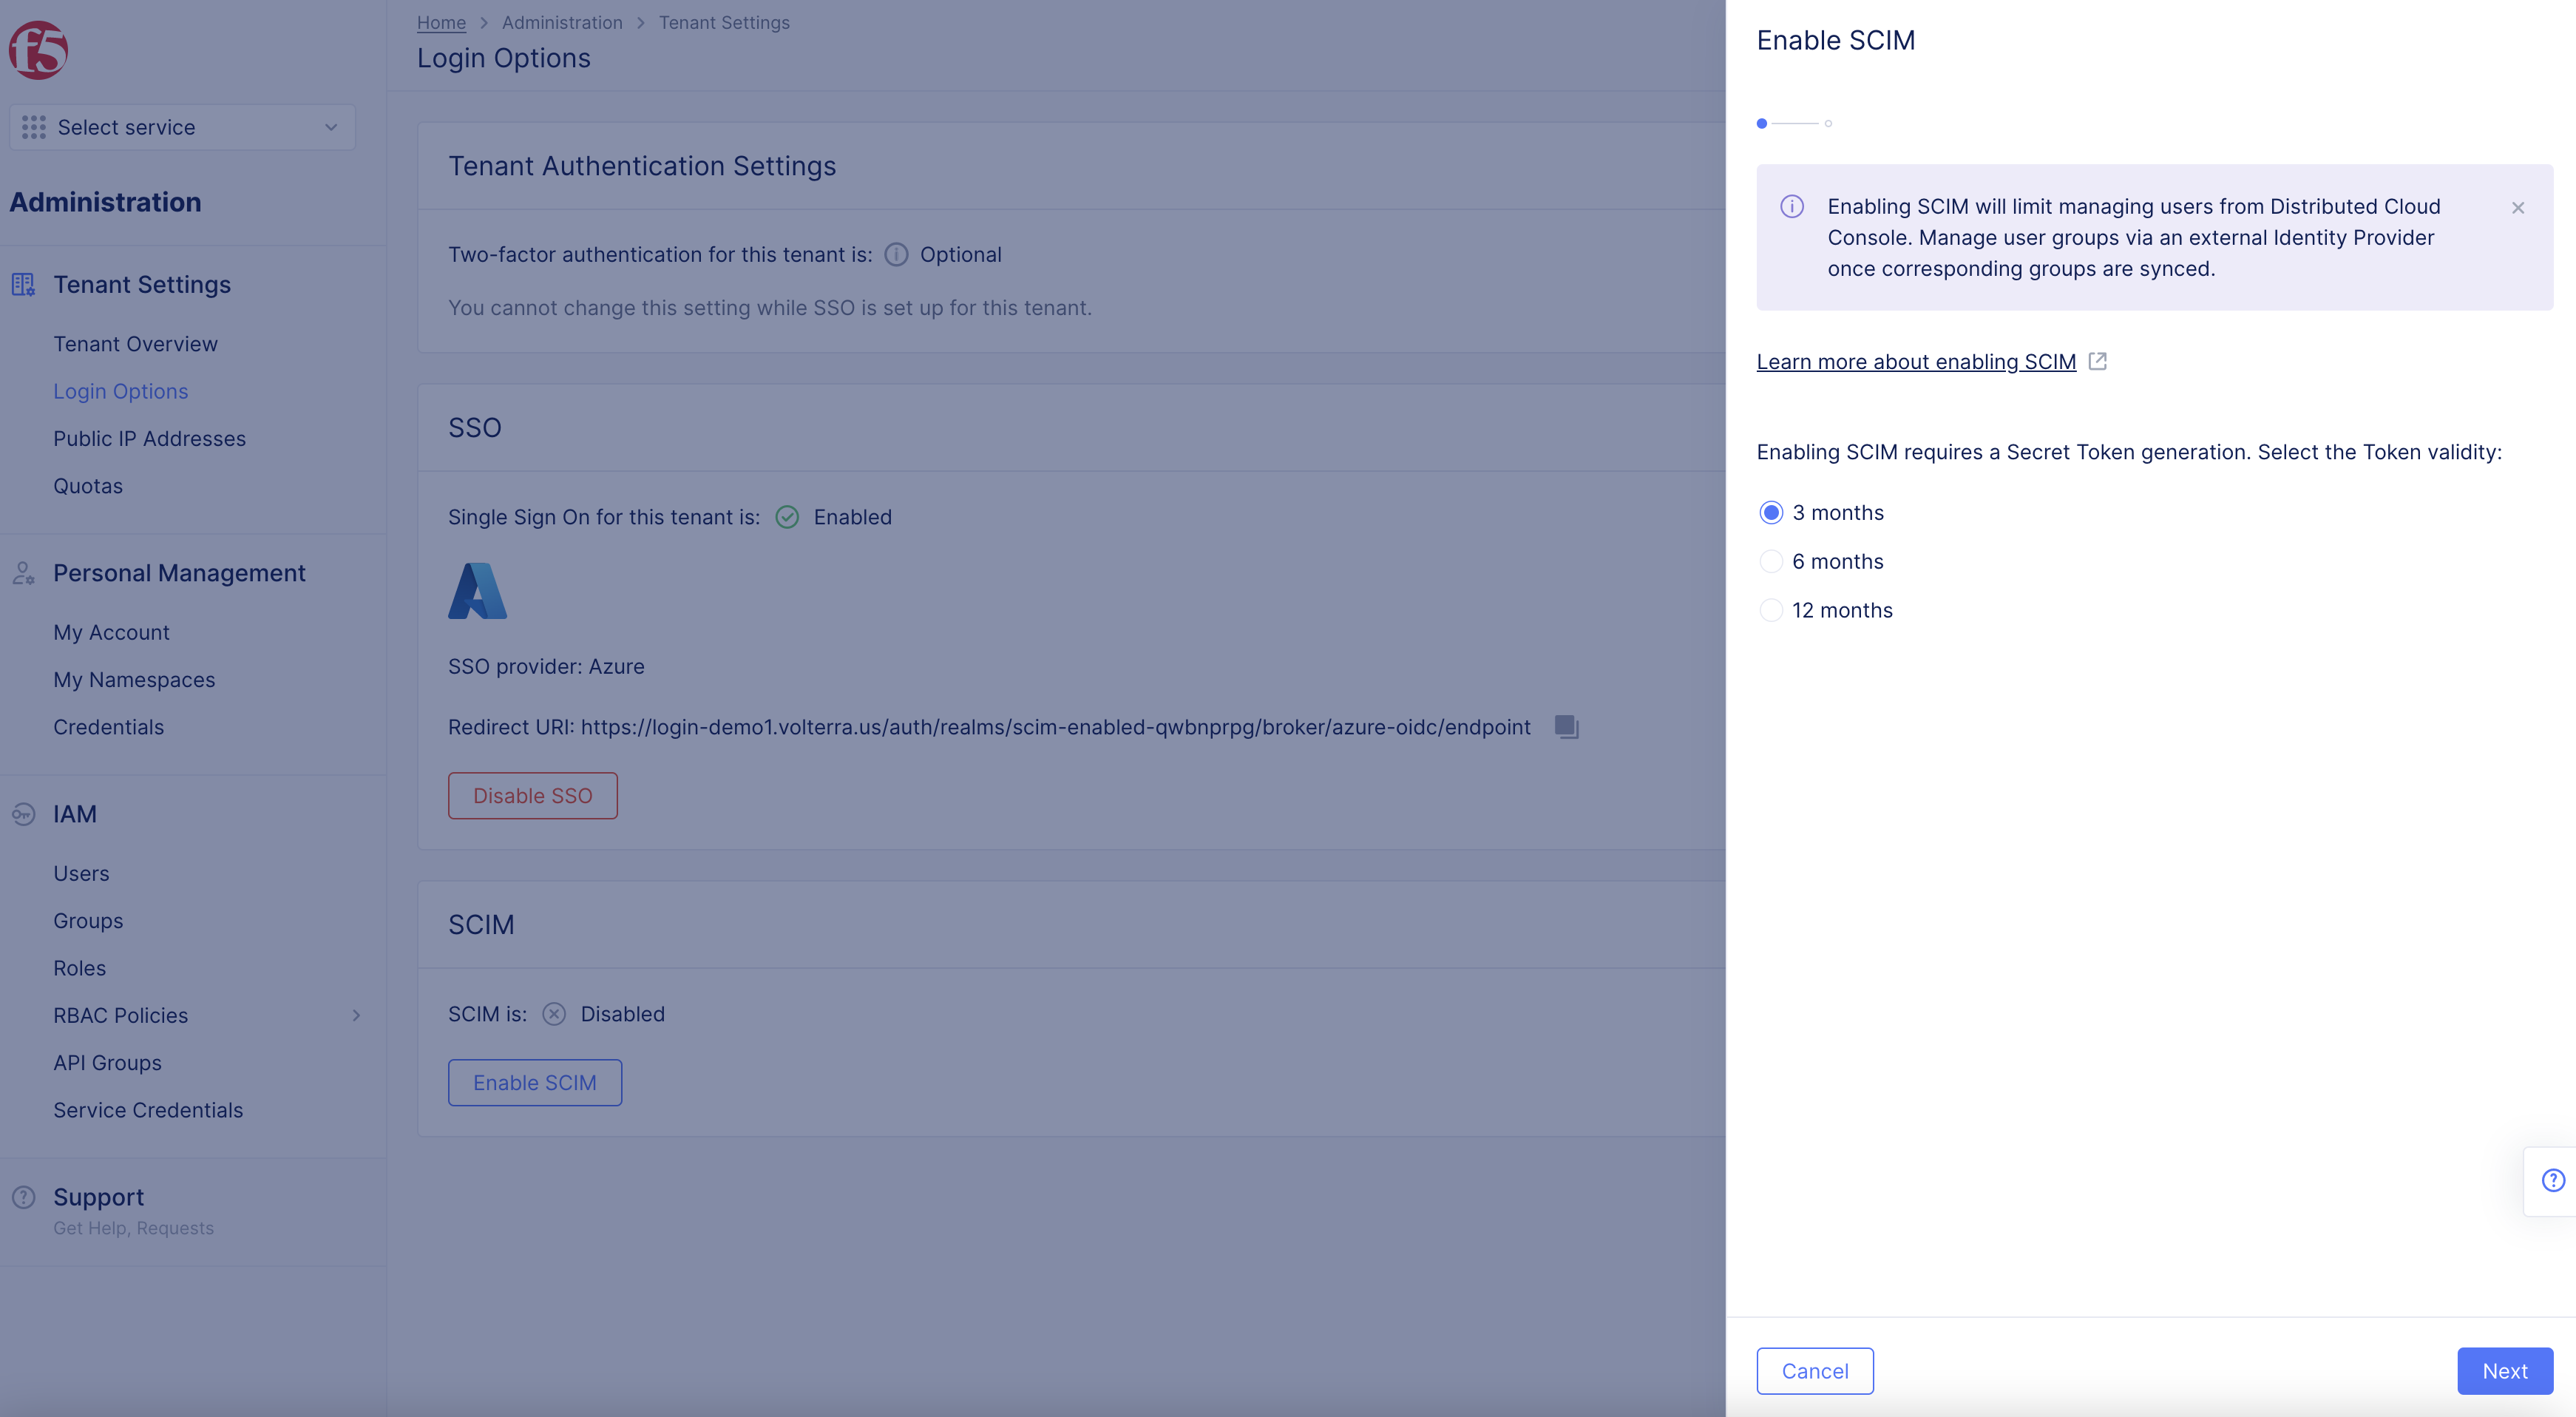
Figure: Enable SCIM
-
Copy
tenant URL. -
Copy
Secret Token.
Note: Note token provided for use in Azure. One token is used at one time. Once you regenerate a token it voids the old token.
- Select
Donebutton.
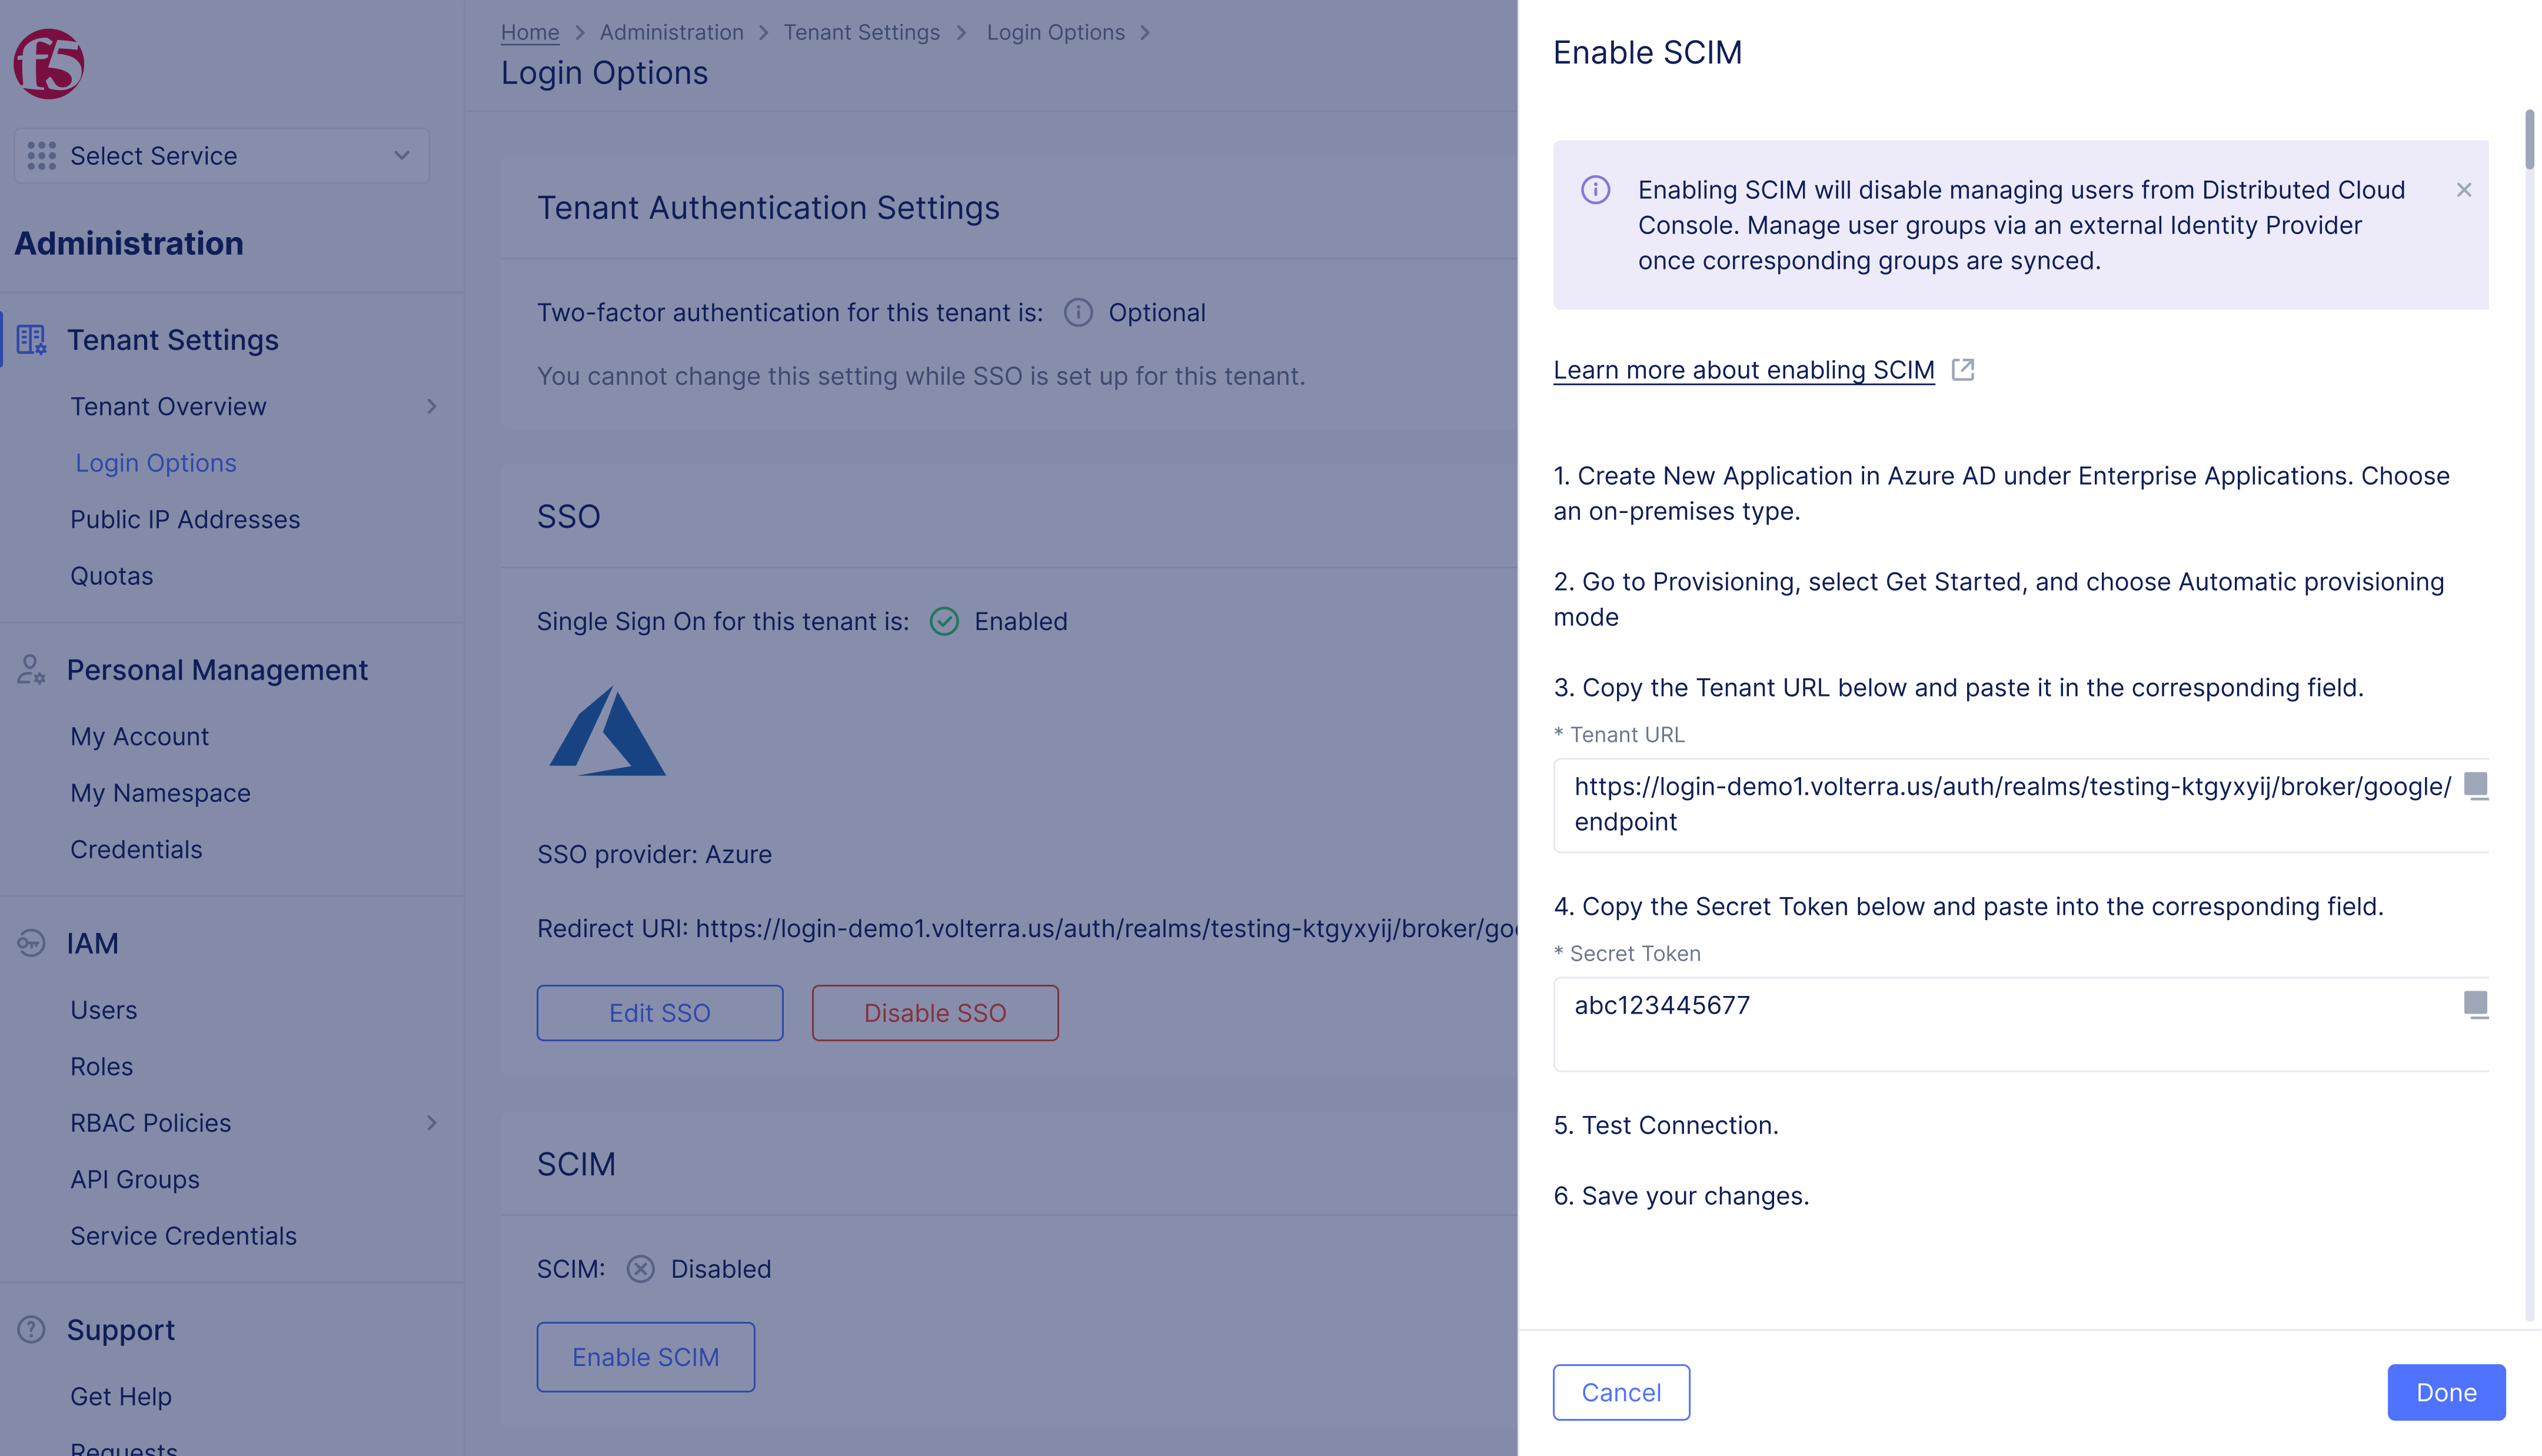
Figure: SCIM
- Select
Complete SCIM Setupbutton.
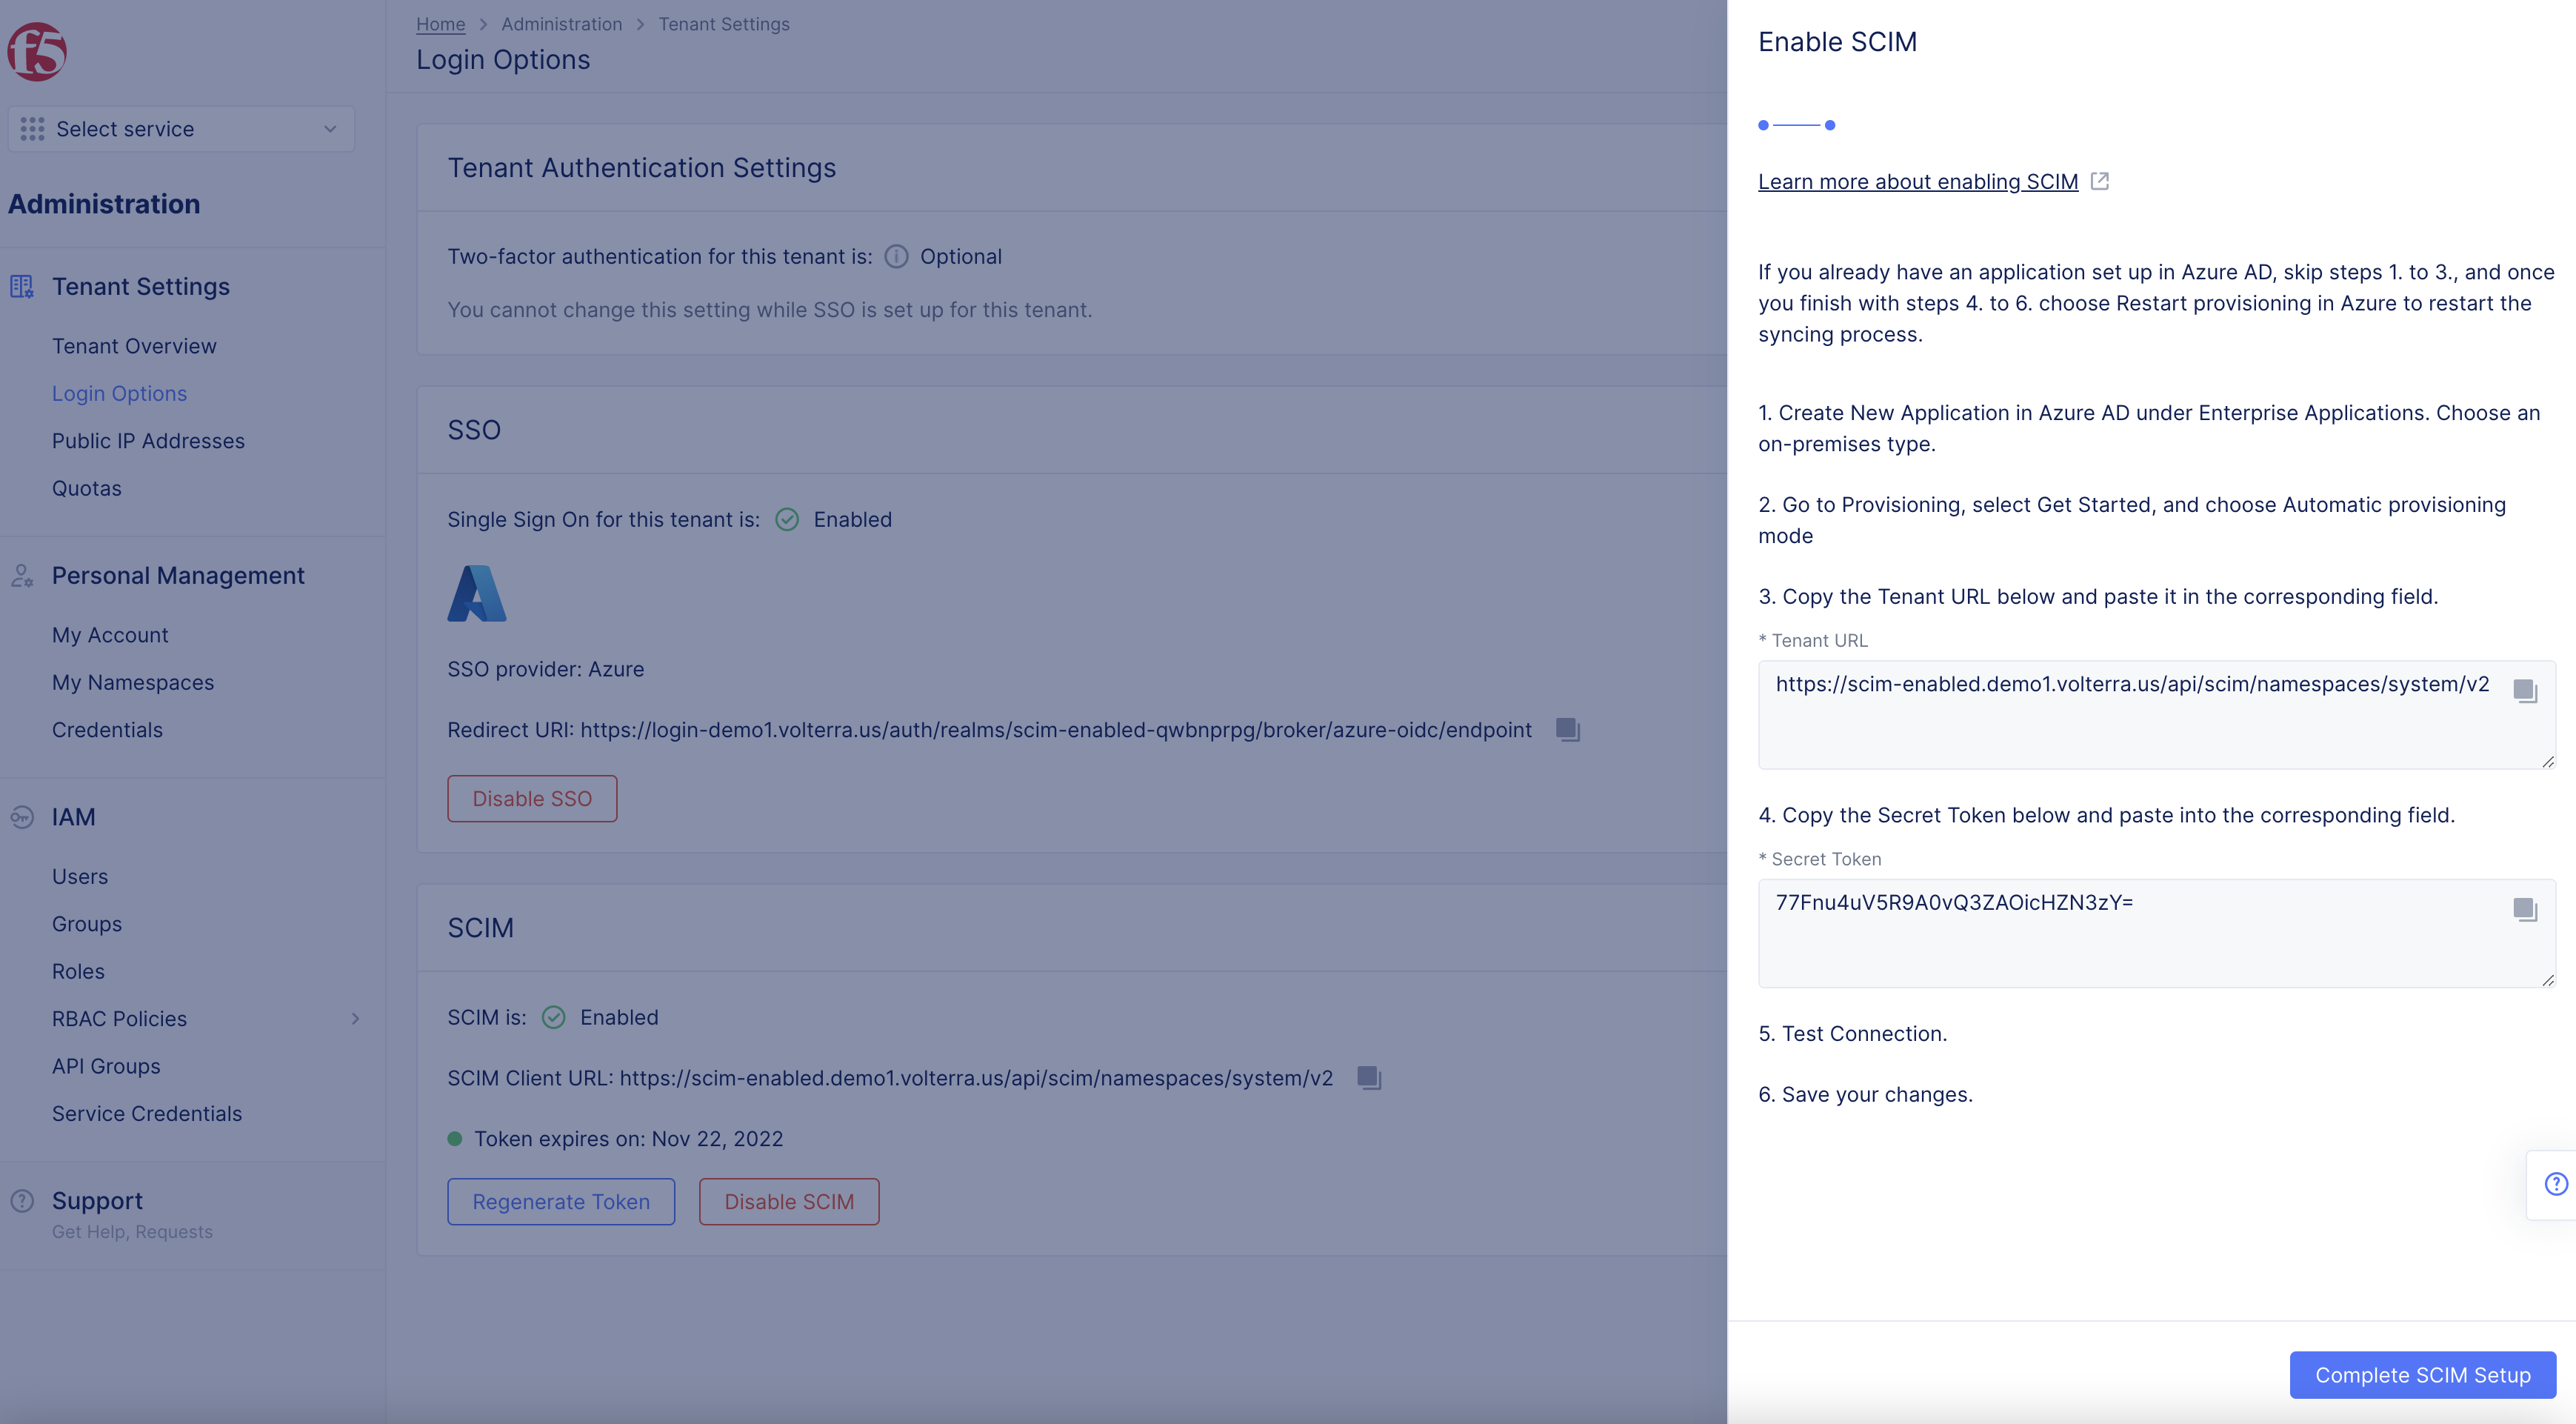
Figure: Complete SCIM Setup
Step 2.1: Regenerate Token.
Note: Regenerate token as needed.
- Select
Regenerate Tokenbutton in SCIM section.
Note: One token is used at one time. Once you regenerate a token it voids the old token.
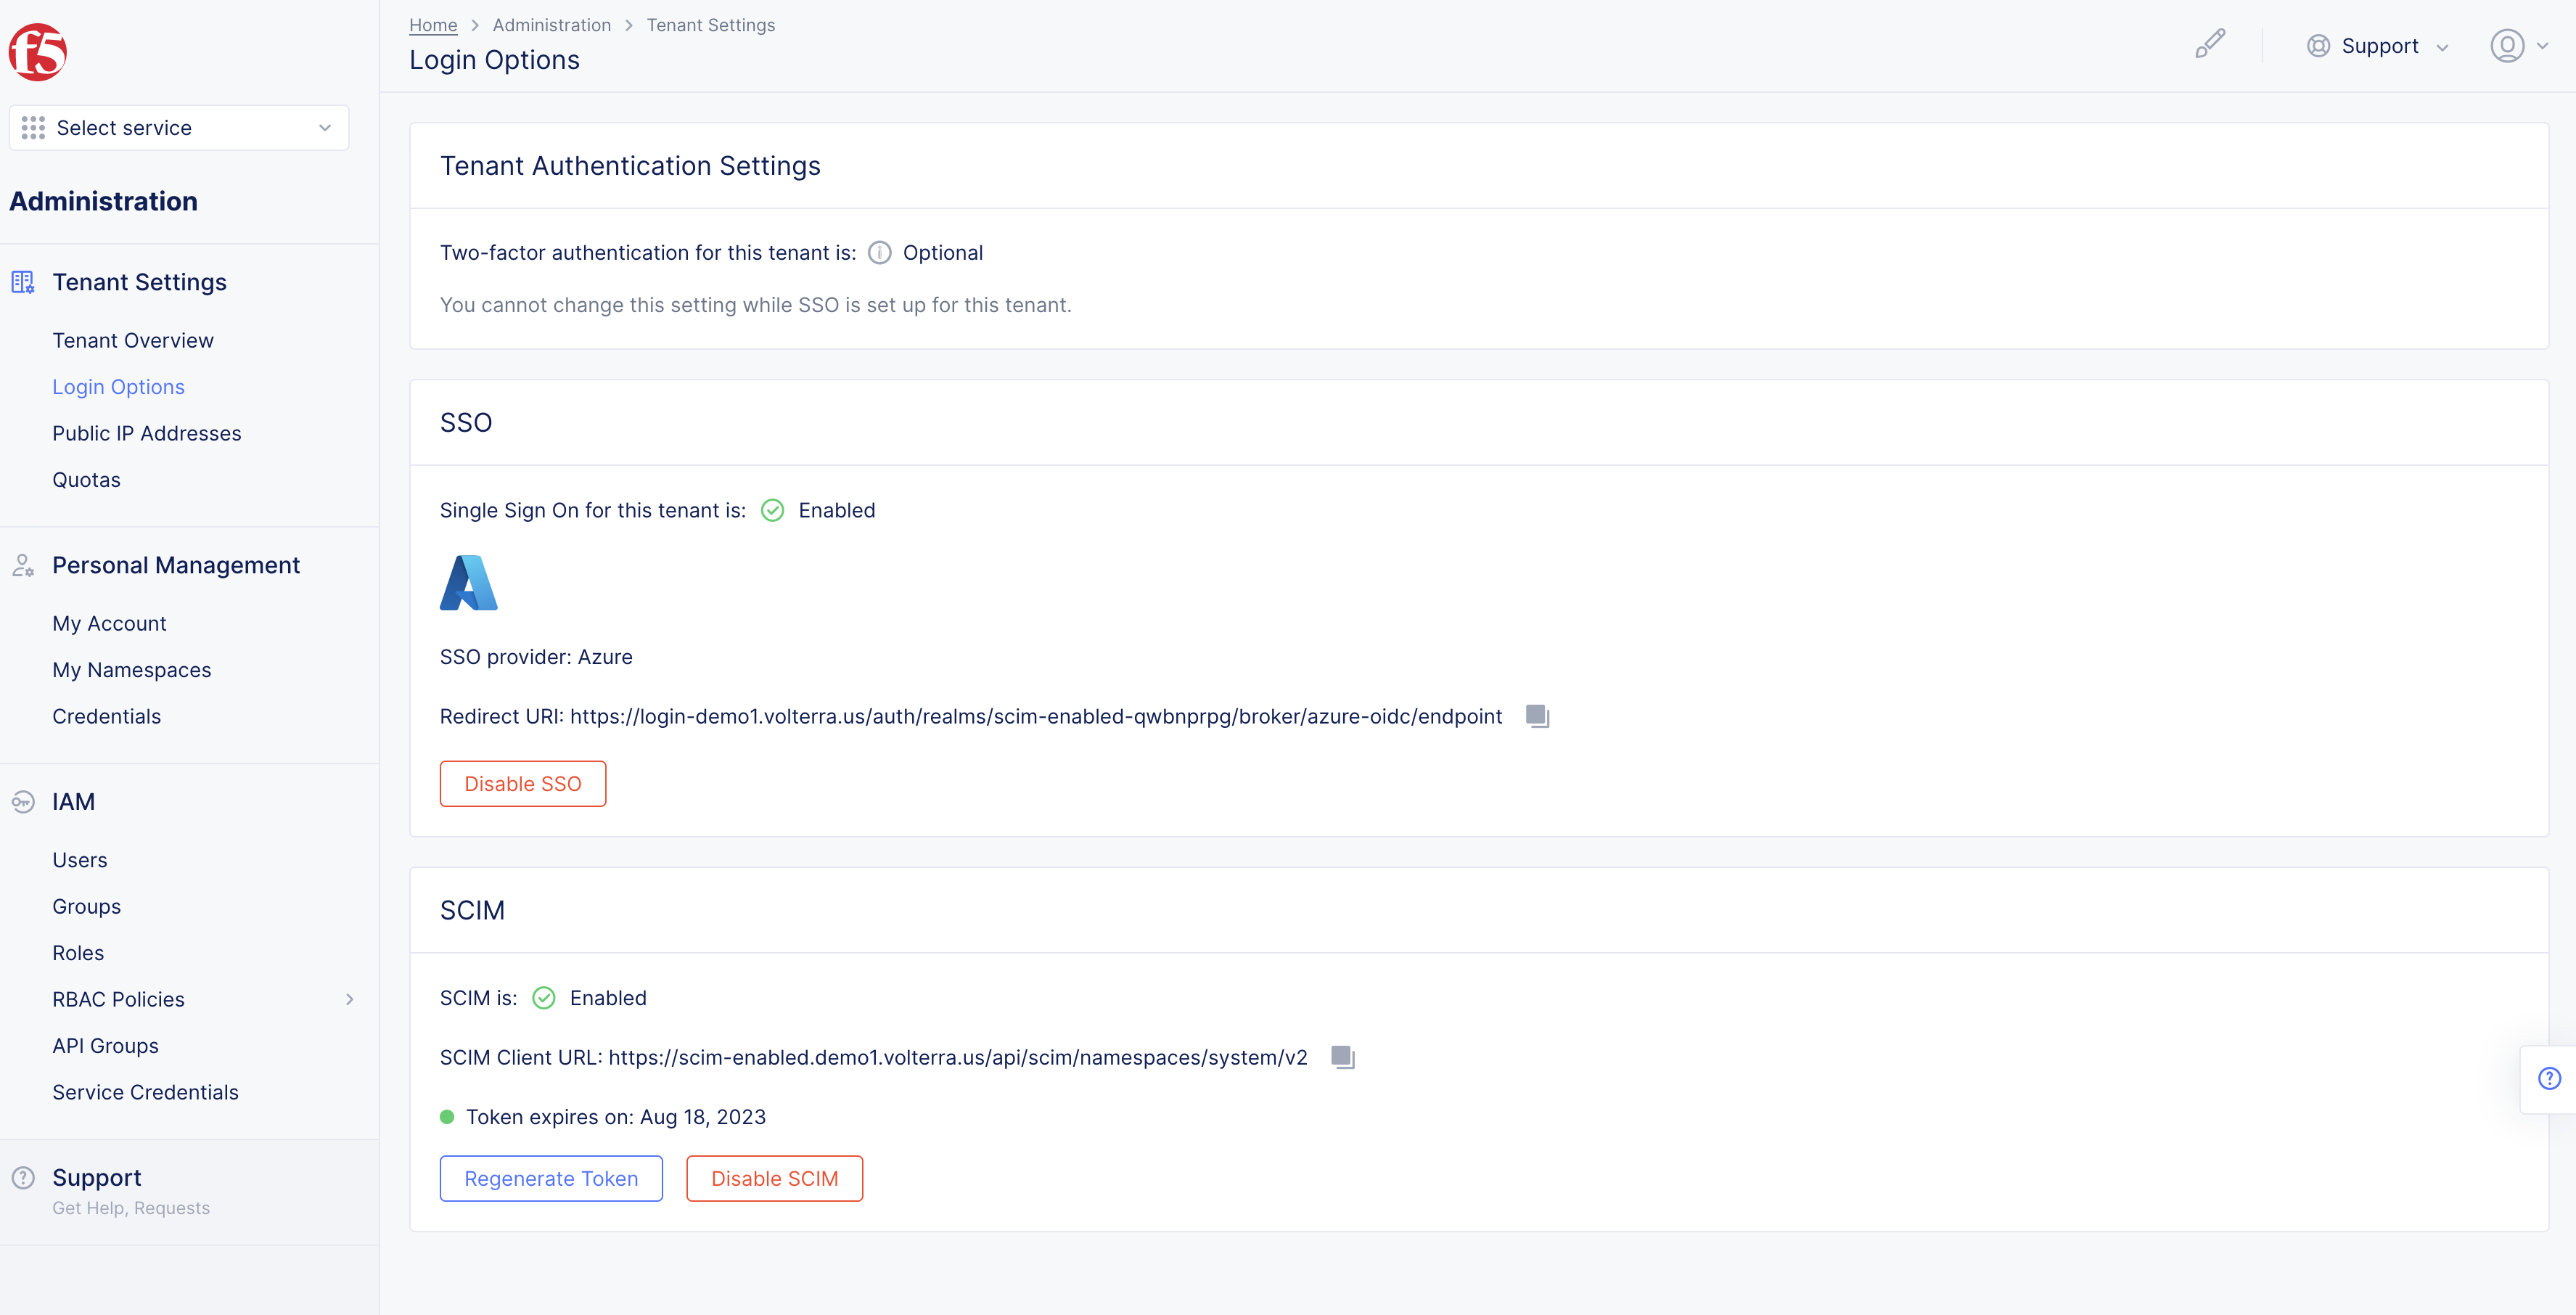
Figure: Regenerate Token
-
Select
Regenerate Tokenbutton in pop-up to confirm. -
Copy
tenant URL. -
Copy
Secret Token.
Note: Note token provided for use in Azure. One token is used at one time. Once you regenerate a token it voids the old token.
- Select
Donebutton.
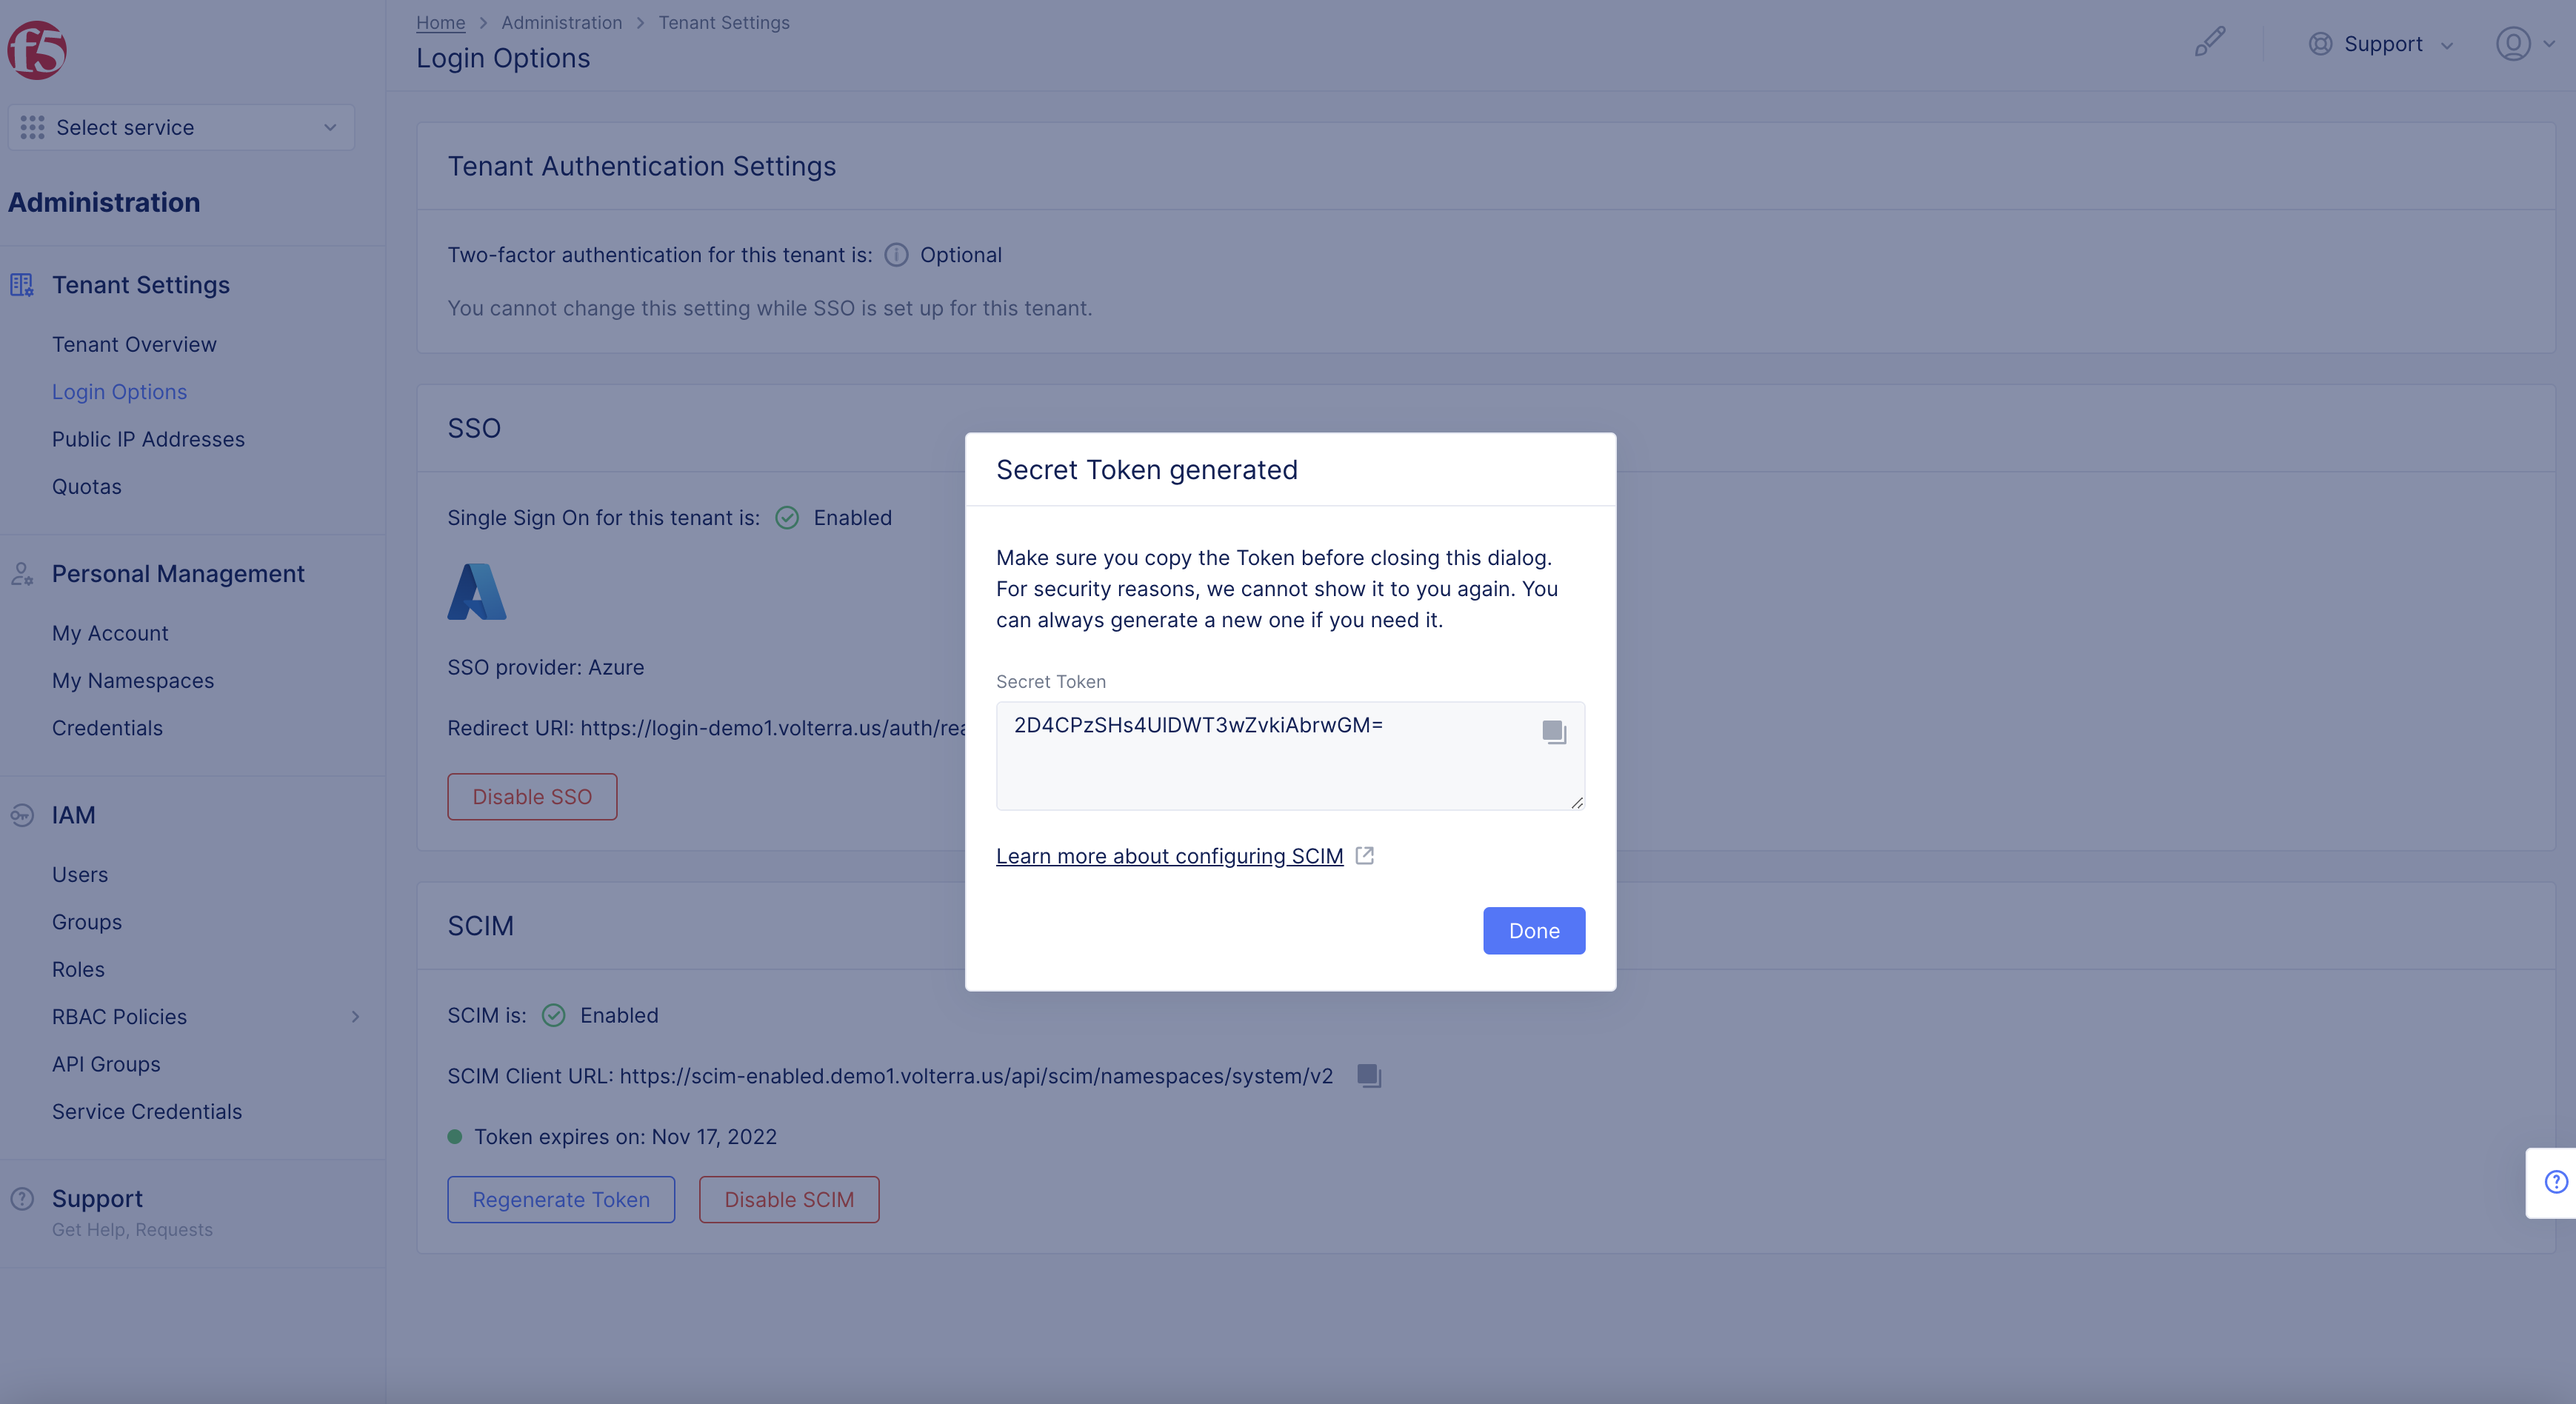
Figure: Token
Note: Tenant Owner only has permissions to add SCIM permissions.
Step 3: Setup Azure Application, Sync User Group.
Create a user group in the tenant with external-id specified. See SSO - Azure to learn more.
Step 3.1: Setup Azure Application.
-
Open Azure (portal.azure.com).
-
Select
Azure Active Directory.
Figure: Azure
- Select
Enterprise Applications.
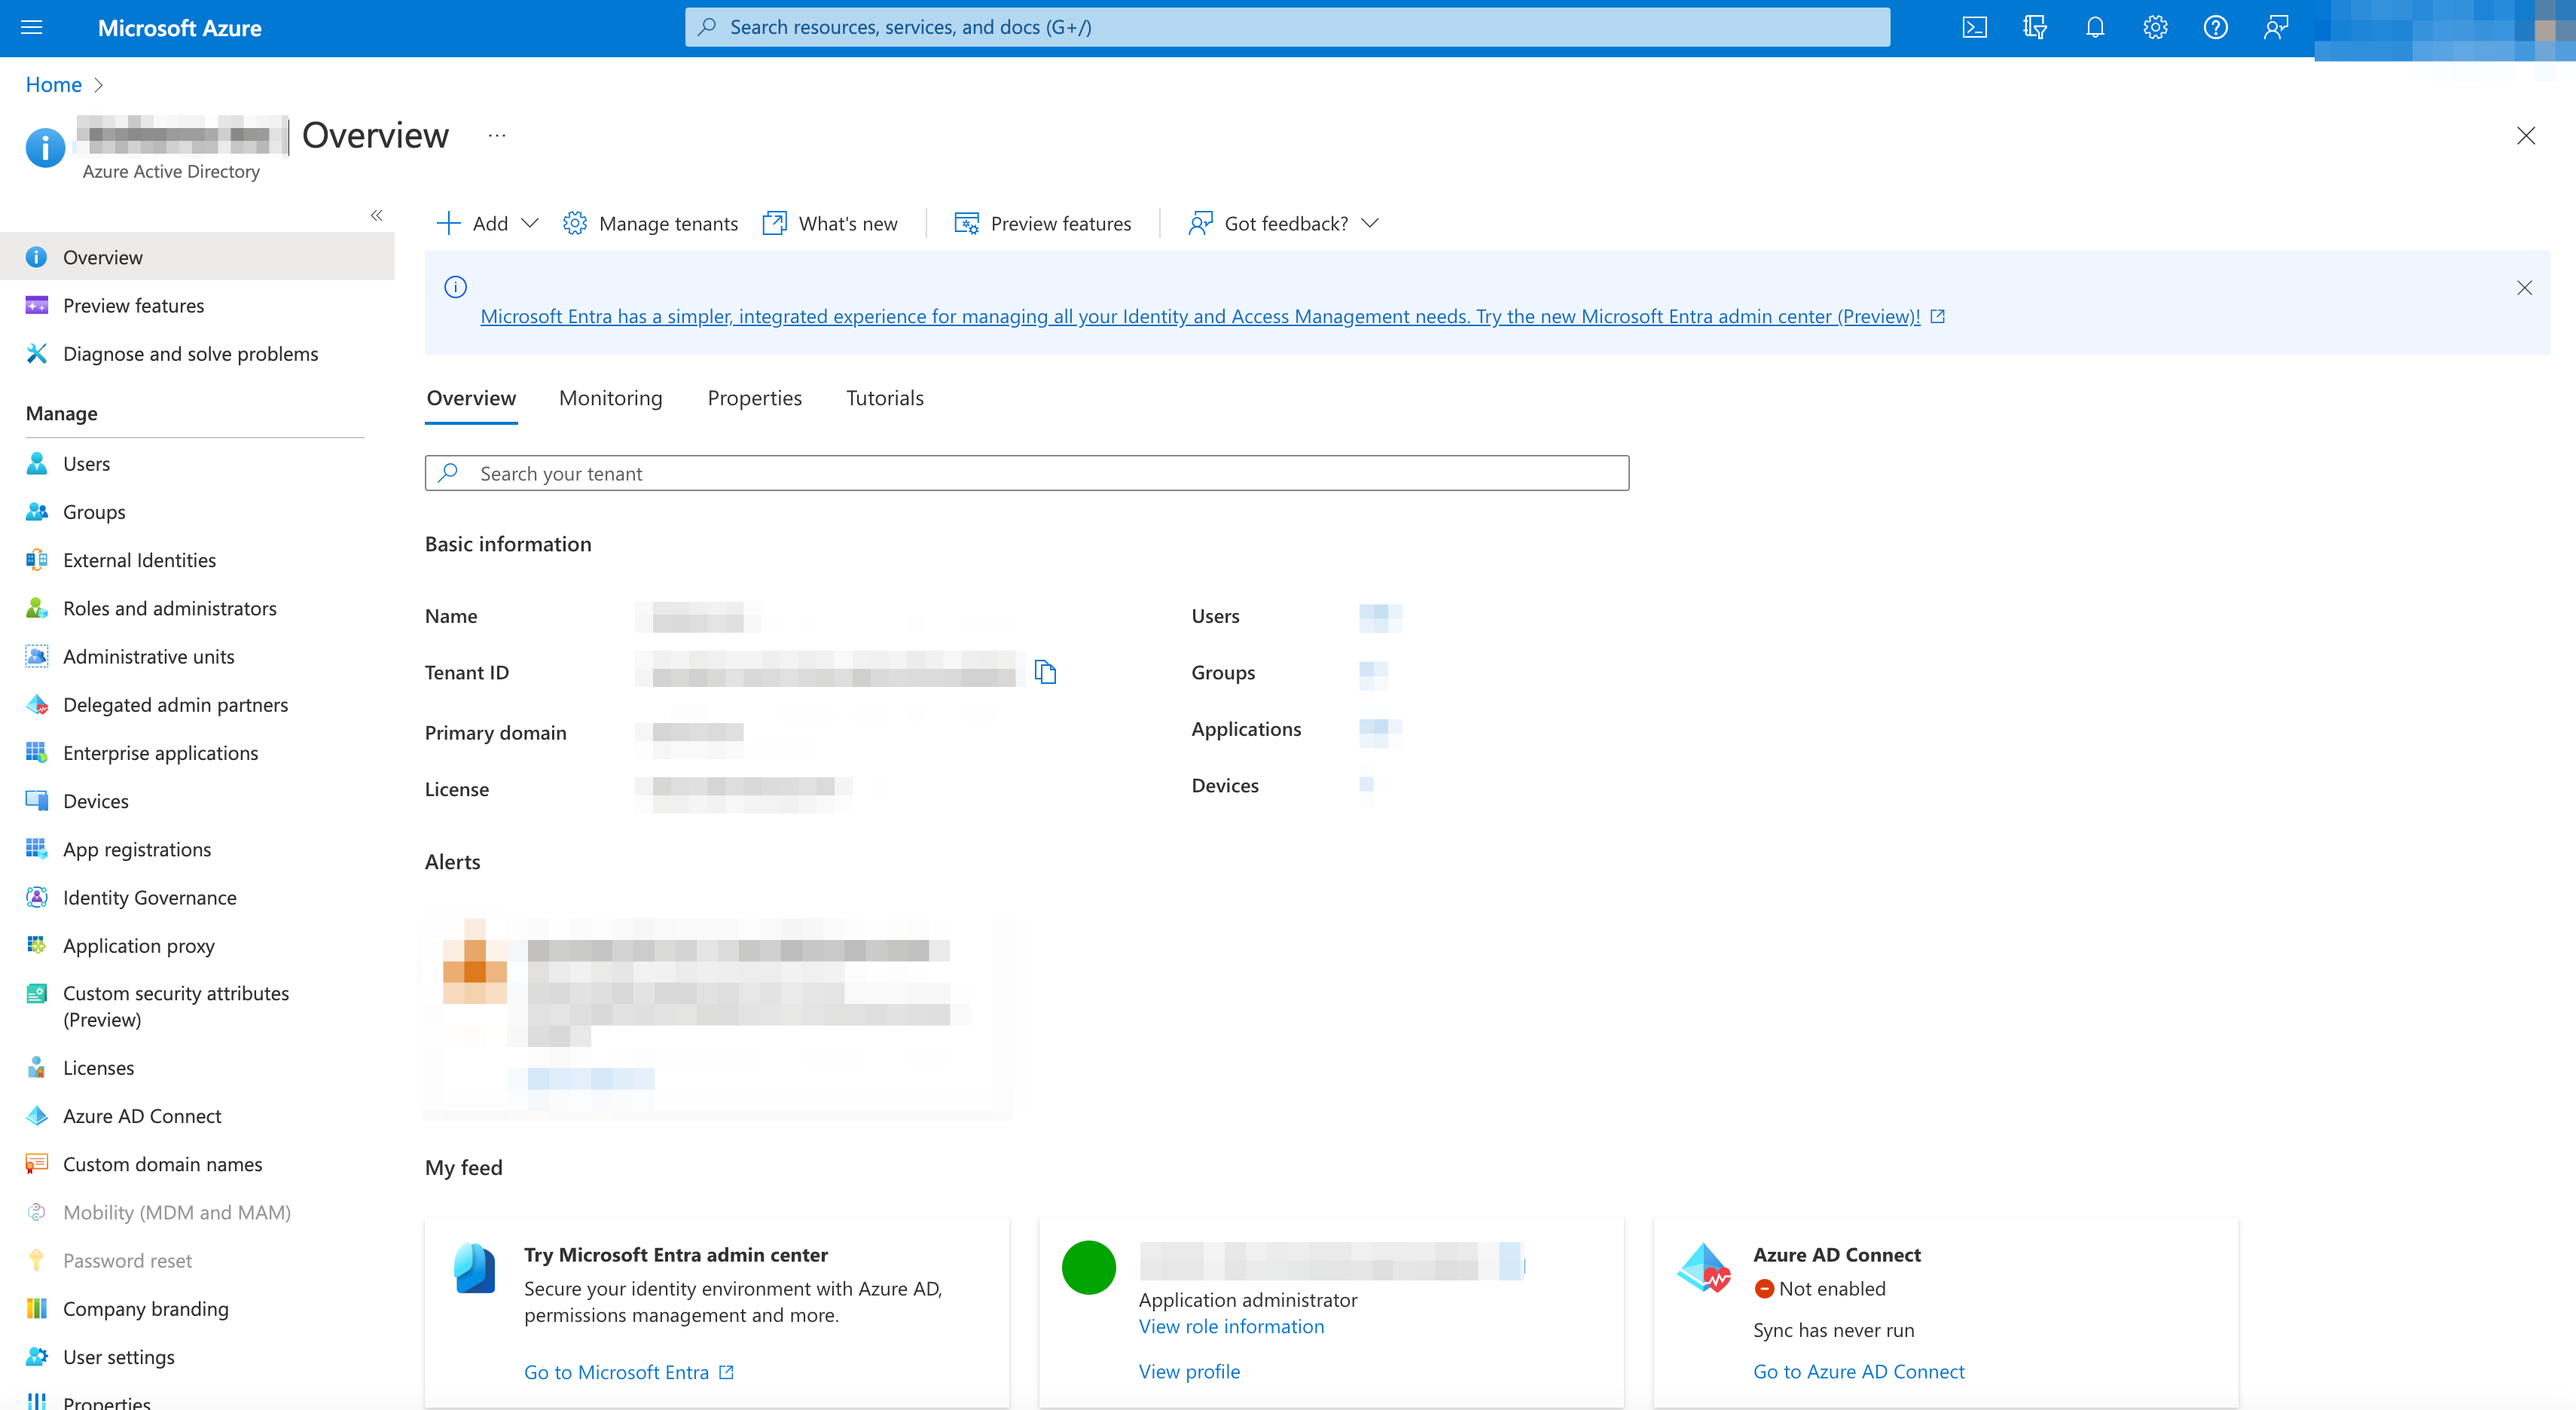
Figure: Azure Enterprise Applications
- Select
+ New applicaton.
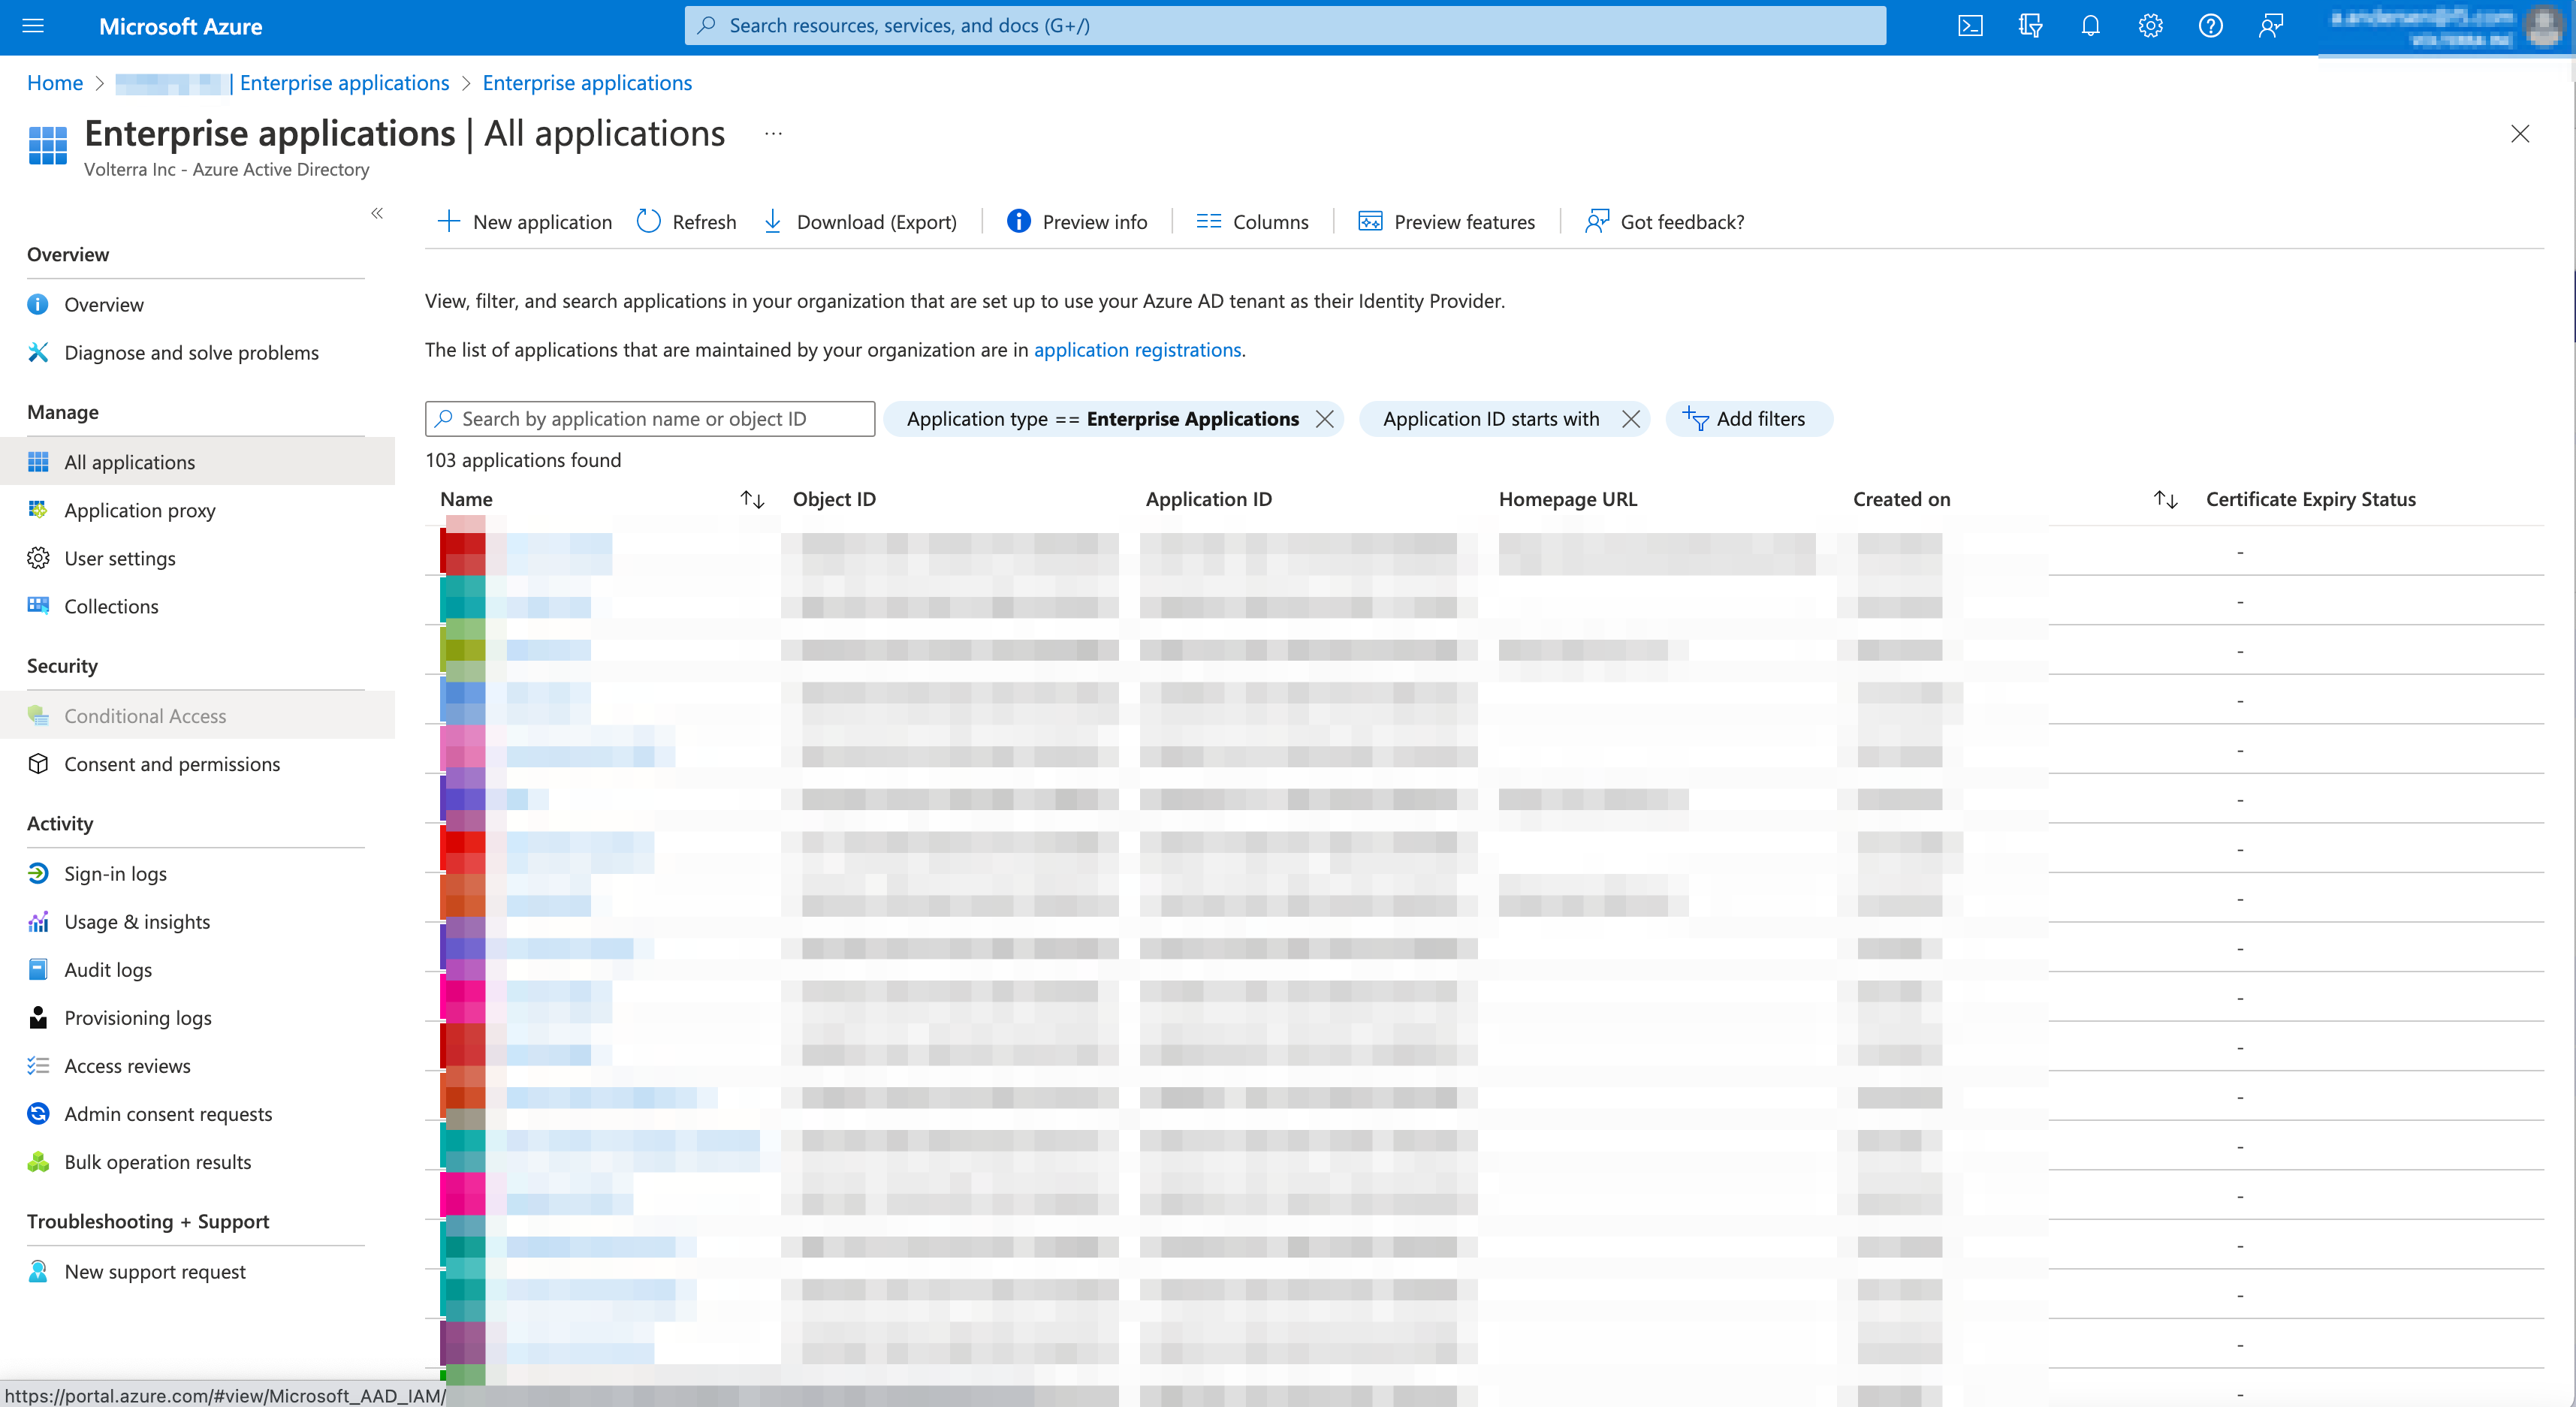
Figure: New Azure Application
- Select
Create your own applicationin Azure.
-
Input name in
Create your own applicationpop-up window. -
Check option
Integrate any other applications you don't find in your gallery (Non-gallery).
Note: Non-gallery application option.
-
Select
Createbutton. -
Adding Application pop-up will appear when loading.
Note: Application
nameadded successfully with green check mark verifies application added successfully.
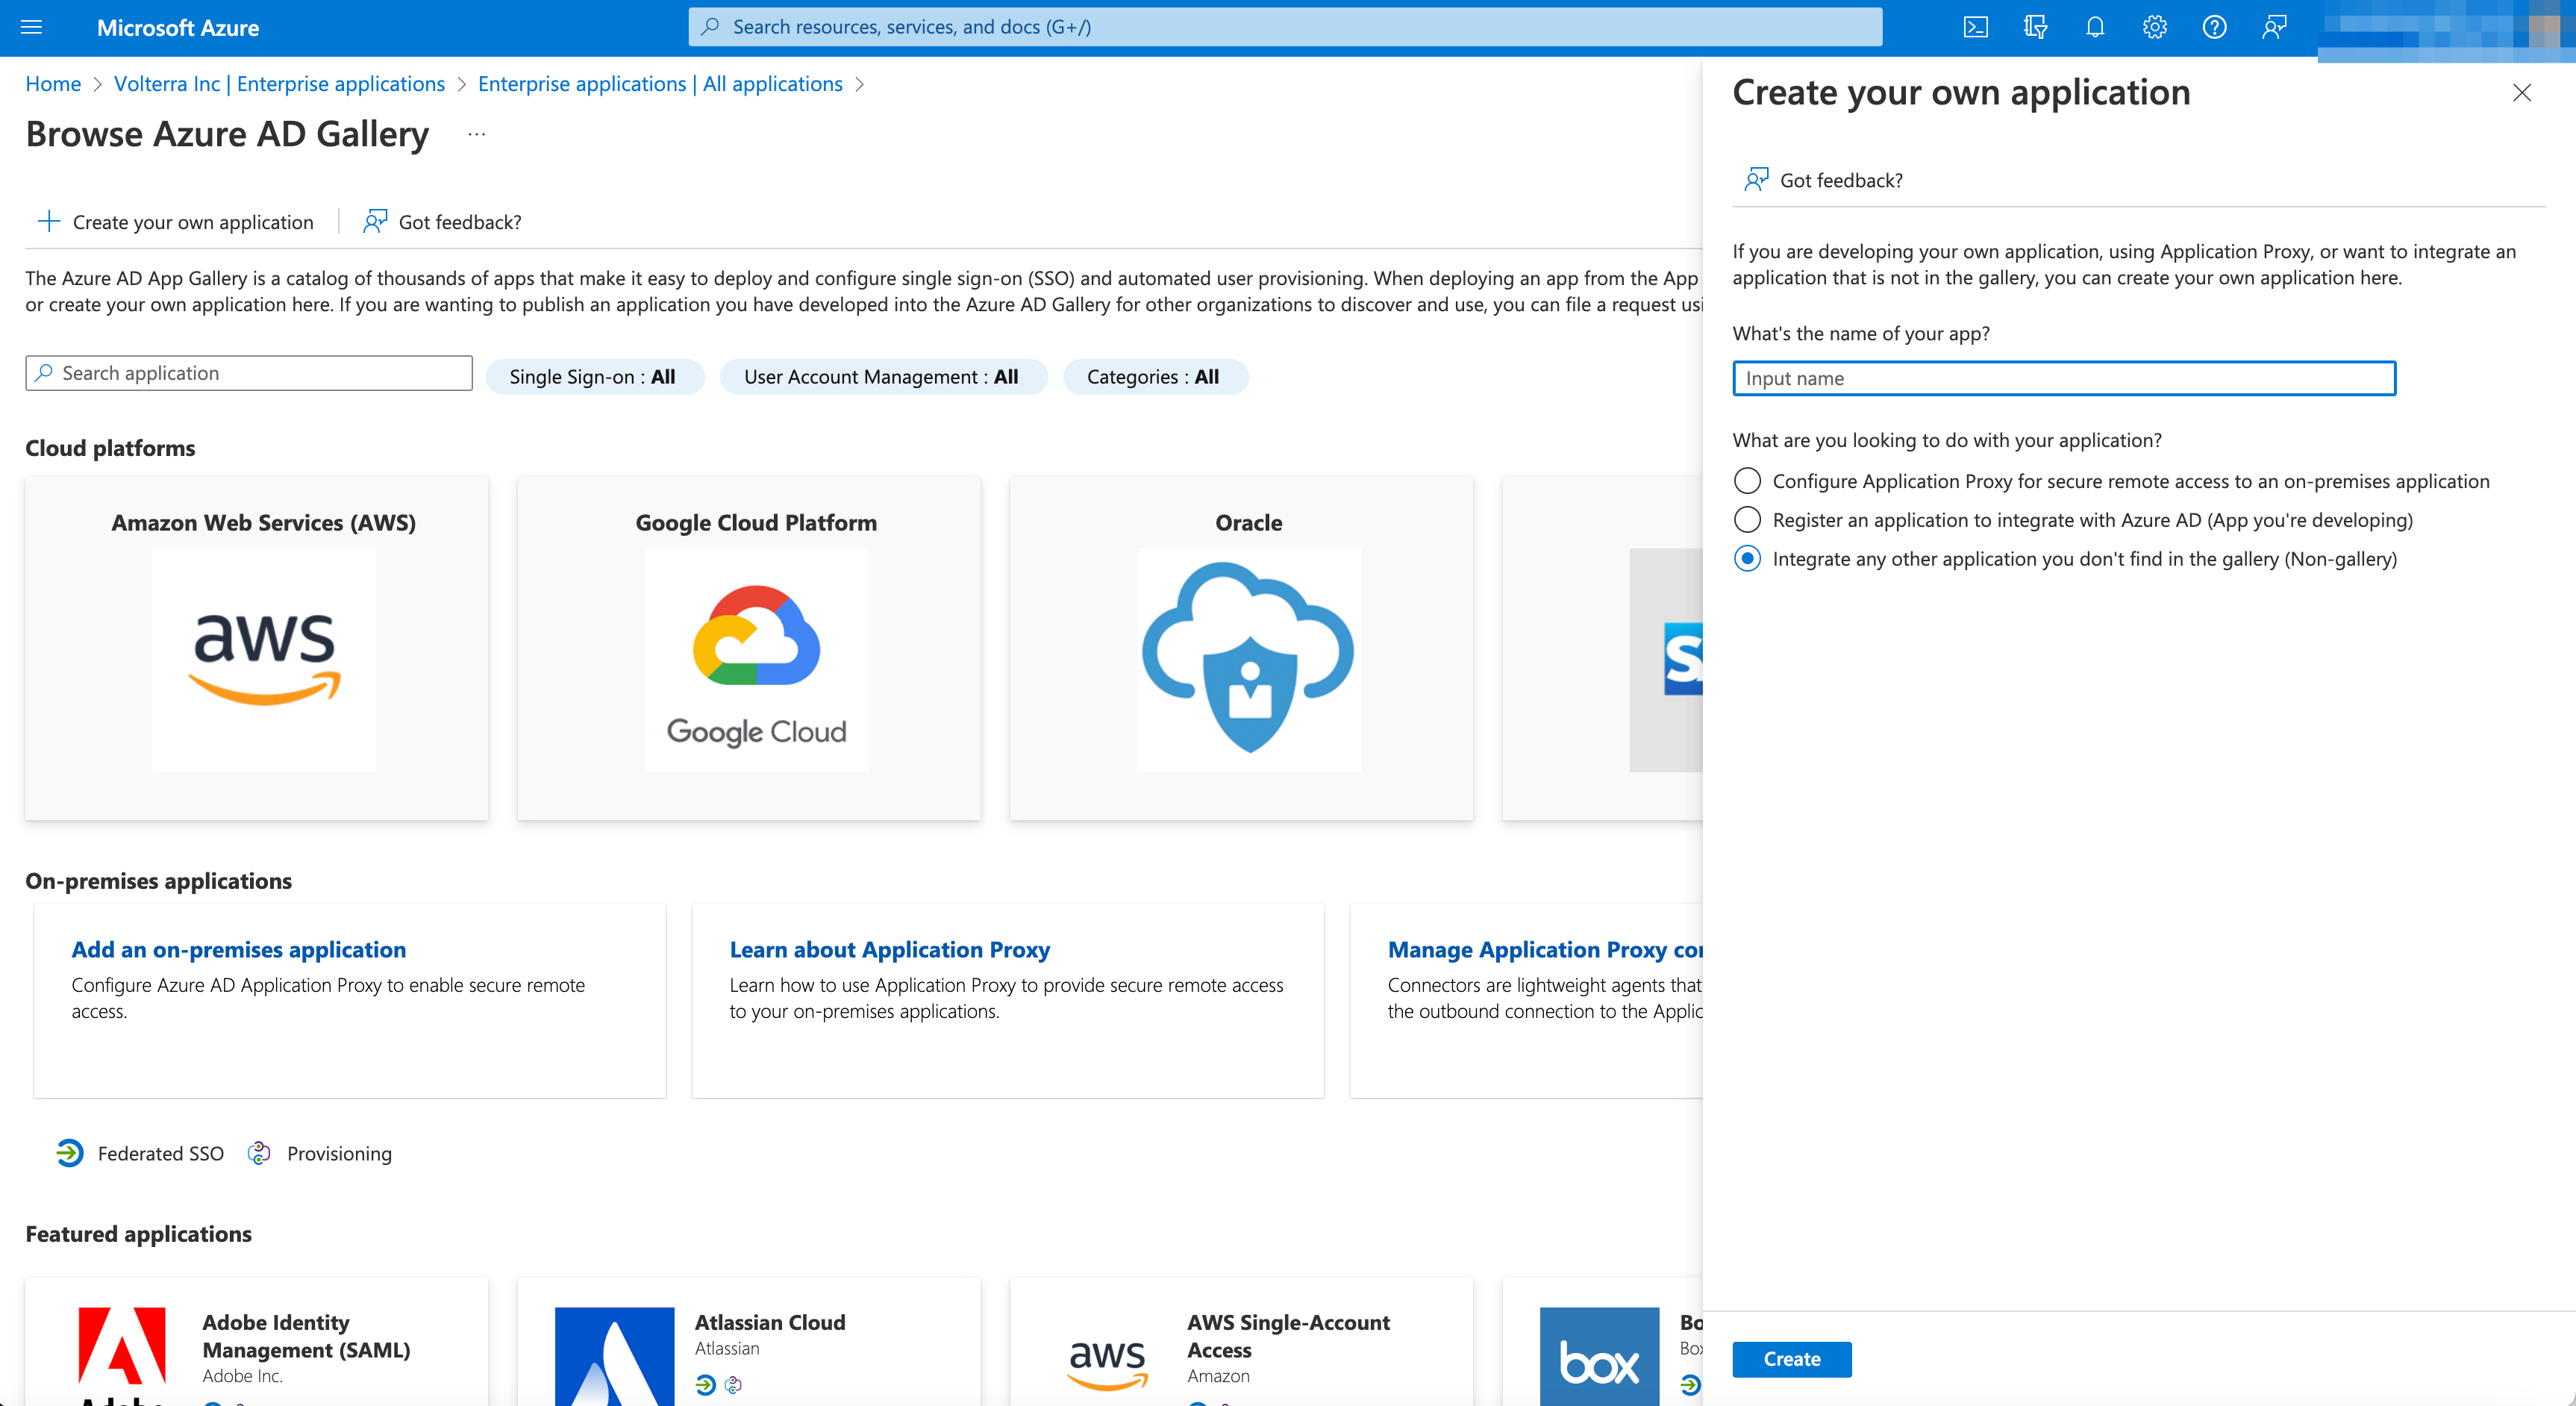
Figure: Azure
Step 3.2: Add Azure User Group.
Go to step 3.3 to set up new group if needed.
- Select
Users and GroupsinManagetab in left column in new Enterprise Application page in Azure.
Note: Add users and groups to your application to sync with F5 platform.
- Select
+ Add user/group.
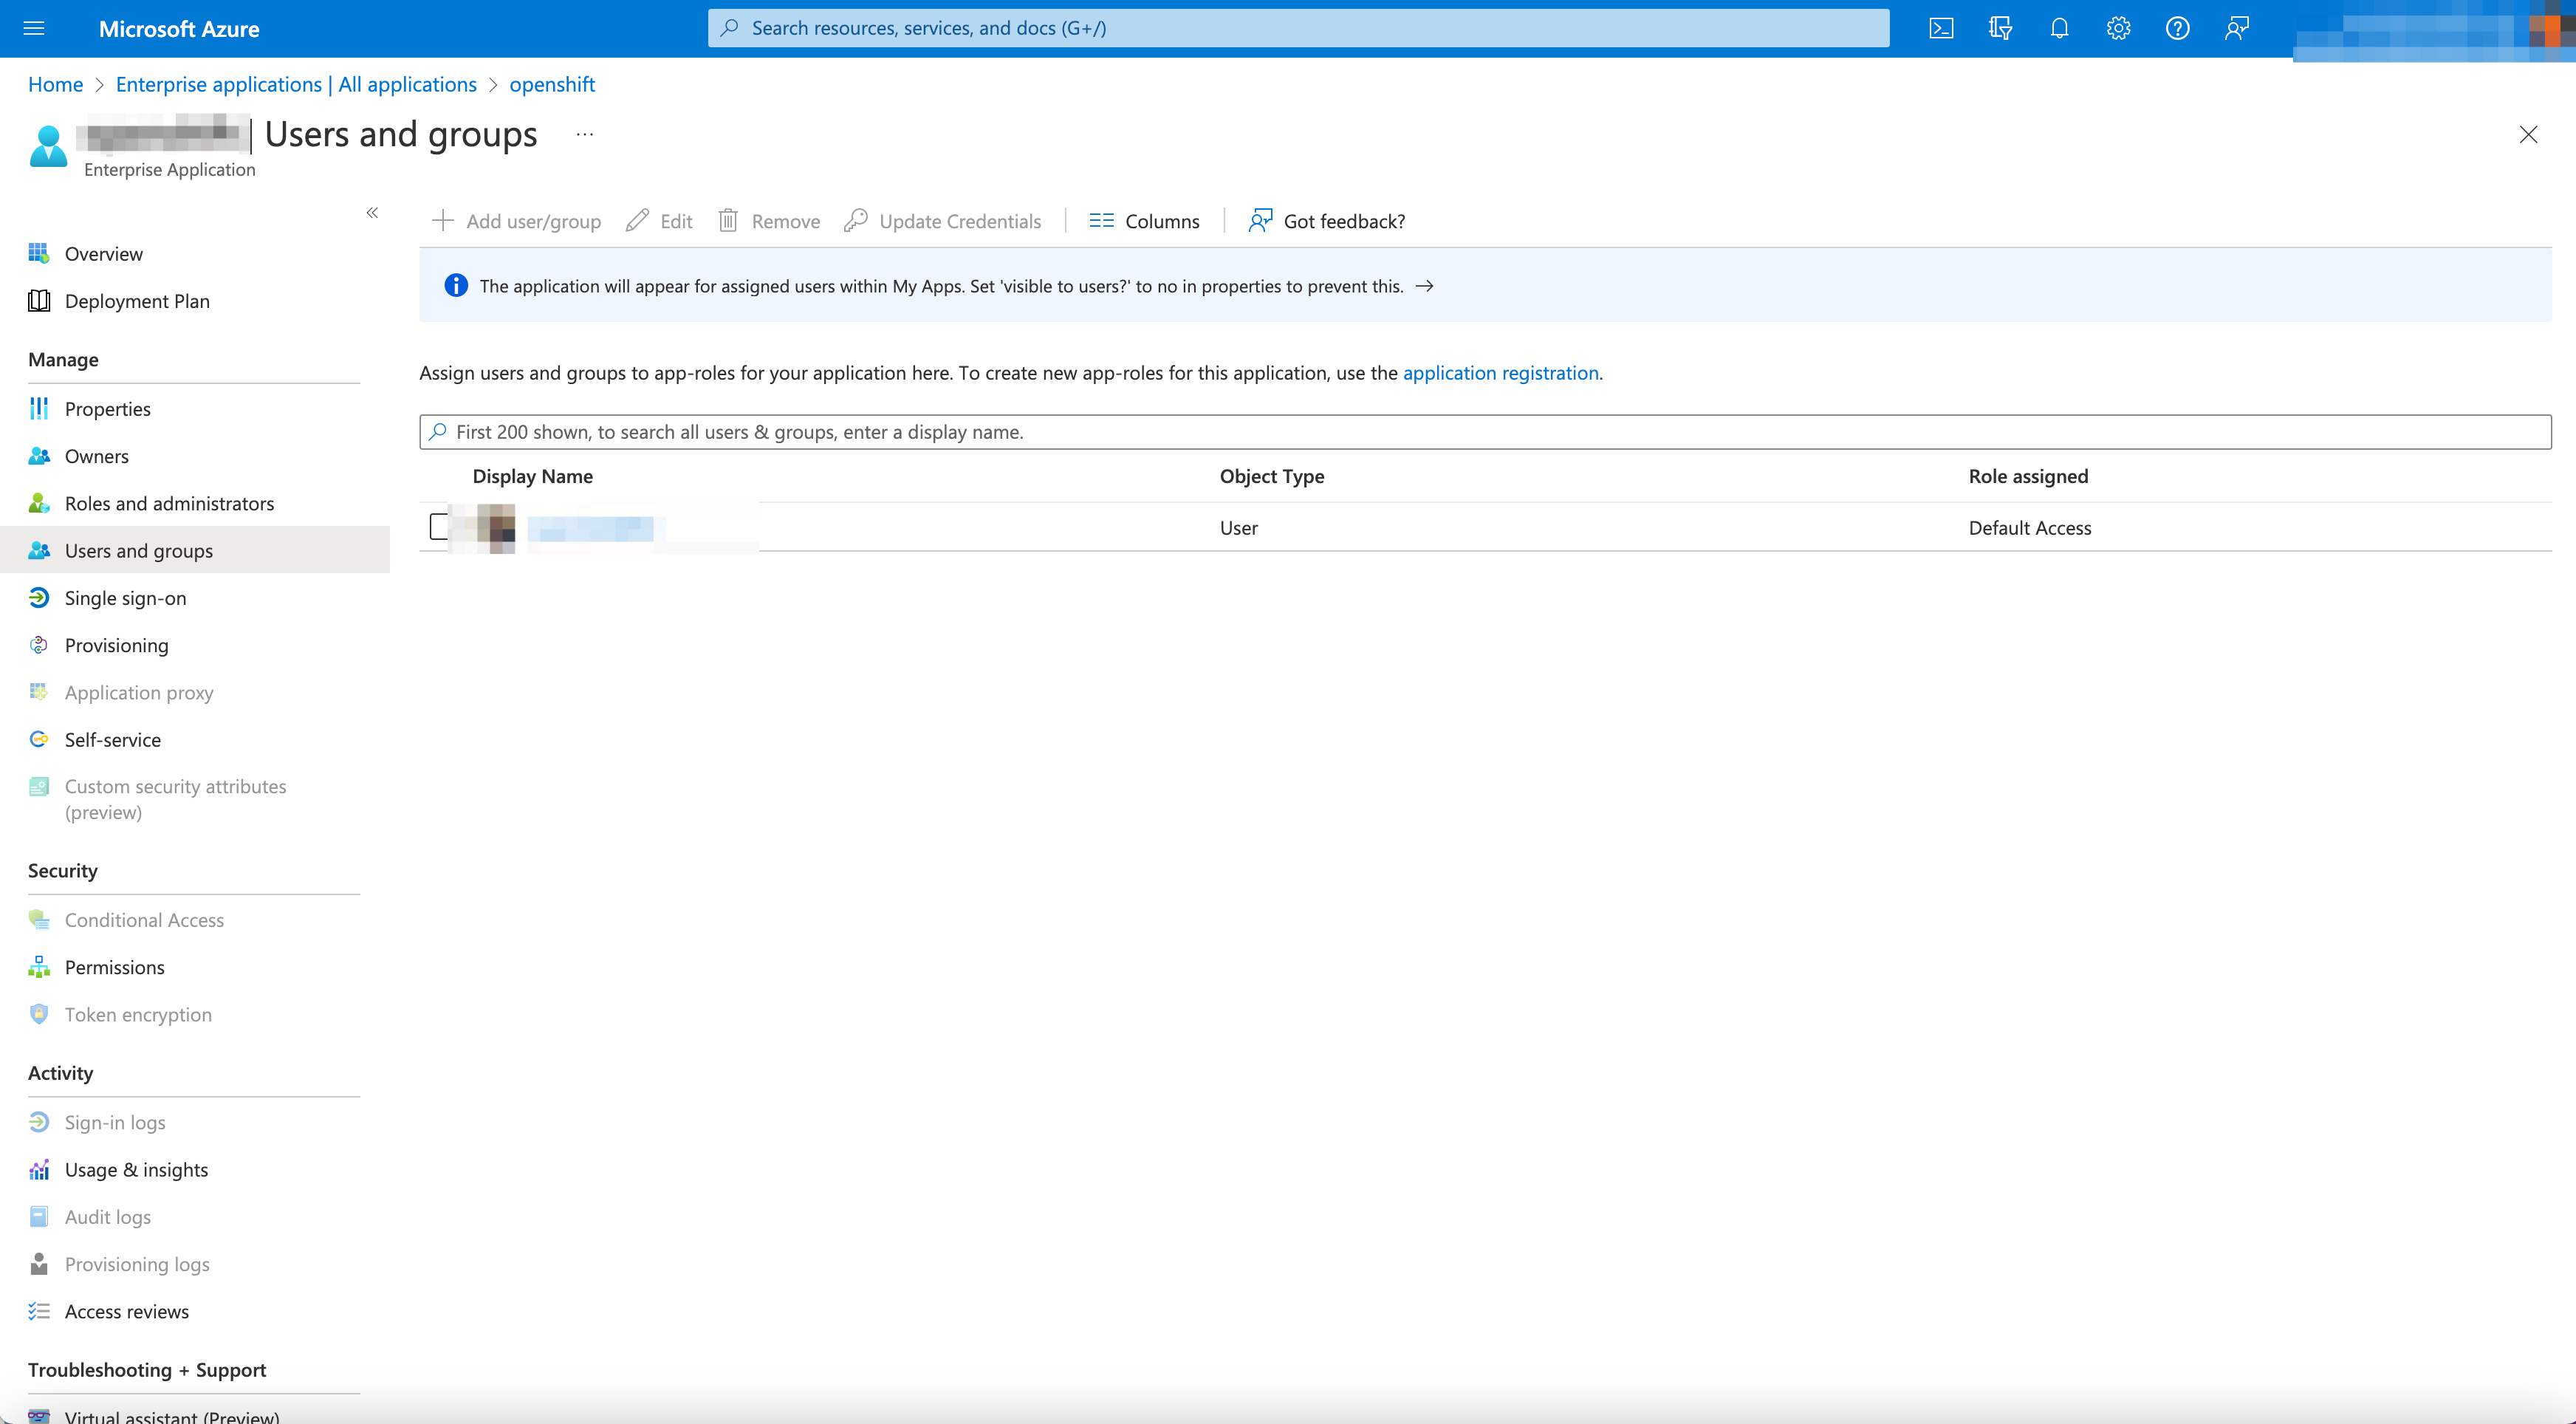
Figure: Azure Users and Groups
-
Select
None SelectedunderUsers and groupsinAdd Assignmentpage if no users or groups are to be added. -
Search for user group used previously in
Users and groupspop-up inAdd Assignmentpage. -
Select
UserorGroupto add toSelected itemslist. -
Selectbutton to add.
Note: Number of
Users or groupsselected will show underUsers and groupsafter added in pop-up form.
- Select
Assignbutton.
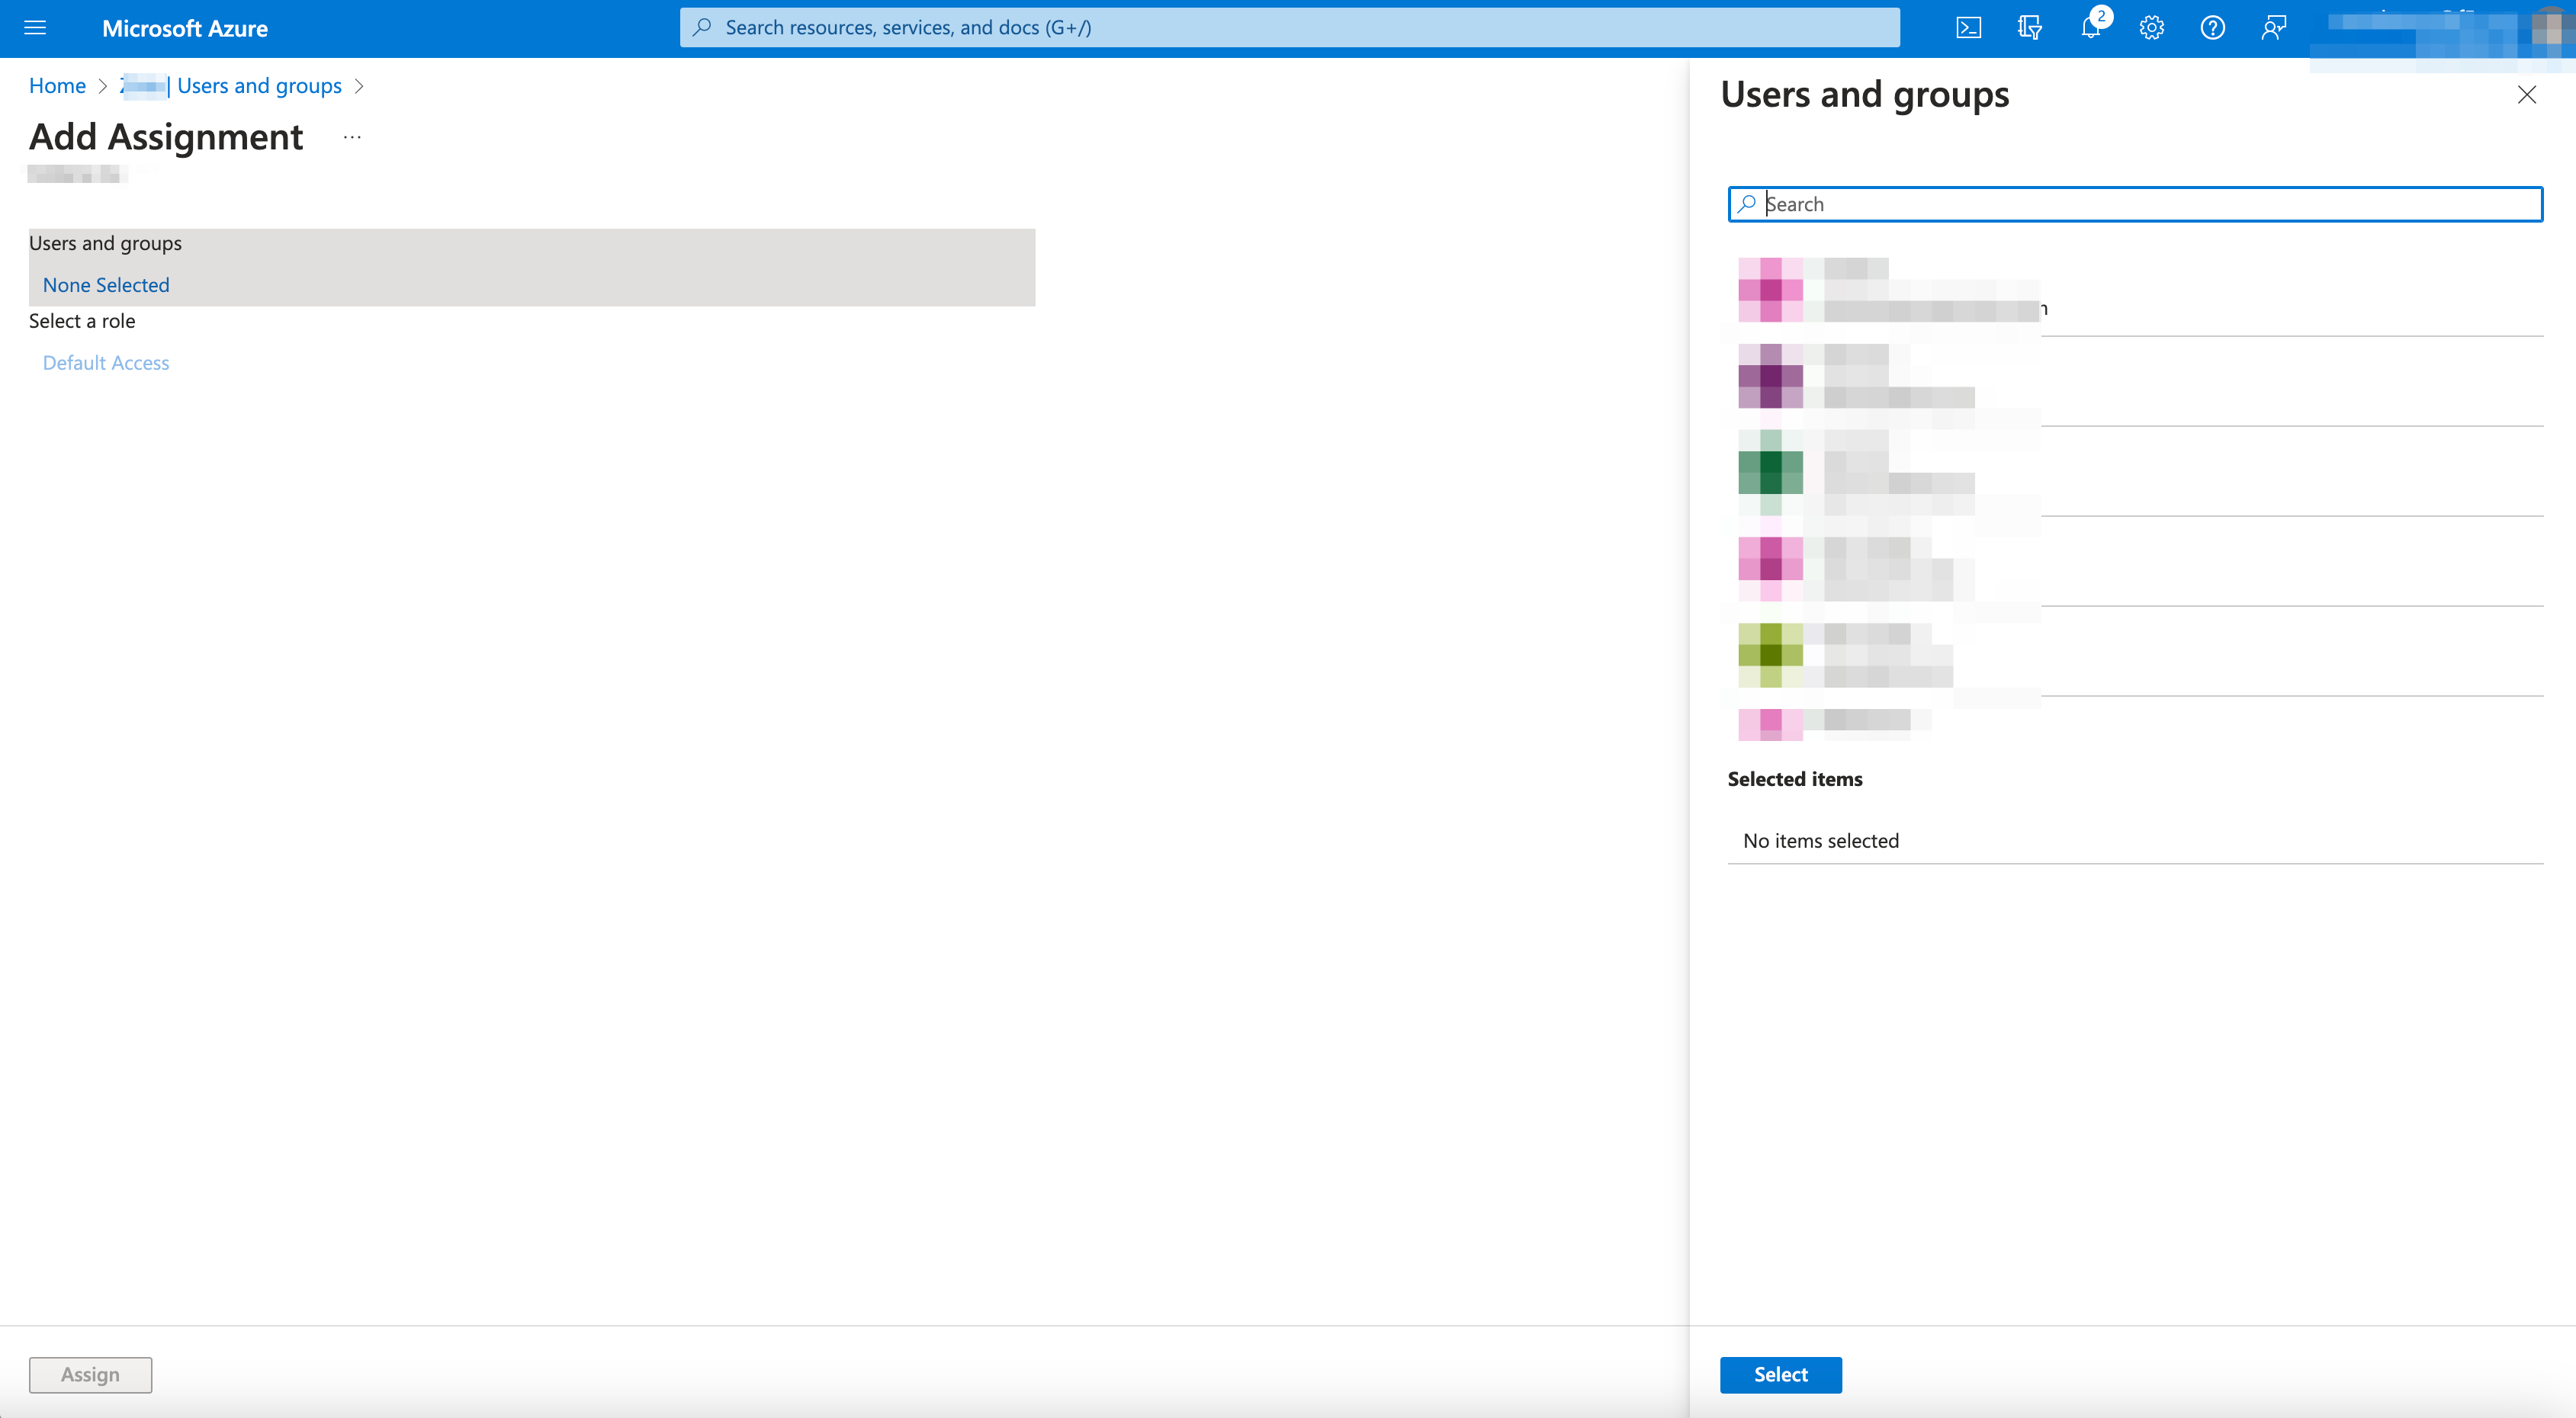
Figure: Azure Users and Groups
Note: View
Membersto confirm users are the same in application.
Step 3.3: Setup Azure Group.
-
Select
Homein Application page to go back to Azure homepage. -
Select
Azure Active Directory. -
Select
Groups. -
Select
New groupto load form. -
Select
Group typedrop-down menu >Security. -
Enter
Group name. -
Select
Membership typedrop-down menu >Assigned. -
Select
No members selectedlinked text underMembers. -
Search for users in
Searchbox, select user to add toSelected itemslist. -
Selectbutton to add users to group. -
Select
Createbutton to create group.
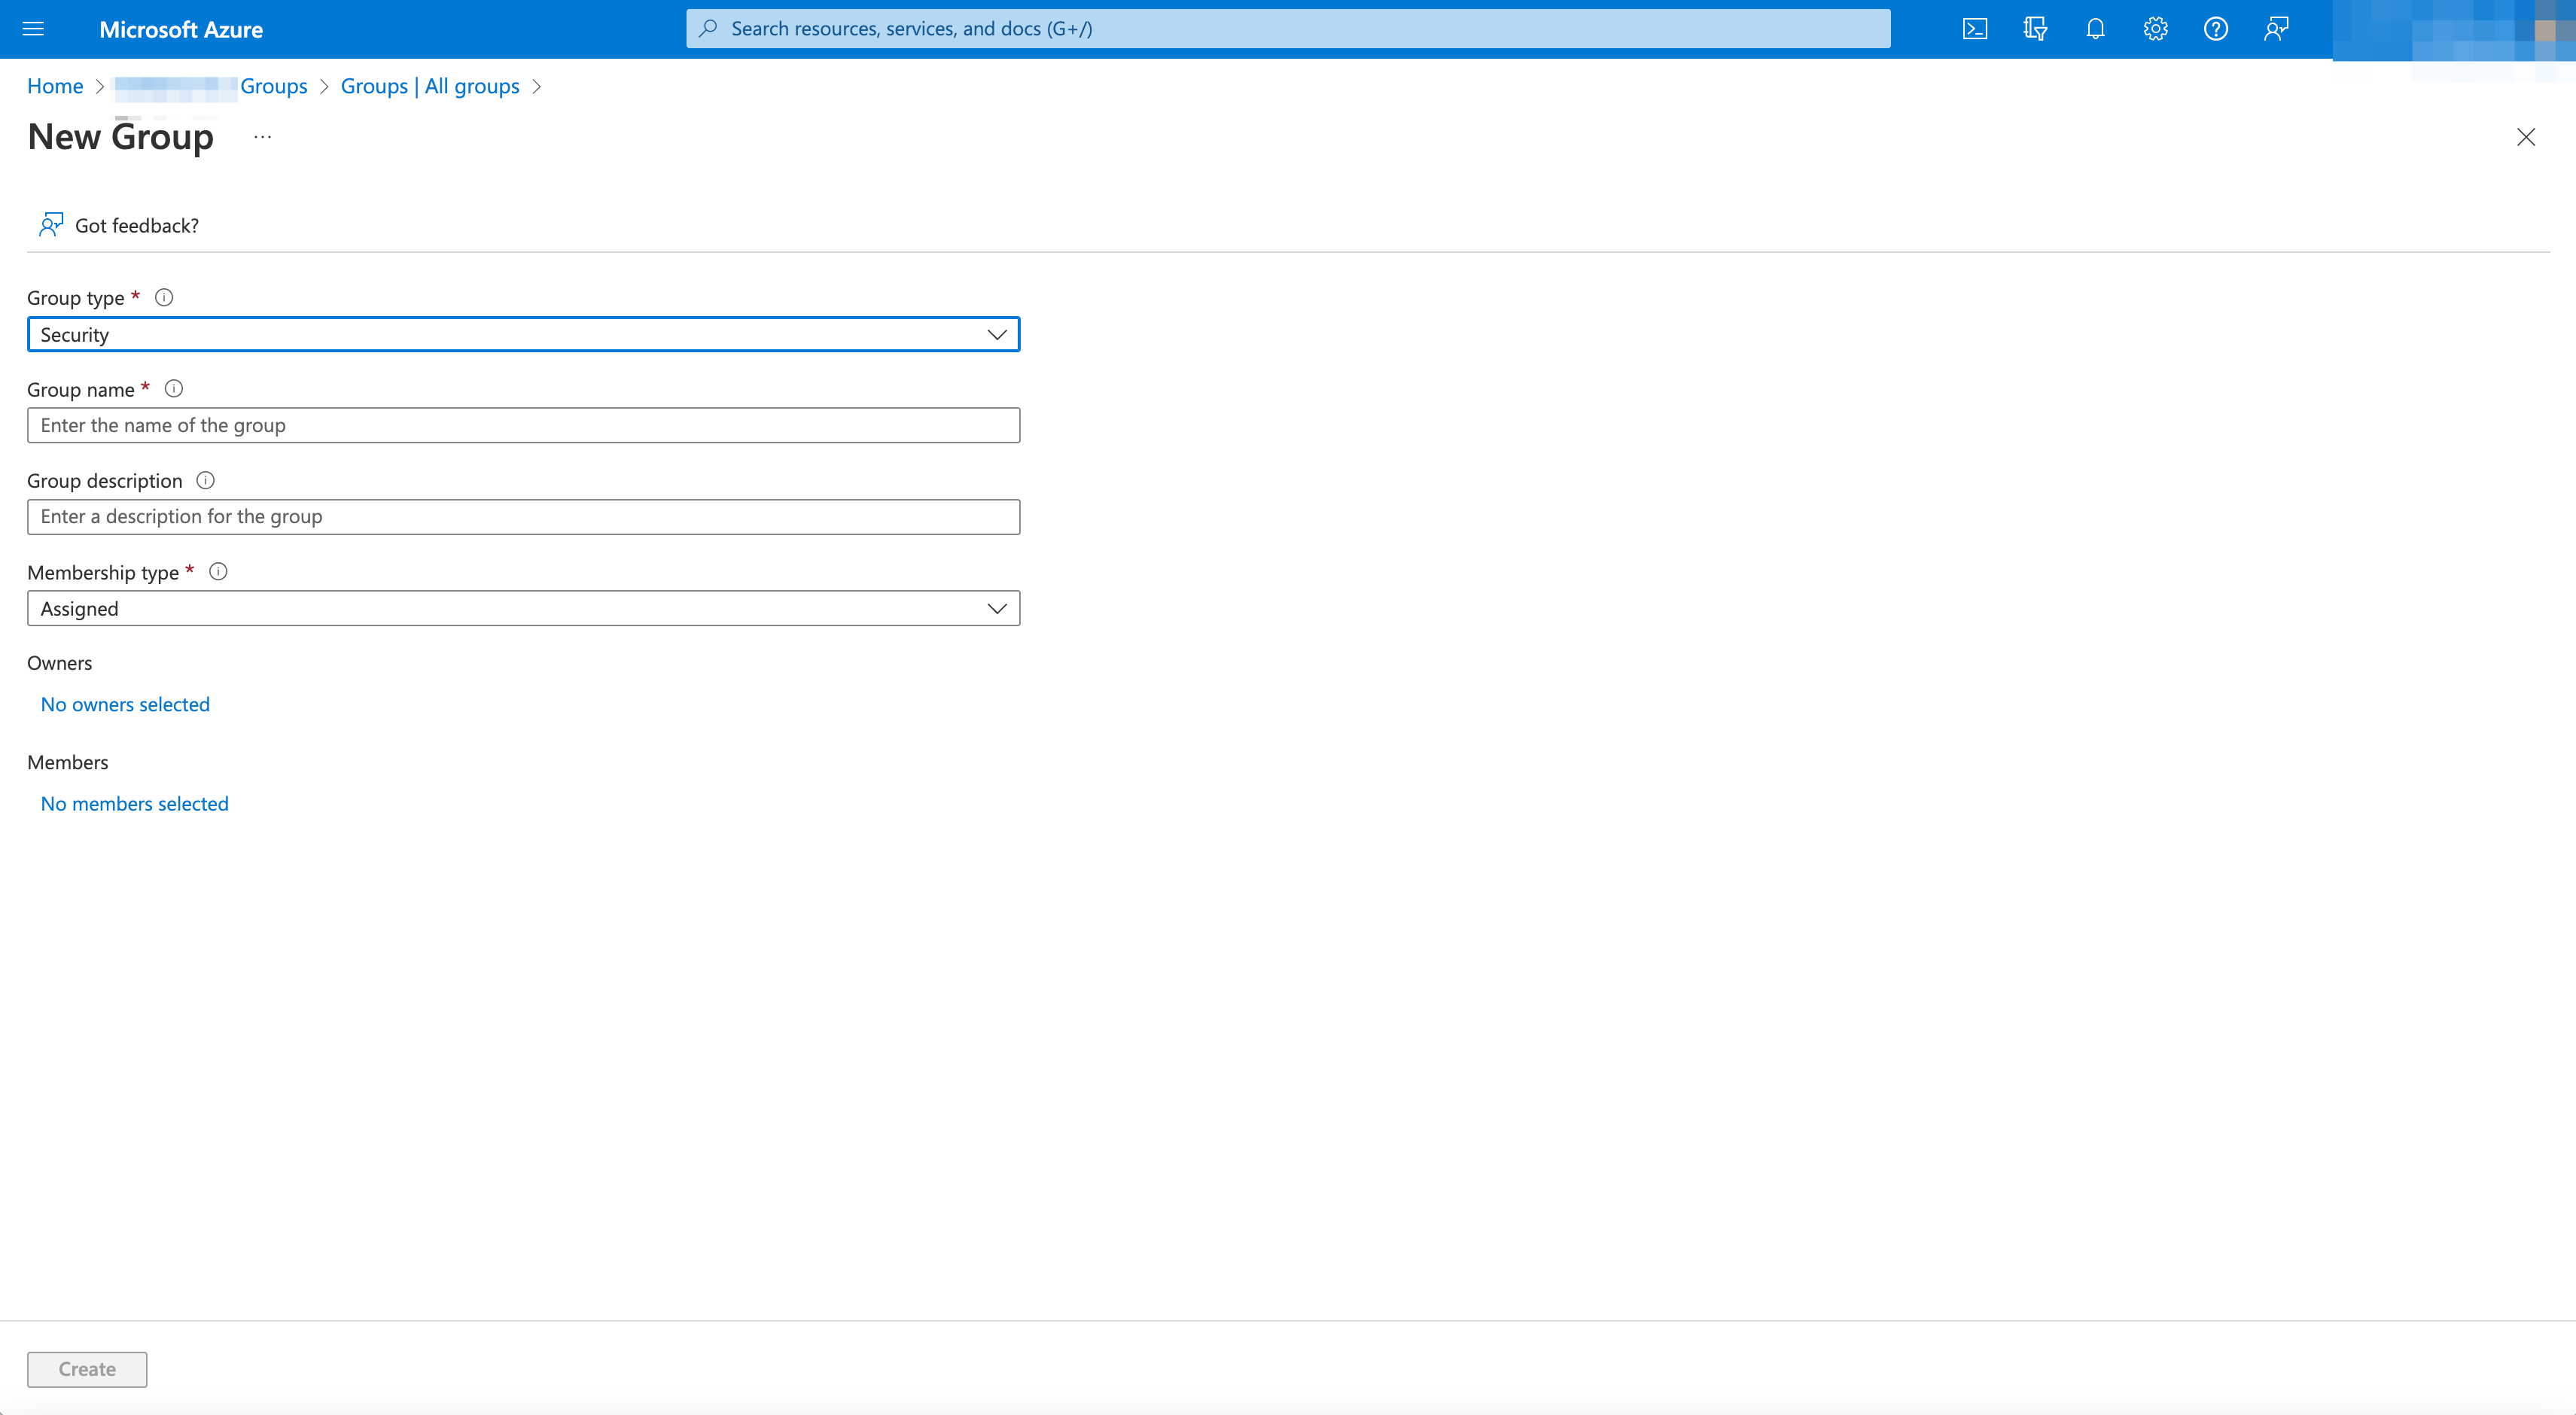
Figure: New Azure Group
Note: View
Membersto confirm users are the same in application.
Step 3.4: Provision User/Group in Azure.
-
Azure Active Directory>Enterprise applications> selectNmaeof application. -
Select
ProvisioninginManagein Azure Enterprise ApplicationOverviewpage. -
Select
Get StartedorStart Provisioningbutton.
Note:
Get Startedbutton will appear if this is your first time provisioning the application.
- Select
AutomaticinProvisioning Modedrop-down menu.
Note: Provisioning can take up to 40 minutes.
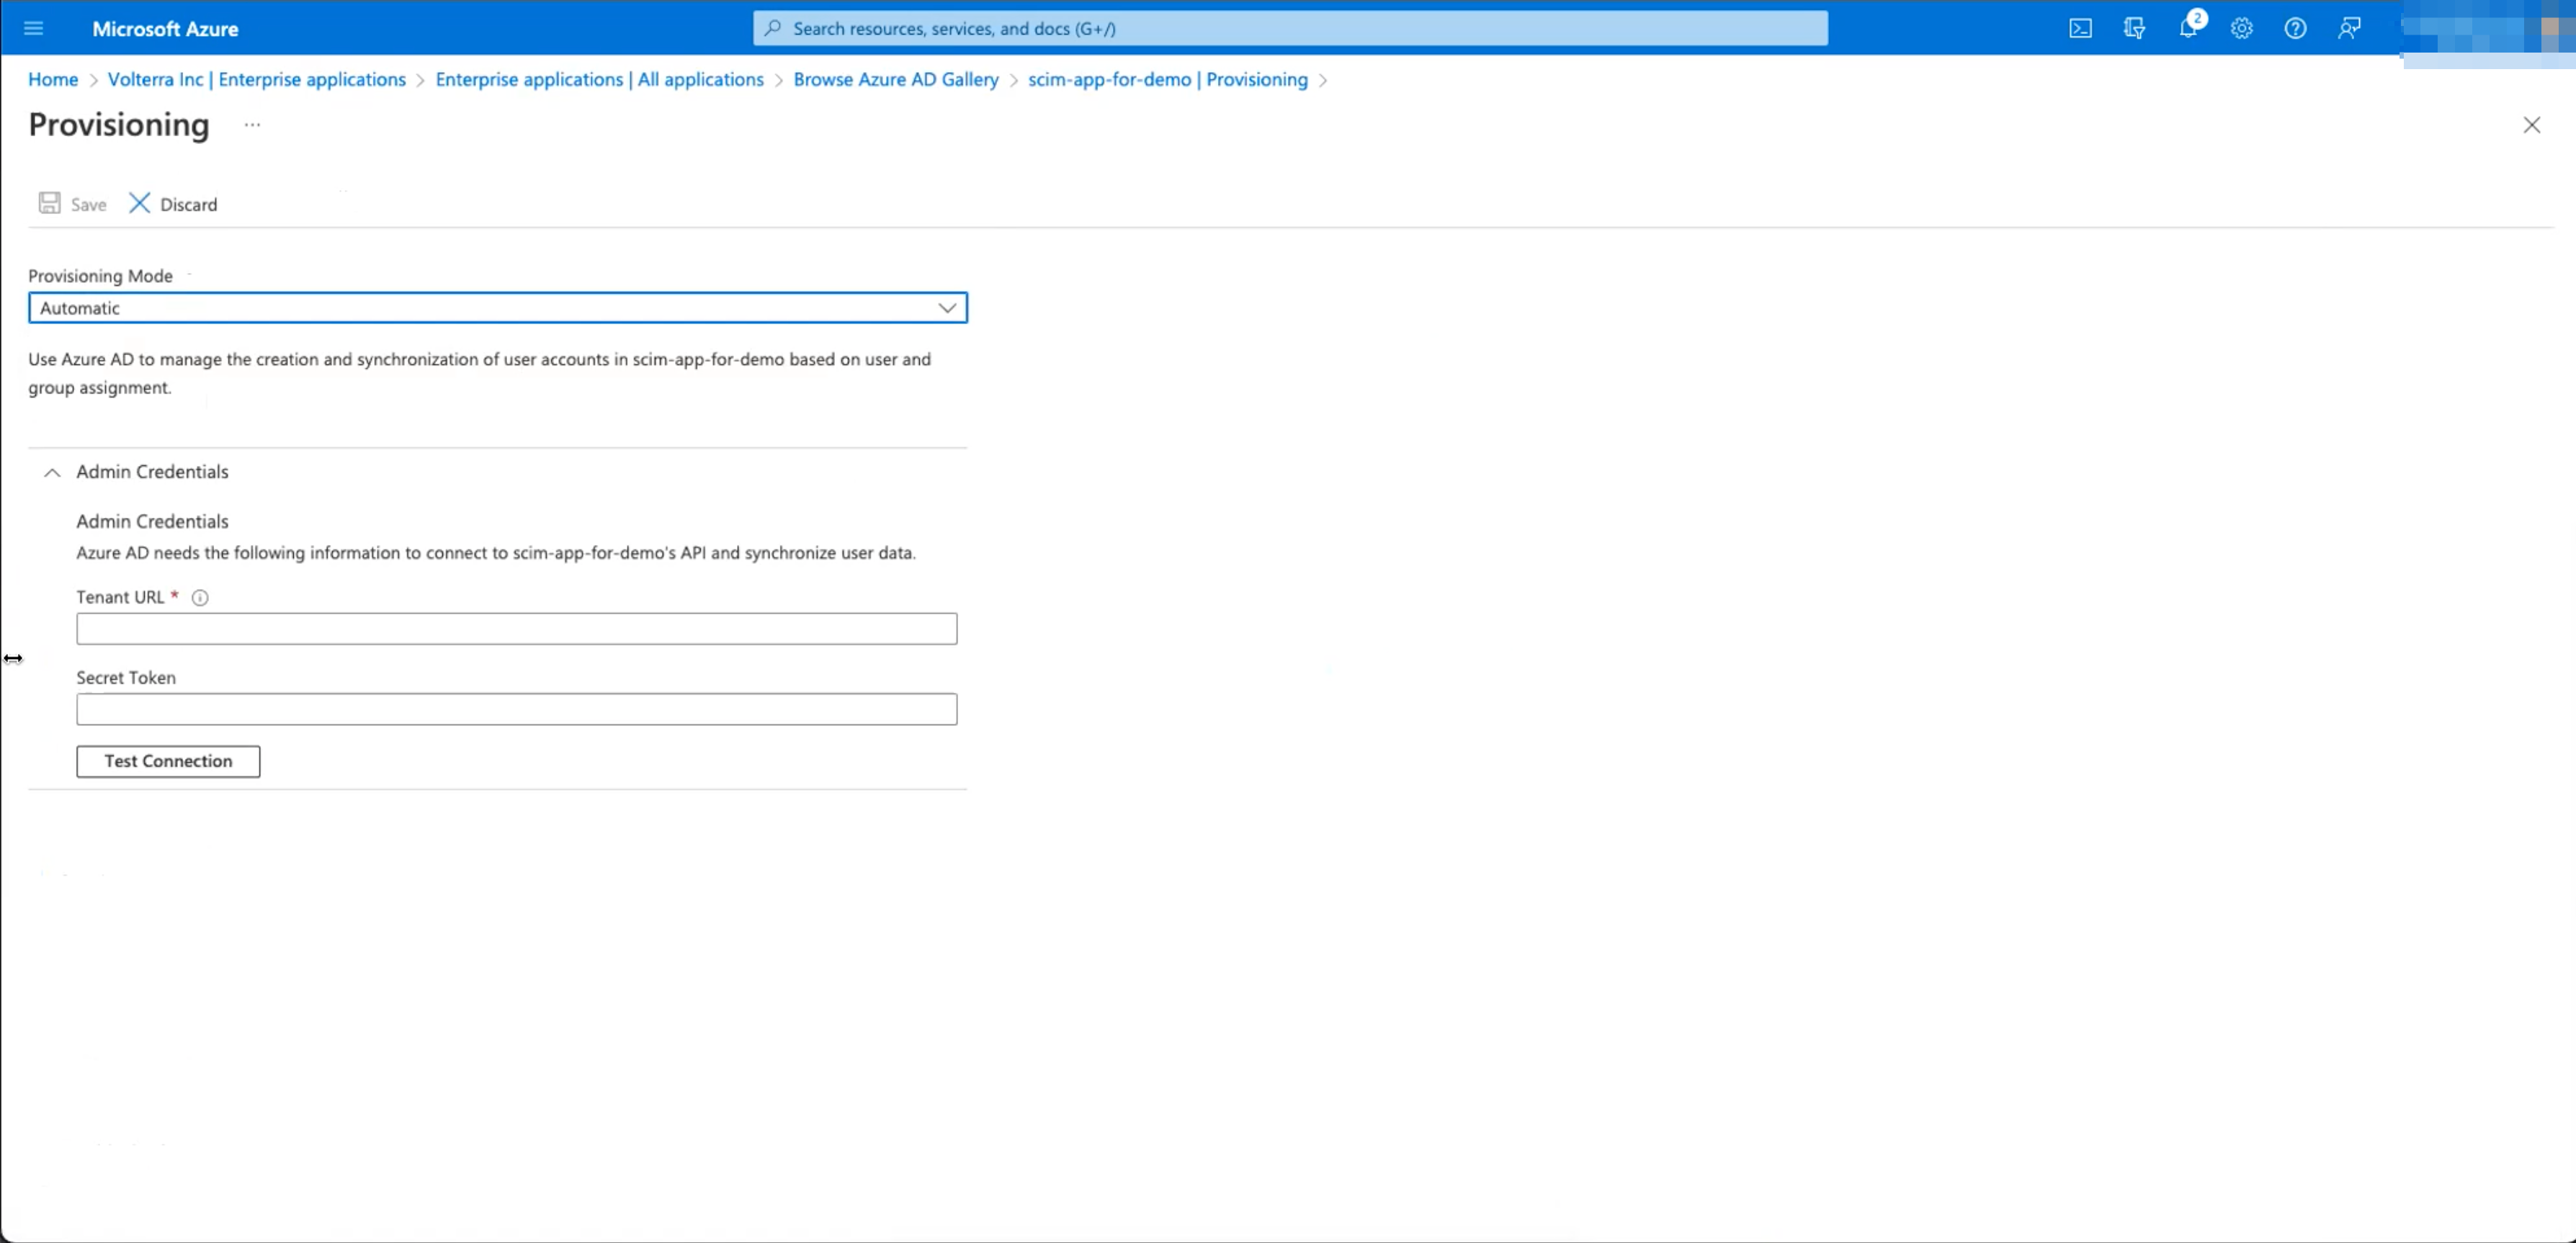
Figure: Azure Provisioning
Step 3.5: Add Tentant URL/Secret Tokens.
Note: Regenerate token as necessary.
-
Enter
Tenant URLin Azure from F5 Console. -
Enter
Secret Tokenin Azure from F5 Console.
Figure: Azure Provisioning
-
Copy and paste
Tenant URLfrom F5 Console.- In
Administration>Login Options>SCIM> copySCIM Client URLfor tenant URL.
- In
-
Copy and paste
Secret Tokenfrom F5 Console.- In
Administration>Login Options>SCIM> selectRegenerate Tokenbutton > selectToken Validity>Regenerate Tokenbutton in pop-up > copySecret Tokenin F5 Console.
- In
Figure: SCIM
- Select
Donebutton to complete token generation in F5 Console.
Note: Once you create a new token the old token will be automatically destroyed. At any point in time there will only be one token associated with one primary tenant.
Figure: SCIM
Step 3.6: Provision Test Connection.
Provisioning to communicate Azure application with F5 console.
- Select
Test Connectionbutton inProvisioningpage in Azure.
Note:
Testing connection to name-The applied credentials are authorized to enable provisioningpop-up appears in Azure upper-right corner validating connection is successful.
Figure: Azure Provisioning
Note:
Uploading user provisionsing settings - successfully updated namepop-up appears in Azure upper-right corner validating provisioning successful.
- In
Provisioningpage see ready to start provisioning.
Note: To start provisions you have to create a placeholder group to select which group you want to sync with F5 Console.
Step 3.7: Configure Azure Groups.
- Select
Users and groupsinManagetab.

Figure: Azure Users and Groups
-
Select
Groups. -
Copy
Object idin group page.
Note:
Object idis what Azure uses to keep track of the group.
Step 3.8: Add F5 Console Group.
- In F5 Console
Administration>IAM>Groups.
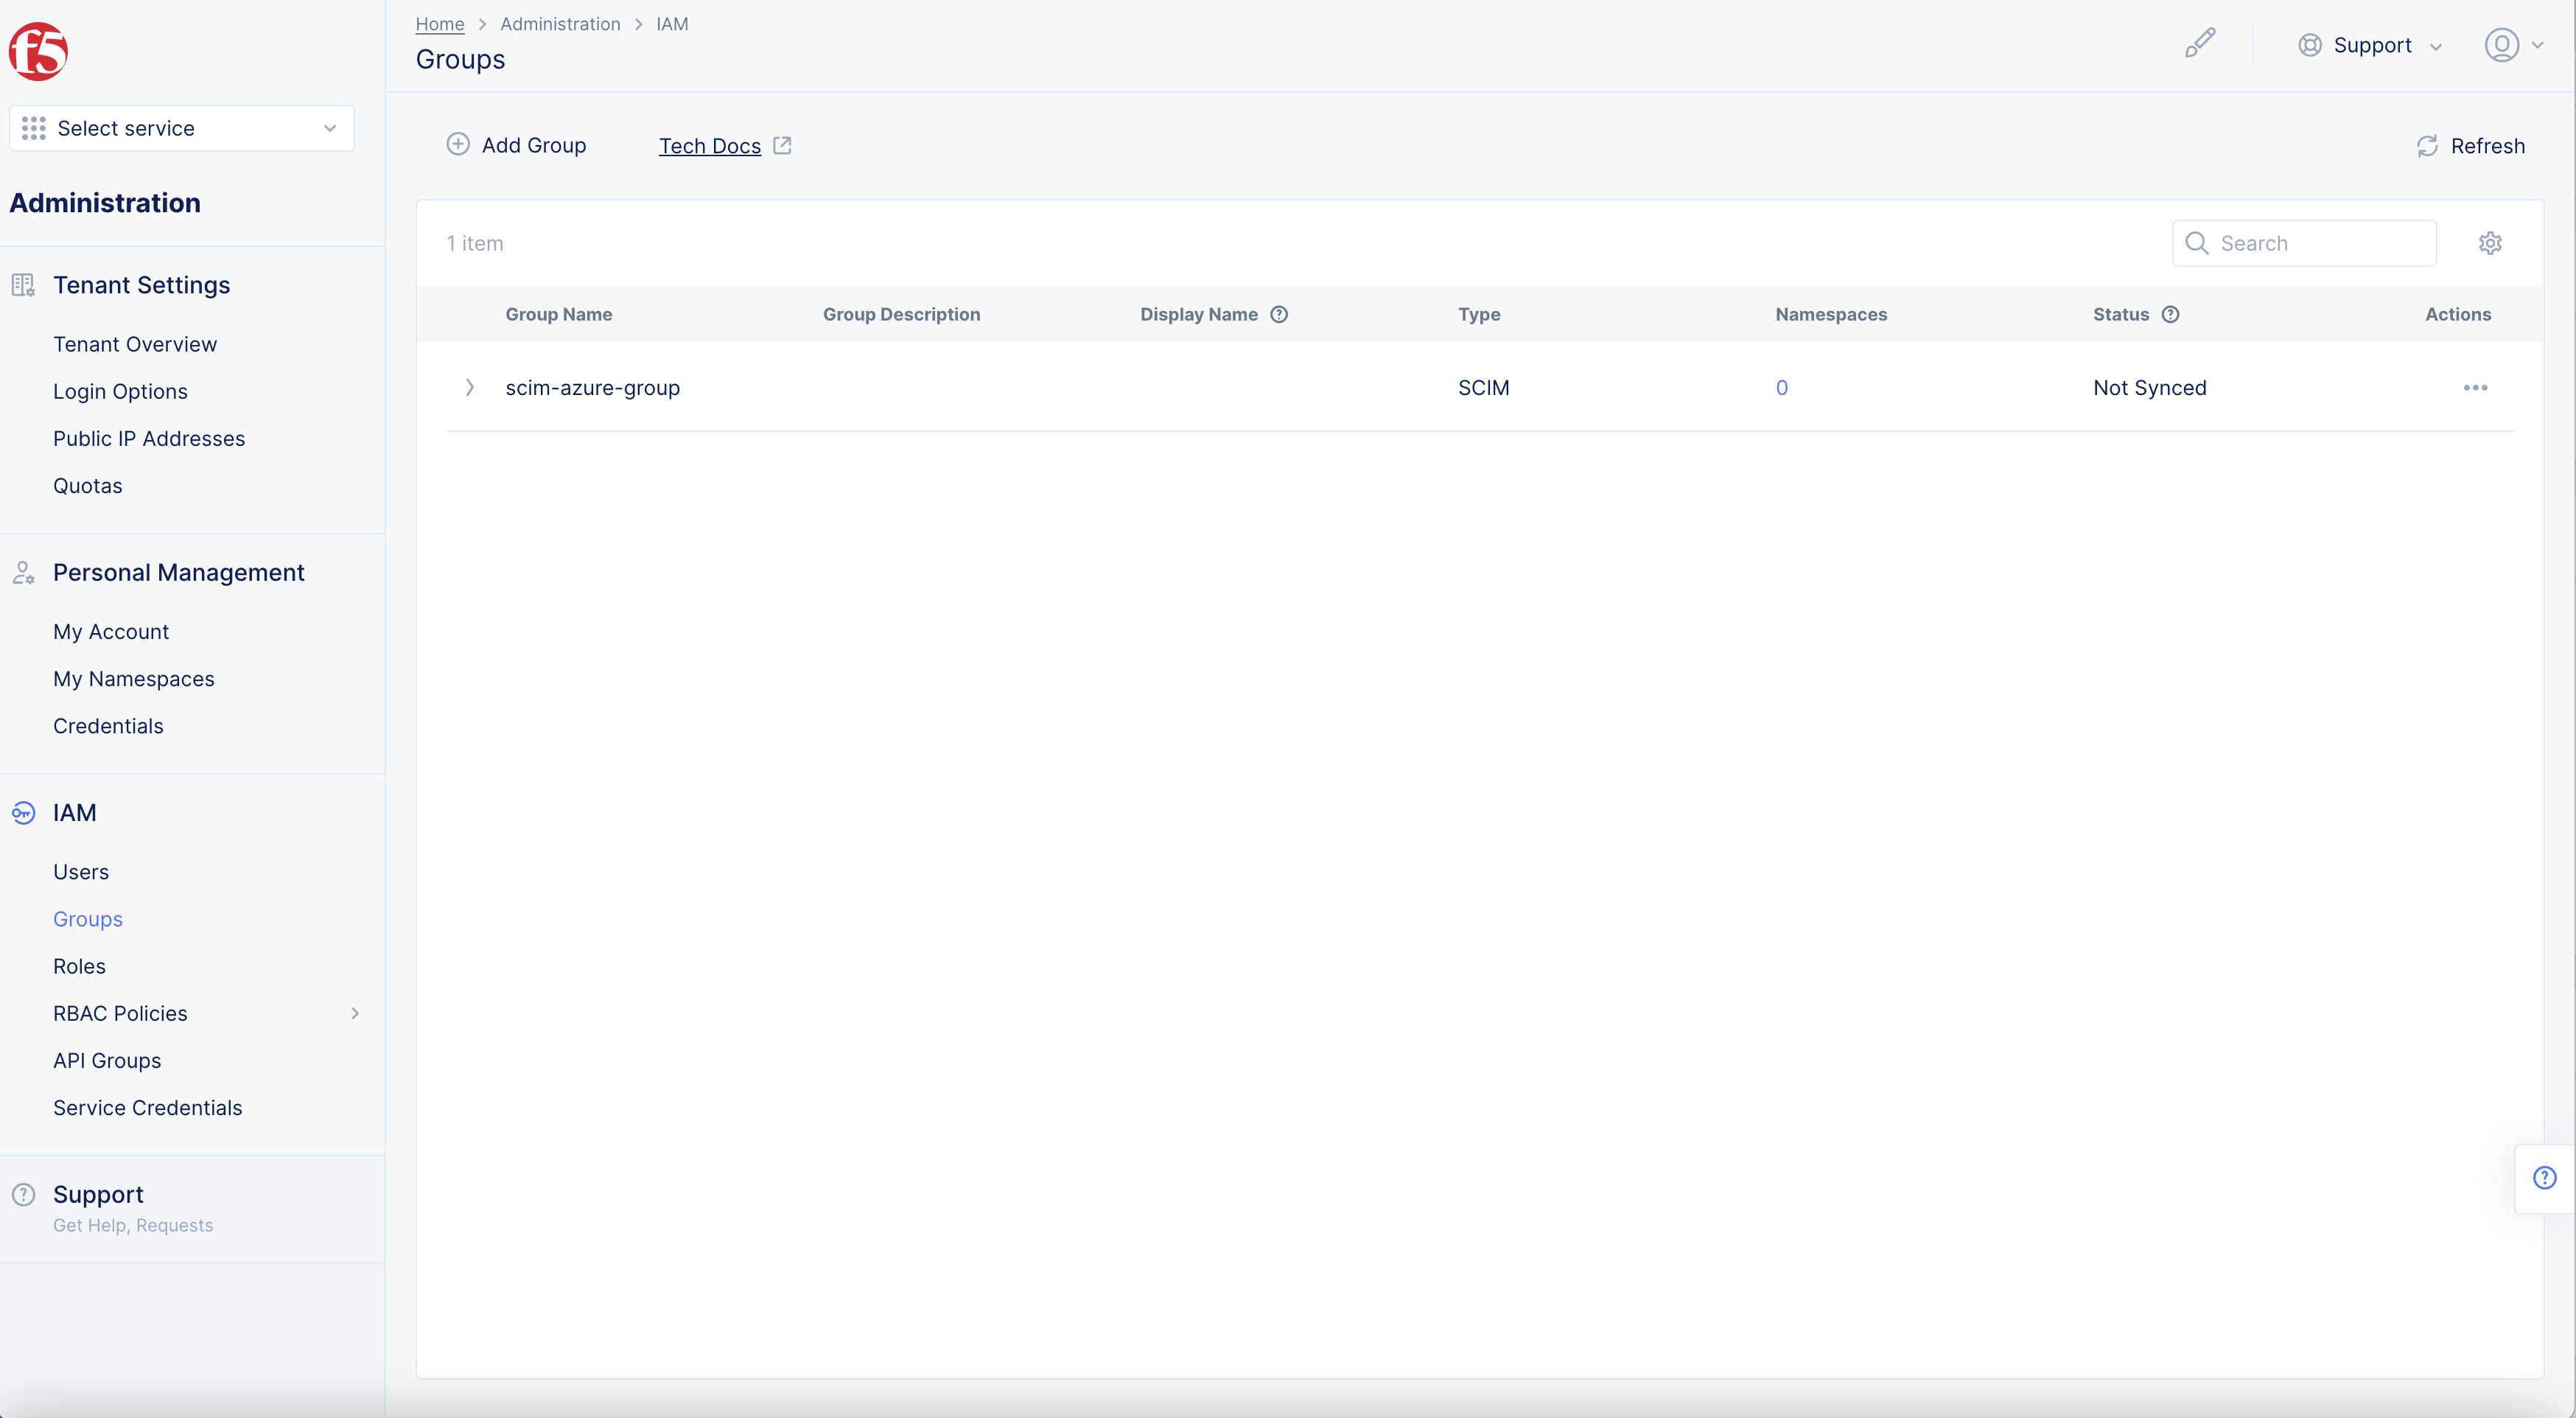
Figure: F5 Console Groups
- Select
+ Add Group.
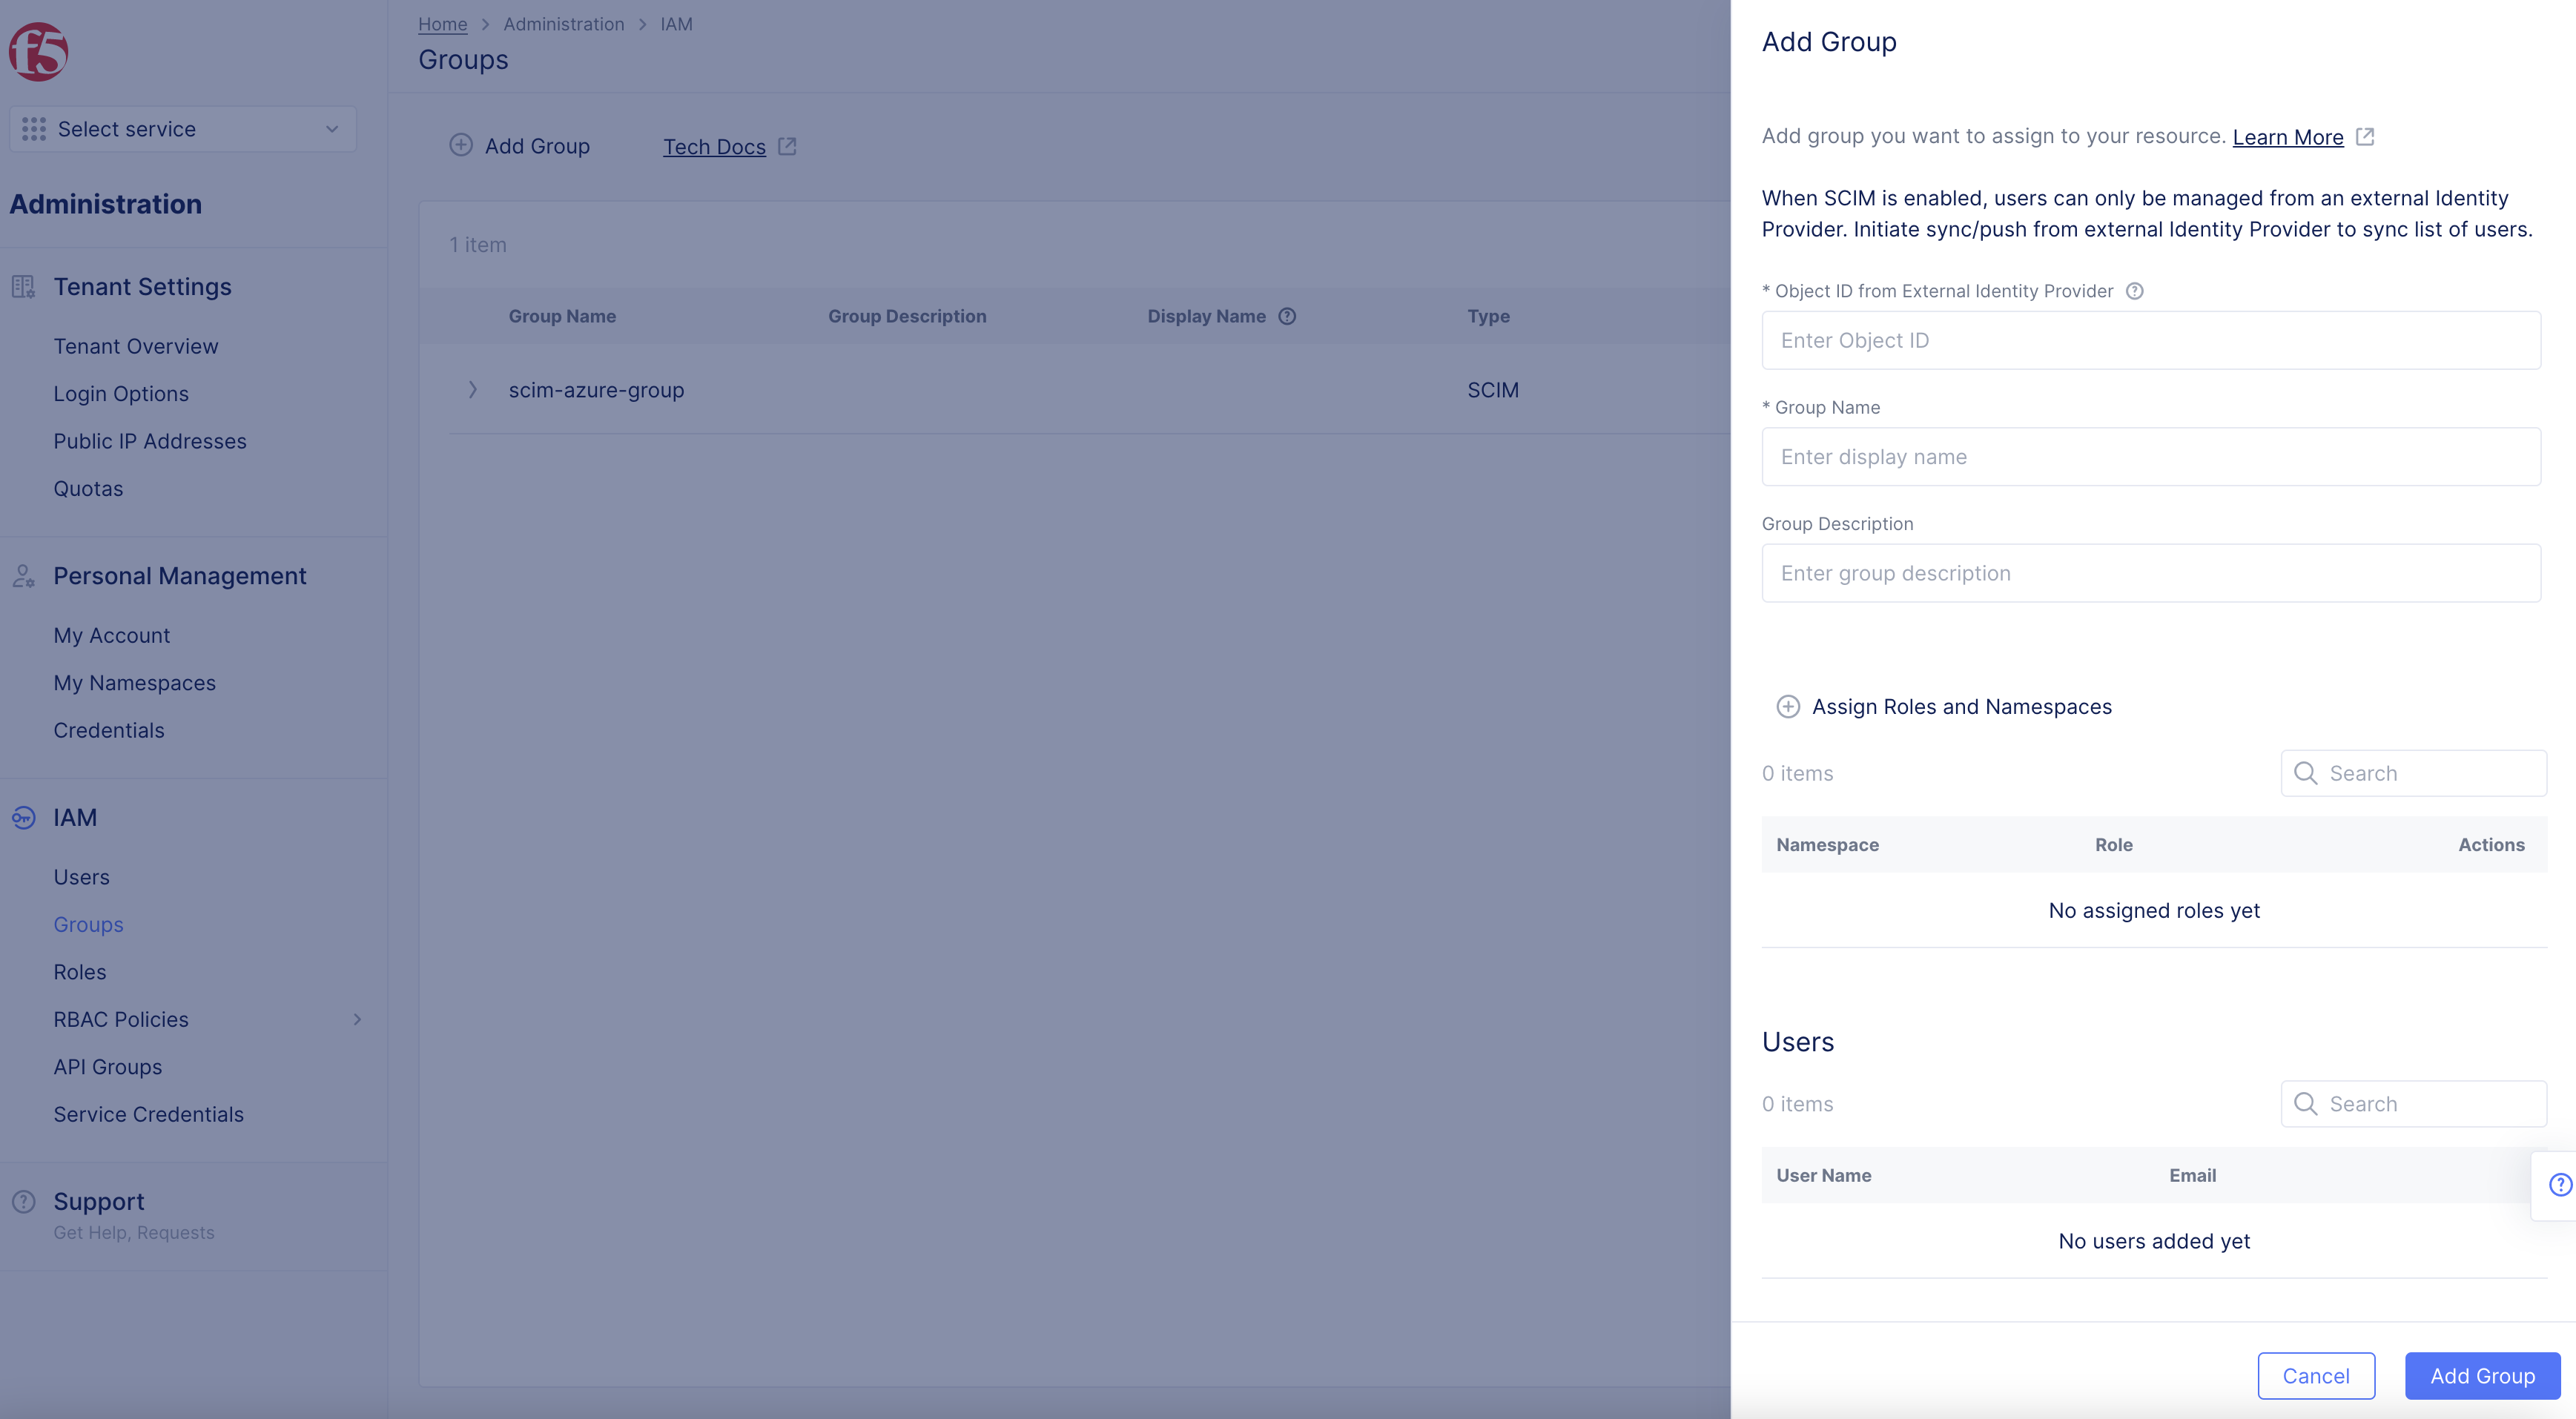
Figure: Add Group
- Copy
Object idfrom Azure application intoObject ID from External Identity Providerbox inAdd Grouppop-up form.
Figure: Copy Object id from Azure
-
Enter
Group Name. -
Select
Add Groupbutton.
Note: Group will show as added but
Not Syncedunder Status. GroupTypeisSCIM.
Figure: Groups
Step 3.9: Complete Provisioning in Azure.
-
In Azure, select
Provisionsingin your application. -
To Start Provisioning, select
View provisioning detailsdrop-down option to view issues or updates. -
Provisioning interval time (fixed): 40 minutes. -
Select
Start Provisioningbutton.
Note: Provisioning will happen between time button is selected and 40 minutes.
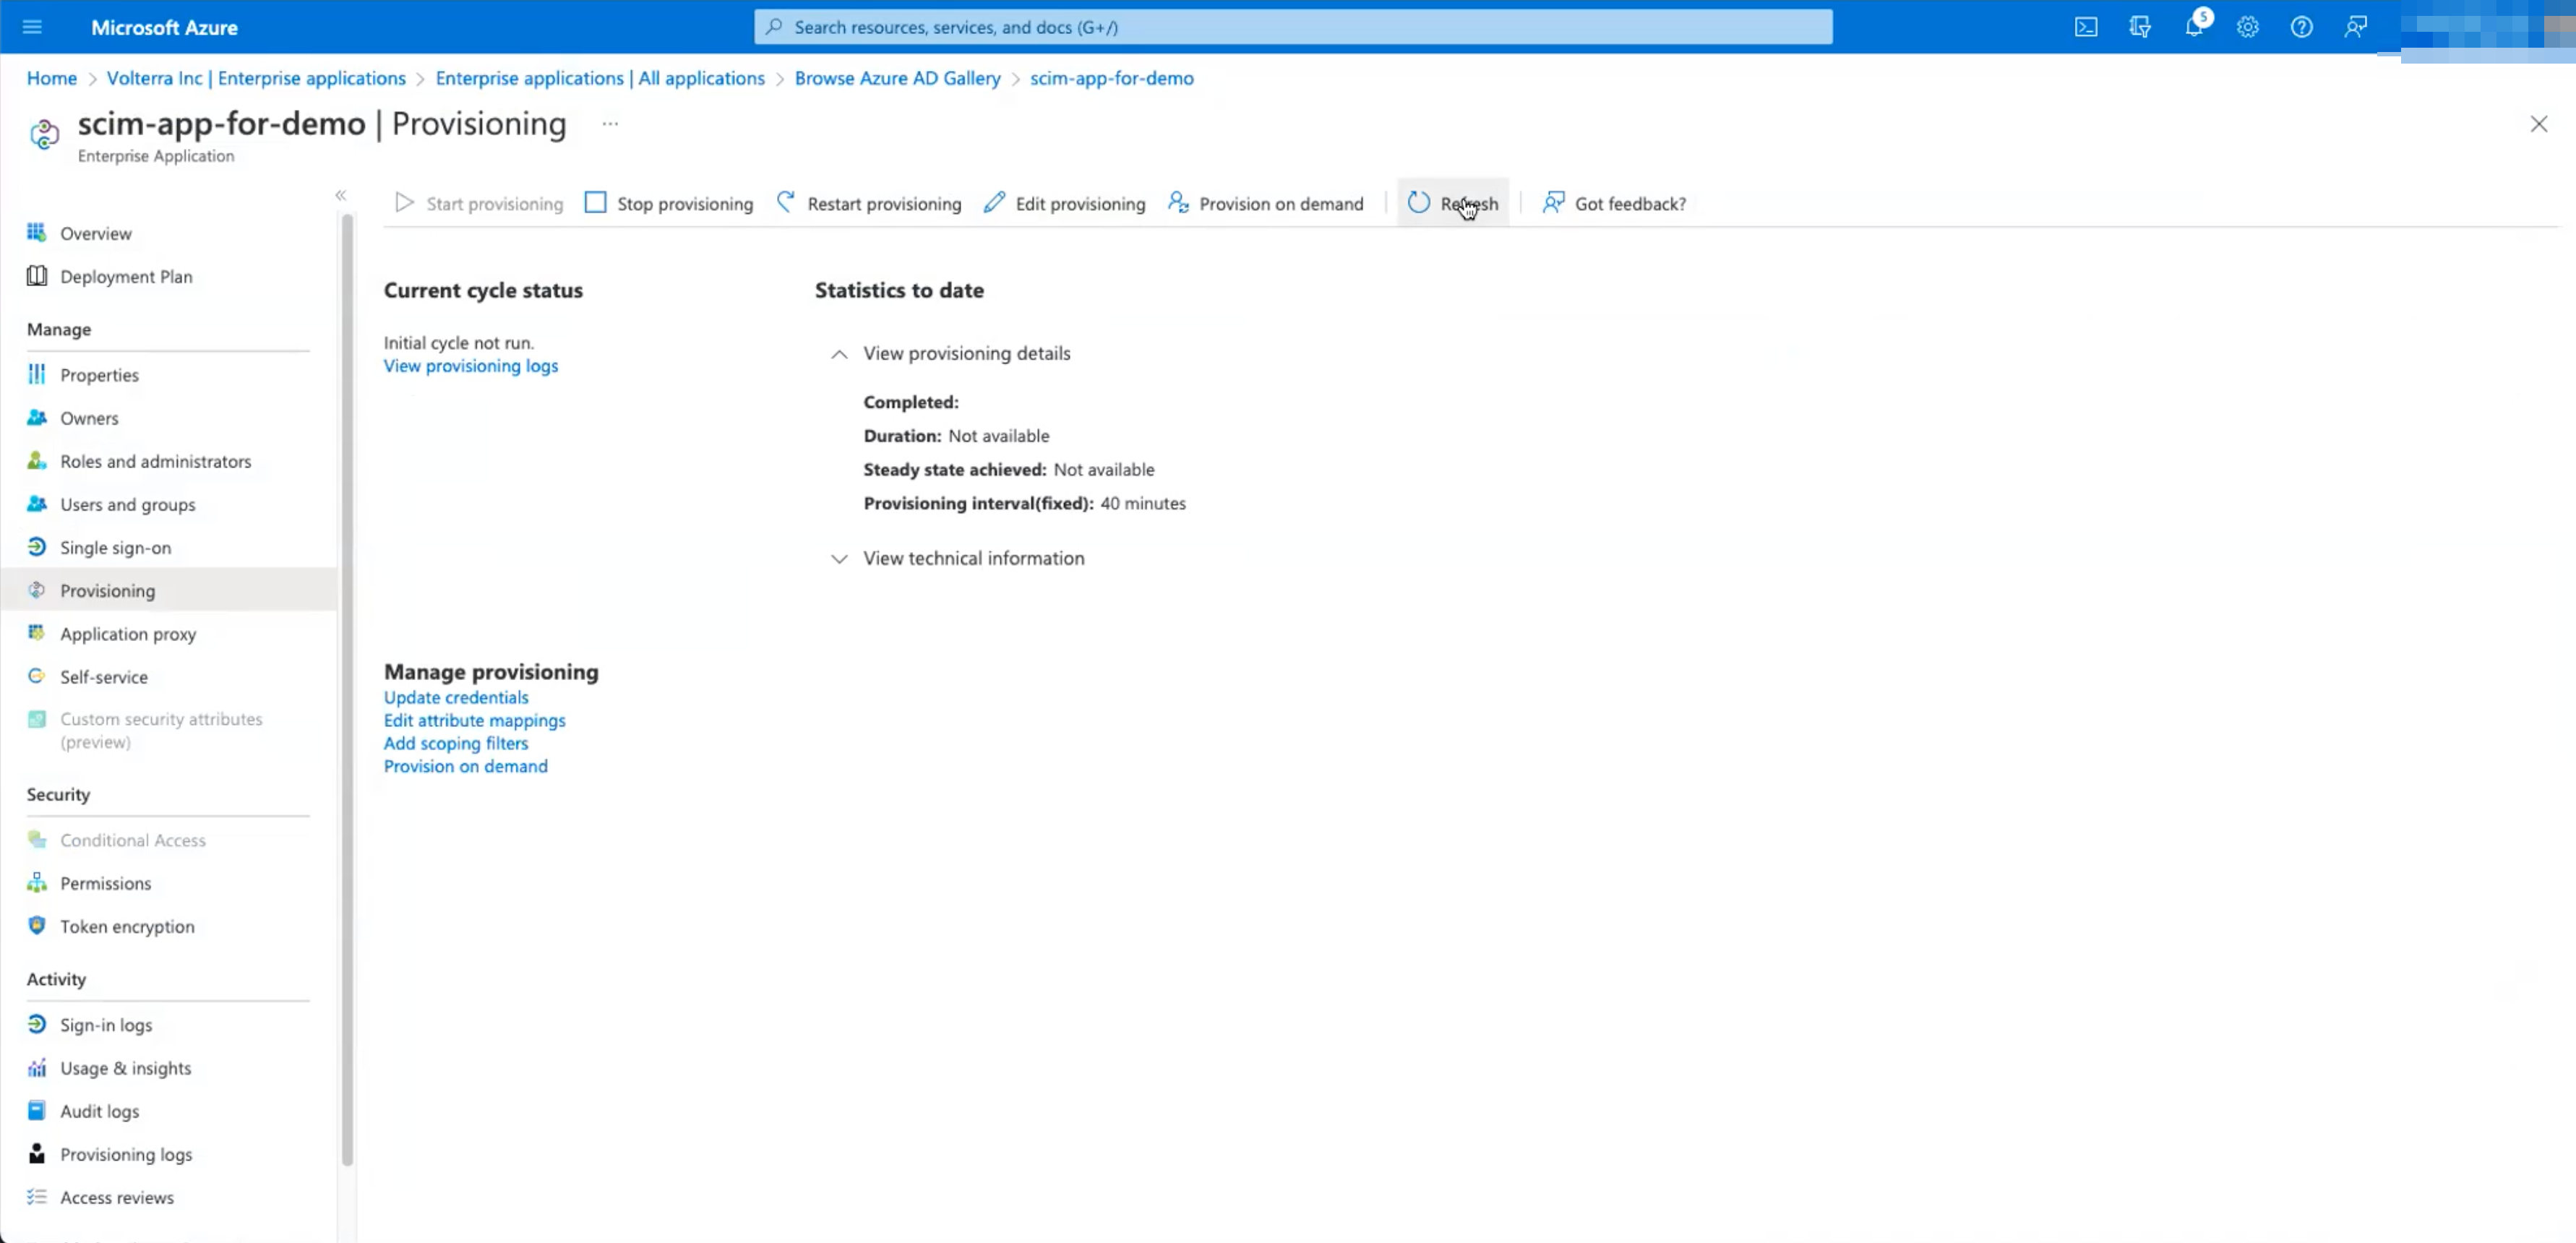
Figure: Azure Provisioning
Note:
Start Provisioningpop-up will appear confirmingProvisioning is scheduled to start.
Step 4: Push SCIM Users to F5 console.
Watch the group's non-existing users created in the dashboard with the type labelled SCIM.
- In F5 Console
Groupspage, selectRefresh. git add
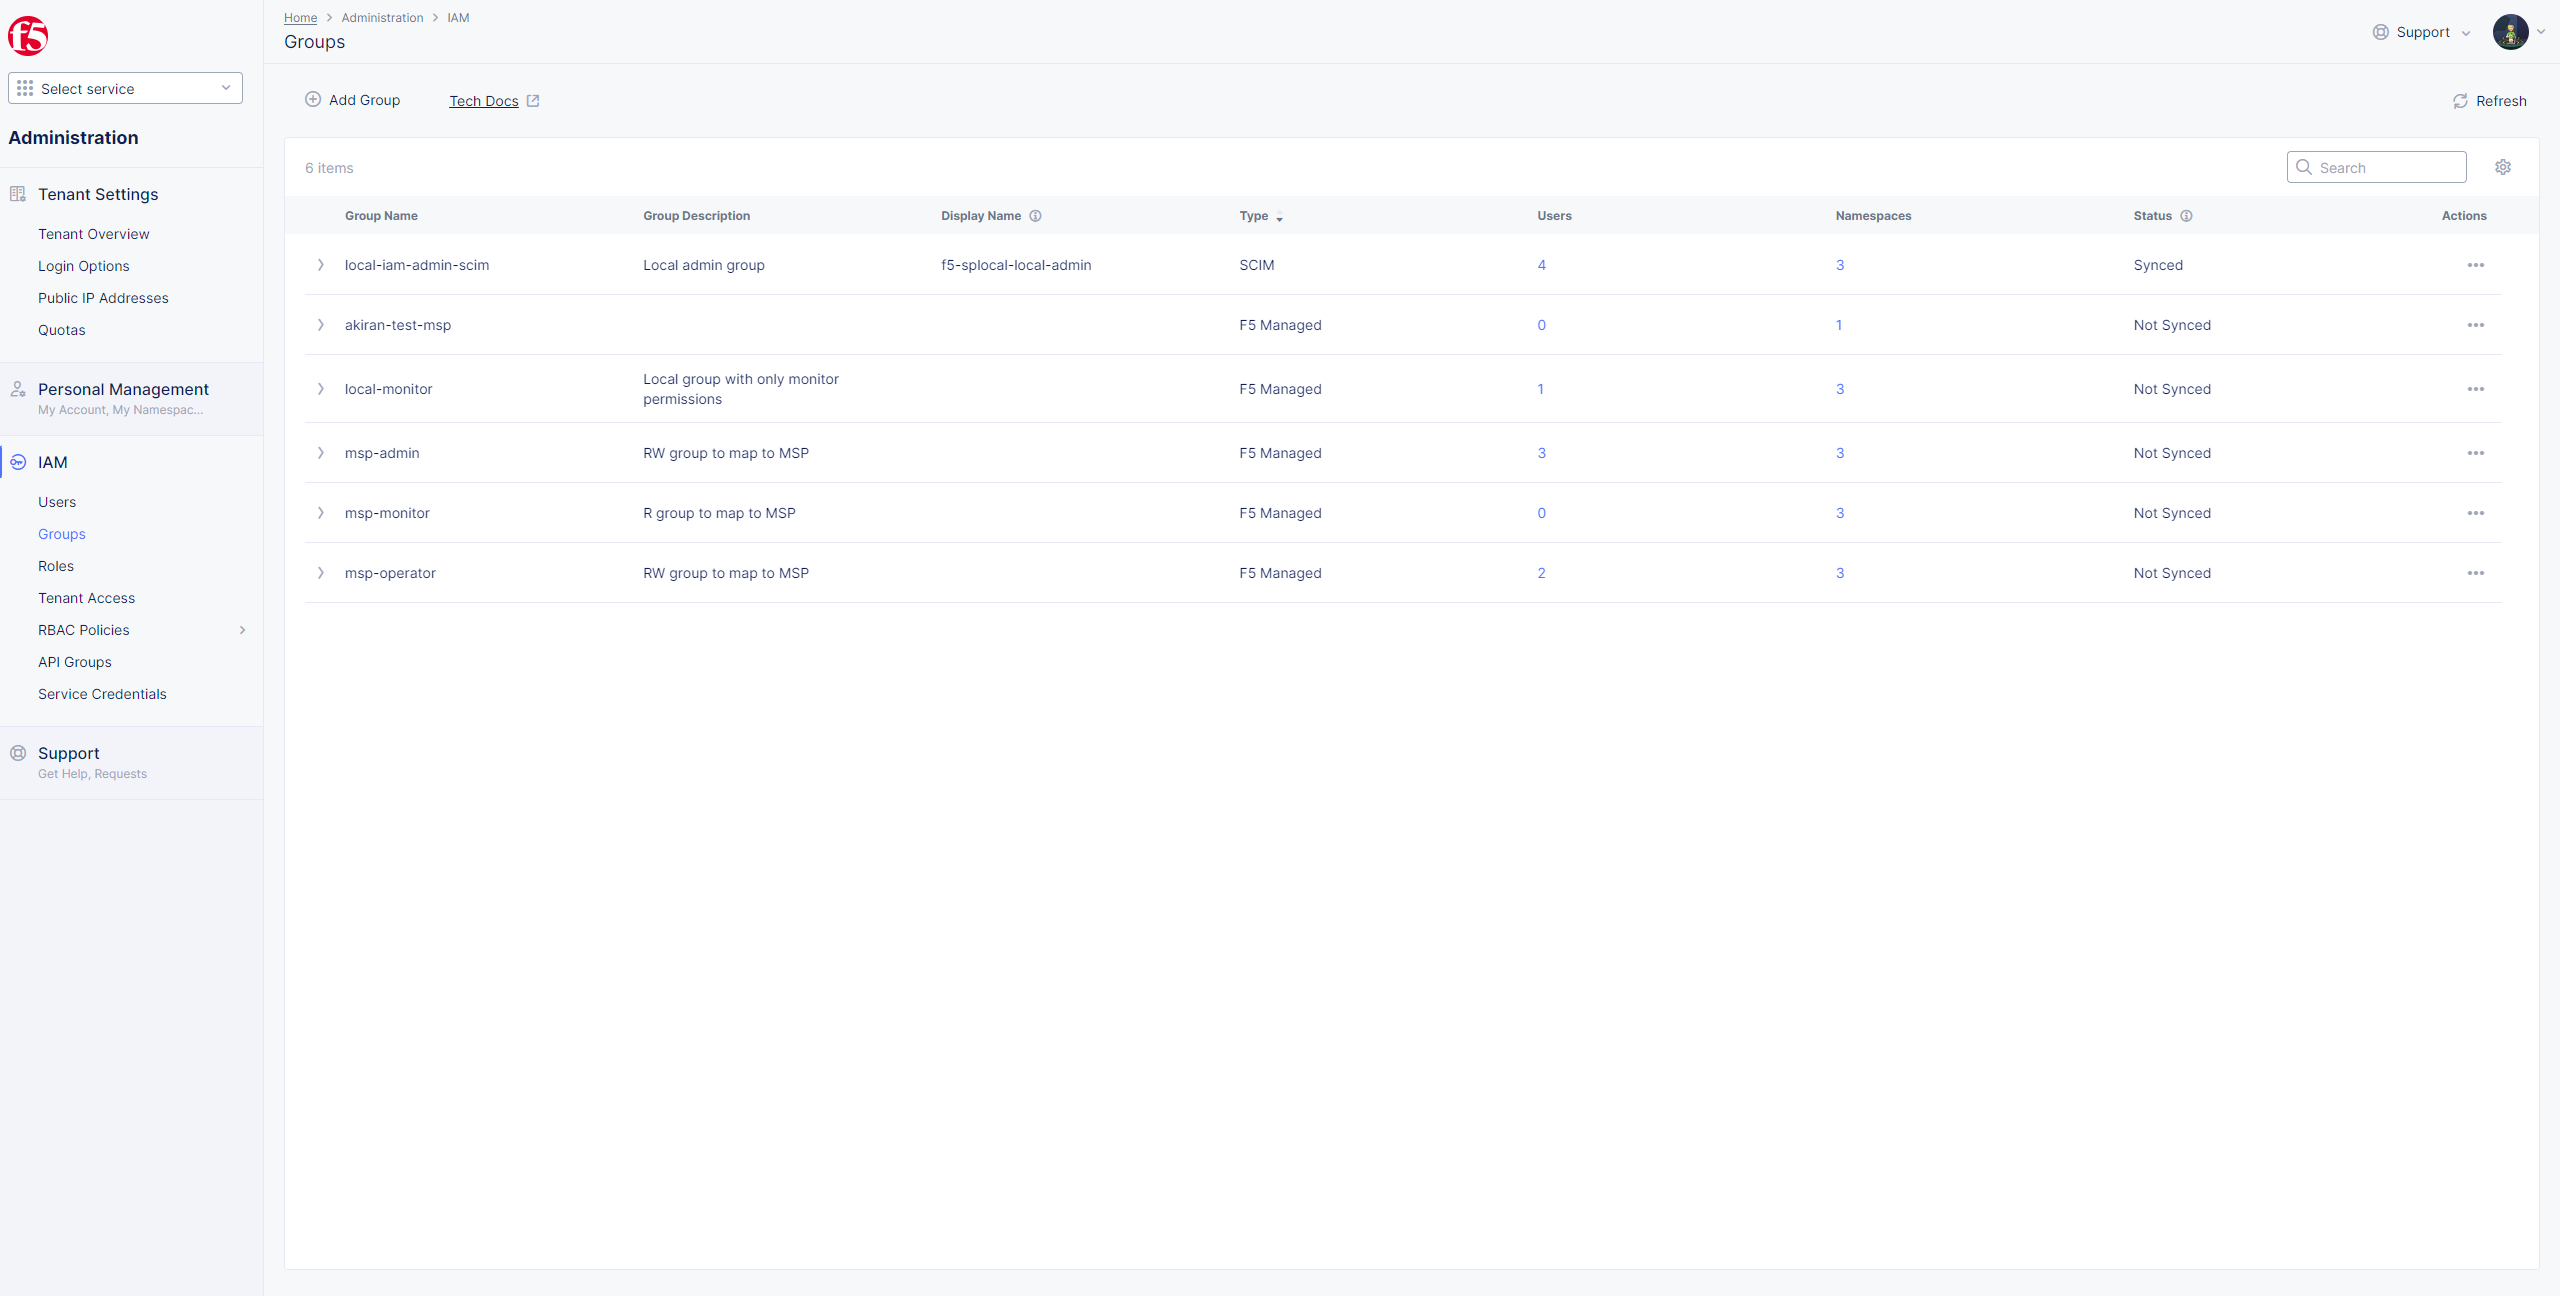
Figure: SCIM Synced
Note: Group will show as
Syncedunder Status.
-
Check
UsersinIAMtab shows users from Azure withTypeasSCIM. -
Select
Refresh.
Note: Tenant Owner will show
TypeTenant Owner/SCIM.
Step 5: Sync SCIM Users and Groups.
Watch the users (if already existing) converted to the type of SCIM in the dashboard.
-
In Azure, select
RefreshinProvisioningpage. -
In F5 Console, open
usersandgroupsto confirm if SCIM has synced. -
Provisioning interval time (fixed): 40 minutes.
Figure: Azure Provisioning
Step 5.1: Provision on Demand.
- Option to select
Provision on demand.
Note:
Provision on demand, forceful request of users to sync application, but it is not recommended. Recommended to wait for provision sync time (40 minutes).
-
Enter group in search function in
Select a user or groupbox inProvision on demandpage. -
Select group.
-
Select
View members only. -
Select users in
selecteddrop-down box.
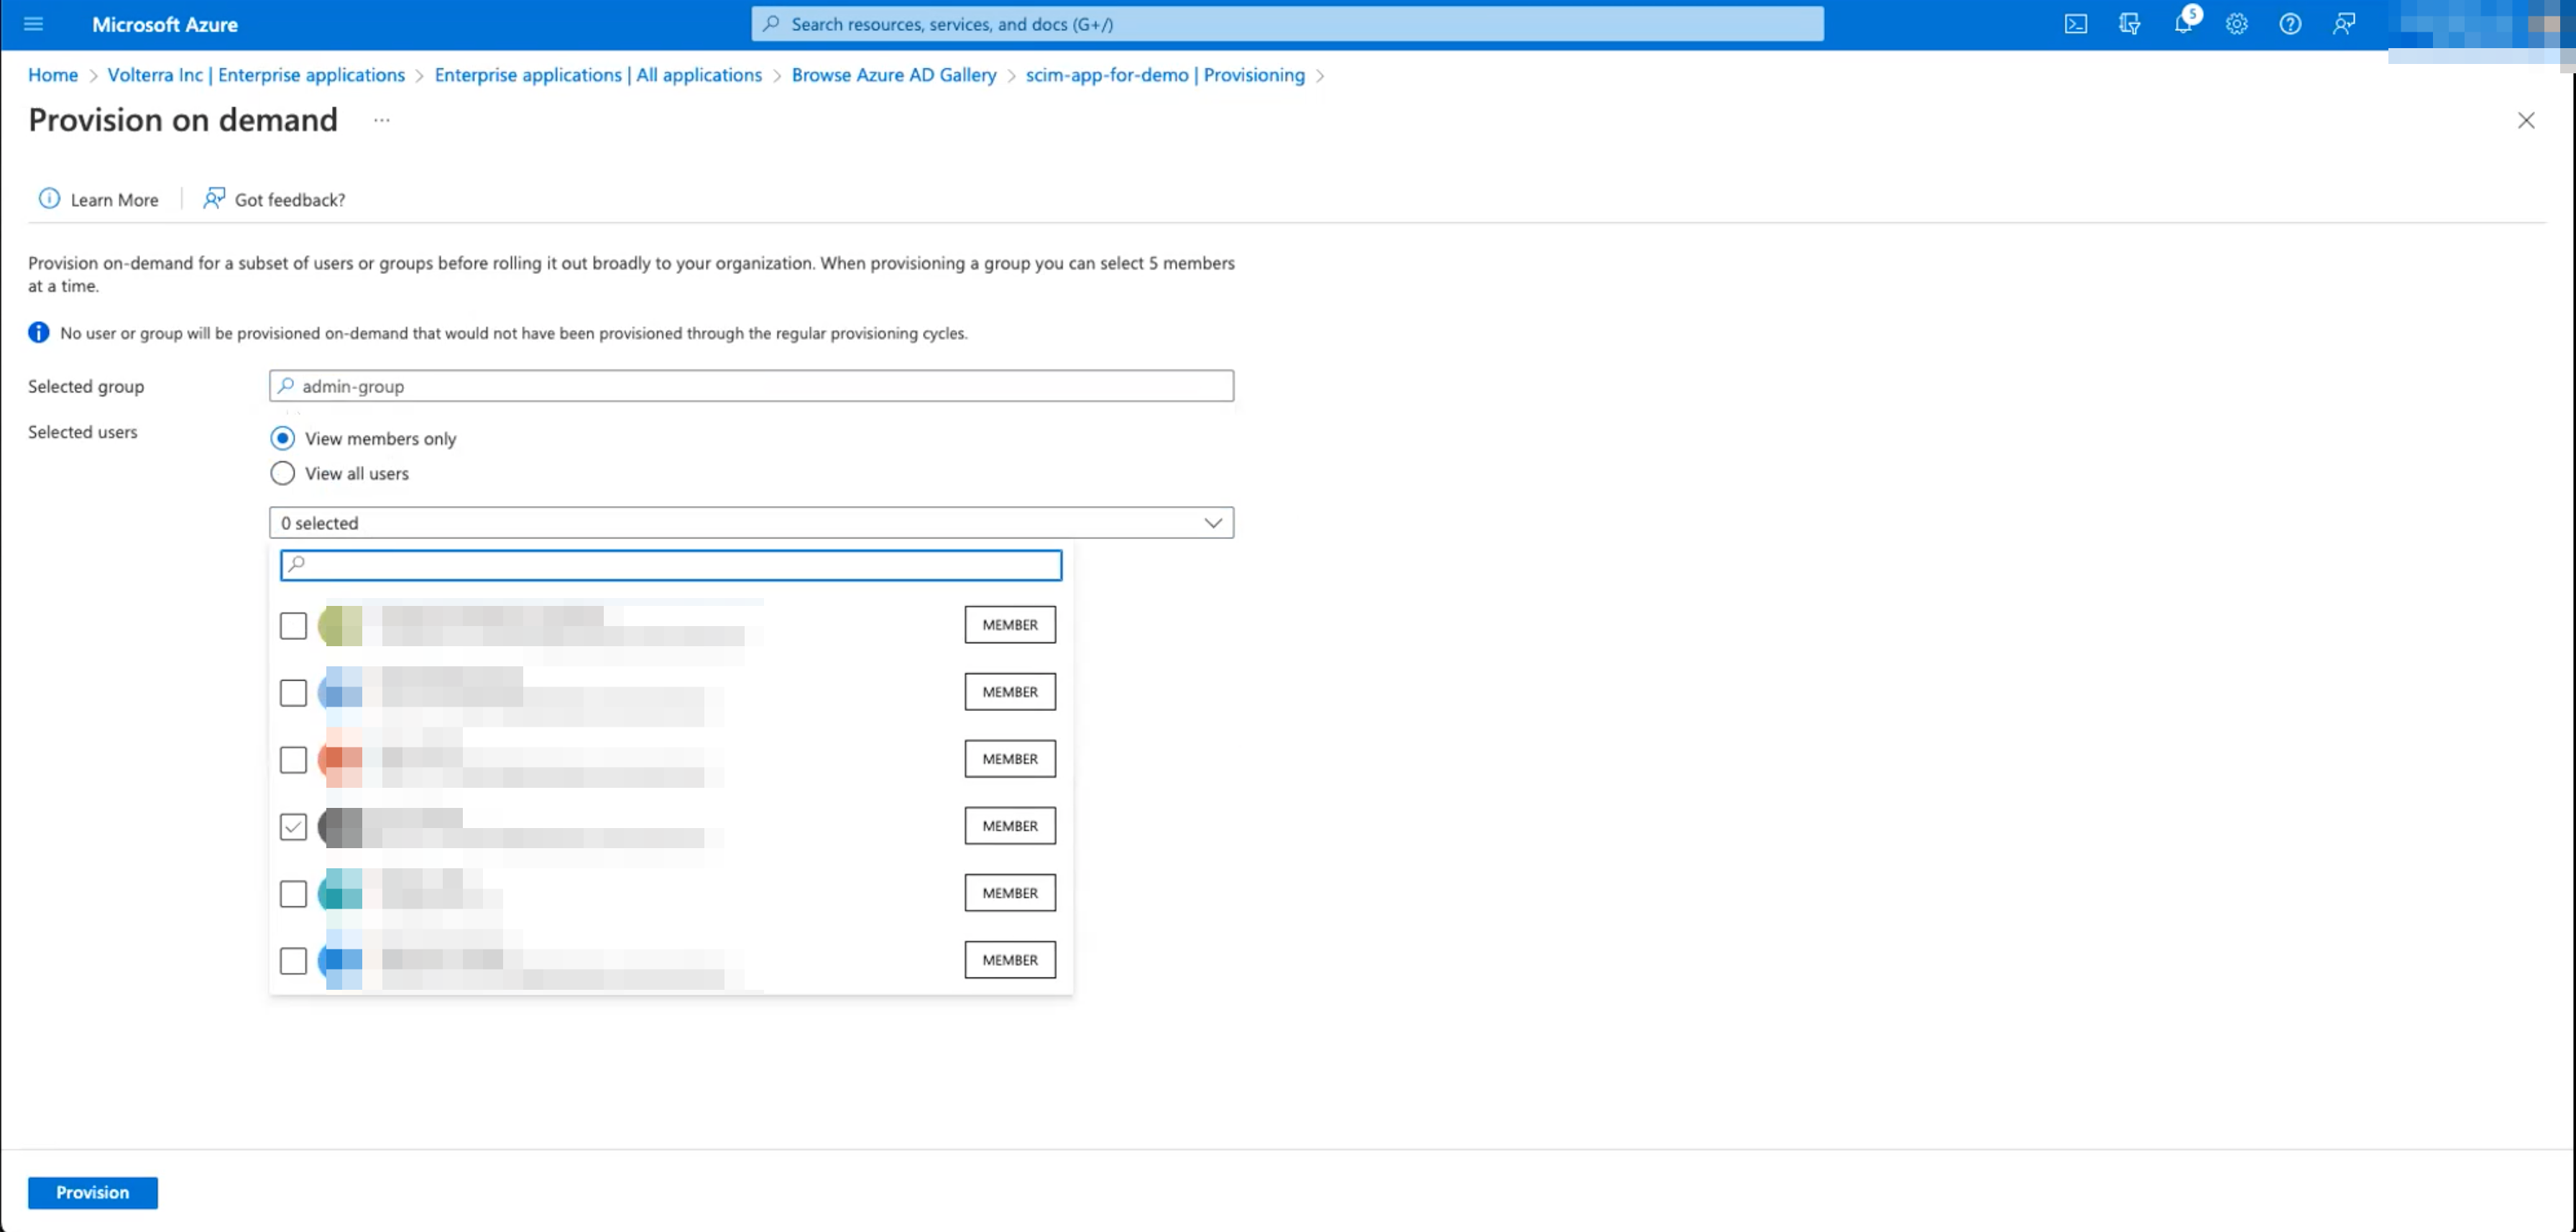
Figure: Azure Provision on Demand
Note: On-demand provisioning supports up to 5 members at a time. Please unselect members until 5 members are selected.
- Select
Provisionbutton.
Note: Provision button shows
validatingas it syncs.
- Provision page will show
Success.
Figure: Azure Provision on Demand Success
Step 6: Confirm F5 SCIM Status.
- In F5 Console >
Administration>IAM>Groups> selectRefresh.
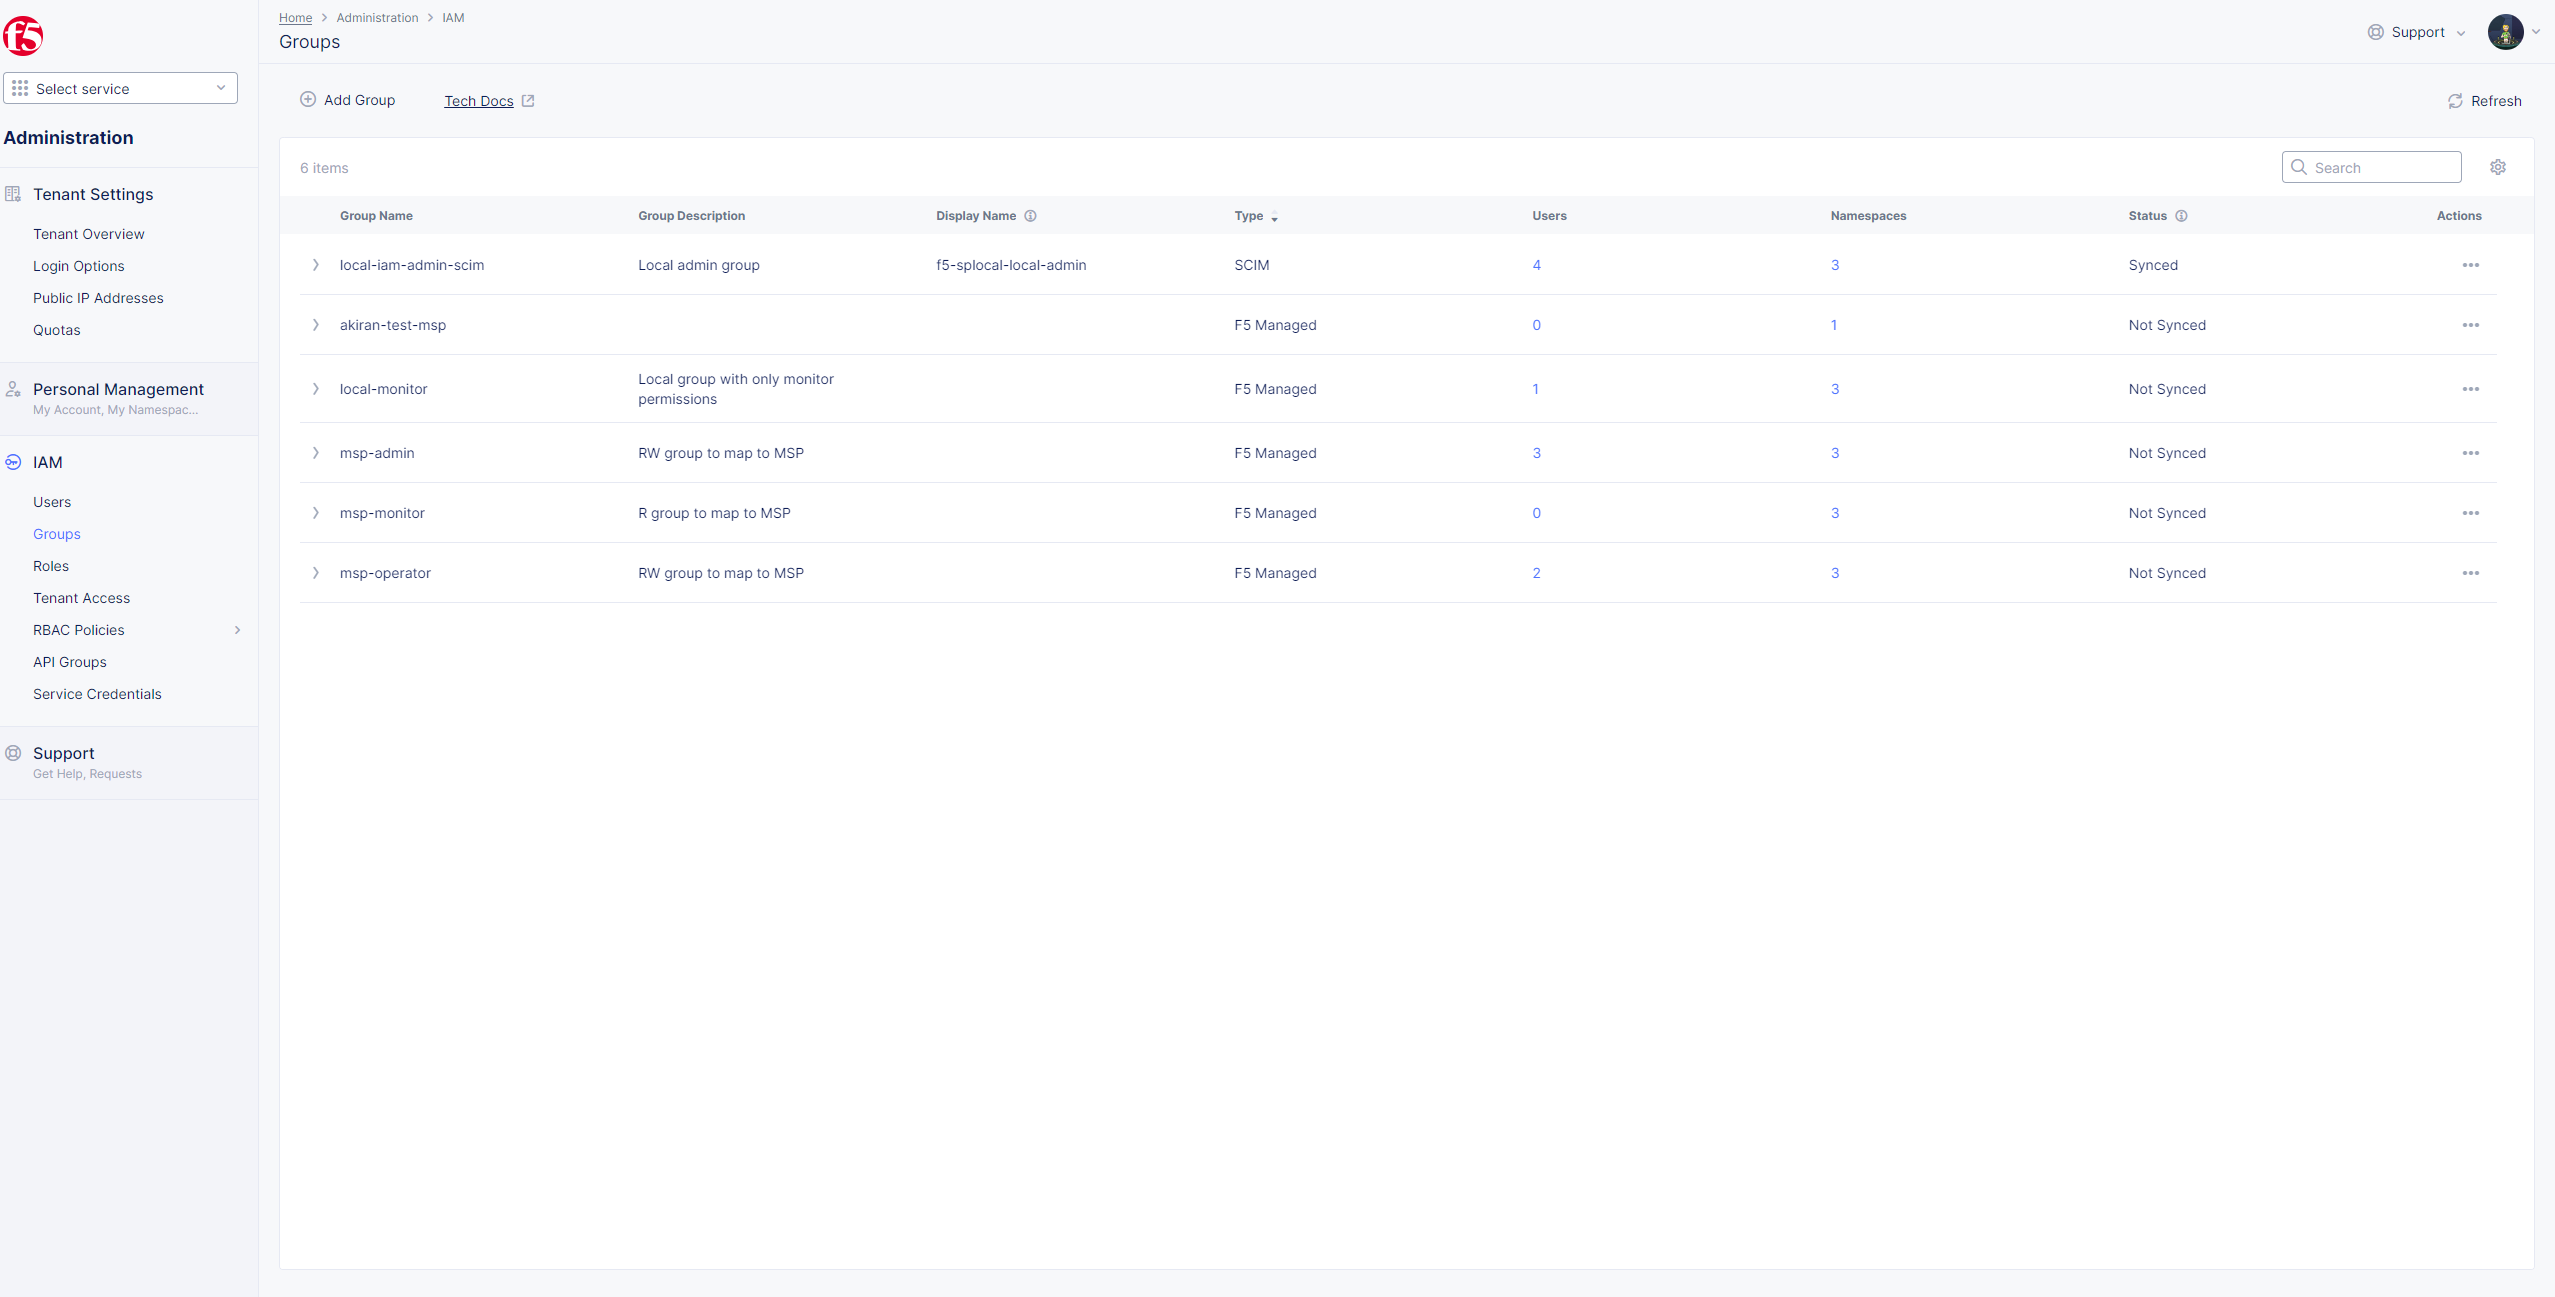
Figure: F5 Groups
- Select
UsersinIAM, users withTypeSCIMshould showStatusEnabled.
- In Azure,
Provisioningpage selectRefreshto confirmCurrent cycle status.
Note:
Current cycle status: Initial cycle completed 100% complete.
Figure: Azure Provisioning
Step 7: Log into F5 Console via SSO.
The synced users can now log into the F5 dashboard via SSO.
- Select
Sign in with Azurebutton to log into the F5 console.
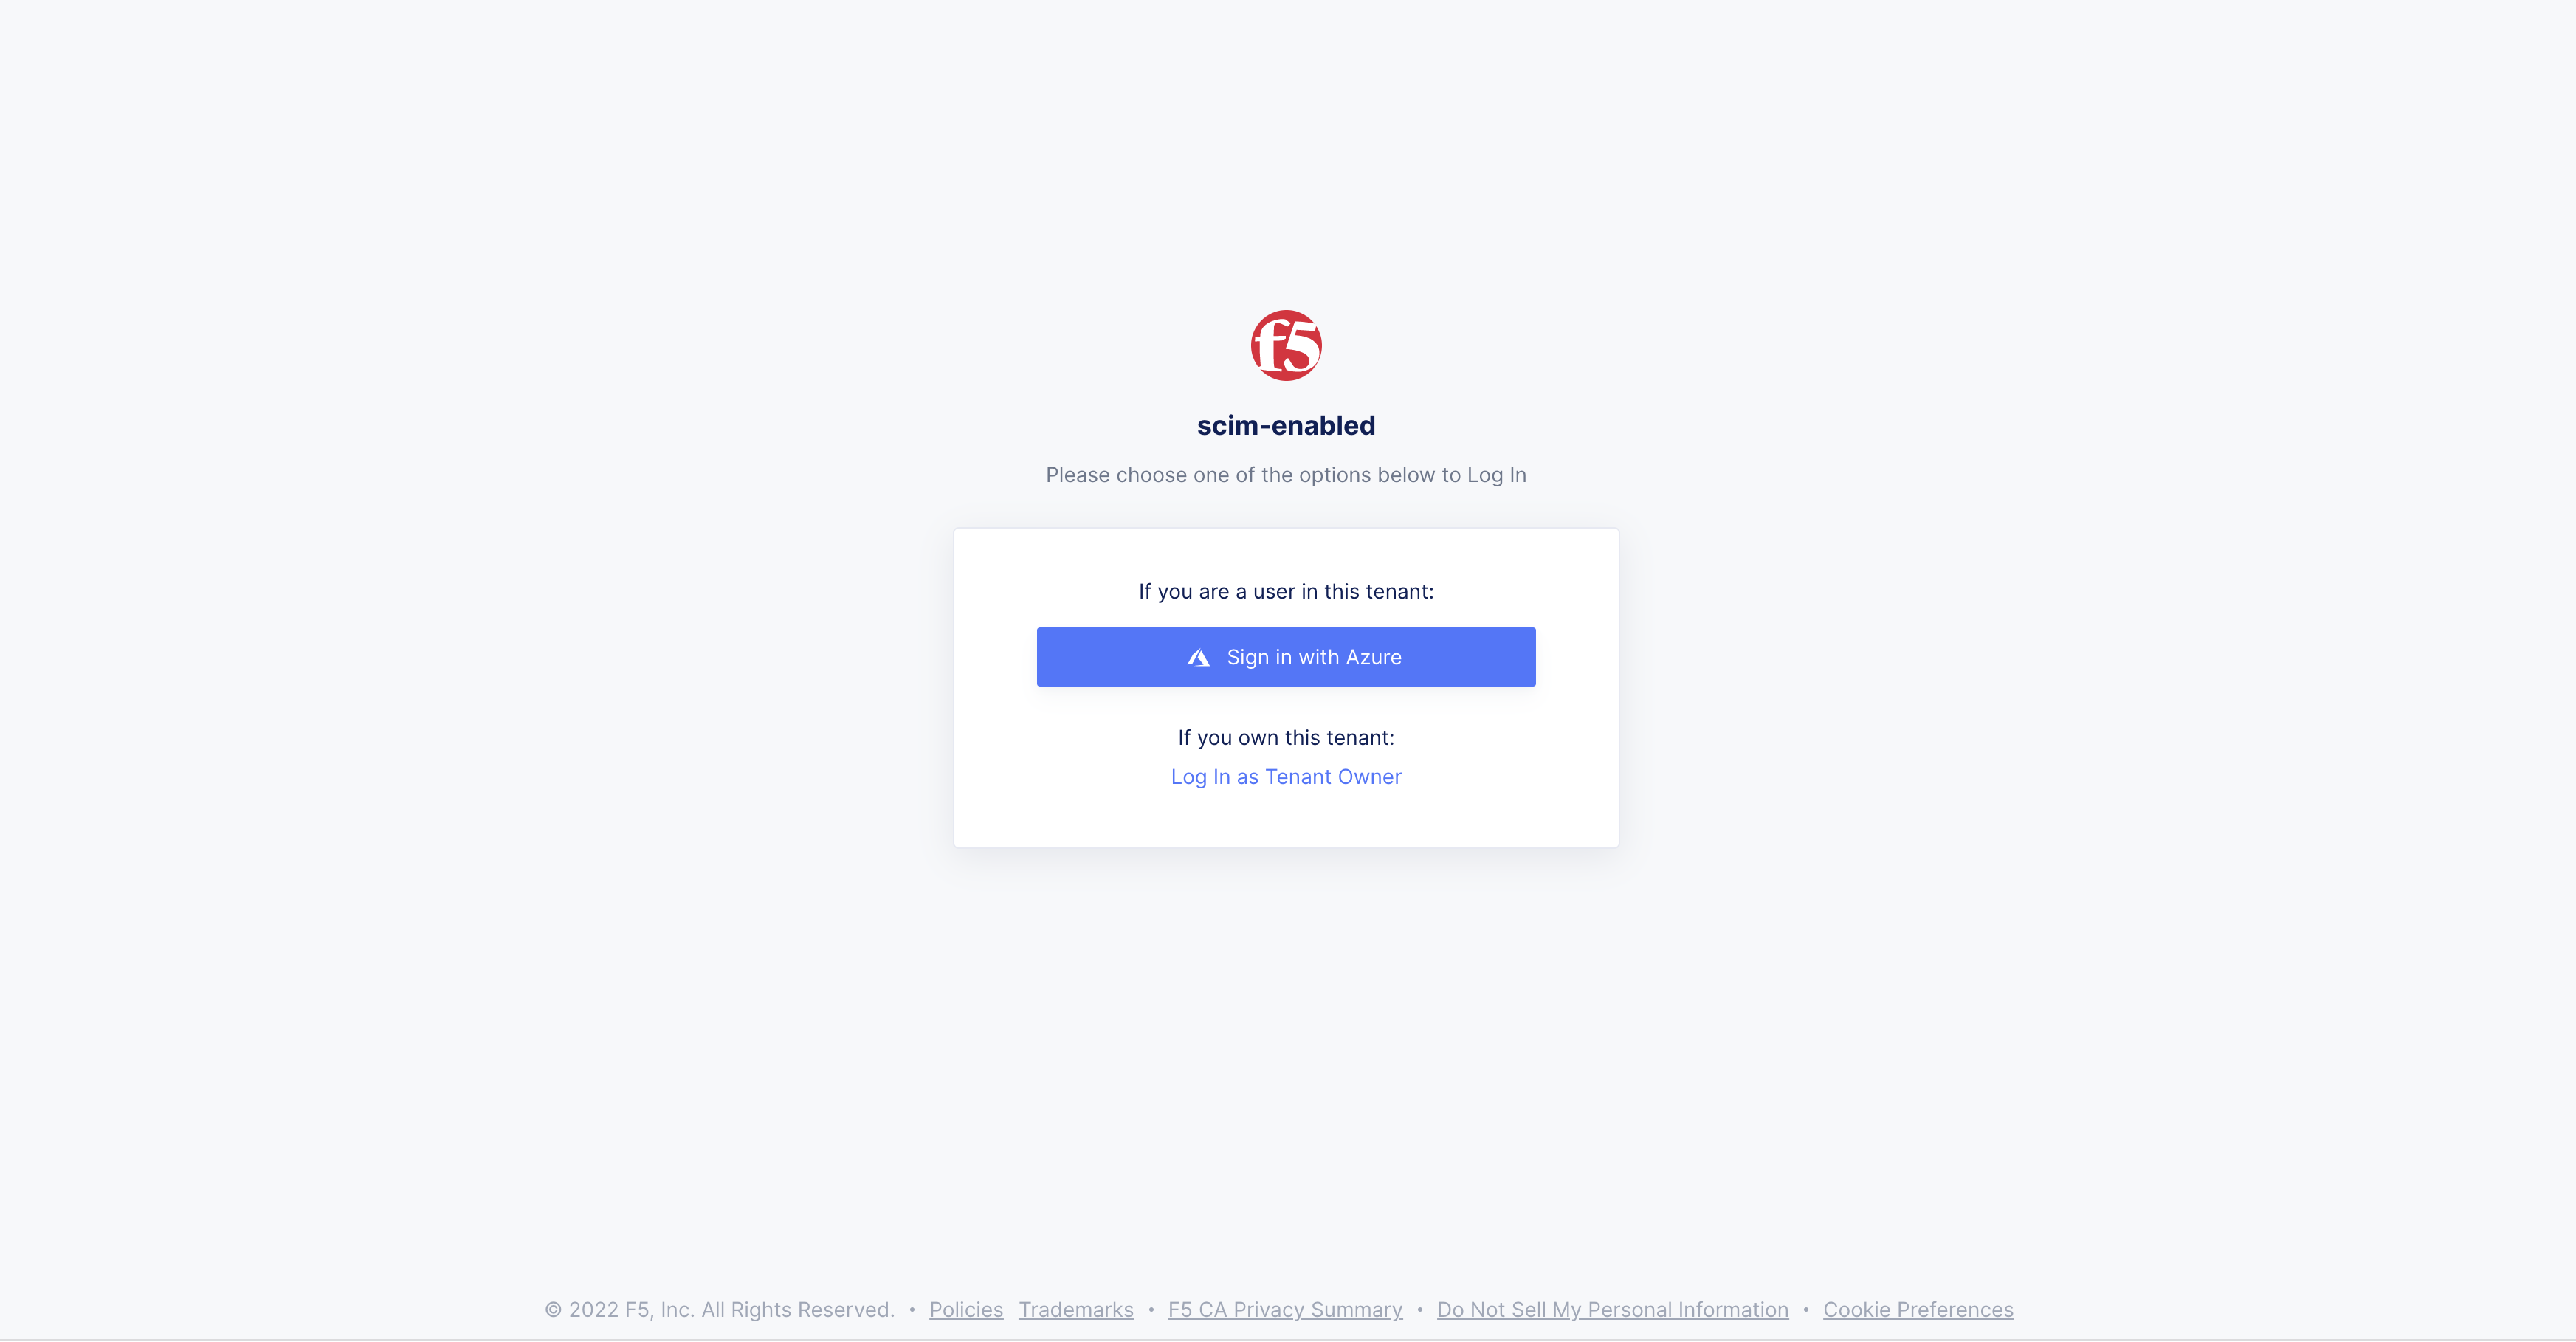
Figure: Azure SSO Login
Step 8: Disable SCIM - Delete Users and Groups Syncing.
- Select
Stop provisioningin AzureProvisioning.
Note: Deleting the groups could delete the users as well (conditions apply).
- Select
OKbutton inAre you sure you want to pause syncpop-up.
Note: Recommended to stop provisioning in Azure before disabling SCIM in F5 console.
Figure: Azure Provisioning
Note:
Stop future provisioning cycles: Please wait while future provisioning cycles are disabled.pop-up confirms stop provisioning is initiated and in process.
- In F5 console >
Administration>Tenant Settings>Login Options>SCIM> selectDisable SCIMbutton.
Figure: Disable SCIM
-
Select
Disable SCIMbutton in pop-up window to confirm. -
Select
GroupsandUsersinIAMin F5 console to confirm groups and users are unsynced after SCIM is disabled.
Figure: F5 Groups
Note: Tenant Owner will show
TypeTenant Ownerwithout/SCIMafter SCIM is disabled.