User Management
Objective
This guide provides information on how to create users and assign roles in the F5® Distributed Cloud Console. The console's Role-based Access Control (RBAC) is used to define and enforce user capabilities while using the F5 platform. For more information on roles and access control, see Roles.
Prerequisites
A valid F5 Console Account is required.
- Note: If you do not have an account, see Get Started with Console.
Create Users and Assign Roles
You can create users and assign roles to users after they log into the F5® Distributed Cloud Console.
See User Management, for instructions on creating users and assign roles.
Perform the following instructions to create users and assign roles in your F5 Distributed Cloud Console:
Step 1: Open User Management.
- Open
F5 Distributed Cloud Console> selectAdministrationbox.
Note: Homepage is role based, and your homepage may look different due to your role customization. Select
All Workspacesdrop-down menu to discover all options. Customize Settings:Administration>Personal Management>My Account>Edit work domain & skillsbutton >Advancedbox > checkWork Domainboxes >Save changesbutton.

Figure: Homepage
- Select
IAMin left-menu > selectUsers.
Note: If options are not showing available, select
Showlink inAdvanced nav options visiblein bottom left corner. If needed, selectHideto minimize options from Advanced nav options mode.
- Select
+ Add Userbutton.

Figure: User Management
Add New Userwindow pops-up.
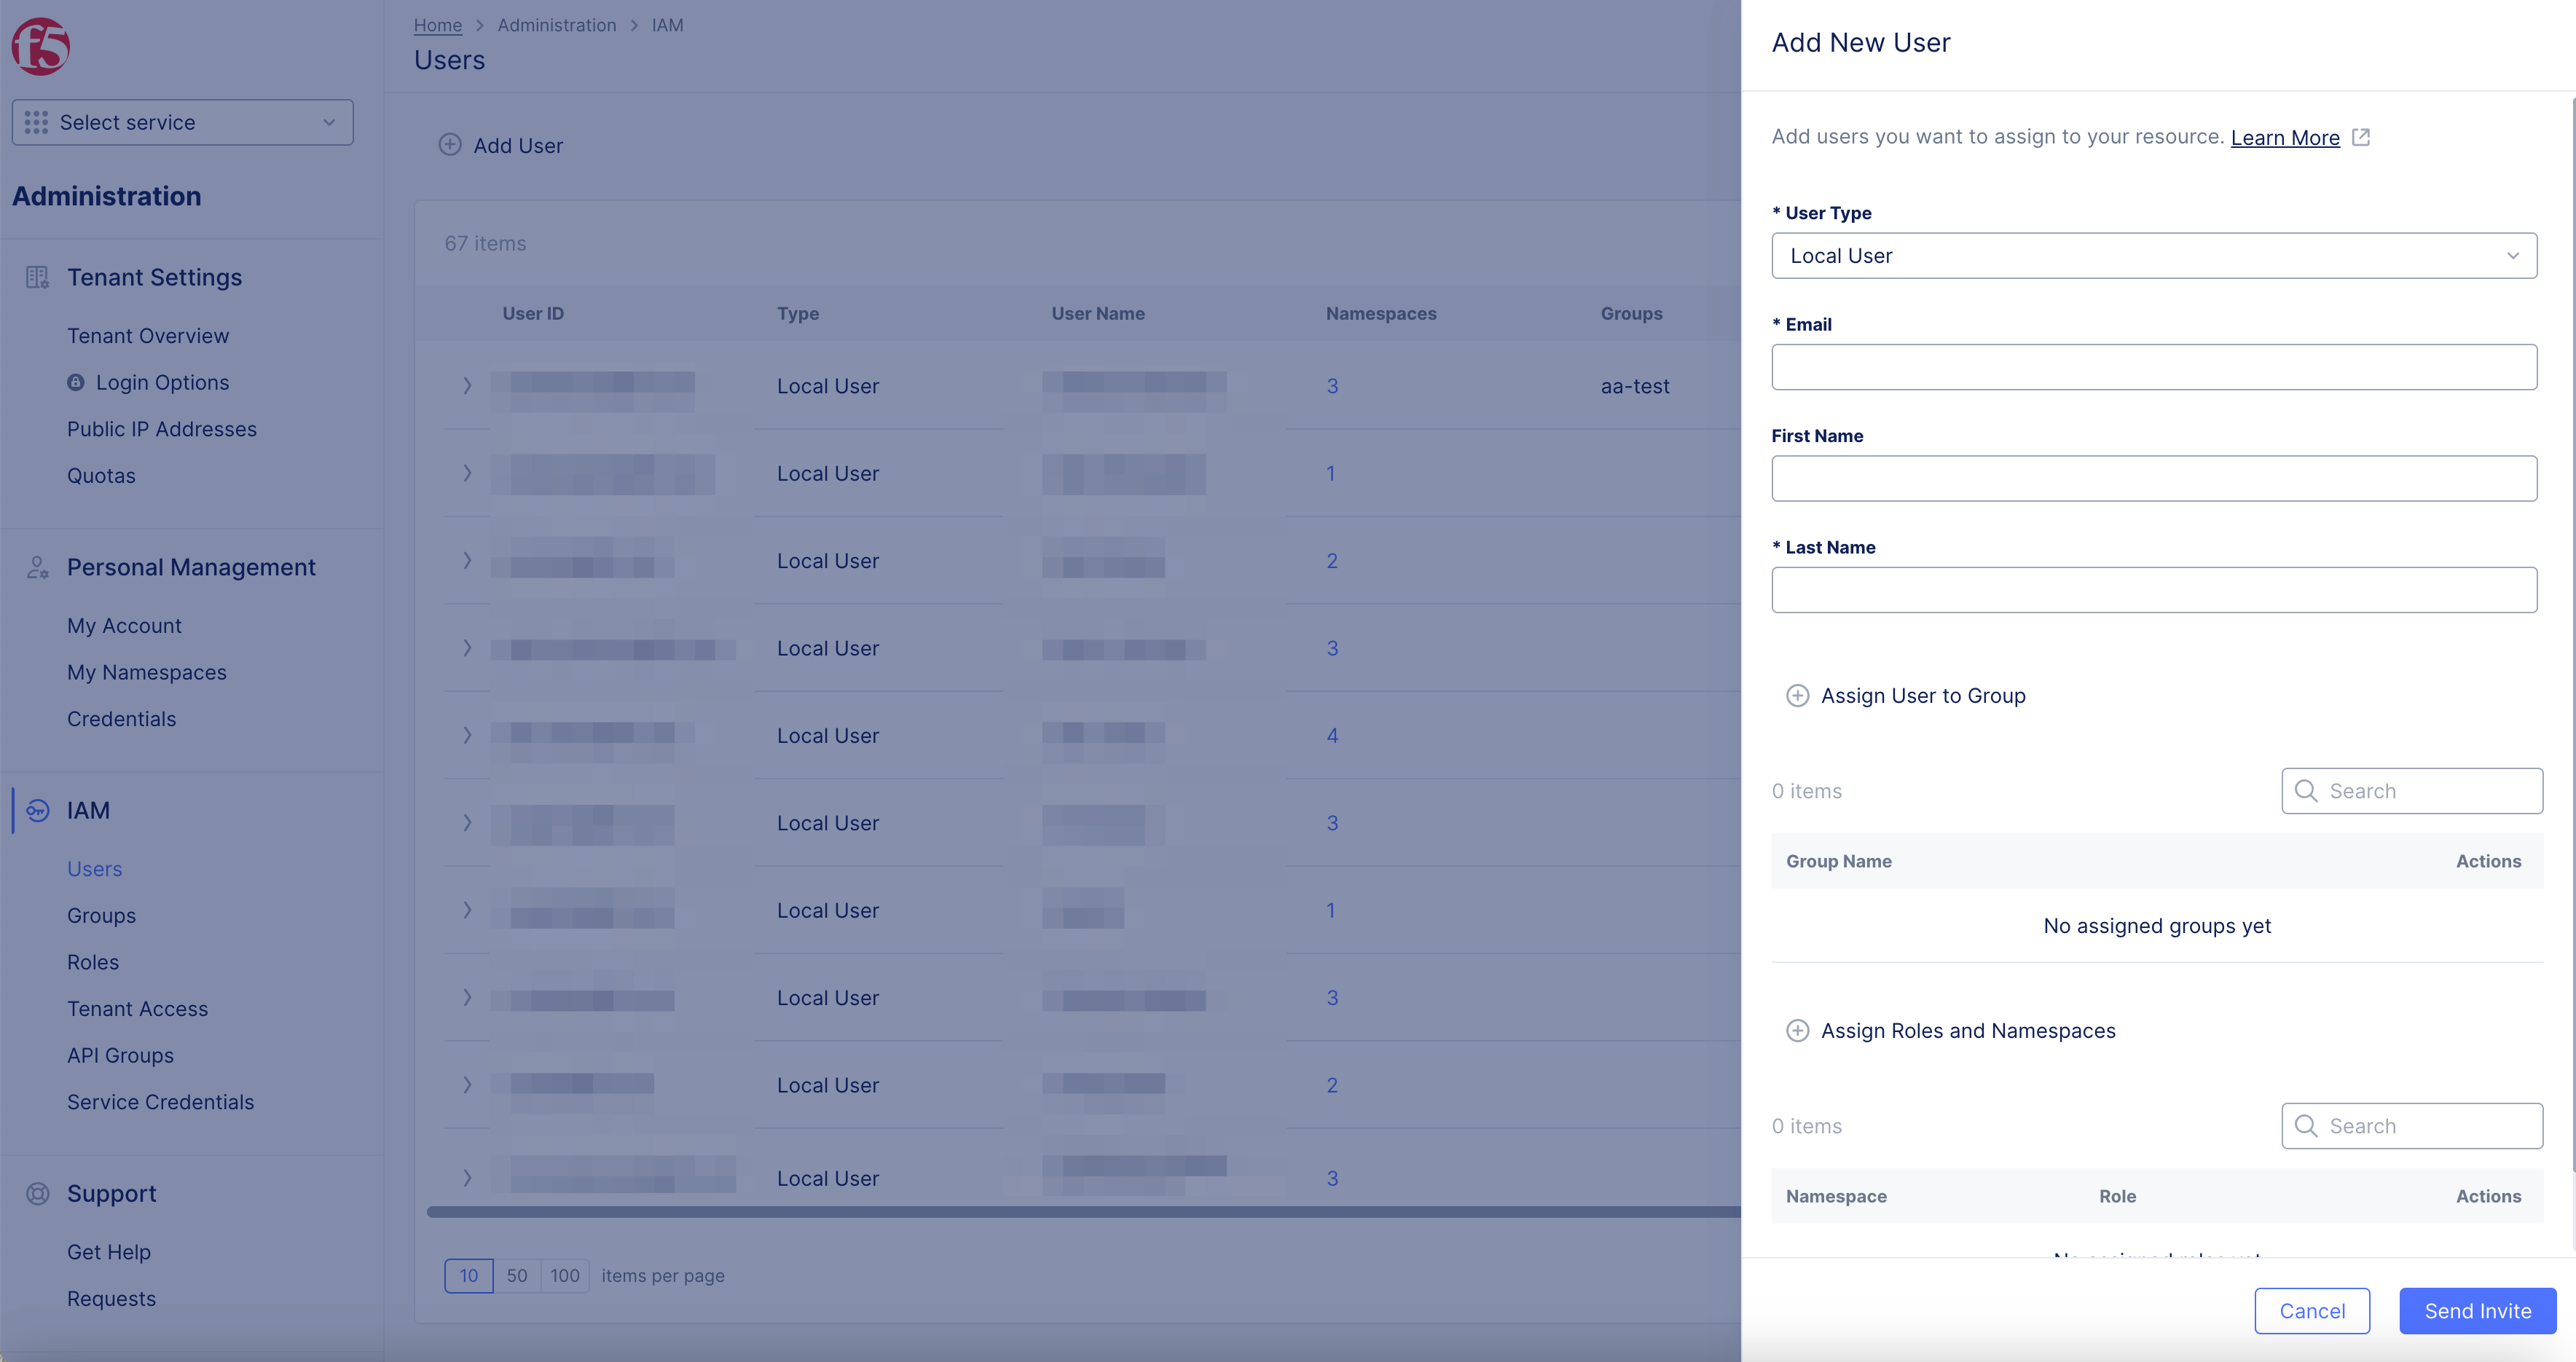
Figure: Add New User Pop-up Window
Step 2: Setup and Assign Roles to User.
-
Select
User Typedrop-down menu option:-
SSO User: If you enabled SSO for the tenant.
Note: See, SSO Guides to set up SSO for your enterprise.
-
Local User: If users logs in using their email address and password.
Note: SSO must be disabled in order to create a
Usertype. -

Figure: Select User Type
Note: One
User Type,SSO UserorUser, allowed enabled at any point in time.
-
Enter data for
SSO UserorUserwith steps below:-
Enter
Emailaddress of user. -
Enter
First Namein box. -
Enter
Last Namein box.
-
Figure: Add User Type Info
Note: If
useris not assigned aroleorgroupaccess will be denied to anything in the console. See Roles, for more information.
-
Select
+ Assign Roles and Namespacesbutton to customize in pop-up window.-
Select
Namespacefrom drop-down menu, orall application namespaces. -
Optionally, select the
Make Admincheckbox to enable administrator role for the namespace selected. -
Select
Roleneeded by checking boxes. -
Select
Assign Rolesbutton to apply roles to the user.
-
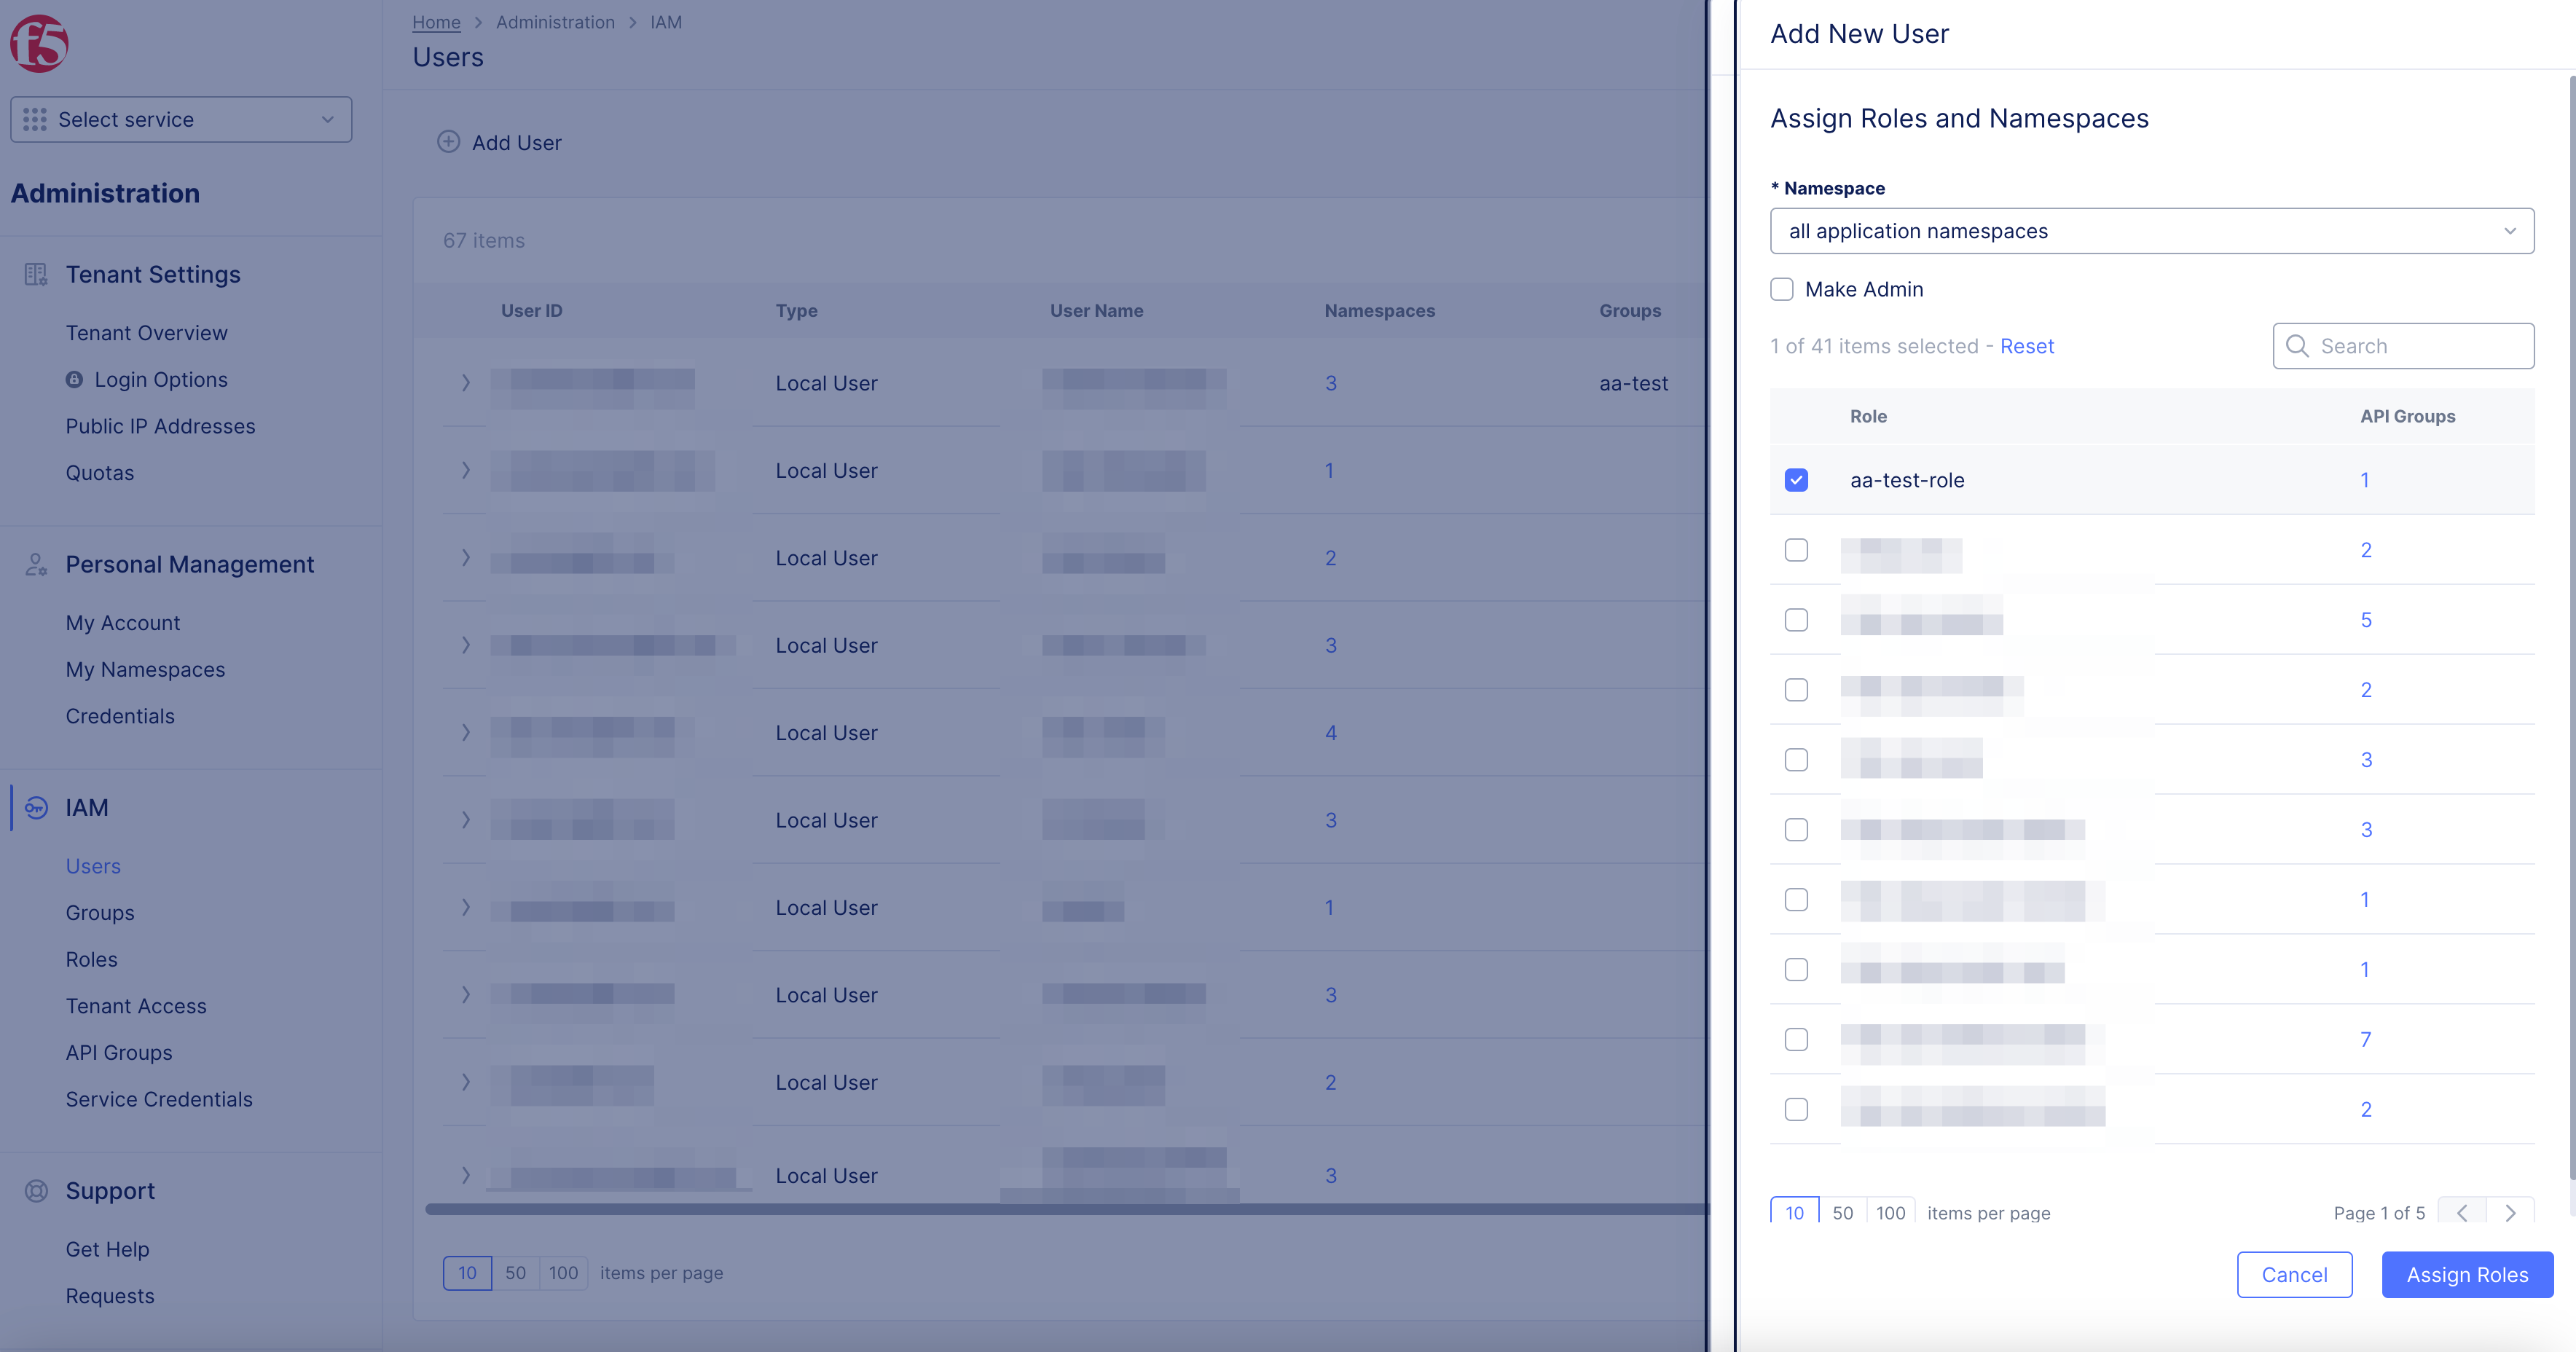
Figure: Add Roles and Namespaces
Step 3: Complete User Creation.
- Select
Send Invitebutton to invite user to tenant.
Figure: Create User
Create User Groups and Add Users
Step 1: Create Group.
-
In
Administrationworkspace. -
Select
GroupsinIAMsection. -
Select
+ Add Groupbutton.

Figure: Create Group
-
Enter
Group Name. -
Enter
Description.
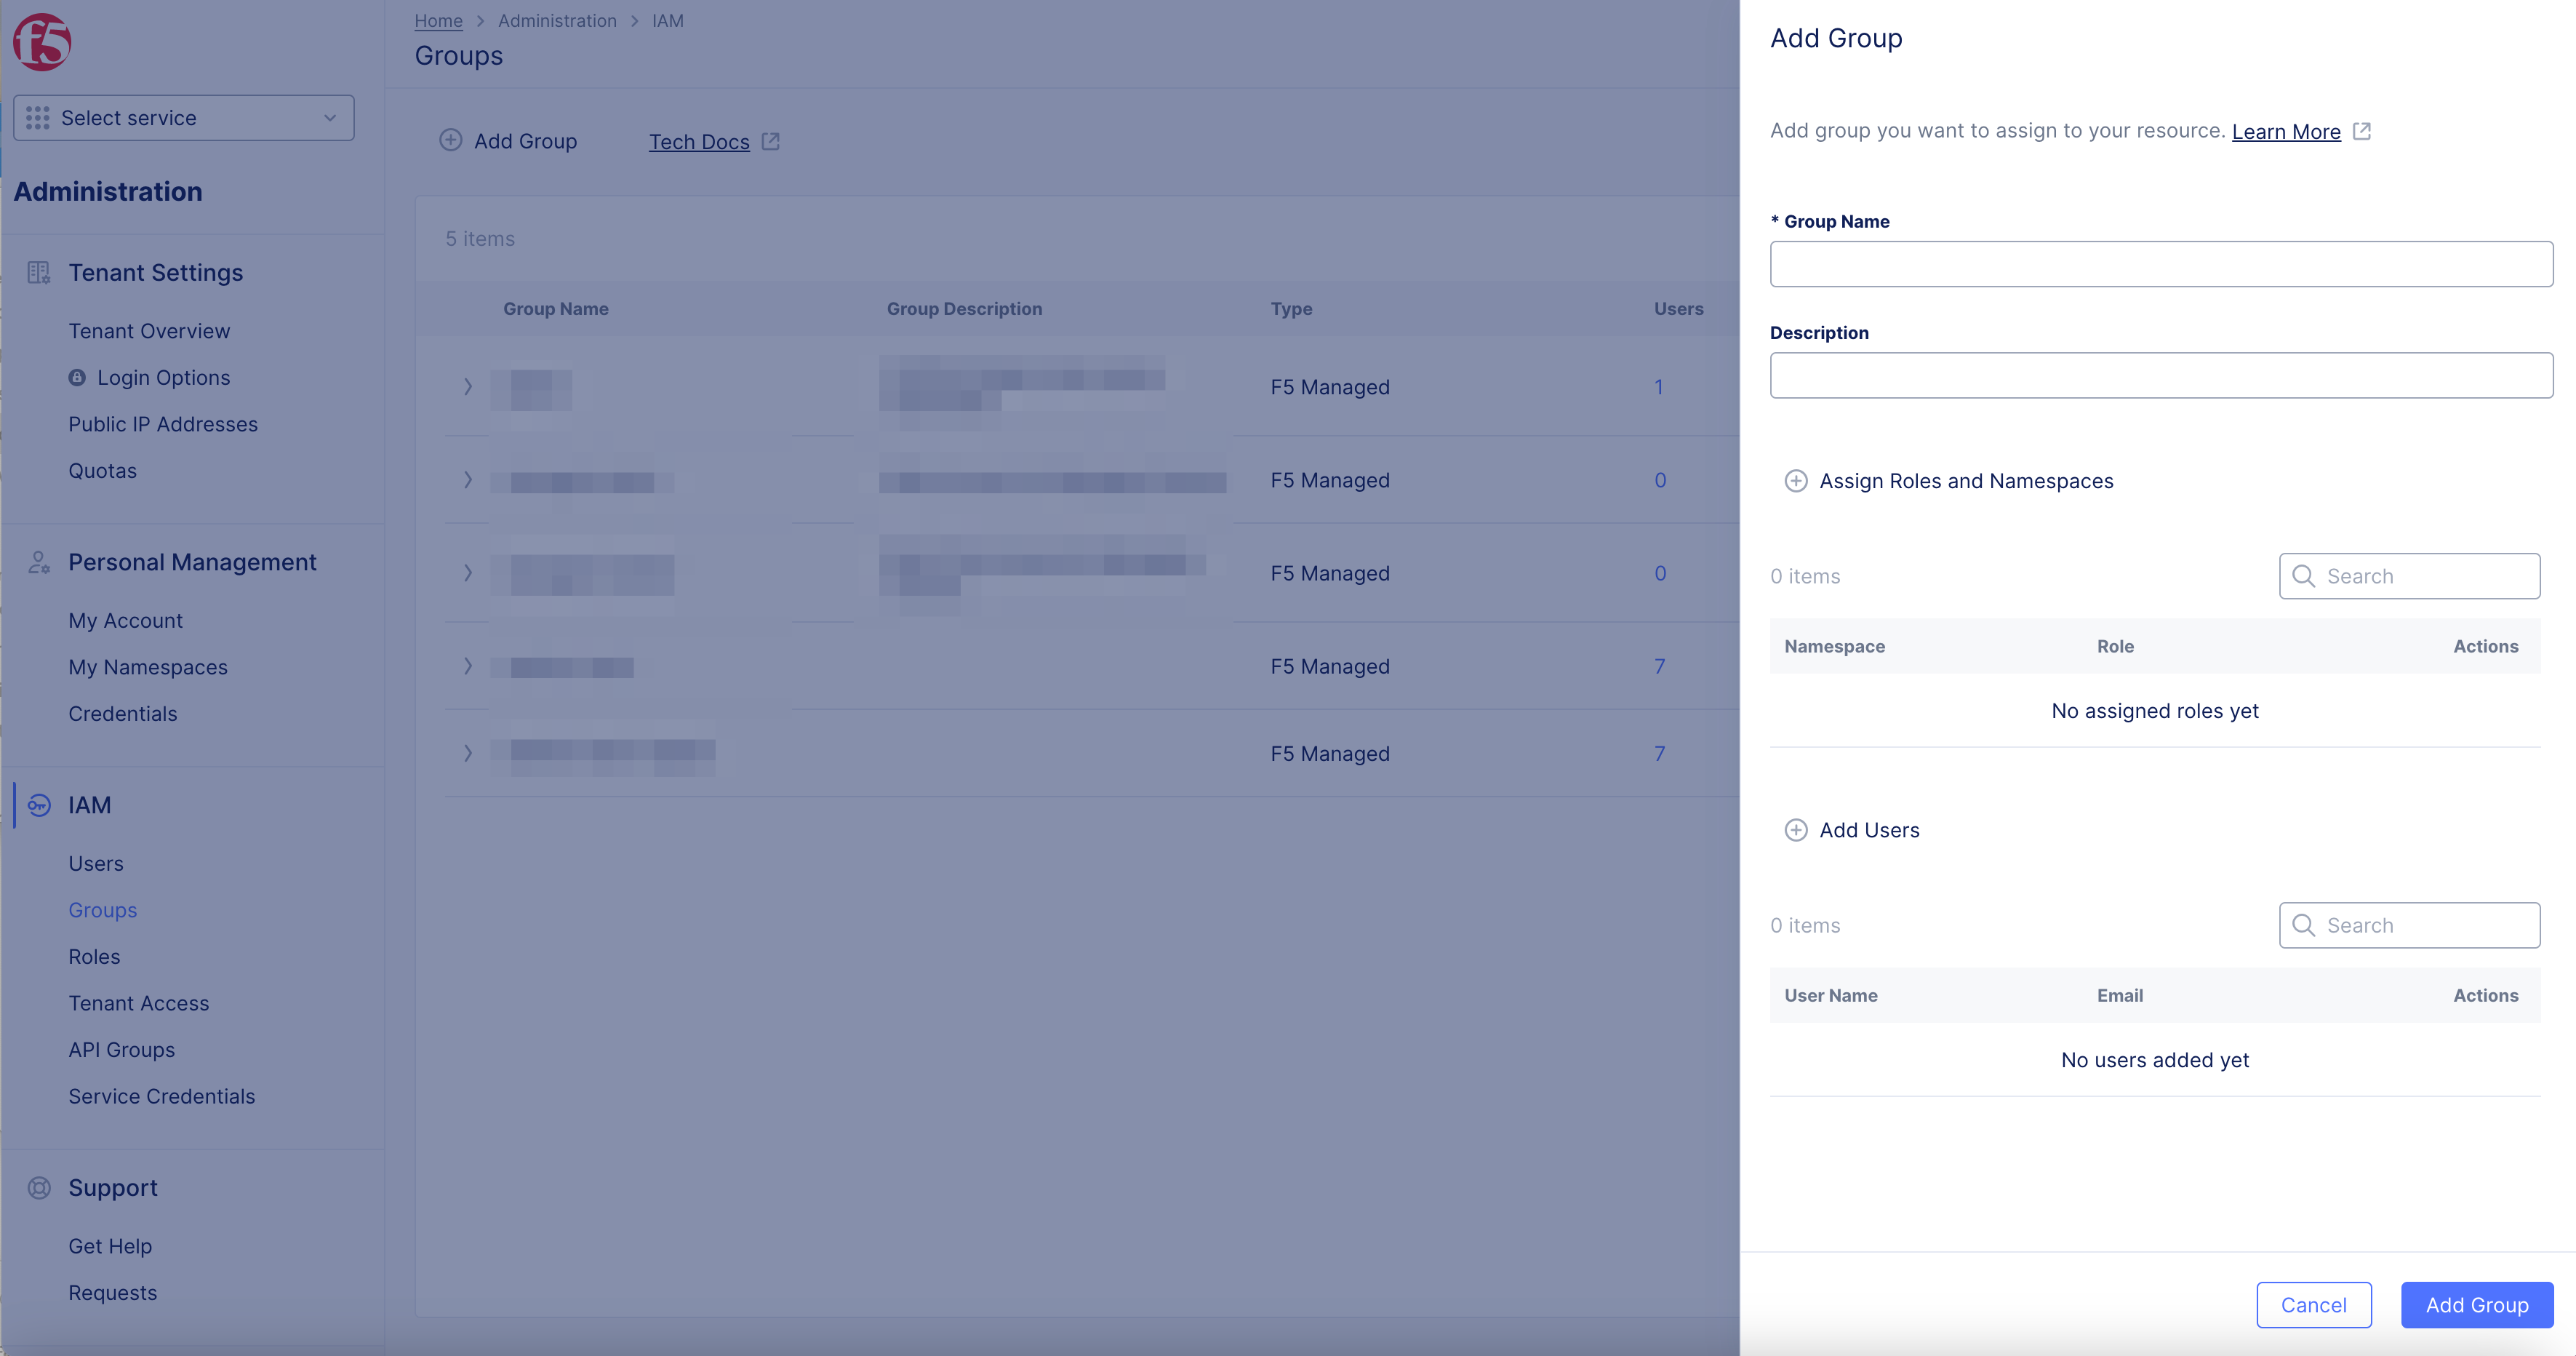
Figure: Name Group
-
Select
+ Assign Roles and Namespacesbutton.-
Select
Namespacein drop-down menu. -
Check
Make Admin, if applicable. -
Check
Role(s)boxes to add to group. -
Select
Assign Rolesbutton.
Note: You can edit
NamespacesandUserssections by selecting...inActionscolumn. -
-
Select
+ Add Usersbutton.-
Check
User Nameboxes to add to group. -
Select
Add Usersbutton.
-
-
Select
Add Groupbutton to create group.
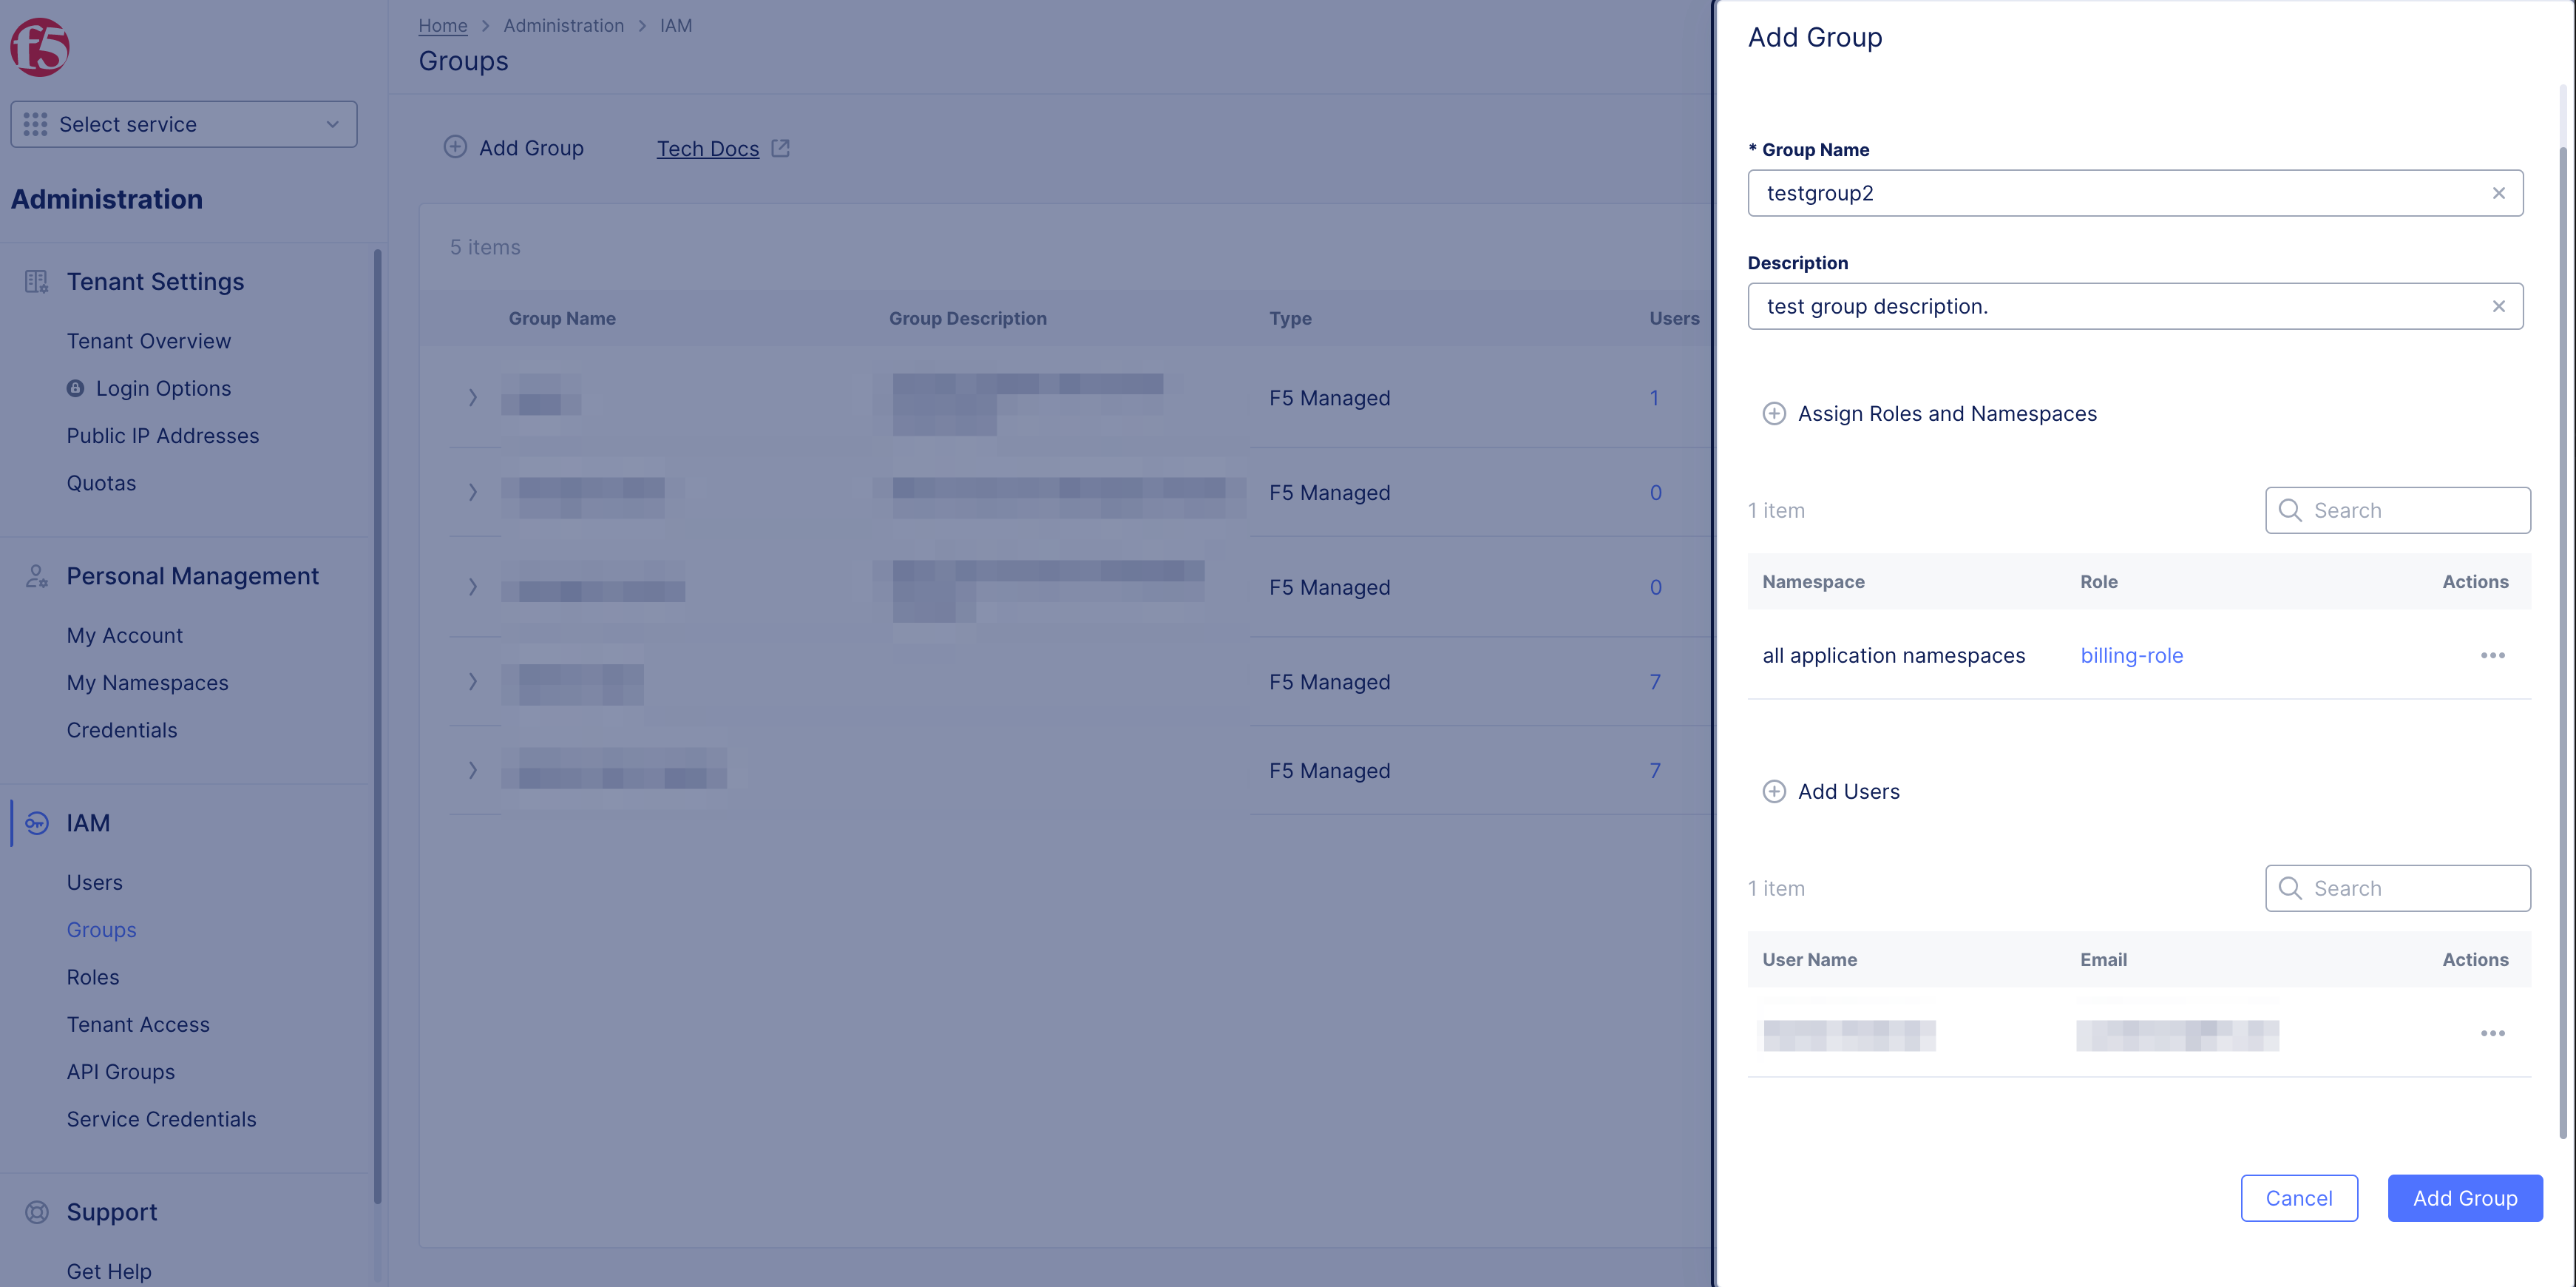
Figure: Add Group
- Select
+ Add Groupbutton in upper-left corner to add additional groups.
Step 2: Add User to Group.
- Select
UsersinIAMsection to add users to groups.
Note: You can add, edit, and view groups in
UsersandGroupssection ofIAM.
-
Select
...inActionscolumn. -
Select
Edit User.
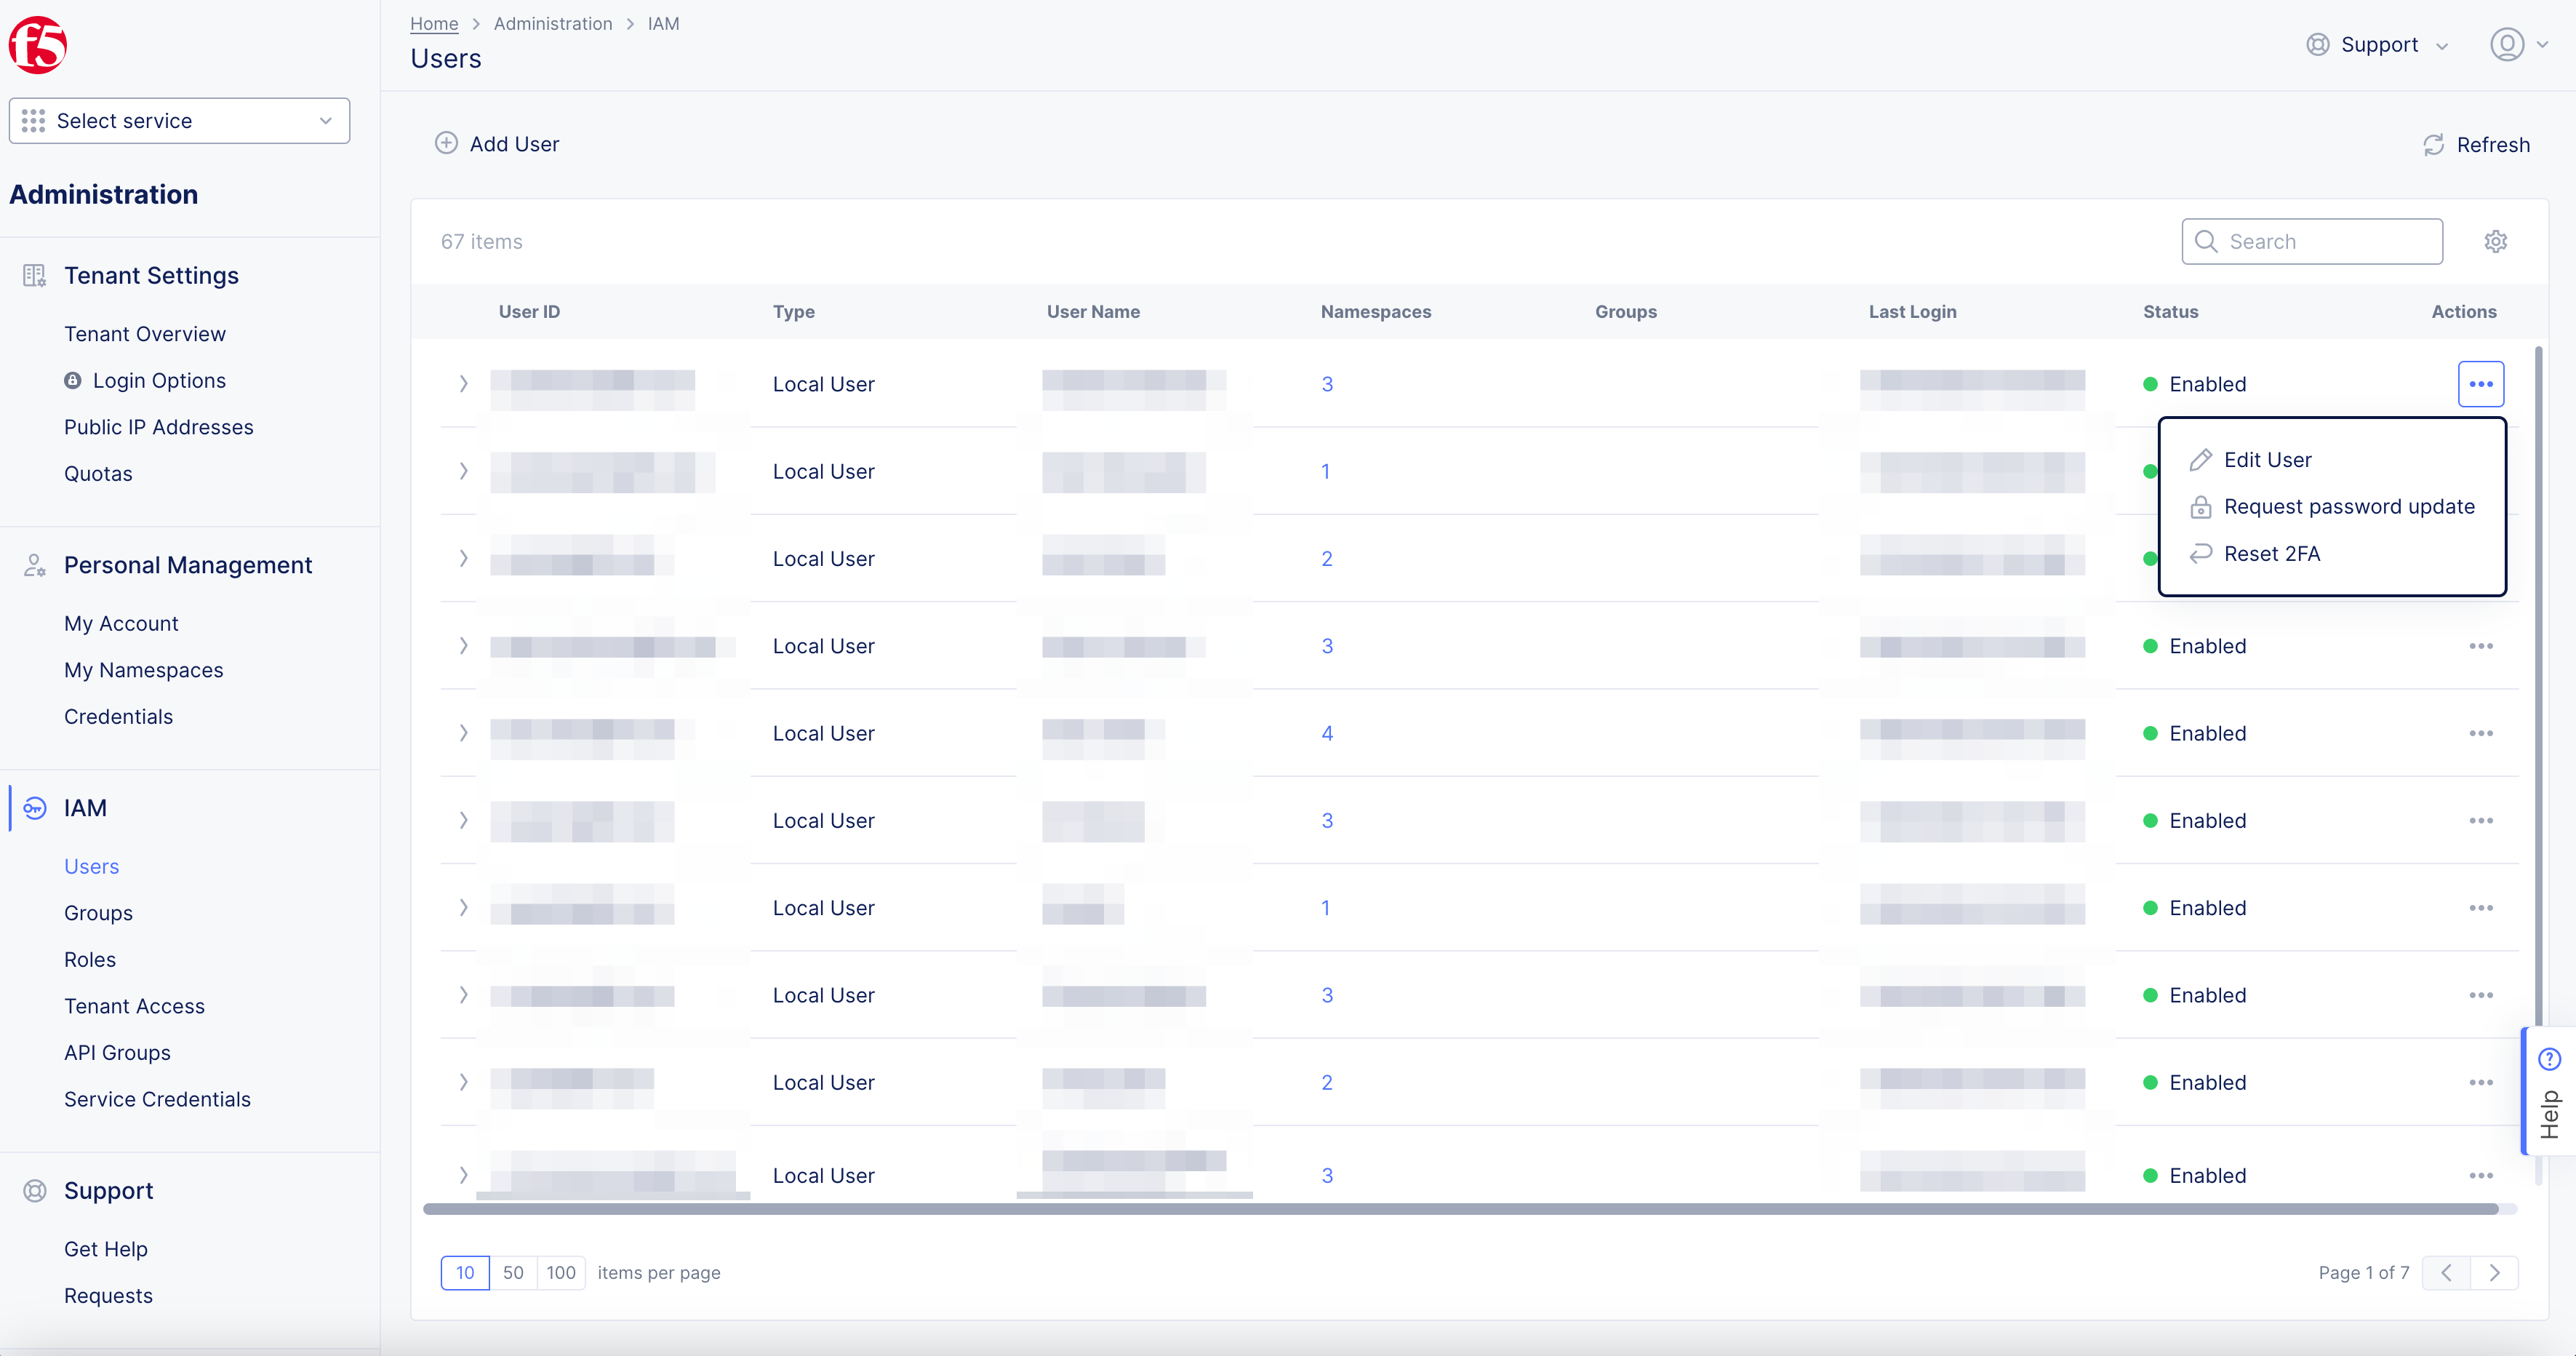
Figure: Add User to Group
Note: Users
Groupscolumn will show which groups user is assigned.
- Select
+ Assign User to Groupbutton to add group to user.
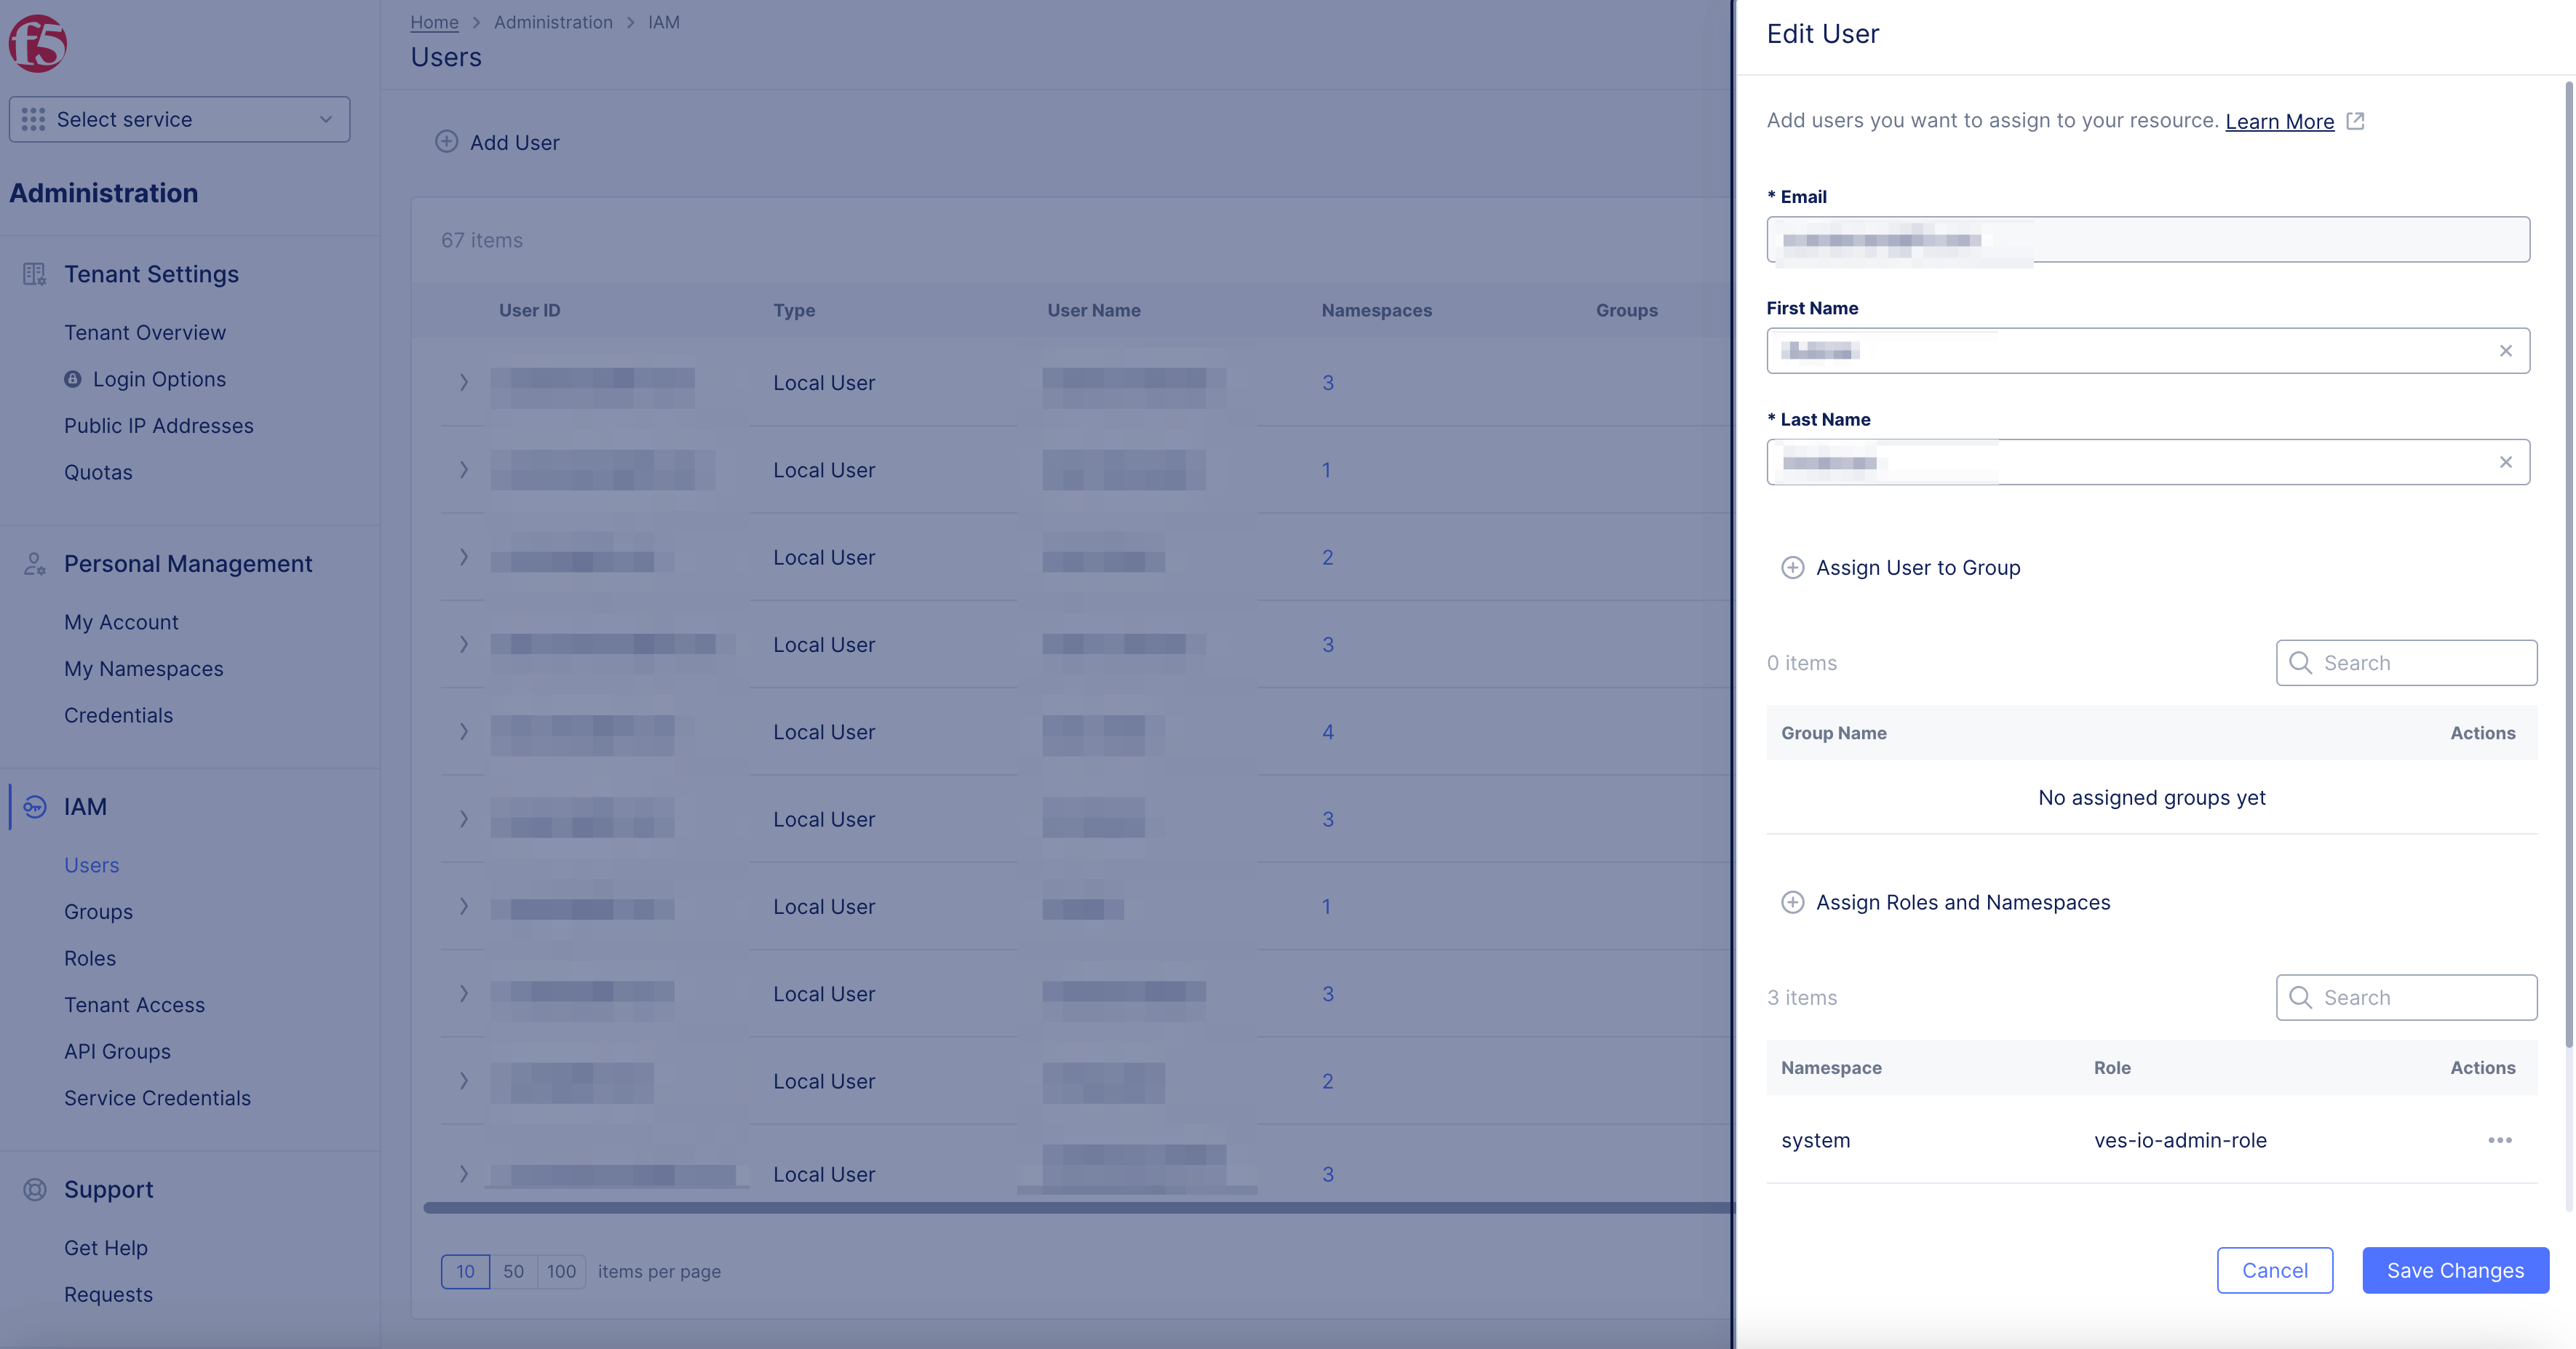
Figure: Add Users
-
Check
Group Name. -
Select
Assign to Groupbutton.
Note: Select
...inActionscolumn to delete user fromGroup Name.
-
Select
Assign Roles and Namespacebutton to add roles and namespaces to user.-
Select
Namespacedrop-down menu. -
Check
Make Admin, if applicable. -
Check
Role(s)for group. -
Select
Assign Rolesbutton.
-
-
Select
Save Changesbutton to add user to group.

Figure: Assign Roles
- Confirm
Groupscolumn is updated with group added.
Step 3: Add Multiple Users to One Group.
-
Select
GroupsinIAMto add multiple users to one group. -
Select
..., selectEdit.
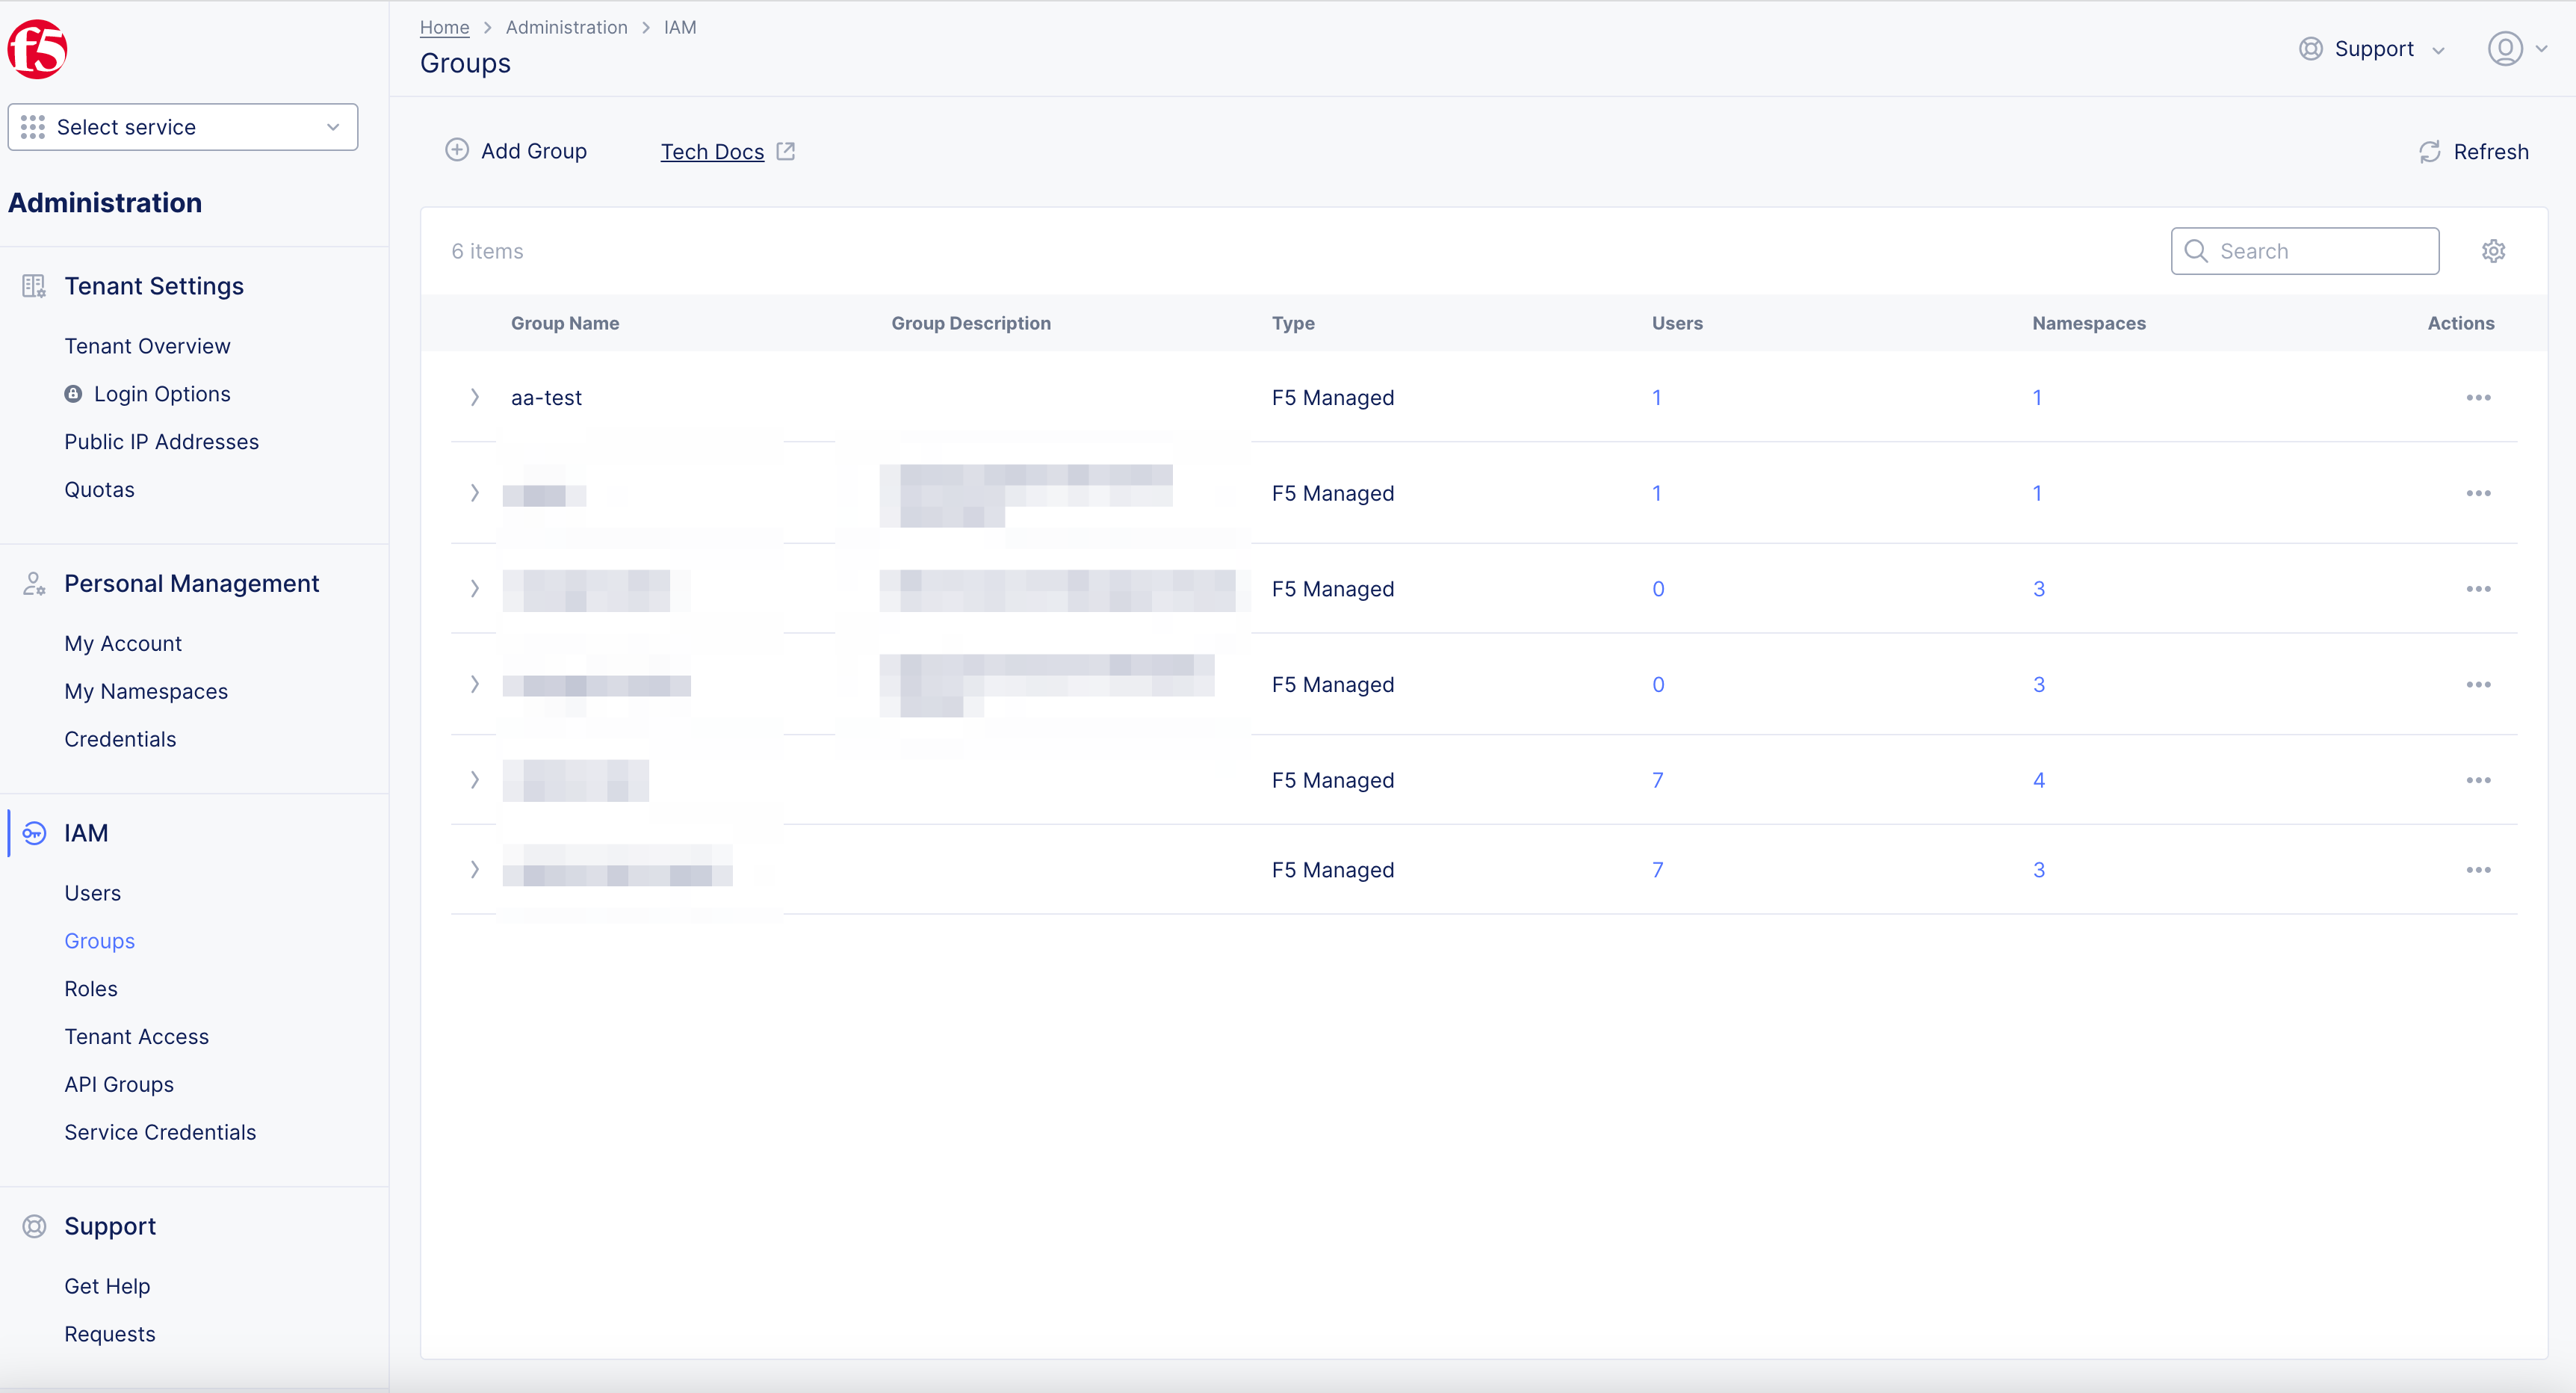
Figure: Add Multiple Users to One Group
-
Select
+ Add Users. -
Select
User Nameyou want added to group. -
Select
Add Usersbutton. -
Select
Save Changesbutton.
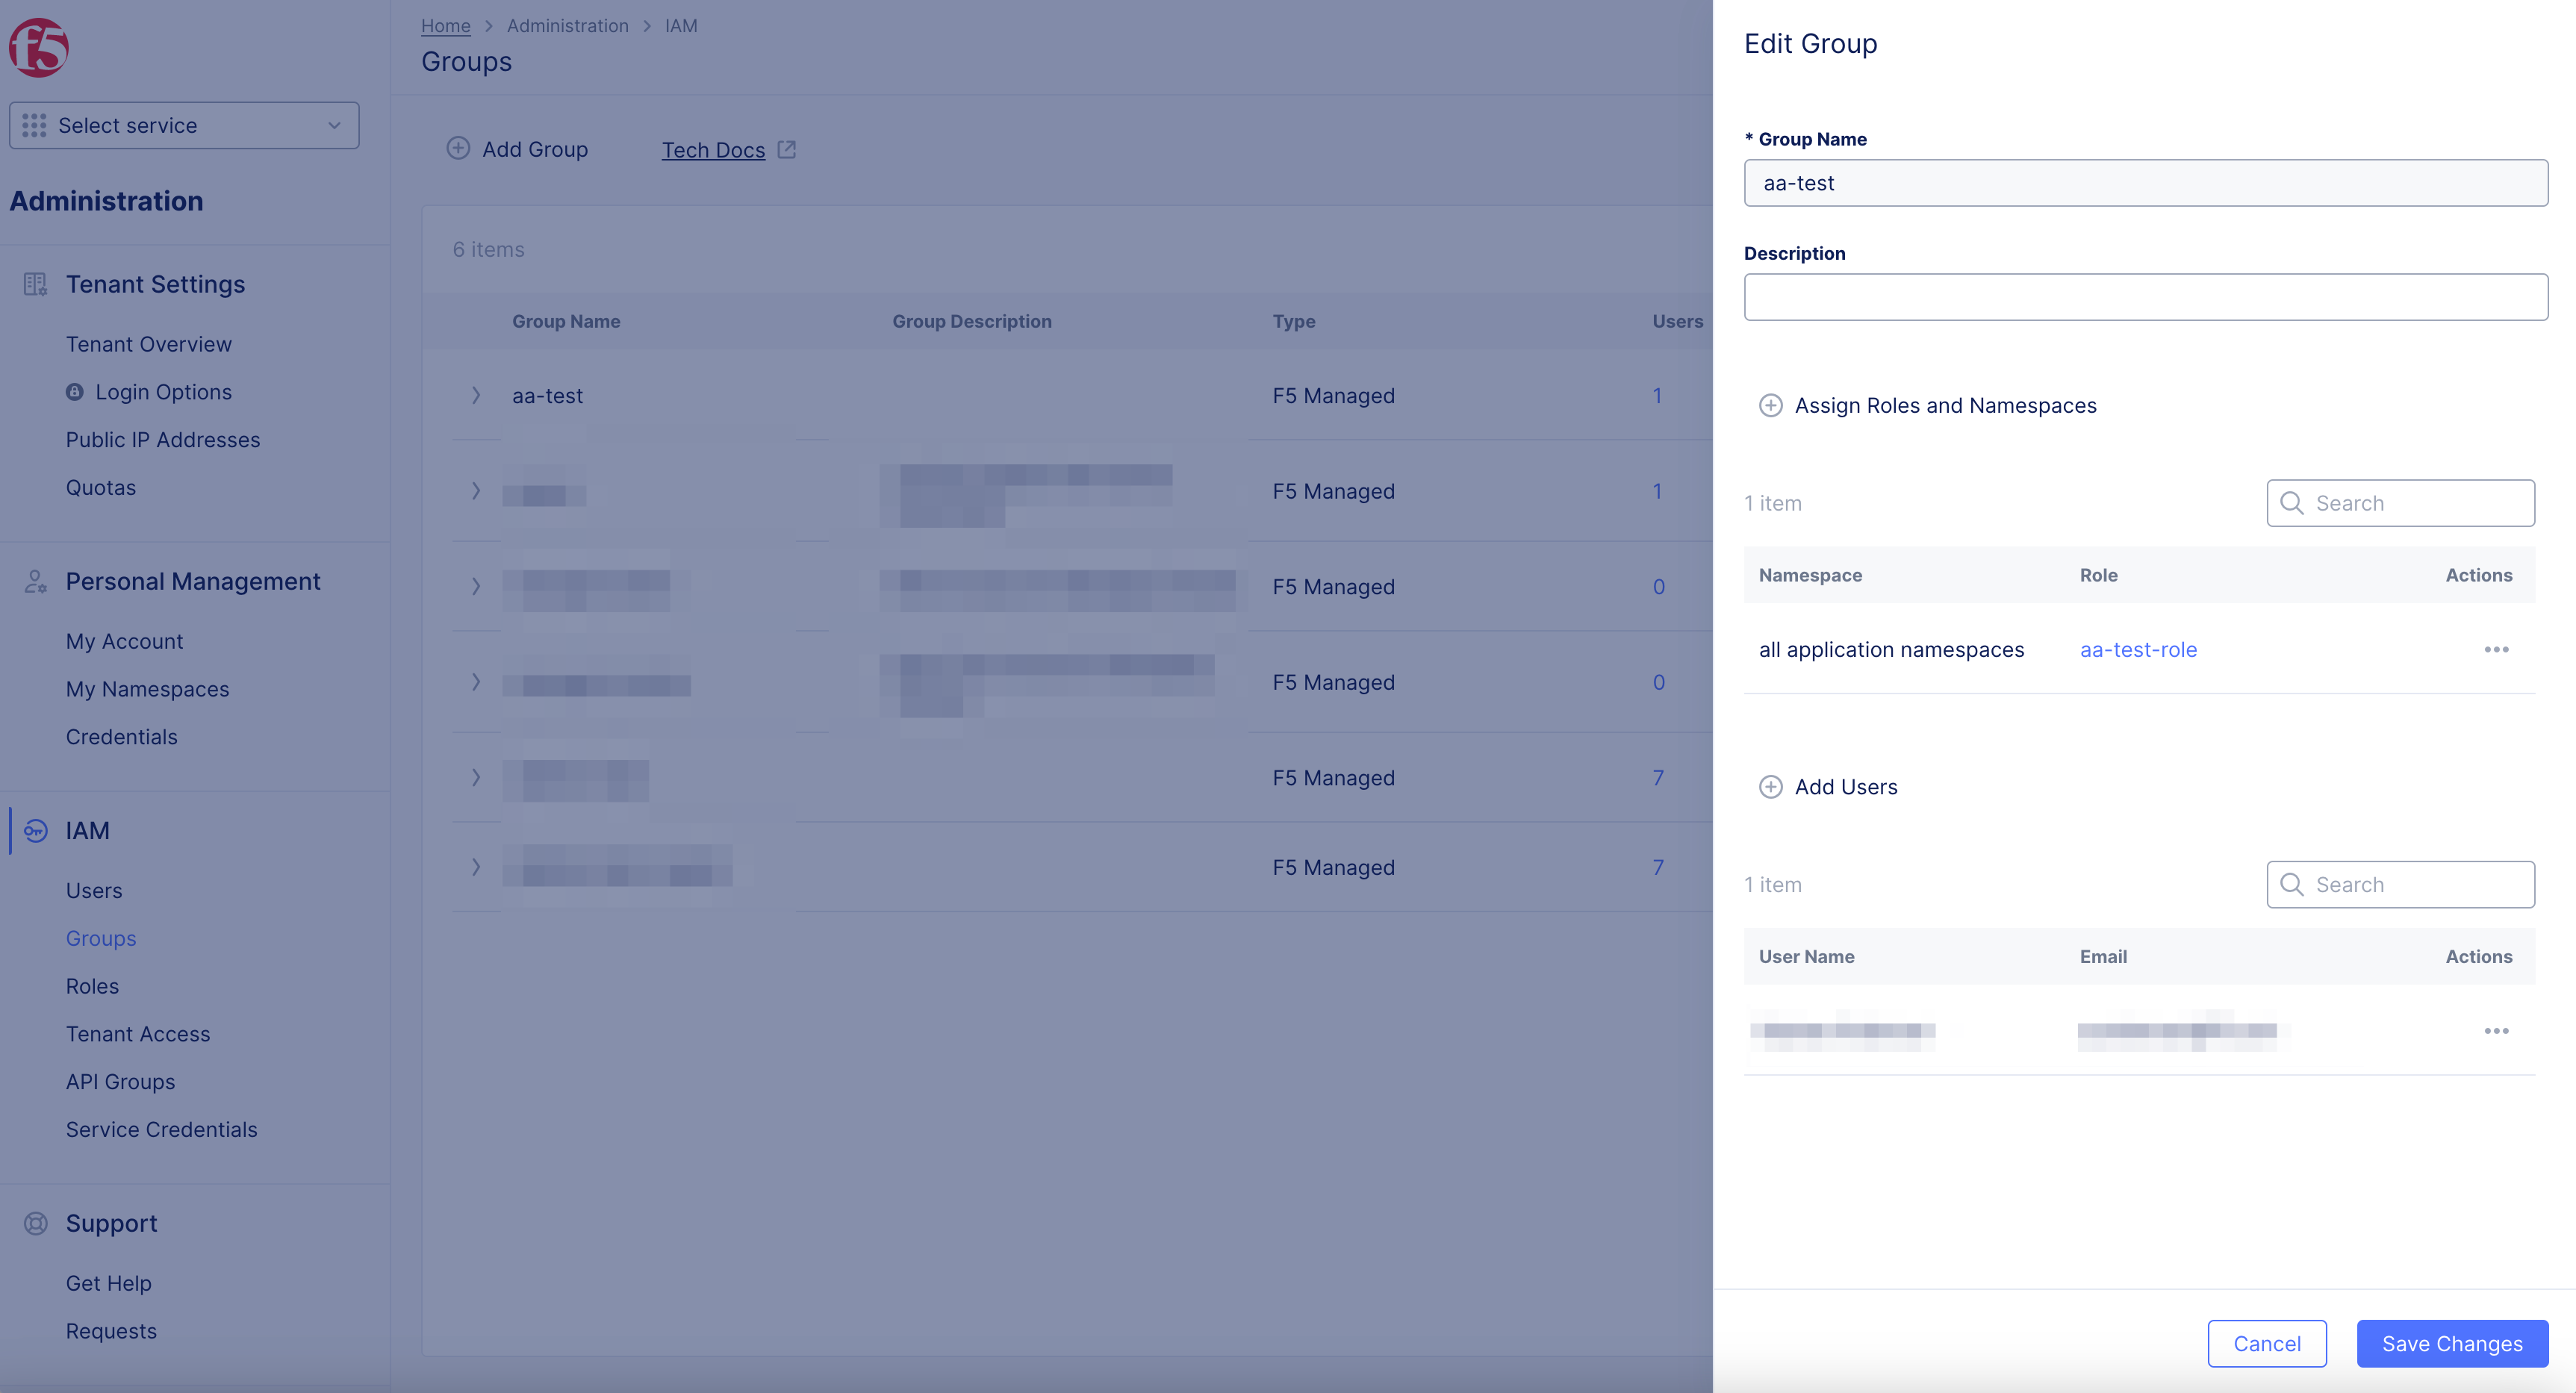
Figure: Add Users to Group
Delete Users and Groups
Step 1: Delete Users.
-
In
Administrationworkspace. -
Select
UsersinIAM. -
Identify
User IDyou want to delete. -
Select
...> selectDelete User.

Figure: Delete Users
-
Select
Deletebutton in pop-up window. -
Confirm user is removed from
Userslist.
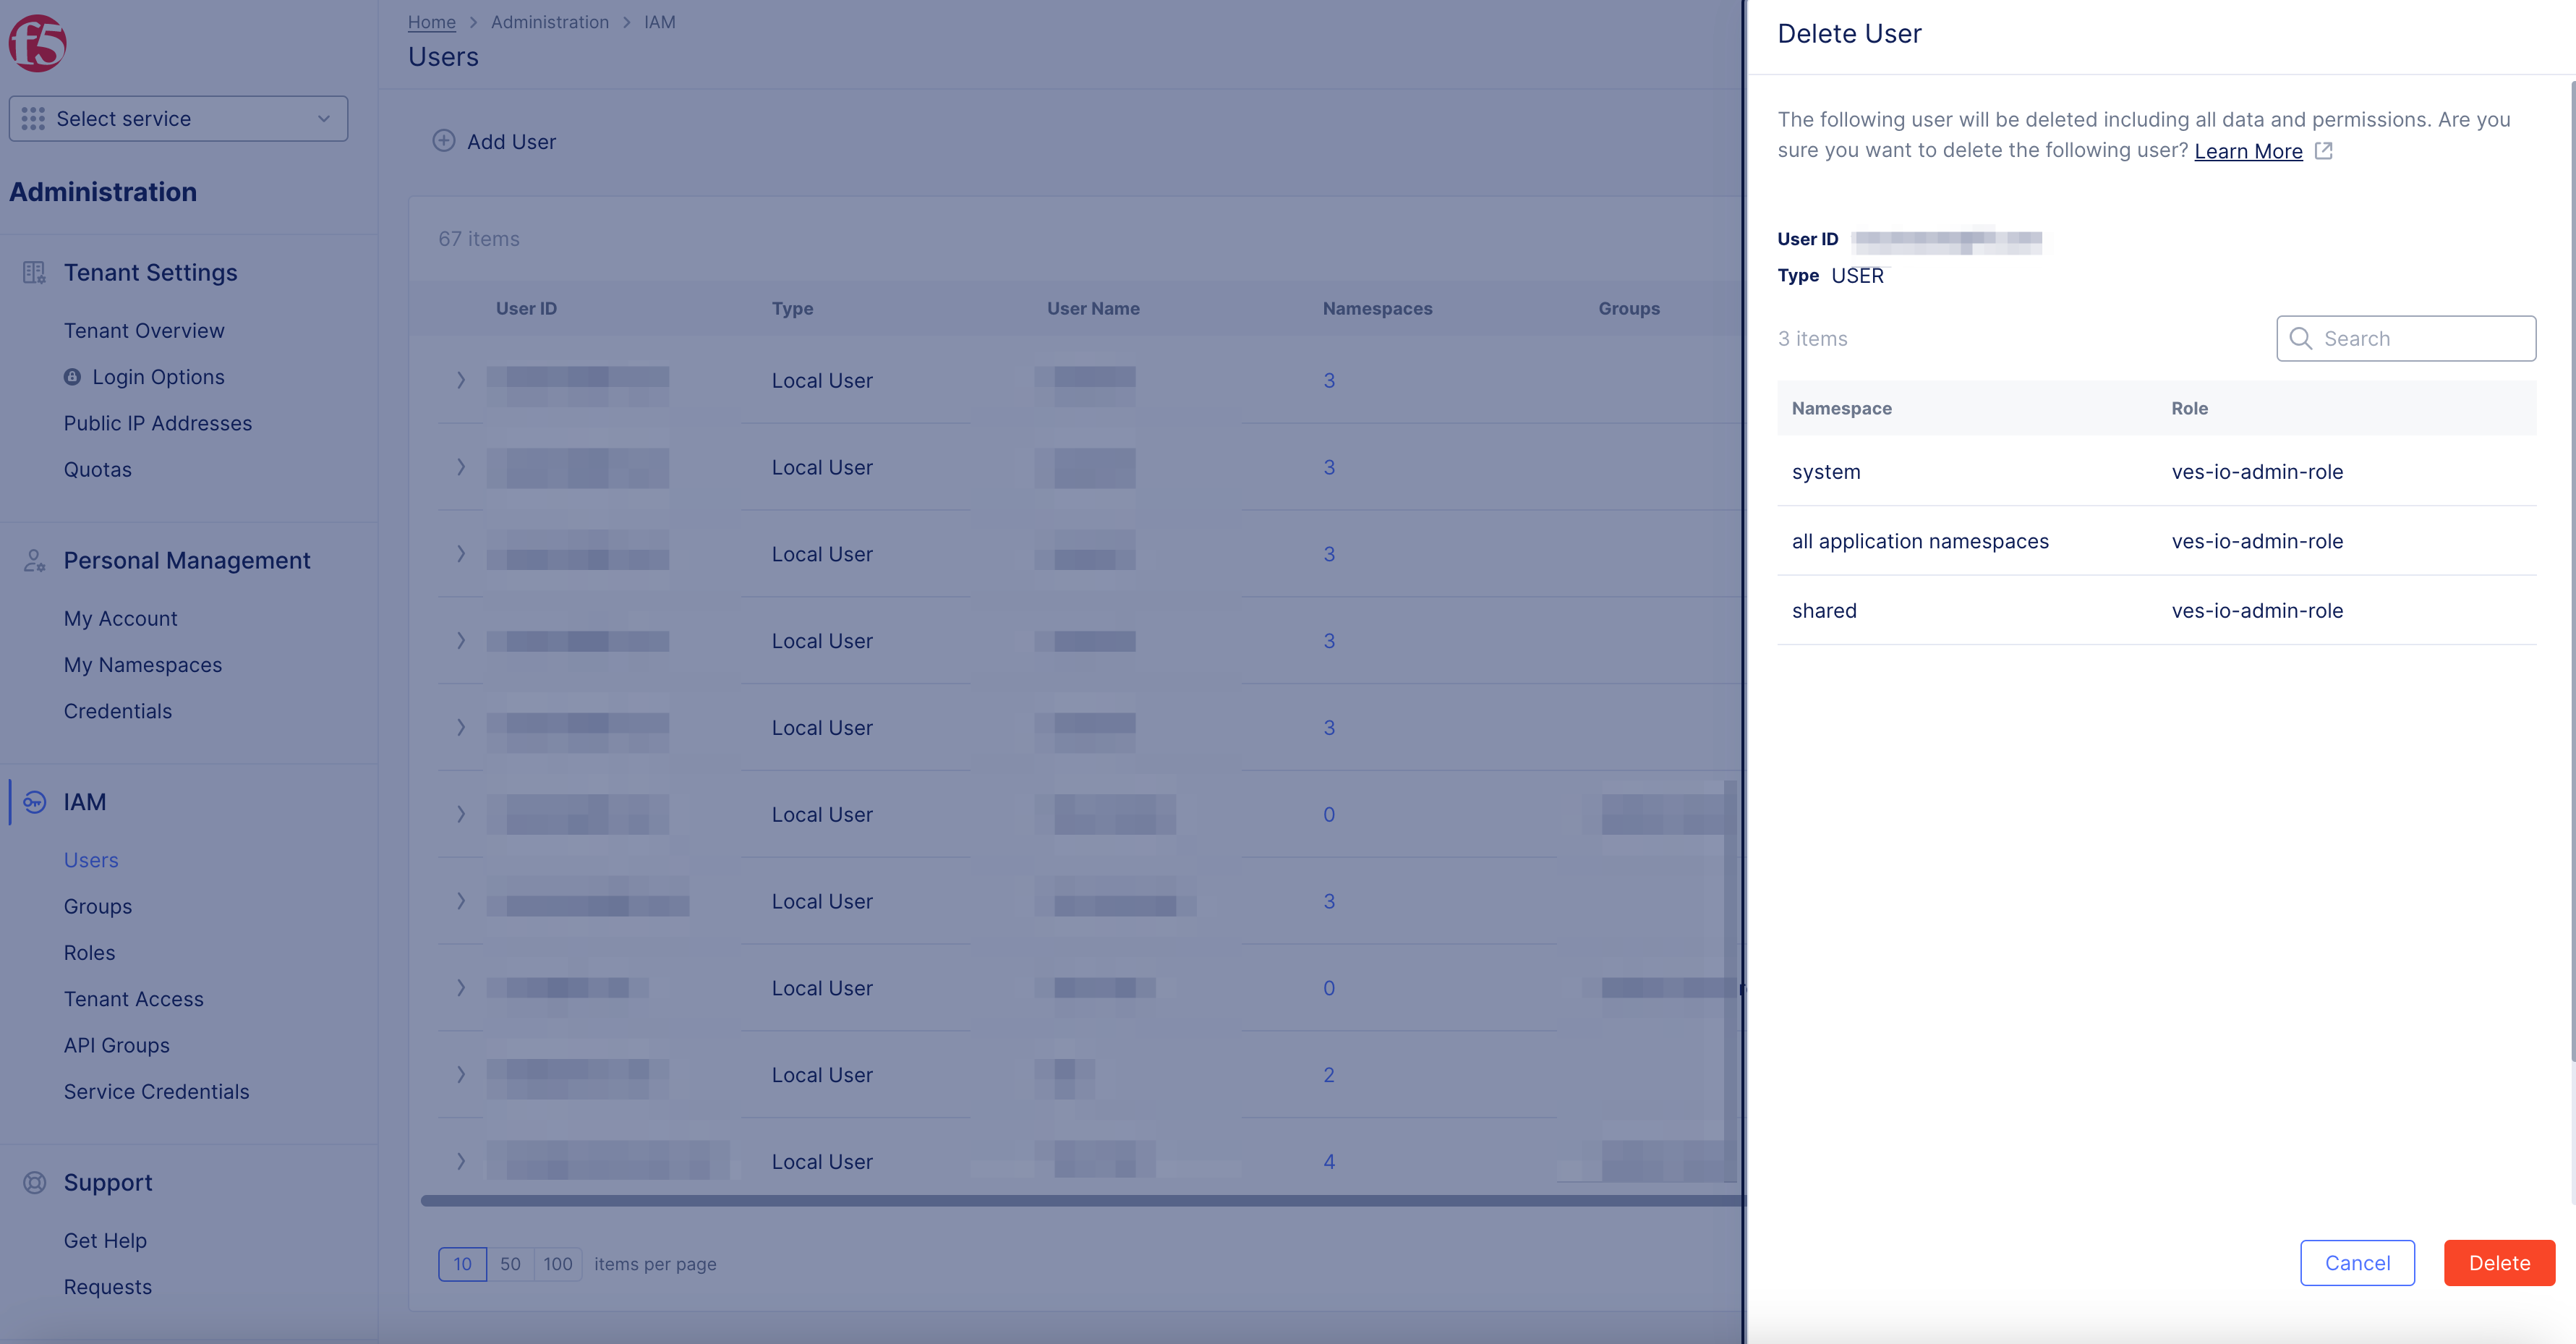
Figure: Delete Users
Step 2: Delete Groups.
Note: You must delete dependent objects from the group before you can delete the group.
-
In
Administrationworkspace. -
Select
GroupsinIAM. -
Identify
Groupyou want to delete. -
Select
...> selectDelete.
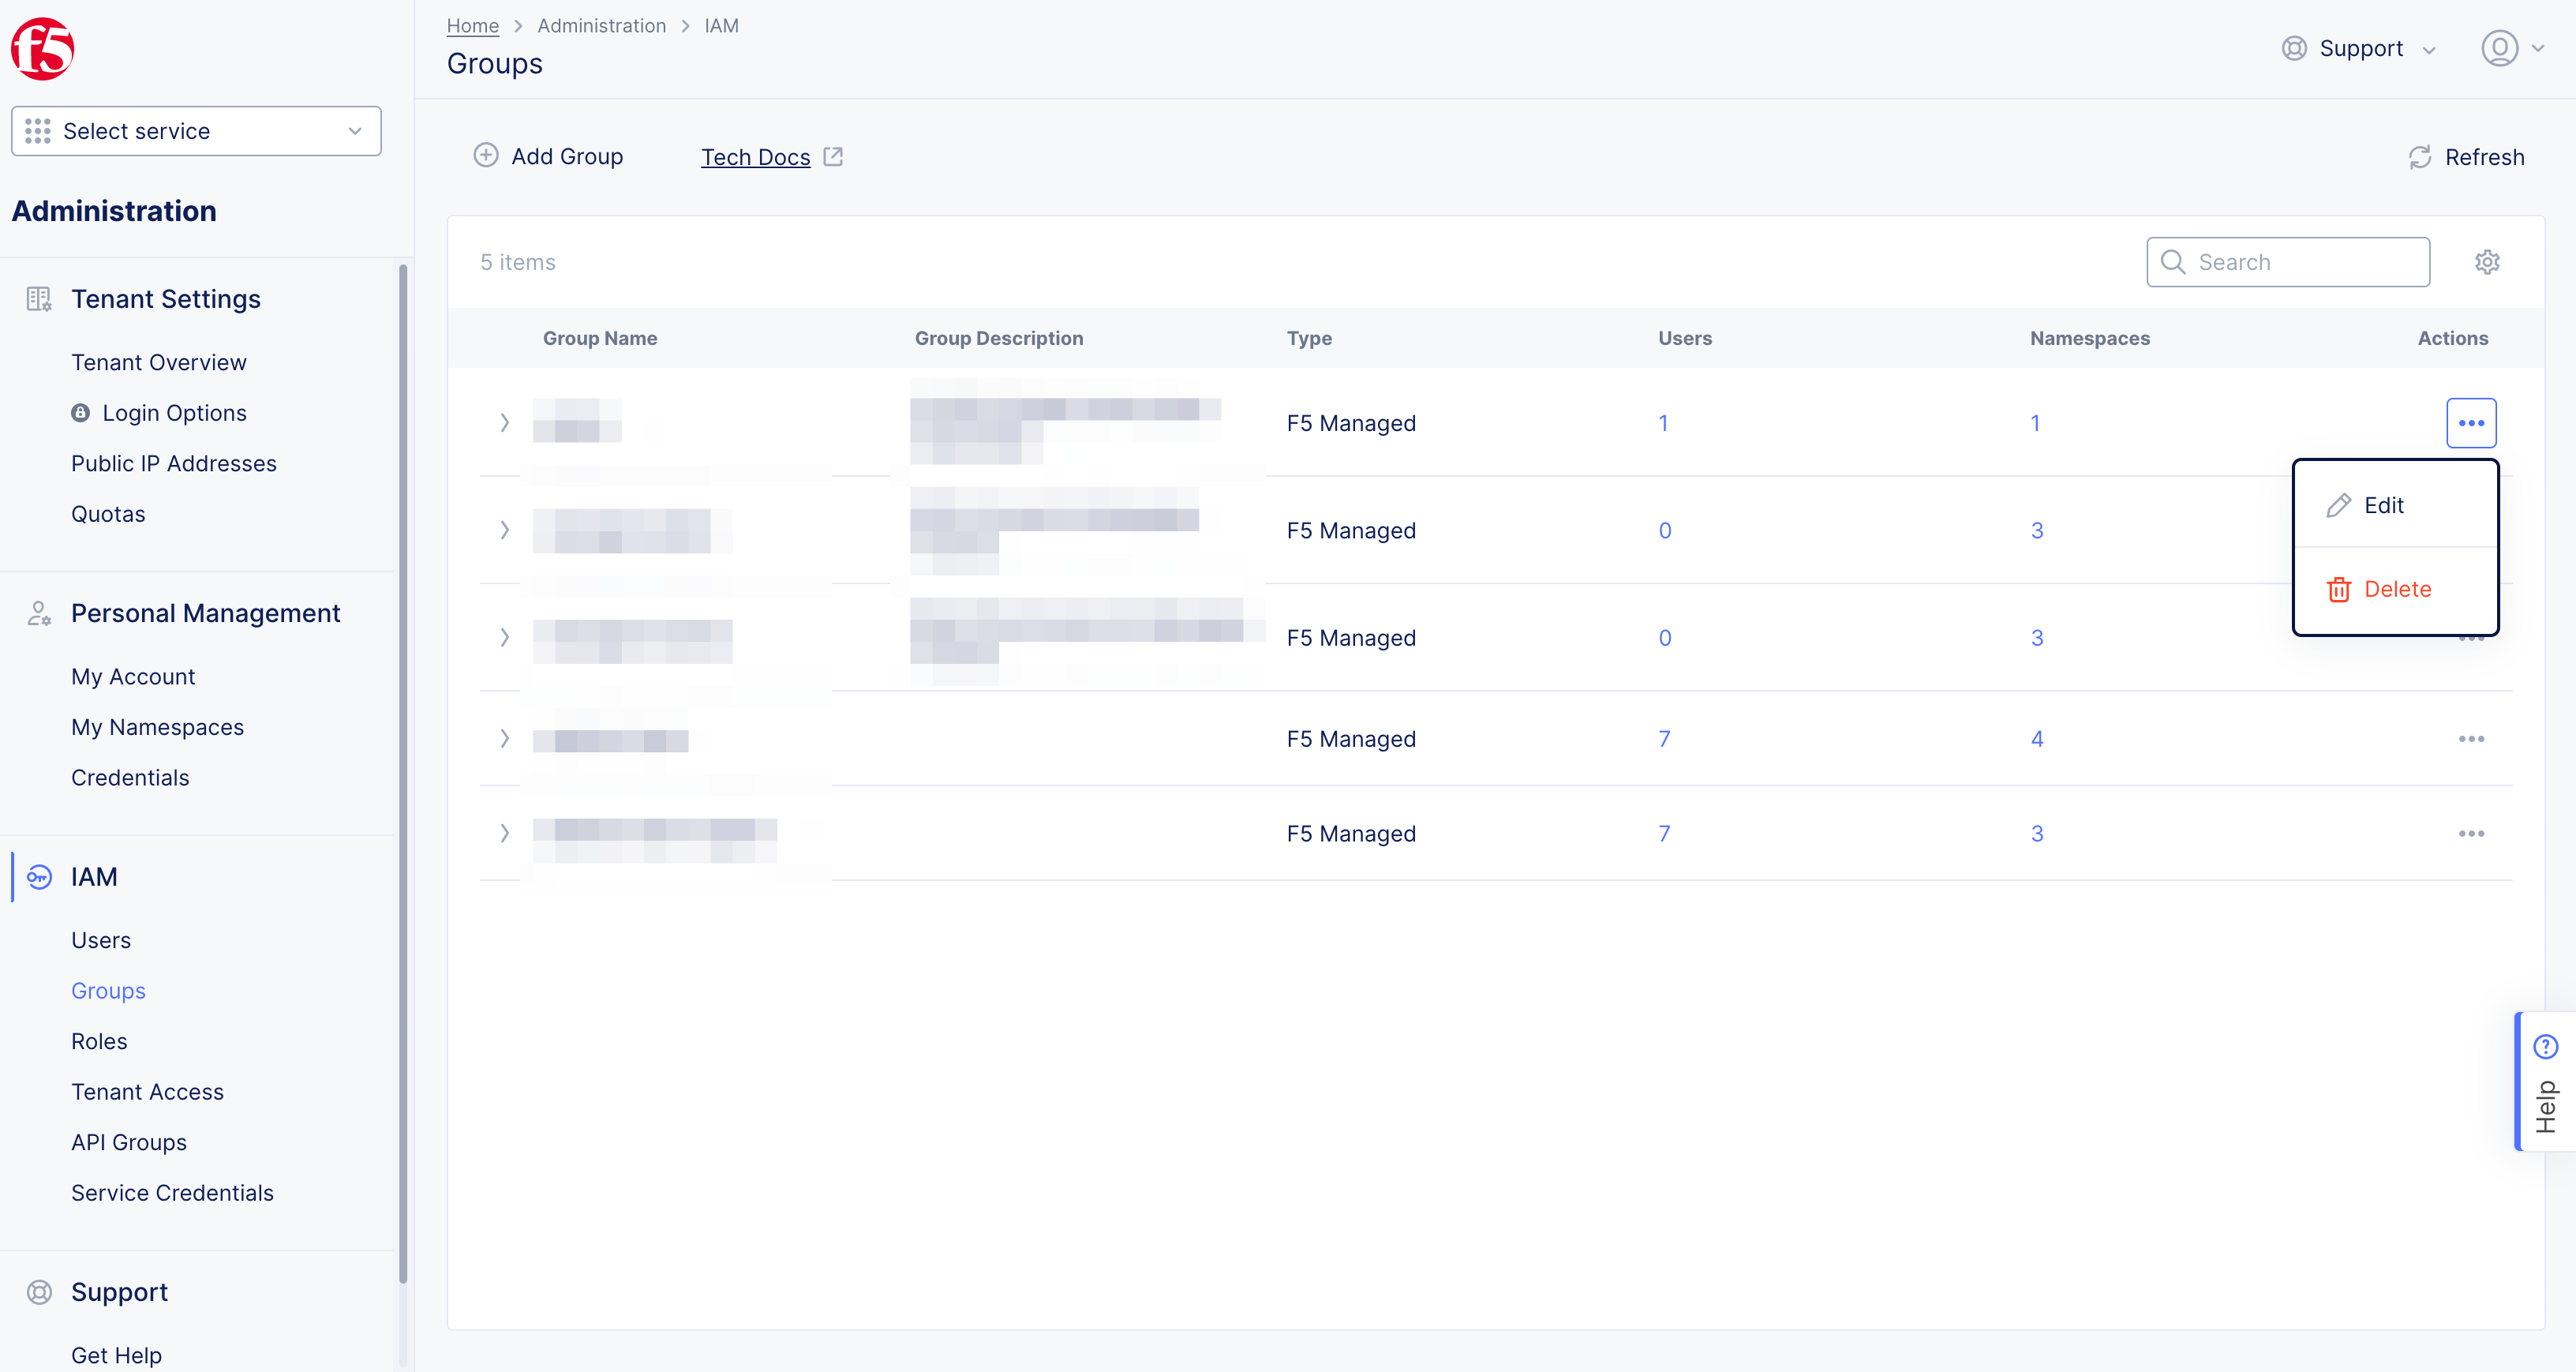
Figure: Delete Groups
-
Select
Deletebutton in pop-up window. -
Confirm group is removed from
Groupslist.
Figure: Delete Groups
Show Referring Objects
Use the Show Referring Objects option to see all objects attached to the user group.
- From the Distributed Cloud Console homepage, select
Administration, and then selectIAM > Groups. - From the Actions column, select the Action menu
...next a user group. - Select
Show Referring Objectsto view the following object types that refer to that user group:- User
- Allowed tenants
- Child tenant manager
- Access mapping
- Service credentials

Figure: Show Referring Objects
