Replace Node in Customer Edge Site
Objective
This guide provides instructions on how to replace a node in a F5® Distributed Cloud multi-node cluster site and a single-node site. To know more about sites and nodes, see Distributed Cloud Site.
In case you need to replace a Distributed Cloud node in your site due to reasons such as a hardware failure or any other issues, use the instructions provided in this document to perform the replacement.
Prerequisites
-
F5 Distributed Cloud Account is required. In case you do not have an account, see Getting Started with Console.
-
The Distributed Cloud site should be registered and running.
-
Confirm your site meets the minimum resources required. For a full listing of the resources required, see the Customer Edge Site Sizing Reference guide. All the nodes in a given CE Site should have the same resources regarding the compute, memory, and disk storage. When deploying in cloud environments, these nodes should use the same instance flavor.
Configuration
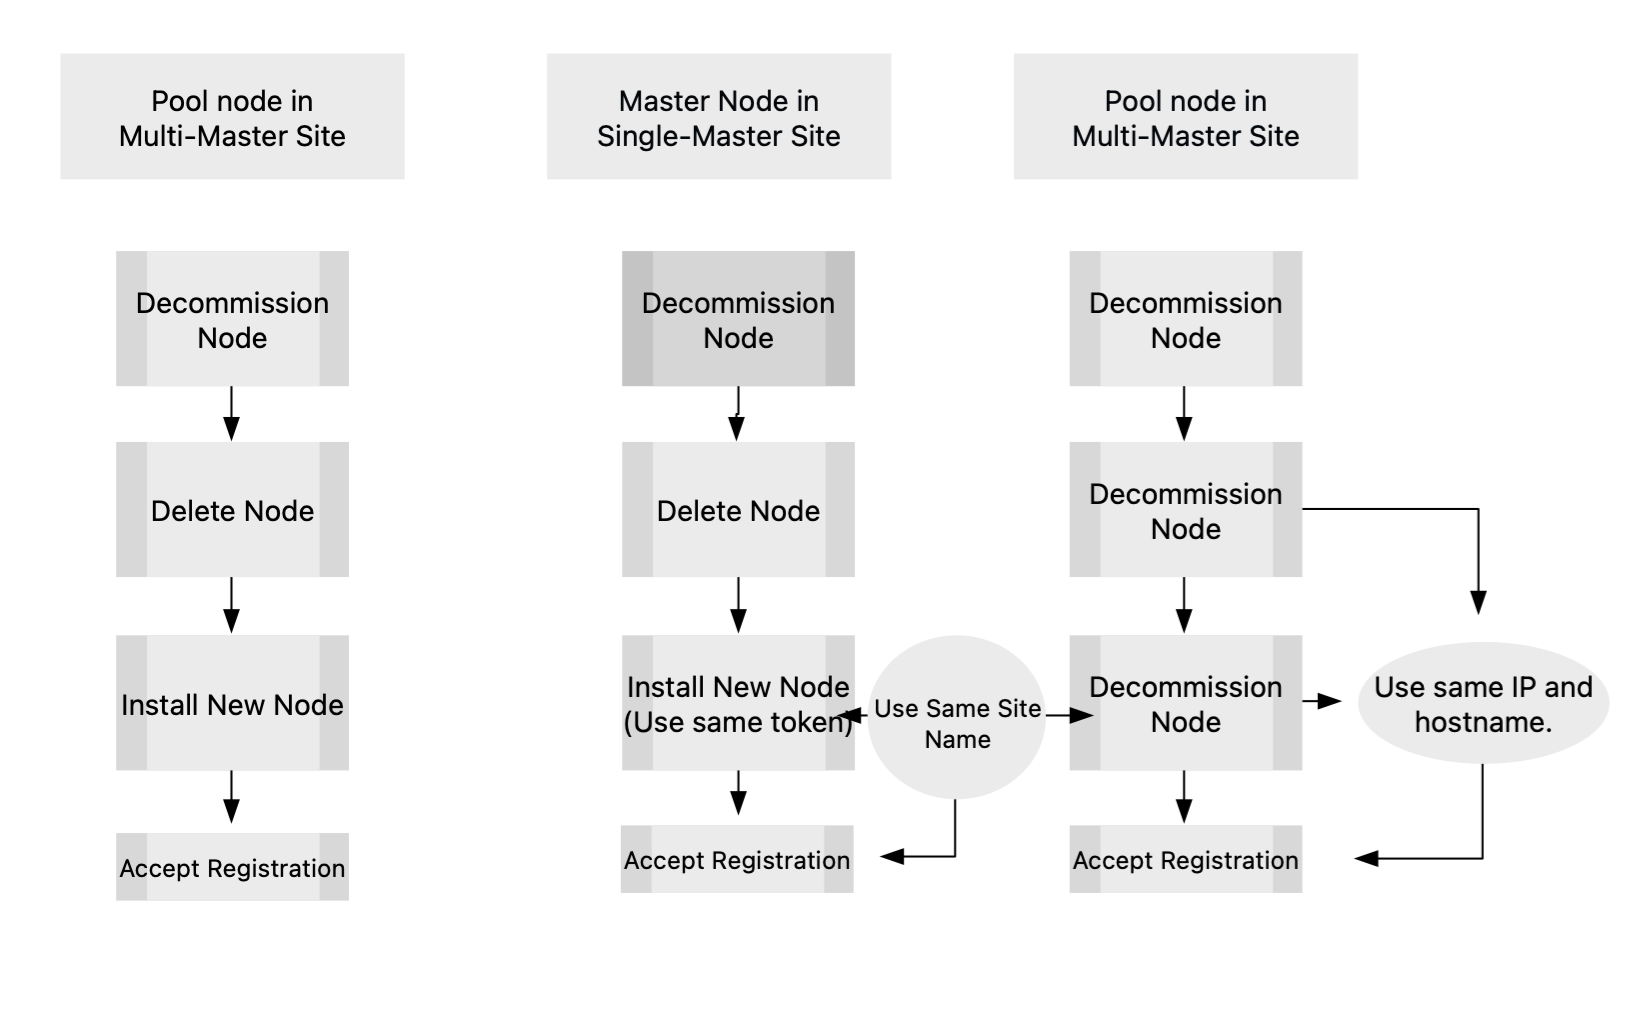
The following figure shows the sequence of steps in replacing a pool node and a control node.

Figure: Node Replacement Workflow
Configuration Sequence
Node replacement for pool or control node includes performing the following sequence of actions:
| Phase | Description |
|---|---|
| Remove Node | Removal of Node includes powering off and handling physical connections if it is a hardware node. |
| Install Node | Replacing a node requires installing another Distributed Cloud Node on the same site. |
| Update the Node | Add the replaced node to the existing cluster. |
Note: Procedure to replace pool node is different to that of control node. However, the sequence of actions is same.
Replace Pool Node in a Multi-Node Site
Perform the following steps to replace a pool node.
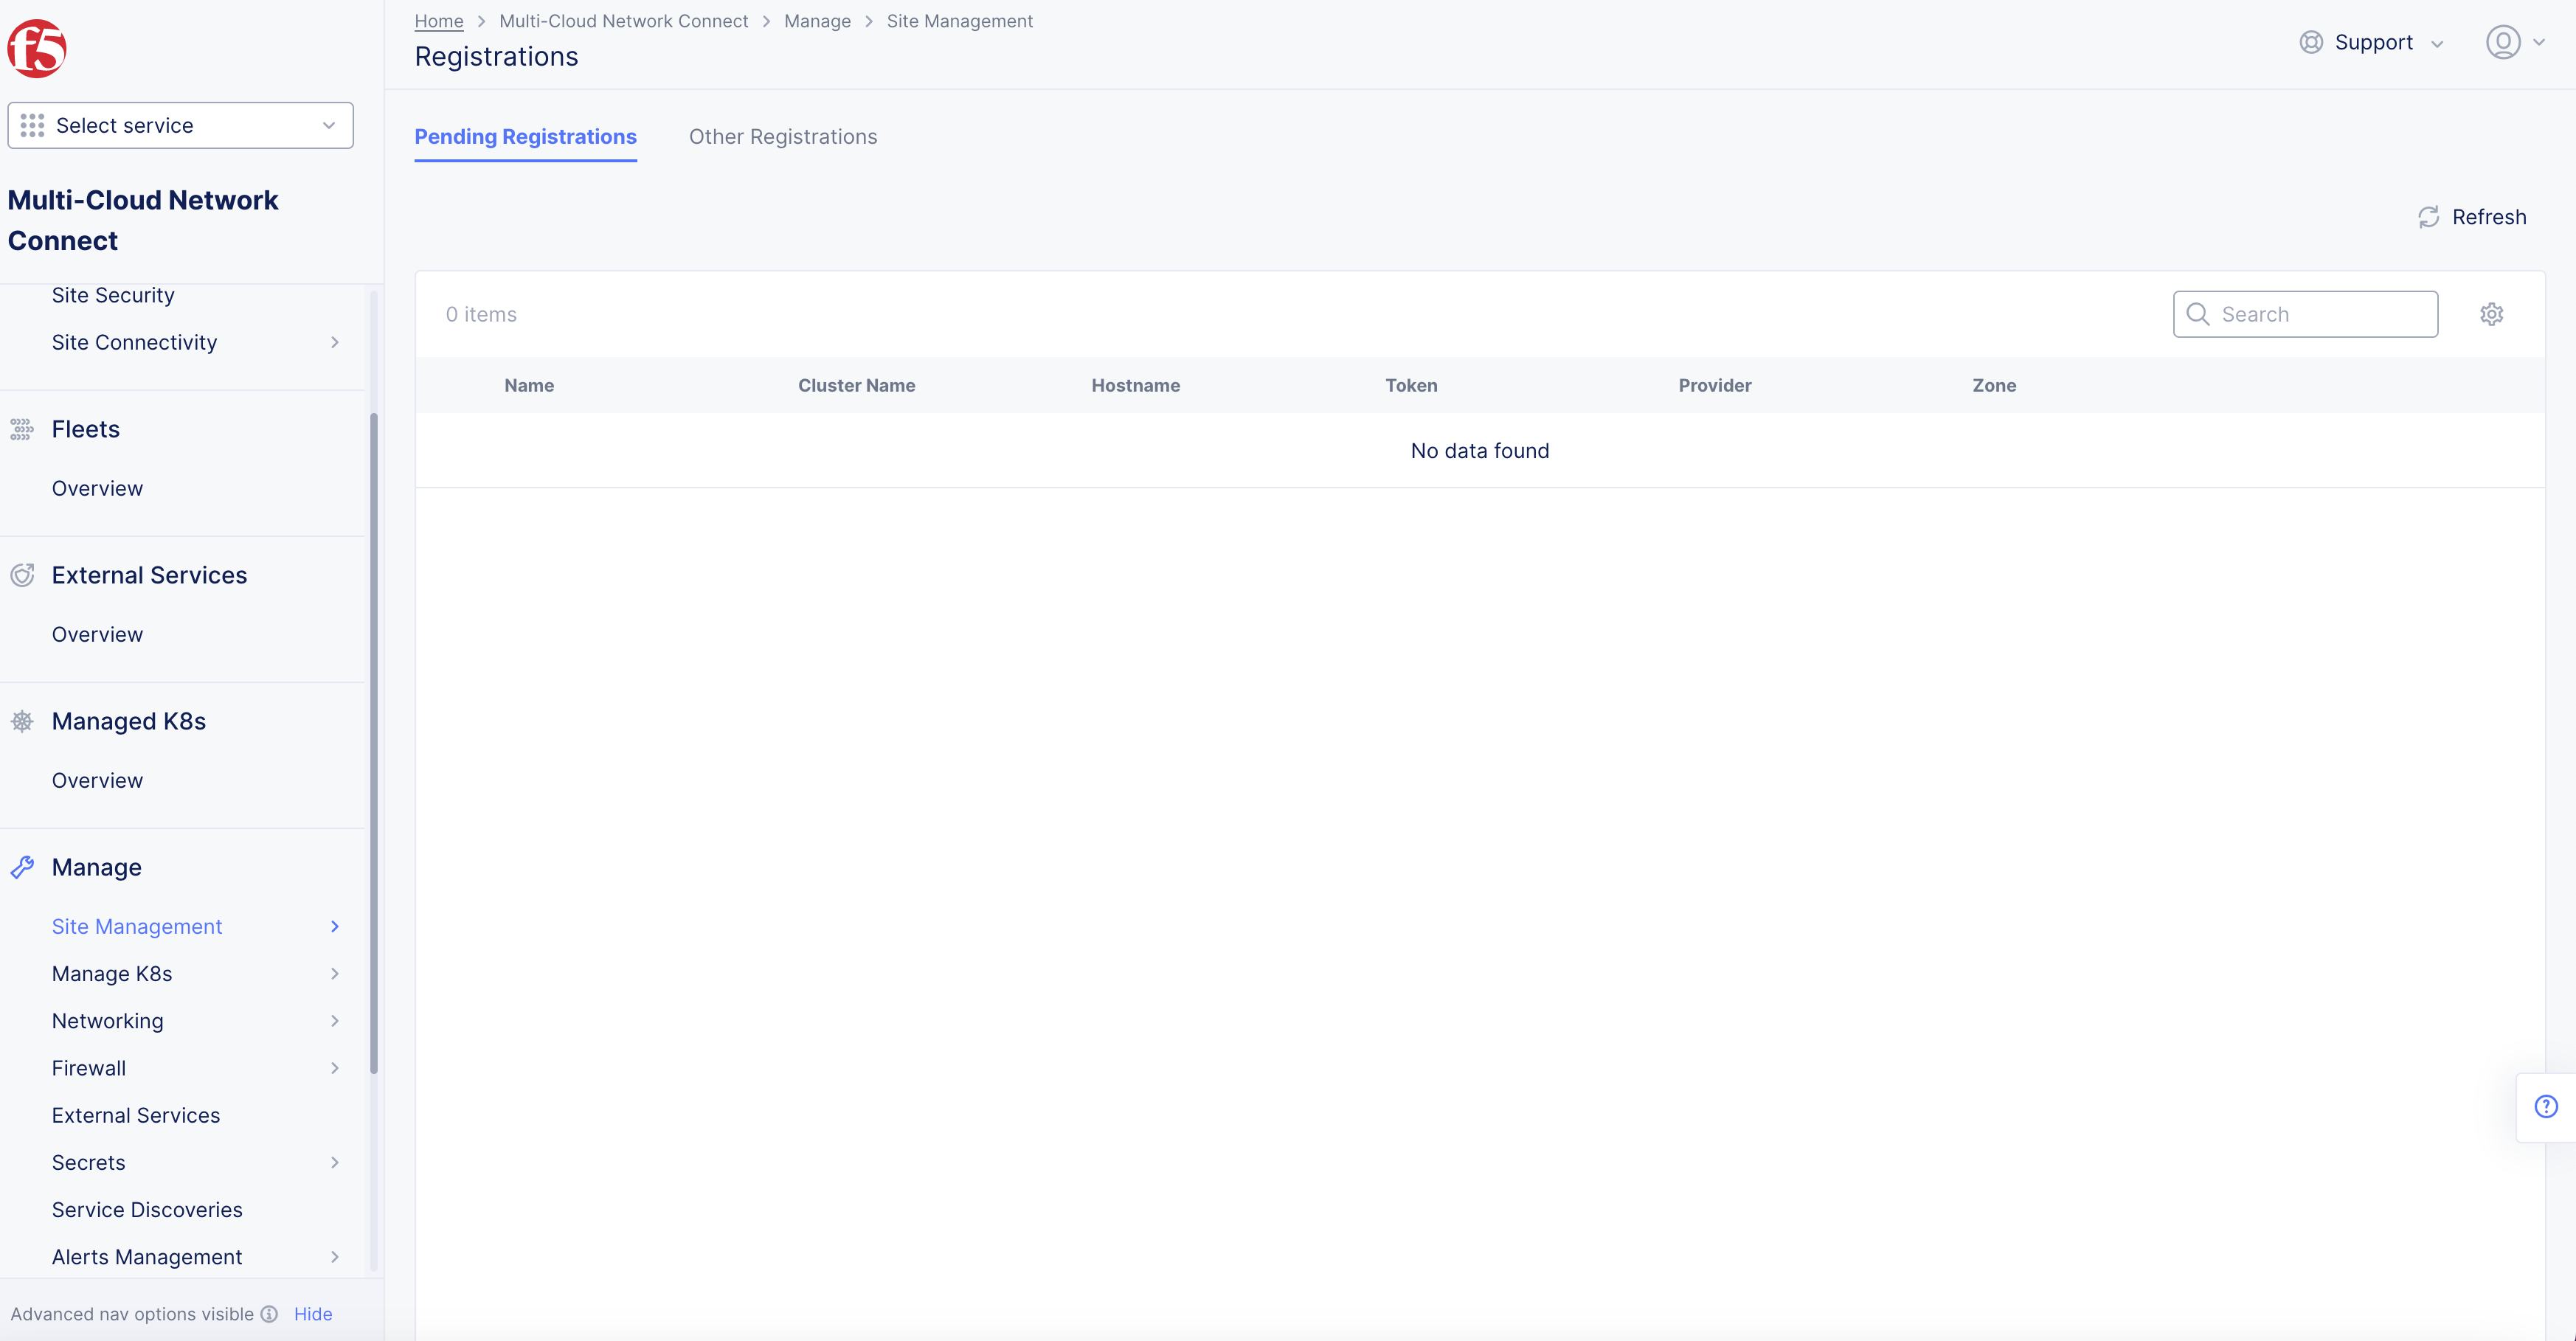
Step 1: Navigate to the registrations page.
-
Select the
Multi-Cloud Network Connectworkspace. -
Navigate to
Manage>Site Management>Registrations.

Figure: F5 Distributed Cloud Home Page
Step 2: Decommission the node to be replaced.
-
Select
Other Registrationsoption at top ofRegistrationspage. -
Find
Cluster Namefor pool node. -
Select
...inActionscolumn. -
Select
Decommissionoption for pool node. -
Select
Decommissionin pop-up confirmation window.

Figure: De-register the Node
Note: User should wait until registration is deleted (it is first RETIRED and then deleted from the list of registration).
Step 3: Delete the pool node from your public cloud location or enterprise locations per your setup.
Note: In the case of physical hardware, you may have to power-off the node as part of decommissioning.
Note: You can also use Distributed Cloud terraform to destroy the node. See the Destroy chapter for Azure or AWS in the create site documents.
Step 4: Install the replacement node.
-
Install another Distributed Cloud Node depending on the type of your setup.
-
Once the installation is complete, accept the registration from the console.
Note: During registration, ensure that the cluster name and size are same as that of the other nodes in the cluster. Also, ensure that the same image is used in case of certified hardware.
Replace Control Node in a Single-Node Site
Perform the following steps to replace a control node in a single-node site.
Note: Same IP and hostname must be used even in single master scenario when any pool node is present.
Step 1: Navigate to the Site List page.
-
Select the
Multi-Cloud Network Connectworkspace. -
Navigate to
Sites>Site List.
Step 2: Reregister your control node.
- Select your site from the displayed list.
Note: Control Node is a physical non-cloud site. Registration is done automatically by system.
- Select
...>ReregisterandReregisteragain in the confirmation window.
Note: Confirm that the site shows up with the
WAITINGNODESstate. It can take more than 10 minutes per node to do finish.
Step 3: Shutdown and delete the node.
Note: Depending on the type of node, physical decommissioning may be required.
Step 4: Install the replacement control node.
-
Use the same image as that of the replaced node in case of certified hardware.
-
Configure the same site token as that of the node that is decommissioned.
-
Set the site name the same as that of the node that is decommissioned.
Step 5: Complete site registration.
Log in to the F5 Distributed Cloud Console with your tenant credentials to complete site registration of the new node.
Replace Control Node in a Multi-Node Site
Perform the following steps to replace a control node in a multi-node site.
Step 1: Shutdown the control node you want to replace.
Note: Depending on the type of node, you may need to additionally perform physical activities such as hardware removal.
Step 2: Navigate to the registrations page.
-
Select the
Multi-Cloud Network Connectworkspace. -
Navigate to
Manage>Site Management>Registrations.
Step 3: Decommission the control node.
-
Select
Other Registrationsoption at top ofRegistrationspage. -
Find
Cluster Namefor pool node. -
Select
...inActionscolumn. -
Select
Decommissionoption for pool node. -
Select
Decommissionin pop-up confirmation window.
Note: Confirm that the de-registered node shows up with the
RETIREDstate in theOther Registrationstab.
Step 4: Install the replacement control node.
-
Use the same image as that of the replaced node in case of certified hardware.
-
Configure the same site token as that of the node that is decommissioned.
-
User can use DHCP with static IP address assignment (by mac address or duid).
-
Set the cluster name and hostname to the same as that of the replaced node.
Step 5: Complete site registration.
Log into Console with your tenant credentials to complete site registration of the new node.
Concepts
- System Overview
- Core Concepts
- Networking
- F5 Distributed Cloud - Customer Edge
- F5 Distributed Cloud Site