Manage Customer Edge Site
Objective
This guide provides instructions on how to manage an F5® Distributed Cloud Site in your cloud or edge location. A Distributed Cloud Site consists of one or more nodes. To learn more about sites, see Distributed Cloud Site.
Using the instructions provided in this guide, you can edit the Site properties, perform scaling, perform upgrades, or remove the Site.
Note: For multi-node sites, the nodes will not be functional if the primary outside interface is down, and they are rebooted. They become functional only after the primary outside interface comes up.
Prerequisites
-
An F5 Distributed Cloud Services Account is required. If you do not have an account, see Getting Started with Console.
-
Allow traffic from and to the Distributed Cloud public IP addresses to your network and allowlist related domain names. See F5 Customer Edge IP Address and Domain Reference for Firewall or Proxy Settings guide for the list of IP addresses and domain names.
-
Confirm your Site meets the minimum resources required. For a full listing of the resources required, see the Customer Edge Site Sizing Reference guide. All the nodes in a given CE Site should have the same resources regarding the compute, memory, and disk storage. When deploying in cloud environments, these nodes should use the same instance flavor.
-
For more information regarding sites, see Site Management.
Edit Site
You can edit the Site configuration by performing the following:
Important: Cloud Site configurations can only be edited from the Site Management menu. You must navigate to Manage > Site Management to select your respective cloud Site.
Step 1: Navigate to Site and open the edit form.
This example uses AWS TGW Sites.
- Select the Multi-Cloud Network Connect workspace.
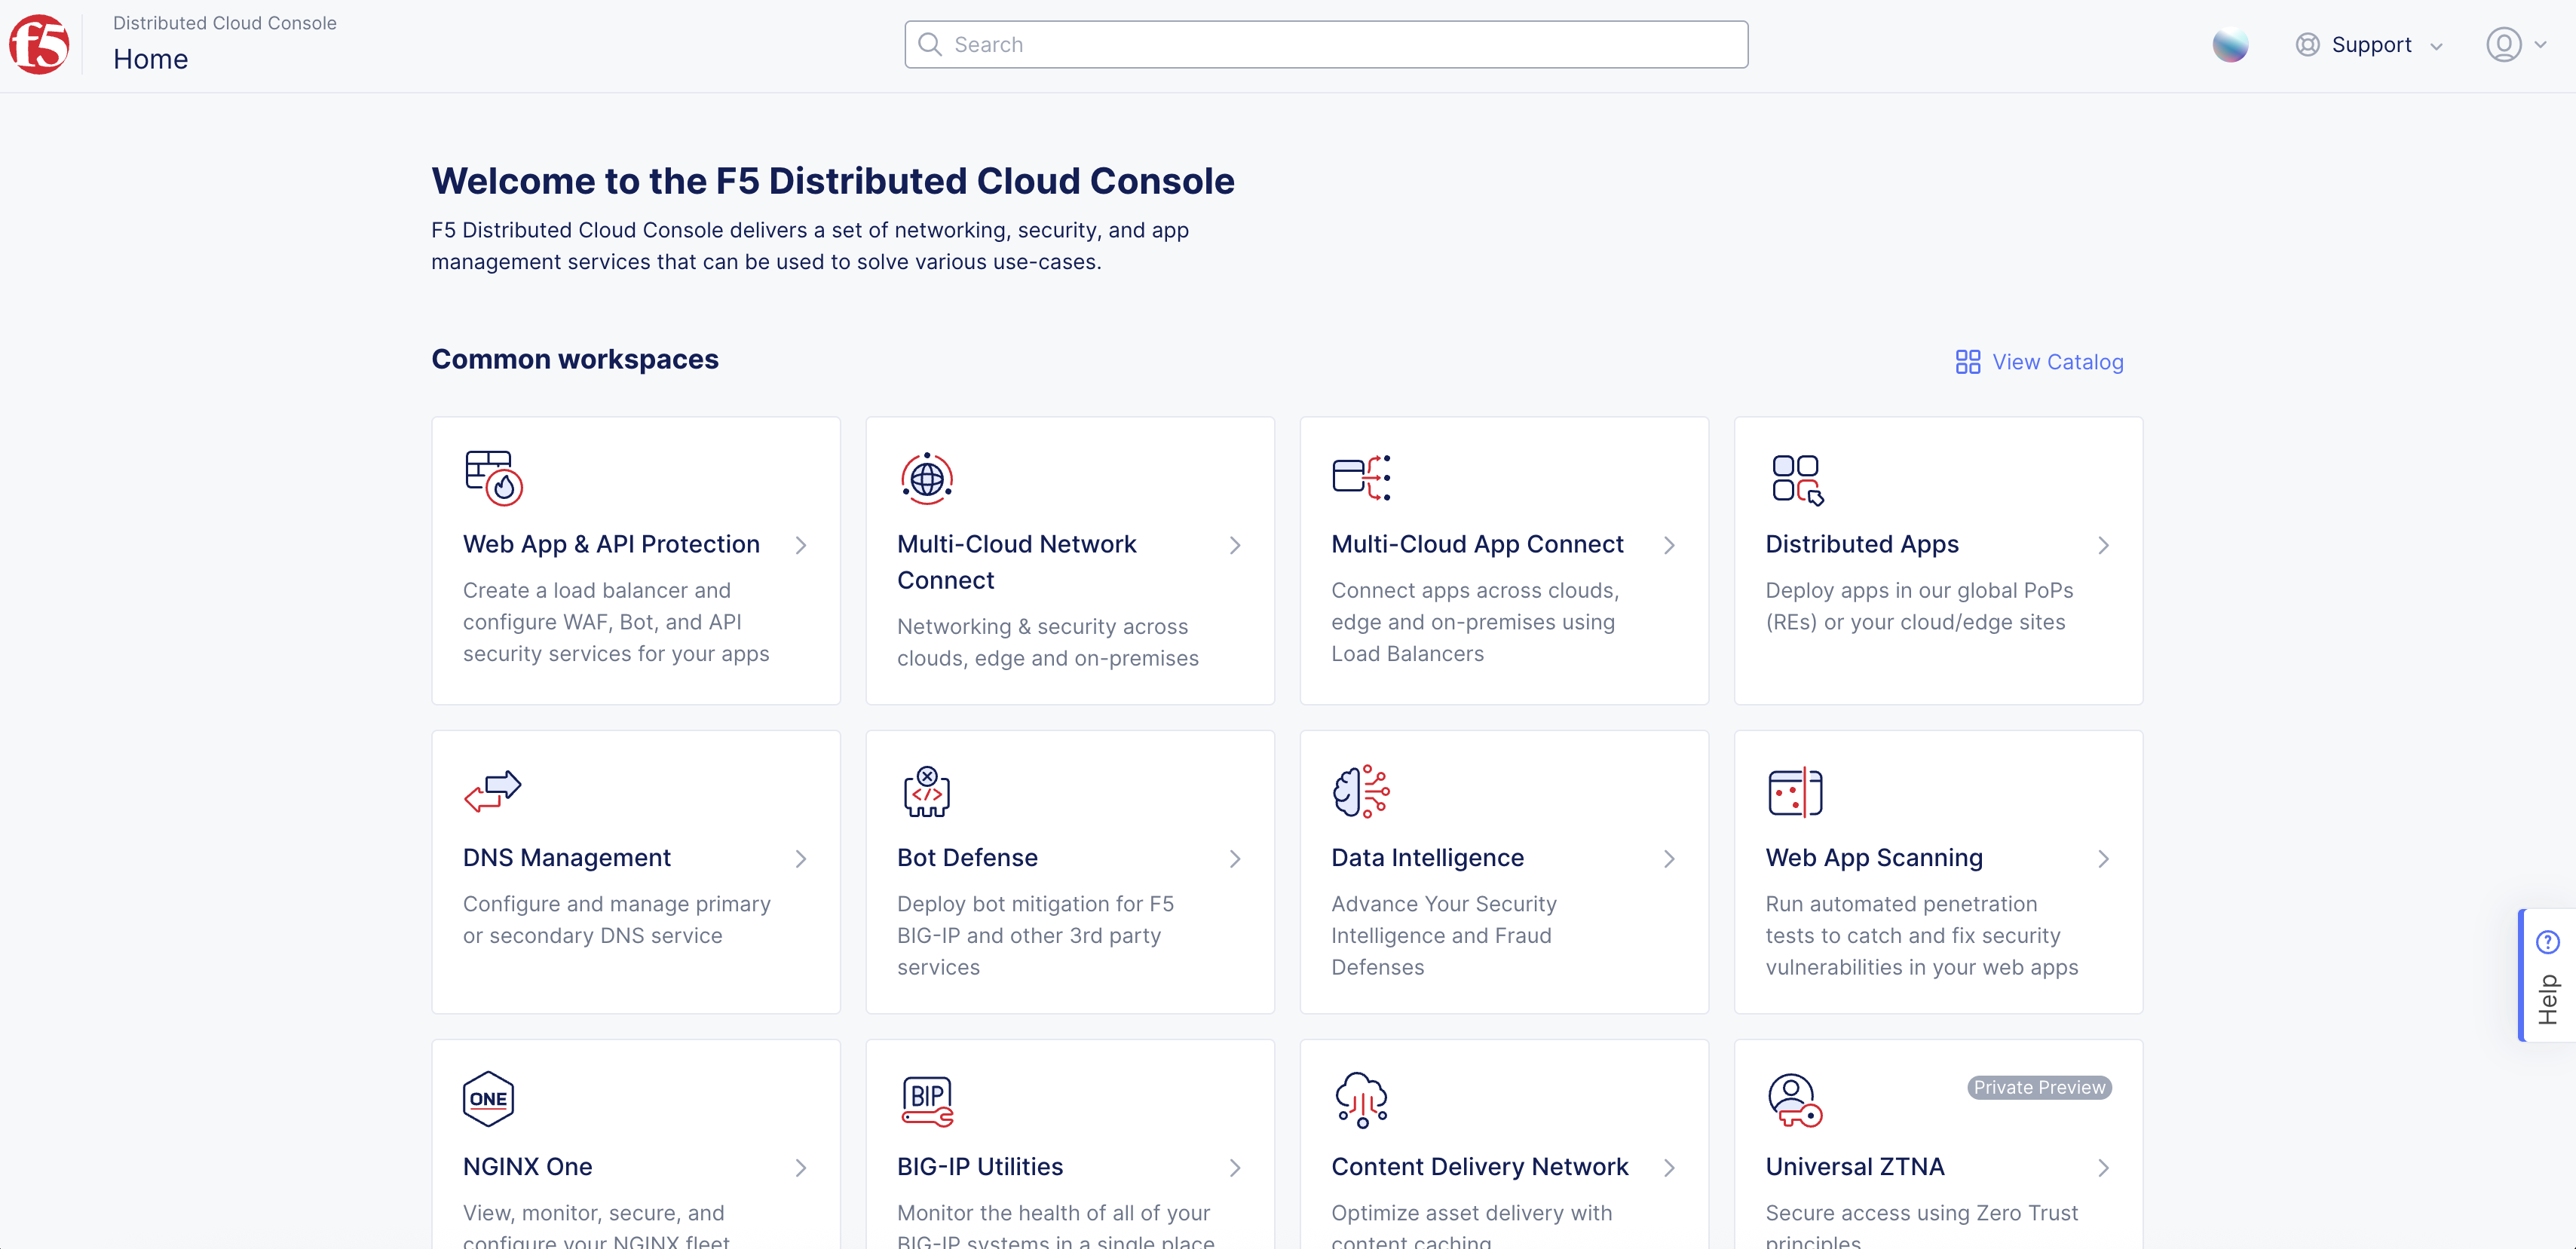
Figure: F5 Distributed Cloud Homepage
-
Select Manage > Site Management.
-
Select type of Site you want to edit.
-
Select ... > Manage Configuration to view your Site's configuration.
-
Select Edit Configuration in upper right corner to edit its configuration.
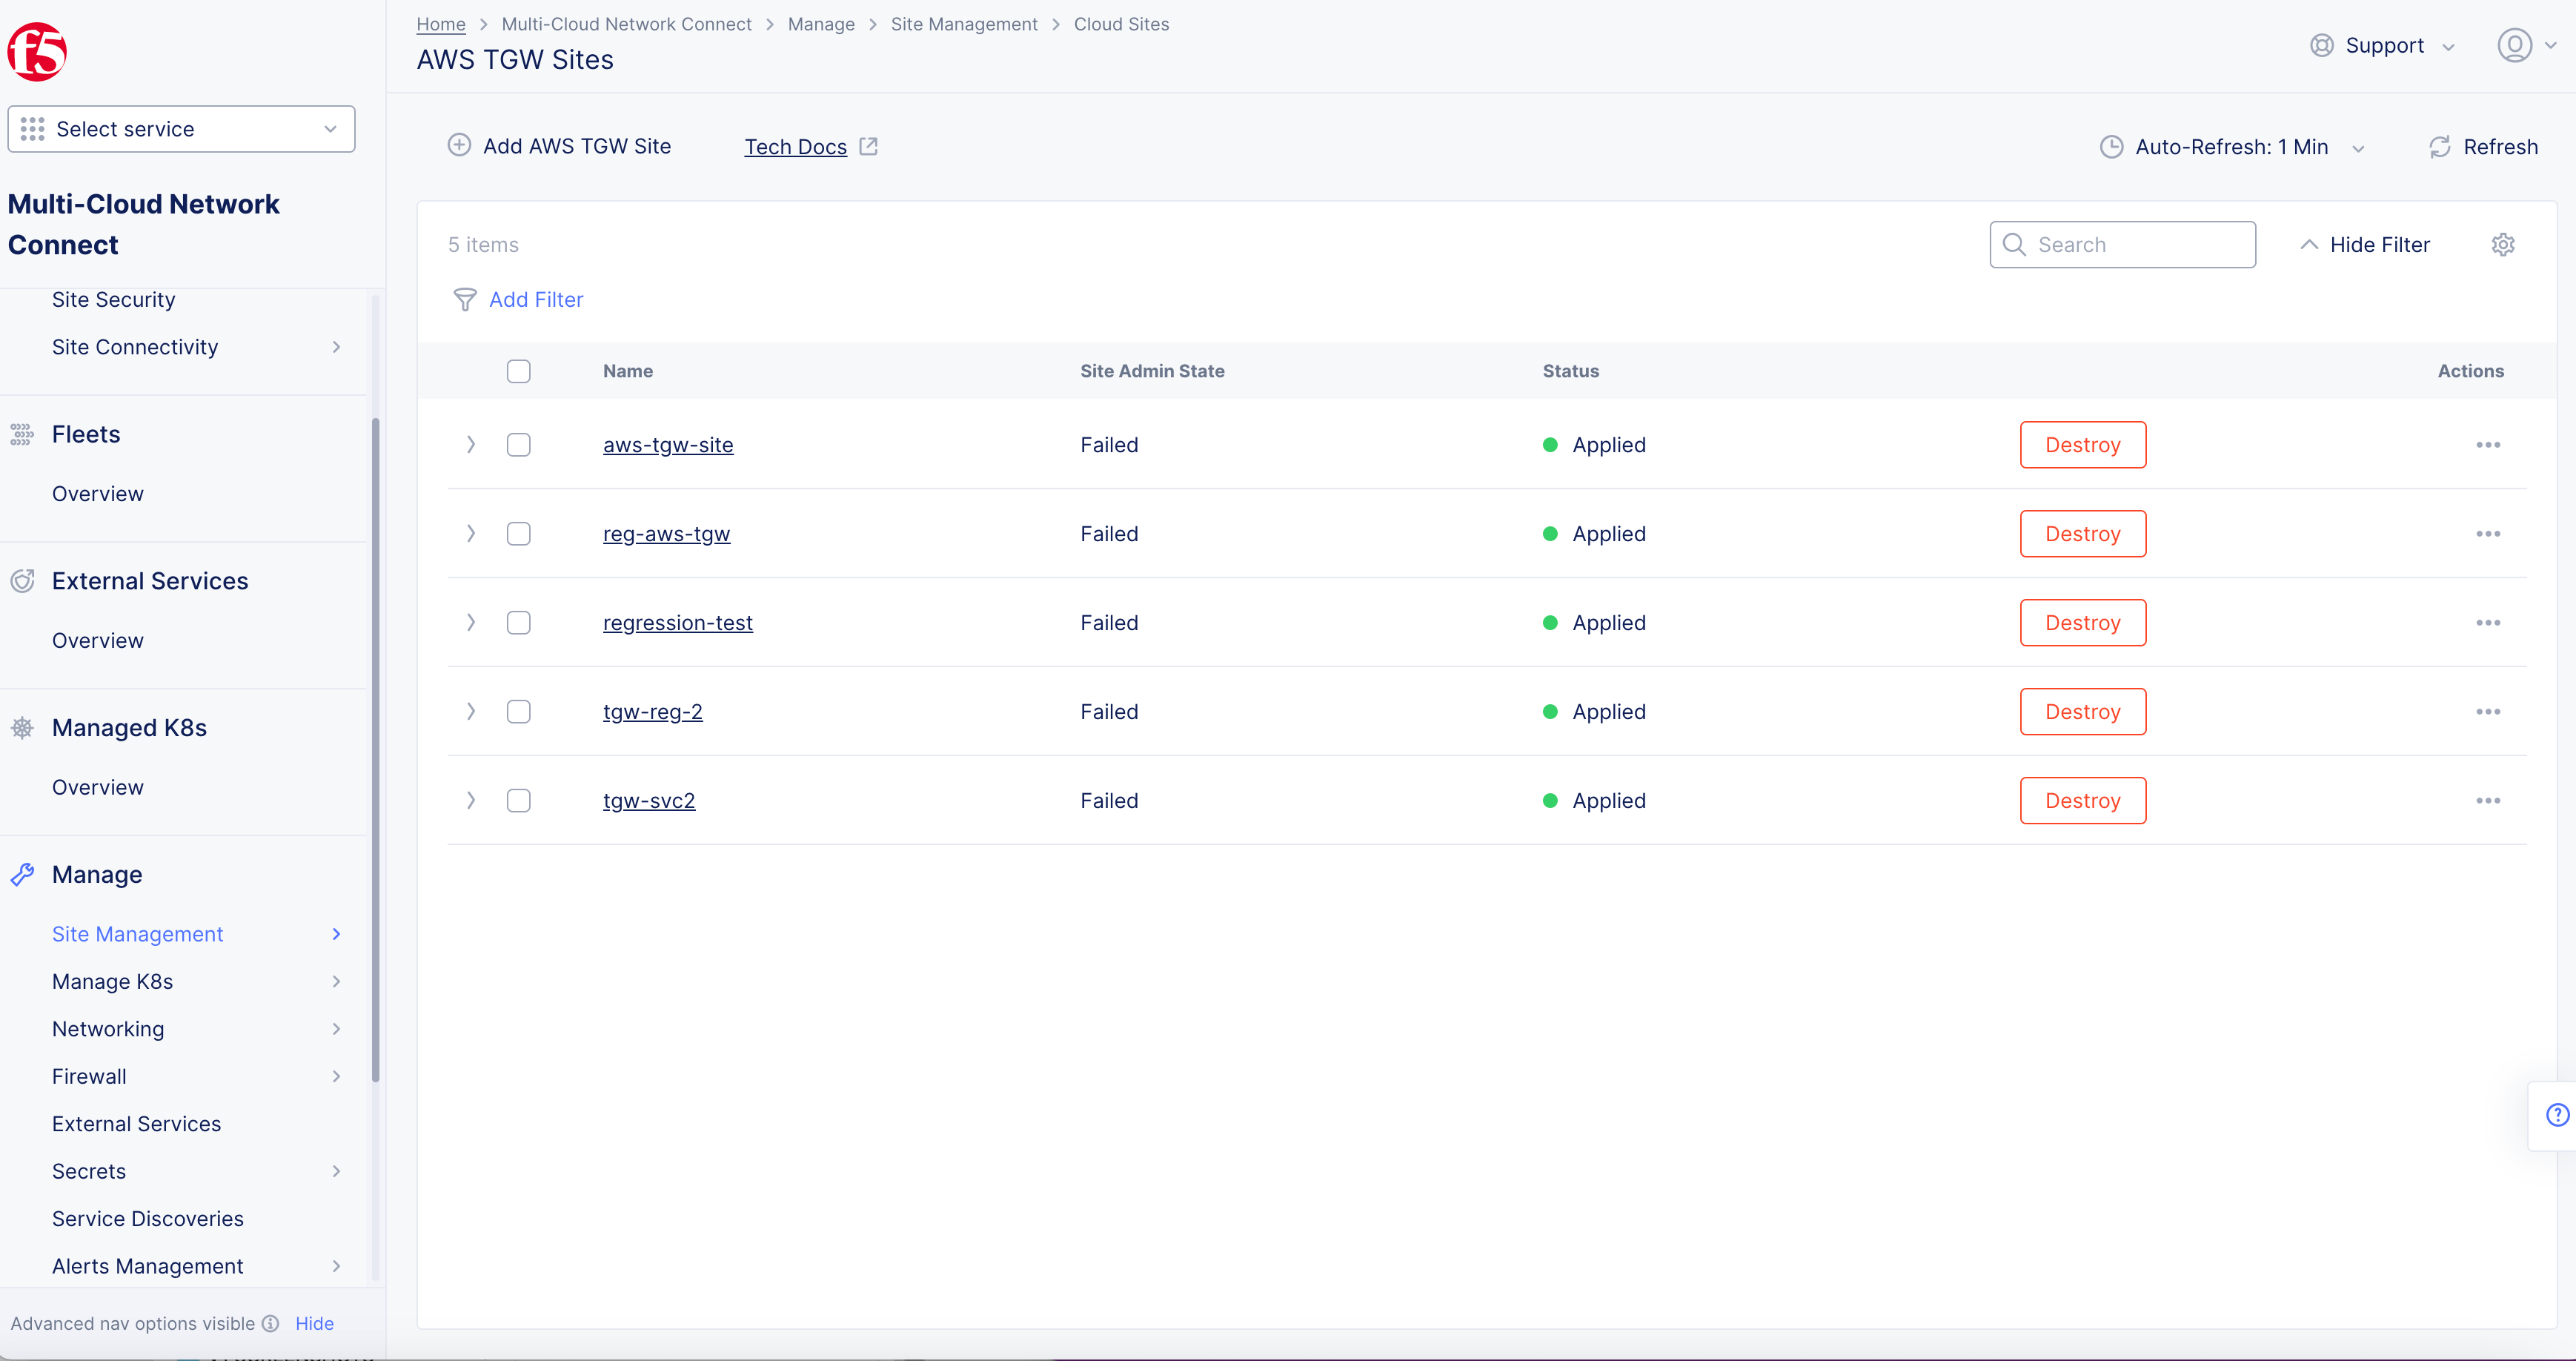
Figure: Edit Site
Step 2: Edit the Site and apply the changes.
-
Set Site configuration parameters according to your requirements.
-
If configuring the VIP addresses, choose from the reserved addresses. The system reserves addresses using the following mechanism of DHCP subnet prefix length (PL):
- Select Save AWS TGW Site.
Add or Remove Worker Nodes
You can configure scaling for your sites after registration. This example uses AWS TGW Sites.
Note: Scaling works on AWS and Azure cloud sites only. It does not work on GCP sites. For information on node replacement, see the Replace a Node in Site guide.
Step 1: Edit worker node selection.
-
Select the Multi-Cloud Network Connect workspace.
-
Select Manage > Site Management.
-
Select type of Site you want to edit.
-
Select ... > Manage Configuration to view your Site's configuration.
-
Select Edit Configuration in upper right corner to edit its configuration.
-
In the AWS Resources section, select the Edit Configuration link.
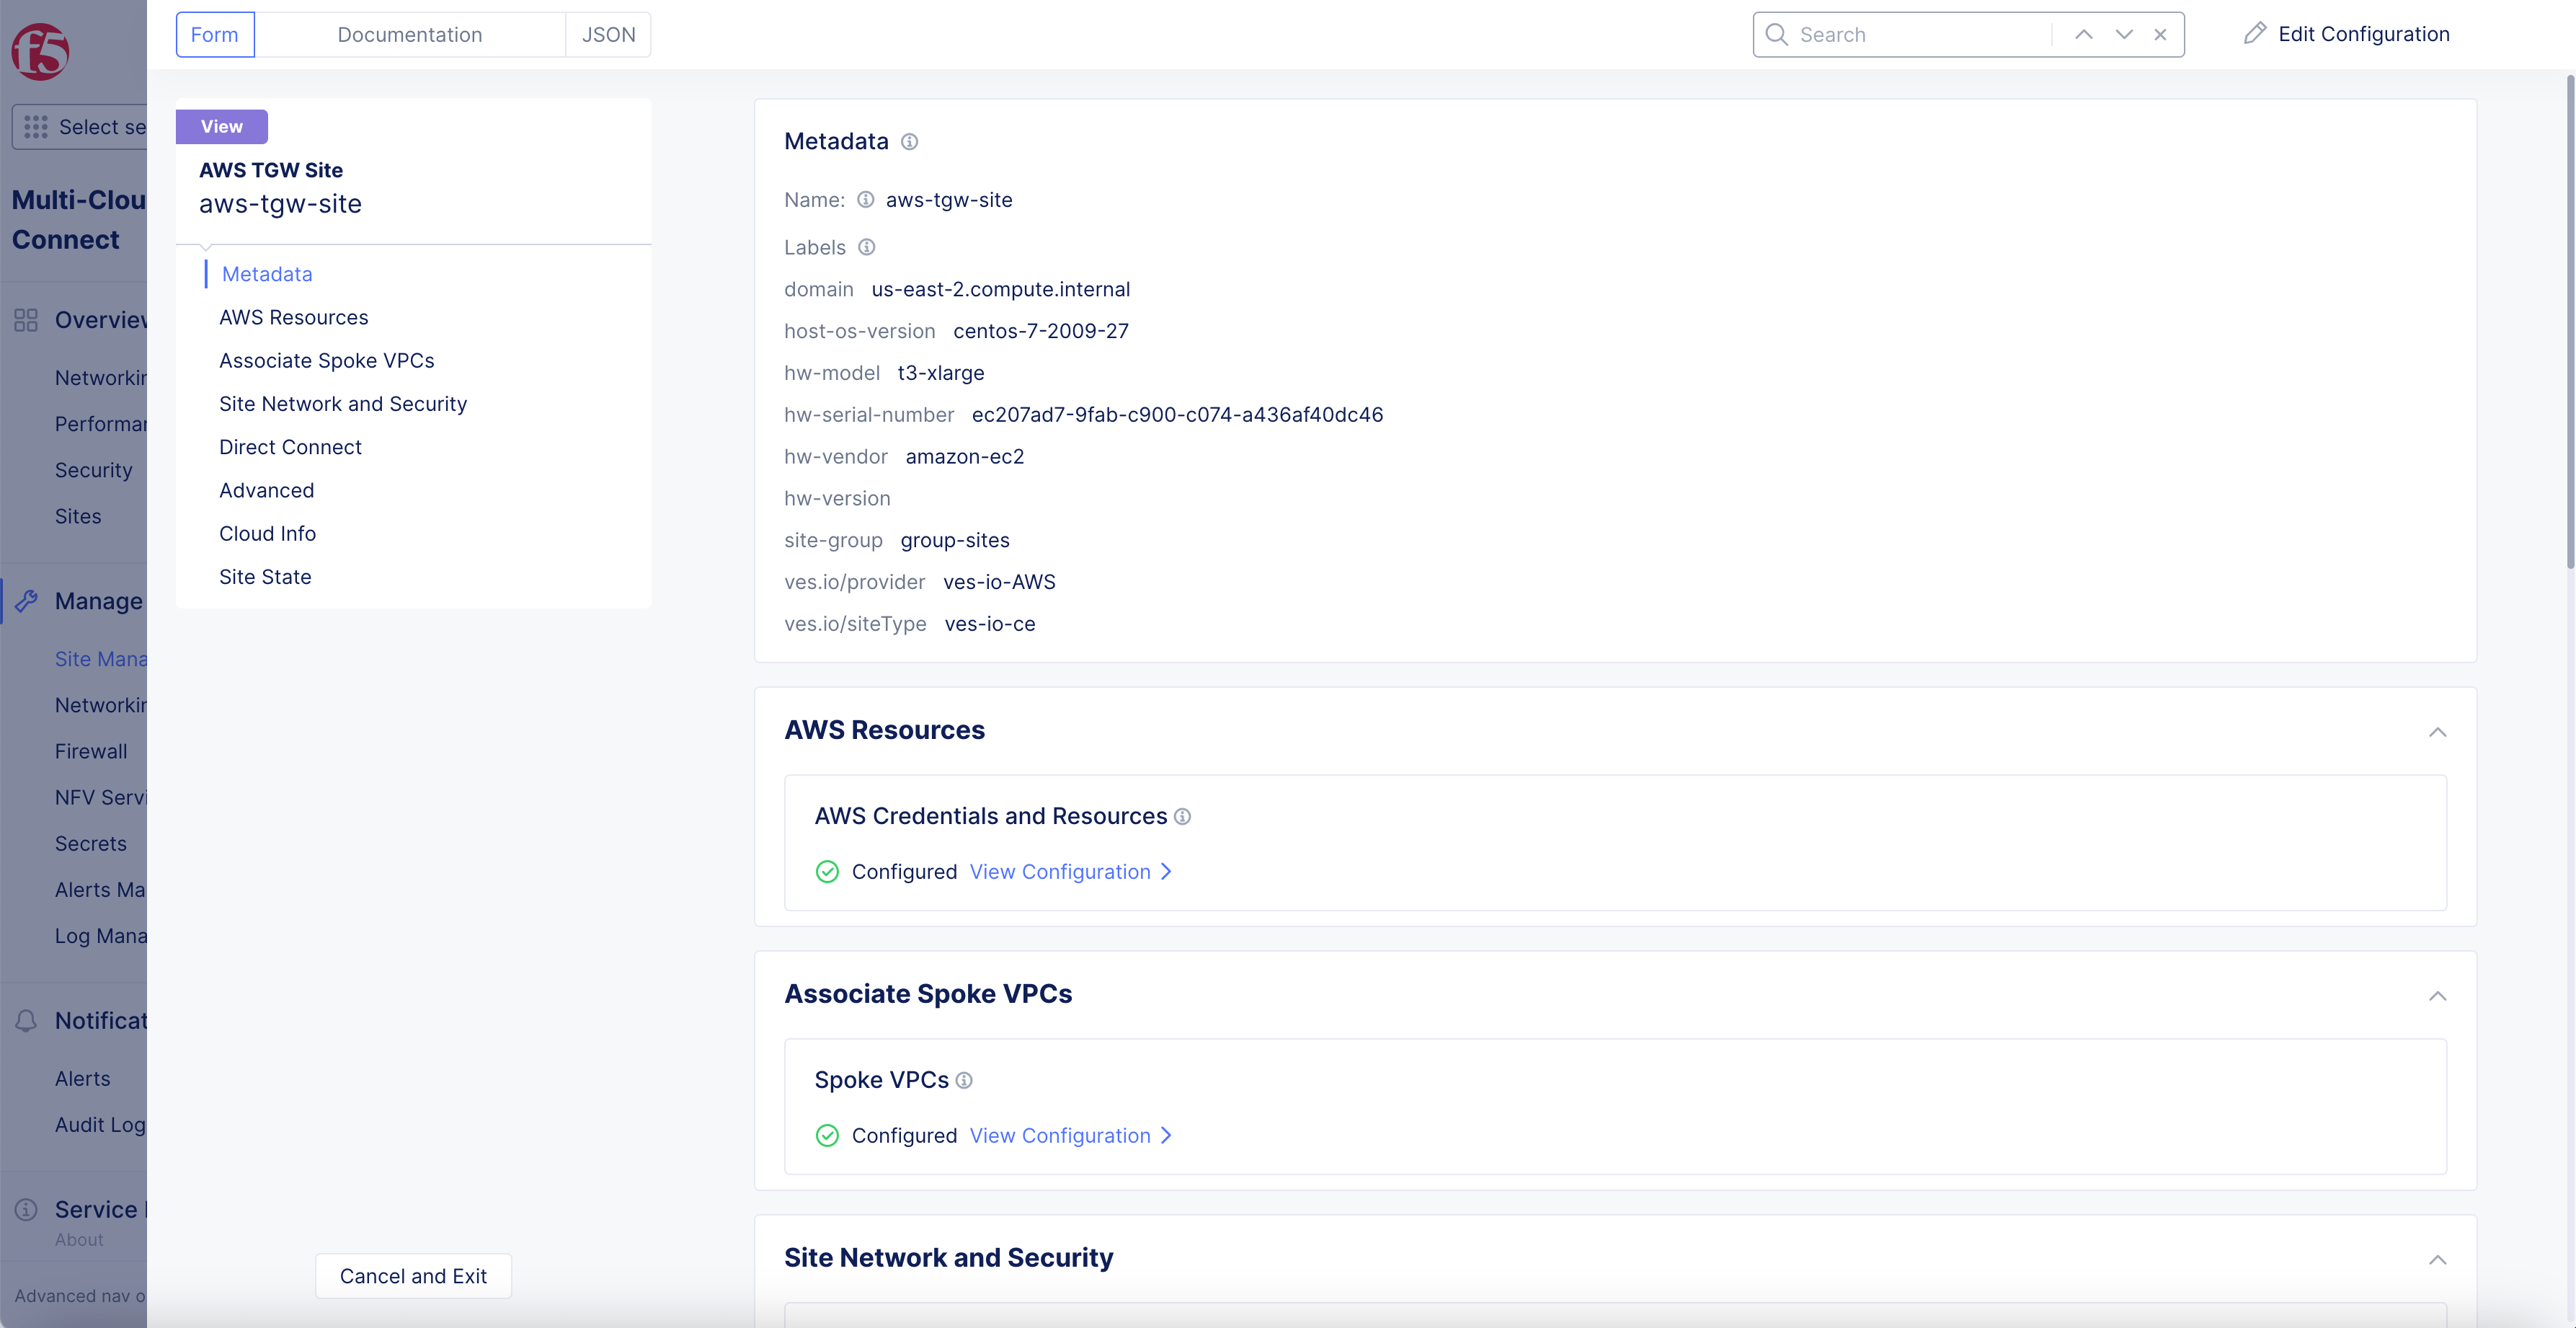
Figure: Site Configuration
-
Toggle Show Advanced Fields to expand the Worker Nodes section.
-
From the Desired Worker Nodes Selection drop-down menu, select from the following:
-
Desired Worker Nodes Per AZ: Enter a number.
-
Total Number of Worker Nodes for a Site: Enter a number.
-
No Worker Nodes: Default option.
-
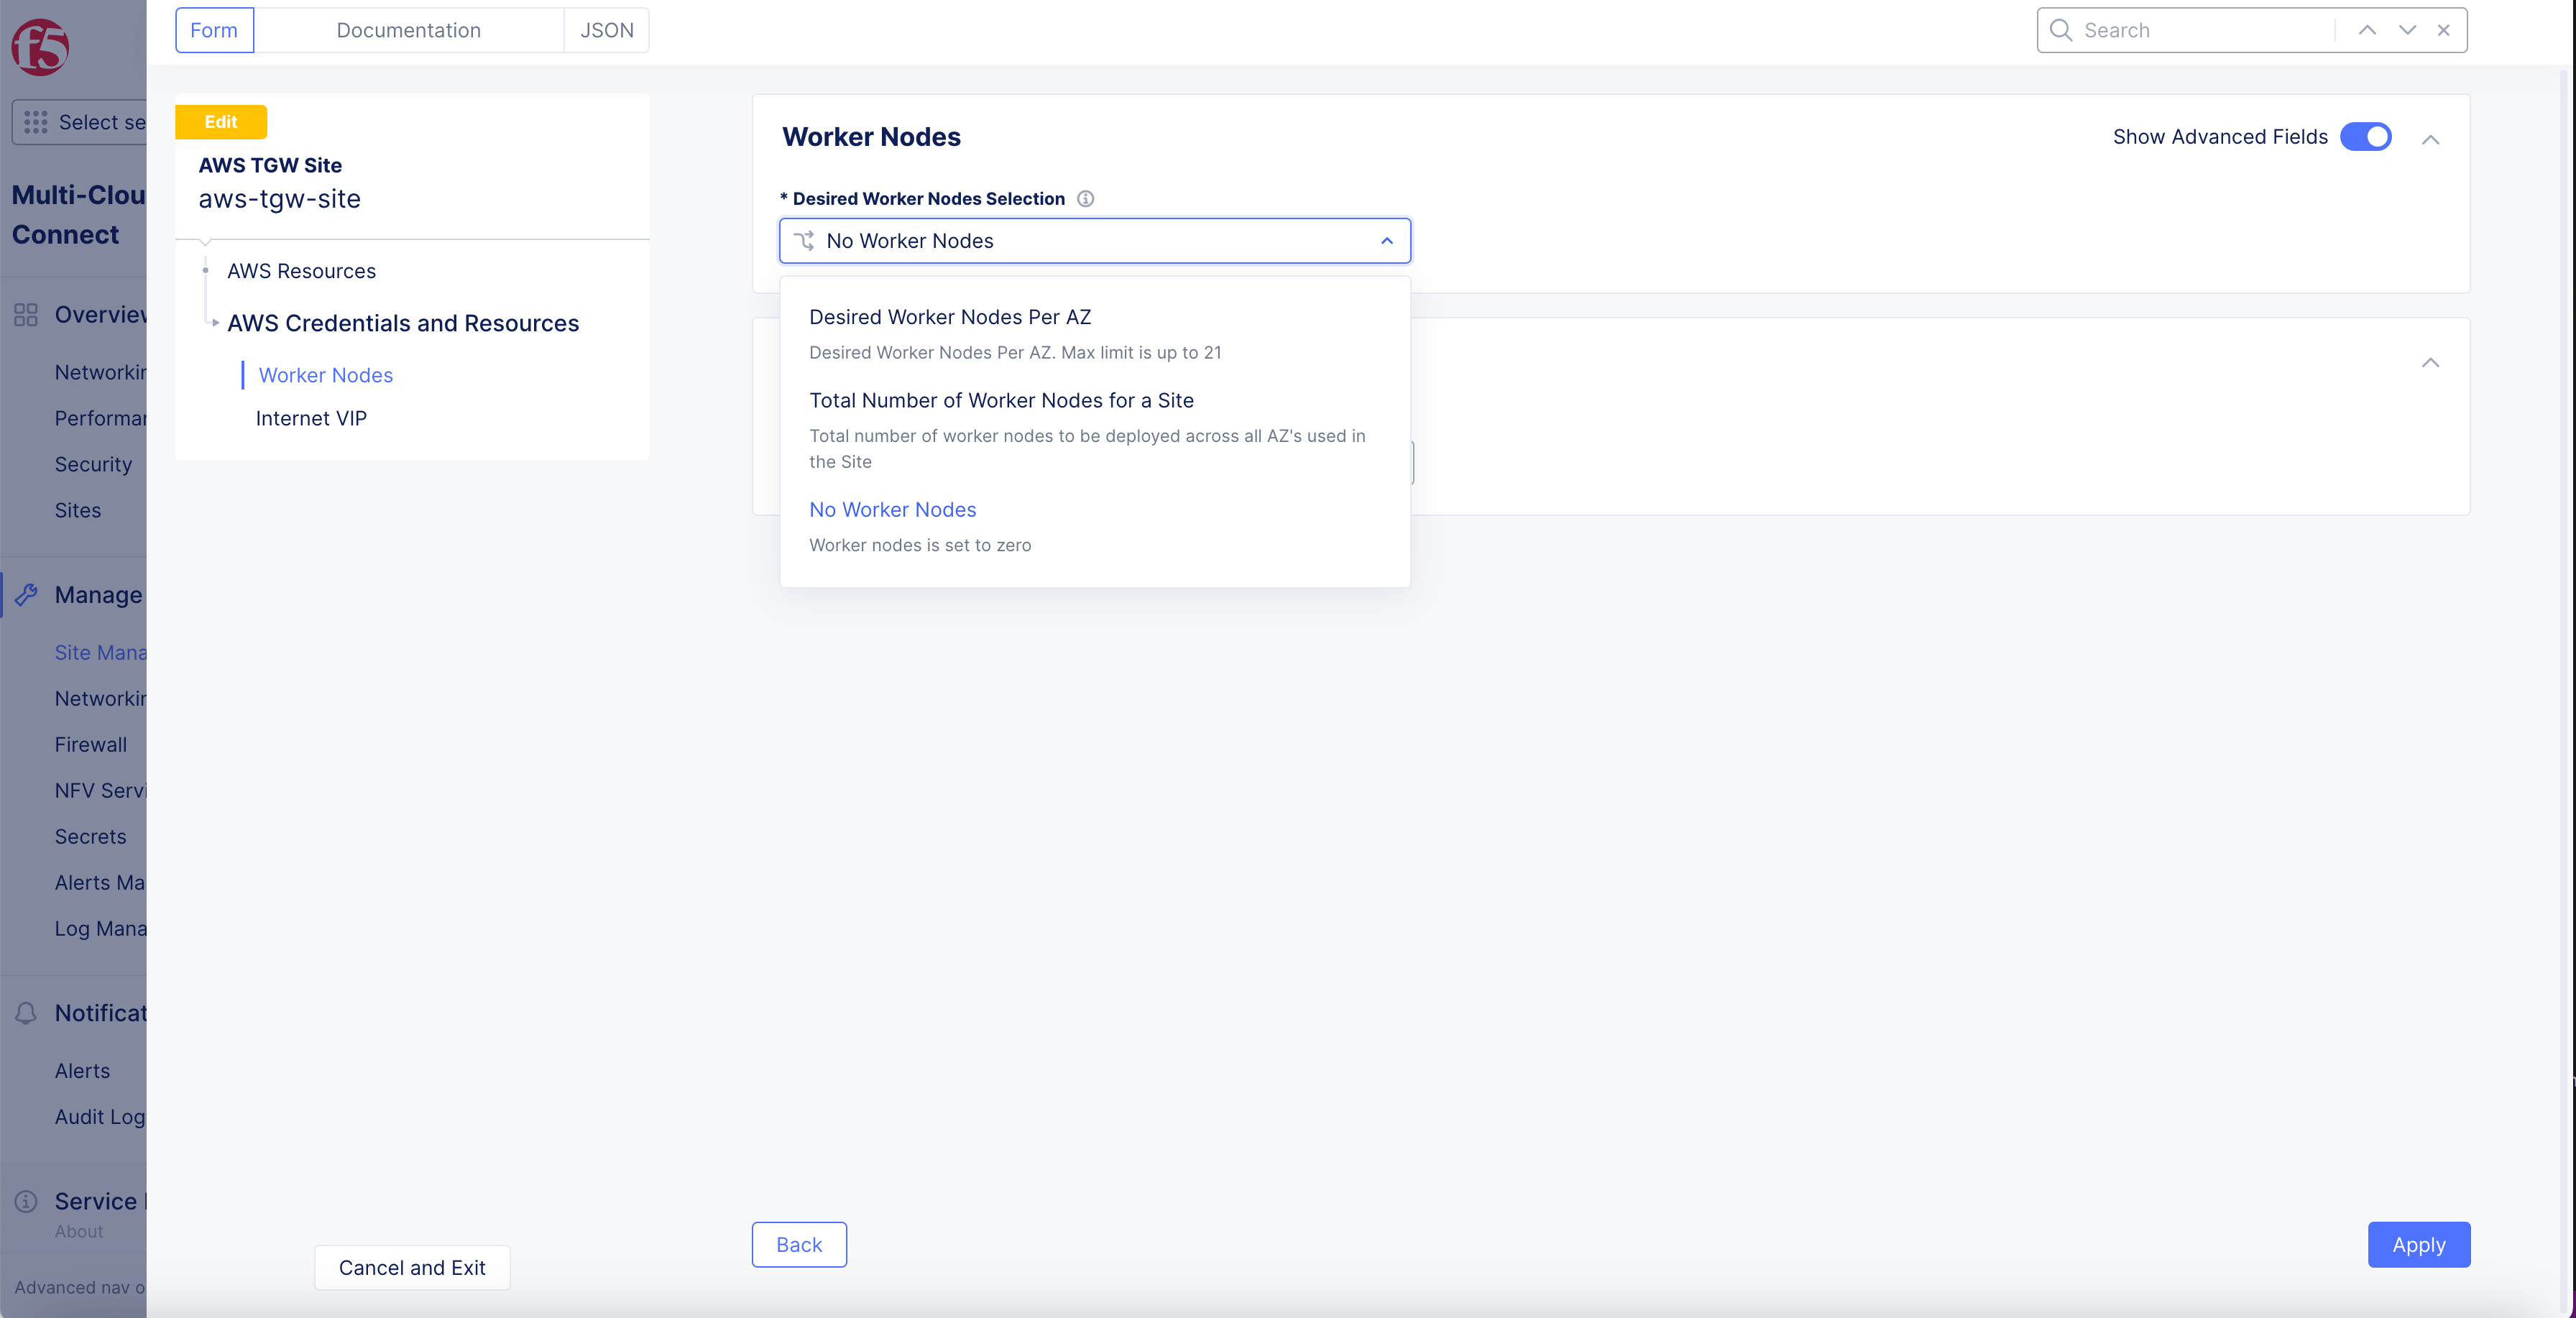
Figure: Desired Pool Count Setting
-
Select Apply.
-
Select Save AWS TGW Site.
Step 2: Perform registration for new pool nodes.
Individual nodes are not visible from the Site list for multi-node sites. However, you can check the nodes in the Other Registrations tab.
-
Select Manage > Site Management > Registrations.
-
Select the Pending Registrations tab.
-
Approve pool nodes.
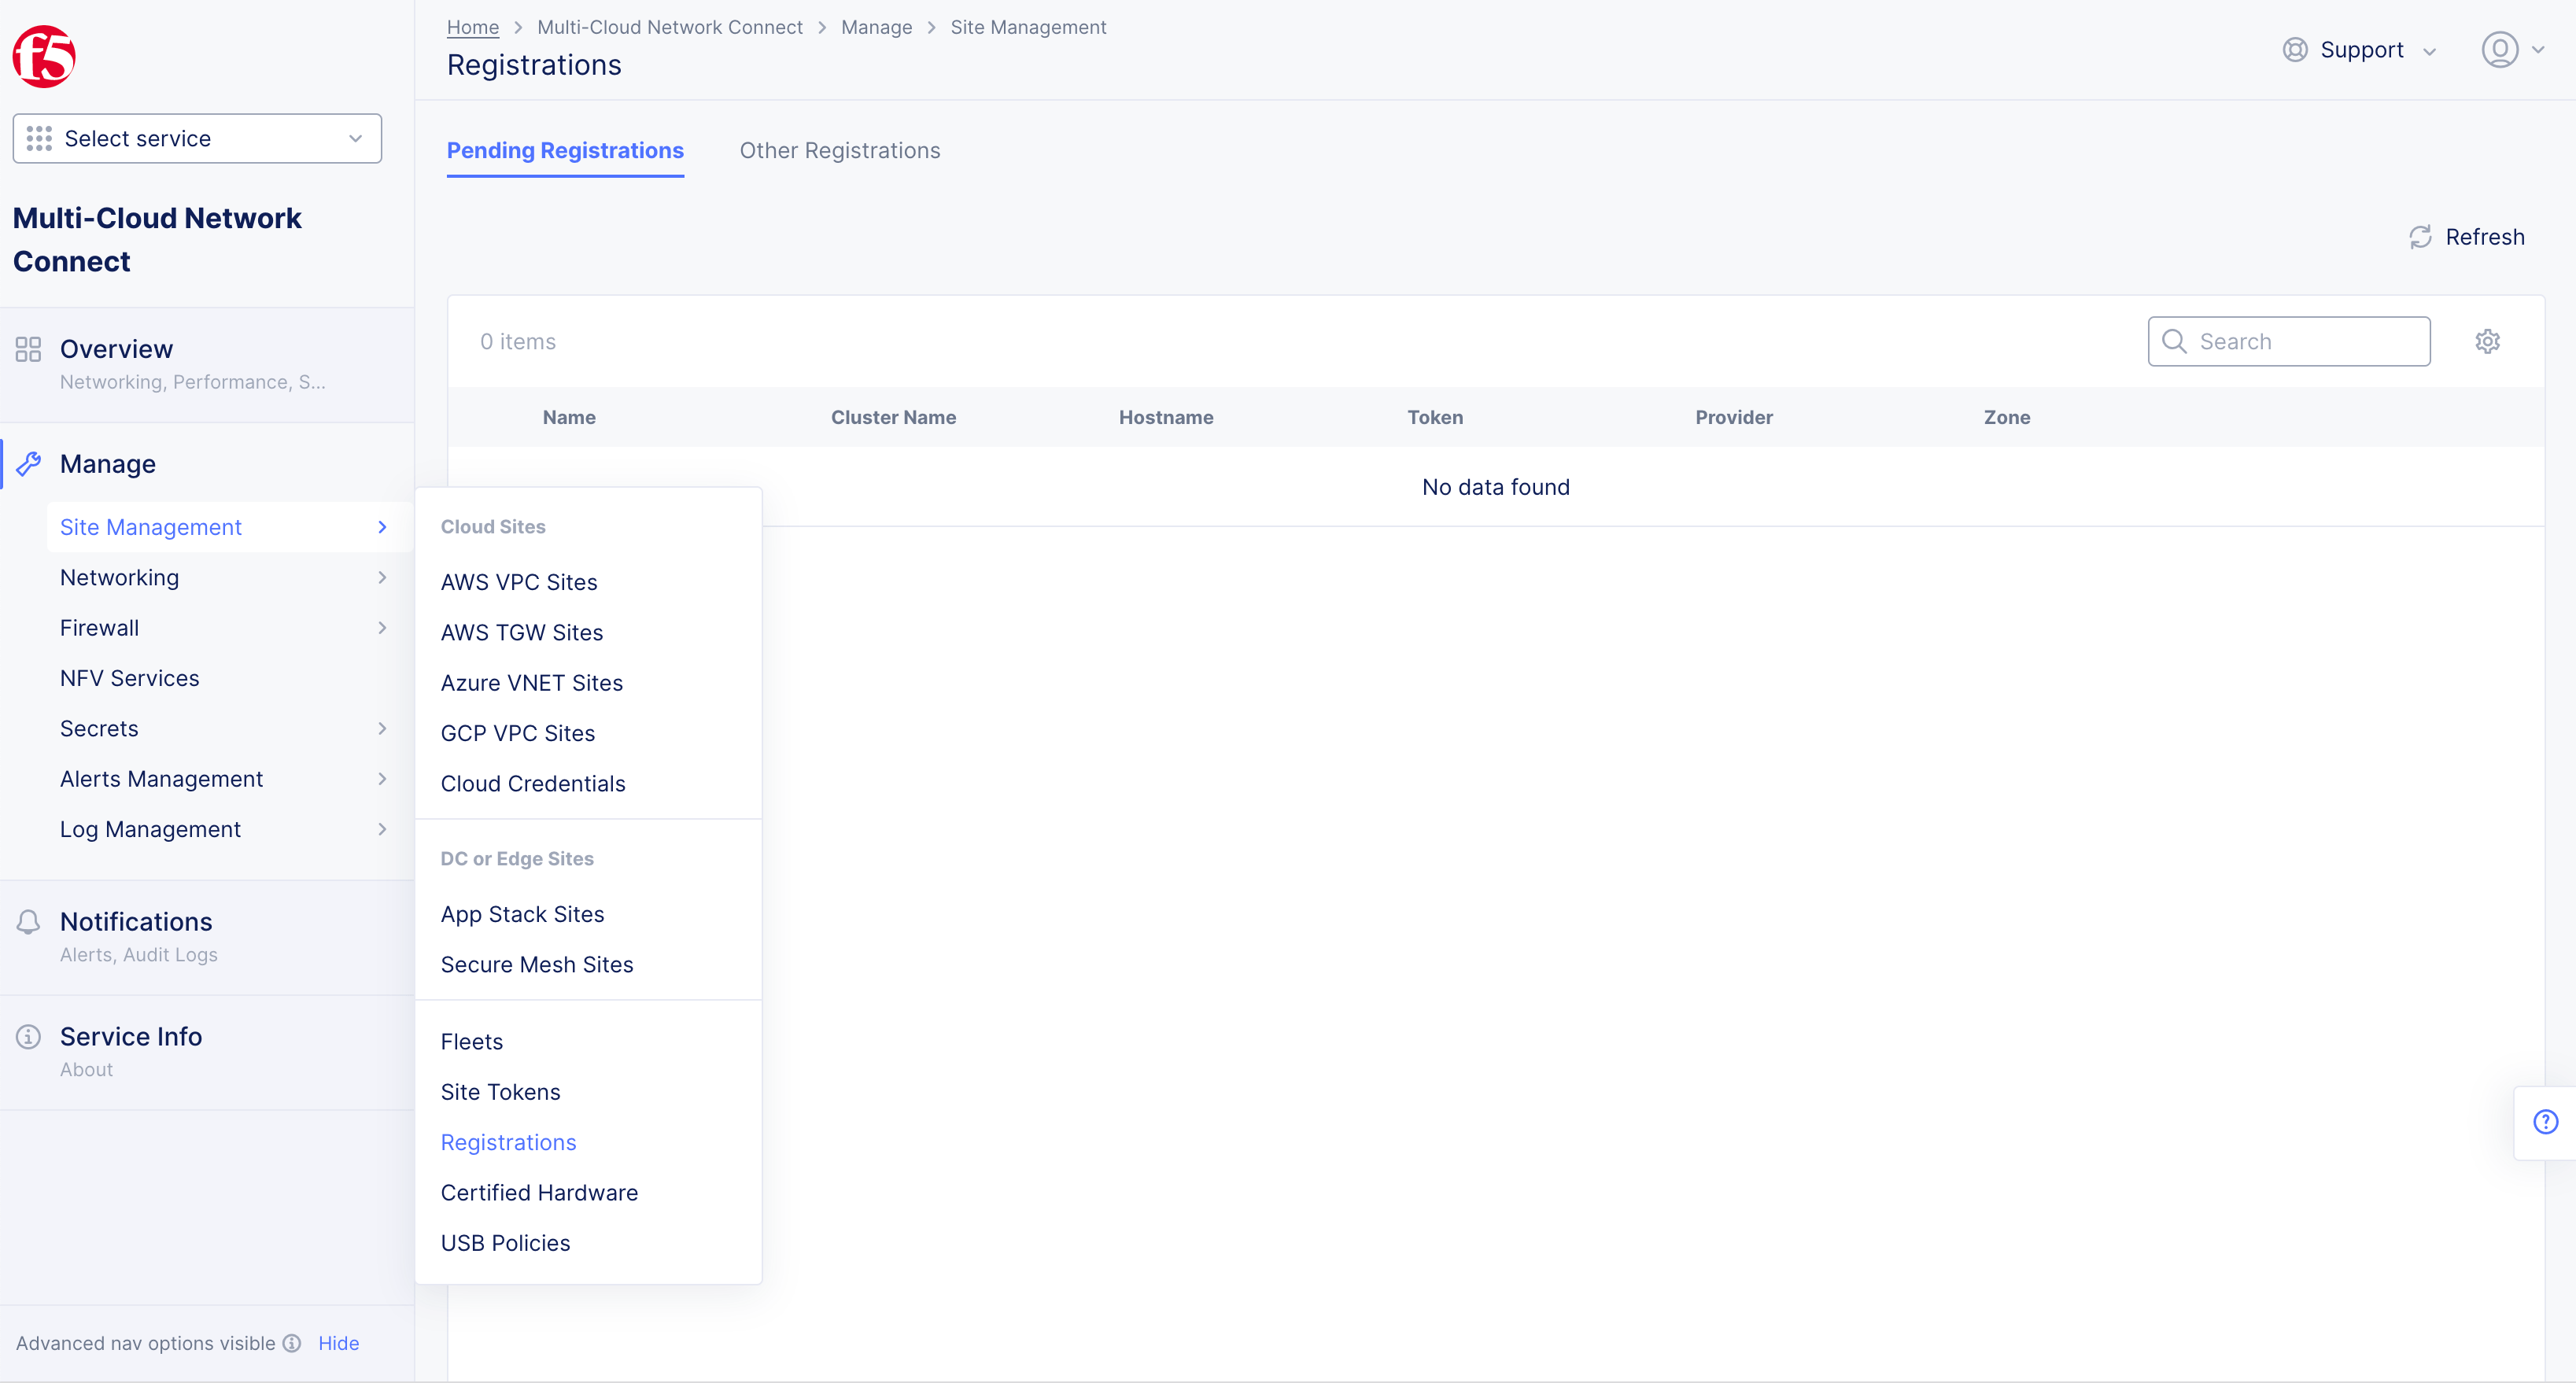
Figure: Registration
Upgrade Site
Site upgrades include the F5 Software upgrade and node Operating System upgrade, and you can perform both from the F5 Distributed Cloud Console. The upgrade functionality is visible only if it is available and applicable for your Site. The F5 Software Site upgrades may take up to 25 minutes per Site node.
The update status is indicated in the Update Status field on the Site dashboard for each Site.
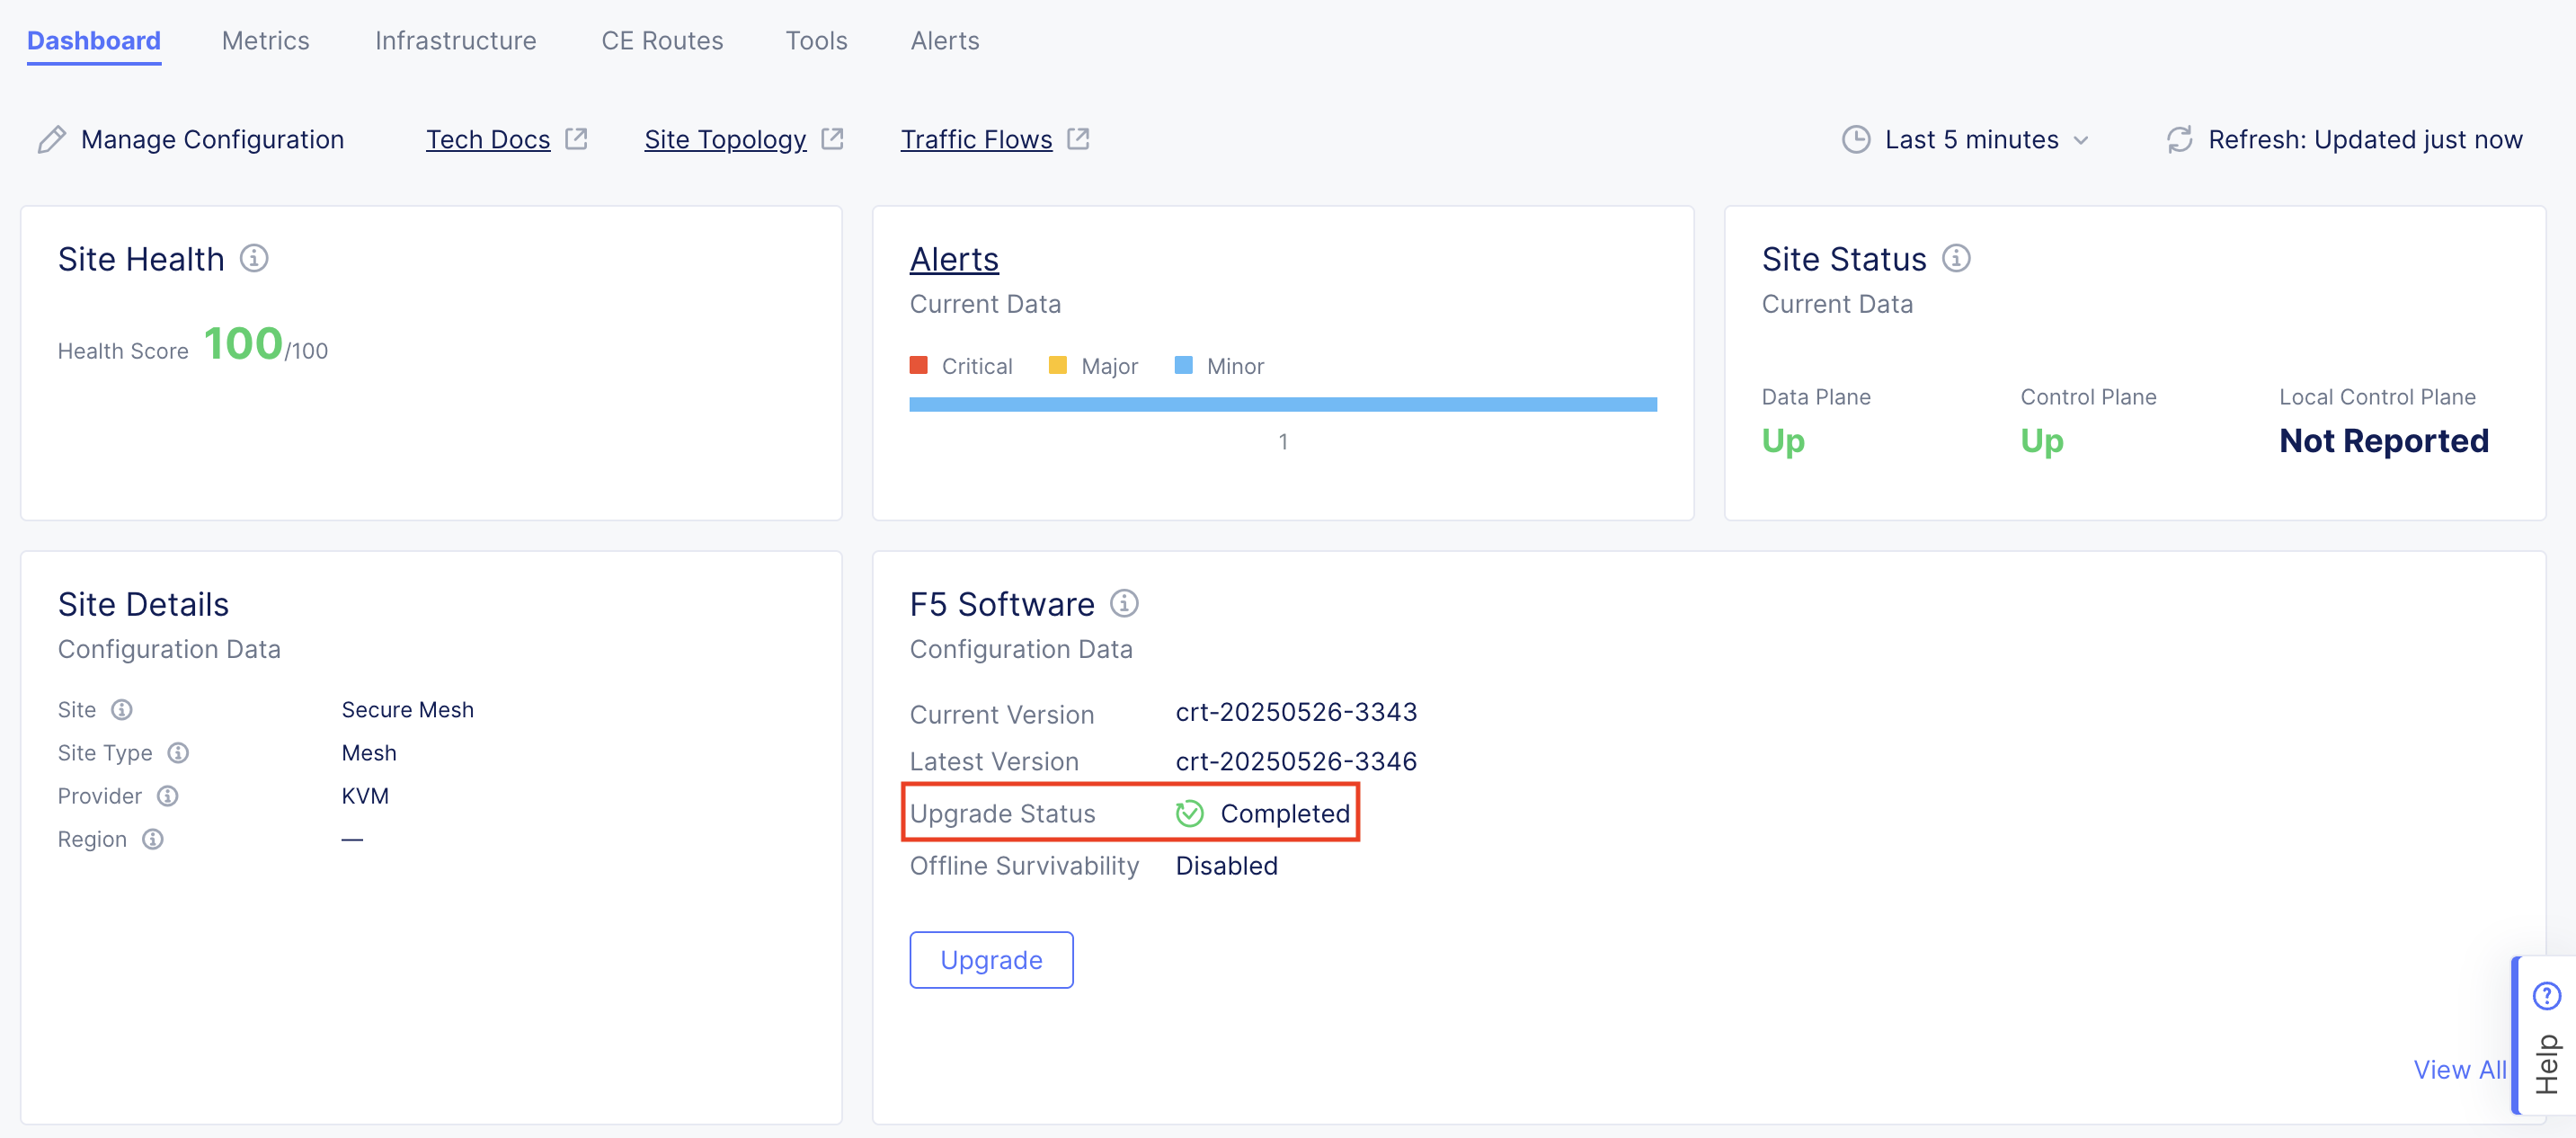
Figure: F5 Software Upgrade Status
In the Site list view, the upgrade status is indicated in the SW version (Current/Status) and OS version (Current/Status) columns next to each respective Site.
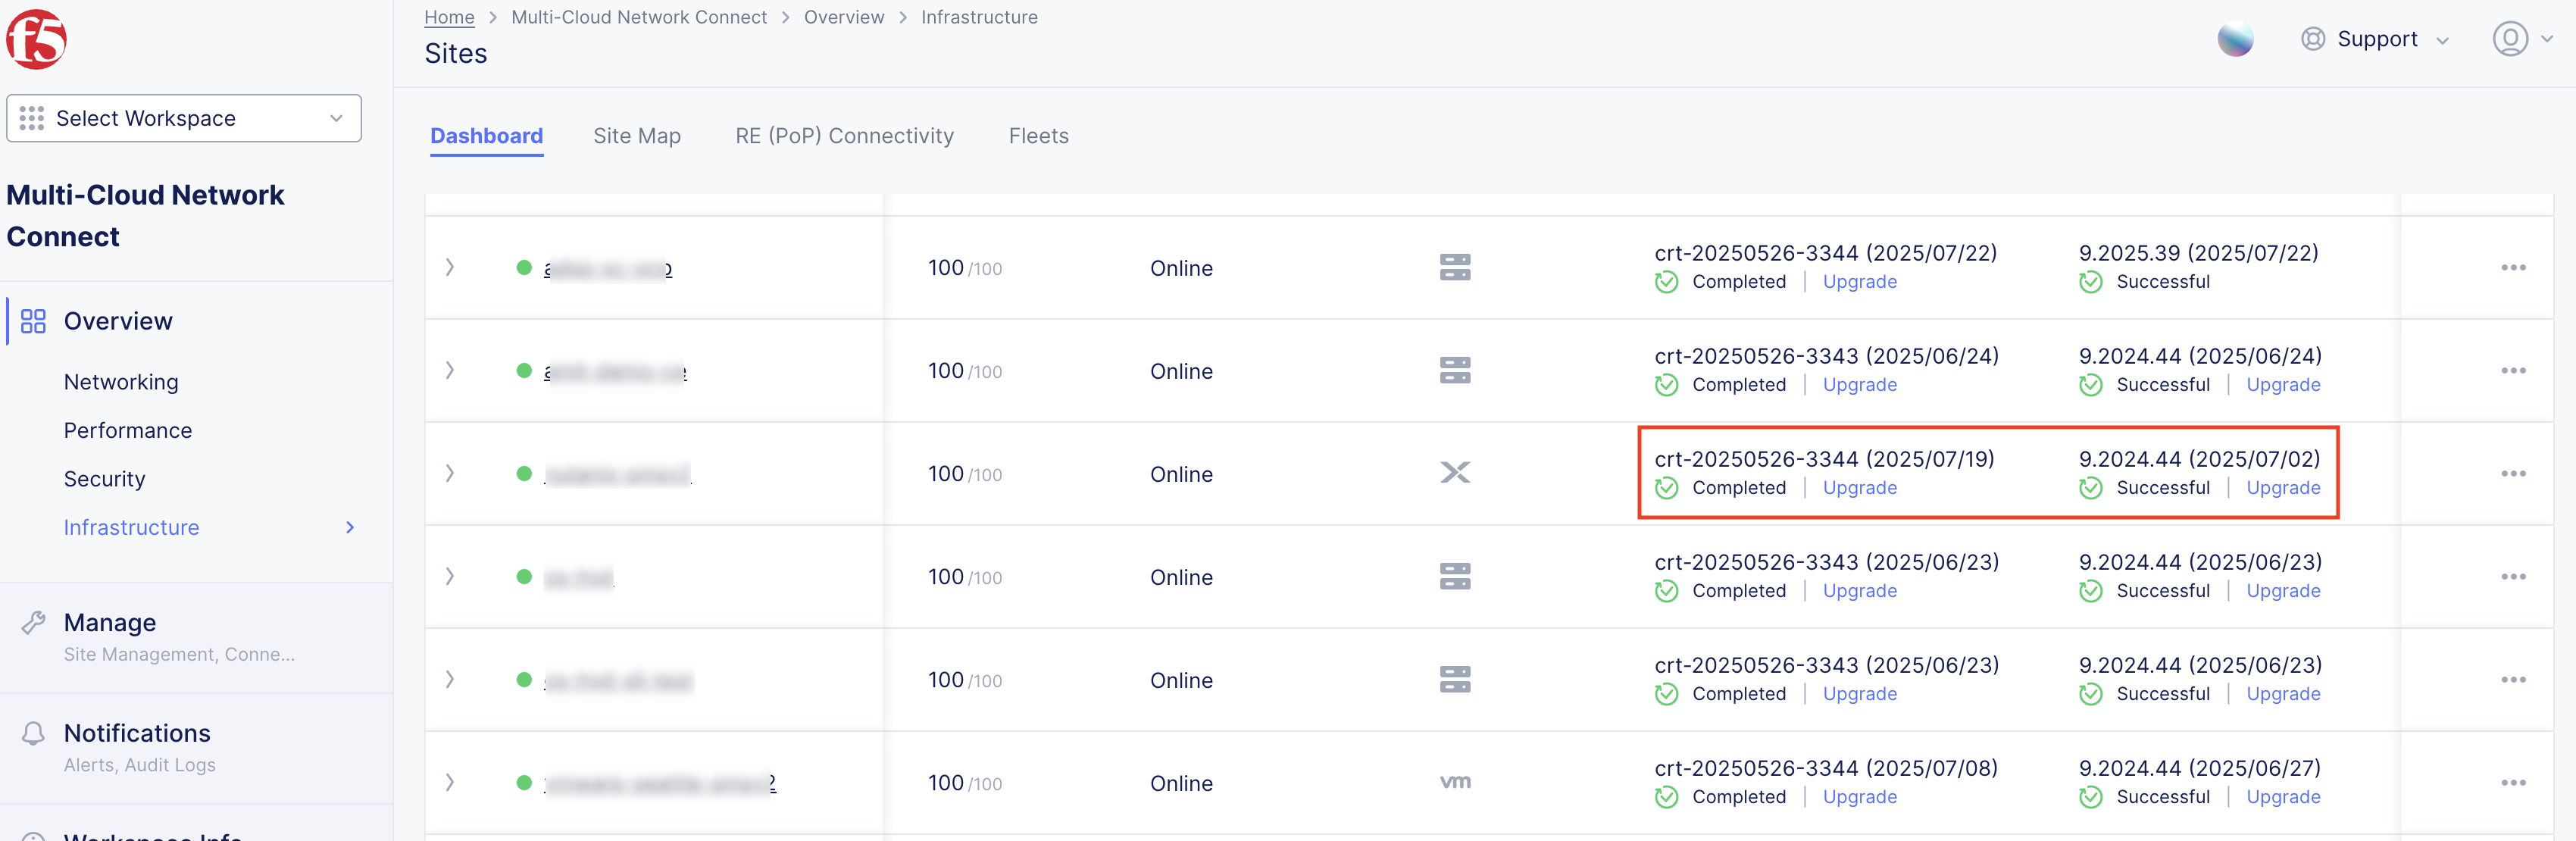
Figure: Site List View
Pre-Upgrade Check
Pre-upgrade checks are essential for minimizing risks during the software upgrade process. They evaluate the system’s current state to identify potential issues in advance. Some checks are critical and must pass for the upgrade to continue, while others are advisory and flagged as warnings. These checks address the most common causes of upgrade failures. However, note that passing all the checks does not eliminate the risk of failure.
As part of the new F5 CE software upgrade process, running the pre-upgrade checks now displays a link to the version release notes. This allows you to review any known caveats before proceeding with the upgrade.
Each pre-upgrade check is provided individually below, with additional context for what each check does and, more importantly, the recommended actions to take if a check fails.
Important: API upgrades are not affected by this pre-upgrade check feature. Only UI updates in Distributed Cloud Console.
The pre-upgrade check applies only to F5 software, not the OS software.
When a pre-check fails, and you resolve that failure, it may take up to 10 minutes for the failed metric to update to show the resolution. After this time period, you can proceed with the upgrade.
Types of Pre-Upgrade Checks
Regardless of where you trigger your Site F5 software update, the pre-upgrades checks process runs. You must ensure all checks are passed before preceding with the upgrade.
Software Compatibility
This check validates two key aspects:
- Whether the selected F5 software version exists.
- Whether it is compatible with the current OS version running on the CE.
This is a critical check. If it fails, the upgrade cannot proceed, as continuing could result in an unstable or failed system state.
Example UI Message
1. S/W version does not exist: This software version does not exist.
Please verify the version and try again.

1. F5 Software Version is not compatible with the OS Version
"software version does not meet minimum requirements, os version: "7.2009.41", software version: "crt-20231124-1234: Software version requires an OS version with CRIO enabled. Please upgrade OS version to 7.2009.45”
Recommended Action
If the error indicates the F5 software version does not exist: Revalidate the selected version. Use the recommended version, which is automatically populated when the upgrade process starts.
If you manually overwrote the recommended version, quit the side modeless panel and restart the upgrade process to view the recommended version again.
If the error is due to version incompatibility between F5 Software and the OS: The reason provided indicates which version of the F5 software is compatible. You can use that version or revert to the recommended one, which is populated by default at the beginning of the upgrade process.
After addressing the issue, make sure to re-run the pre-upgrade check to confirm that the problem is resolved before proceeding.
Node Availability
This check ensures that all nodes in the Site are available before the upgrade begins. The F5 Software Upgrade process is designed to continually attempt upgrades across all Site nodes until completion. If any node is down, the upgrade persists in trying to reach it, potentially resulting in an incomplete or unstable Site state.
This is a critical check. If it fails, the upgrade cannot proceed, as upgrading with missing nodes could lead to inconsistency or service disruption.
Example UI Message
Node(s) (node-1, node-2) are not available. Please check the condition of this node or retire this node to proceed.
Recommended Action
-
Ensure all CE nodes are powered on, regardless of their form factor—this includes VMs in private clouds, instances or VMs in public clouds, or physical servers.
-
If a main (non-worker) node is unavailable, powering it on is the only valid resolution, as upgrading without it results in a failed or unstable Site.
-
Once all nodes are confirmed online and healthy, re-run the Pre-upgrade check to ensure readiness before proceeding.
In some cases, a worker node may become permanently unrecoverable. To proceed with the upgrade in such situations, you must decommission the affected worker node—that is, remove it from the Site—before continuing.
For detailed steps on how to decommission a worker node, refer to this guide.
Site Health Score
This is a non-critical check and returns a status of Warning if any issues are found. The health score reflects various aspects of a Site's overall health, including the connectivity of the data plane and control plane to the RE, as well as the status of nodes within the Site.
Since this is not a critical check, the upgrade process can still proceed even if the check returns a warning, though addressing any health score issues is recommended for optimal performance.
Example UI Message
Site health score is 51.2, please investigate the reasons that the score is not 100.0 or proceed with caution as the upgrade may fail.
Recommended Action
If the health score is below 100, follow these steps to troubleshoot and resolve the issue:
-
Check the Site health score and refresh every few minutes to see if the Site has recovered.
-
Review the Site Status Widget on the Site dashboard, paying particular attention to:
- Control Plane Status
- Data Plane Status
-
In the Nodes Widget, verify that none of the nodes are down. In the Connectivity Table, check that the tunnels to the REs are up for both the Control Plane and Data Plane.
After addressing any issues, re-run the pre-upgrade check to confirm that the Site is ready for the upgrade.
Regional Edge Connectivity
Ensuring proper connectivity to two Regional Edges (REs) is essential for the operation of a CE. This check verifies that both the tunnel status and the connectivity of the data plane and control plane from the CE to the RE are up.
This is a non-critical check, meaning that even if the check returns a warning, the upgrade process can still proceed if desired. However, F5 recommends that you address any connectivity issues to ensure smooth operation post-upgrade.
Example UI Message
Control plane connectivity to pa4-par is down.

Data plane connectivity to pa4-par is down.
Recommended Action
To ensure proper connectivity to the REs, follow these troubleshooting steps:
- Check the Nodes Widget: Verify that none of the nodes are down.
- Review the Connectivity Table: Confirm that the tunnels to the REs are up for both the control plane and data plane.
- Metrics tab: Check for any recent fluctuations in the Control Plane or Data Plane within the last few minutes.
- Alerts tab: Look for any of the following alerts:
- SiteCustomerTunnelInterfaceDown: Indicates the connection from CE to a single RE is down. Some functionality is limited.
- SiteTunnelInterfaceDown: Indicates the connection from both REs to the CE is down. The majority of functionality is impacted.
- Check for Firewall Issues: Ensure there are no firewalls blocking the communication between the CE and the REs. In cloud environments, verify that AWS Security Groups or Azure Network Security Groups or their equivalent are not preventing the communication.
If you are unable to resolve the connectivity issues despite following these steps, F5 recommends you open a support case for further assistance. It is best to address any CE-RE connectivity issues before proceeding with the upgrade.
Node Disk Space
This is a critical check that ensures that the CE Site nodes have sufficient disk space for the upgrade. The check aims to ensure that each node has 20 GB plus 15% of the disk capacity allocated to the node.
For example, a 100 GB disk space requires:
- 20 GB free space
- 15% of 100 GB is 15 GB free space
Total free space required is 20 + 15 = 35 GB.
Example UI Message
Node %s does not have enough storage, available storage: 20GB, needed storage: 35GB.
Recommended Action
You should ensure that you have enough disk space. Either provision a CE with higher disk space or expand your storage space with your provider.
F5 Software Upgrade Status
At any point during the upgrade status, you can view the status of the upgrade process.
After you trigger the F5 software update and the pre-checks process begins running, simply select Upgrade Details. This action launches the side pop-out window. The individual UI components include the following:
- System Setup: This is to install the required OS and K8 packages on all the nodes within the cluster.
- Image Download: This is to pre-fetch all the required files and images required for the upgrade. Note that this is an optional step that if it fails, it can be done through the Site/node components upgrade.
- Site Components: These are the components that are upgraded Site-wide.
- Node Components: This only displays when the Beta feature of the Node-by-Node upgrade is enabled. This is to make sure worker nodes are upgraded on a node-by-node basis and improve service and application uptime for customers.
- Validation: Ensures that the system and node-level components have been upgraded successfully.
- The Upgrade Status on top (under Version Information) shows the overall status of the upgrade.
There is a Failure Reason displayed along with a red banner if the upgrade process continues to fail beyond a certain time period. The banner contains a link to Contact Support to open a case.
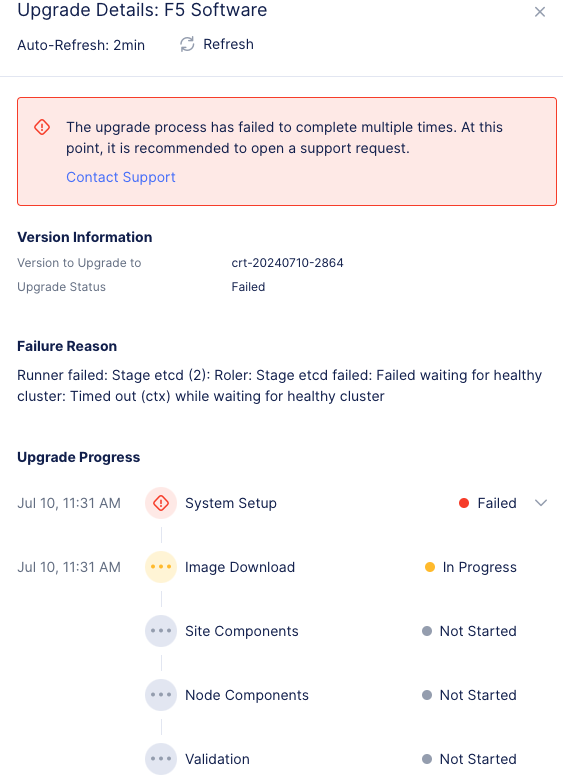
Figure: Contact Support
Upgrade Methods
You can perform the CE Site upgrades using any of the following methods:
Site List: Upgrade in Site List Column.
This method is used for cloud and non-cloud sites.
-
Navigate to Overview > Infrastructure > Sites > Dashboard tab.
-
Select Upgrade in the SW version (Current/Status) and OS version (Current/Status) columns for your Site to perform software and OS upgrades, respectively.

Figure: Upgrade from All Sites List
-
Select Upgrade in the confirmation window to proceed for both F5 software and OS upgrades.
-
For visibility on the Site upgrades, click on the particular Site to see details and progress.
Site Dashboard: Upgrade in Site Dashboard view of Site Management.
This method is used for cloud and non-cloud sites.
-
Navigate to Manage > Site Management.
-
Select the link that corresponds to your Site type (AWS, Azure, GCP, App Stack, or Secure Mesh Site v2).
-
Select your Site. The Site dashboard page appears.
Upgrade F5 Software
- Select Upgrade under the F5 Software section to upgrade the node software version to the latest version available. The side modeless panel appears.
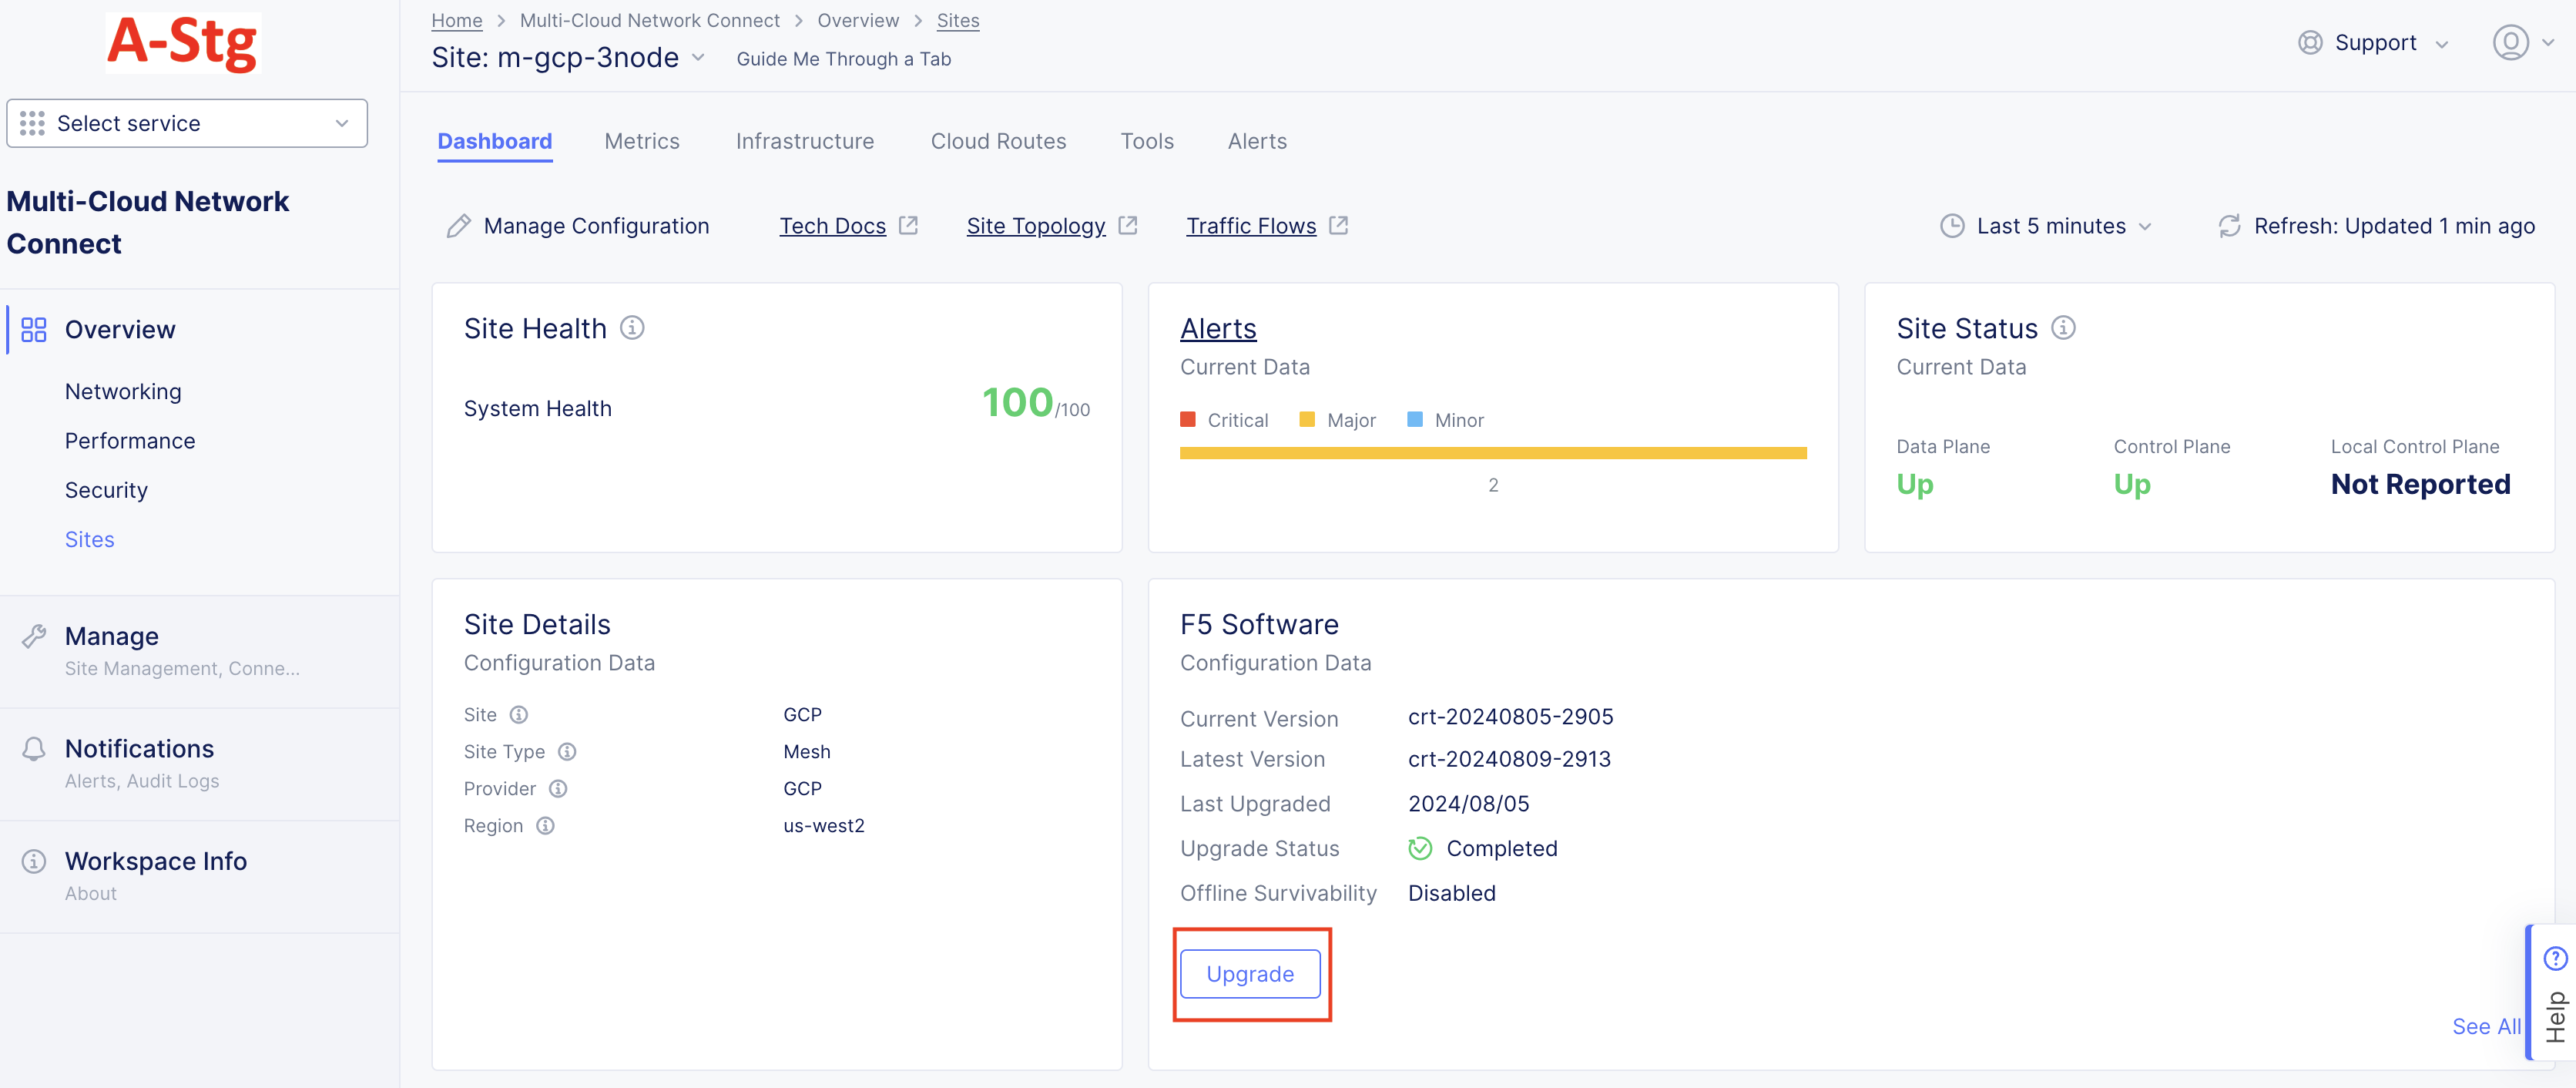
Figure: F5 Software Upgrade
-
Click Run Pre-Upgrade Checks.
-
Wait for the checks process to complete and display any potential issues.
-
Confirm all tests are passed.

Figure: Upgrade Checks Complete and Passed
- Click Upgrade.
Upgrade OS
- Select Upgrade under the Operating System section to upgrade the node OS (RHEL) to the latest version available.
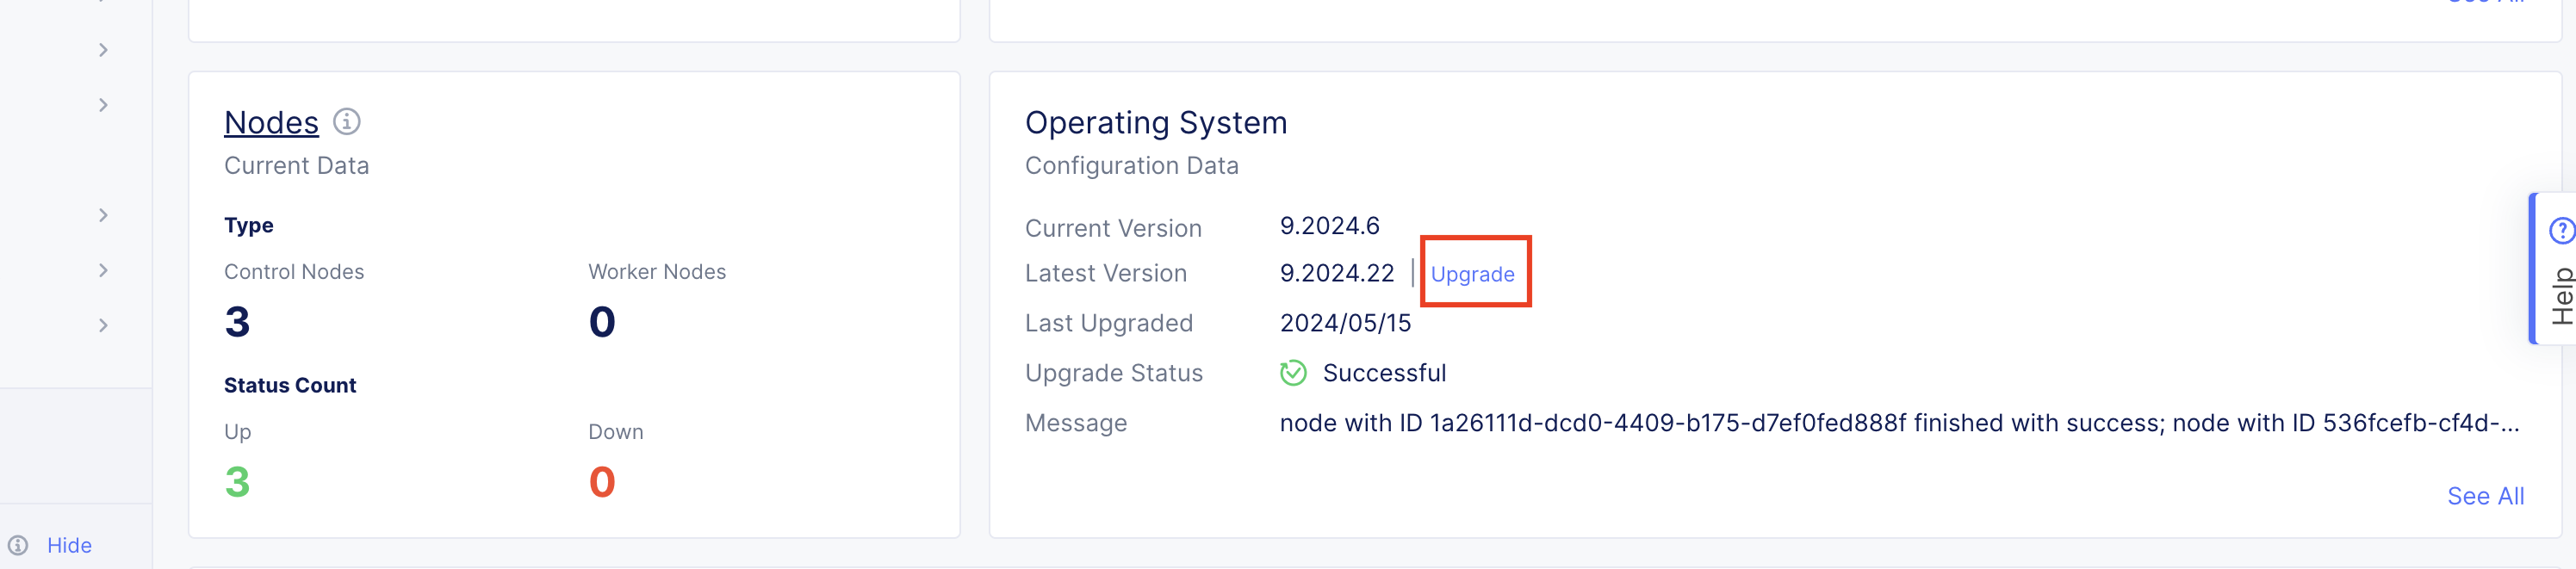
Figure: OS Upgrade
- Select Upgrade in the confirmation window to proceed.
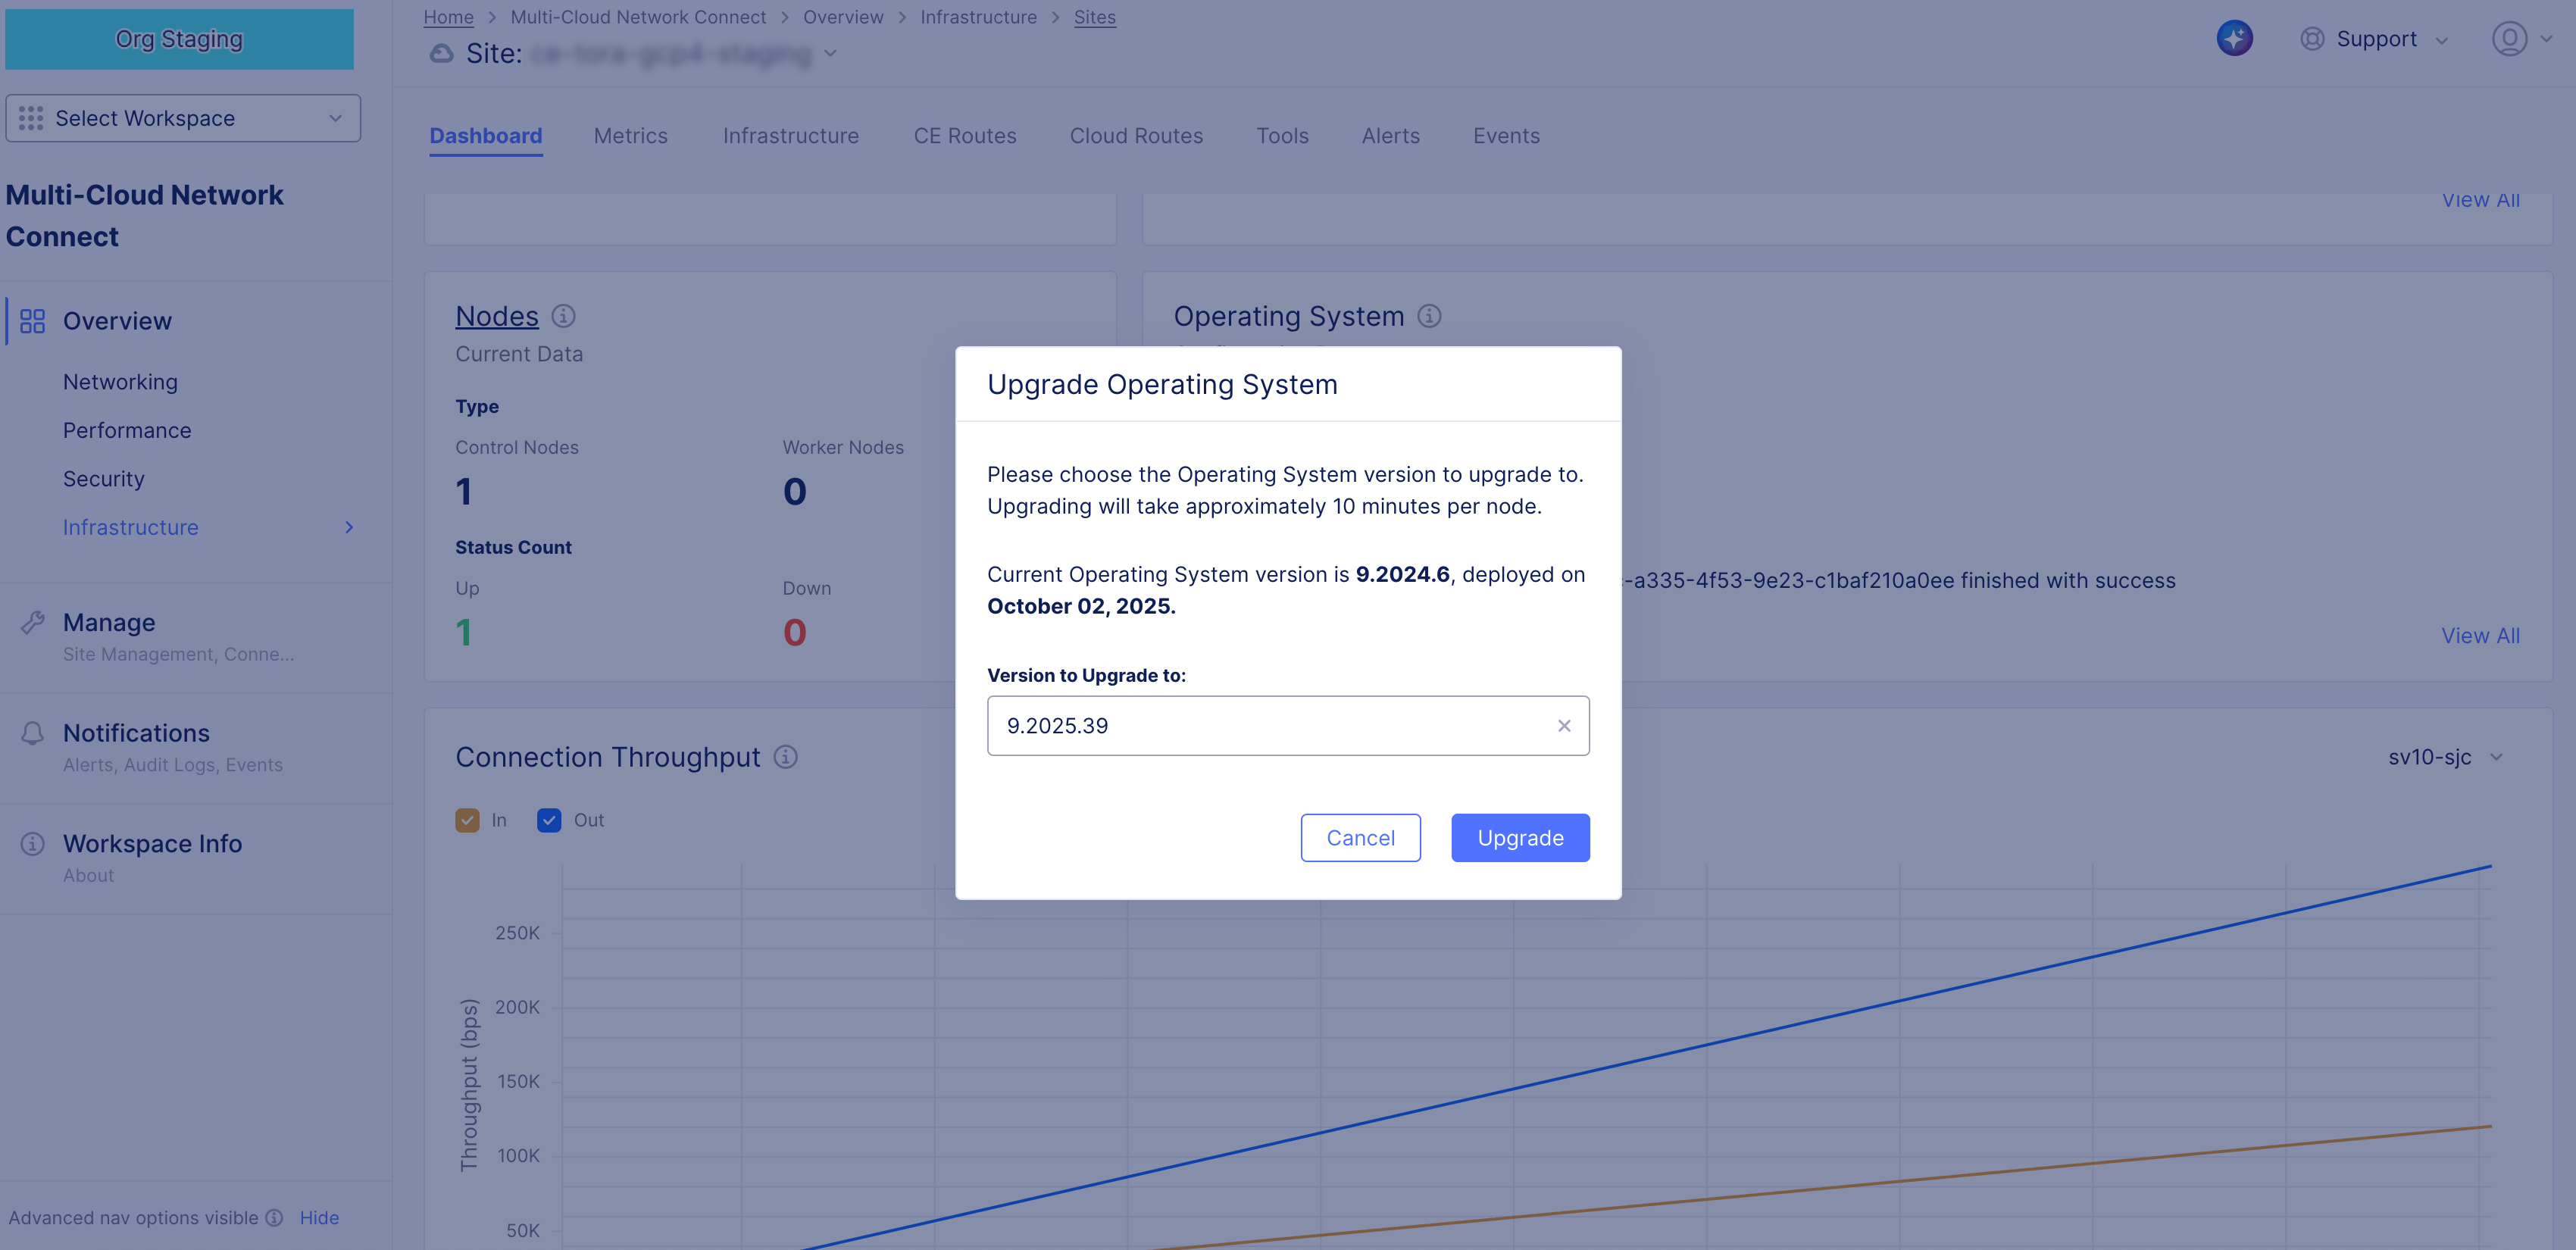
Figure: OS Upgrade Confirmation
Site Status: Upgrade in Site Status view of Site Monitoring.
This method is used for cloud and non-cloud sites.
-
Select your Site in Overview > Infrastructure > Sites to load the dashboard.
-
Select your Site.
-
In the Site dashboard, select Upgrade under F5 Software. The side modeless panel appears.
-
Select Run Pre-Upgrade Checks.
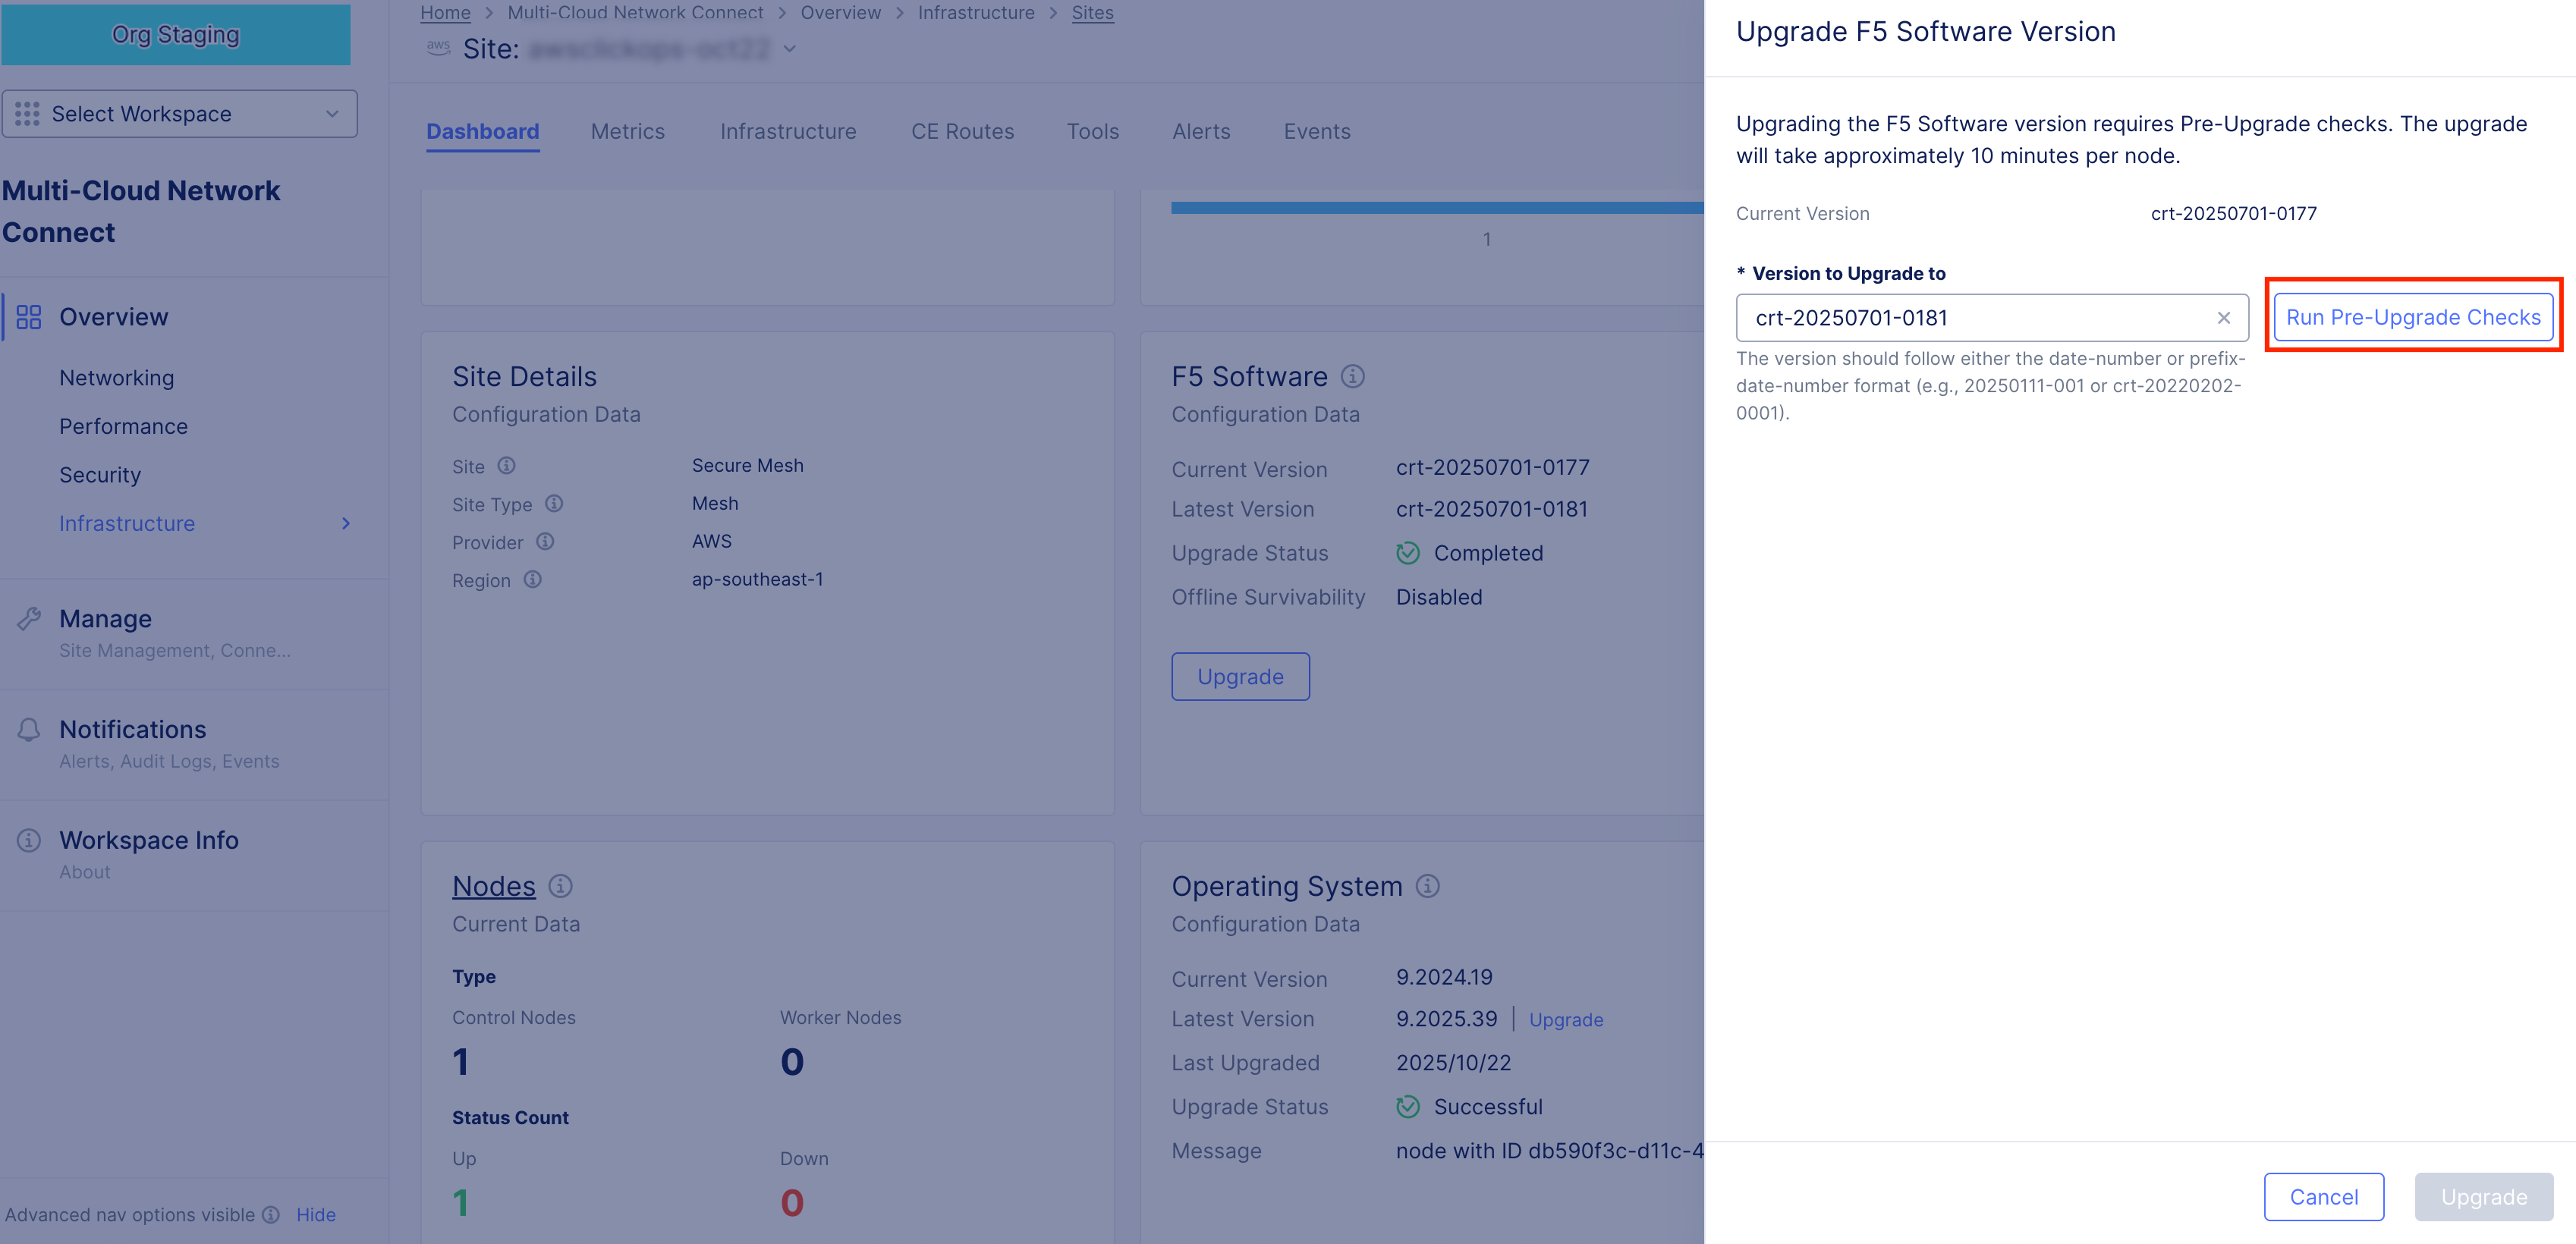
Figure: Run Pre-Upgrade Checks
-
Confirm all checks have Passed or with a Warning indicator. If you have errors, ensure you fix them and then return to run the pre-checks again.
-
Confirm the version to update to and then select Upgrade. By default, the latest version is always provided.

Figure: Confirm Pre-Upgrade Checks
-
Select Upgrade Details to see the current status of the upgrade process.
-
Click Refresh for latest results.
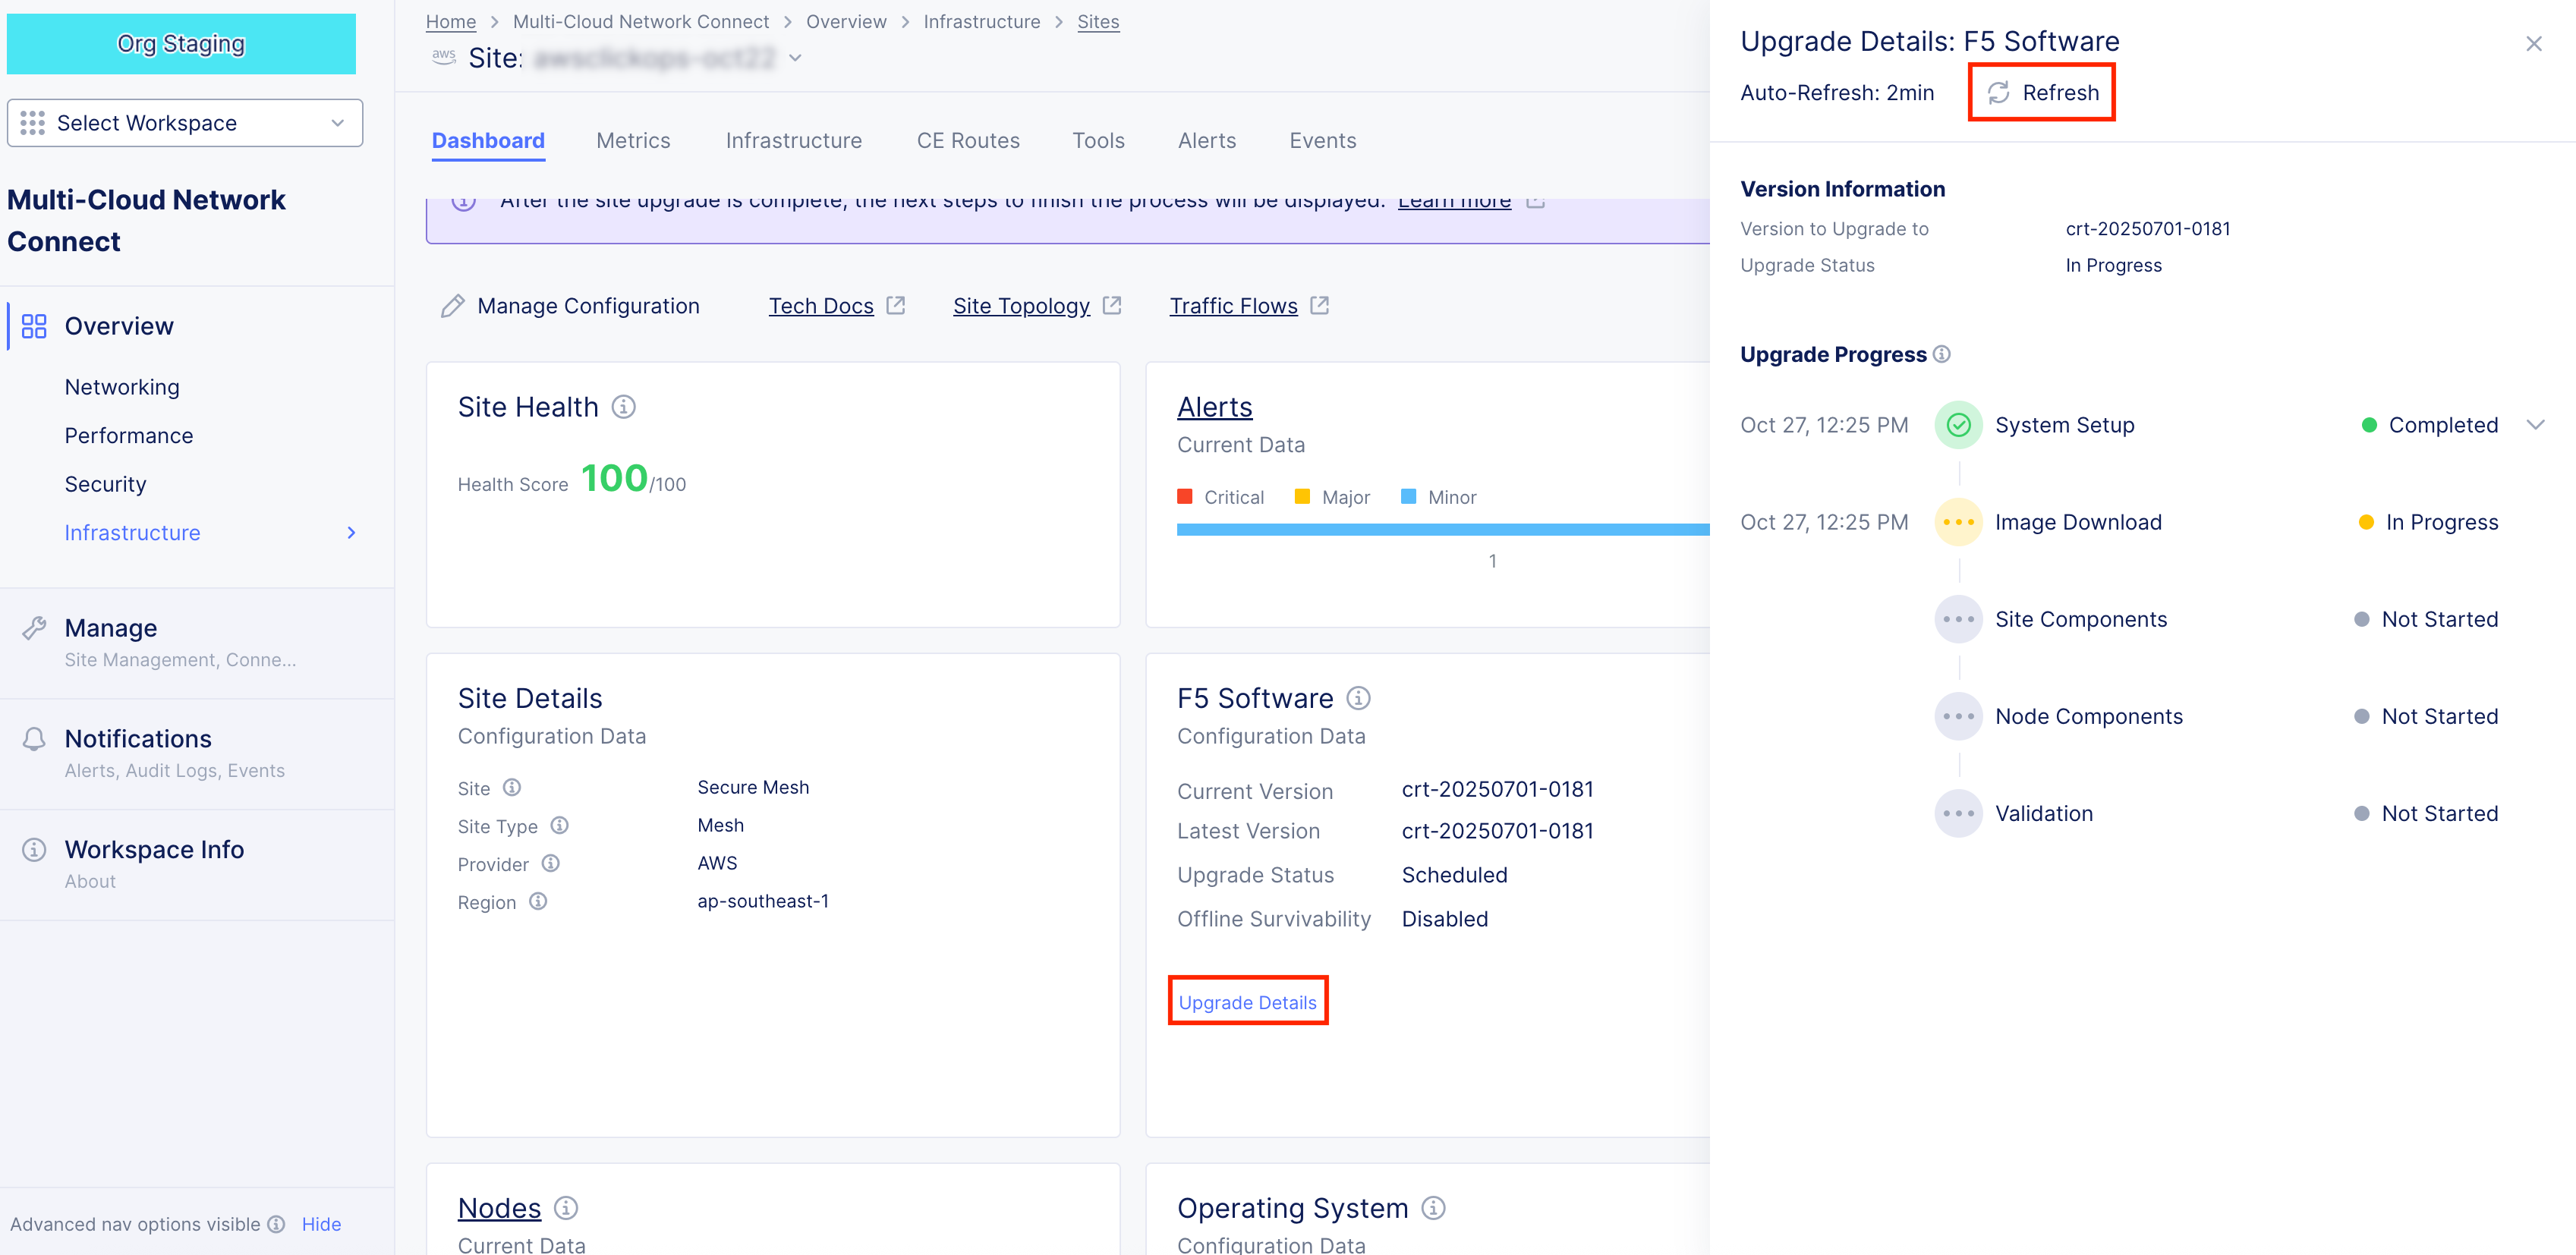
Figure: Upgrade Checks Status
API: Upgrade using API.
To upgrade using API, go to How to upgrade Customer Edge (CE) version via API.
Delete Site
If you delete a Site, all associated nodes are deleted.
New Secure Mesh Site v2
-
Select the Multi-Cloud Network Connect workspace.
-
Select Manage > Site Management.
-
Select Secure Mesh Sites v2.
-
Locate your Site, and select it. Then choose one of two methods:
-
Select ... > Delete.
-
Click Delete selected.
-
-
Select Delete in the confirmation window.
Legacy Site
-
Select the Multi-Cloud Network Connect workspace.
-
Select Manage > Site Management.
-
Select type of Site you want to remove.
-
Locate your Site and then select Delete.
-
Select Delete.
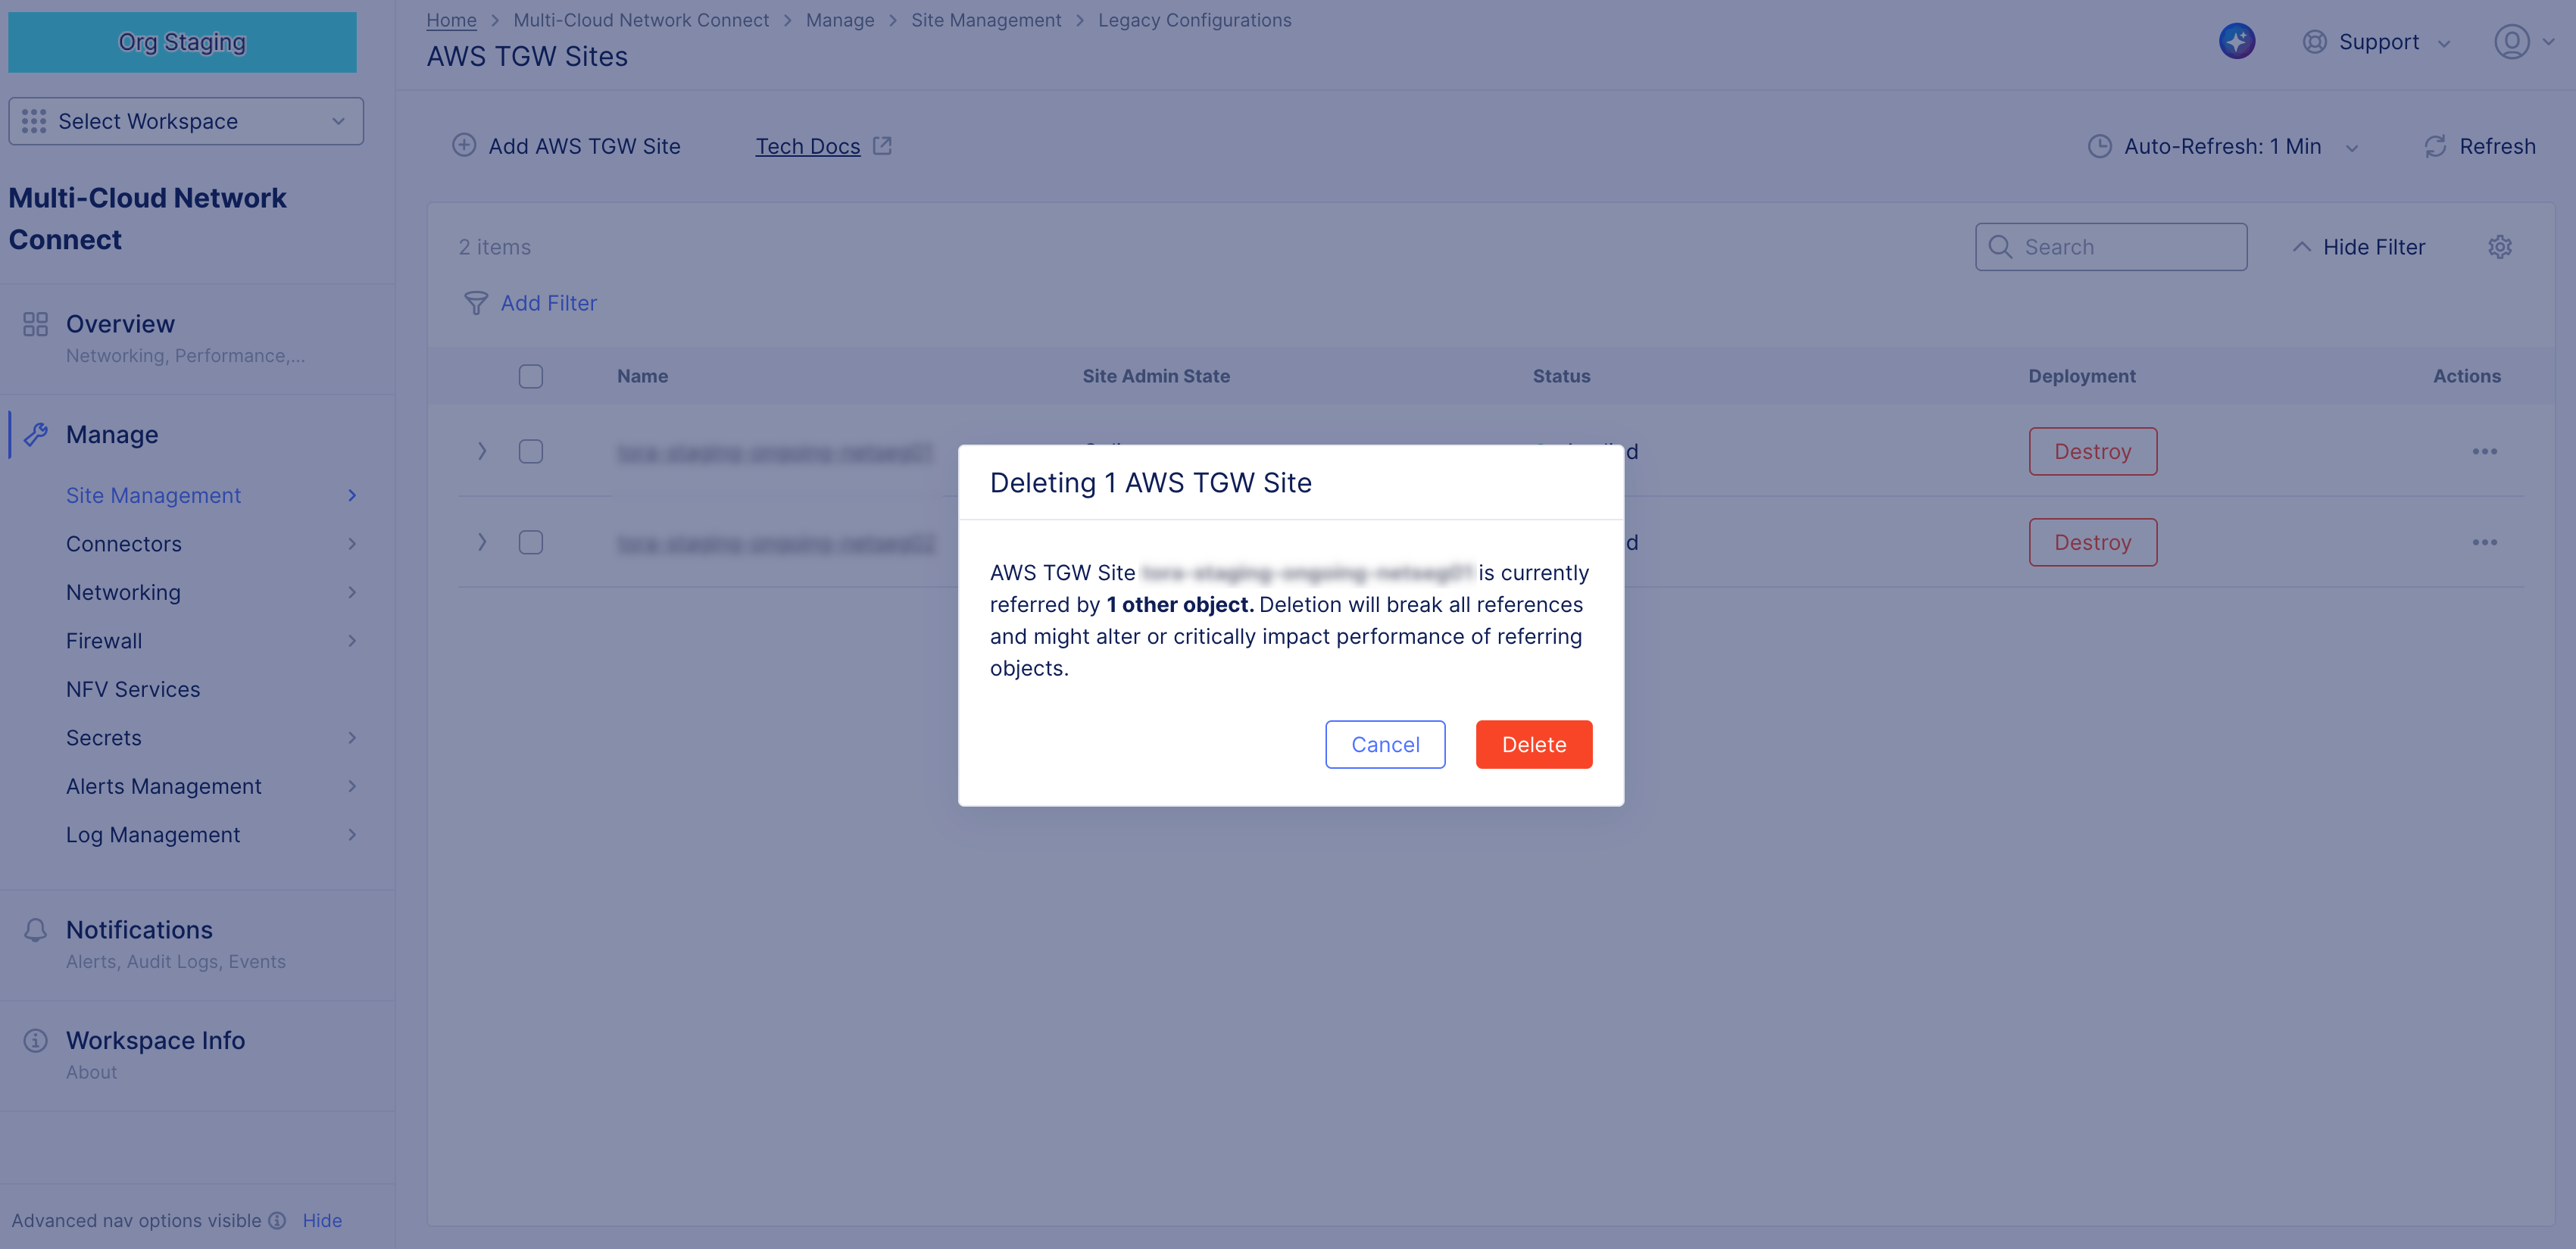
Figure: Delete Site
Perform Factory Reset
You can trigger factory reset of the nodes in your legacy Site by performing the Site re-registration. The factory reset process does not apply to the new Secure Mesh Site v2.
For multi-node sites, re-registration removes all nodes from the Site and factory reset starts for all nodes. Re-registration, as in a factory reset, is only available for physical sites. Virtual sites (sites created by a cloud provider) are "factory reset" by destroying the Virtual Site and then recreating it. This can be done in Manage > Site Management with Destroy and Apply.
Step 1: Navigate to registrations page.
-
In the Multi-Cloud Network Connect workspace, select Infrastructure > Sites.
-
For your site, select ... > Reregister.
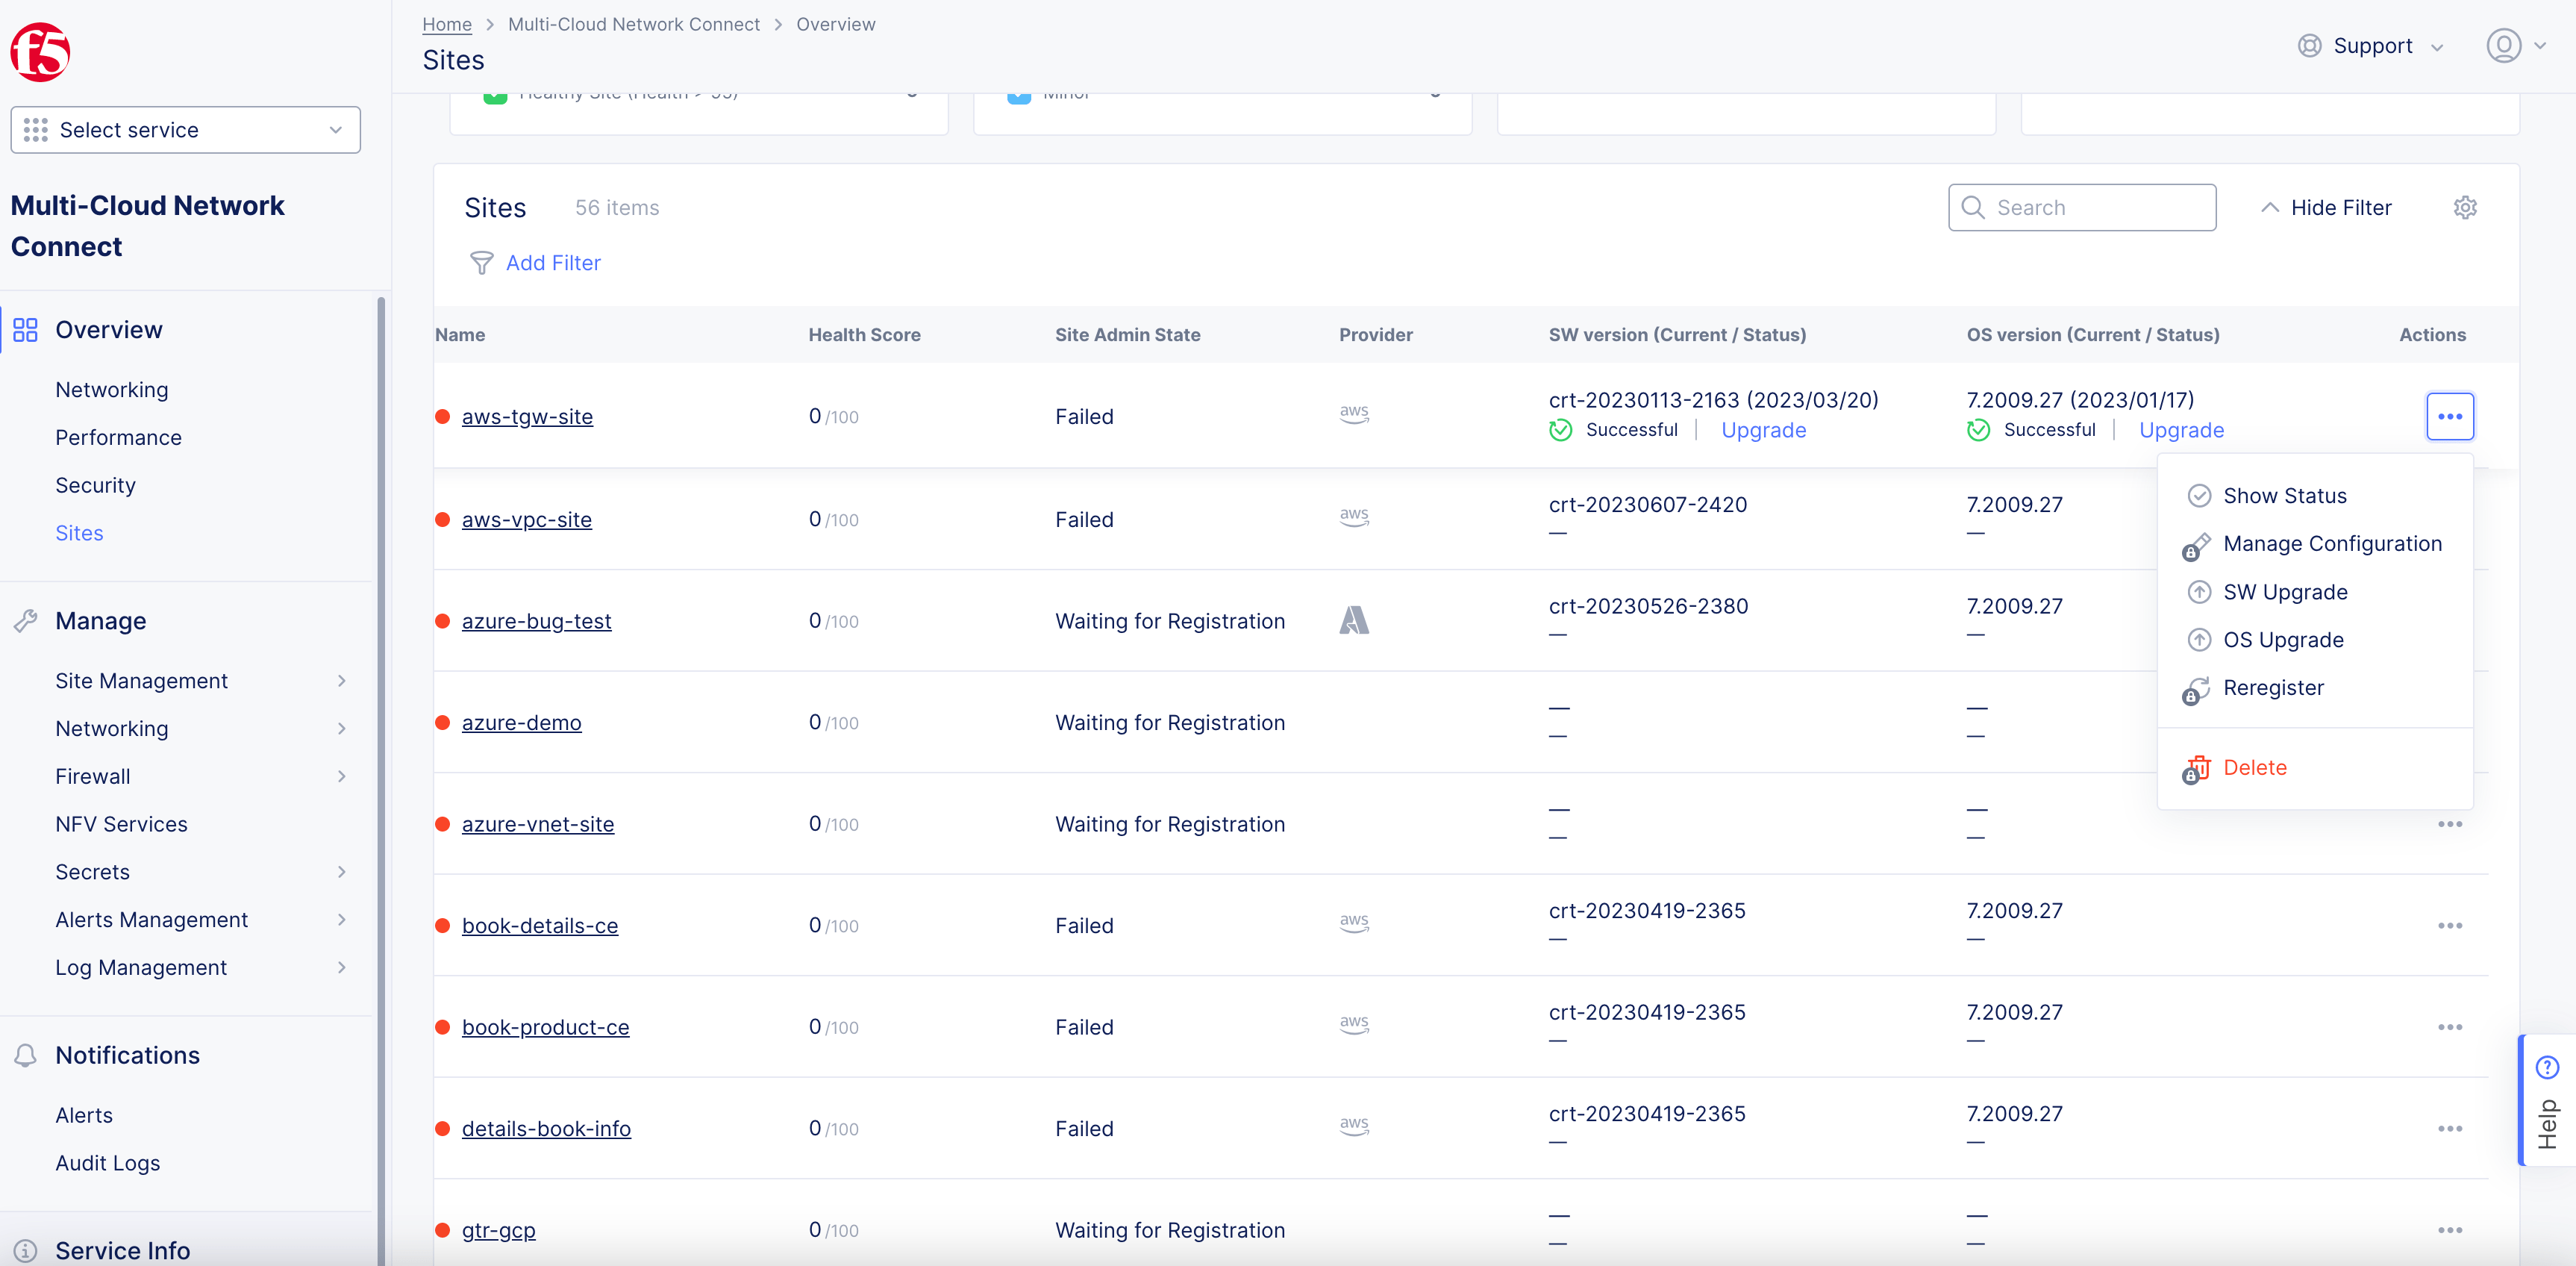
Figure: Site Factory Reset
- Select Reregister in the confirmation window. This removes the node from the Site and changes the Site state to WAITINGNODES. The factory reset is applied to all available nodes and then reboots those nodes. New registration requests are created after a node is rebooted.
Step 2: Approve new registration for Site.
-
Select Manage > Site Management > Registrations.
-
Select your Site from the Pending Registrations tab to approve the registration. For multi-node sites, perform this step for each node request.
Concepts
References
API References
On this page:
- Objective
- Prerequisites
- Edit Site
- Add or Remove Worker Nodes
- Upgrade Site
- Pre-Upgrade Check
- Types of Pre-Upgrade Checks
- Software Compatibility
- Node Availability
- Site Health Score
- Regional Edge Connectivity
- Node Disk Space
- F5 Software Upgrade Status
- Upgrade Methods
- Delete Site
- Perform Factory Reset
- Concepts
- References
- API References