
Create Network Segments
Objective
This guide provides instructions on how to create and use segments using the guided wizard in F5 Distributed Cloud Console (Console). Network segmentation allows you to manage VPCs/VNets efficiently. You can group your VPCs/VNets and set rules for them to communicate with each other.
Prerequisites
A valid F5 Distributed Cloud Services account. If you do not have an account, see Getting Started with Console.
Manage Segments
Take specific actions.
-
Log into Console and select
Multi-Cloud Network Connect. -
Click
Manage>Networking>Segments. TheSegmentspage shows a list of your segments with key details shown for each.
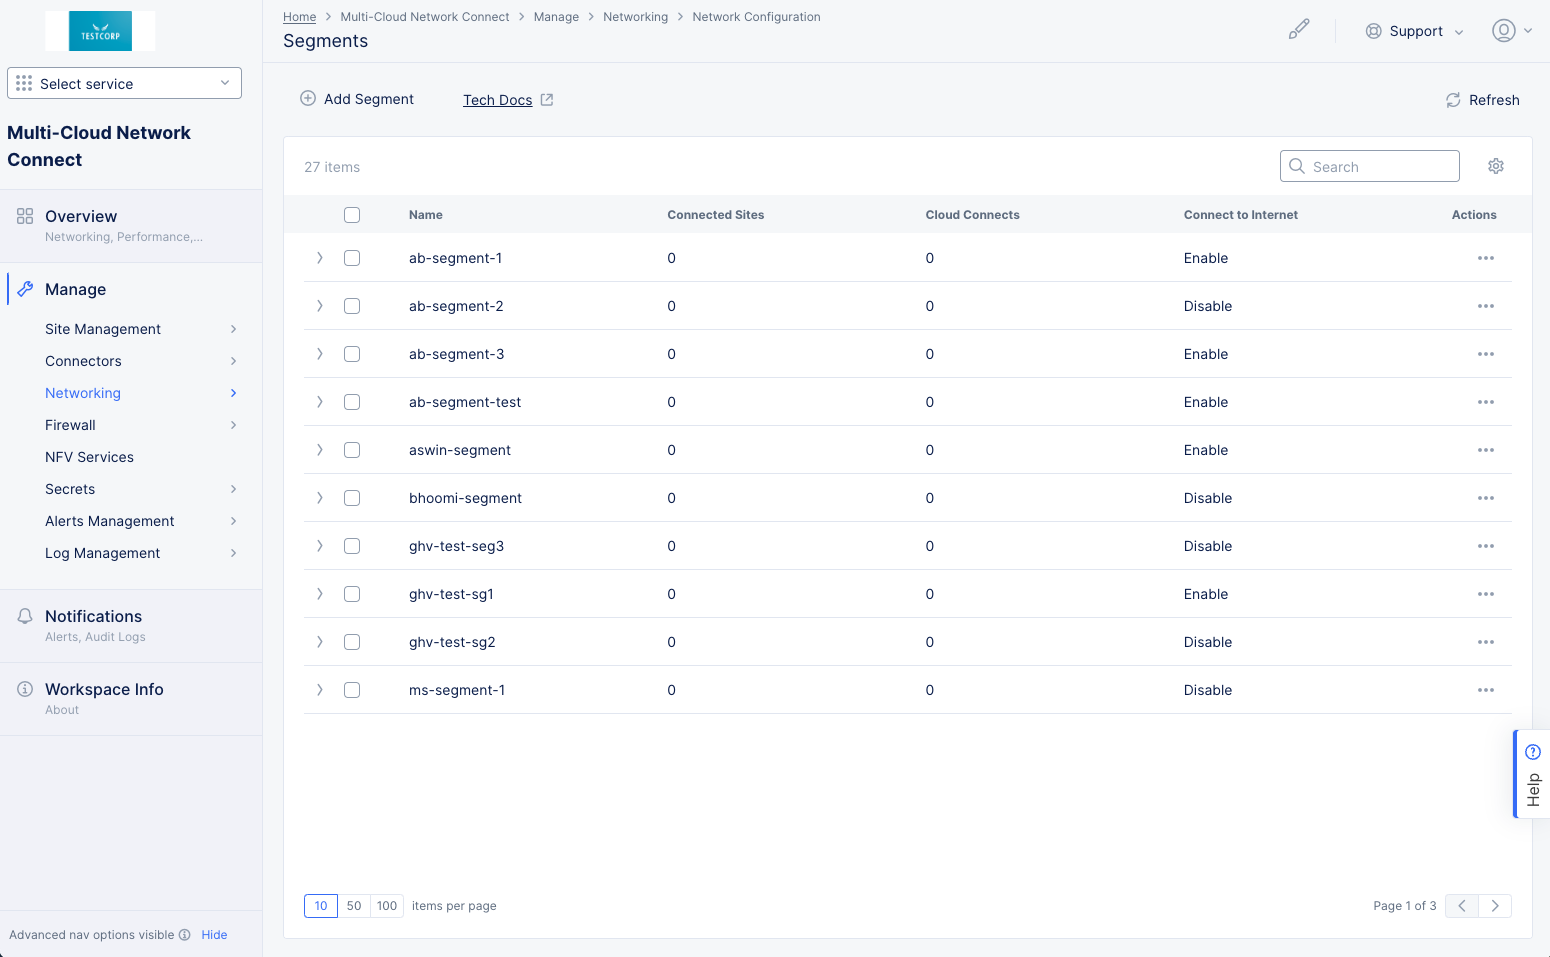
Figure: Network Segments
-
Change the key details you see in the table by clicking on the gear icon ( ⚙ ) and selecting different fields.
-
Enter text in the
Searchfield to only see table rows that include that text (even if they were not shown due to theitems per pagesetting). -
Click the arrow on the left side of a row to see all the information for the segment in JSON format. Use the
JSONdrop-down menu to switch to YAML format. Click the arrow again to hide the information. -
Use the checkboxes on each row to select or unselect a row. Use the checkbox on the table header row to select/unselect all rows on the current page. Click
Resetat the top of the table to unselect all rows. -
Click
Delete selectedto delete the selected row(s) (segments). -
Use the
items per pageselector to determine how many rows you see on a page. -
Use the
Pagearrows to change which page is shown in the table.
Create a segment.
-
Click
Add Segmenton theSegmentspage. Alternatively, you can click...>Clone Objectin theActionsmenu of an existing segment. -
In the
Namefield, enter the name for the new segment. -
Optionally, add labels and a description.
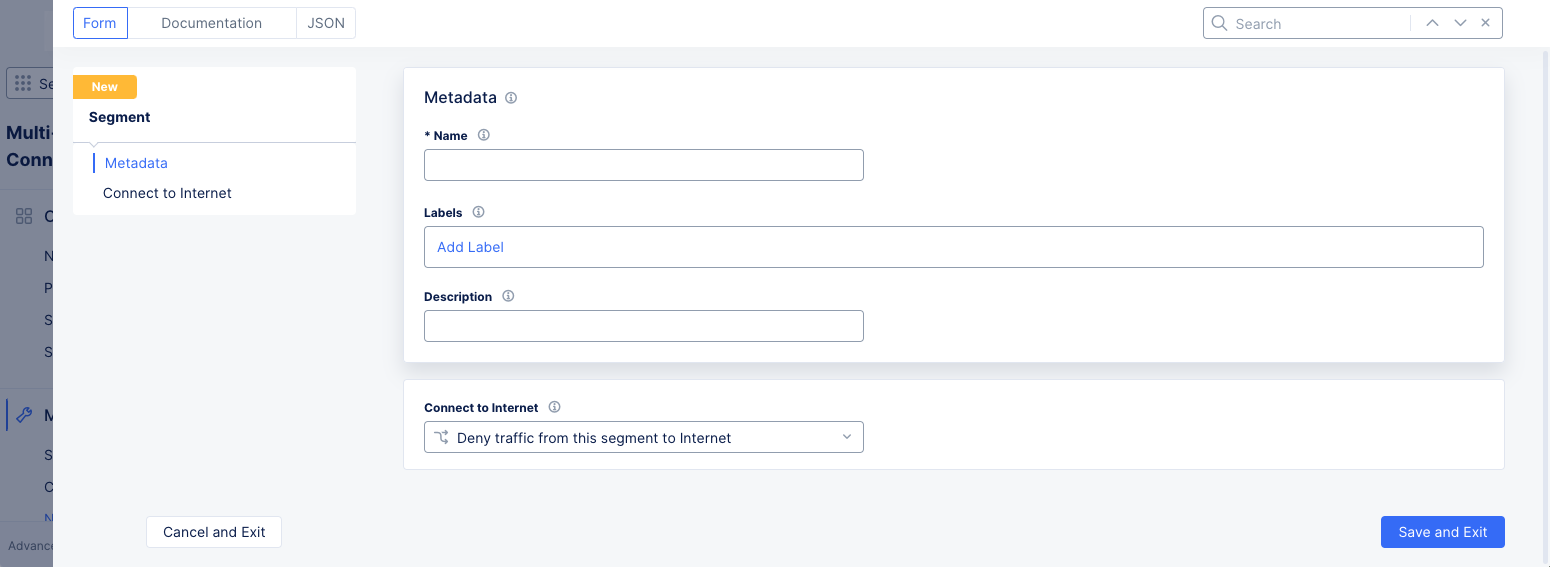
Figure: Add Segment
-
Select an option with the
Connect to Internetdrop-down menu. -
Click
Save and Exitto create the segment.
View or modify a segment.
-
Click
...>Manage Configurationin theActionsmenu of the segment you want to view/modify. This displays all the user-modifiable information in the segment. -
Click
Edit Configurationin the upper right corner if you want to make modifications.
Important: You will not be able to change the segment name. To change the segment name, you will need to create or clone a new segment and then delete the old segment.
- Click
Cancel and Exitto return to theSegmentspage, or clickSave and Exitto save the change you made and return to theSegmentspage.
Delete a segment.
There are two ways to delete segments.
Delete one or more segments:
-
Toggle the checkbox for each segment you want to delete.
-
Click
Delete selected.
Delete one segment:
-
Click
...>Deletein theActionsmenu of the segment you want to delete. -
Either method will display a confirmation pop-up. Click
Deletein the confirmation pop-up to delete the segment(s).
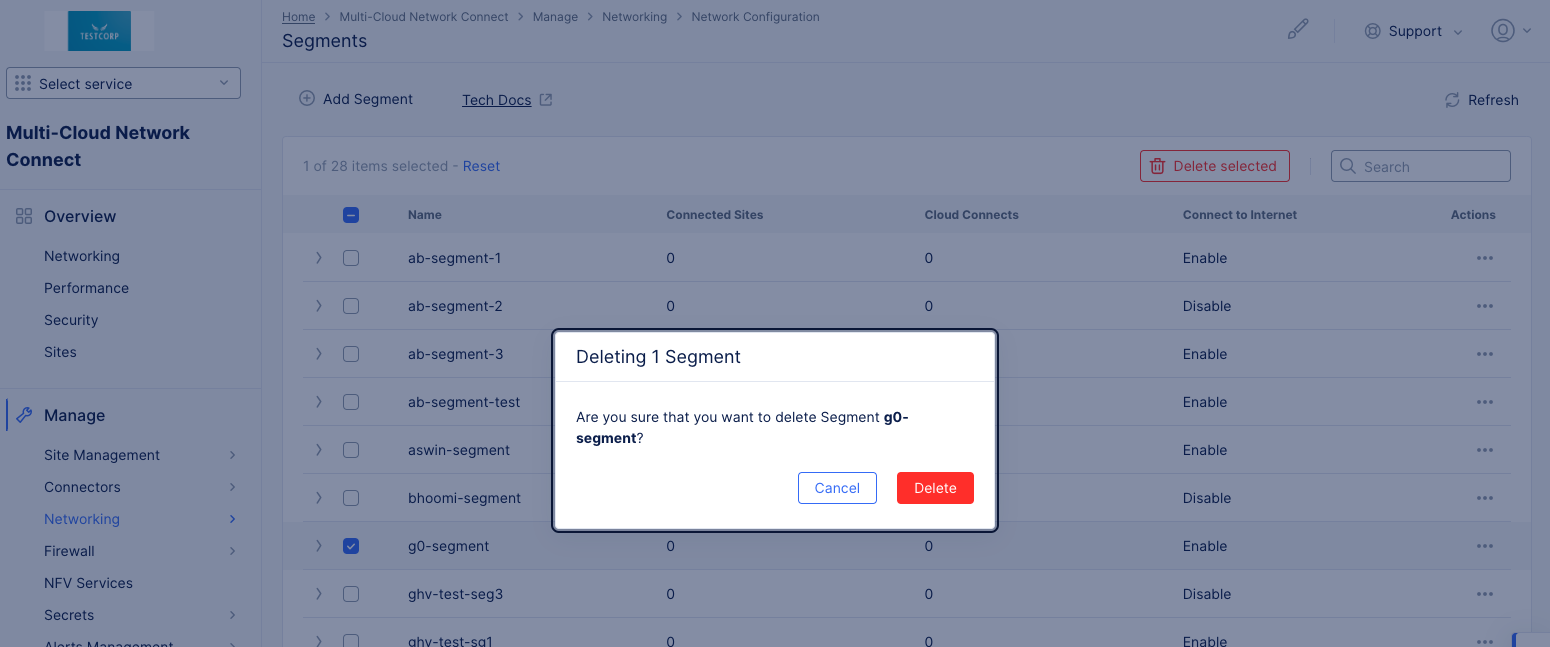
Figure: Delete Segment
Manage Segment Connections
-
In Console, select
Multi-Cloud Network Connect. -
Click
Manage>Networking>Segment Connector. TheSegment Connectorpage shows a list of your segment connections with key details shown for each.
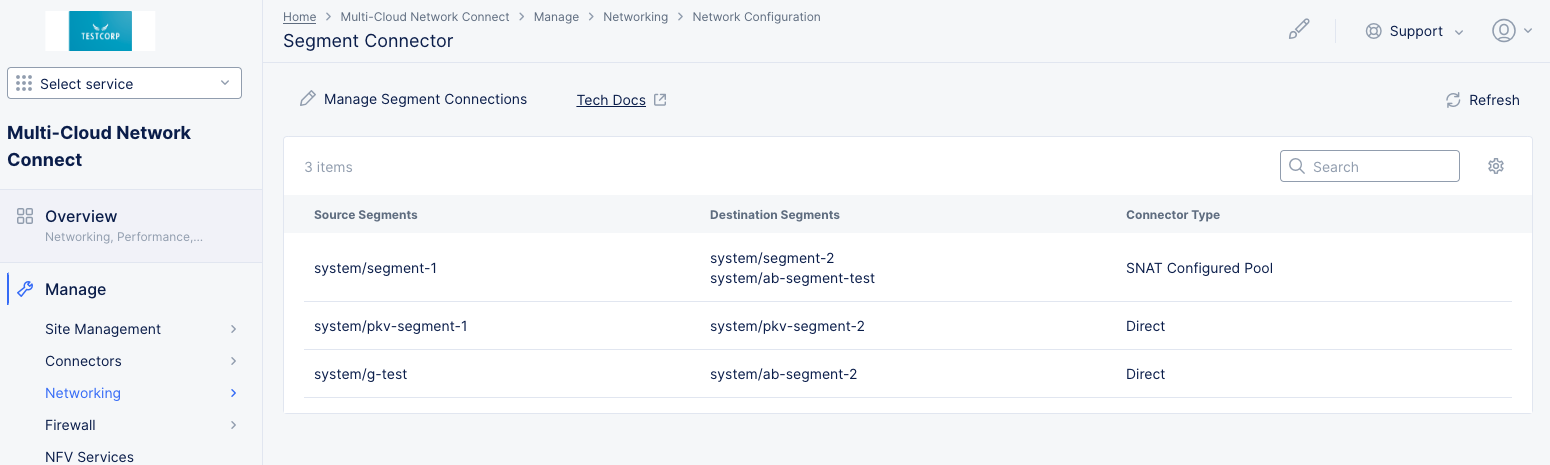
Figure: Segment Connections
-
To take specific action on this page:
-
Change the key details you see in the table by clicking on the gear icon ( ⚙ ) and selecting different fields.
-
Enter text in the
Searchfield to only see table rows that include that text (even if they were not shown due to theitems per pagesetting).
-
Manage segment connections.
-
Click
Manage Segment Connectionsto add, modify, or delete connections. -
From the
Segment Connectorssection, you can see your list of connections between segments, the type of connection and perform the following:- Click the pencil icon to modify the connection shown in that row.
- Click the trash can icon to delete the connection.
- Click
Add Itemto create a new connection. Optionally, add labels and a description.
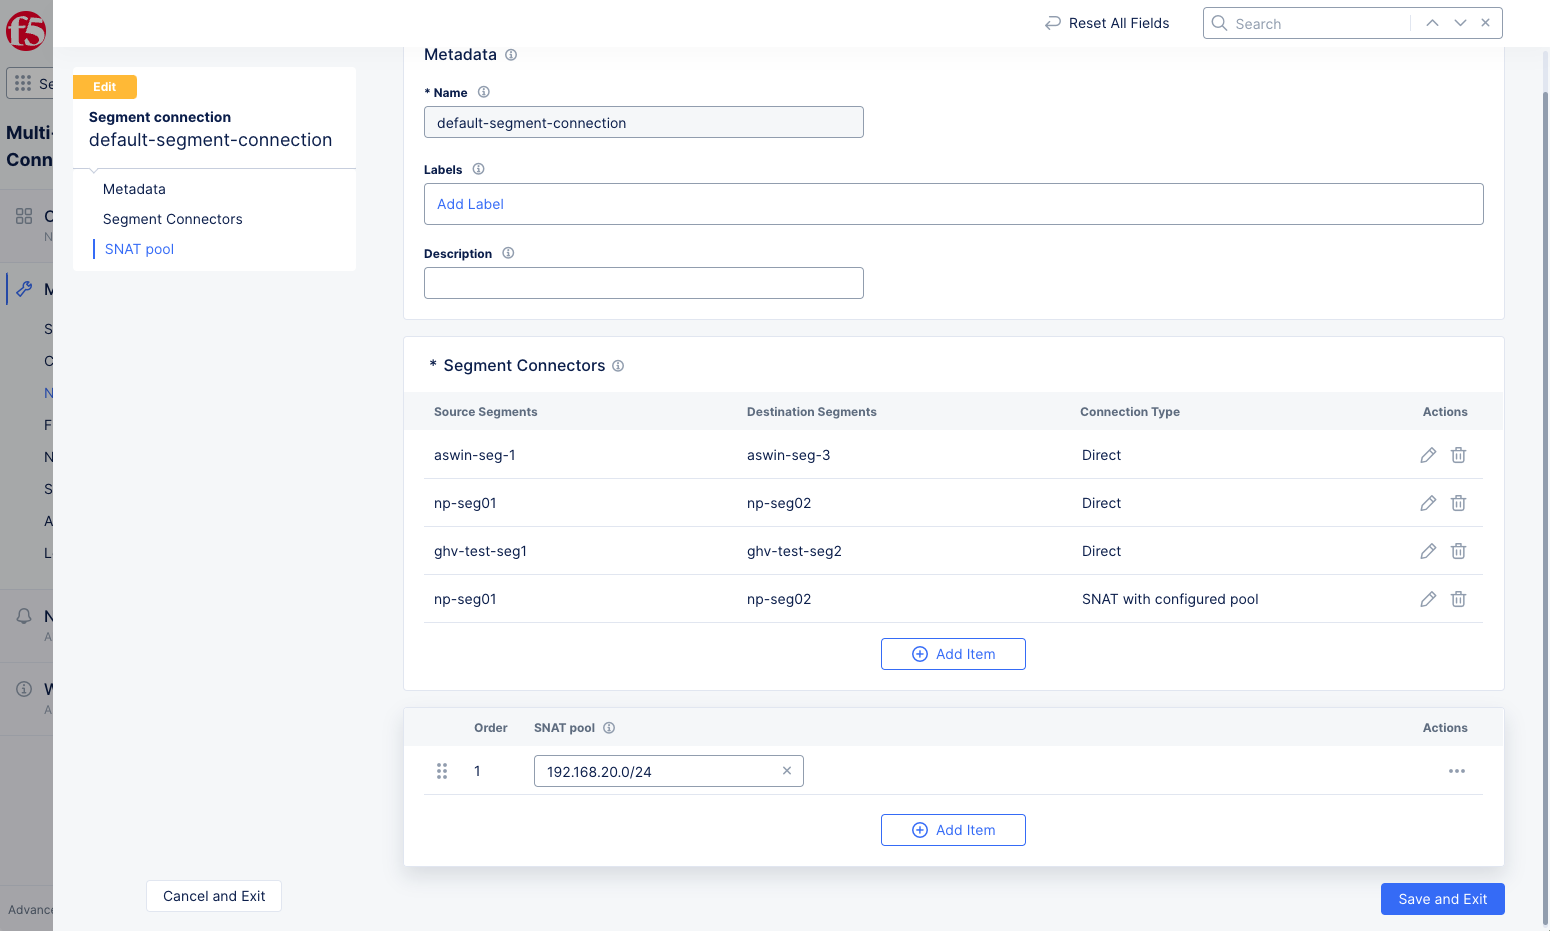
Figure: Segment Connections List
- In the
Source Segmentssection, use the drop-down menu to select a segment. Use the...menu in theActionscolumn to view, edit, or delete that segment. ClickAdd Itemto add additional source segments.
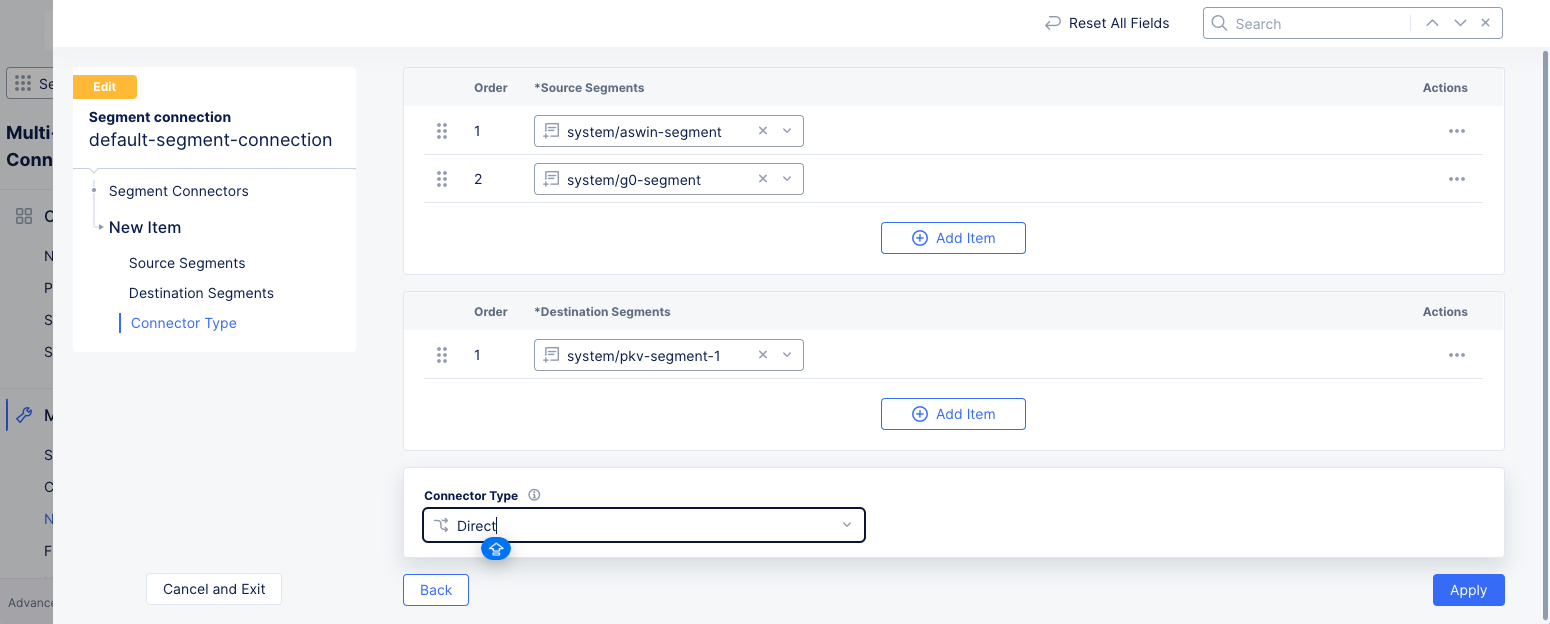
Figure: Segment Connection Form
-
In the
Destination Segmentssection, use the drop-down menu to select a segment. Use the...menu in theActionscolumn to view, edit, or delete that segment. ClickAdd Itemto add additional destination segments. -
From the
Connector Typedrop-down menu, select how you want the segments to connect. -
From the
SNAT poolsection, view the SNAT pools for your connections that use a configured SNAT pool. If needed, perform the following:- Enter the IP address of your SNAT pool. Use
Add Itemto enter more SNAT pools. - Click
...>Deleteto delete a SNAT pool.
- Enter the IP address of your SNAT pool. Use
-
Click
Save and Exitto save your changes.
Concepts
- System Overview
- Core Concepts
- Networking
- F5 Distributed Cloud - Customer Edge
- F5 Distributed Cloud Site