Create Forward Proxy Policy
Objective
This guide provides instructions on how to create a forward proxy policy using the guided wizard in F5® Distributed Cloud Services. Forward proxy policies are applied when the F5 gateway is used in transit.
Using the instructions provided in this document, you can create forward proxy policies with policy rules controlling the traffic to secure your network.
Prerequisites
-
A valid Account is required. If you do not have an account, see Getting Started with Console.
-
One or more cloud or edge locations with F5 Sites. Install the node or cluster image in your Cloud or Edge location.
Configuration
Create Forward Proxy Policy
Step 1: Open policy configuration form.
- Open
F5® Distributed Cloud Consolehomepage, selectMulti-Cloud Network Connectbox.
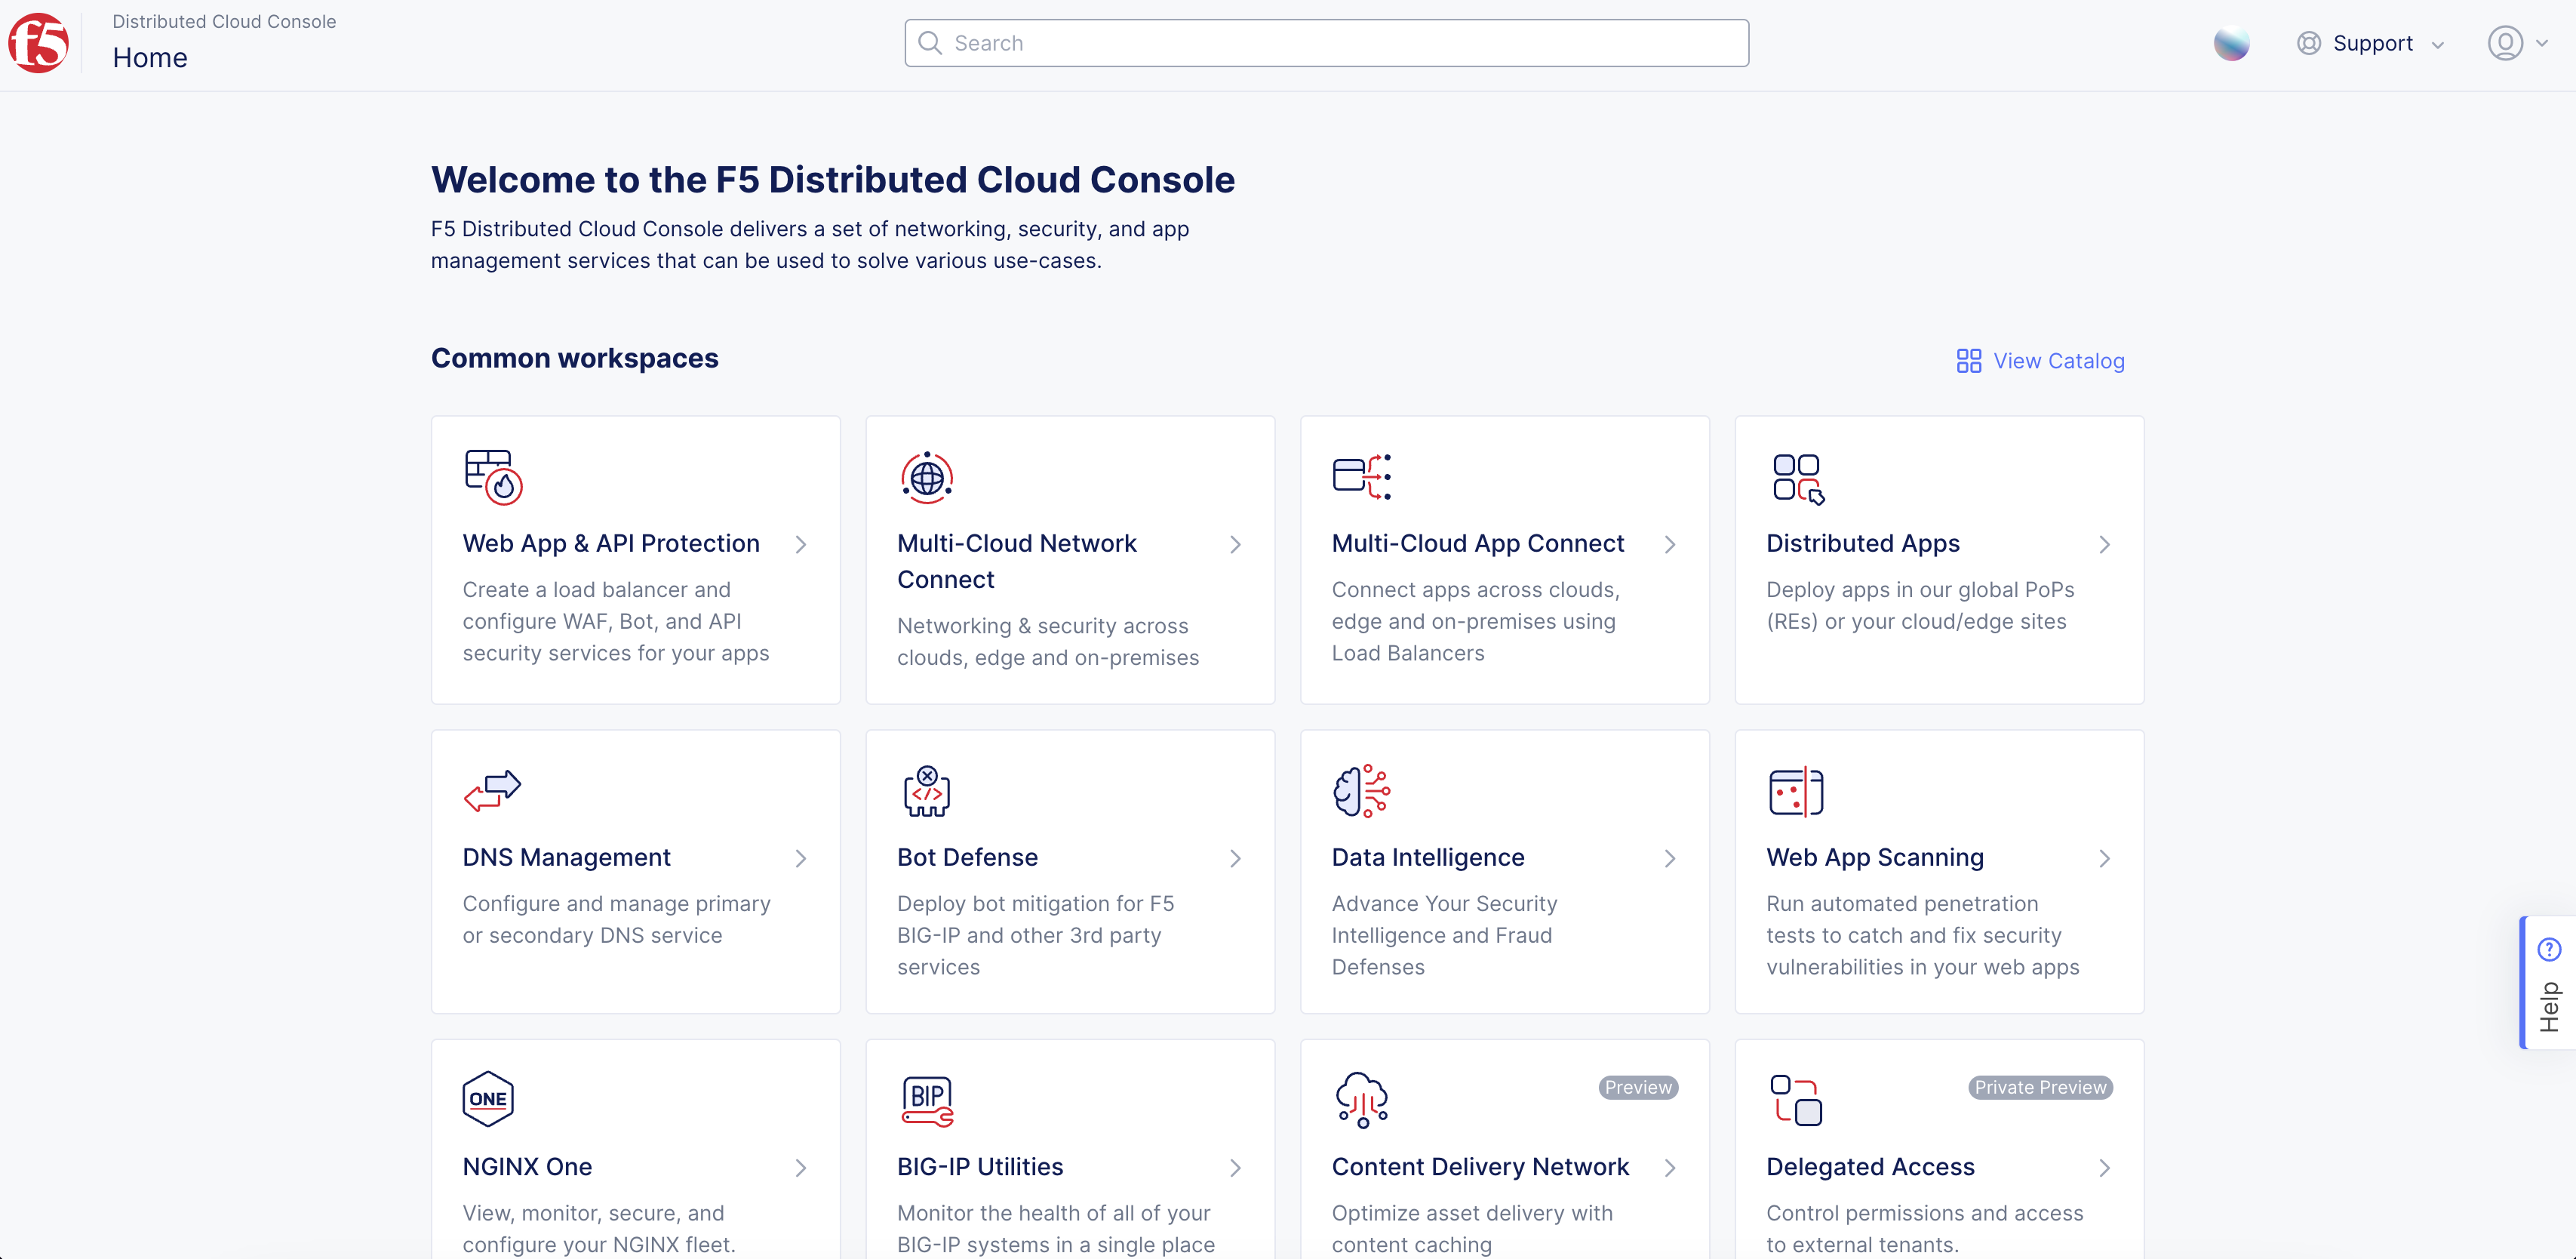
Figure: Homepage
-
Select
Manage>Firewall>Forward Proxy Policies. -
Select
Add Forward Proxy Policy.
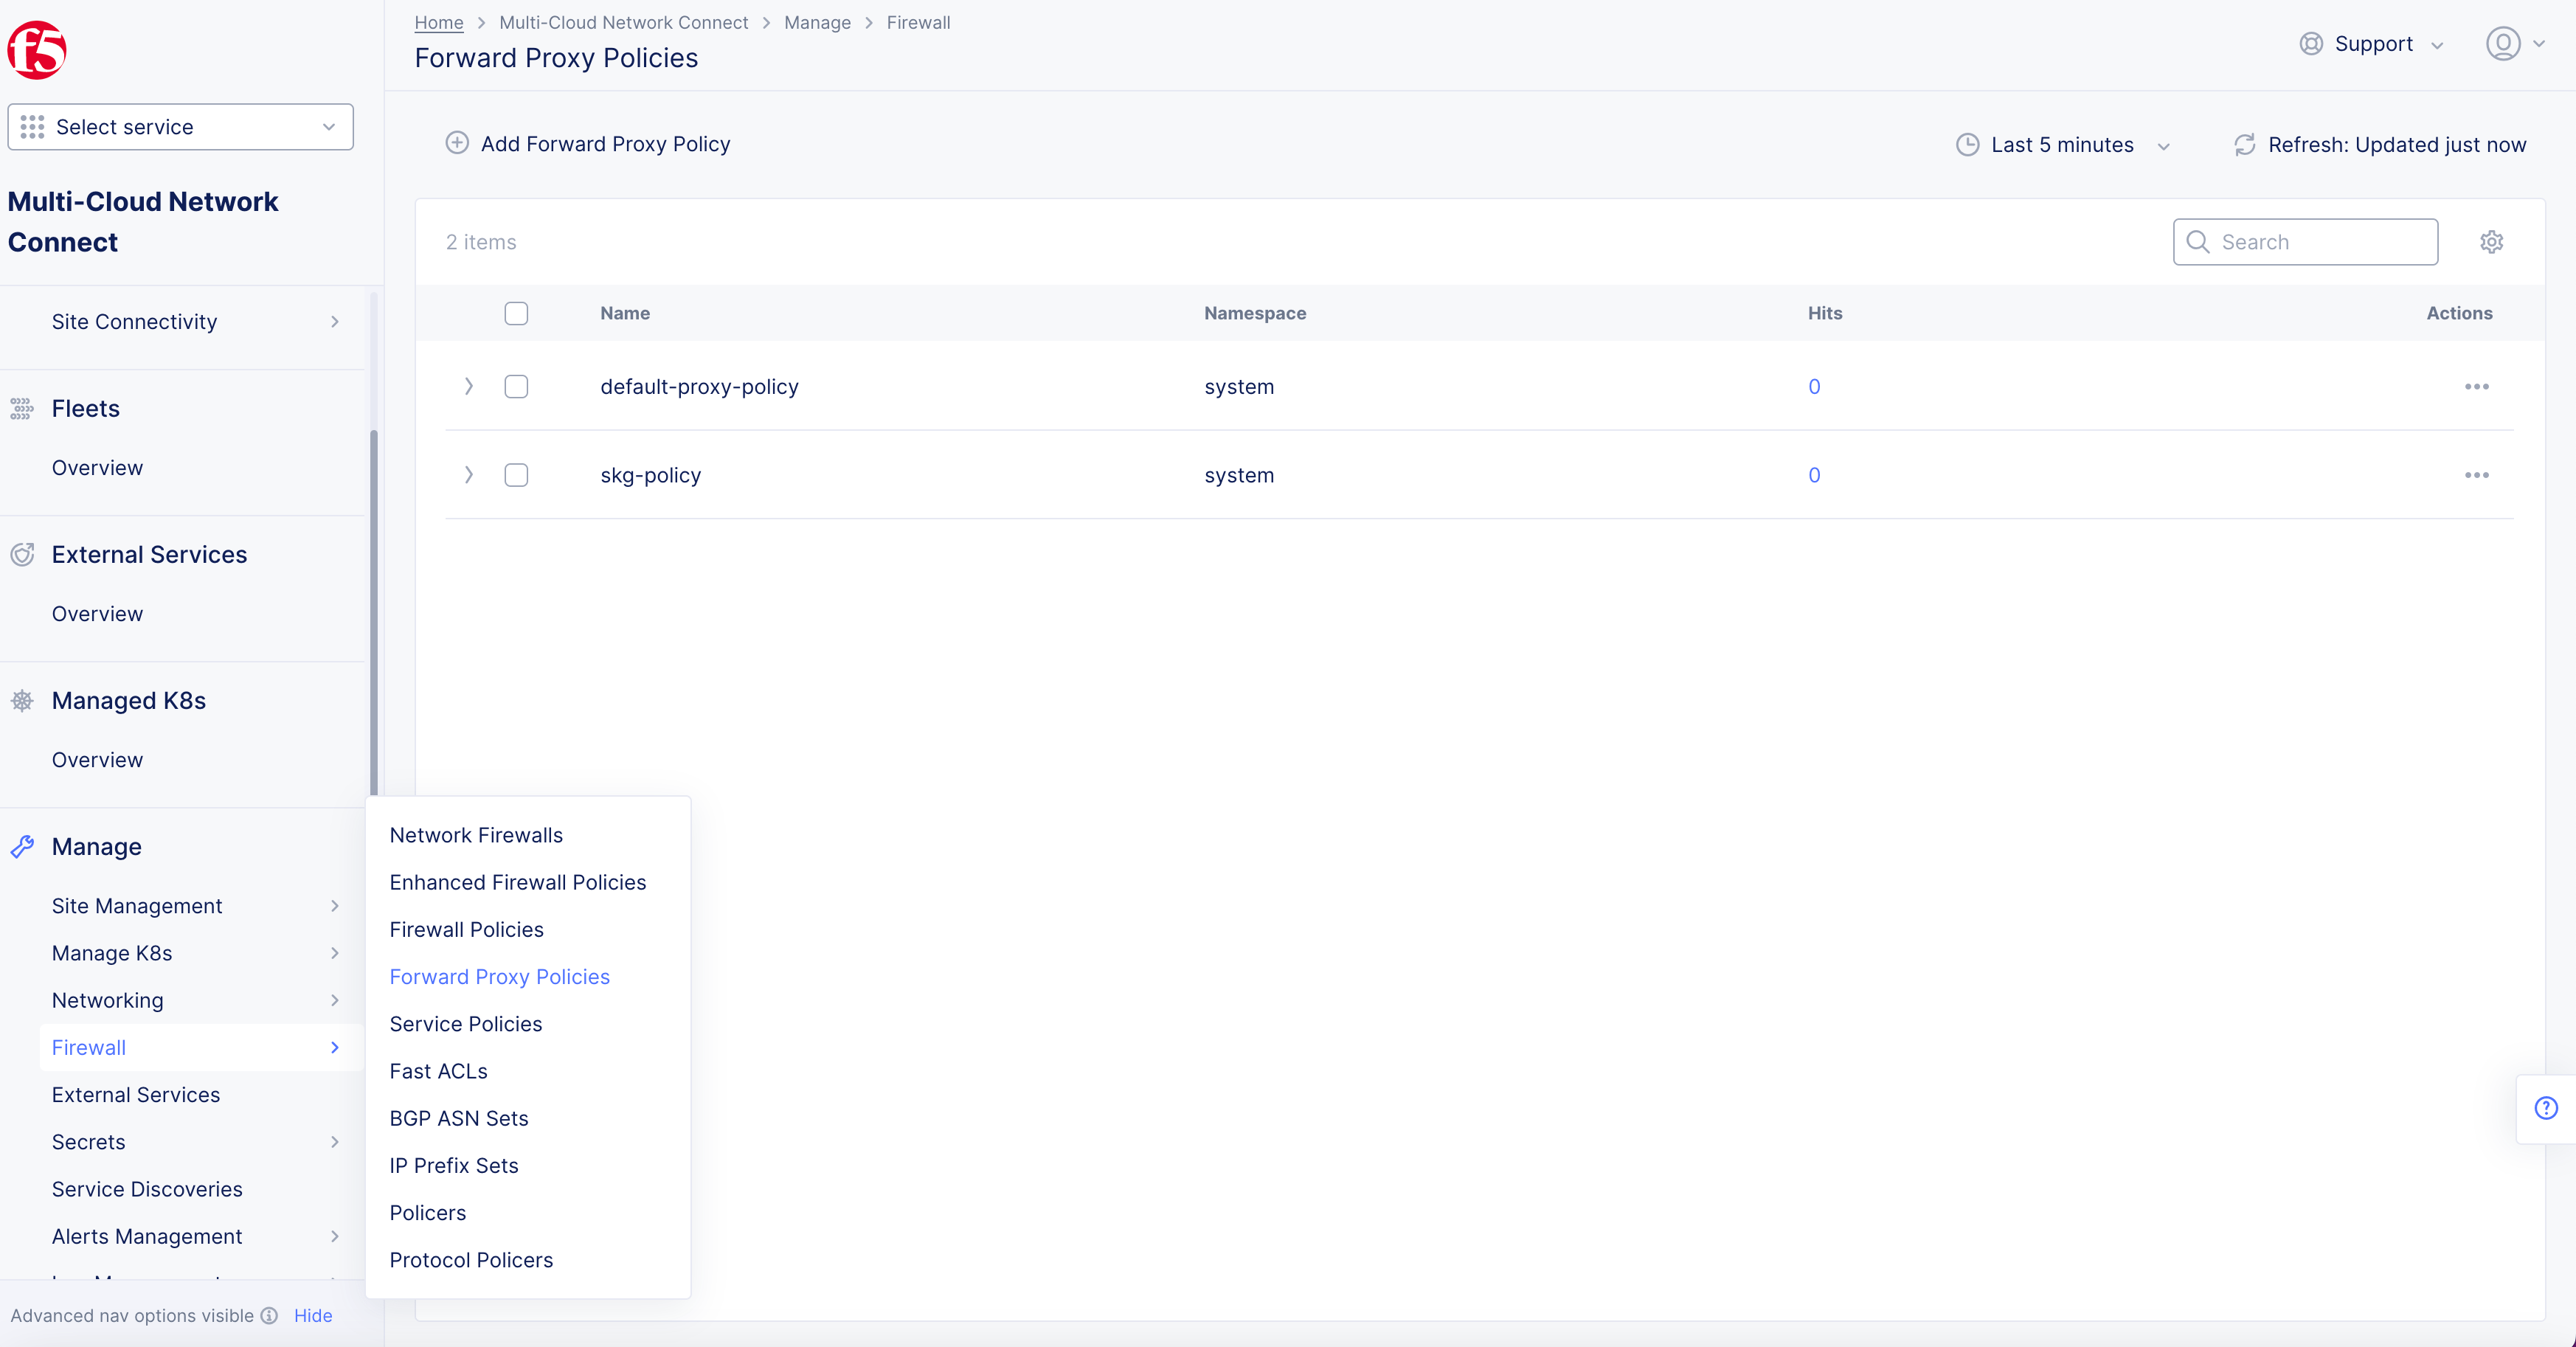
Figure: Forward Proxy Policies
Step 2: Create and configure proxy.
-
Enter
Name,Labels, andDescriptionas needed. -
Select Forward Proxydrop-down menu inProxybox options:-
All Forward Proxies on Site: All the proxies configured. -
Network Connector>Select Network Connectorin drop-down menu to a specific network connector. -
Network Connector Label Selector>Selector Expressionlabel in drop-down menu to identify label selection for network connector.
-
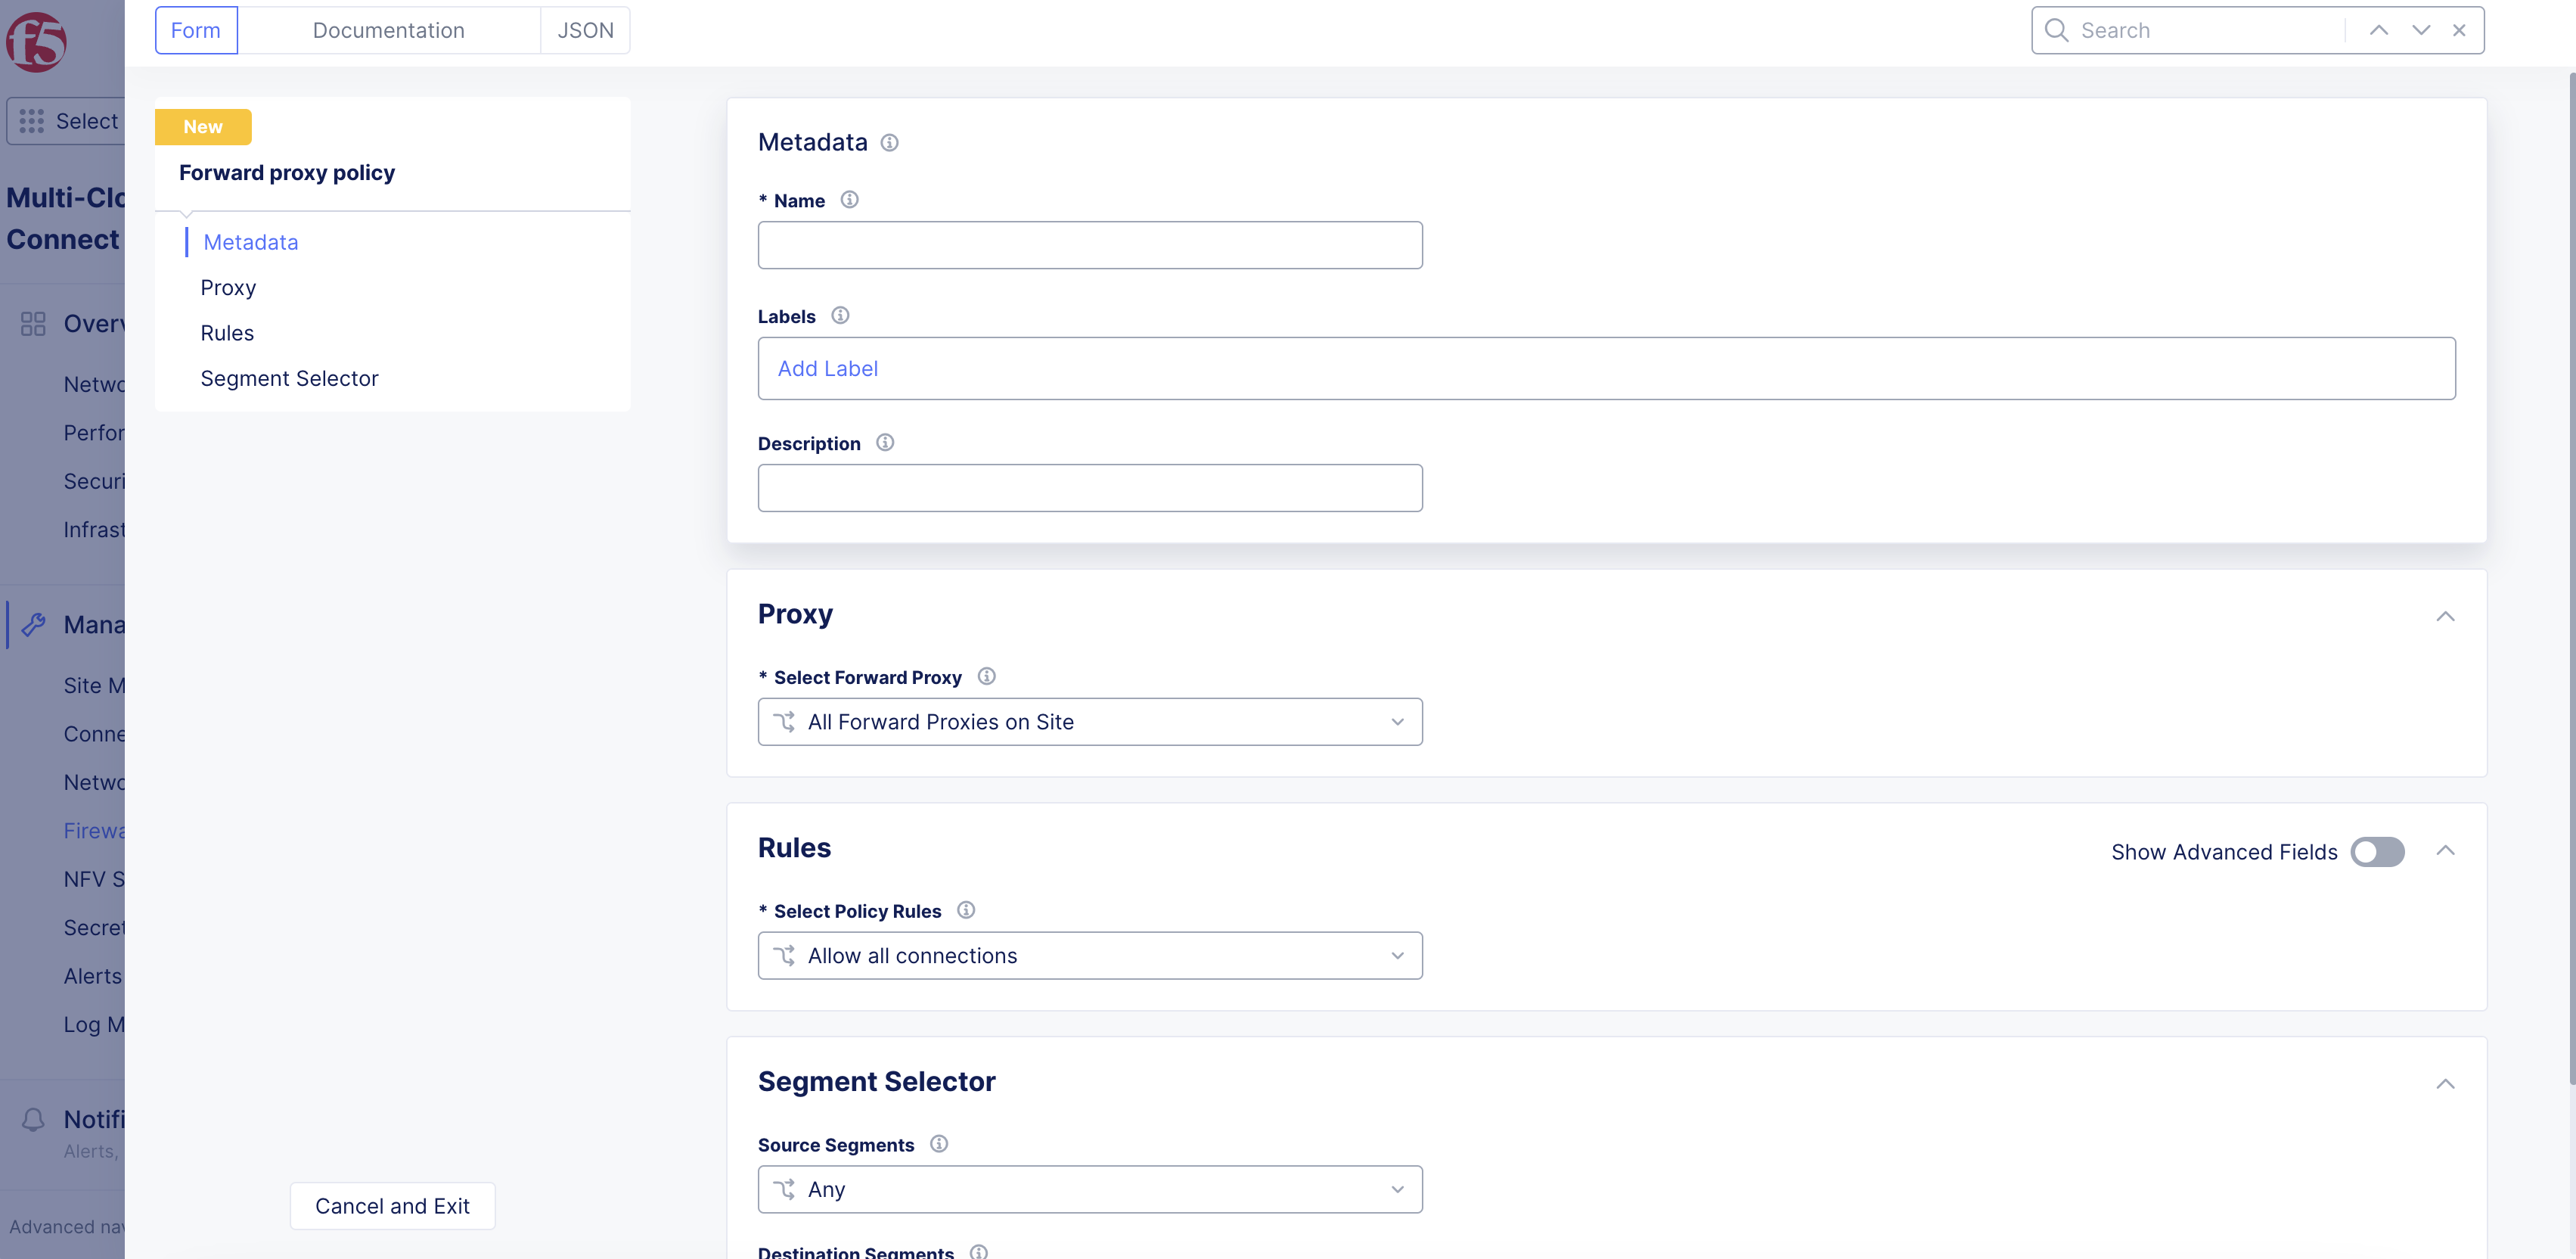
Figure: Create Policy
Step 3: Configure policy rules.
Select Policy RulesinRulessection drop-down options:
Allow all connections
This option allows all traffic.
Allowed connections: Connections to allow; everything else is denied.
-
Configure connection options:
-
TLS Domains: SelectAdd item> SelectEnter Domaindrop-down menu option:Exact Value,Suffix Value, orRegex Values of Domains. Enter the value in box to match domains. Then clickApply. -
HTTP URLs: SelectAdd item> SelectEnter Domaindrop-down menu option:Exact Value,Suffix Value, orRegex Values of Domains. Enter the value in box to match domains.Enter Pathdrop-down option. Then clickApply. -
L4 Destination List: SelectAdd item. SelectAdd Itemto add additional prefixes. EnterPort Ranges. SelectApply. -
Select
Default Actiondrop-down menu option:Next Policy,Deny, orAllow.
-
Note: If
L4 Destination ListandDefault Actionoptions do not appear, selectShow Advanced Fieldstoggle located in upper-right corner ofRulessection.
Denied connections: Connections to deny; everything else will be allowed.
-
Configure connection options:
-
TLS Domains: SelectAdd item> SelectEnter Domaindrop-down menu option:Exact Value,Suffix Value, orRegex Values of Domains. Enter the value in box to match domains. Then clickApply. -
HTTP URLs: SelectAdd item> SelectEnter Domaindrop-down menu option:Exact Value,Suffix Value, orRegex Values of Domains. Enter the value in box to match domains.Enter Pathdrop-down option. Then clickApply. -
L4 Destination List: SelectAdd item. SelectAdd Itemto add additional prefixes. EnterPort Ranges. SelectApply. -
Select
Default Actiondrop-down menu option:Next Policy,Deny, orAllow.
-
Note: If
L4 Destination ListandDefault Actionoptions do not appear, selectShow Advanced Fieldstoggle located in upper-right corner ofRulessection.
Custom Rule List: List of custom rules.
-
Select
Configurelink. -
Select
Add item. -
Enter
NameandDescriptionas needed. -
Select
Actiondrop-down menu option:DenyorAllow. -
From the
Select Connection Sourcedrop-down menu, select an option:-
All Sourcesto apply the rule to all source endpoints. -
IPv4 Prefix Listto specify IPv4 prefixes and enter the prefixes. ClickConfigure. Enter prefixes for IPv4 or IPv6. UseAdd Itemto add more than one prefix list. Then clickApply. -
Source Label Selectorto useAdd Label. The key-value combination of the label determines the source endpoints. -
IP Prefix Setto specify a prefix set and select the prefix set from the drop-down list for theIP Prefix Setoption. You can also create a new prefix set using theAdd Itemoption in the drop-down list.
-
-
From the
Destination Choicedrop-down menu, select an option:-
All Destinationsto apply the rule to all destination endpoints. -
TLS Domainsto specify the HTTPS domains to which the rule applies. SelectAdd Item. Select an option from the drop-down list of theEnter Domainfield, and set an HTTPS domain in the displayed option. EnterExact Valuein box. You can specify the exact domain name or a suffix or specify regular expression to match domains. SelectApply. -
HTTP URLsto specify the HTTP URLs to which the rule applies. SelectAdd Item. Select an option from the drop-down list of theEnter Domainfield, and set a URL in the displayed option. You can specify the exact URL, or a suffix or specify regular expression to match the URL. SelectEnter Pathdrop-down menu option. SelectApply. -
IPv4 Prefix Listto specify the IPv4 prefix to which the rule applies. ClickConfigure. Enter prefixes for IPv4 or IPv6. UseAdd Itemto add more than one prefix list. Then clickApply. -
IP Prefix Setto selectIP Prefix Setdrop-down menu options to specify the IP prefix set to which the rule applies. You can useAdd Itemif needed and configure metadata. -
BGP ASN Listto specify the BGN ASN list to which the rule applies. SelectConfigure. EnterAS Numbersin box. UseAdd Itemas needed. SelectApply. -
Select
Applyto apply the custom rule list to the forward proxy policy configuration. -
Select
Applyto return toCustom Rule Listpage.
-
Denied Connections Example:
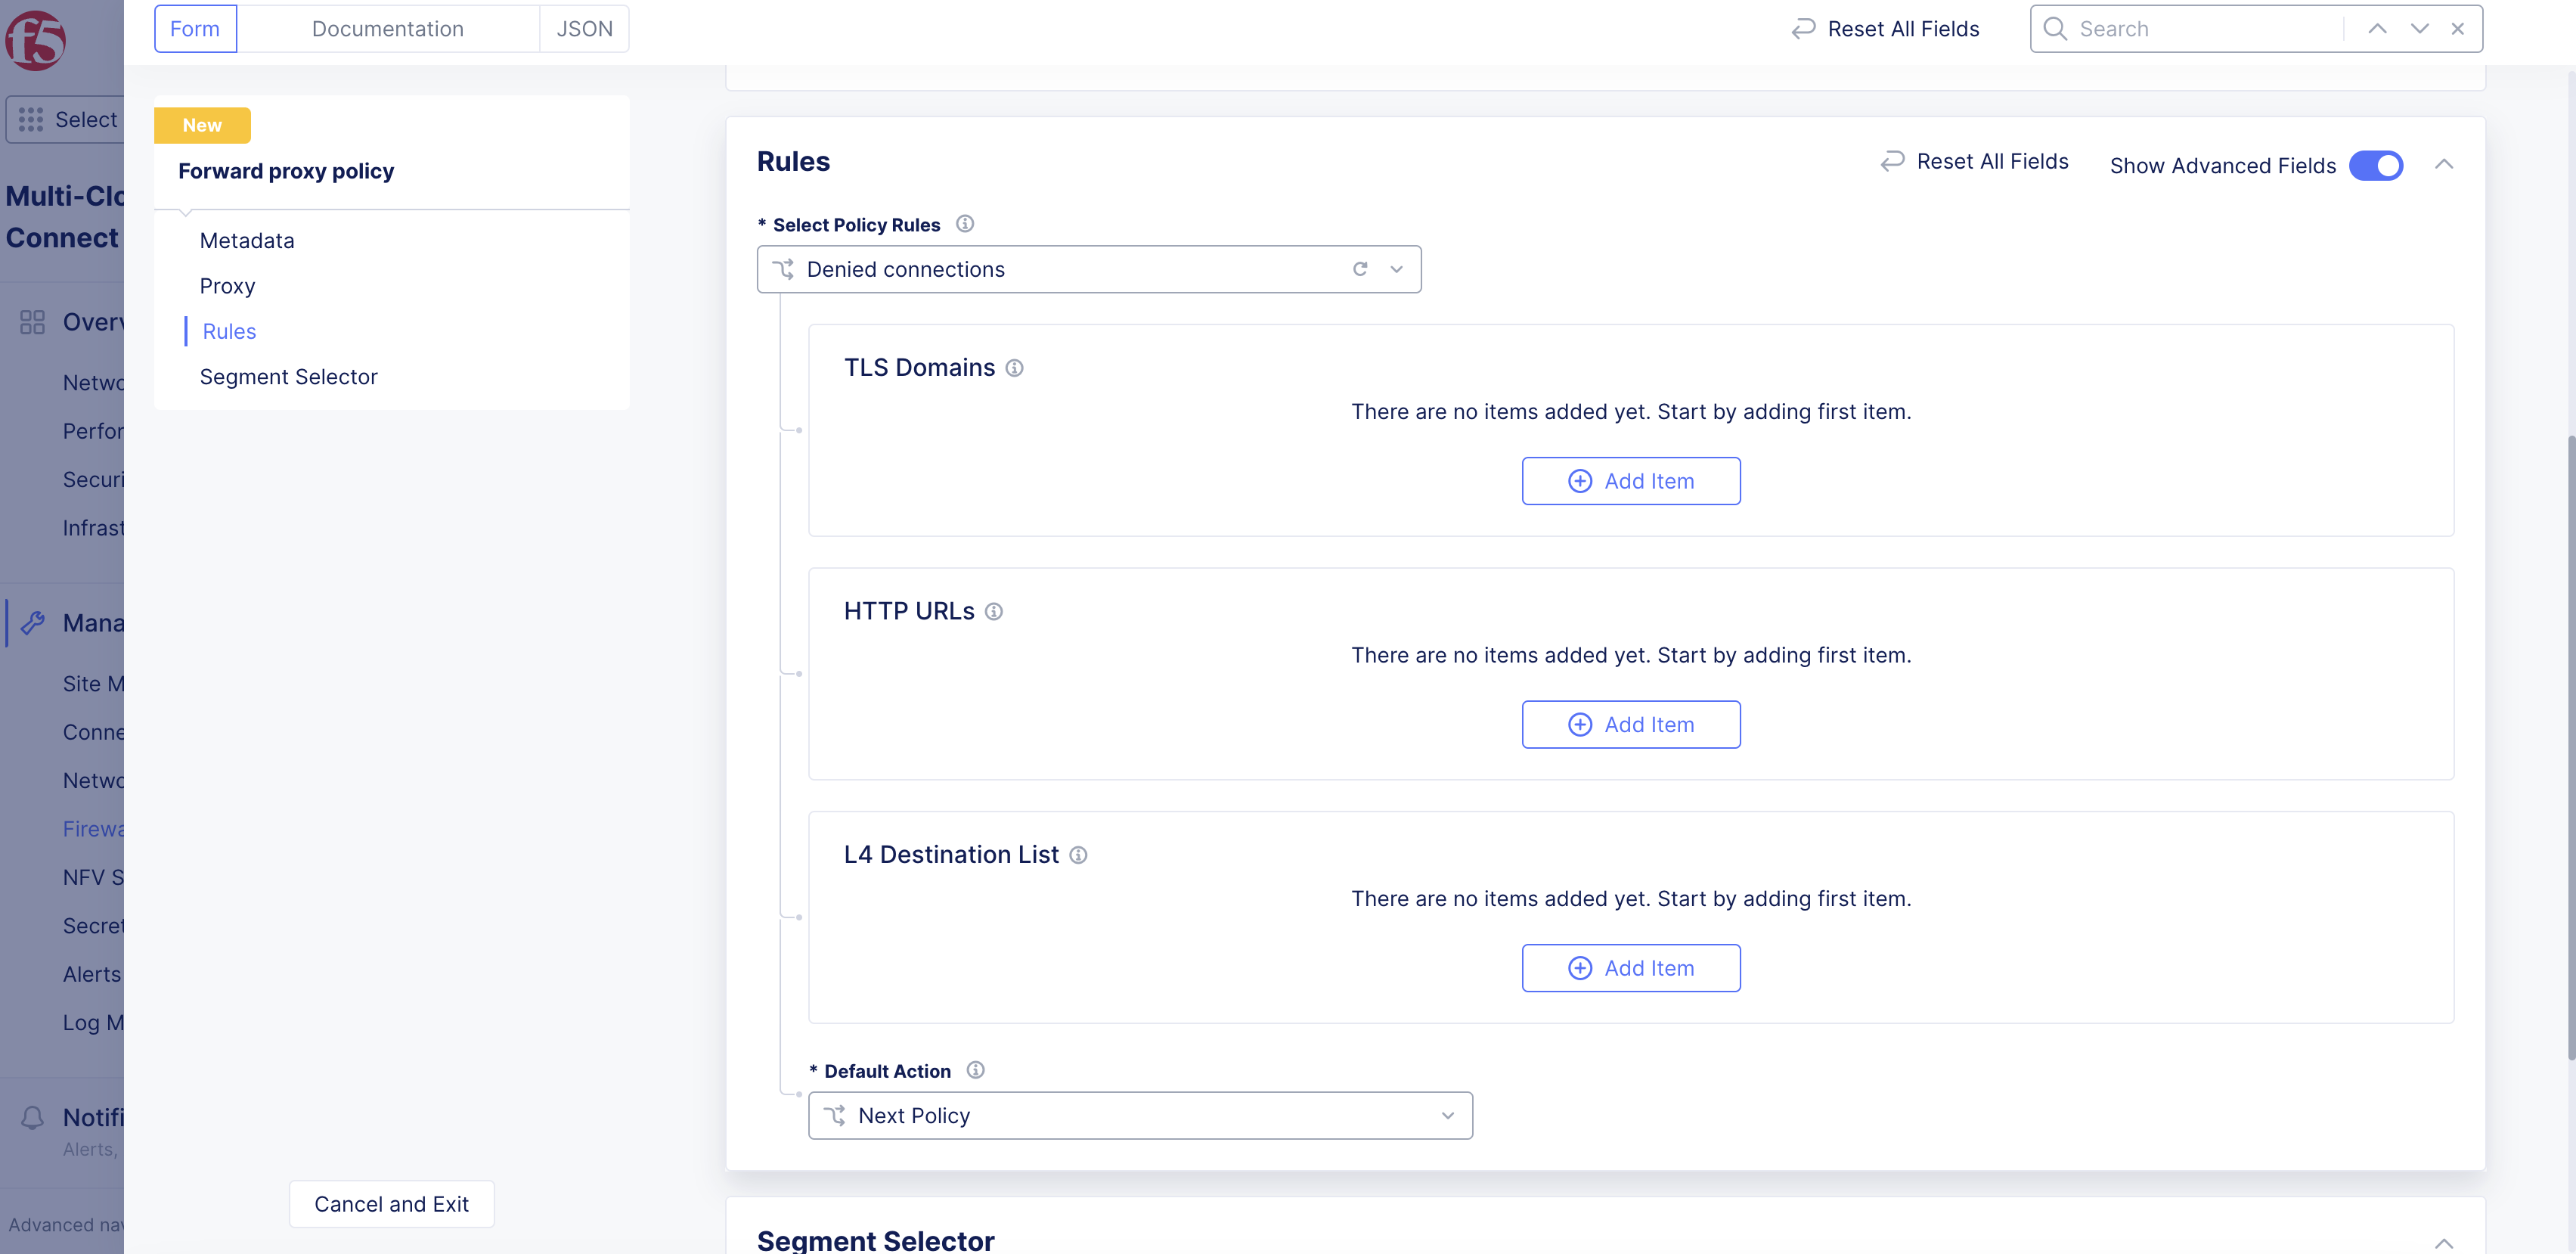
Figure: Policy Rules Configuration
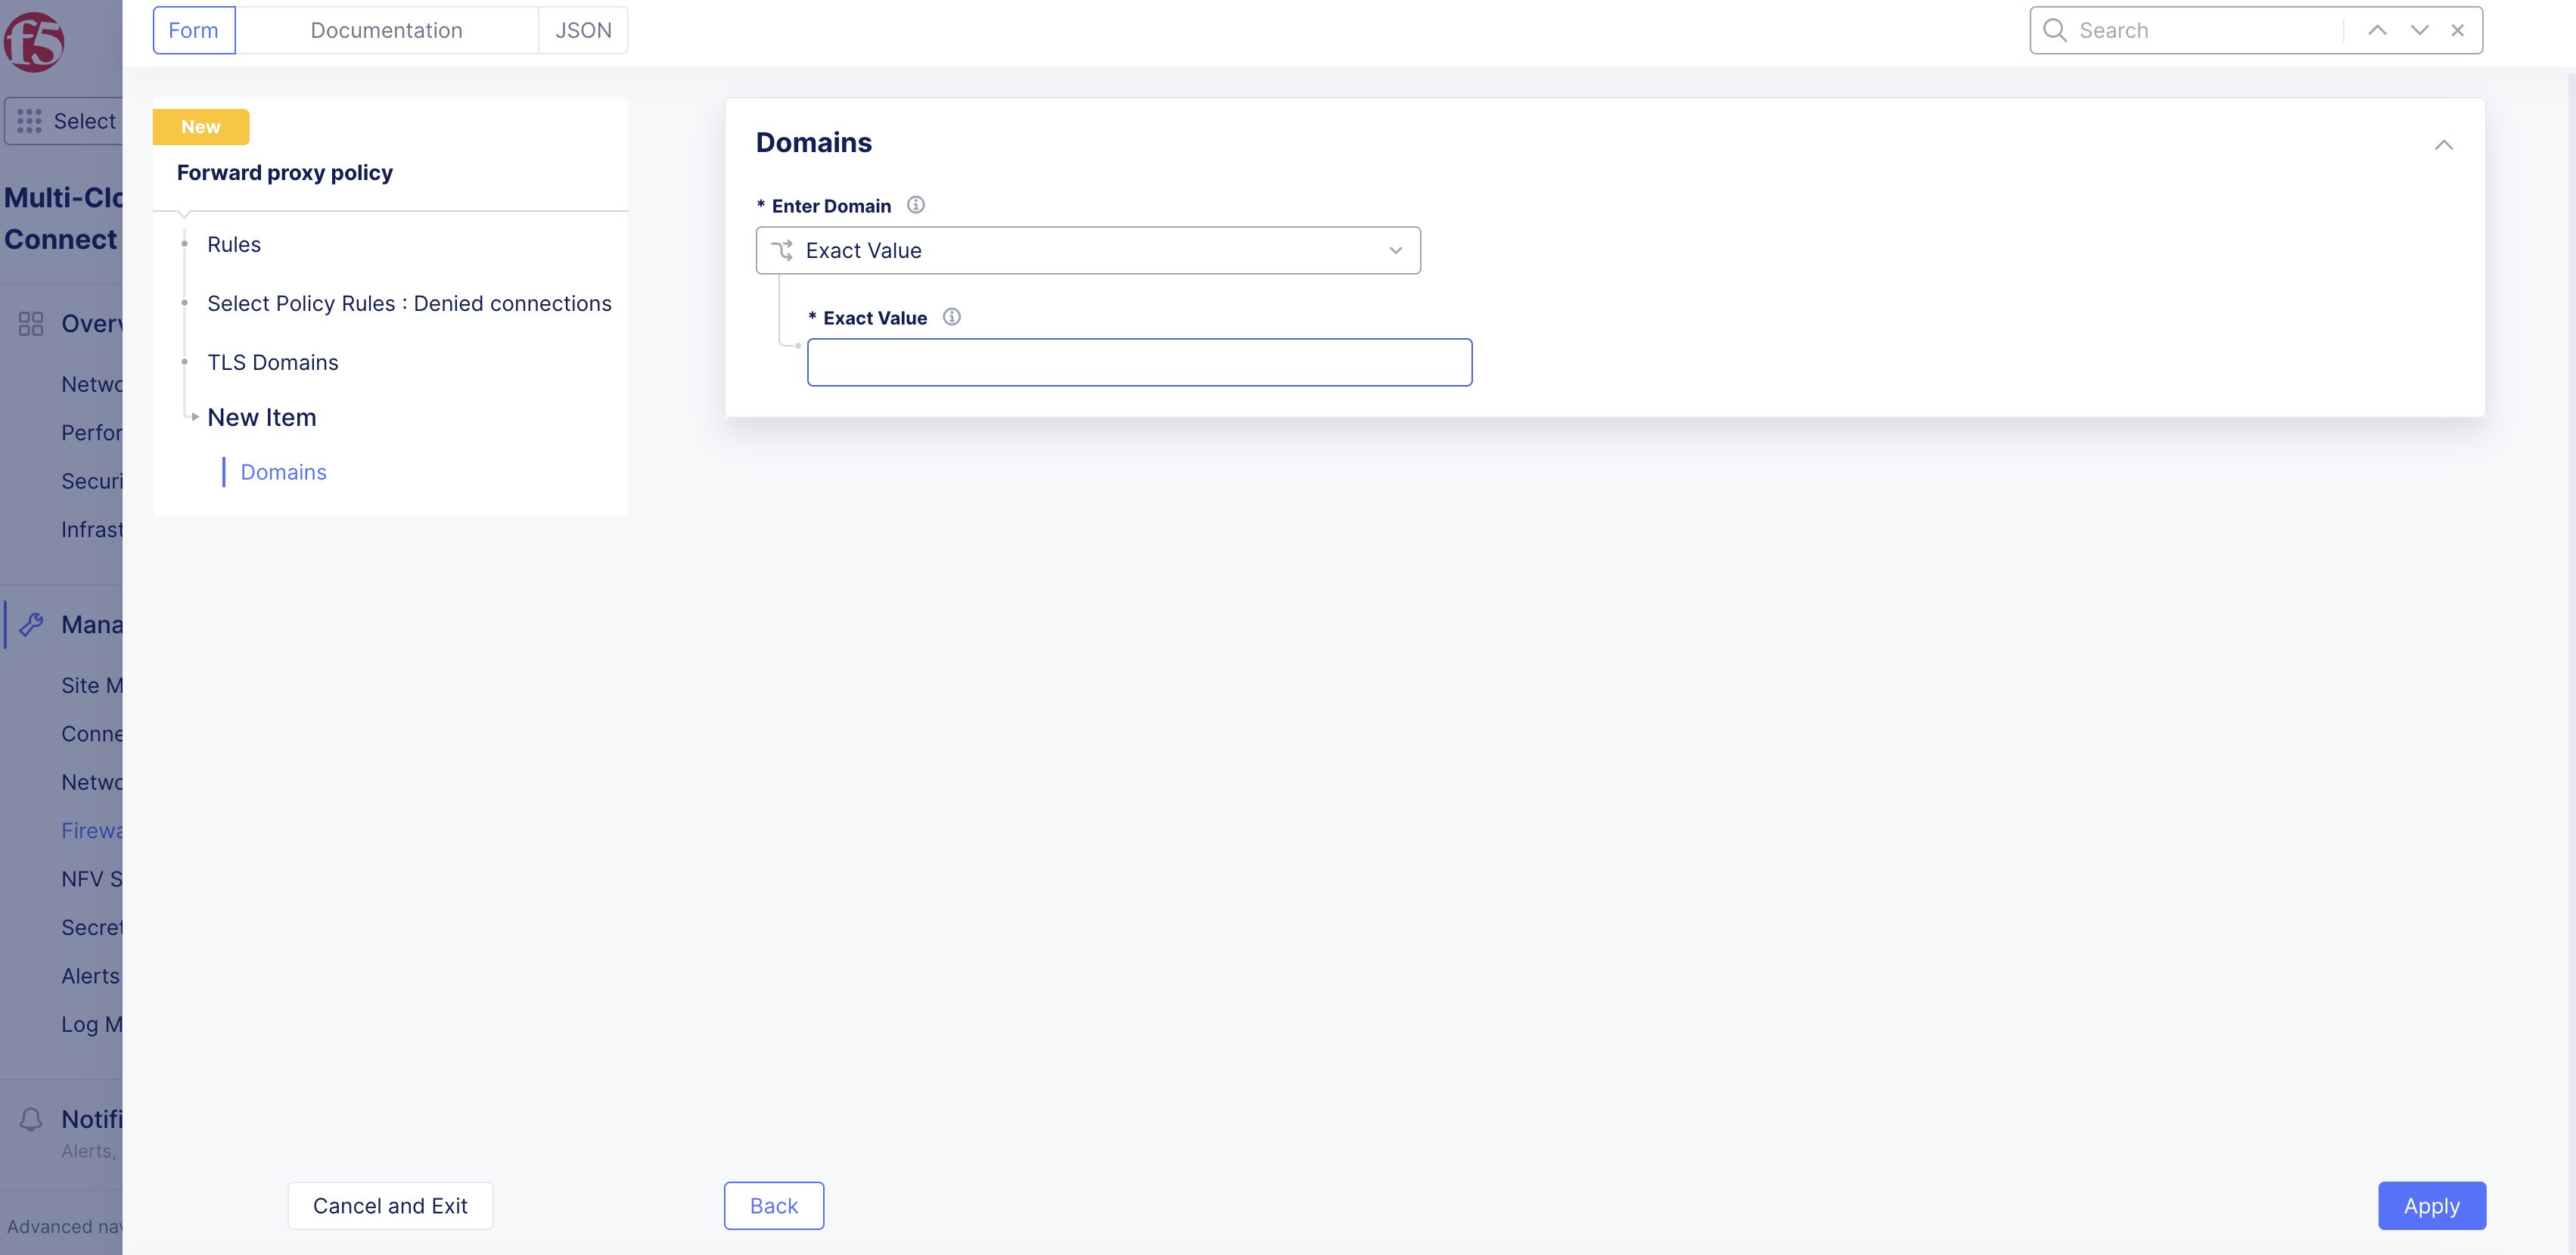
Figure: TLS Domains for Deny Connections
Step 4: Complete forward proxy policy creation.
-
Select
Save and Exit. -
Verify forward proxy policy is displayed in
Manage>Firewall>Forward Proxy Policyview.
Step 5: Attach policy to network firewall.
After creating the forward proxy policy, you can attach it to the network firewall.
-
Select
Manage>Firewall>Network Firewalls. -
Select
...>Manage Configurationfor your firewall from the displayed list. -
Select
Edit Configuration. -
Go to
Forward Proxy Policysection and selectActive Forward Proxy Policiesin theSelect Forward Proxy Policy Configurationdrop-down menu. -
Select the created forward proxy policy from the list drop-down menu in the
Forward Proxy Policysection. You can add multiple policies usingAdd Item.
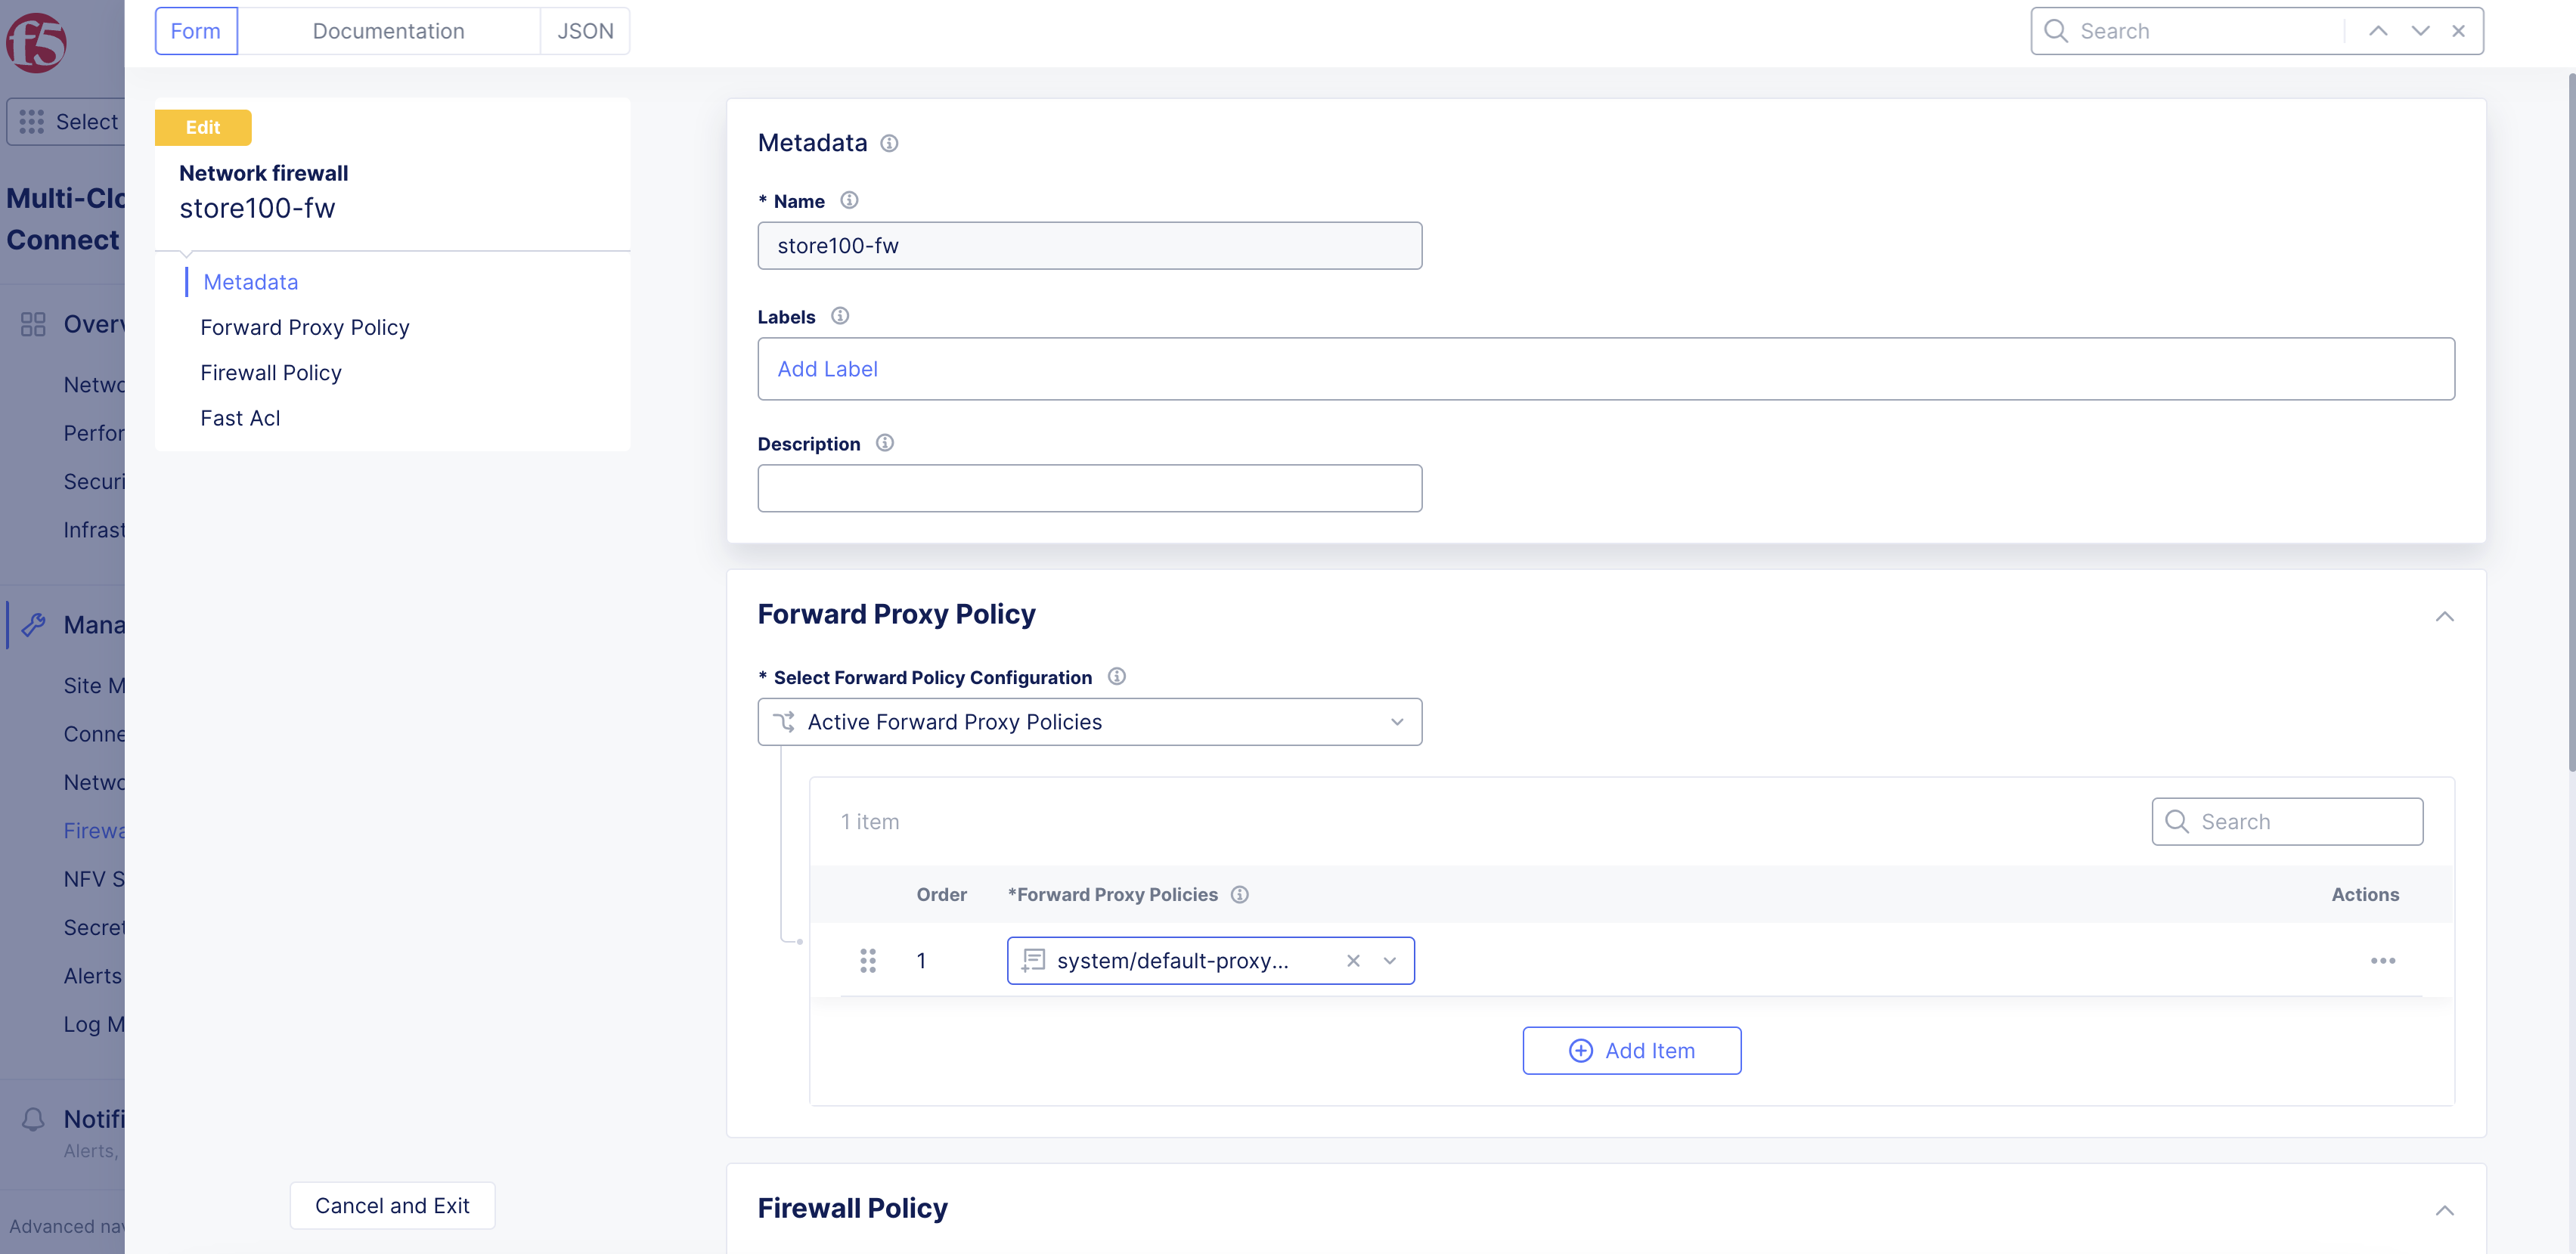
Figure: Attach Policy to Network Firewall
- Select
Save and Exit.
Step 6: Verify policy operation.
-
Select
Manage>Firewall>Forward Proxy Policies. -
Check the
Hitsfield for the displayed list of forward proxy policies. This indicates how many times a network policy is applied to the traffic. -
Select the value of
Hitsto display the which rules are applied and how many times they are applied. You can obtain policy or rule hits over a specific time interval using the time interval selector option.