Create IP Address Allocators
Objective
This document provides instructions on how to create IP Address Allocators in F5® Distributed Cloud Console. Use an IP Address Allocator object to allocate an address or subnet from a given address pool. The mode of the allocator object determines if the allocation is limited within the local site or if the allocation is across different sites (global). The allocator creates a subnet based on the defined allocation scheme. For example, an allocation scheme can define the prefix length of the subnet to be allocated.
Note: Currently, only the local mode of allocation is supported.
Using the instructions provided in this guide, you can create an IP address allocator using an address pool and specify how the subnets are to be allocated.
Prerequisites
-
F5 Distributed Cloud Account is required. If you do not have an account, see Getting Started with Console.
-
One or more registered sites in the enterprise tenant. If you do not have a registered site, see How-to Create a Site.
Create an IP Address Allocator
Perform the following steps to create an IP address allocator in Distributed Cloud Console:
Step 1: Log into Console and start creating an IP address allocator.
-
From the Home screen, select Multi-Cloud Network Connect under All Services.
-
Navigate to Manage > Networking > IP Address Allocators to see a list of existing address allocators. Then select Add Address Allocator.
-
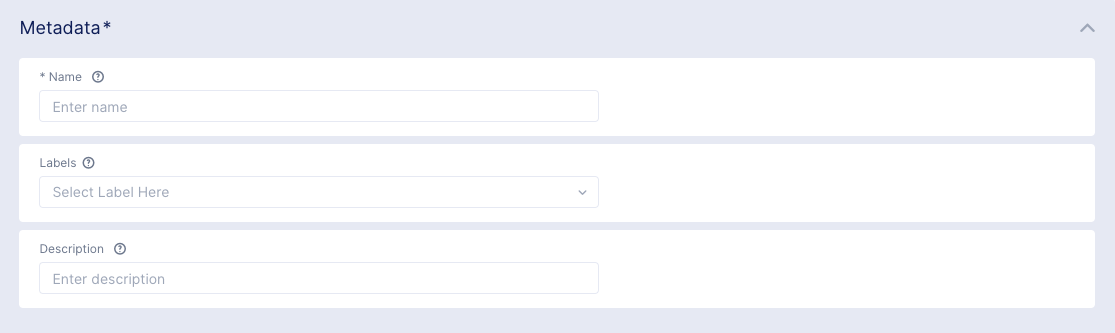
In the Metadata section, perform the following:
-
Enter a name for the address allocator. This name must be unique within the namespace and entered in RFC 1035 format (like a domain name, for example: acmecorp-web or acmecorp-web.com).
-
Optionally select one or more labels. For each label, select a key and corresponding value.
-
Optionally enter a human readable description for the address allocator.

Figure: IP address allocator metadata
-
Step 2: Configure the address allocation scheme.
-
In the
Address Allocator Modedropdown, selectLocal.Note: Currently only Local mode is implemented, meaning the address allocator will be limited to allocating within the local cluster or site.
-
In the
Allocation Unitfield, enter a prefix length indicating the size of each allocated subnet. Use the arrow keys to increment or decrement the value -
In the
Local Interface Address Typedropdown, select an offset type. -
In the
Local Interface Address Offsetfield, enter an offset value.
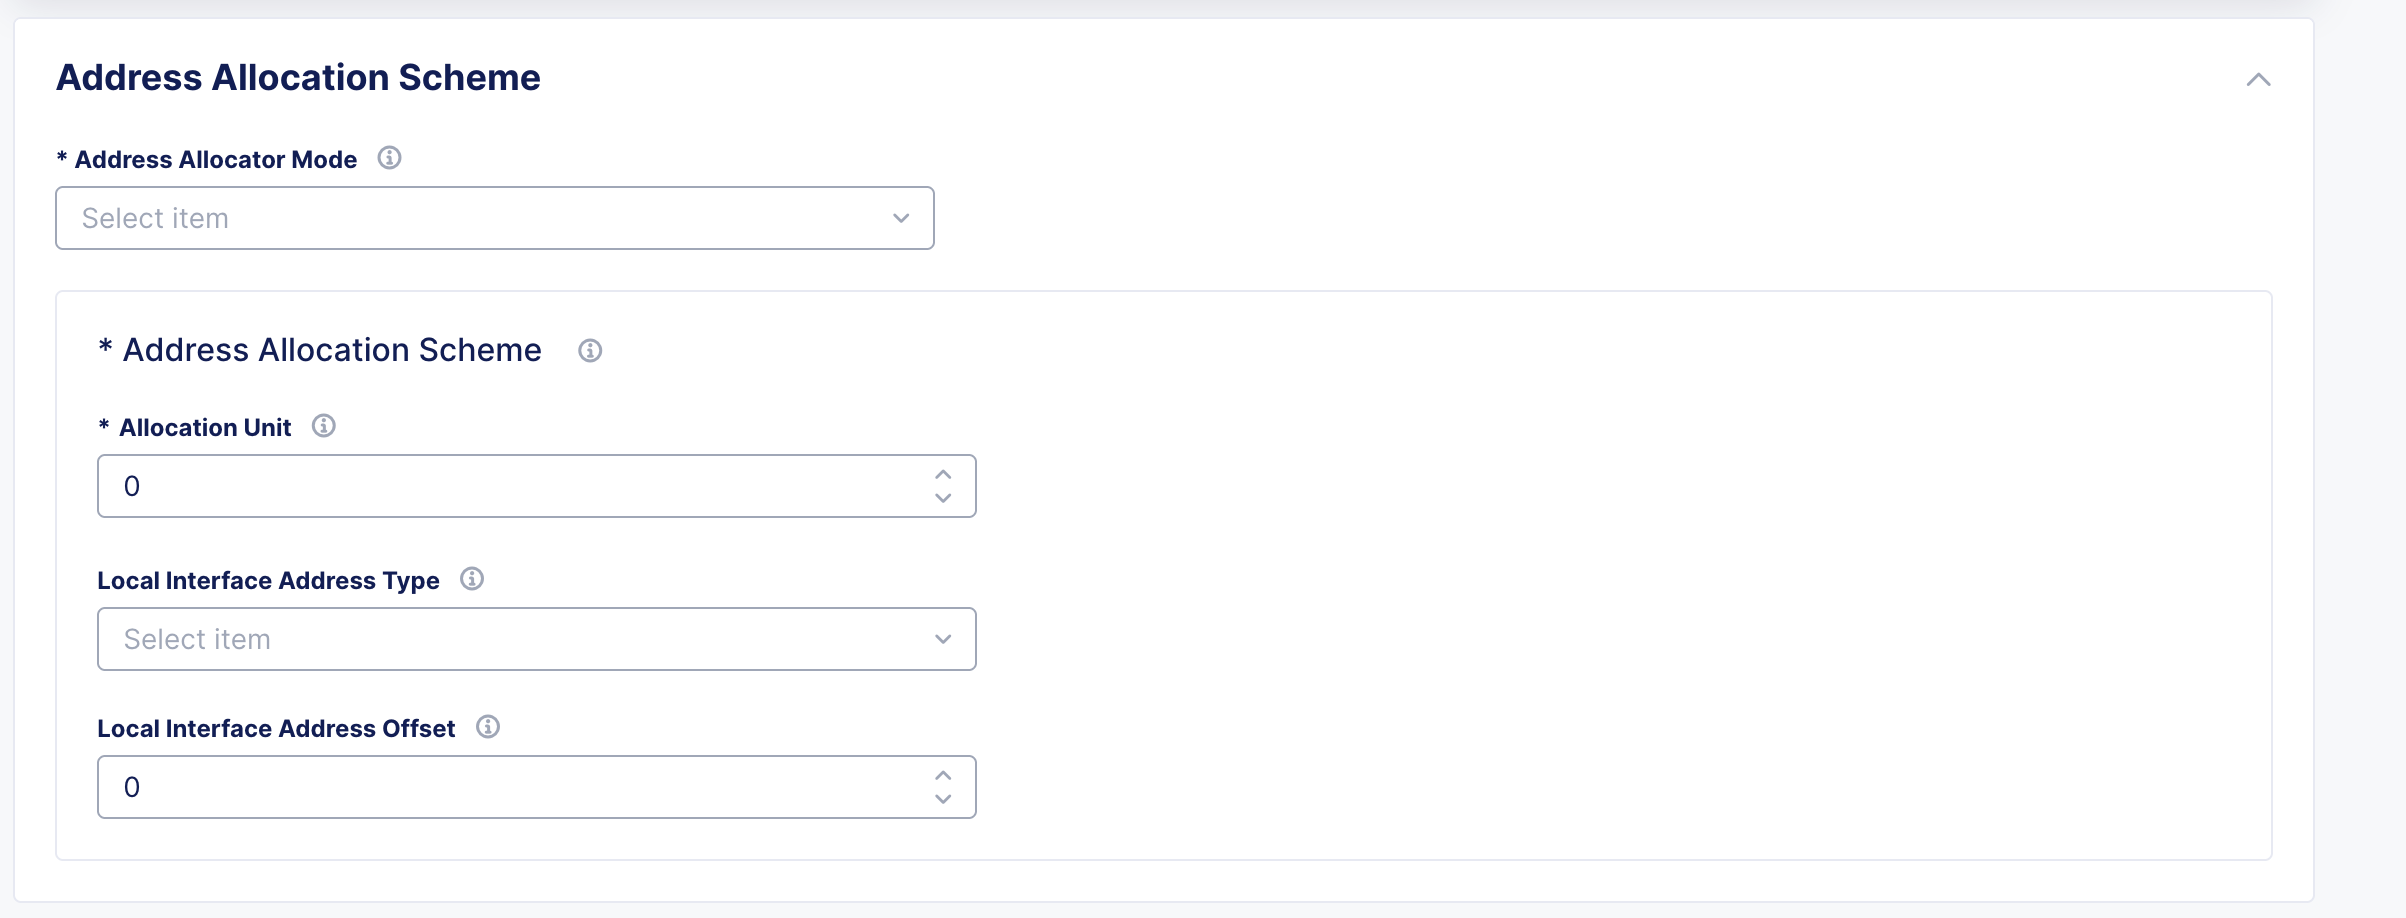
Figure: IP address allocator allocation scheme
Step 3: Enter the address pool.
This address allocator uses address(es) you enter here to allocate addresses and/or submasks to its clients.
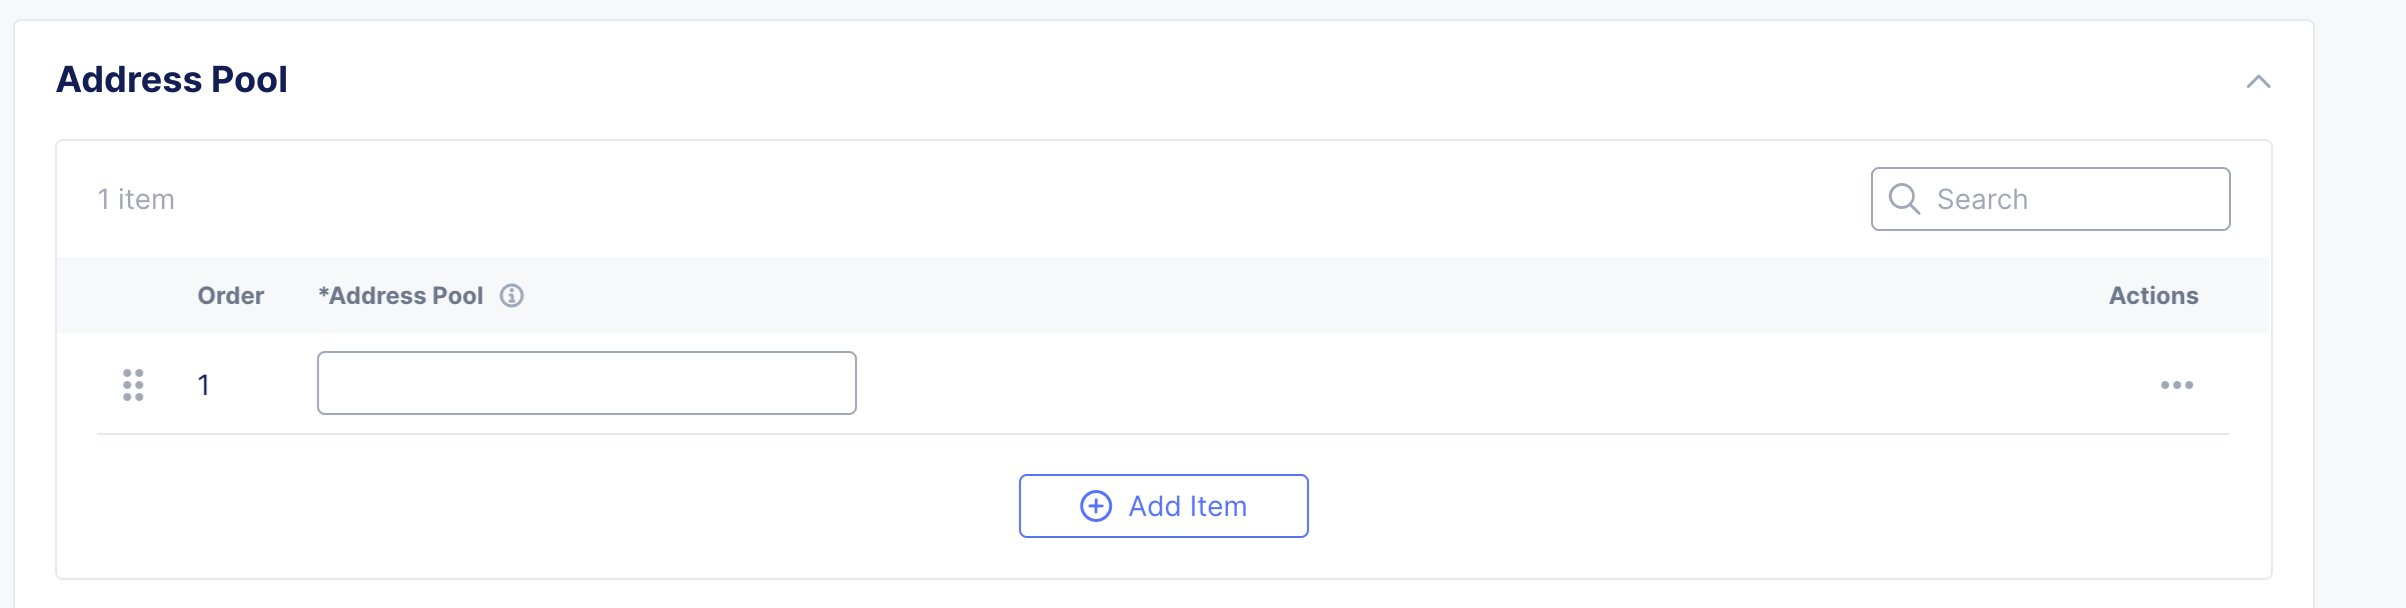
Figure: IP address allocator pool
-
In the Address Pool field, enter an address in IPv4 format, i.e. 10.1.1.0/24.
-
Optionally enter additional addresses using the Add item button.
Step 4: Complete IP address allocator creation.
Select Add Address Allocator.
Delete an IP Address Allocator
Step 1: Log into Console and view your existing IP address allocator(s).
- From the Home screen, select Multi-Cloud Network Connect under All Services.
- Navigate to Manage > Networking > IP Address Allocators to see a list of existing address allocators. Then click Add Address Allocator.
Step 2: Delete an address selector.
- In the table, find the address selector you want to delete.
- At the right side of that row, select ... in the Actions column to see the pop-up menu.
- Select Delete from the menu, and you will be asked for confirmation.
- Select the Delete button to confirm the deletion.