Create Virtual Site
Objective
This guide provides the steps to create a Virtual Site in F5 Distributed Cloud. A Virtual Site allows administrators to logically group multiple sites under a shared label. By the end of this guide, you will be able to:
-
Create a label for organizing sites.
-
Apply labels to individual sites.
-
Create a Virtual Site using label-based selectors.
-
Verify and manage the Virtual Site.
Overview
A Virtual Site is a logical construct in F5 Distributed Cloud that is used to group multiple sites — whether on-premises or cloud-based — under a common configuration umbrella. This enables consistent deployment of services, security policies, and applications across the grouped sites, streamlining management at scale.
Prerequisites
-
An F5® Distributed Cloud Services Account. If you do not have an account, see Getting Started with Console.
-
At least two Customer Edge (CE) sites deployed. If you do not have CE sites, see the Create Secure Mesh Site v2 guide.
Create a Custom Label
Perform these steps to create a custom label:
Step 1: Create the custom key.
-
Click Shared Configuration.
-
Select Manage > Label > Known Keys.
-
Click Add Known Key.
-
In the form that appears, perform the following:
-
In the Label key (Required) field, enter the name of the new custom key.
-
In the Label description field, optionally enter information to describe this new custom key.
-
In the Label values field, enter a potential value that can be used with the new custom key. Click Add Label Value to add more than one value.
-
After you finish, click Add Key.
-
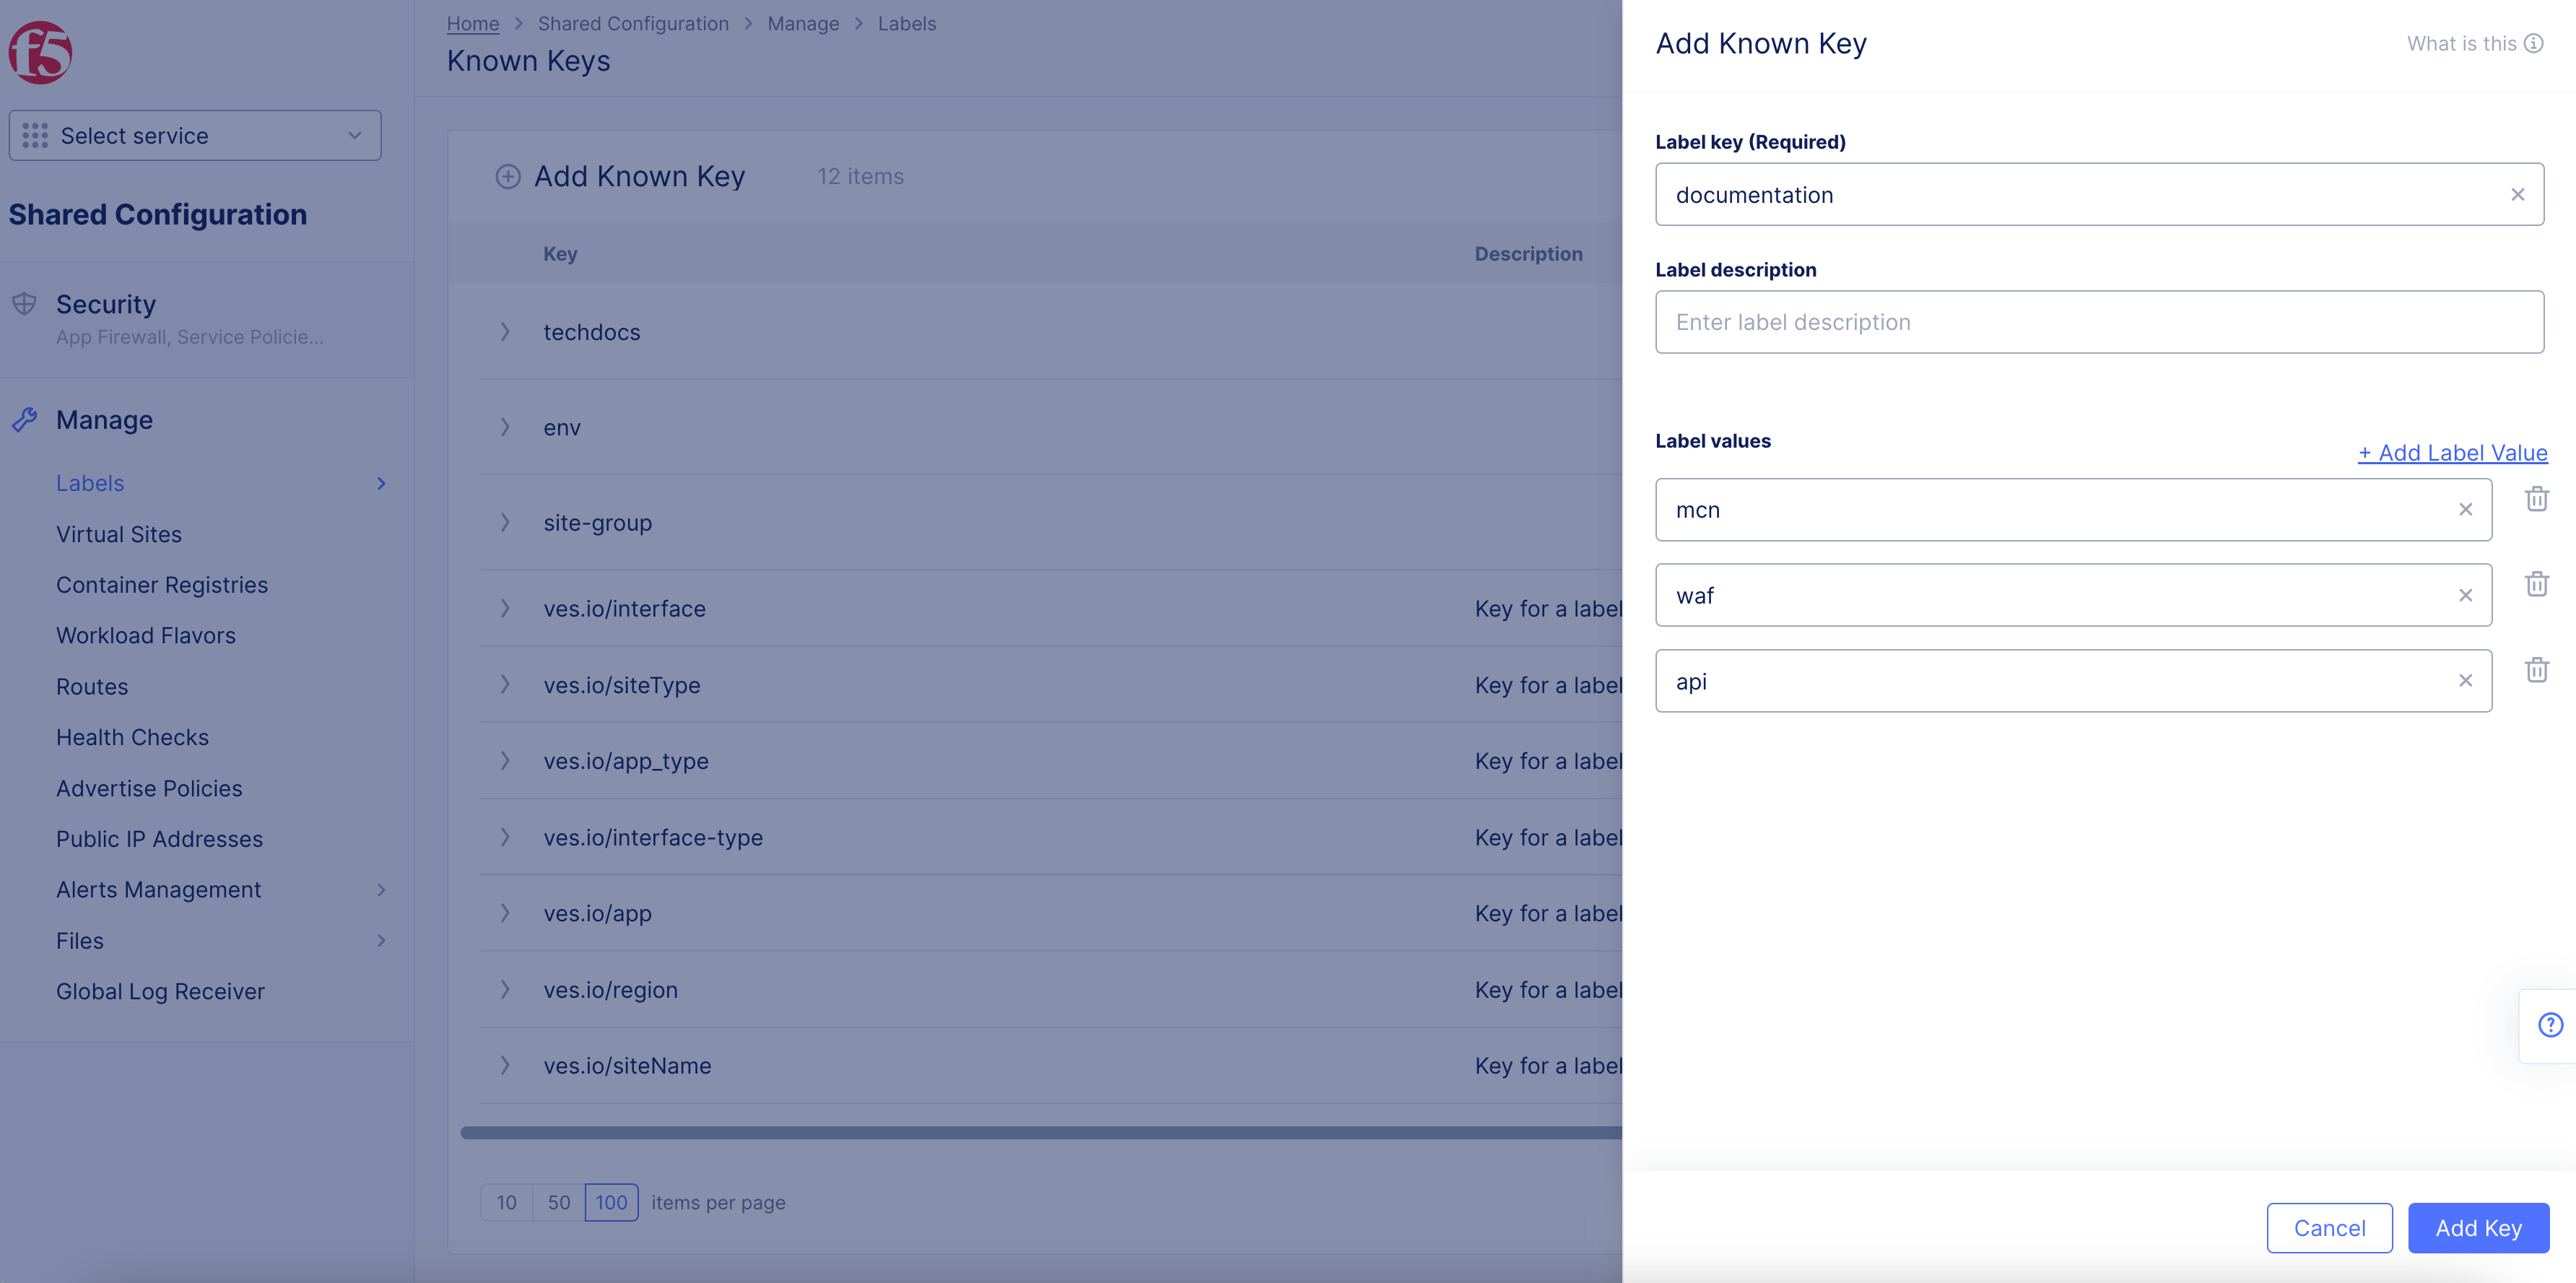
Figure: Key-Value Creation
Step 2: Verify the custom key and value.
-
Navigate to Select Manage > Label > Known Keys to verify all keys.
-
Navigate to Select Manage > Label > Known Labels to verify all keys and their values.
Apply a Custom Label
Perform these steps to apply a custom label:
Step 1: Navigate to the list of sites.
- Click Multi-Cloud Network Connect.
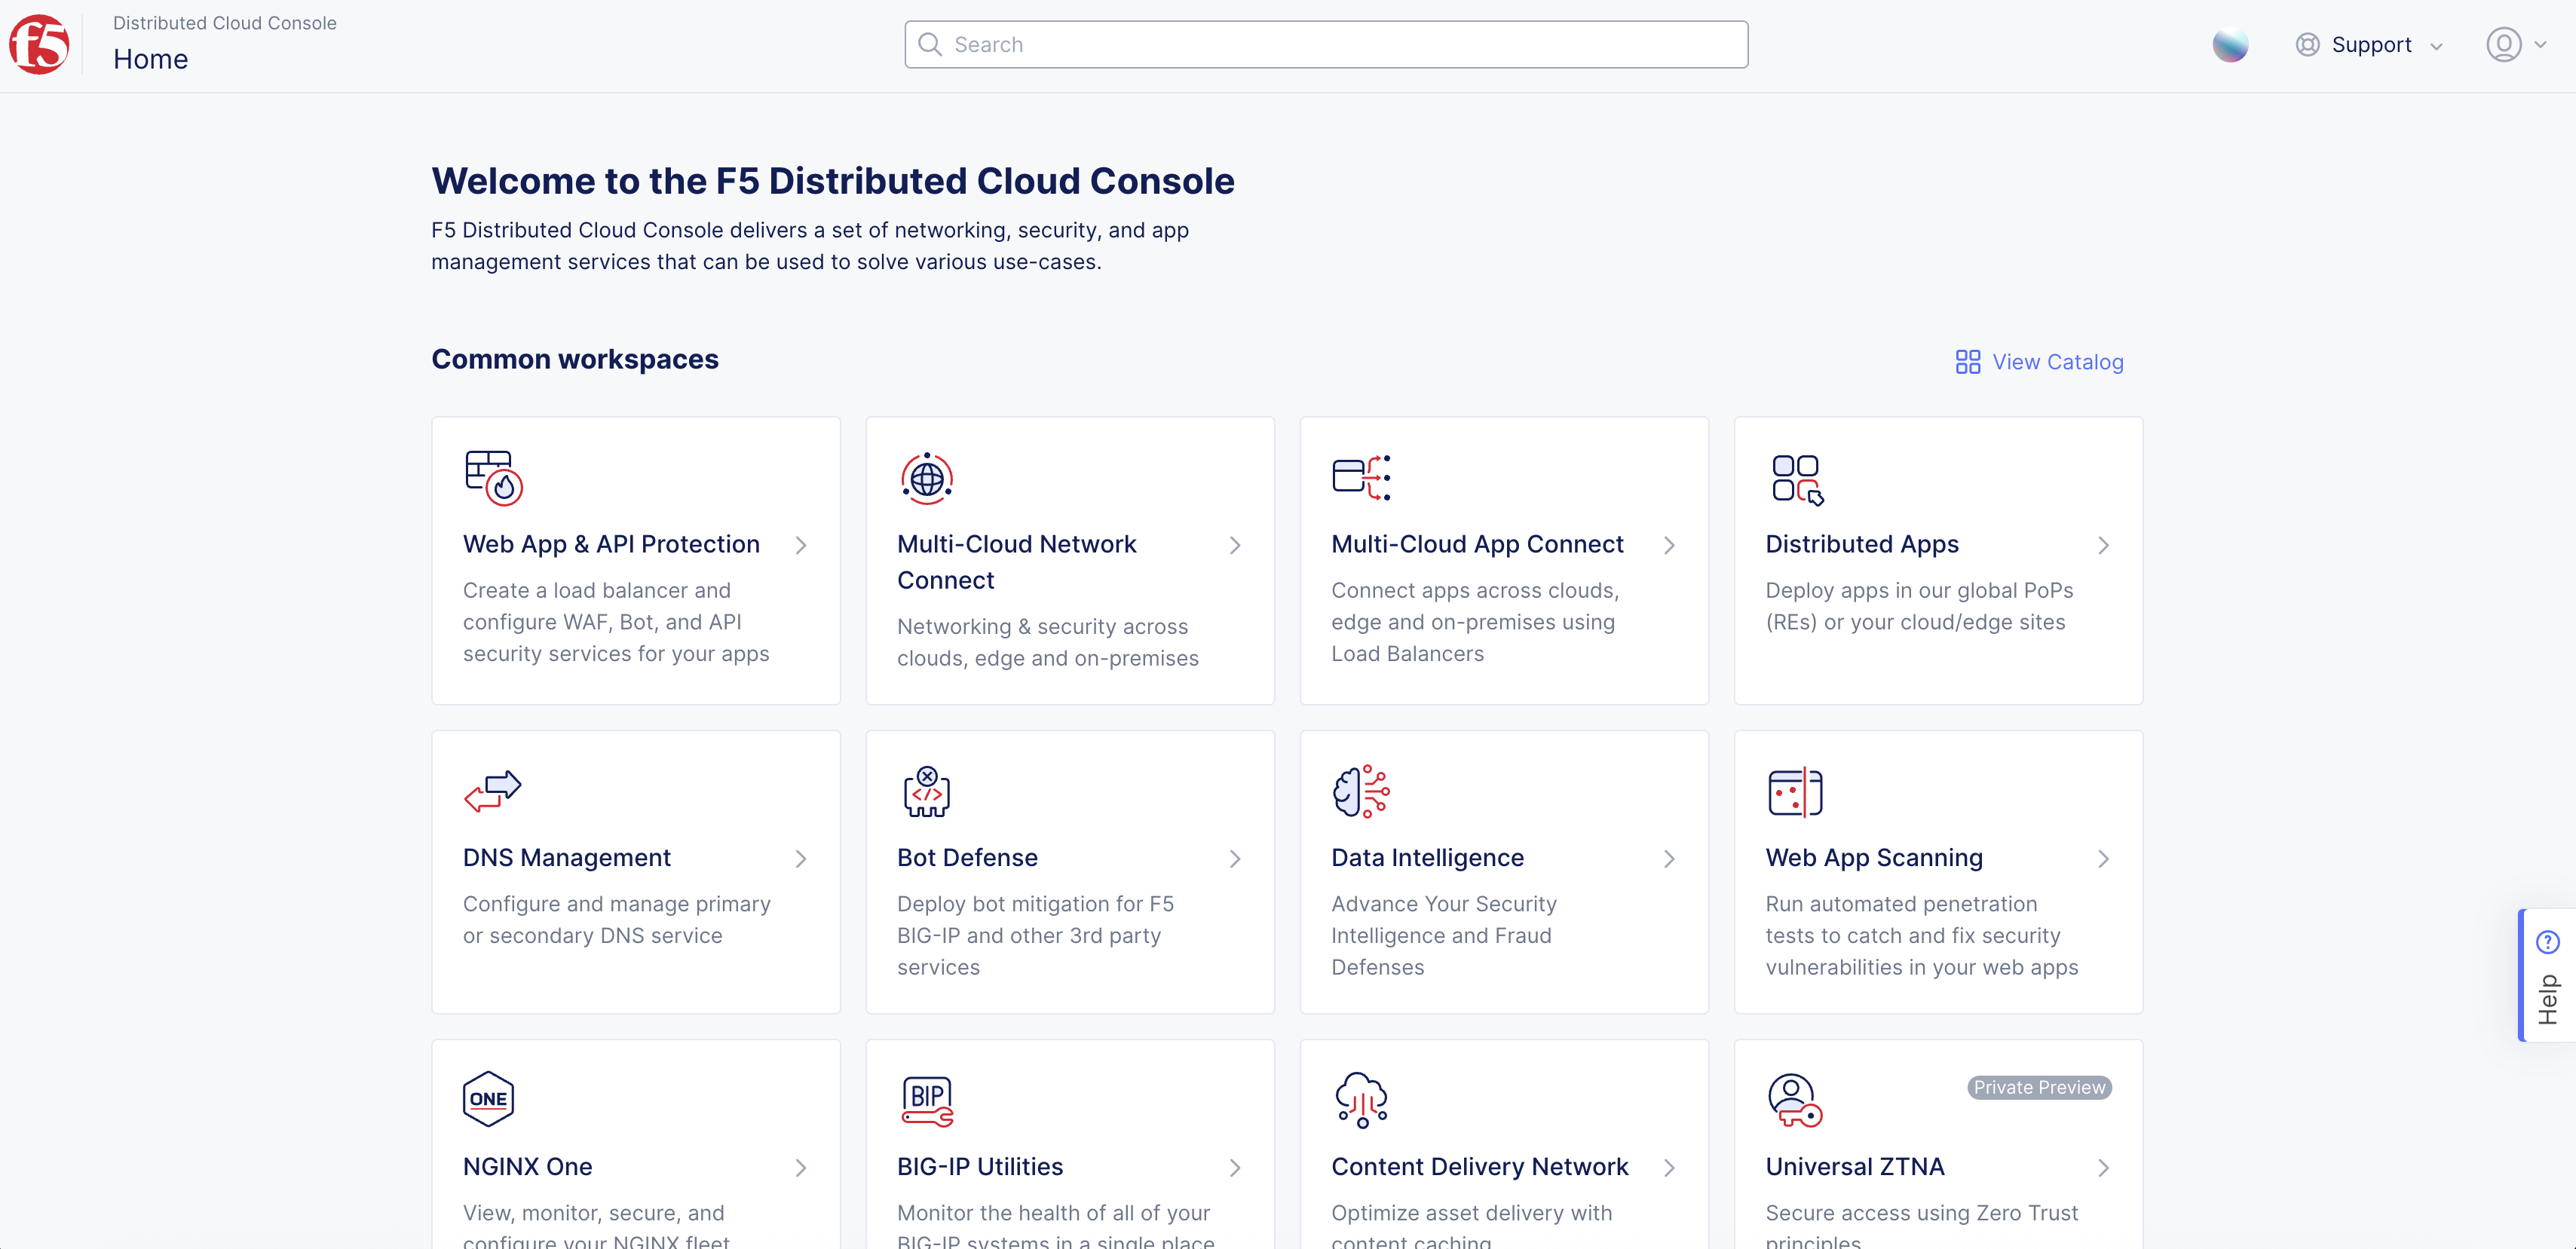
Figure: Console Homepage
-
Find your Site and then click ....
-
Click Manage Configuration.
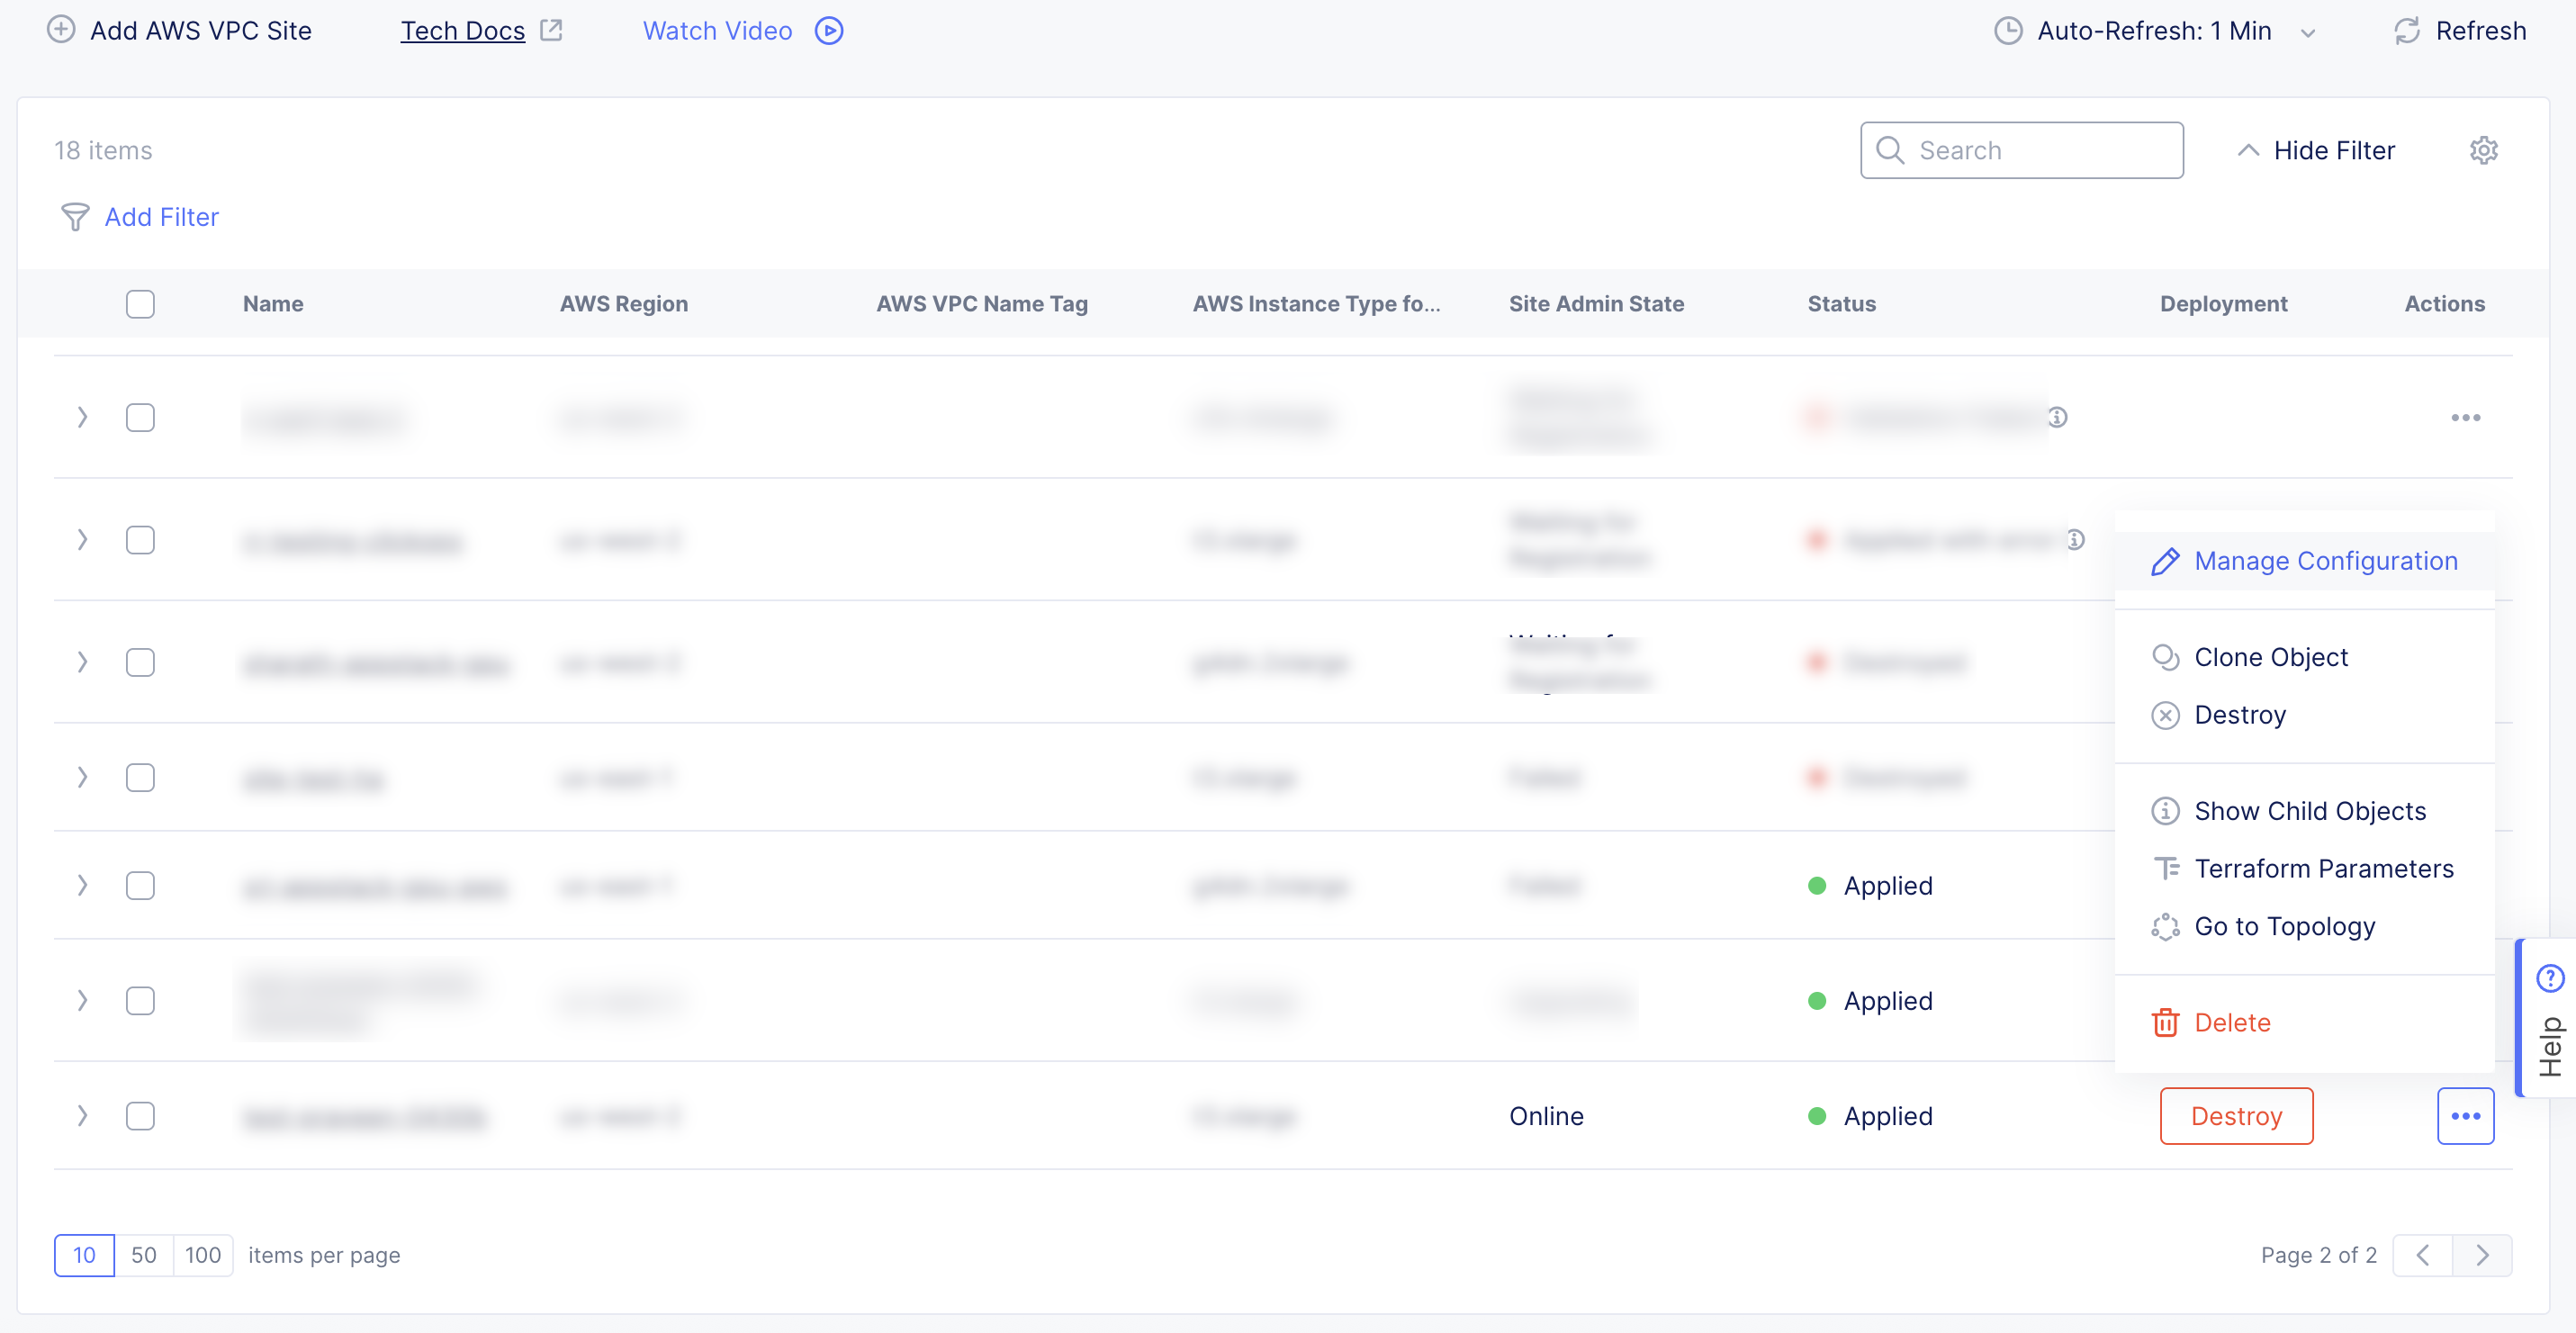
Figure: List of Sites
- Click Edit Configuration.
Step 2: Enter a value for the corresponding key.
-
Navigate to the Labels field in the Metadata section.
-
Select Add Label and performing the following:
- Enter the name of the newly created custom key and then select it.
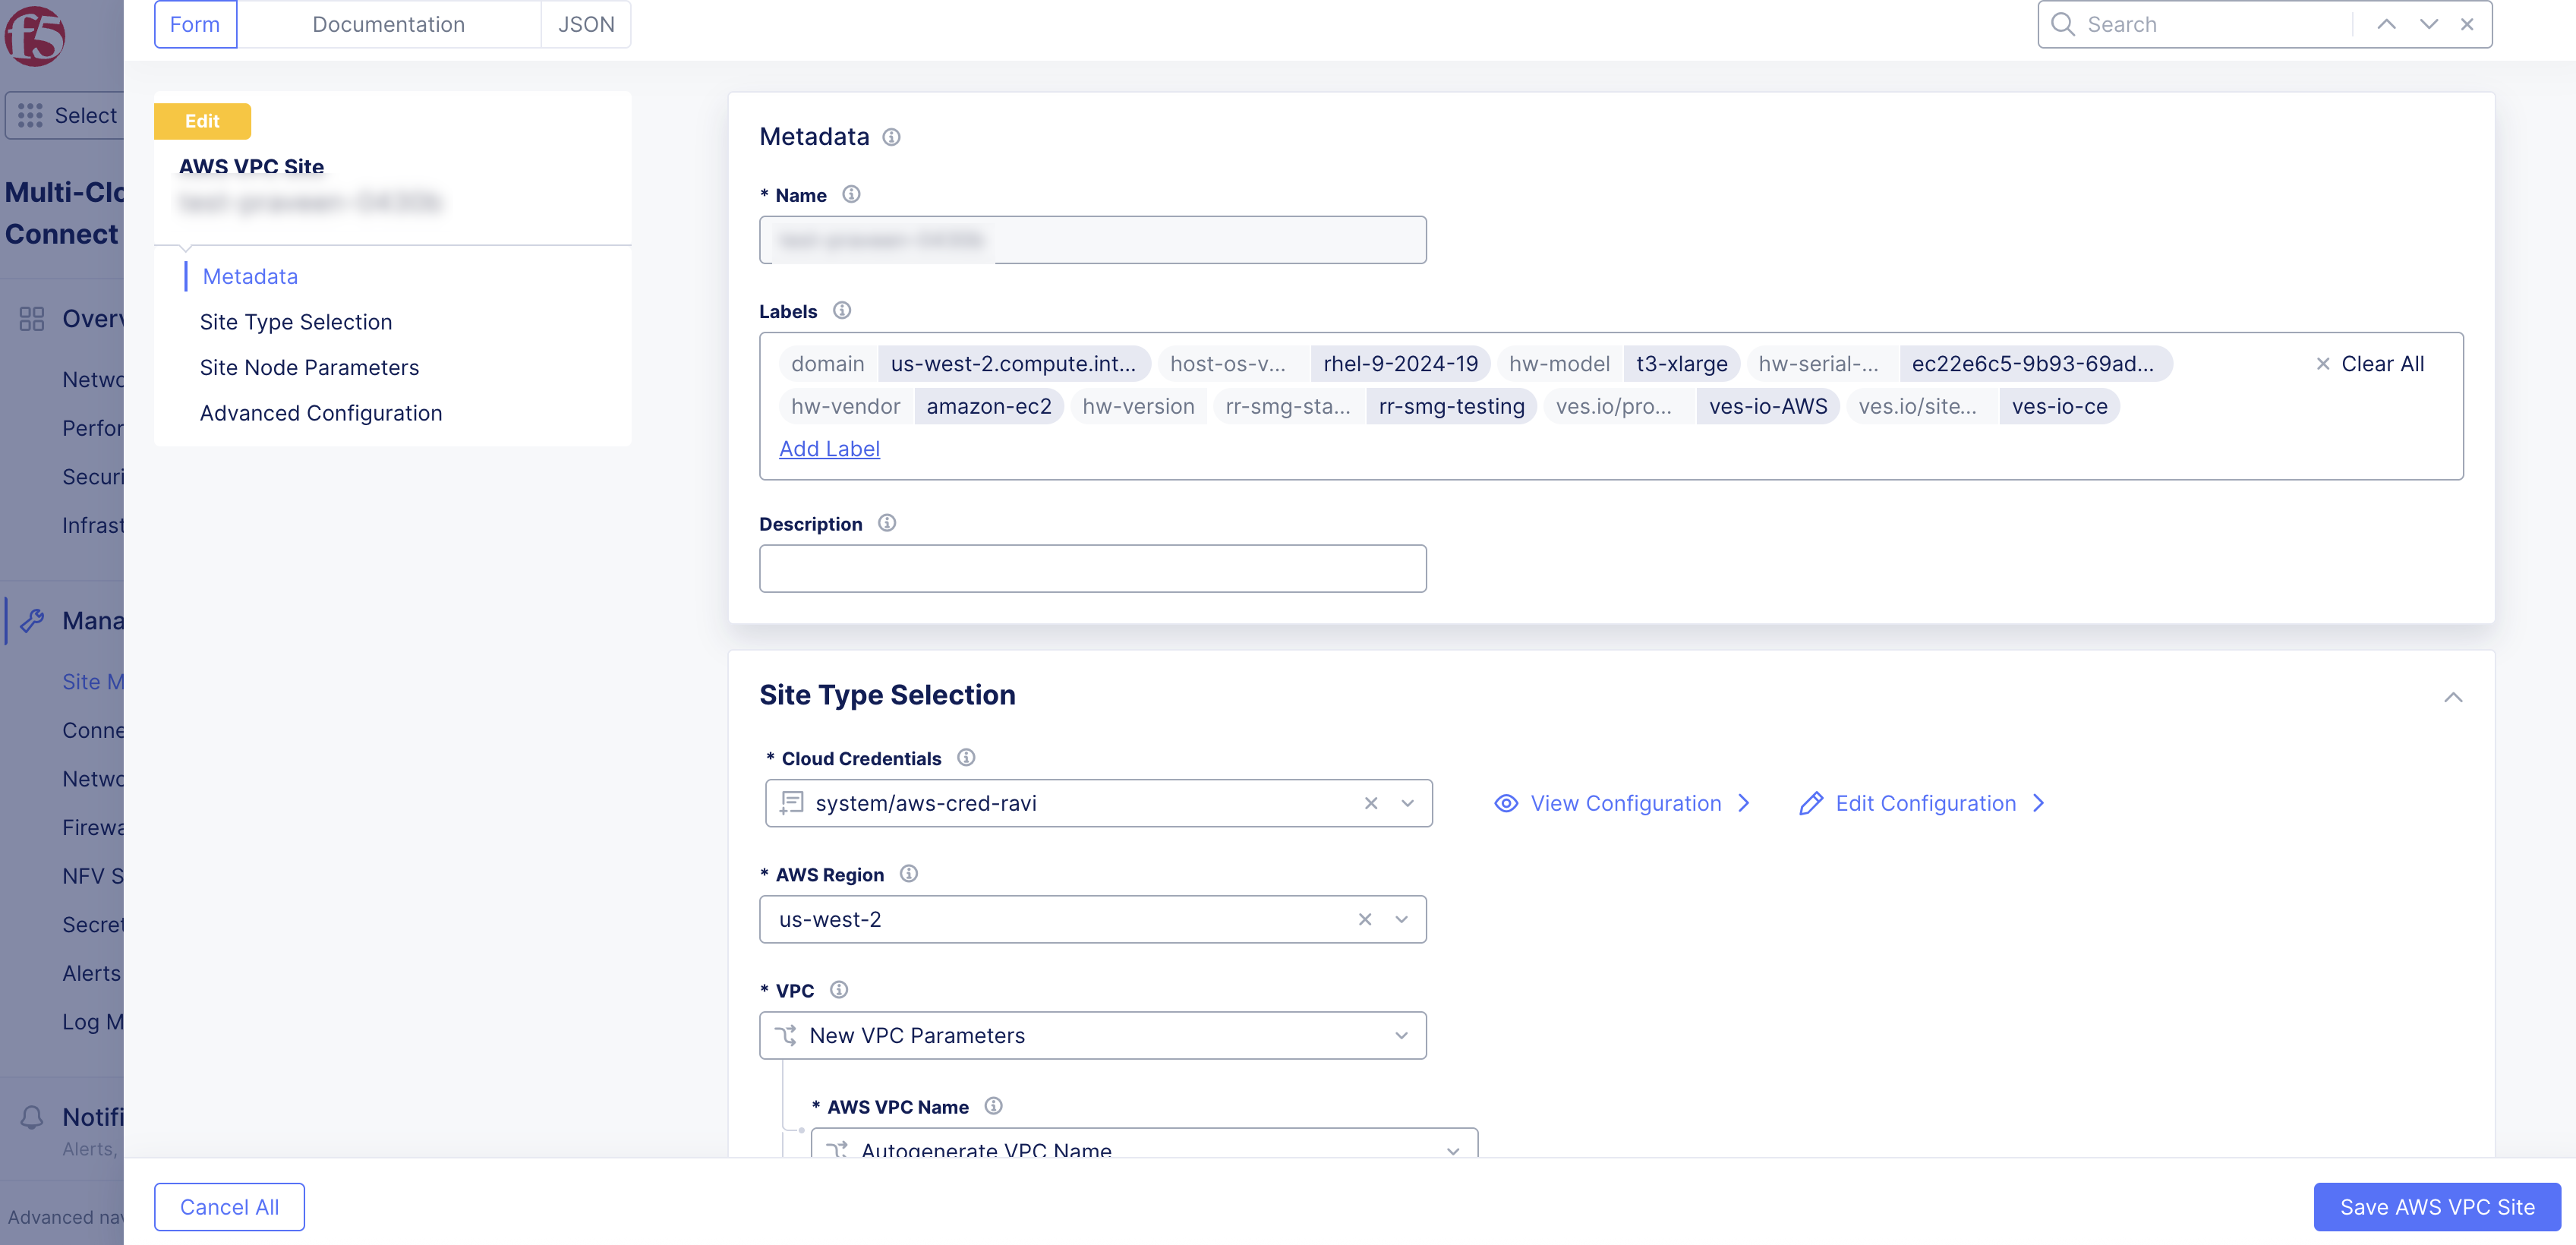
Figure: Key Search
- Enter the name of the value to assign to the key.
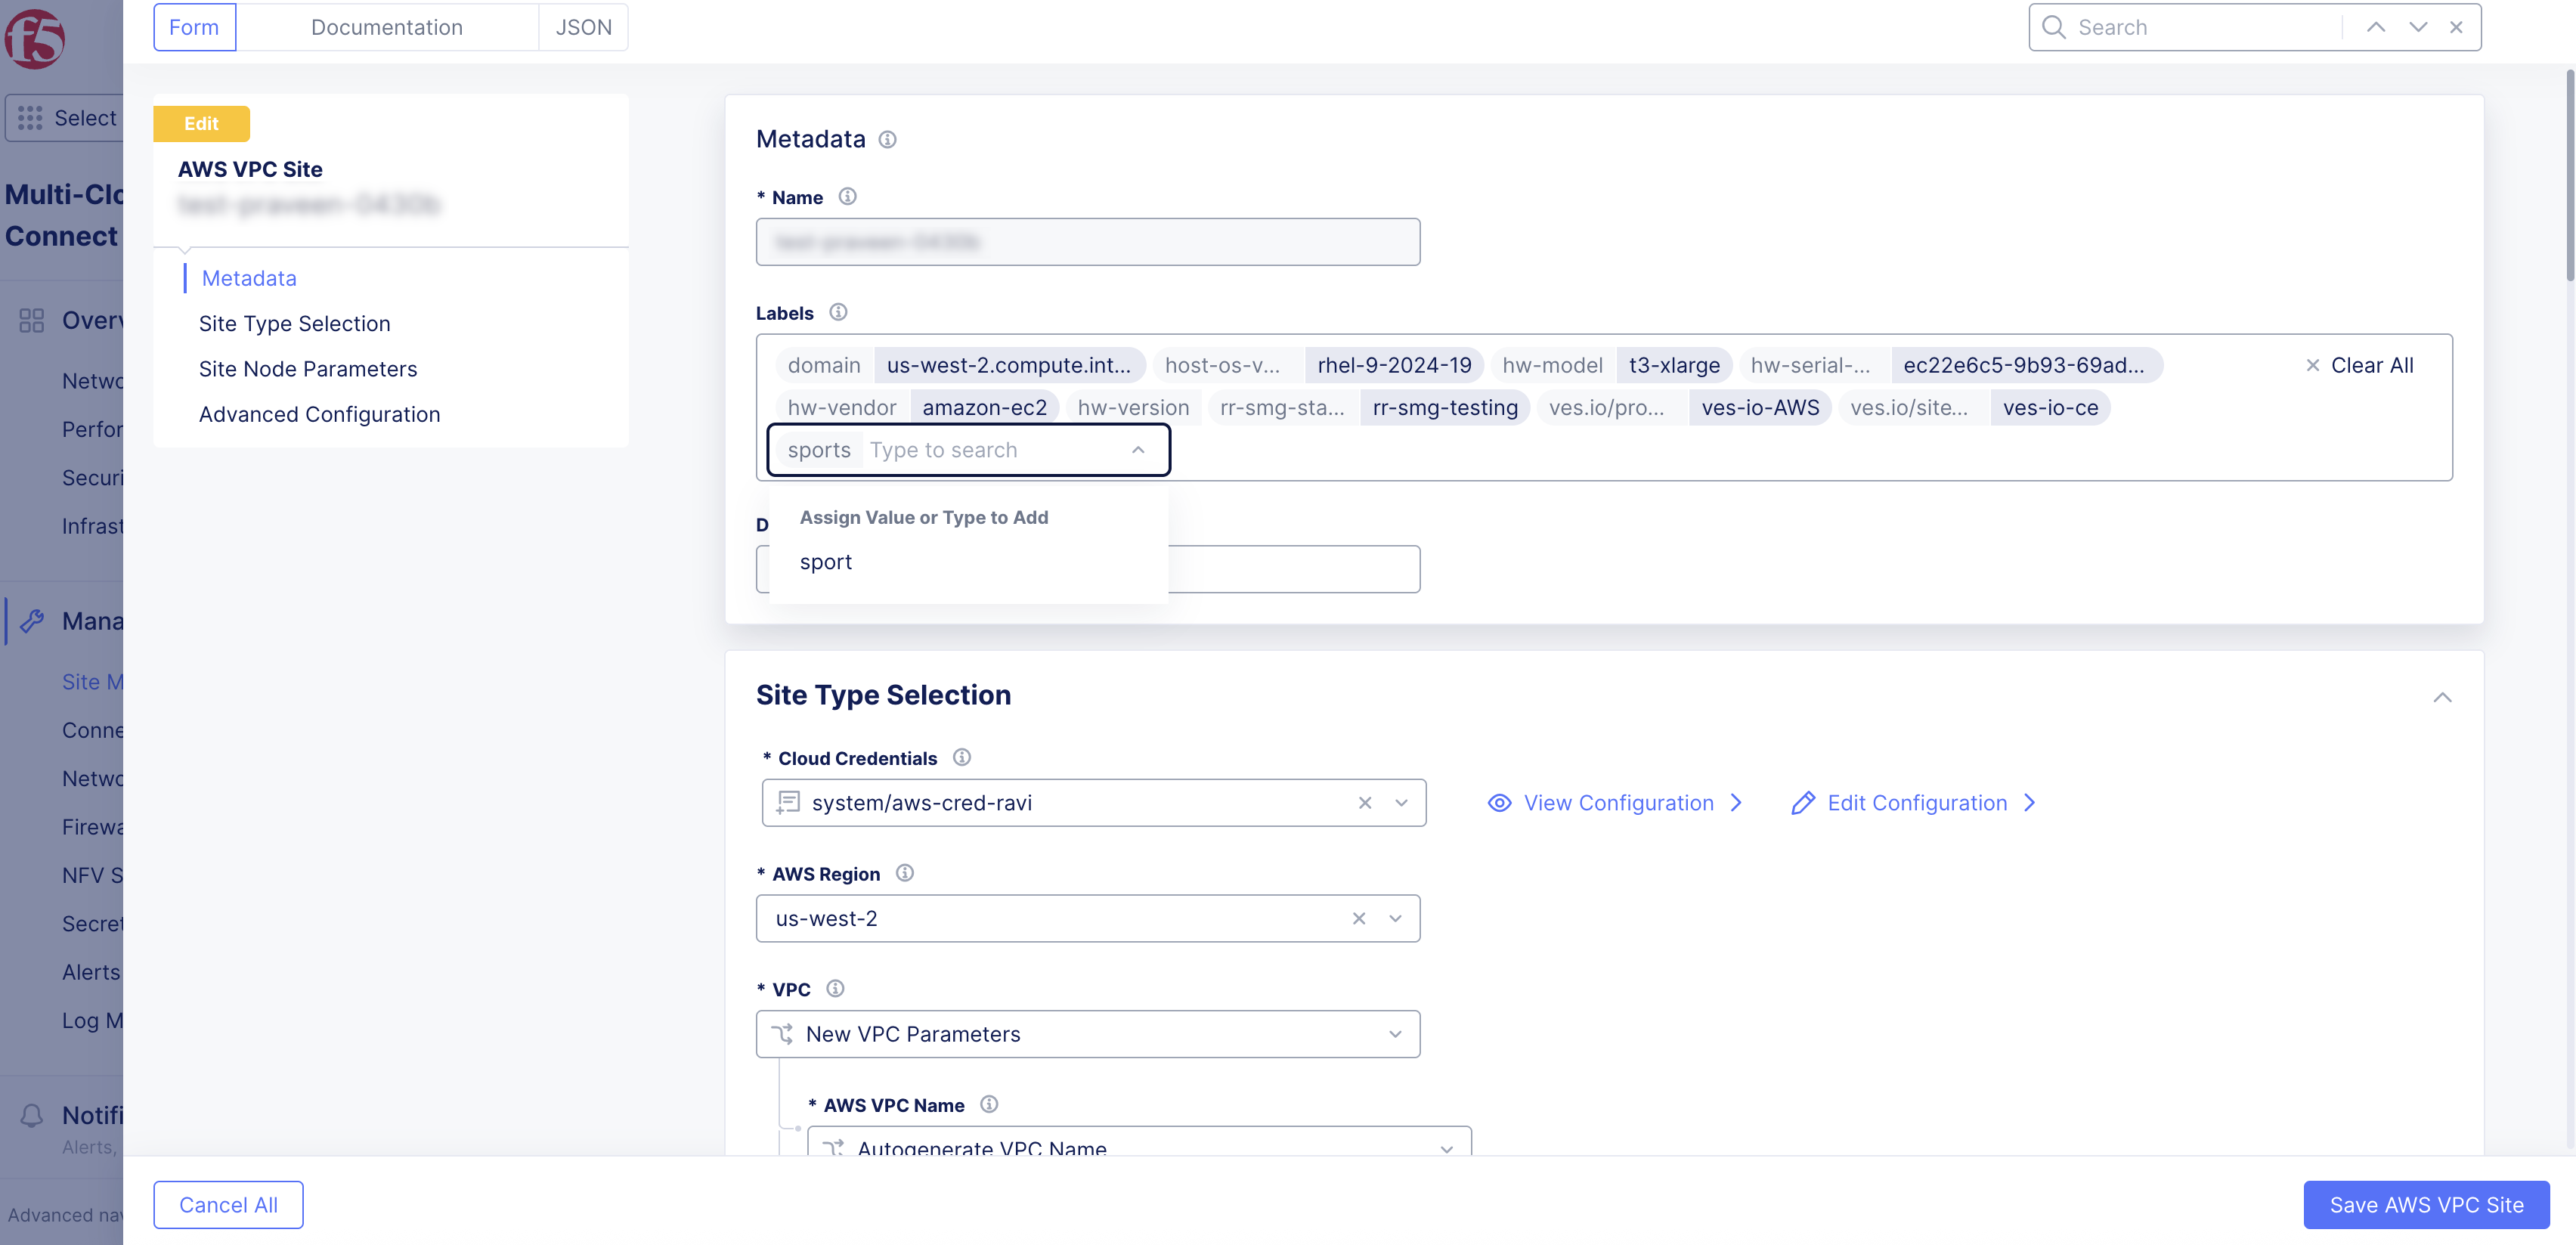
Figure: Value Search
- Click Save AWS VPC Site.
Step 3: View the newly applied label.
-
Navigate to your Site from Infrastructure > Sites and expand the metadata JSON section.
-
Expand "labels" to view the newly applied site label.

Figure: JSON for Labels
Note: The metadata field contains all labels associated with your Site. As sites are registered, Distributed Cloud Services automatically populates some labels, such as hw-vendor, provider, hw-model, and more. You can determine the existing labels assigned to your Site by checking the Site schema from Console or using APIs.
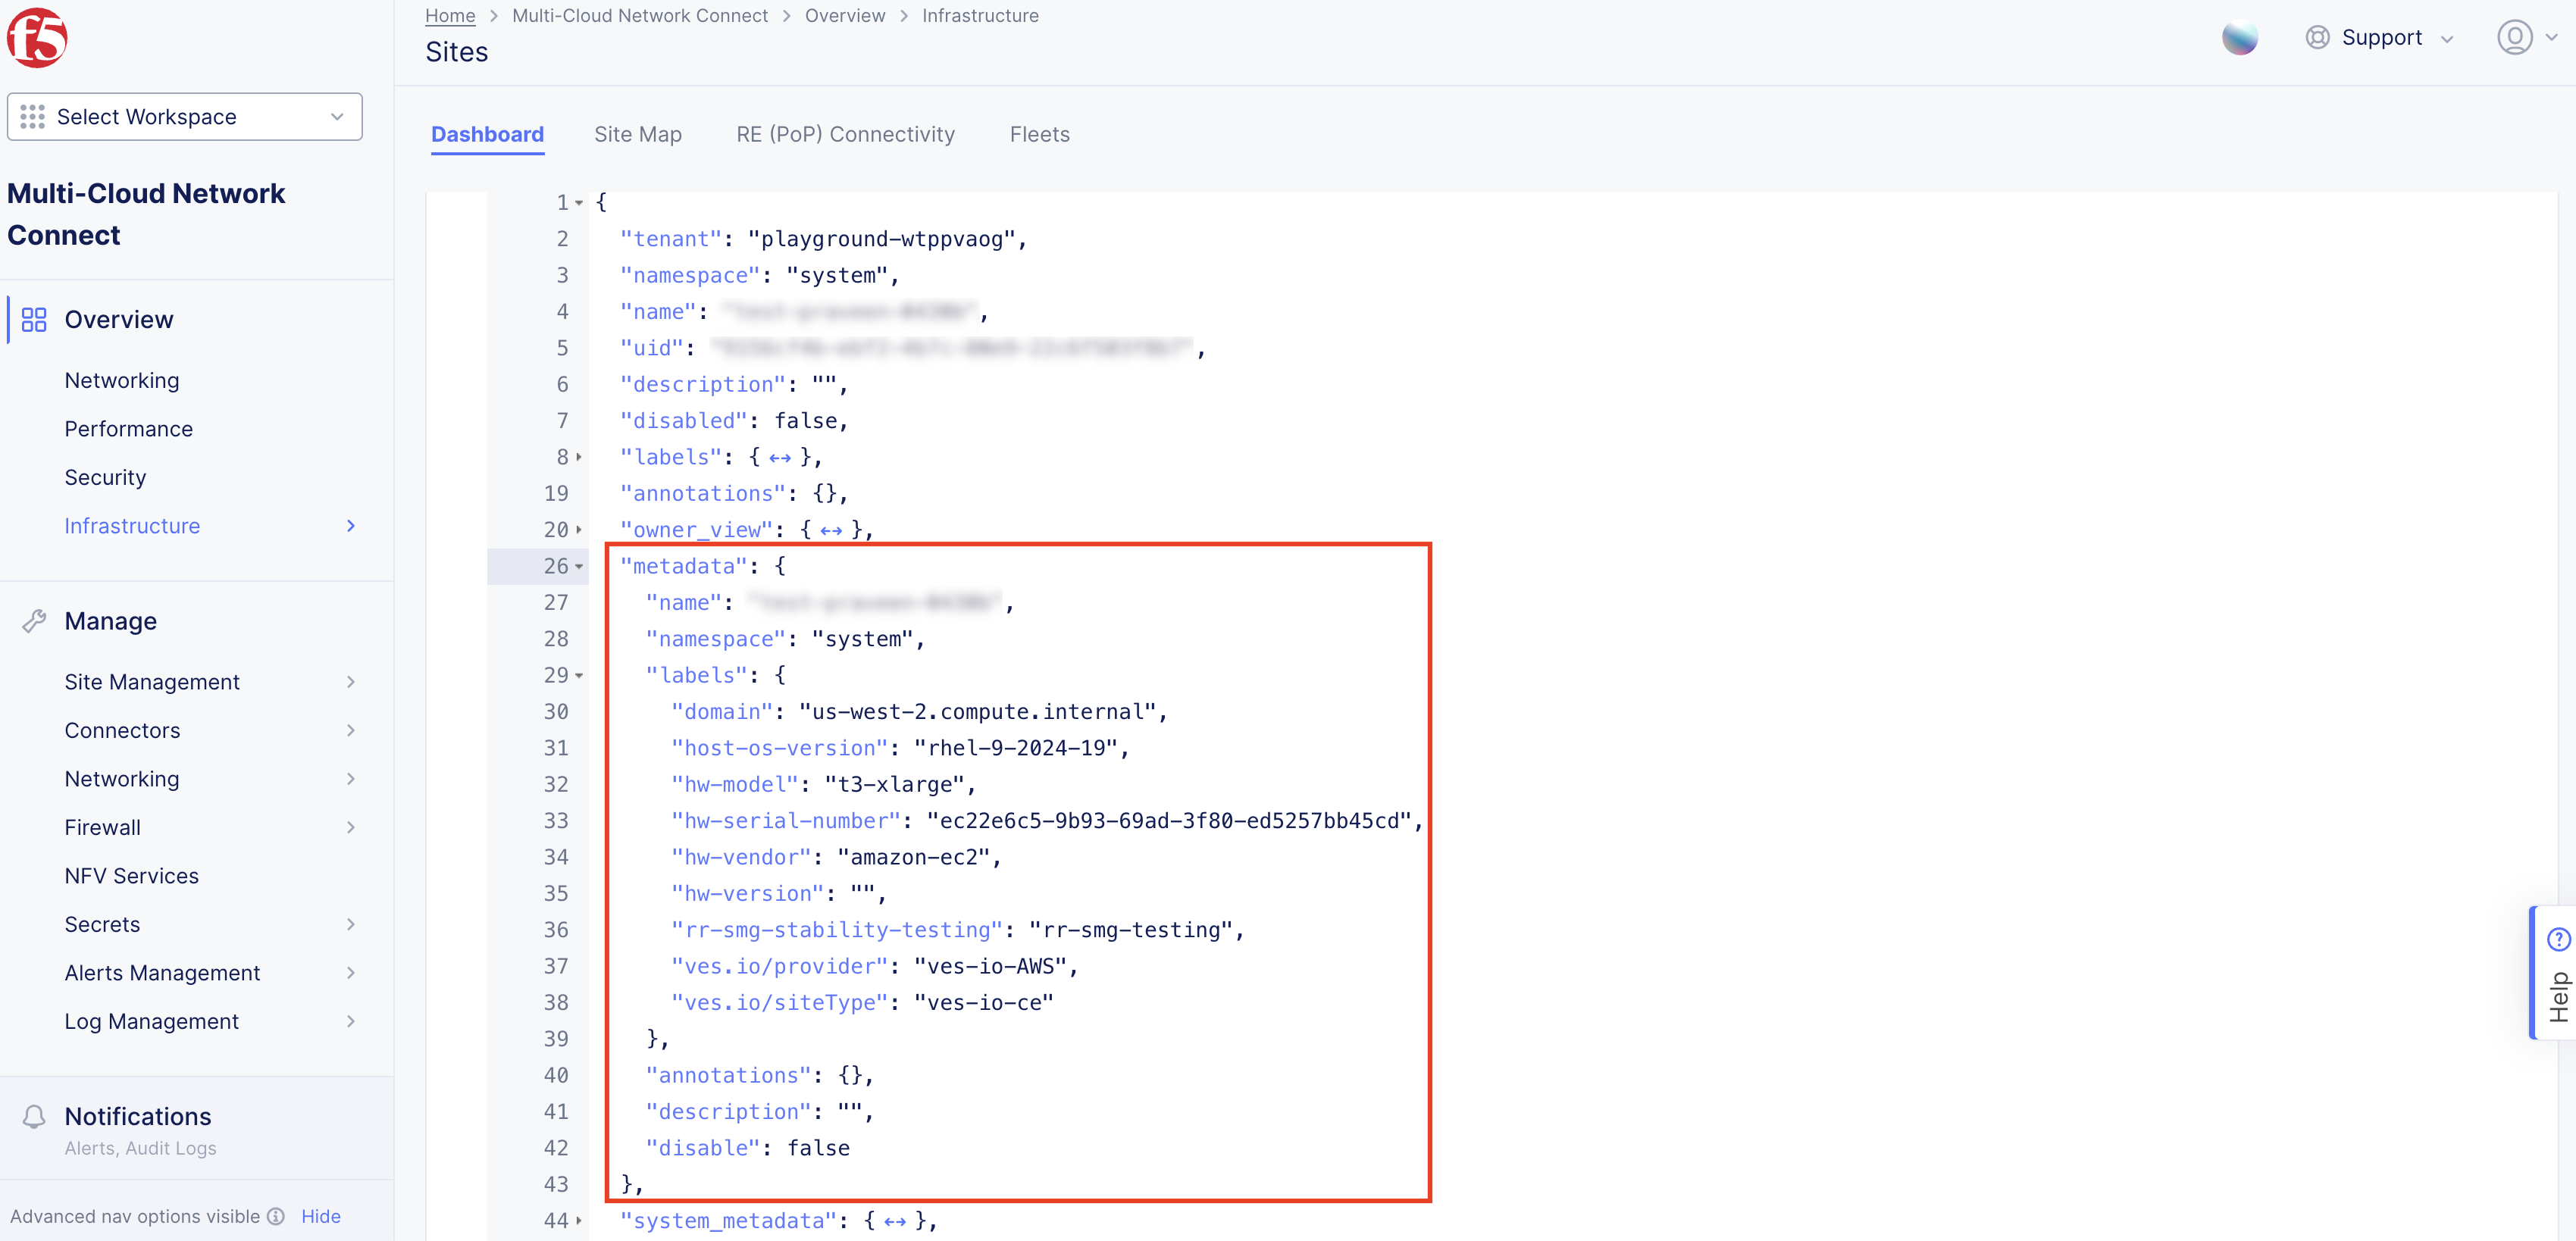
Figure: JSON for Metadata
Create a Virtual Site
Create a Virtual Site using the selector expressions to group sites together.
Note: The steps below show you how to create a Virtual Site in the Distributed Apps workspace. This option limits the Virtual Site to a specific namespace. These same steps can also be performed in the Multi-Cloud App Connect workspace. You can also create a Virtual Site in the Shared Configuration workspace. With the Shared Configuration workspace option, multiple Site objects across different namespaces can use the same Virtual Site and be grouped together. Additionally, if you are using a Site Mesh Group (SMG), you must configure your Virtual Site using the Shared Configuration workspace. This enables the SMG to find the Virtual Site.
Step 1: Start creating the Virtual Site.
- In Console, click Distributed Apps.
Figure: Console Homepage
-
Navigate to your desired namespace.
-
Click Manage > Virtual Sites.
-
Click Add Virtual Site to load the creation form.
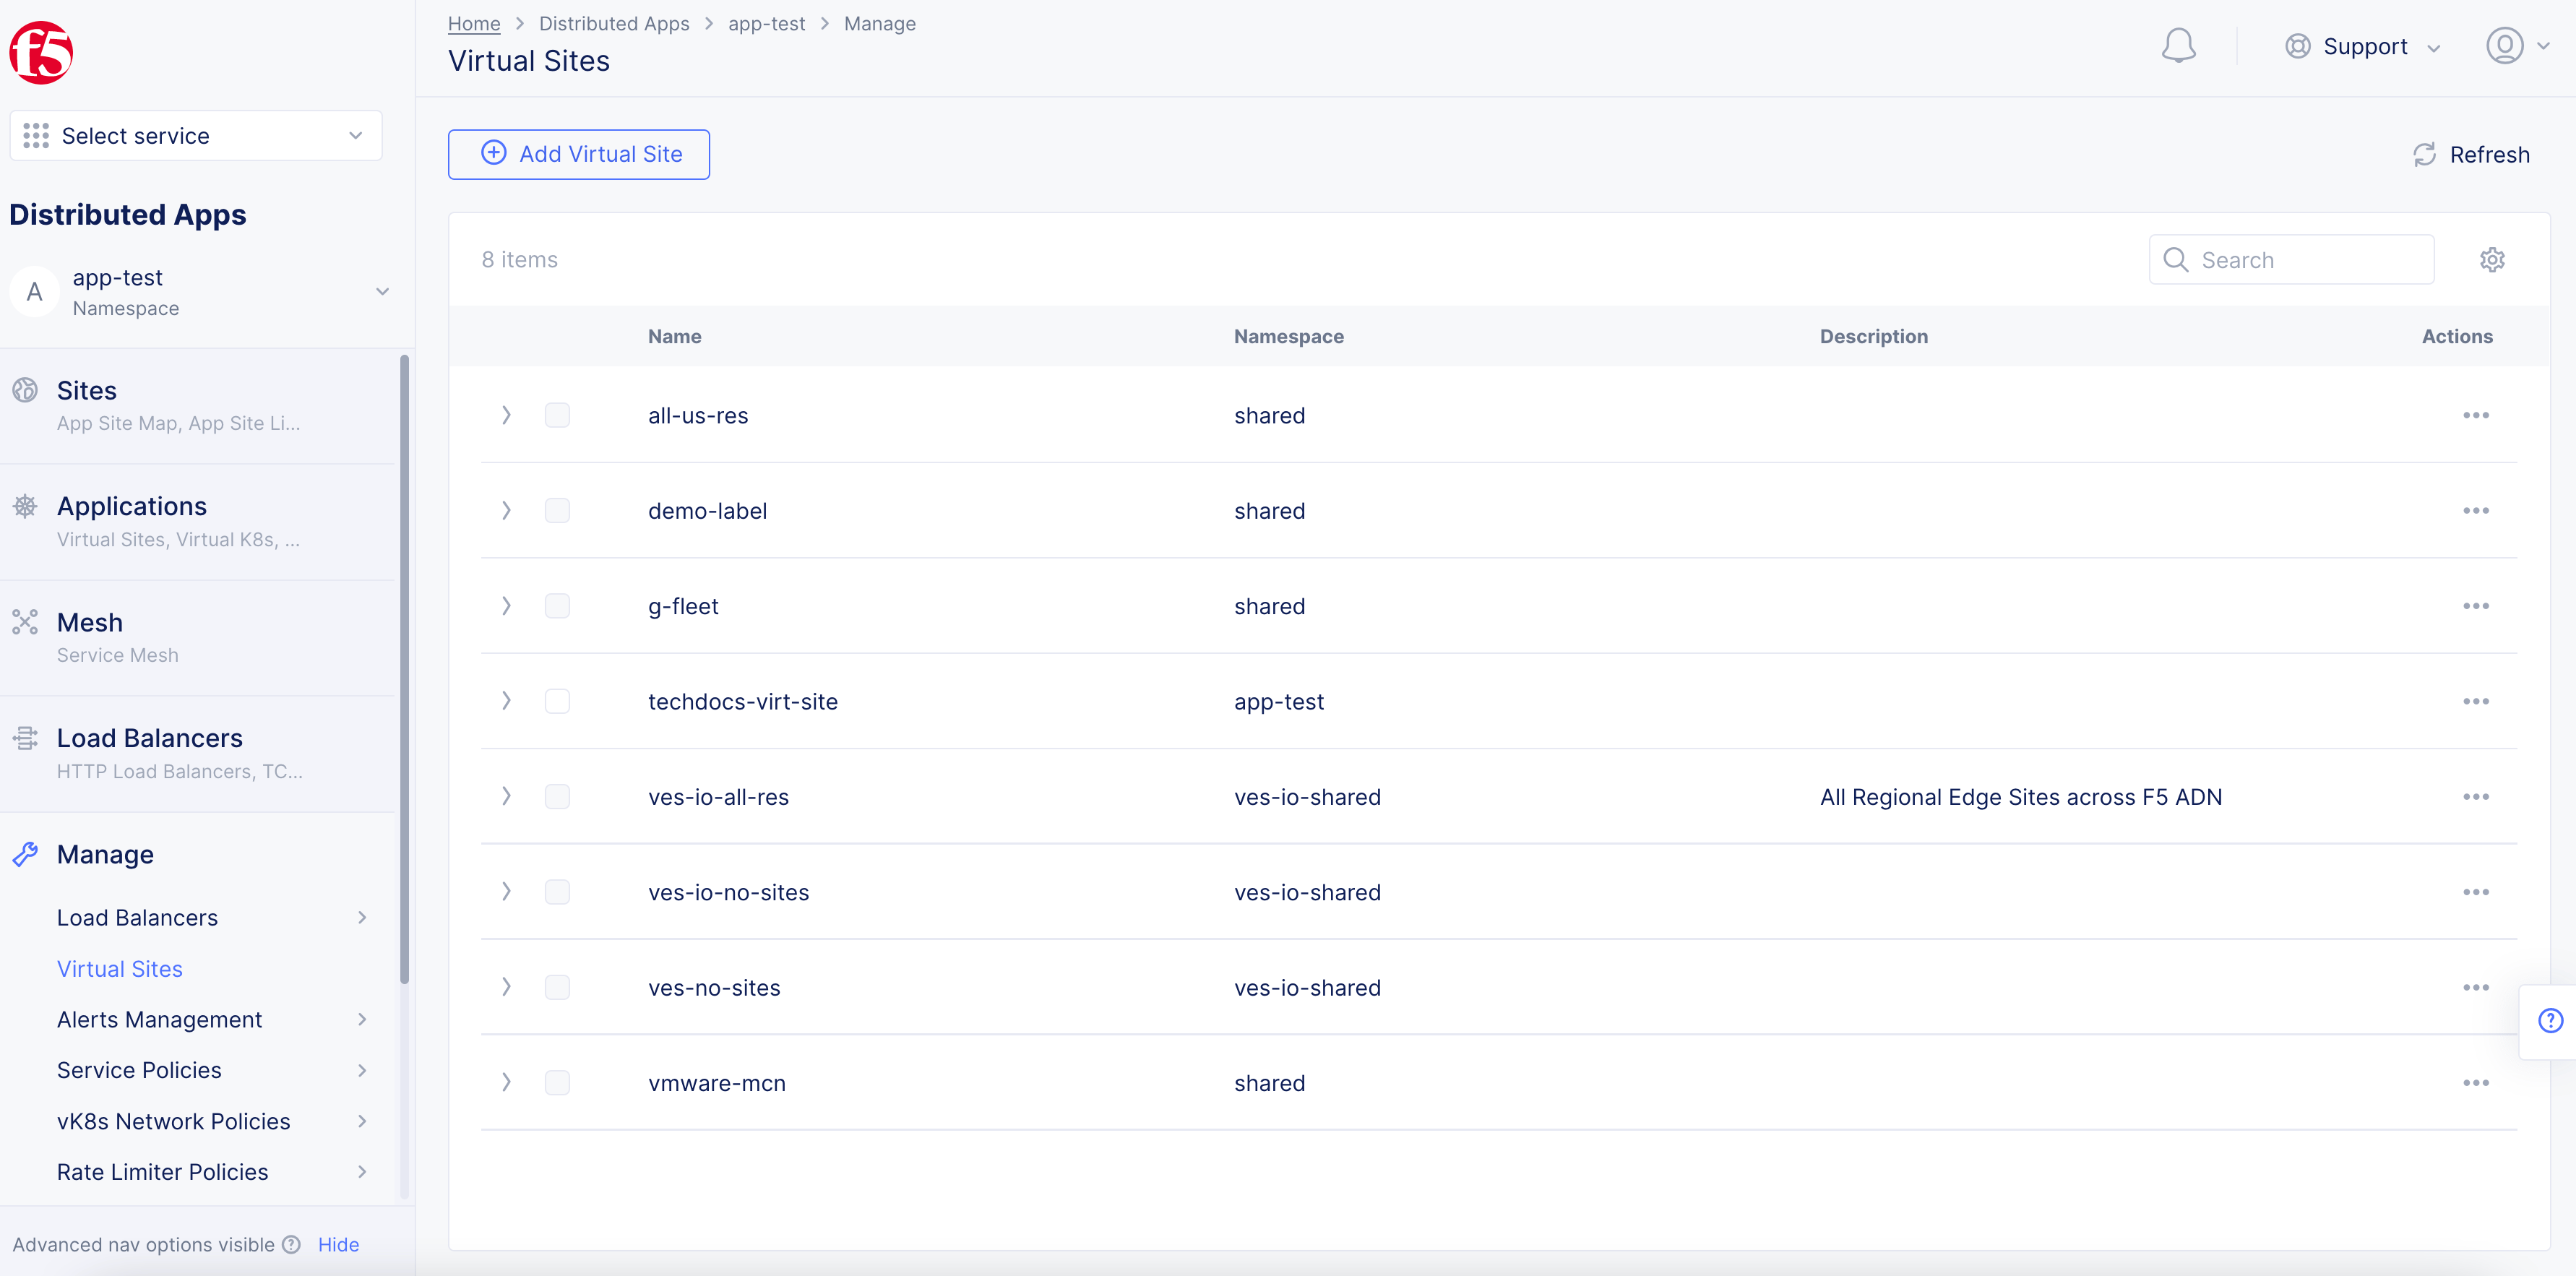
Figure: Add Virtual Site
Step 2: Enter the required information.
-
In the Metadata section Name field, enter a Virtual Site name.
-
In the Site Type section, select a Site type from the drop-down menu.
Step 3: Frame the selector expressions to group sites.
- From the Selector Expression field, click Add Label.
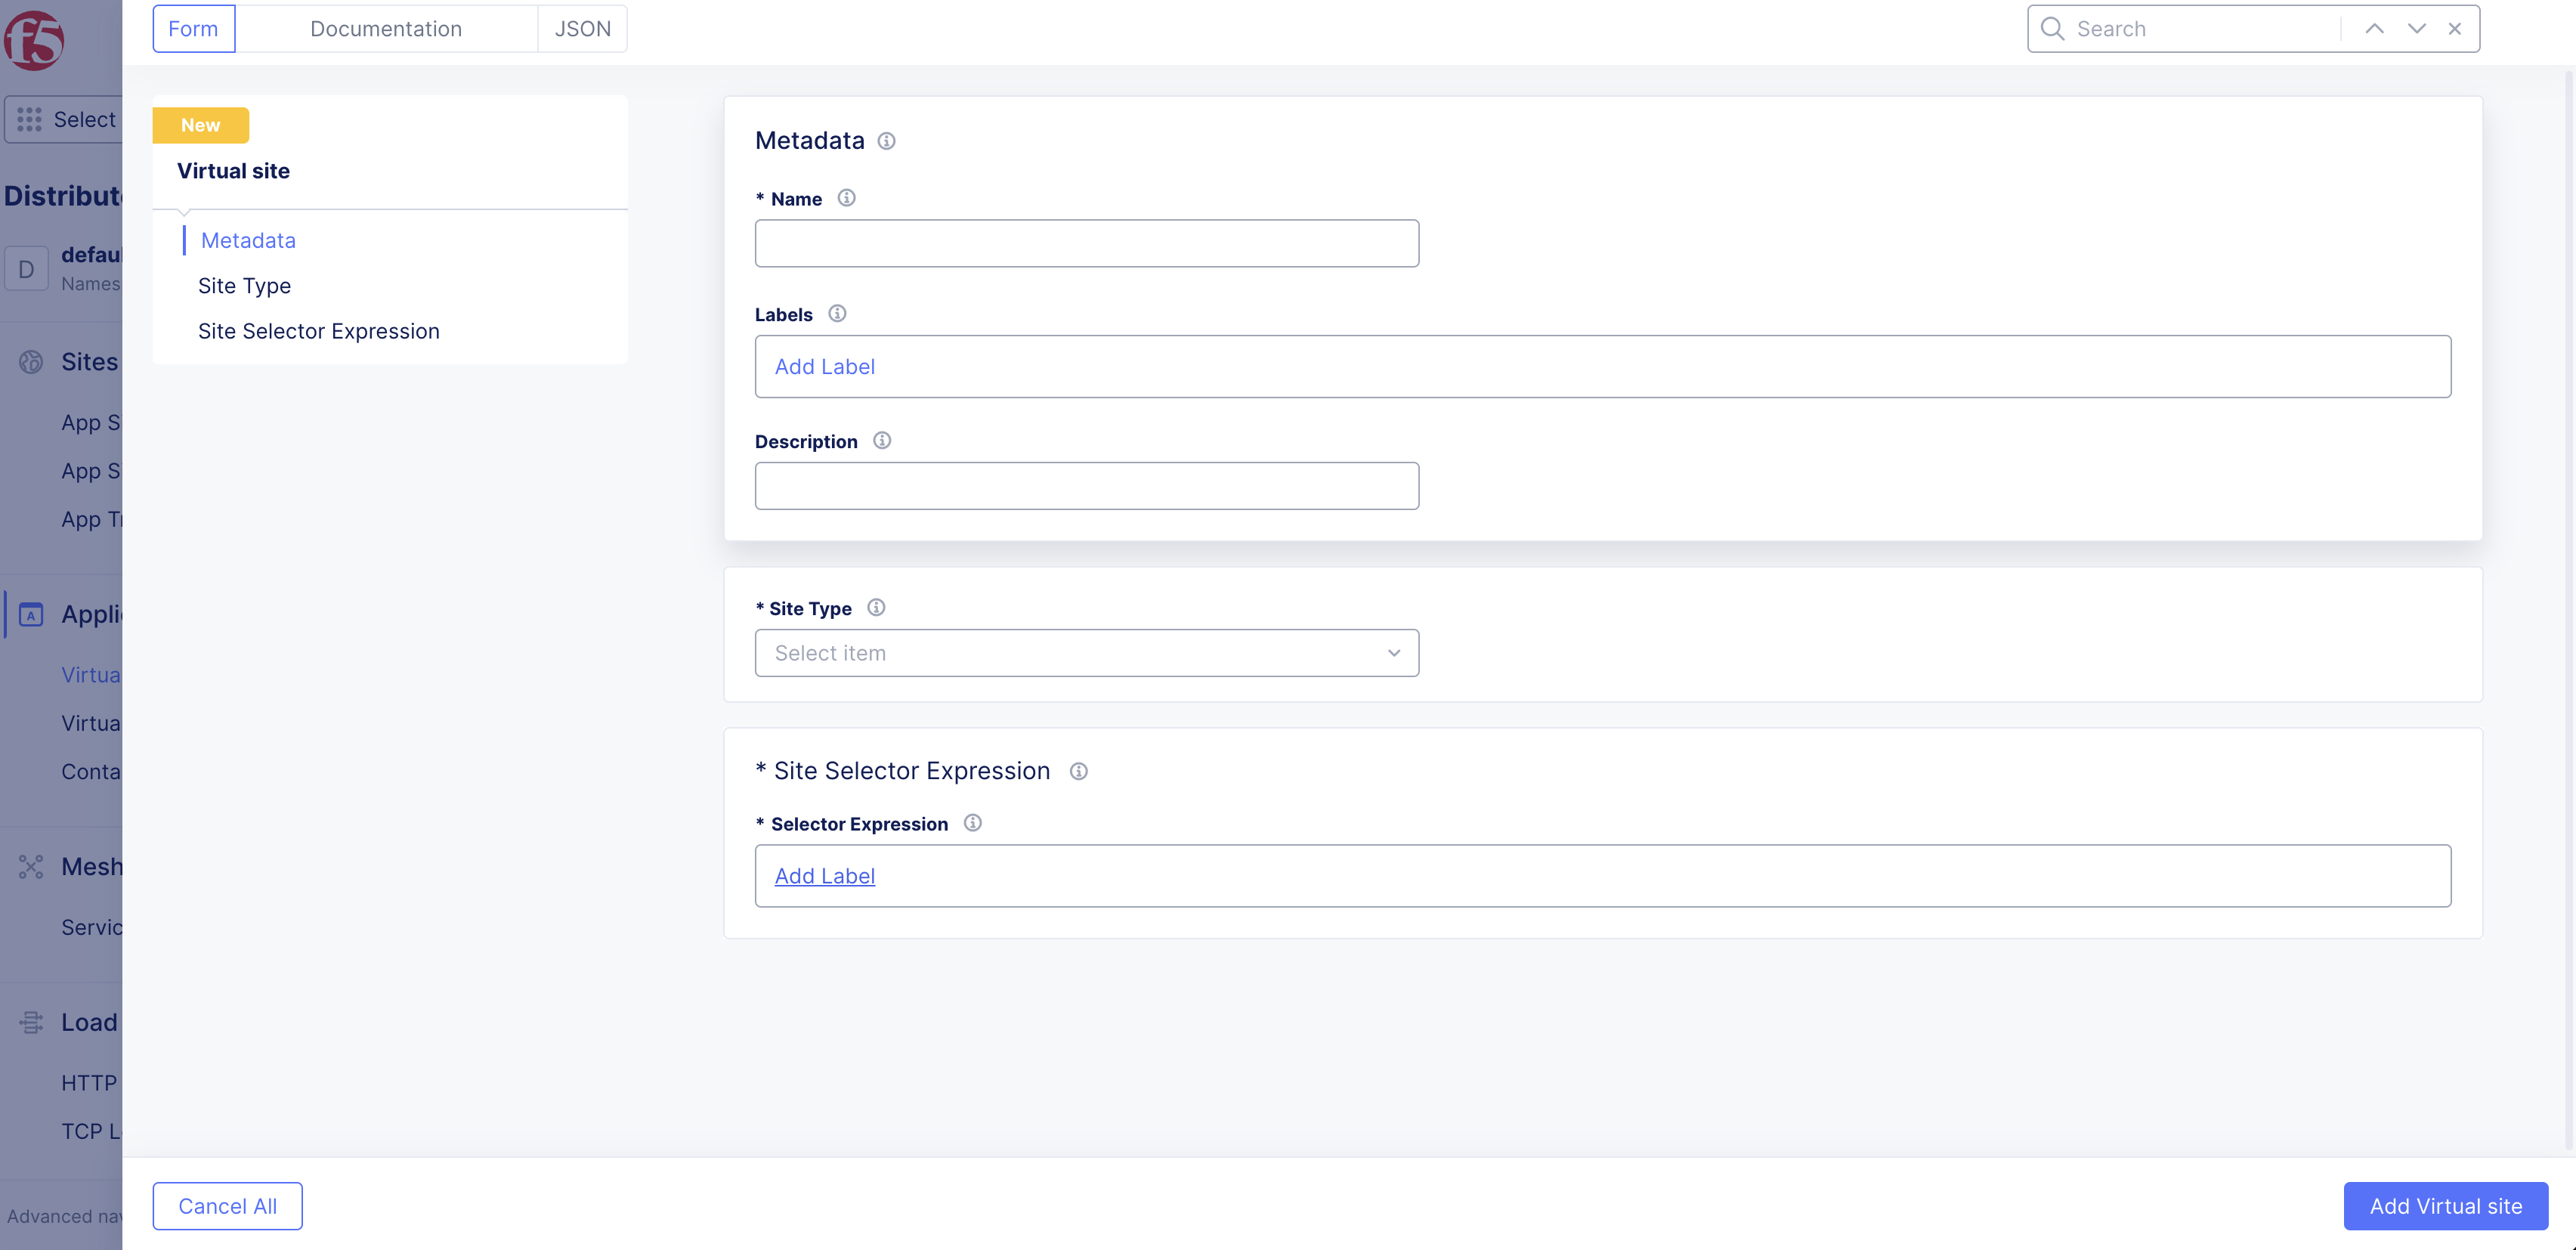
Figure: Selector Expression
-
To frame the selector expression, perform the following:
- Enter the name of the custom key created previously and then select it.
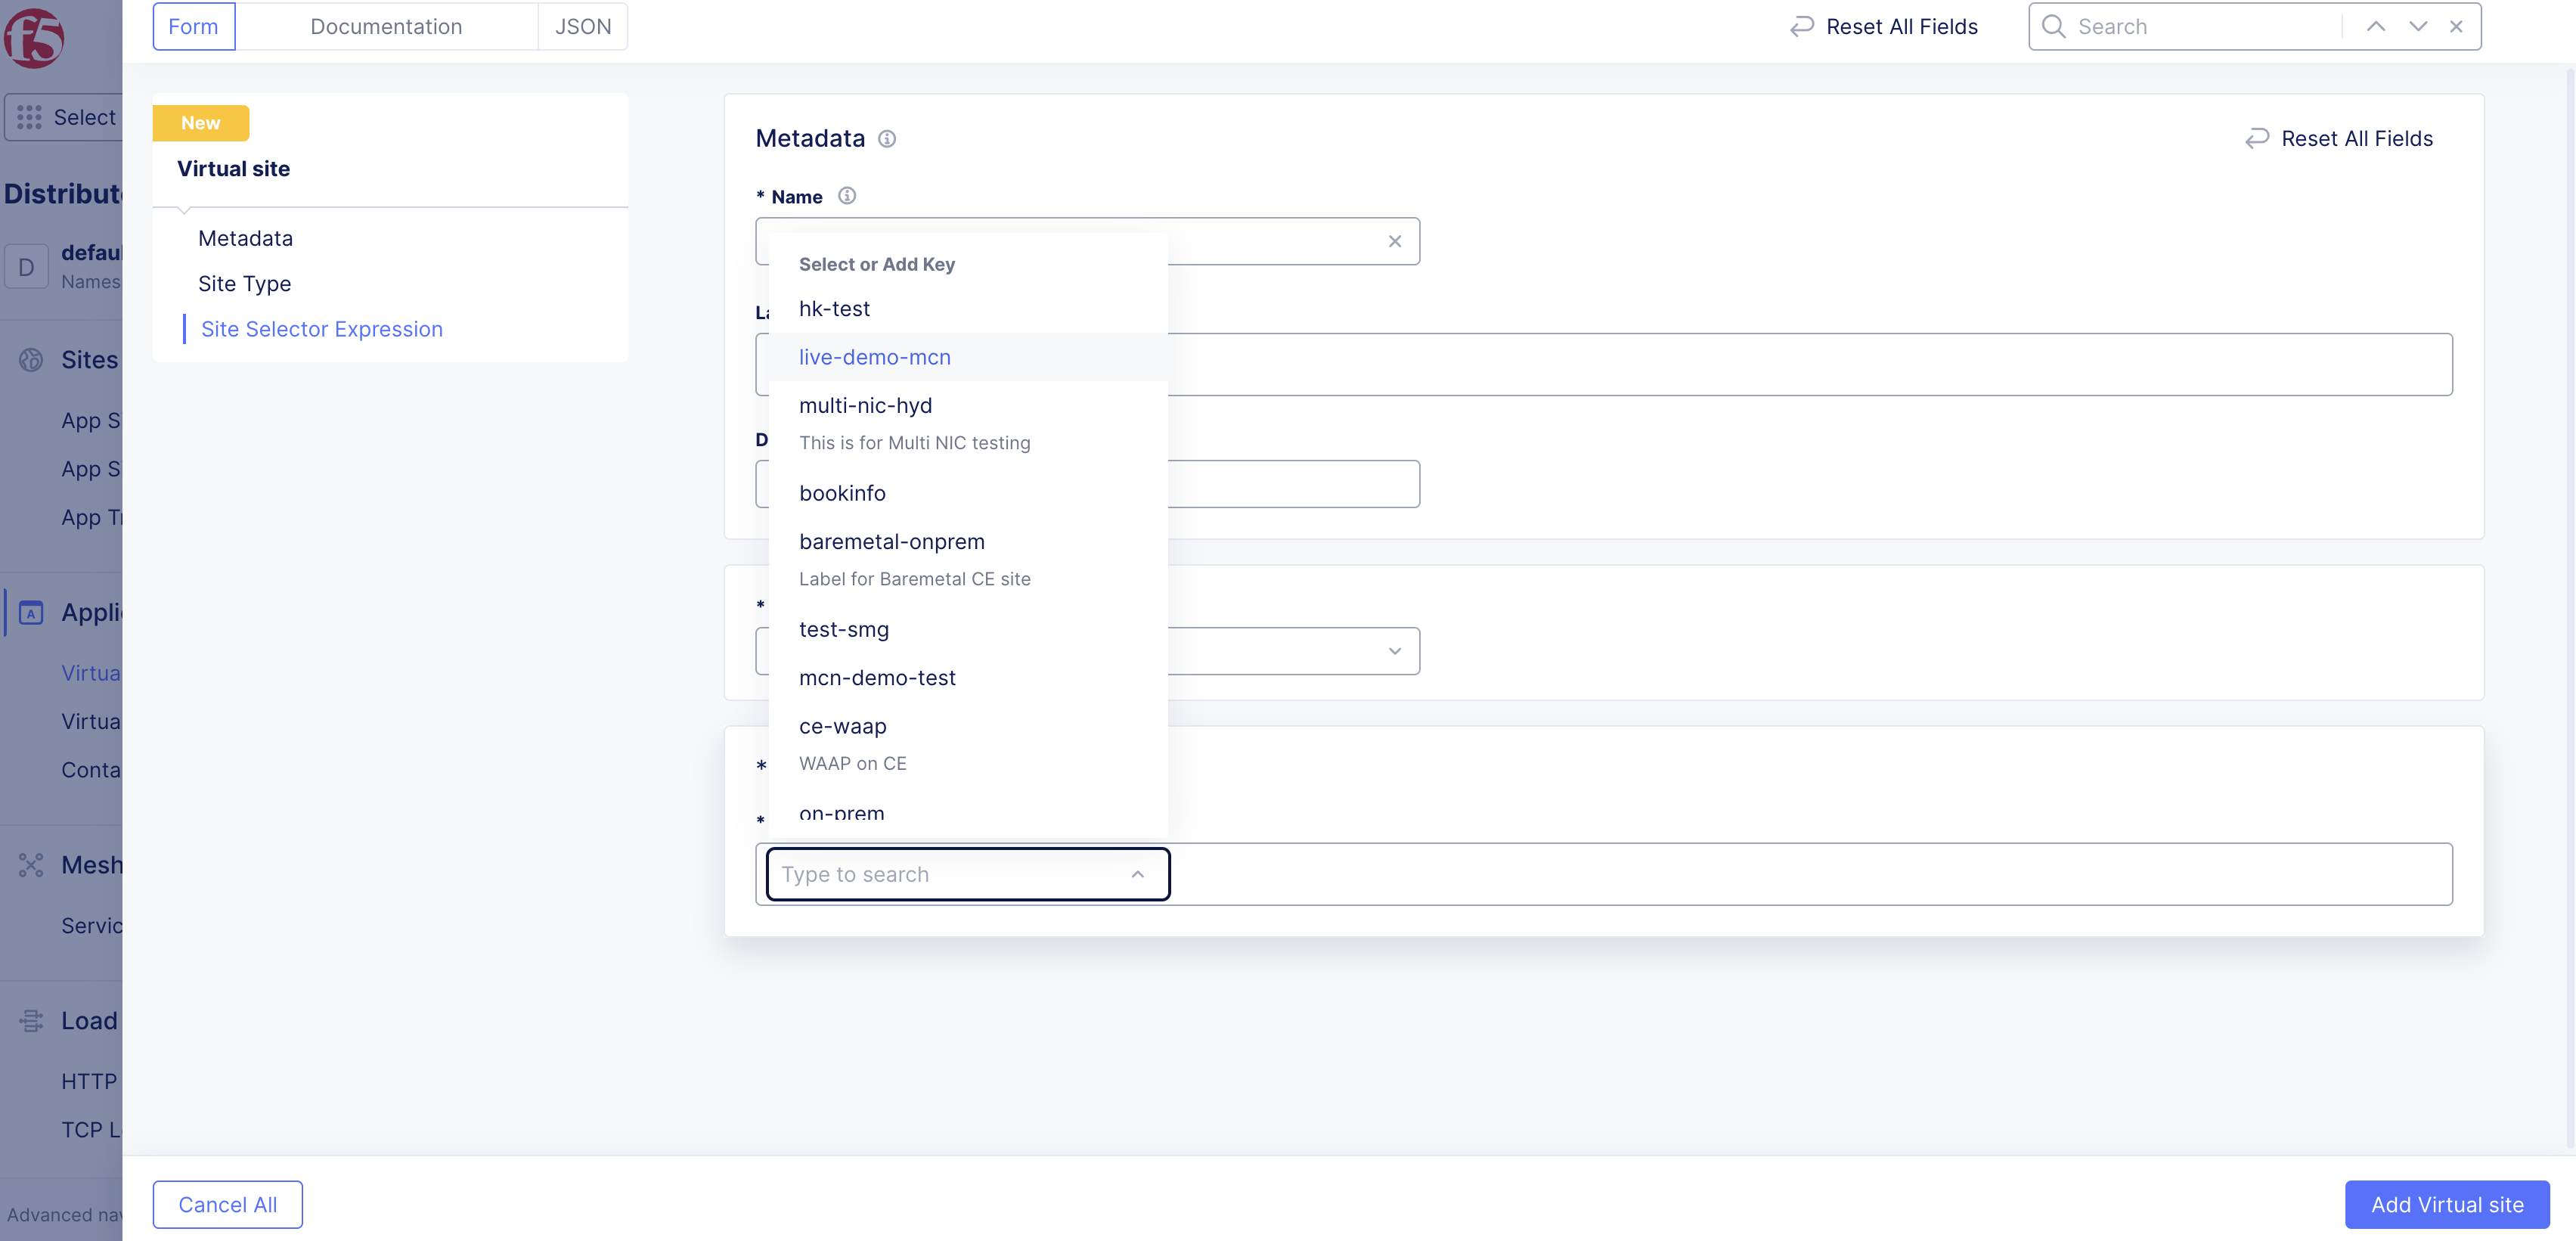
Figure: Selector Expression for Key
-
Select an operator.
-
Select the custom value assigned previously.
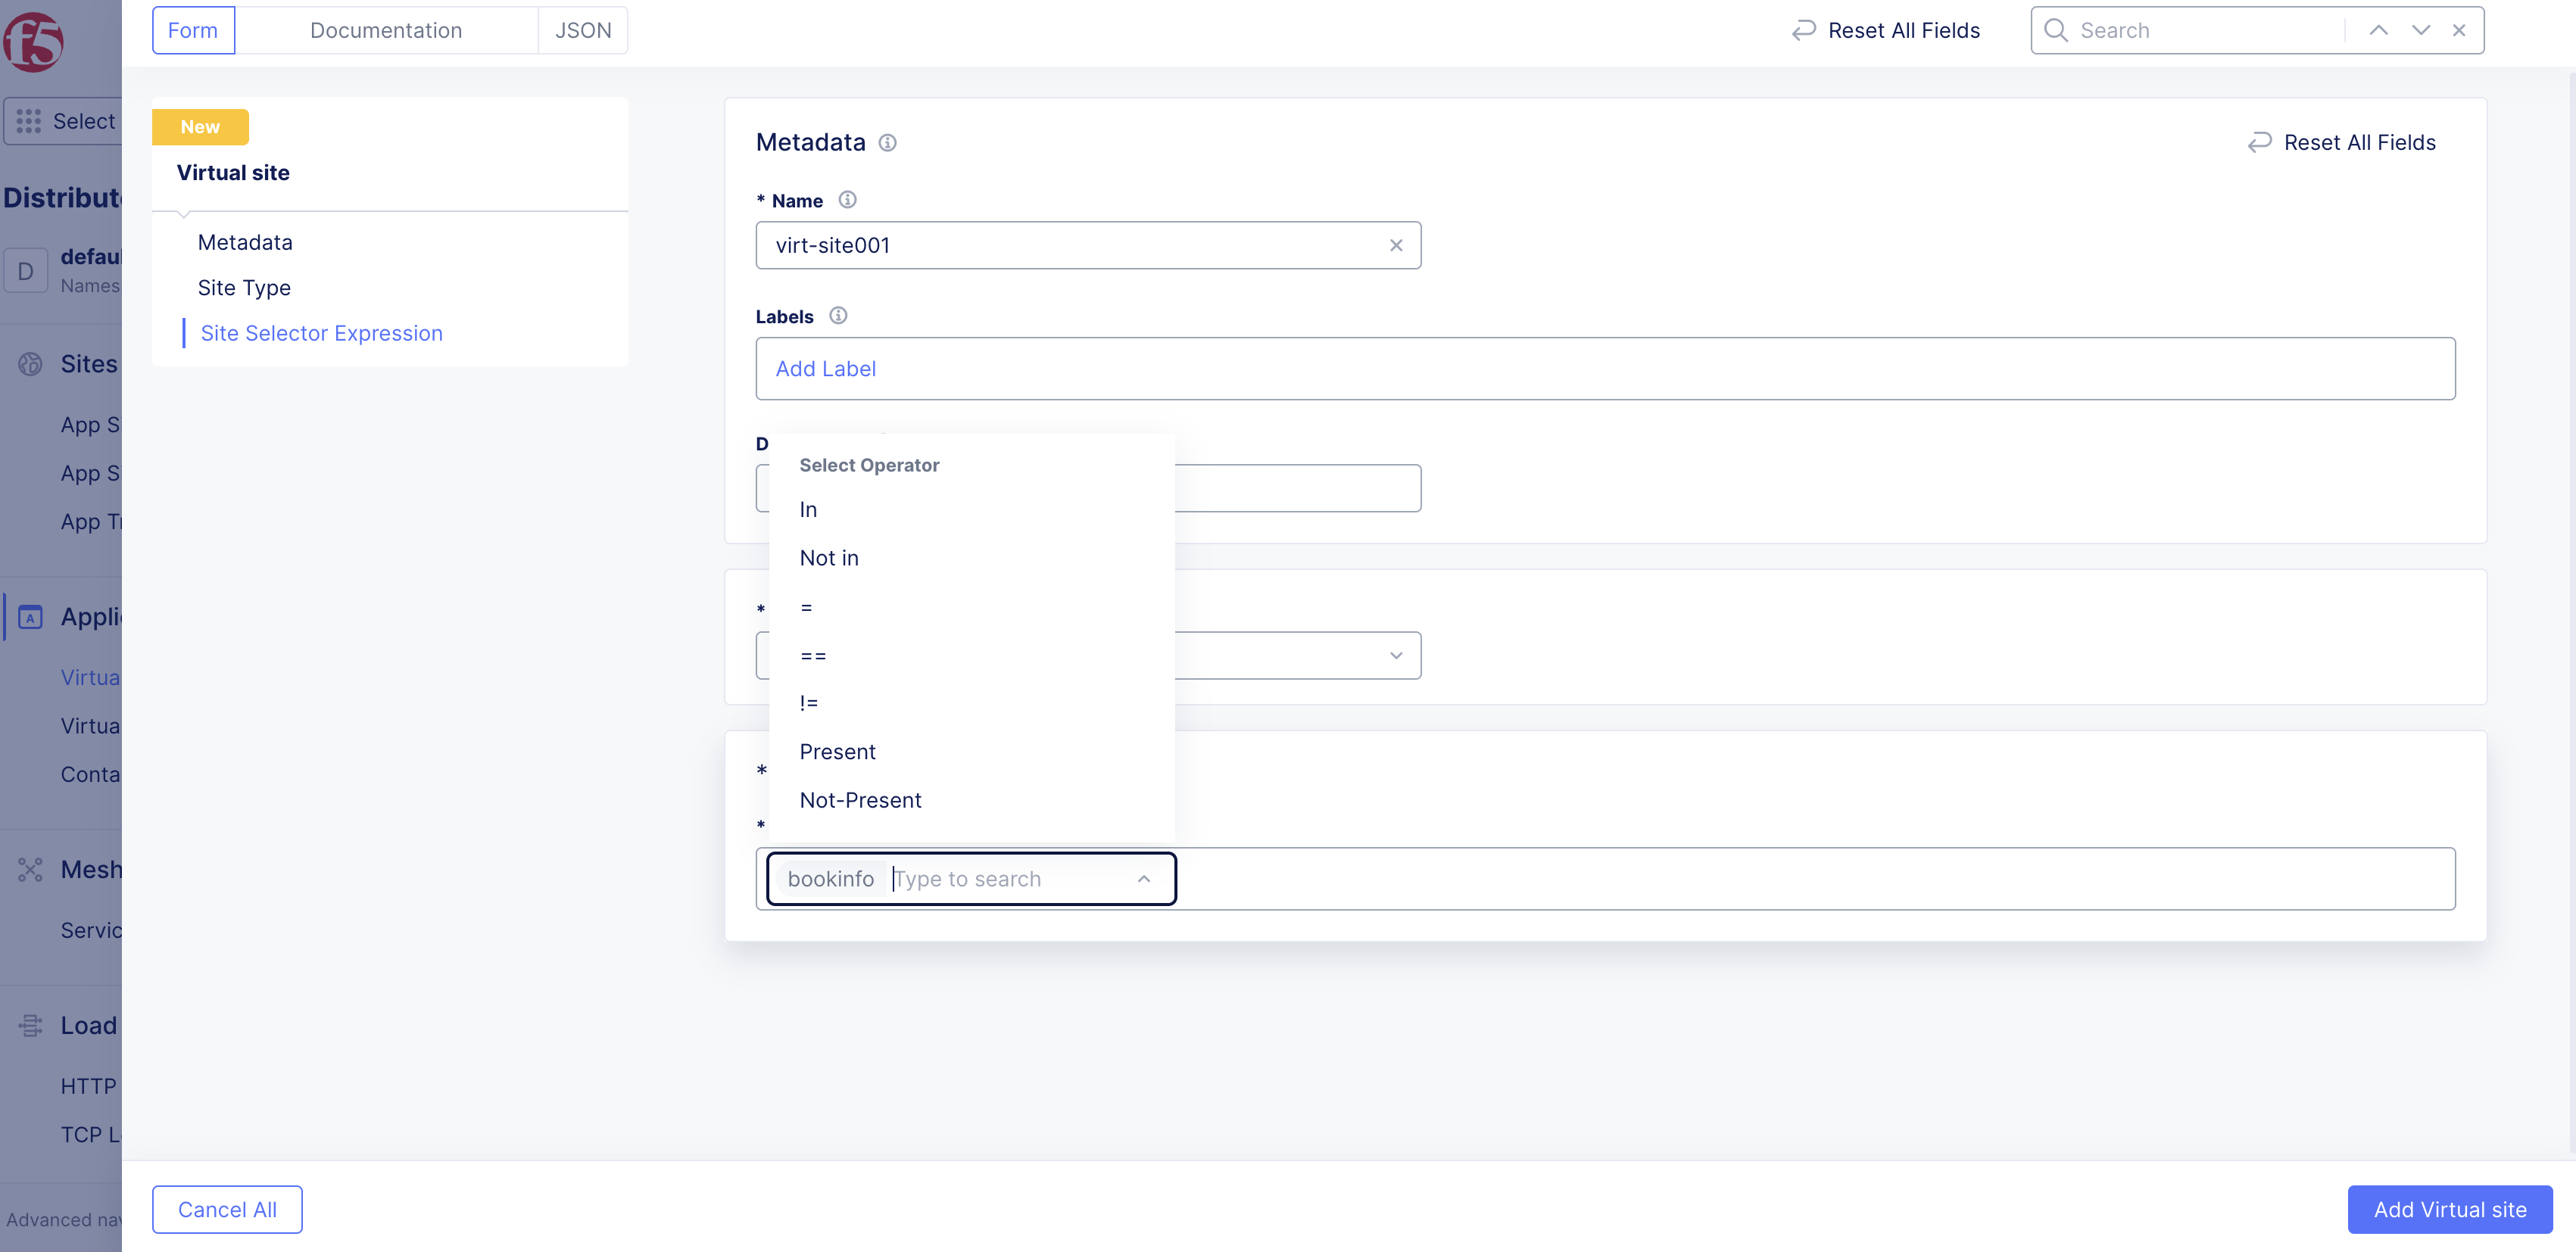
Figure: Selector Expression for Value
Step 4: Complete creating Virtual Site.
Click Add Virtual Site.
Step 5: Verify the new Virtual Site.
-
In the Distributed Apps workspace, navigate to Applications > Virtual Sites.
-
Confirm your Virtual Site is listed.
Using a Virtual Site for High Availability
For deploying applications with high availability (HA) using virtual sites, see the Create Two Node HA Infrastructure for Load Balancing Using Virtual Sites with Customer Edges guide.