Get Started with Distributed Cloud Console
Objective
This guide provides instructions on how to get started with the F5® Distributed Cloud Console (Console) and to set up user preferences based on the various work domain options available. The Console provides a customized view of workspaces that you will be using based on your work domain selection during the onboarding process. You can also update the settings at any point of time based on your requirements.
Using this guide, you can learn how to set up preferences while getting started, navigate the Console, access various workspaces, and update the preferences at any point of time.
Note: This guide assumes that you have administrator role and provides instructions accordingly. All workspaces are visible for all roles. Access to workspaces is defined based on the user roles. For information on various roles, see Roles.
Prerequisites
SaaS account in Console is required. If you do not have an account, sign up here.
Console and Workspaces
The Console is a portal that acts as frontend to the SaaS services and offers various configurable objects grouped into a number of workspaces. Using the Console, you can manage all configurations such as software, infrastructure, applications, users, and so on. You can choose which workspaces to expose in the Console user interface during the initial log in by selecting your work domains.
Although the user interface presents various workspaces, every configurable object is supported with the fundamental isolation of a tenant and then has further isolation in terms of namespaces. For more information, see Core Concepts.
Initial Login and Setup
The following video tutorial shows how to perform the initial setup and shows how to navigate between various views:
Step 1: Log into Console and accept the terms and conditions.
- Go to the Console portal. Enter your tenant name when asked.
- Enter your SaaS account credentials. In case of first time login, accept the terms and conditions and click to proceed.
Note: Depending on the tenant setup, you may be required to log in using SSO credentials. In case your role is insufficient, system automatically sends a request to your admin to grant you access. In addition, you can resend the request using the
Resend Access Requestoption on the home page. The home page displays workspaces after the access is granted.
Step 2: Choose your work domains.
- In the next screen, select your work domains. Work domains are mappings of the functions that you perform, and they are tied to corresponding workspaces. You can also select
Super Userto define that you are superuser.
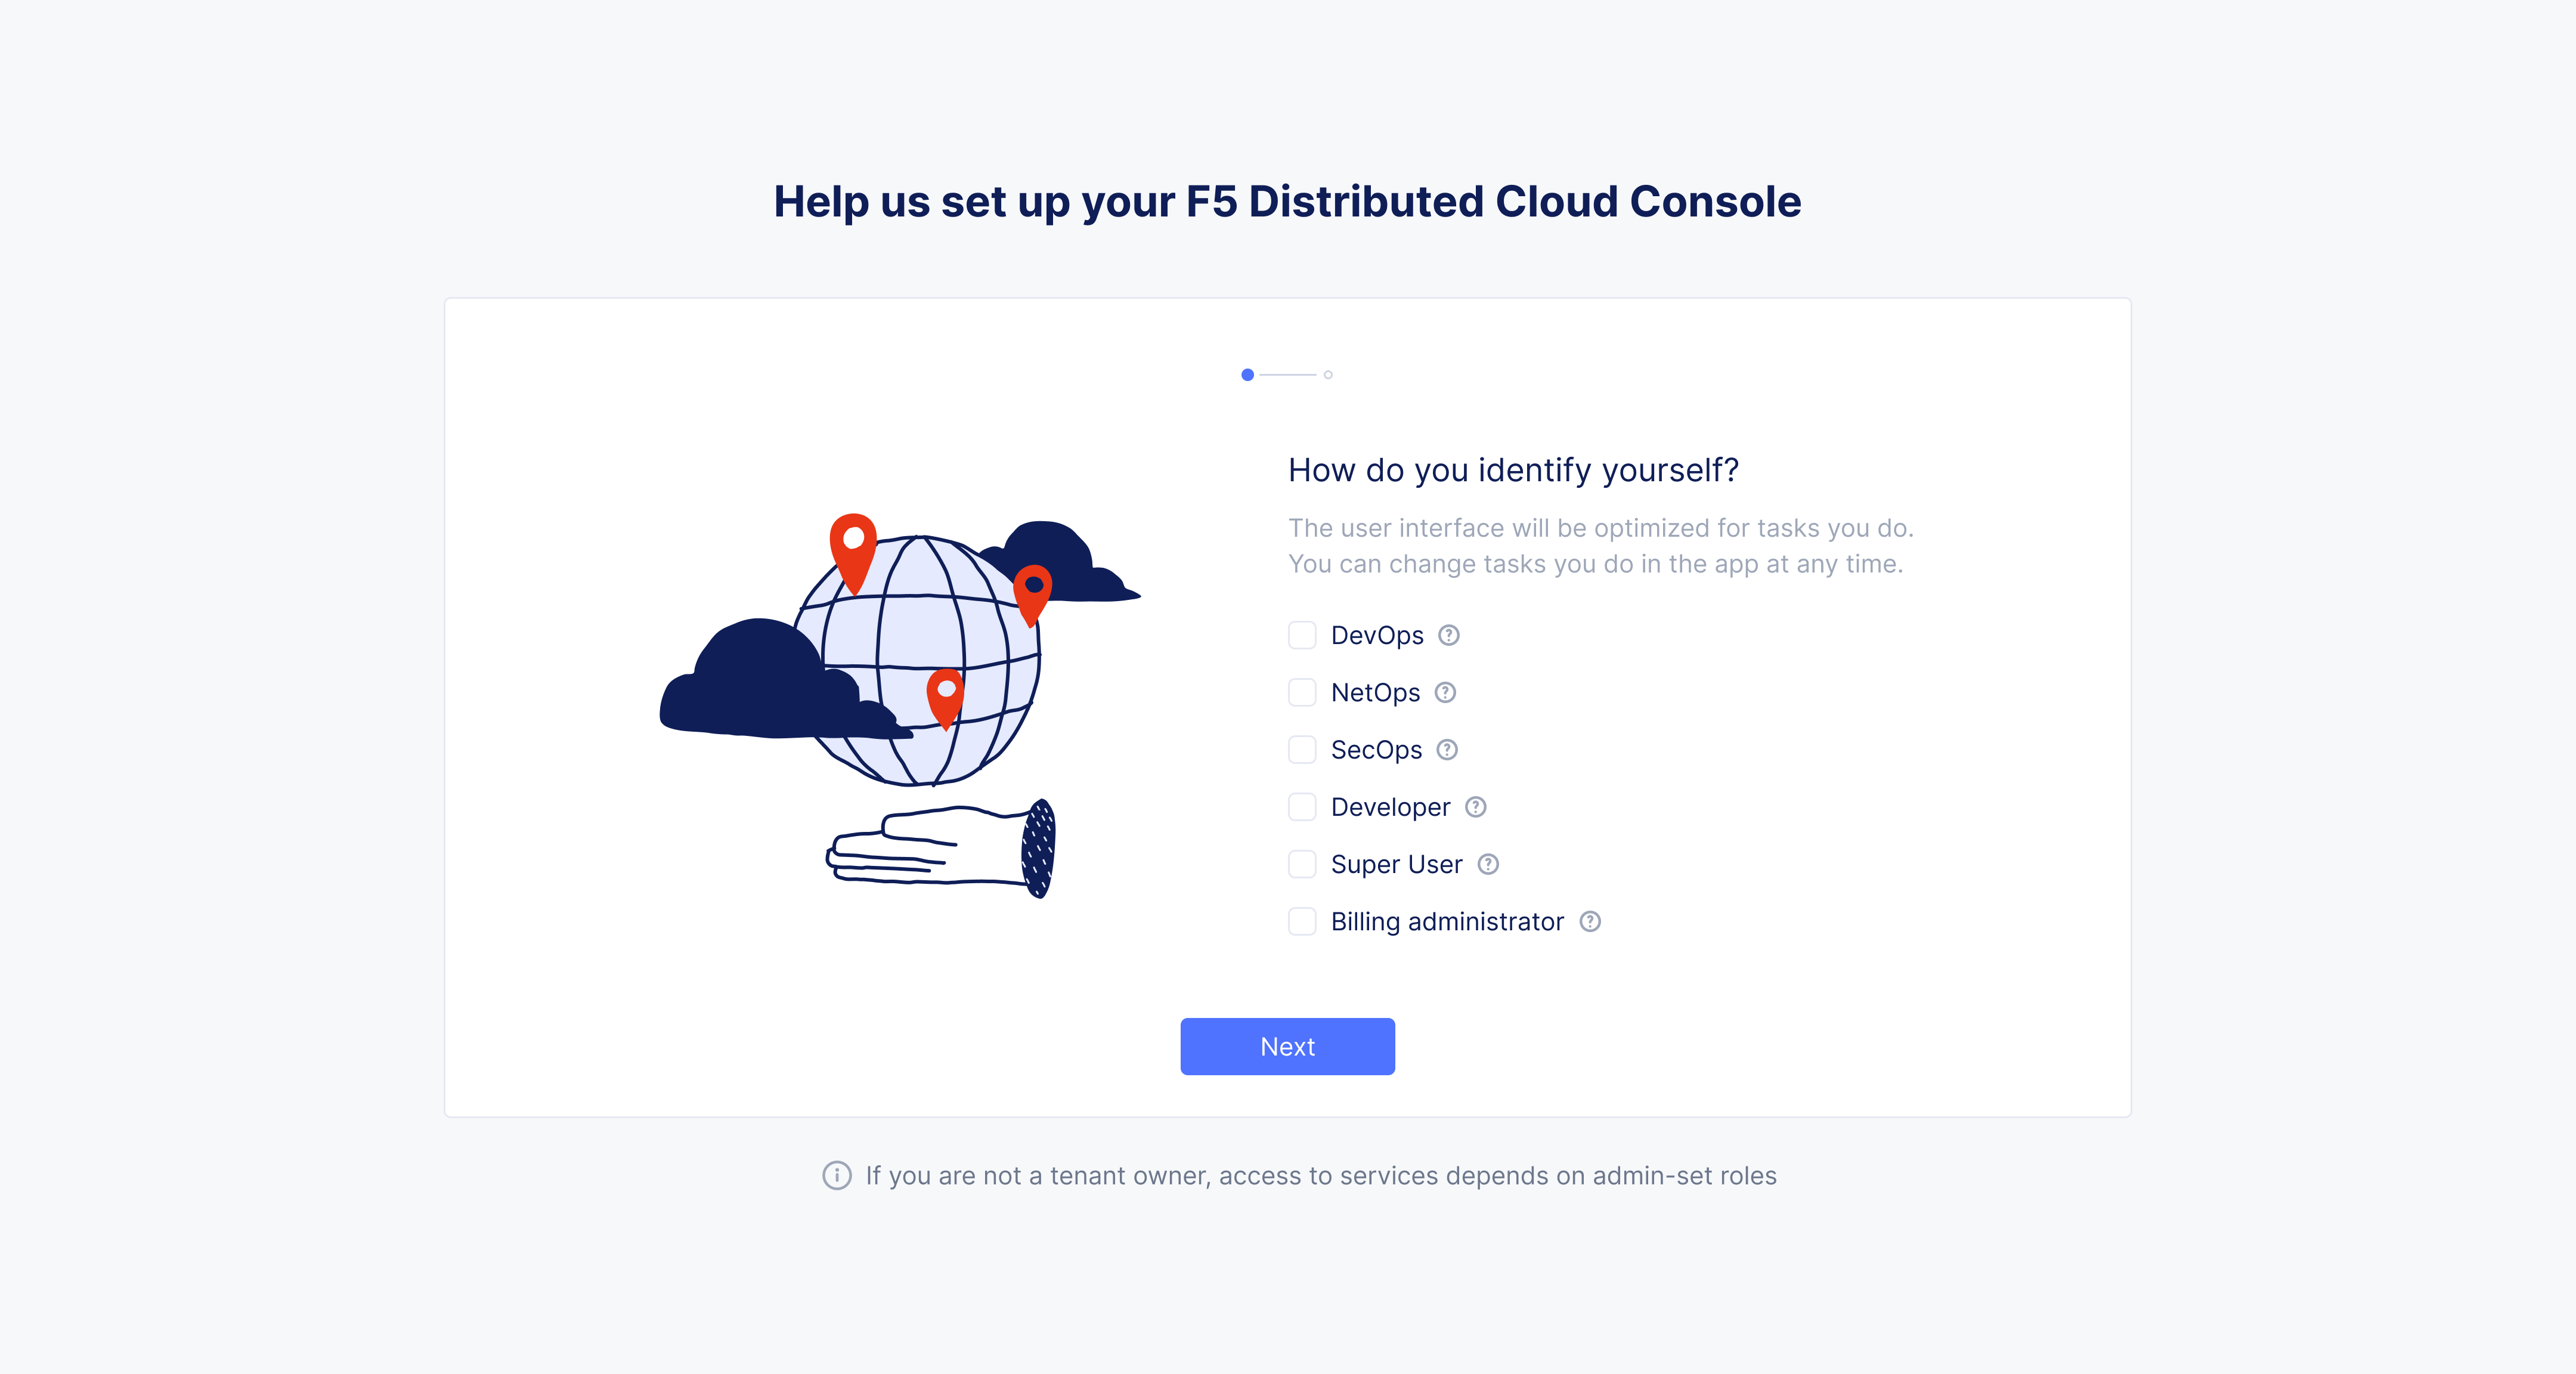
Figure: Choose the Work Domains
- Click
Next.
Step 3: Choose your skill level.
Select whether you are Intermediate User or Advanced User and click Next.
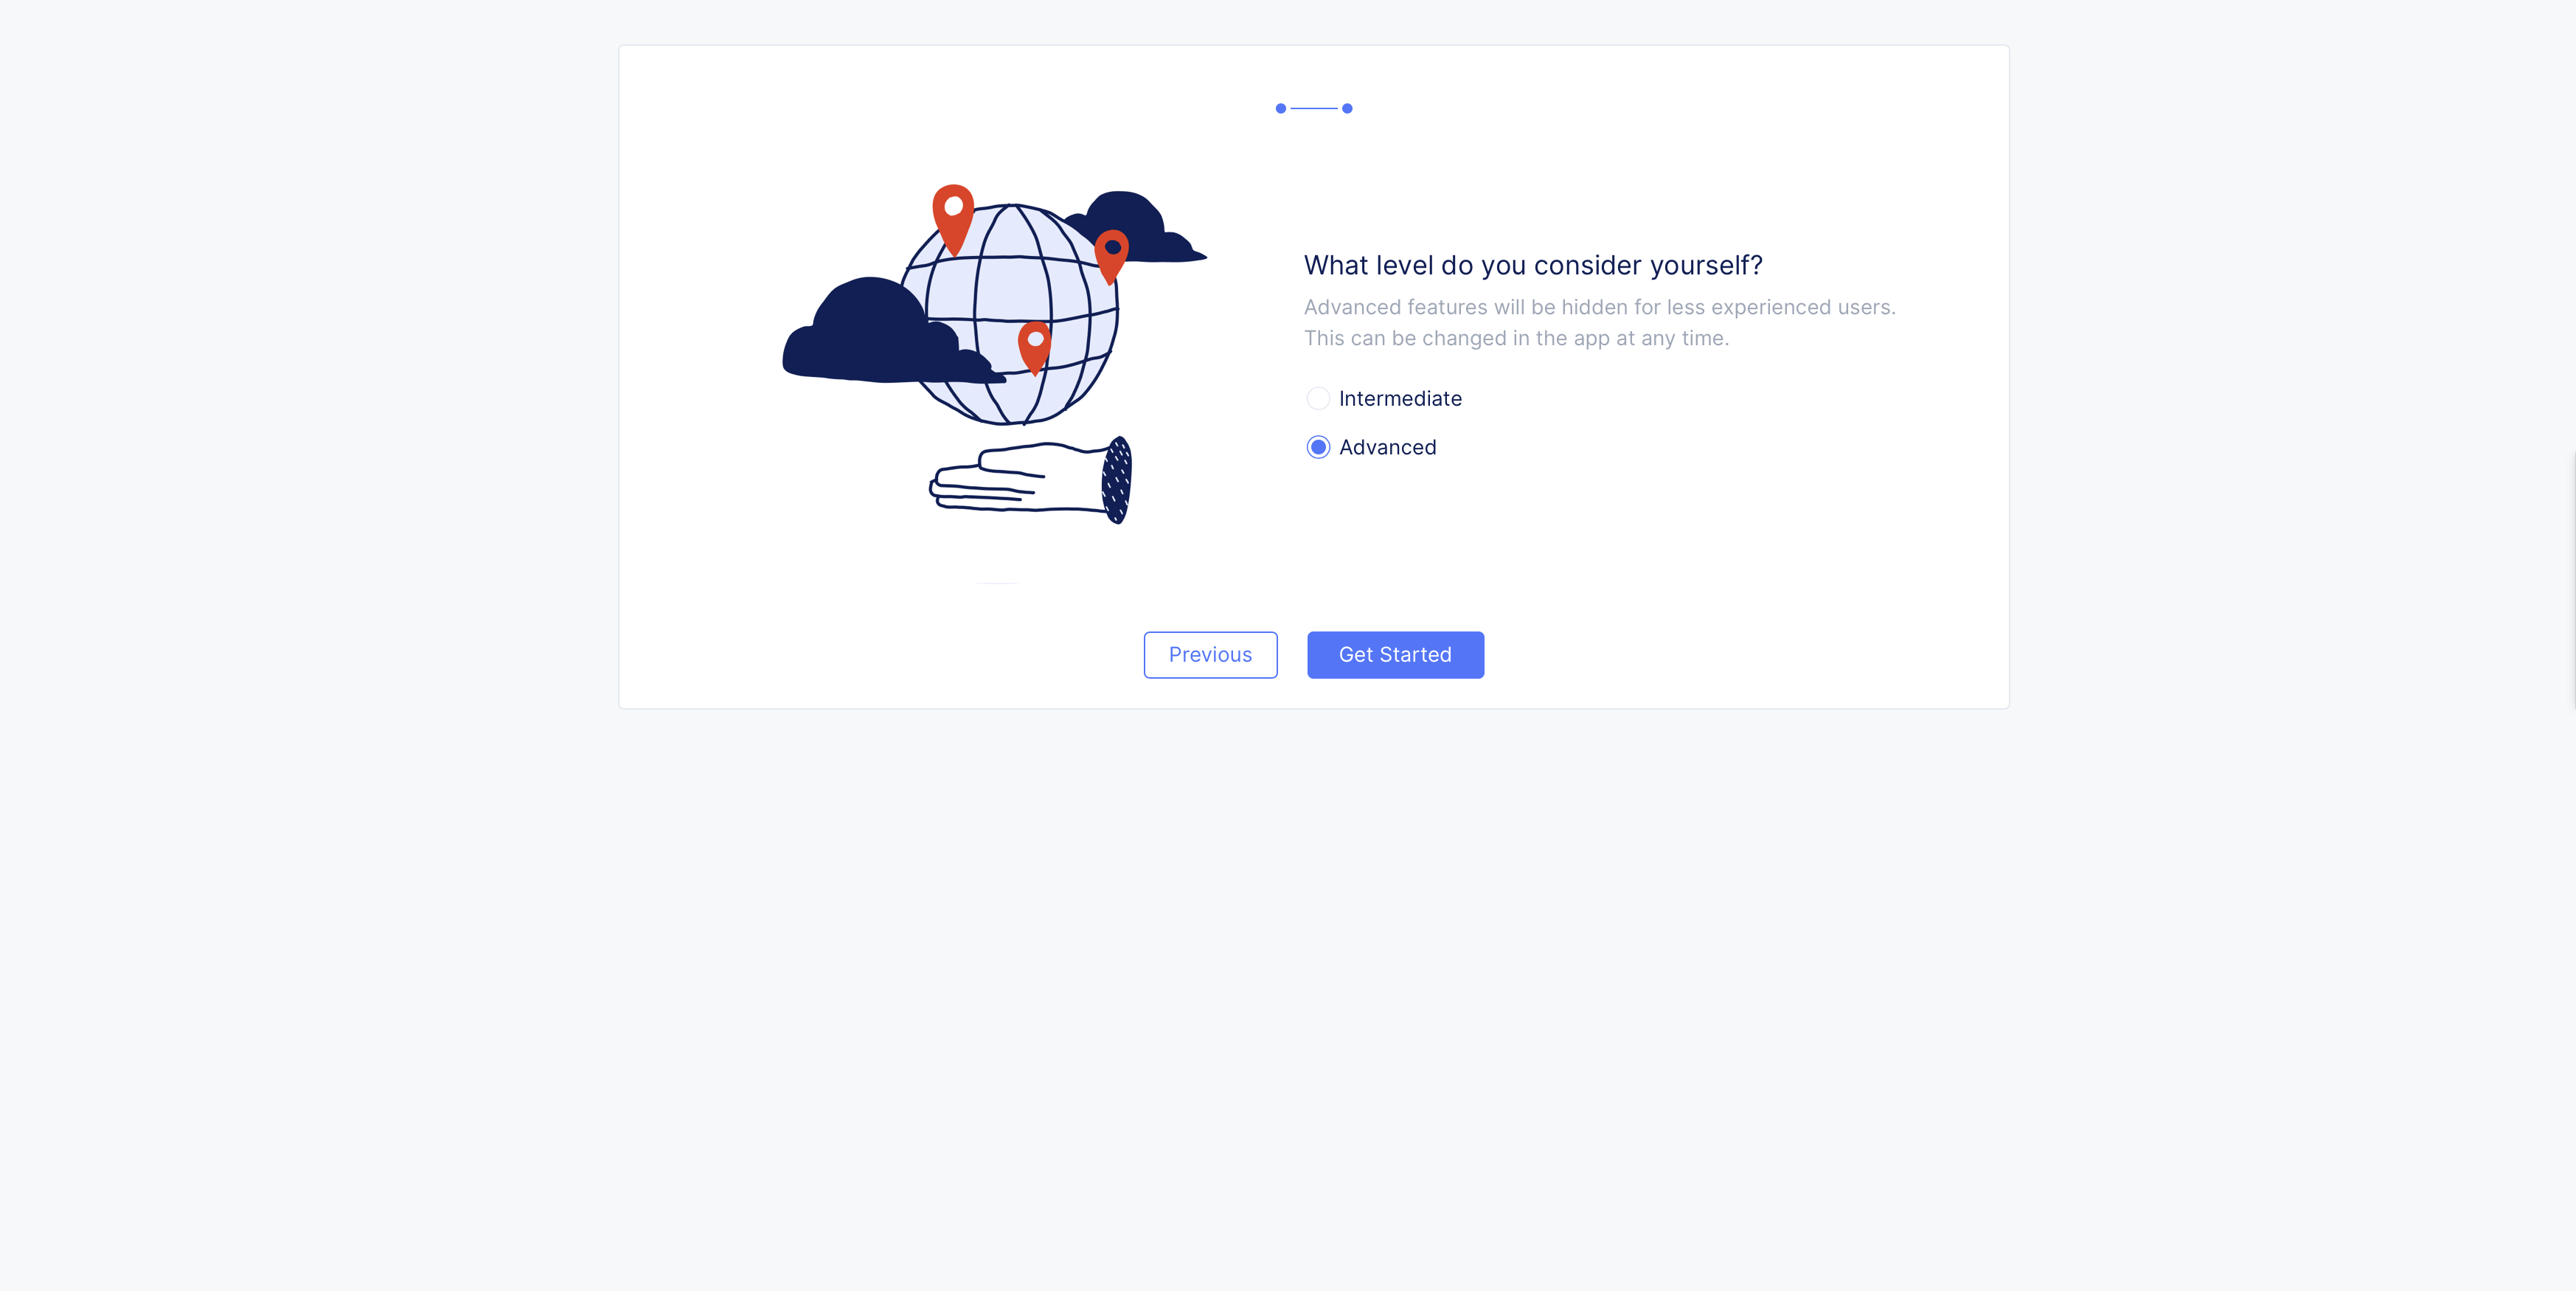
Figure: Choose the Skill Levels
Note: Intermediate users do not have access to advanced features within the workspaces. This can be changed at any point of time within the workspace pages or in user account settings.
Step 4: View the various workspaces on the Home page.
- At this point, the Console Home page loads with
Common Workspacespopulated. The workspaces are presented as tiles and reflect the work domains and skill levels you selected in the previous steps.
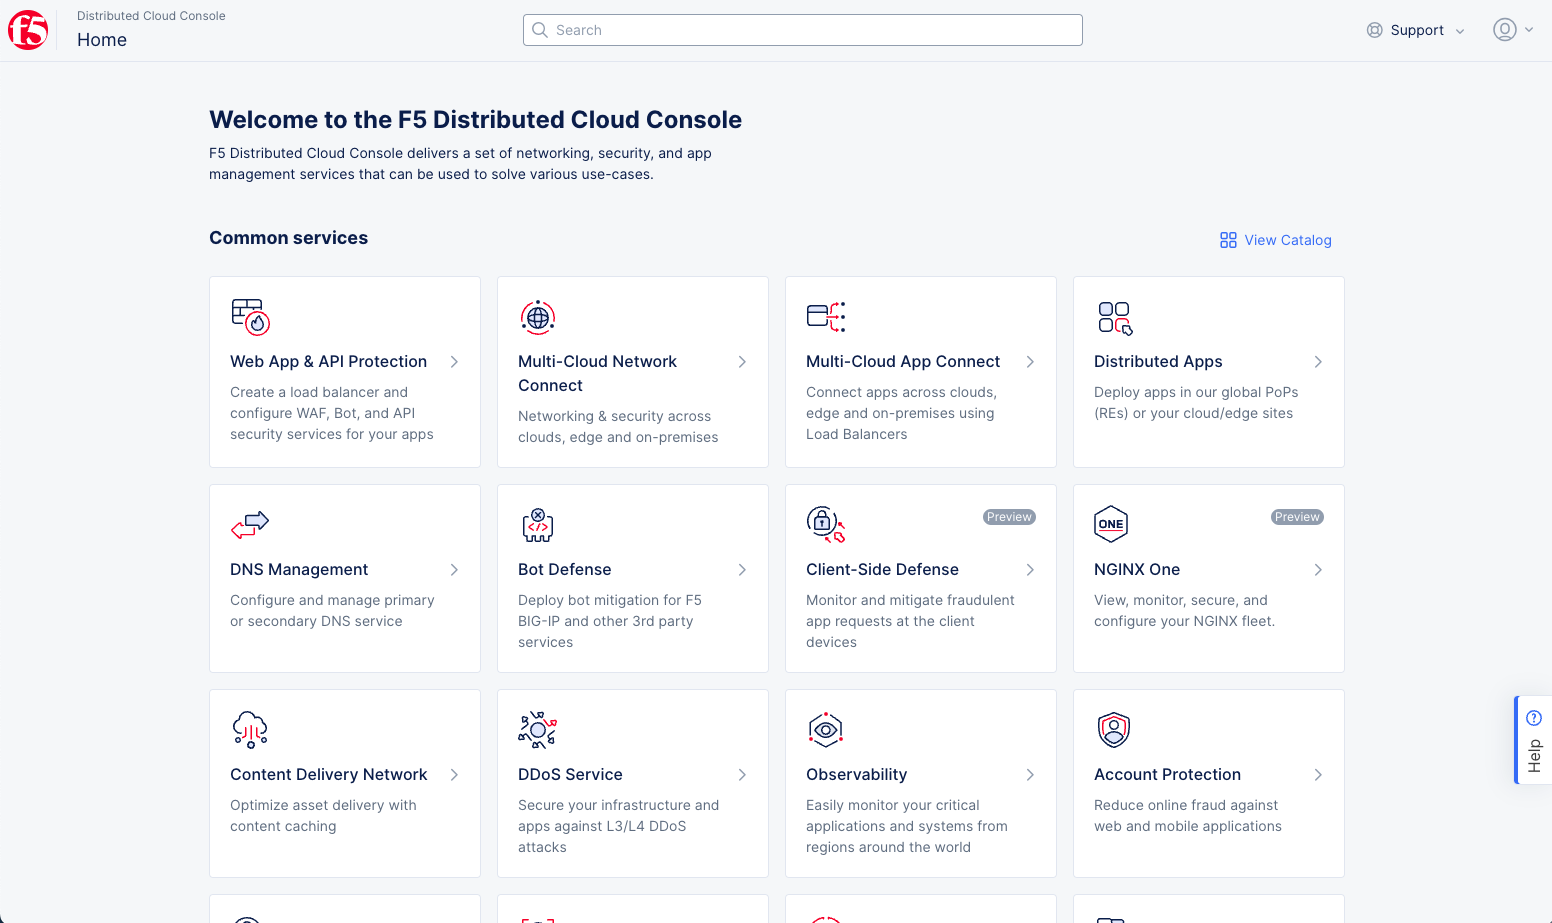
Figure: Home Page Common Workspaces
- Beneath the common workspaces, a collapsible panel named
All Workspacesis placed. Click on the panel to view all the available workspaces. - Beneath the all workspaces drop-down, located are SaaS configuration tutorials you can go through to learn more about the Console and how to create different solutions.
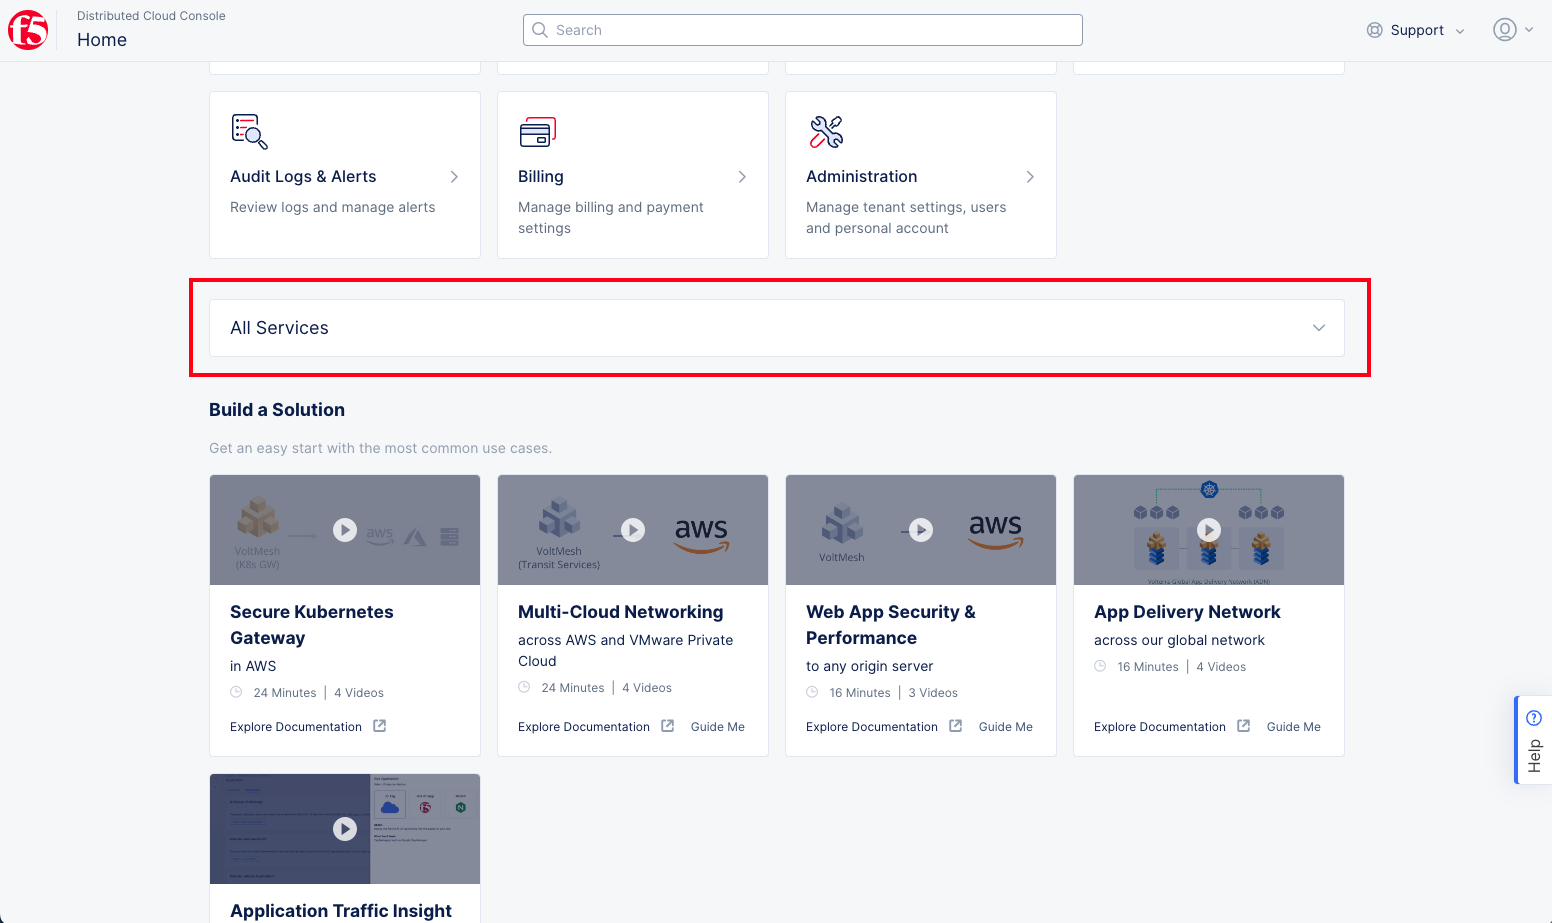
Figure: All Workspaces and Tutorials
Navigate Console and Update Preferences
Use the following steps to explore and navigate through the various workspaces in Console:
Step 1: View catalog page to review workspaces available to you.
- From the
Homepage, click onView Catalogto the right of theCommon Workspacestitle.
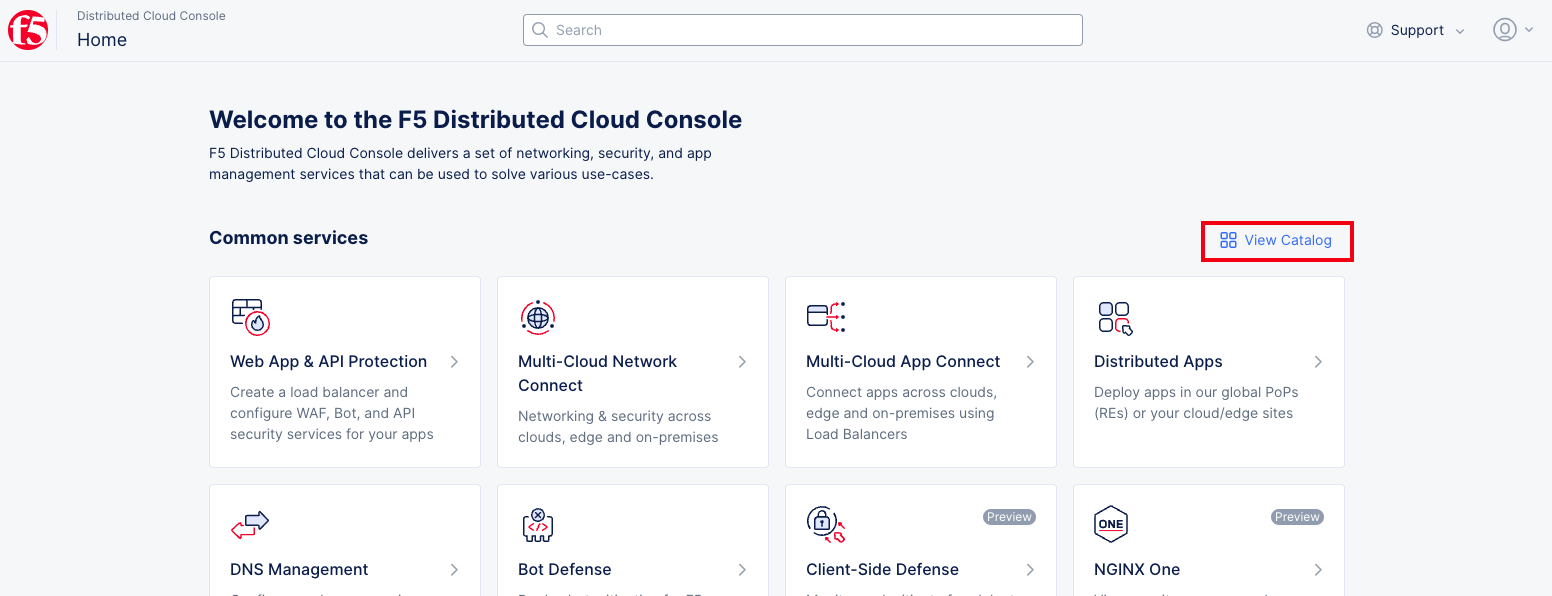
Figure: View the Catalog from the Home Page
- The
Catalogpage allows you to see the workspaces you are subscribed to and explore other workspaces available to you.
Use Cases
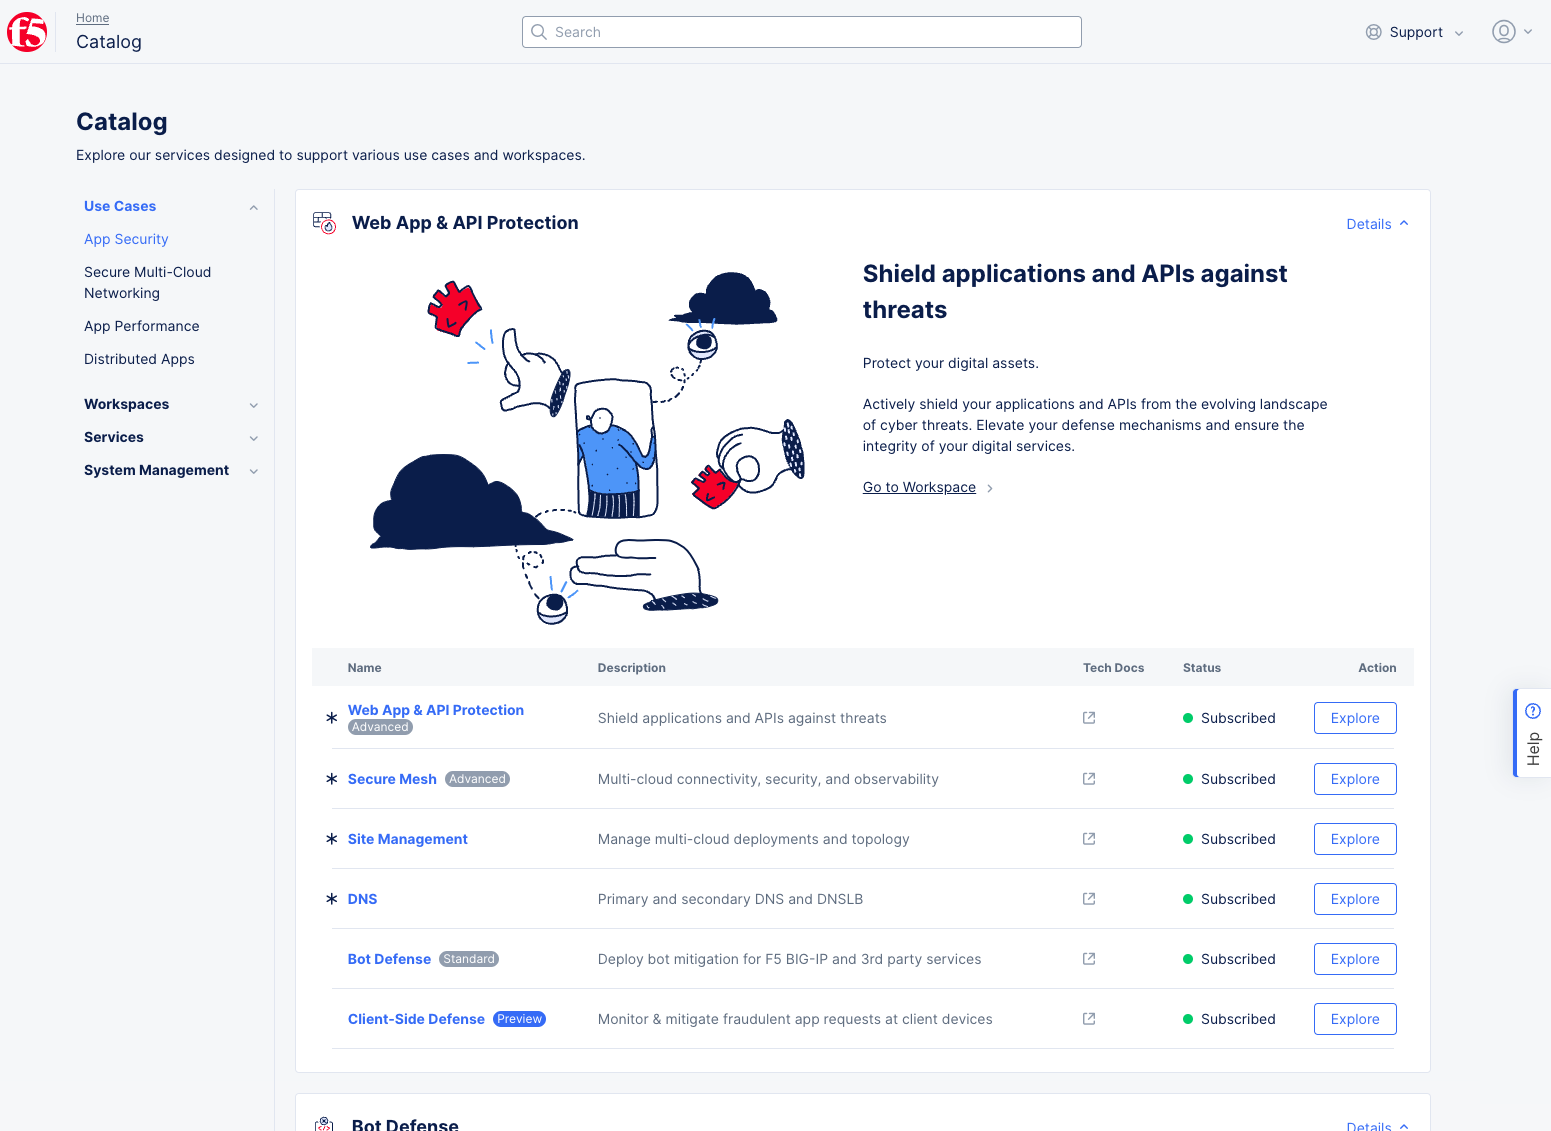
Figure: View the Catalog Use Cases
-
The
Use Casessection in the primary navigation pane shows the workspaces that are associated with a specific use case. -
The use case page area shows a scrolling list of workspace blocks that are applicable to that use case.
-
Each workspace block explains the overall purpose of the workspace and a list of services that are required or optional for that workspace. Those that are part of the minimum required set of workspaces.
-
Each workspace listed also show if you're
Subscribedto the workspace or if it'sAvailableto you. -
You can learn more about a workspace by clicking
Explorefor that workspace.
Workspaces
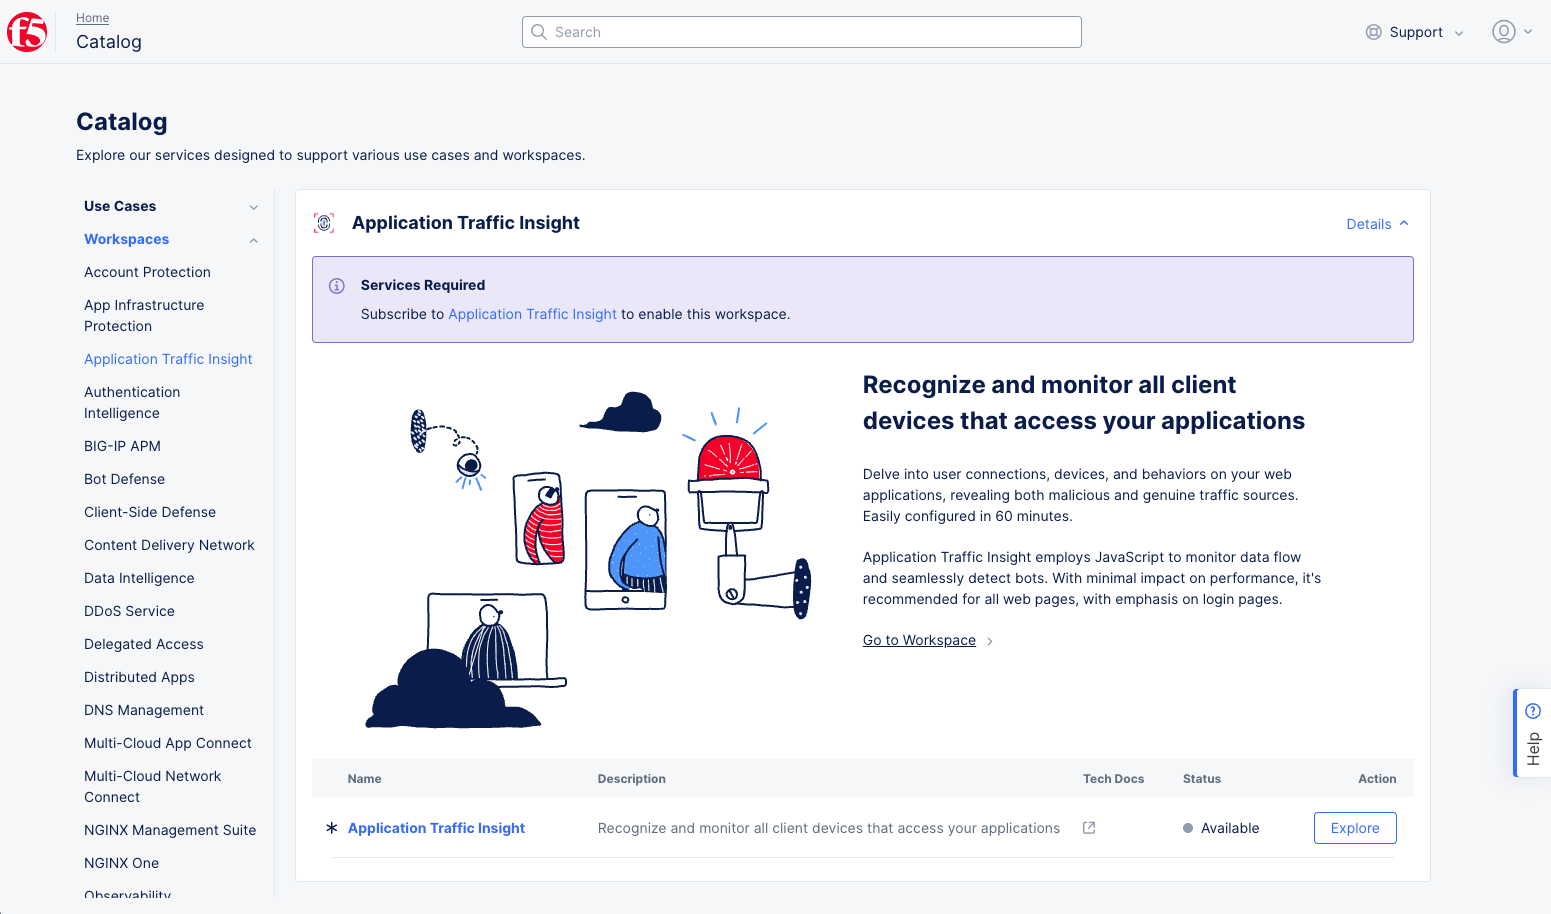
Figure: View the Catalog Workspaces
-
The
Workspacessection shows the services that are associated with a specific workspace. -
The workspace page area displays the selected workspace block that shows the overall purpose of the workspace and a list of services that are required or optional for for that service. Those that are part of the minimum required set of services.
Services
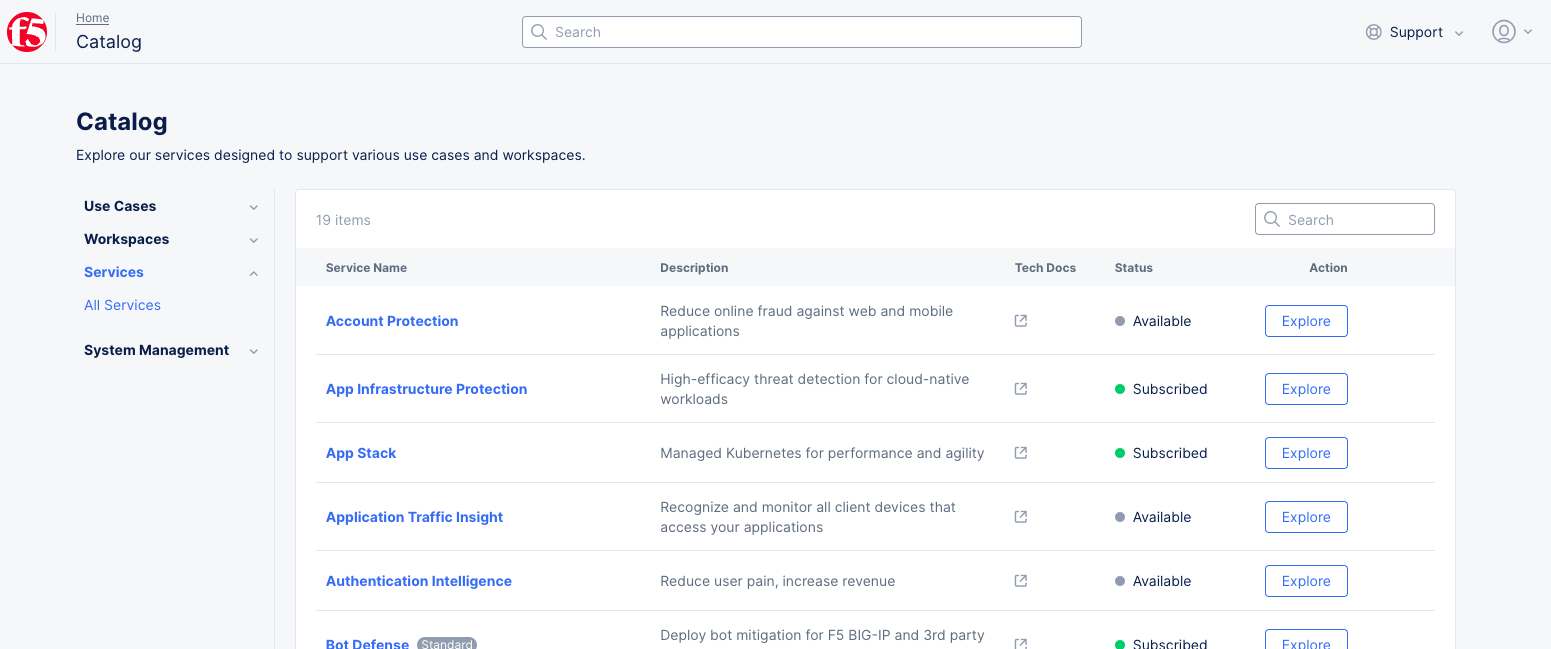
Figure: View All Services
-
The
Servicessection shows a list of all services. -
For each service in the list you'll see a short description, a link to the technical documentation for that service, whether you are subscribed or not, and the ability to explore the service.
System Management
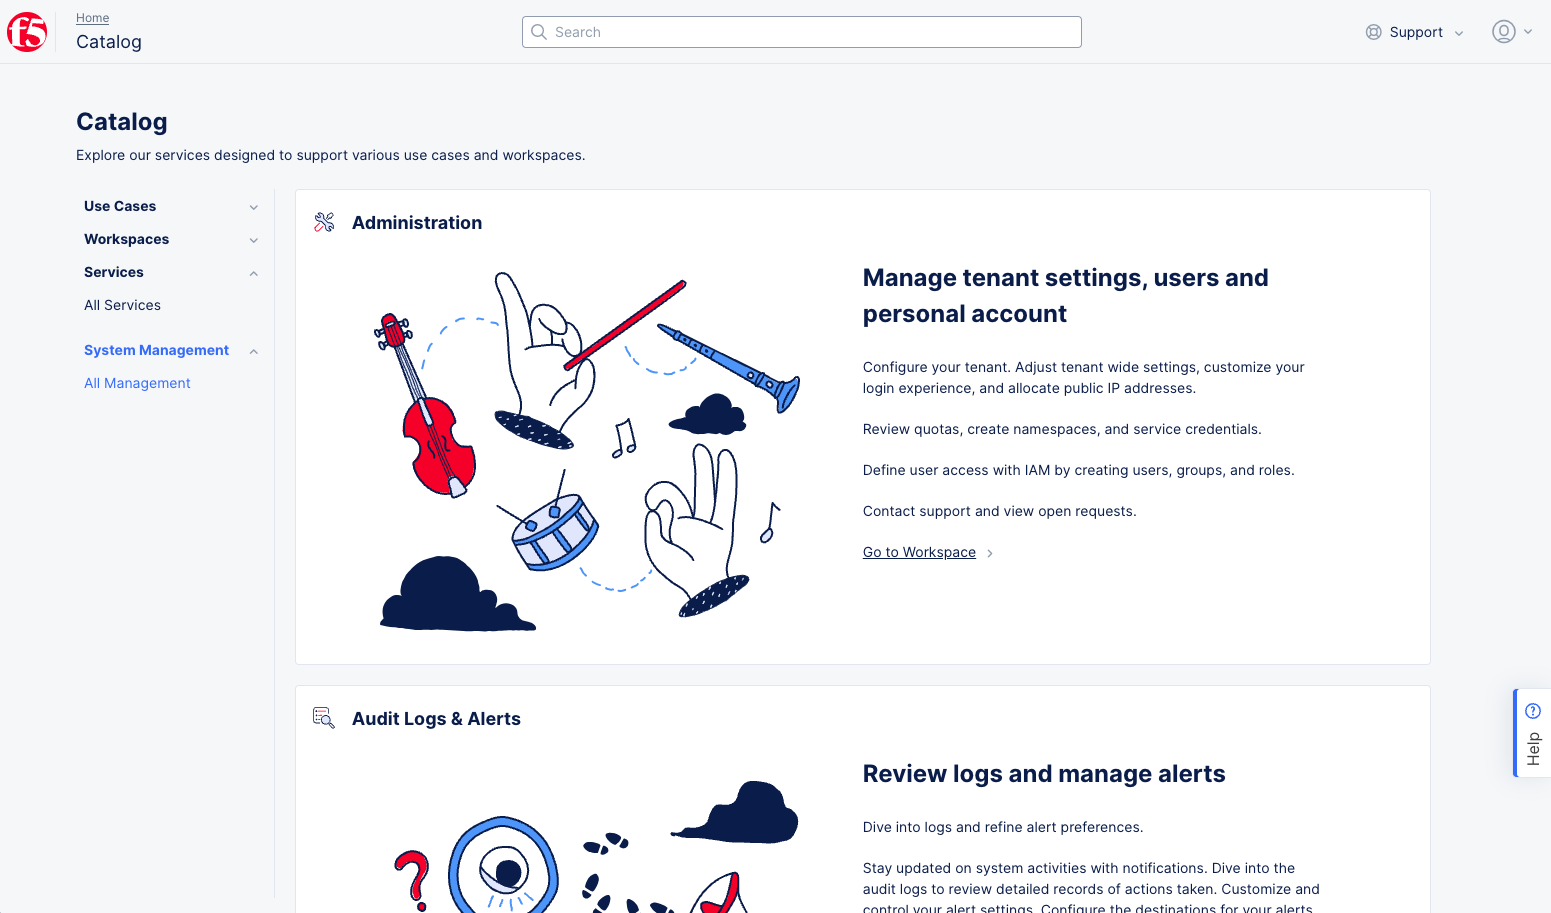
Figure: View System Management Options
-
The
System Managementsection shows all management workspaces that are available to you. -
Each block in the list provides an overview for the purpose and provides a link to the workspace.
Step 2: Navigate to a Workspace.
You can navigate to a workspace in any one of the following ways:
- From the
Homepage, click on the workspace from theCommon Workspacestiles if that workspace is visible in the common workspaces.
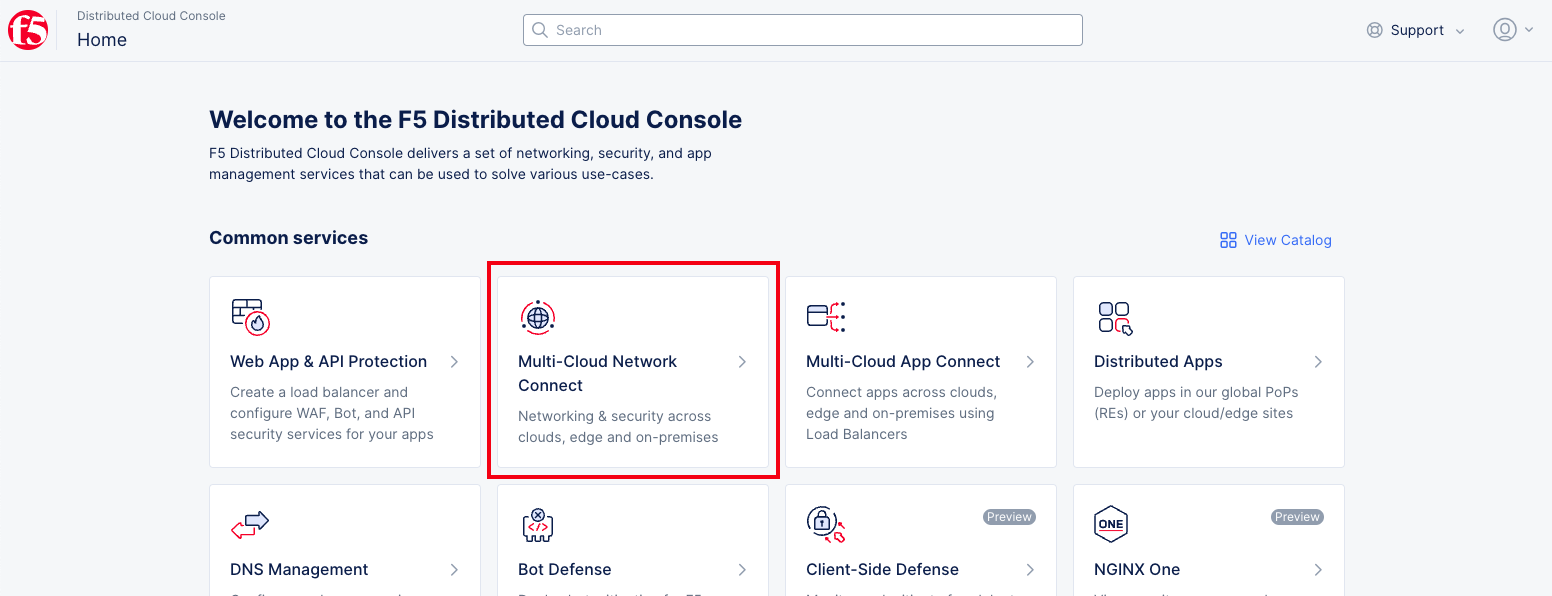
Figure: Select Workspace on the Home Page
- Click on the
All Workspacescollapsible and select your workspace from the available list of workspaces.
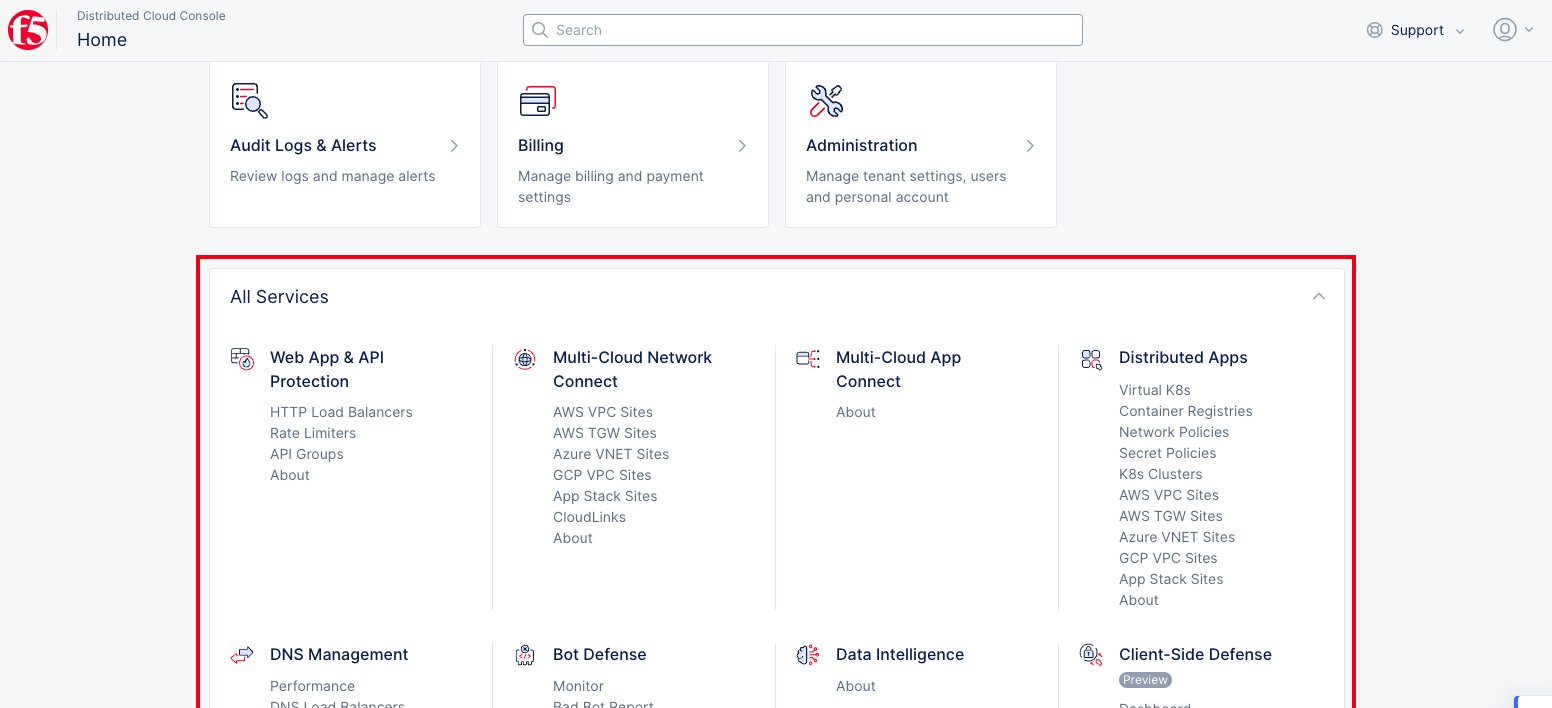
Figure: All Workspaces on the Home Page
- Use the search option located on the top of the home page and enter search text. Select one of the results from the dropdown.
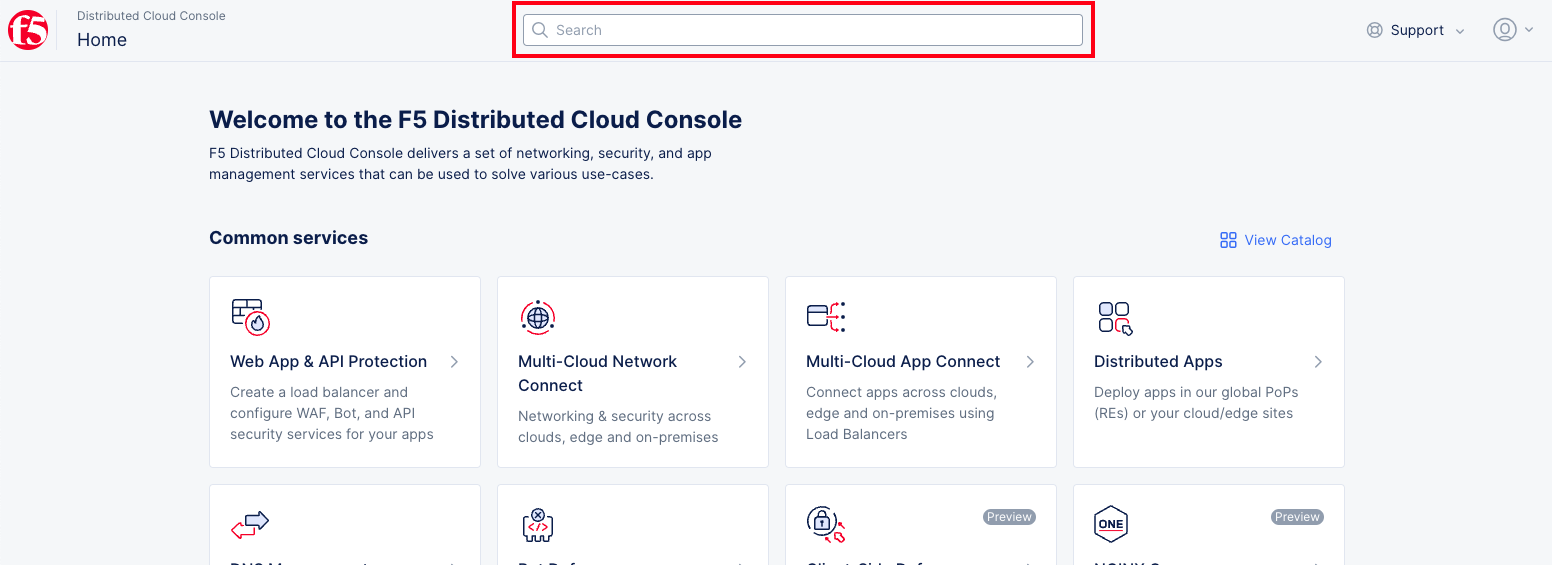
Figure: Search on the Home Page
- From within a Workspace page, click the
Select Workspacedrop-down located on the top left side of the workspace page.
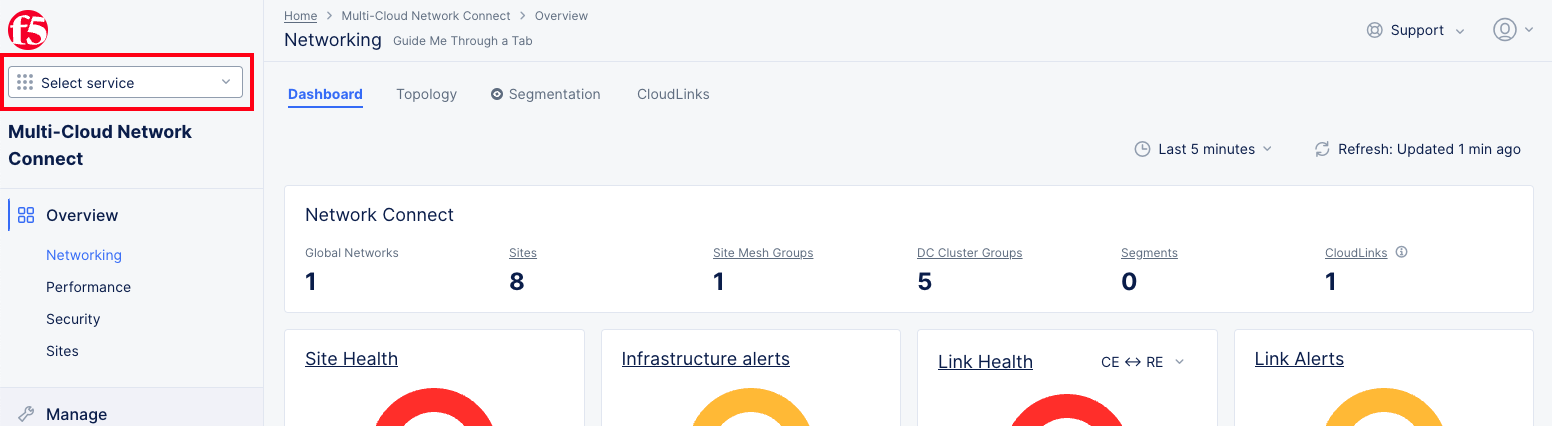
Figure: Select Workspace from Workspace Page
- You can either select a workspace from the displayed list or search for it using the
Quick searchoption. Search is automatically focused, and you can start typing right after you open the drop-down.
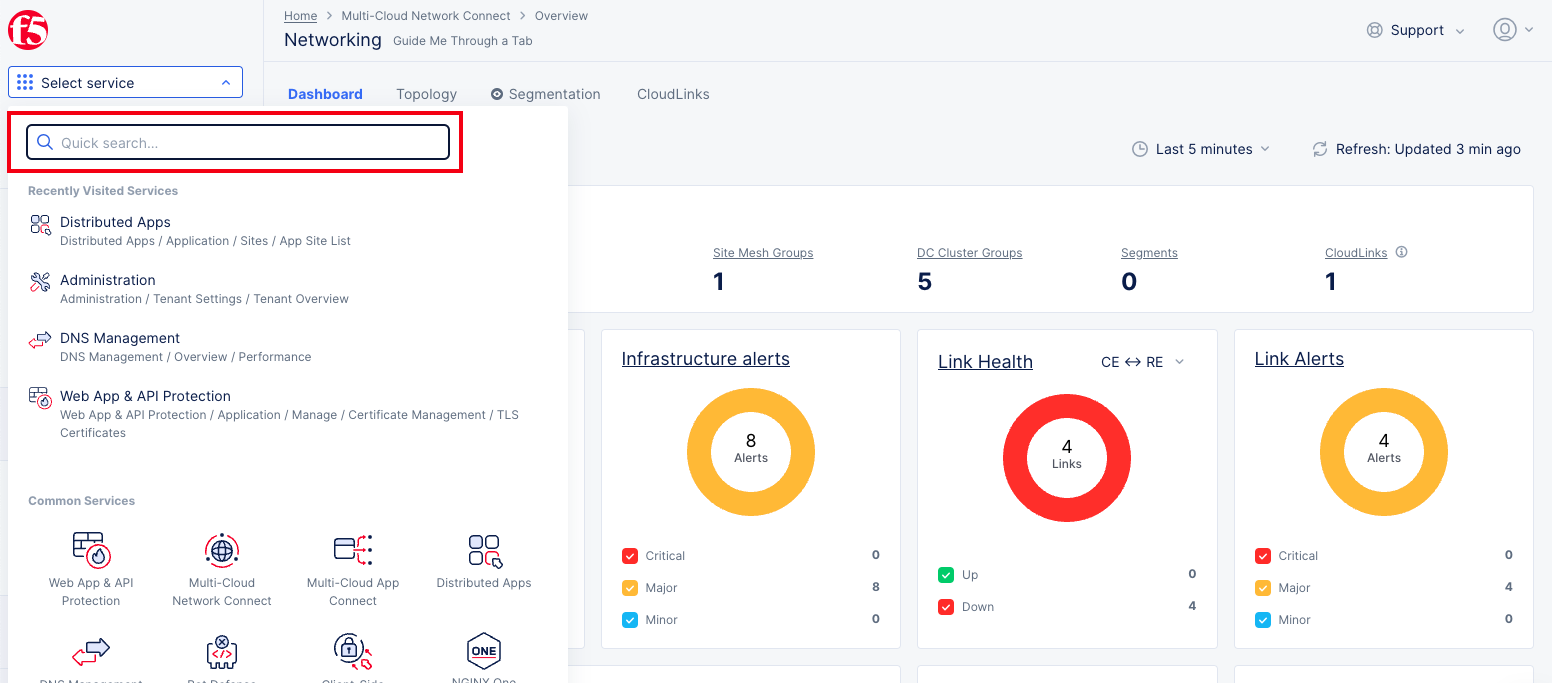
Figure: Quick Search Option for a Workspace
Step 3: View the common functions for all workspaces
Every workspace page has the following 3 areas:
- Navigation blocks, located in the primary navigation pane on the left-side of the workspace page. Each block contains page links and groups related page links together. You can click on a block to expand or collapse it, and when you hover your pointer over a page group, it will display the pages under that group. Below the navigation blocks, if the service contains advanced option links, you will find an option to
HideorShowthe Advanced navigation options. This selection is applied at the account level, meaning that if you enable it, access to advanced pages will be enabled in all workspace pages. Similarly, if you disable it, access to advanced pages will be disabled in all workspace pages.
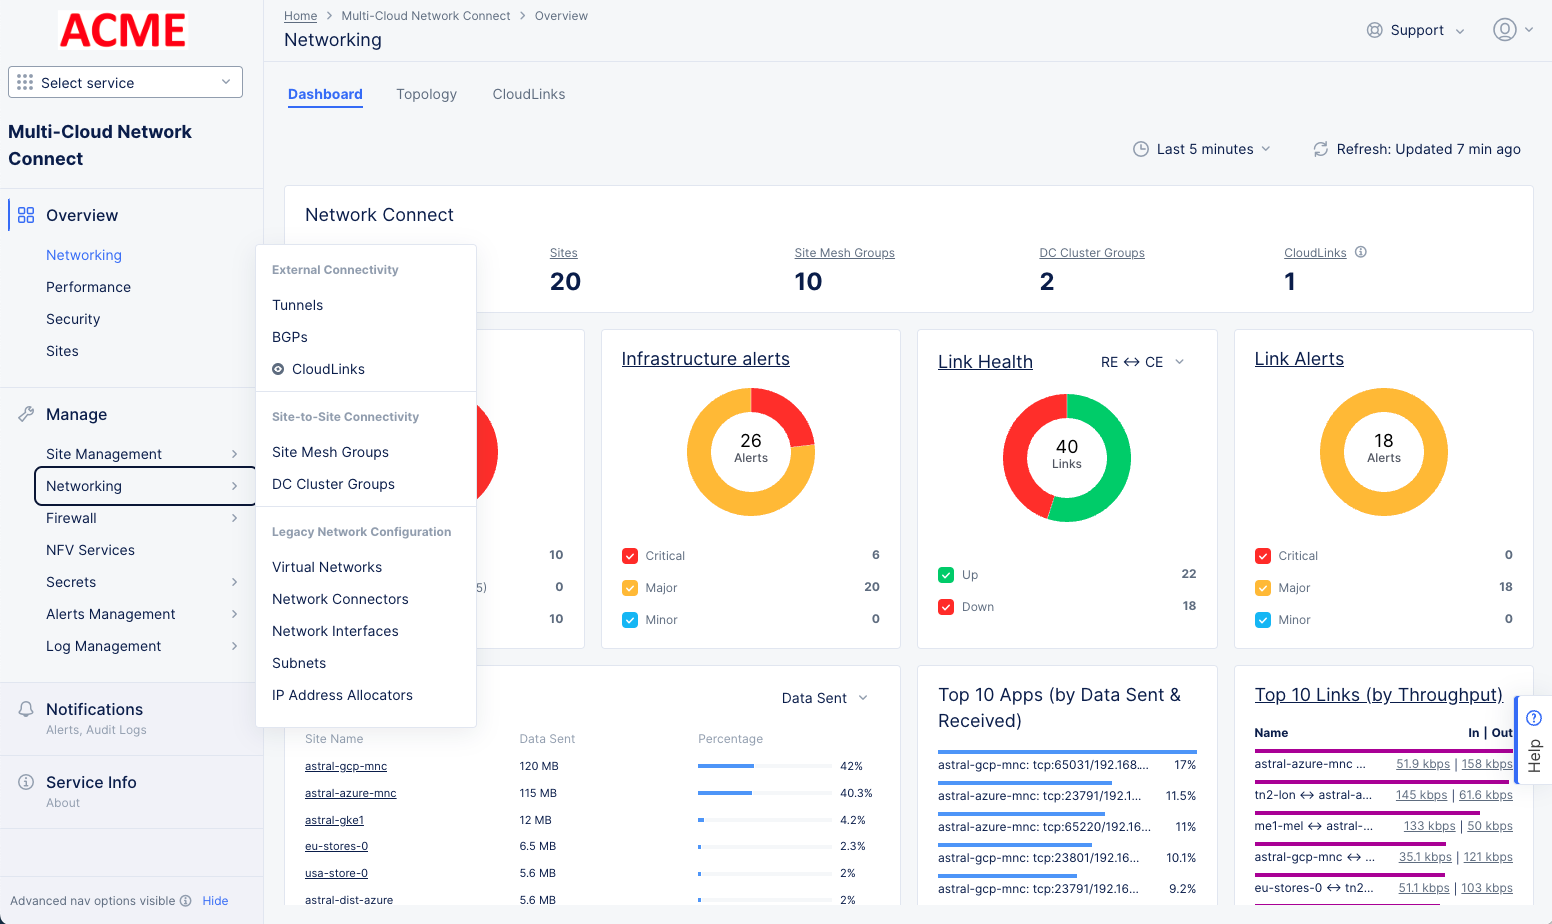
Figure: Hide or Show Advanced Navigation Options
-
Page area on the right side displaying the page content/configuration object. This area contains options to work with presented data or a configuration if the page is a configuration page. If the page is a monitoring page, it displays the dashboards or associated tabs. Each page area contains one or more of the following common options:
- Search input field with which you can search for a specific object on that page.
- Refresh option to refresh the page and content in it.
- If page contains a table, a settings option to select or deselect the fields you want to view. It shows all fields in the
Alltab by default so that you can select the fields you want to display. Accordingly, properties of each created object are displayed in different columns. You can also use the search option within the settings to search for a field. Use theRestore Defaultsoption to display the default set of fields and reset all other table customizations made (column order, size, and so on). Use theSelectedtab to view and verify the selected fields.
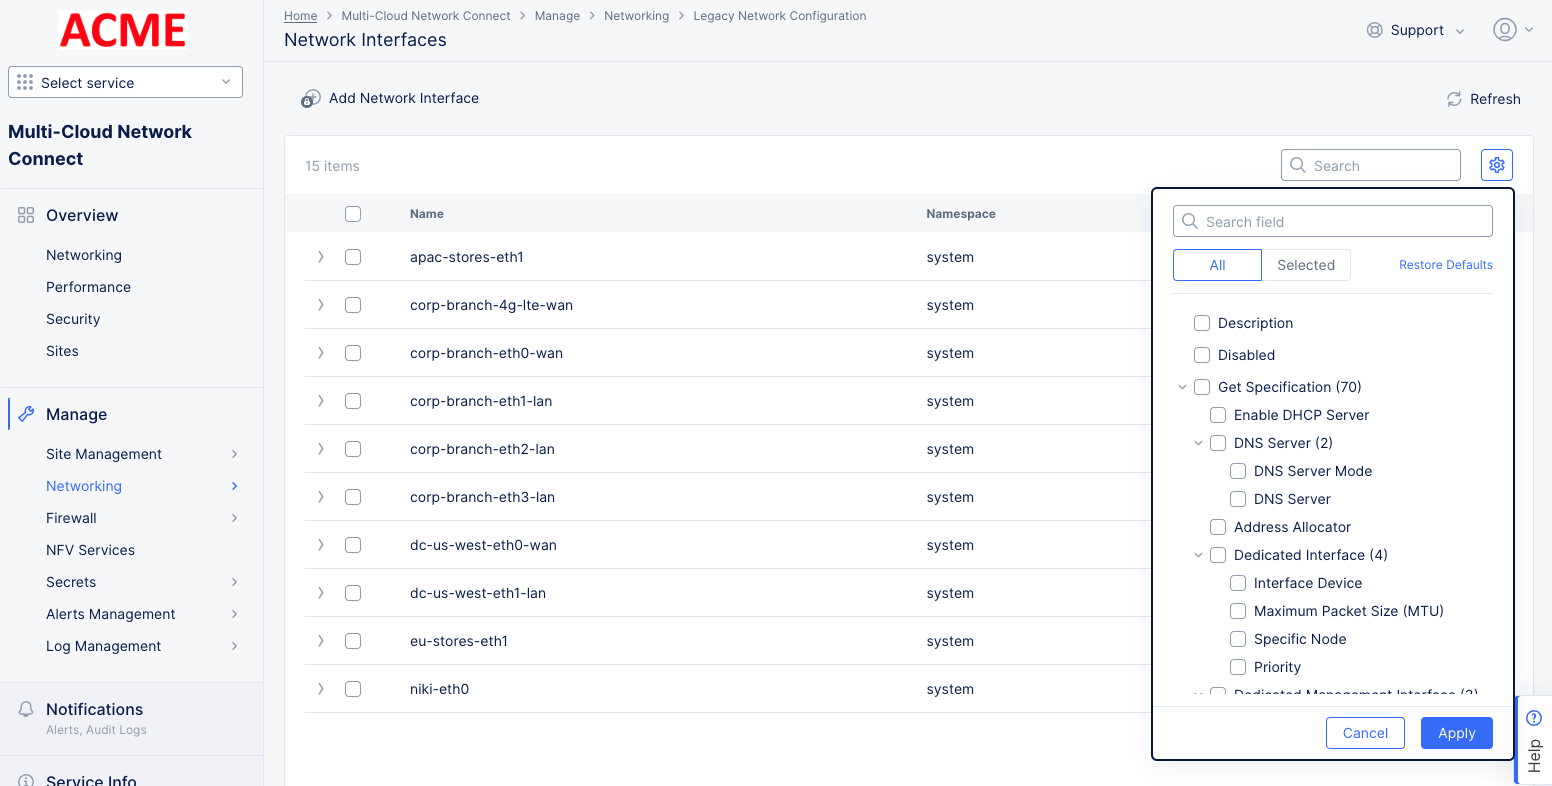
Figure: Page Settings
-
Top area above the configuration page is a secondary navigation, and it shows the navigation path in breadcrumbs. This area also contains the following general options located on the left side:
- Support - Click on the support option to view the drop-down displaying various support options and resources. For more information on how to use support, see Support.
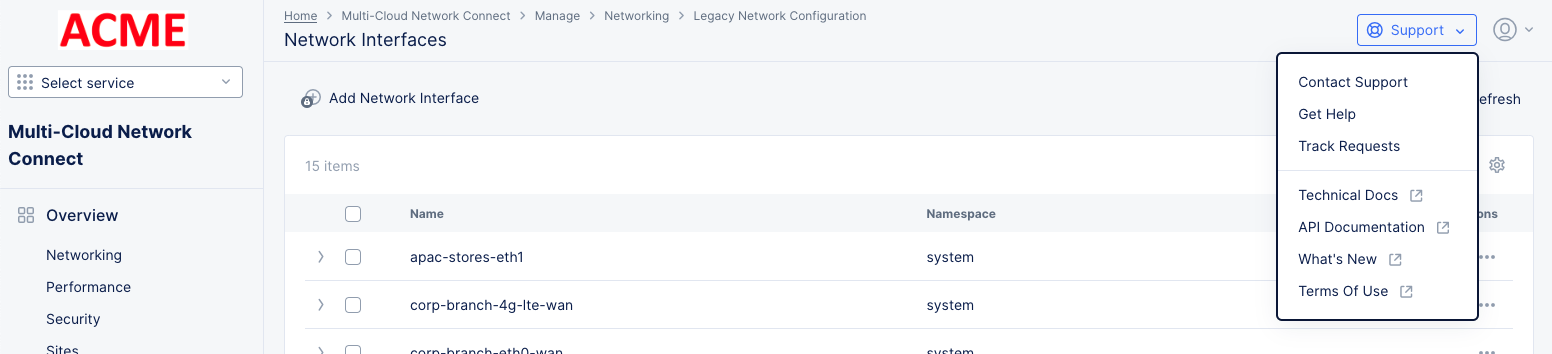
Figure: Support Menu
- Account - Click on the account option to view the drop-down displaying information about your profile, plan, work domains, and skill levels. The account also includes
Account SettingsandLog outoptions.
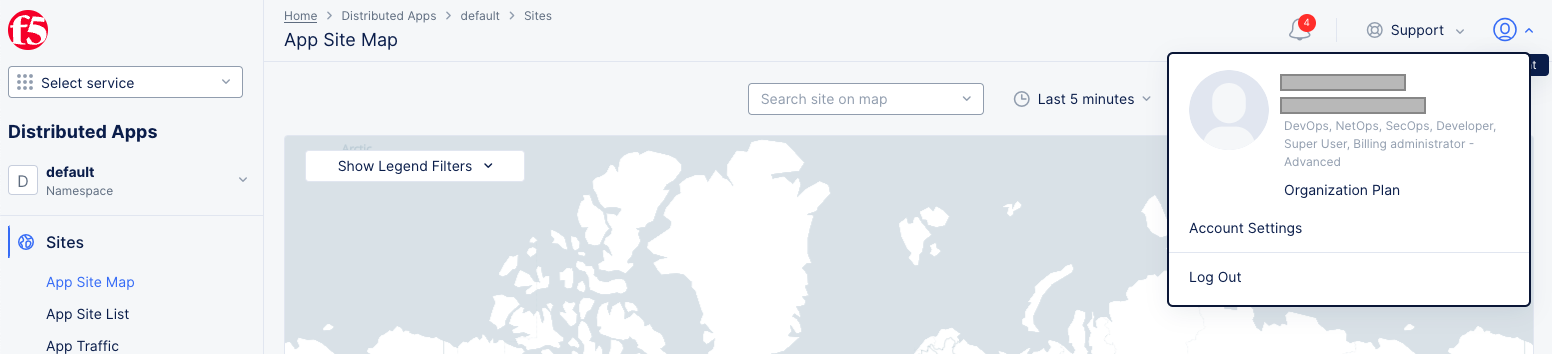
Figure: Account Options
Note: From any page, you can navigate to home page using the
Homeoption located on the breadcrumbs located on the top area. In addition, theSelect Workspacedrop-down located on the top left side of the workspace page also includes theHomeandSupportoptions. Clicking on the logo located on the top left of the workspace page also takes to home page.
Step 4: Update your preferences.
You can update preferences such as workspaces to be included in common workspaces on the home page. Do the following to update preferences at any time.
- Click on the account option located on the top right (next to the support option) on any page. This displays your account information, option to update settings, and option to log out.
Figure: Account Options
- Click on the
Account Settings. This loads theMy Accountpage located in thePersonal Managementsection of theAdministrationworkspace.
Note: You can also search for
My Accountusing the search option in theSelect Workspacedrop-down or the search bar located on the home page.
- Click
Edit Work Domains & Skillsin theWork Domains and Skill Levelsection.
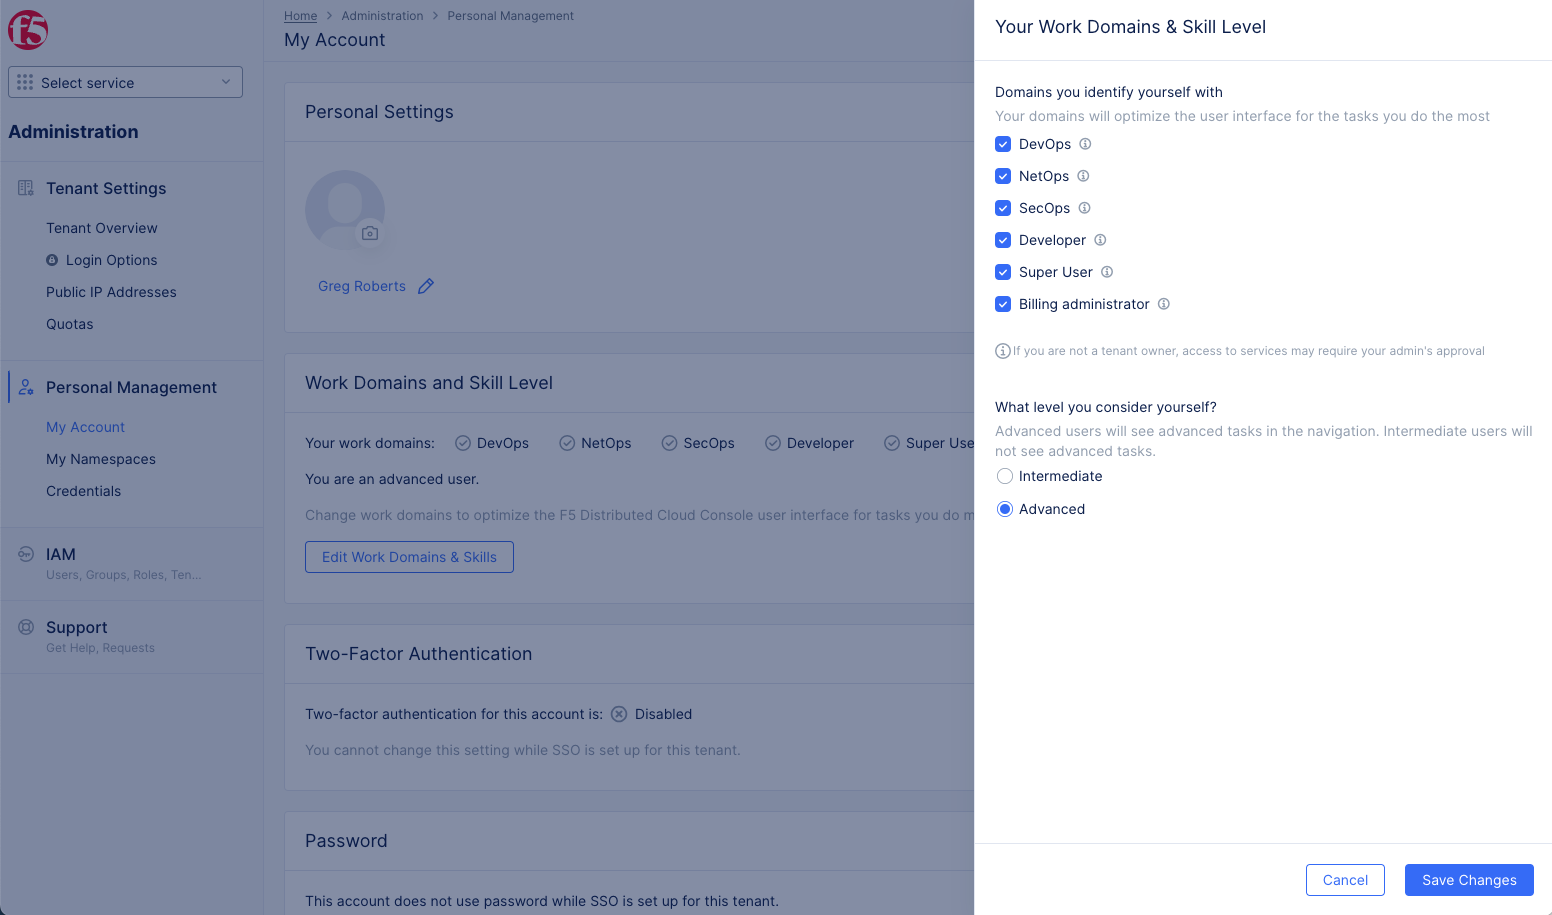
Figure: Update Work Domains and Skill Level
- In the work domains and skills edit form, select or deselect the options as per your preference and click
Save changes. The home page will show the updated workspaces as per your preferences.
Reset Console Login Password
If you forgot your password or just want to change it, use the Forgot Password? link on your login screen and follow the instructions.

Figure: Password Page
Note: You can have access to multiple tenants using the same email account, and each tenant can have a different password. Therefore, make sure you are changing your password for the appropriate tenant.
Note: This only works if you use email/password for your login credentials, not Single Sign-On (SSO).
Detailed steps to reset your password
- Go to the F5® Distributed Cloud Services website.
- If you're not at the login screen, click on Login button on the right side of the top navigation bar.
- Select your account type.

Figure: Select Account Type
For free or Individual accounts:
- Click on the
For Free or Individual accountssquare to expand it. - Click
Forgot Password?
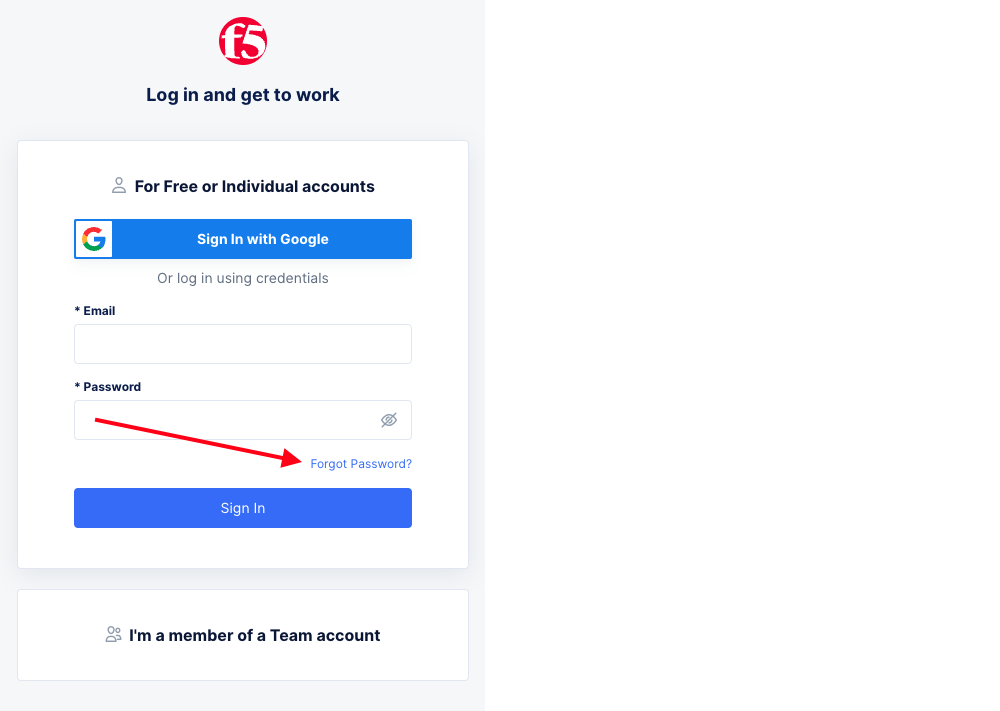
Figure: Password Page
For Team and Organization accounts:
- Click on the
I'm a member of a Team accountsquare to expand it. - Enter your tenant/account name in the text box.
- Click
Next.
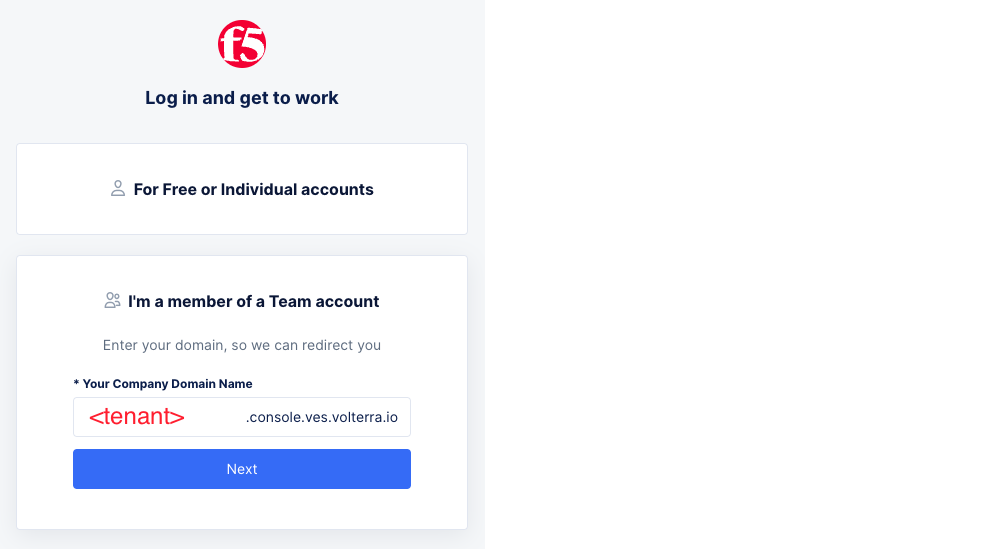
Figure: Tenant Selection
- Click the
Forgot Password?link.
Figure: Password Page
- Enter your email in the text box and click
Submit. - In the email you receive, click
Reset credentials. The email will come fromF5 Distributed Cloudwith the subjectReset password. If you don't see the email, check your spam folder or try again making sure you are entering the correct email. - Enter your new password and then enter the same password in the
Confirm Passwordfield. Then clickSubmit.
If you are still having difficulties, please visit our support page.