Enable SSO - Okta
Objective
This document provides instructions on how to configure Okta Single Sign-on (SSO) integration to F5® Distributed Cloud Services for your enterprise account. For an overview of F5® Distributed Cloud Console, see About.
Note: SSO setup requires you to be of the tenant owner type user. Navigate to General > IAM > Users. Select on the Show/hide column, select the Type field, and select Apply to display the Type column. For the tenant owner, the Type column displays Tenant Owner and others, it displays User.
Prerequisites
The following prerequisites apply:
- A valid Enterprise account.
- Note: If you do not have an account, see Getting Started with Console.
-
Okta Account.
-
A configured identity provider such as Google.
Configuration Steps
Configuring SSO using Okta in F5® Distributed Cloud Console includes performing the following actions:
-
Configure the OIDC authentication application in Okta.
-
Enable SSO using Okta in the Console.
Configure OIDC Authentication Application in Okta
Configuring OIDC authentication application in Okta includes creating an identity provider type and an application for your SSO in Okta. Also, it requires you to allowlist the redirect URI in your identity provider.
This example shows configuring Okta with Google as the identity provider.
Note: Creating OAuth credentials in Google is required for this step. For more information, see SSO-Google guide.
Perform the following actions to configure the OIDC app in Okta:
Note: Skip to step 4 if you have Okta user accounts created.
Step 1: Log into Okta and start new identity provider configuration.
-
Log into Okta portal with your administrator access.
-
In Admin Console, if available.
Figure: Okta Login View
-
In Directory drop-down menu, select People.
-
Select + Add Person button.
-
Select created users highlighted name in list.
-
Select Add Google in Add Identity Provider drop-down menu.
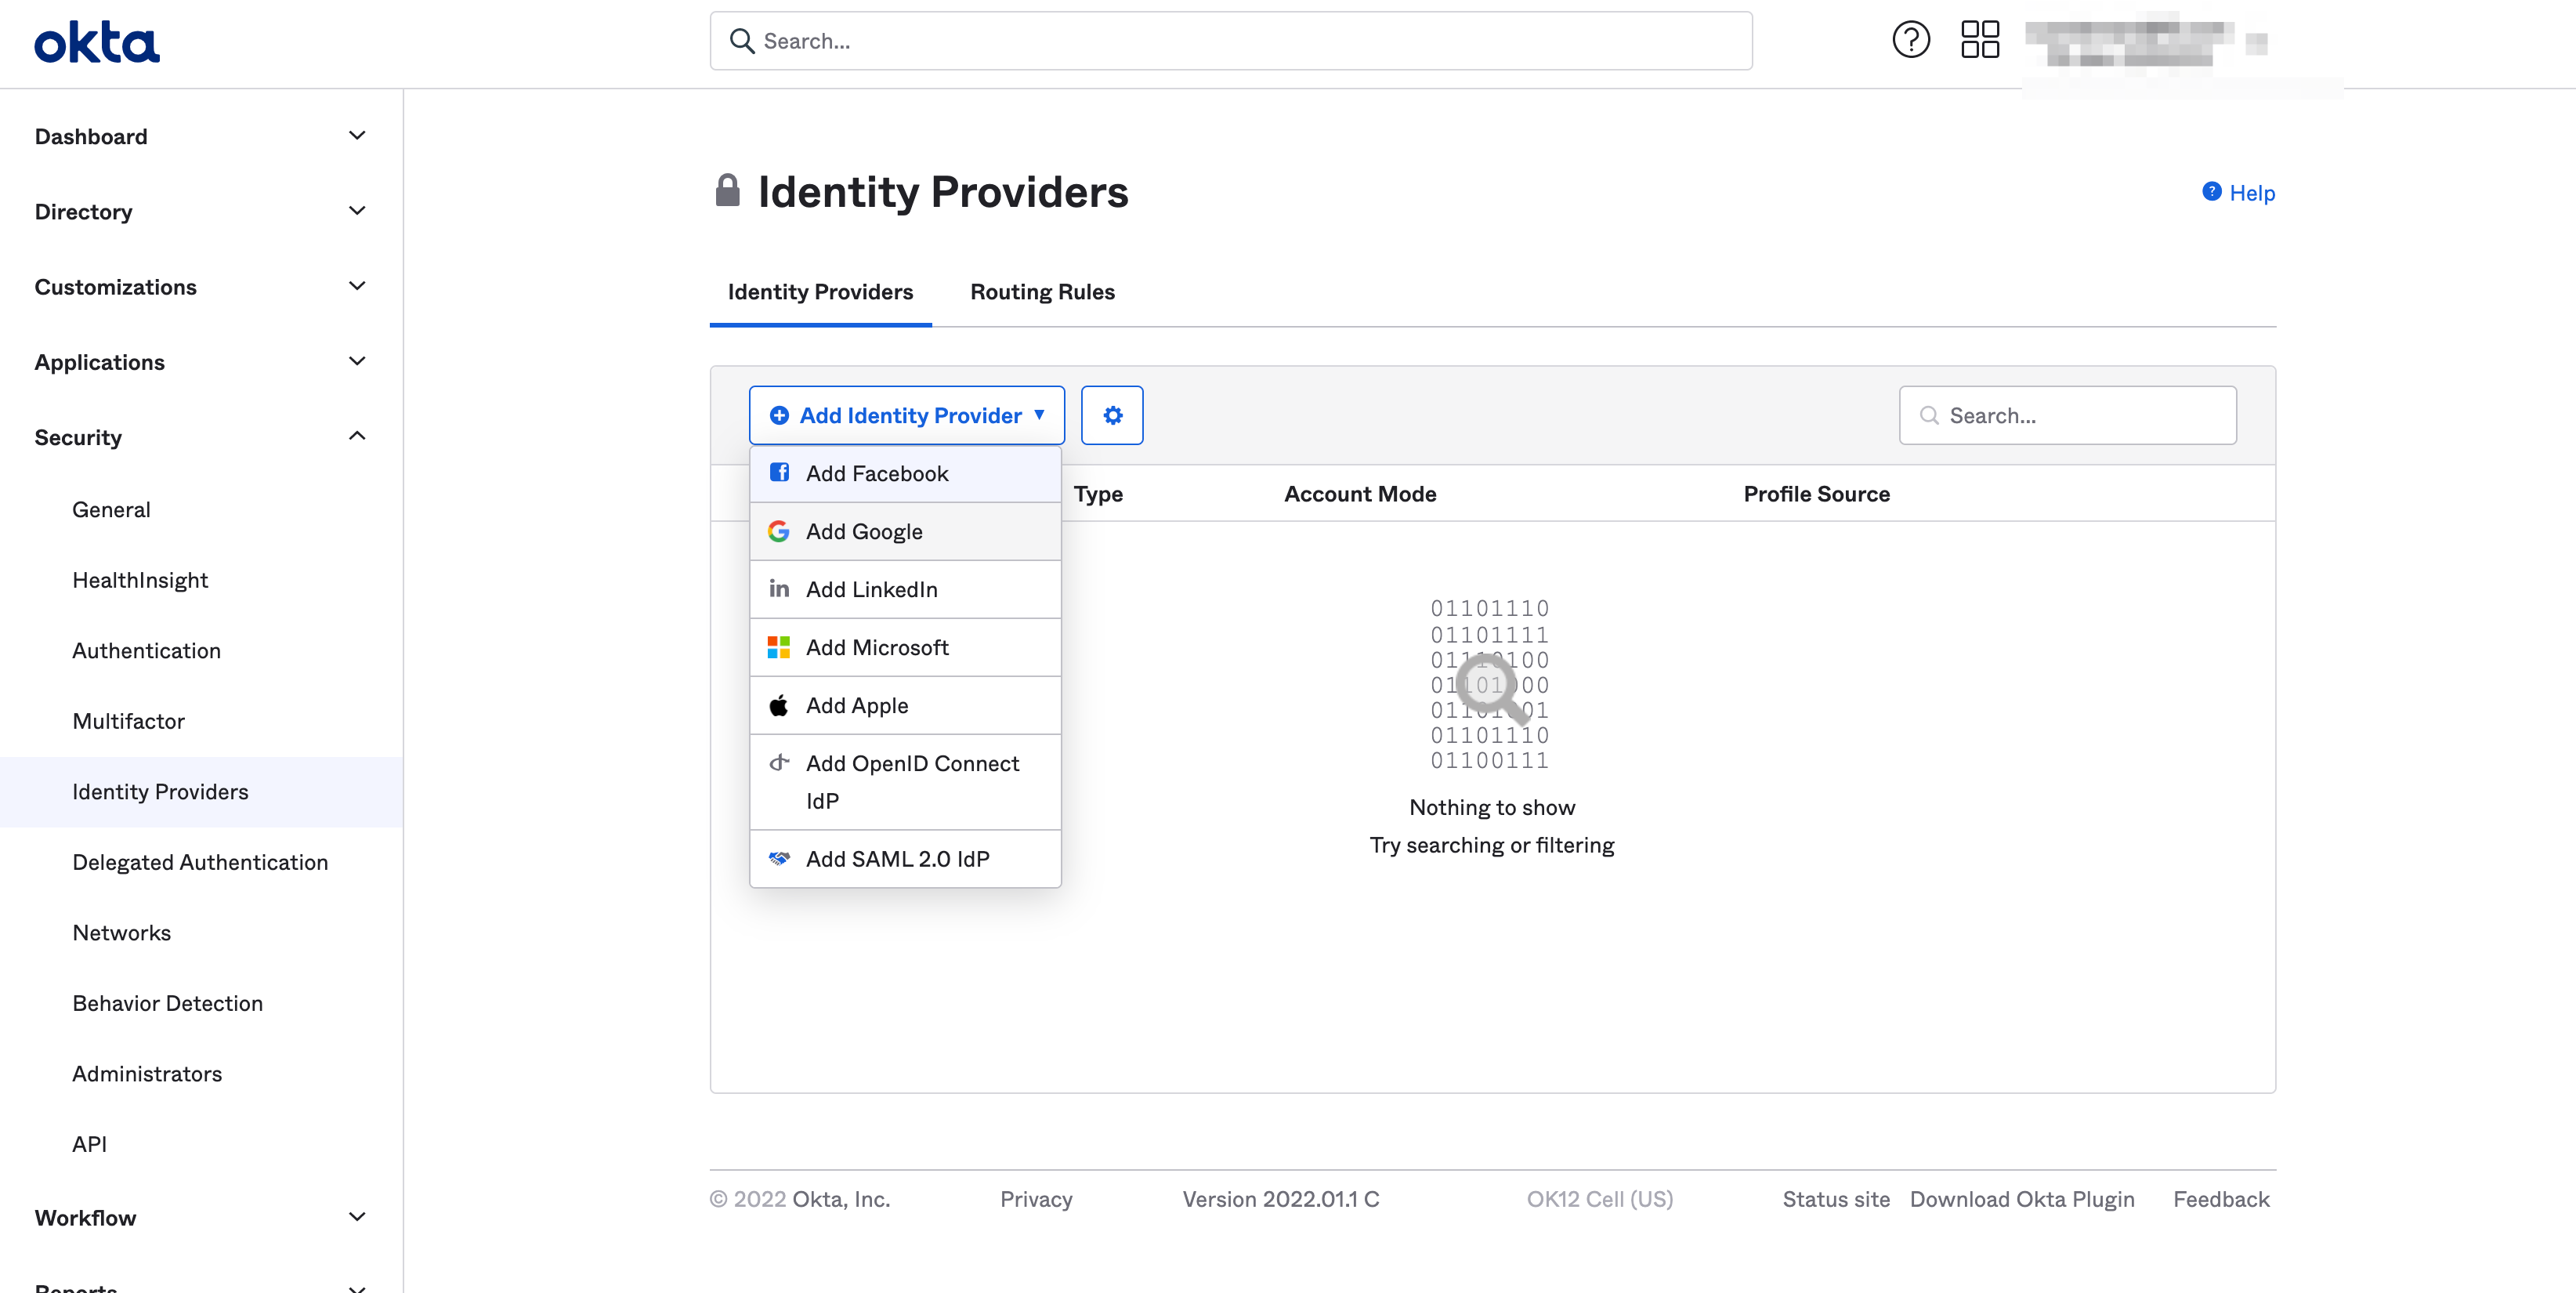
Figure: Select Google As the Identity Provider
Step 2: Obtain the OAuth information from the identity provider and add to the Okta identity provider configuration.
-
Obtain the OAuth details from the identity provider.
-
Add the details in the GENERAL SETTINGS of the Okta identity provider configuration.
Note: This example sets name, client ID, and client secret obtained from Google OAuth settings.
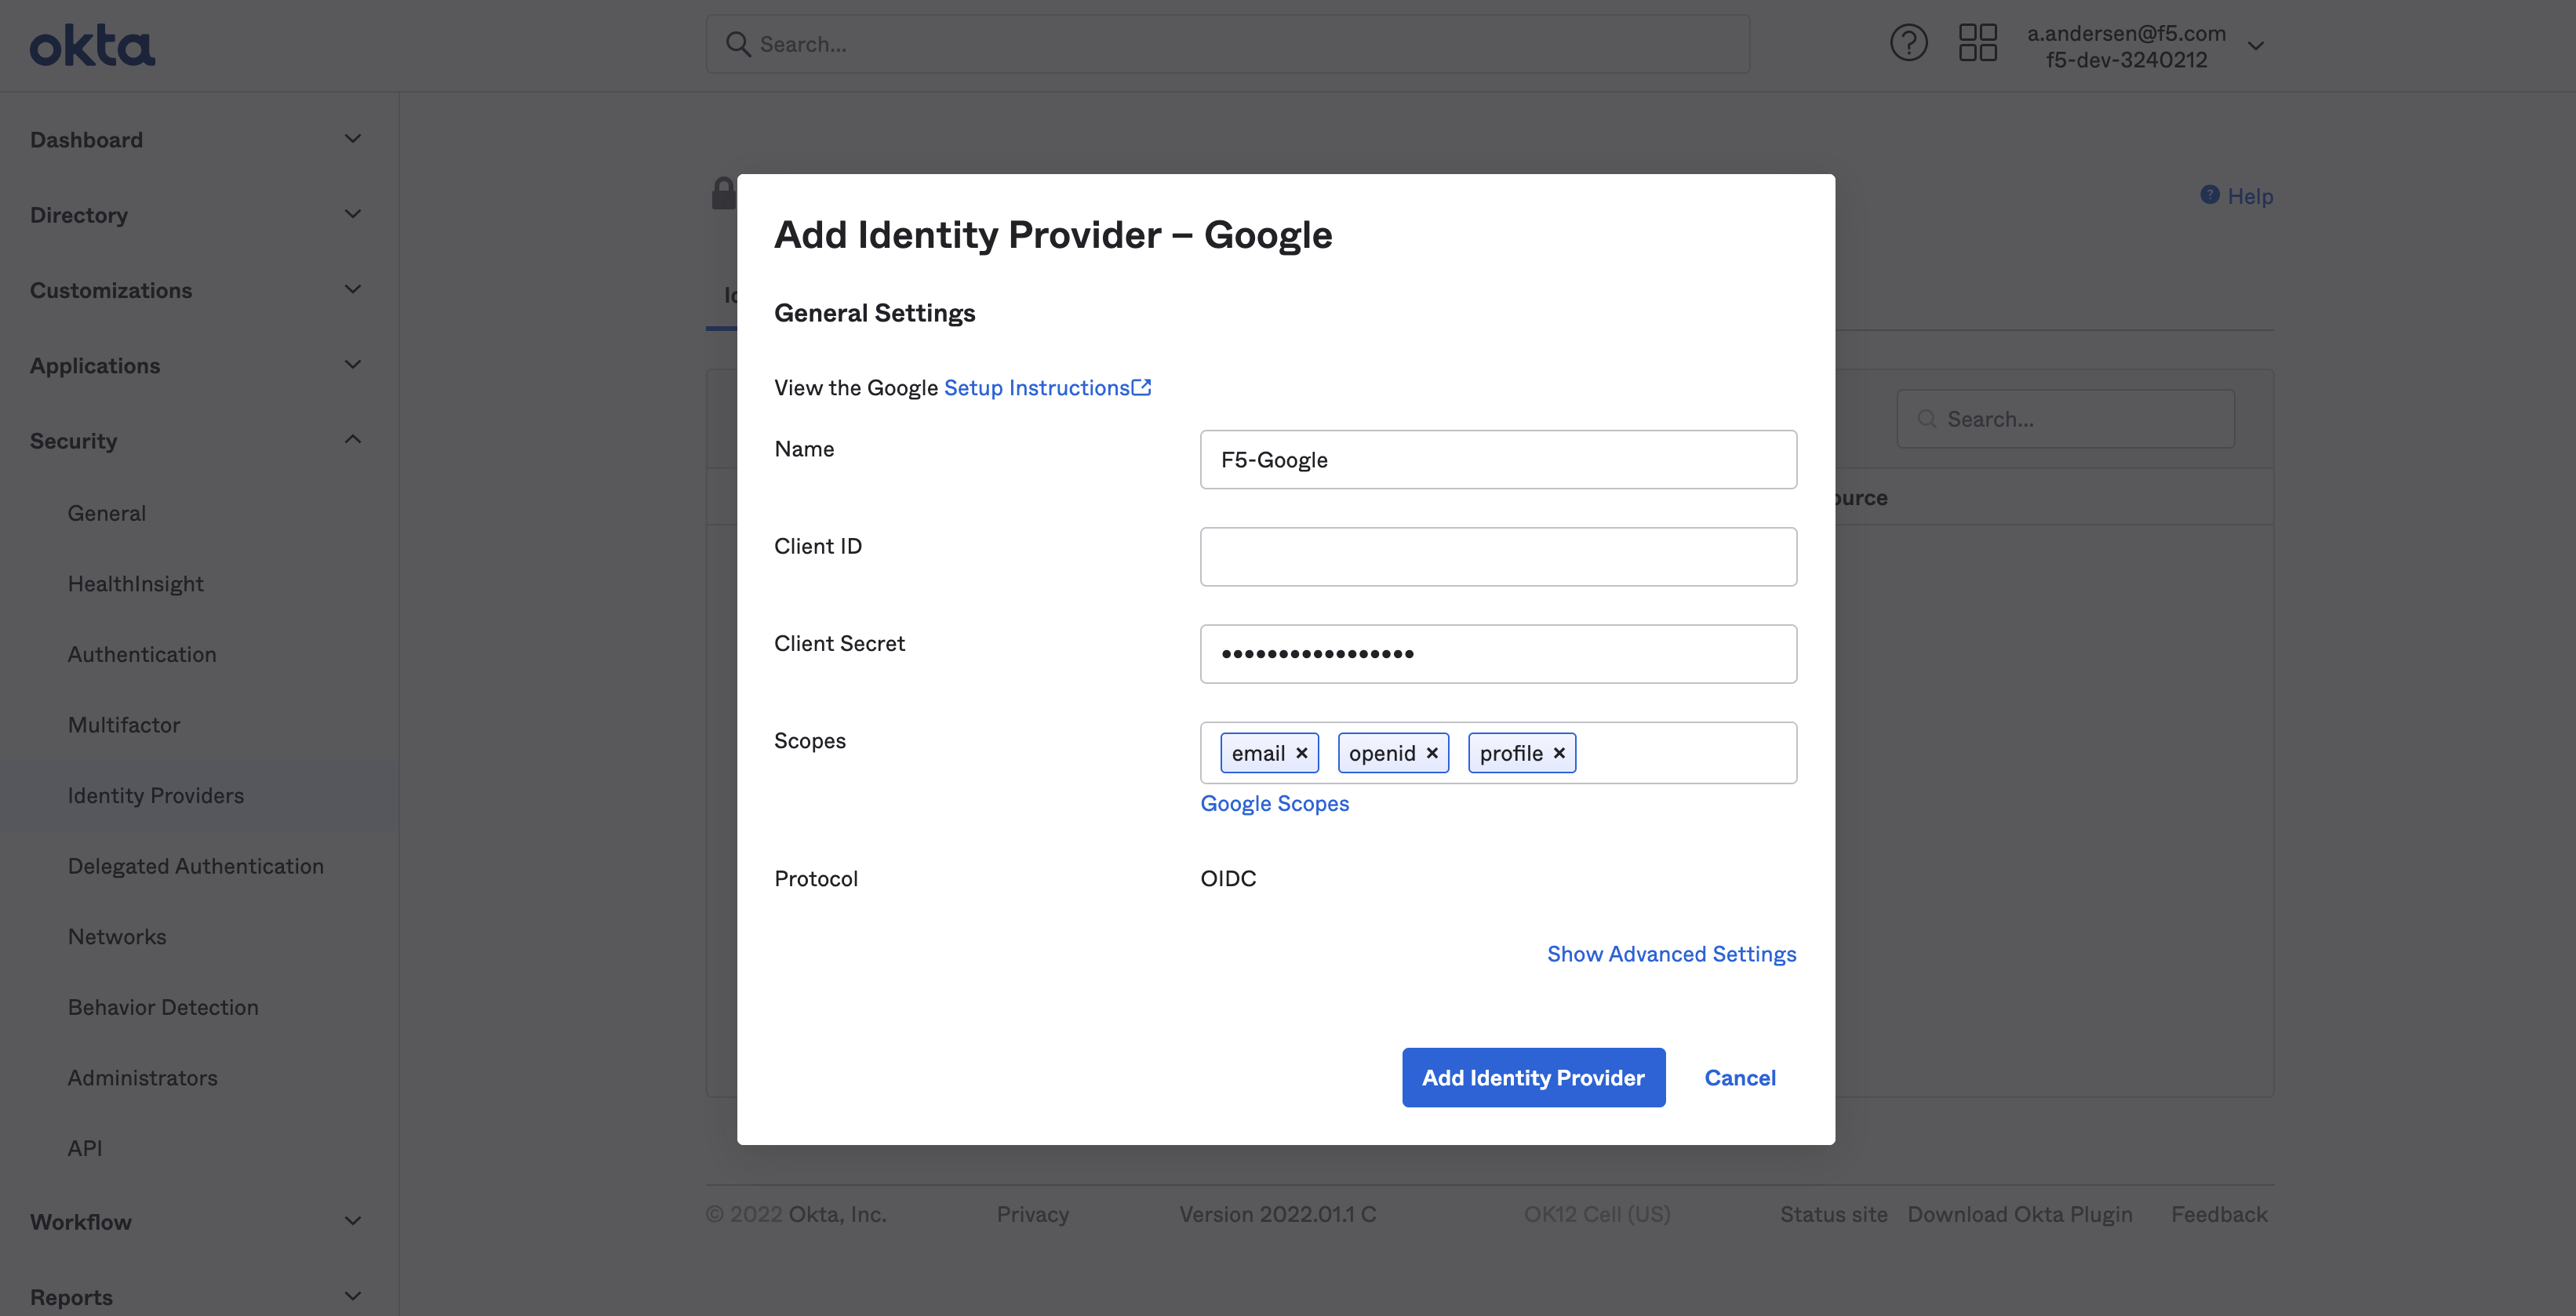
Figure: Identity Provider Client and Secret Settings
-
Select Add Identity Provider button.
-
Copy URL in Redirect URI box.
Step 3: Add the redirect URI to the allowlist of the identity provider OAuth client configuration.
This example shows adding redirect URI to the Google client ID configuration:
-
Log into Google credentials app.
-
Select client ID configuration.
-
Enter redirect URI obtained in previous step in Authorized redirect URIs box.
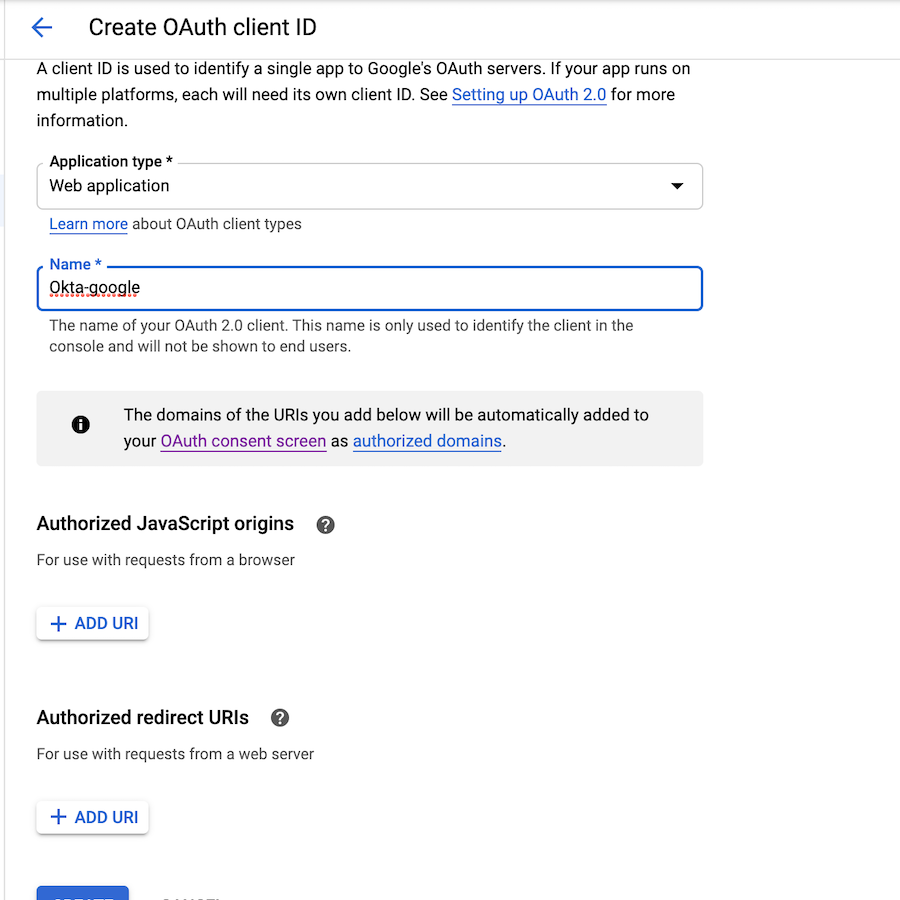
Figure: Redirect URI Option in Google
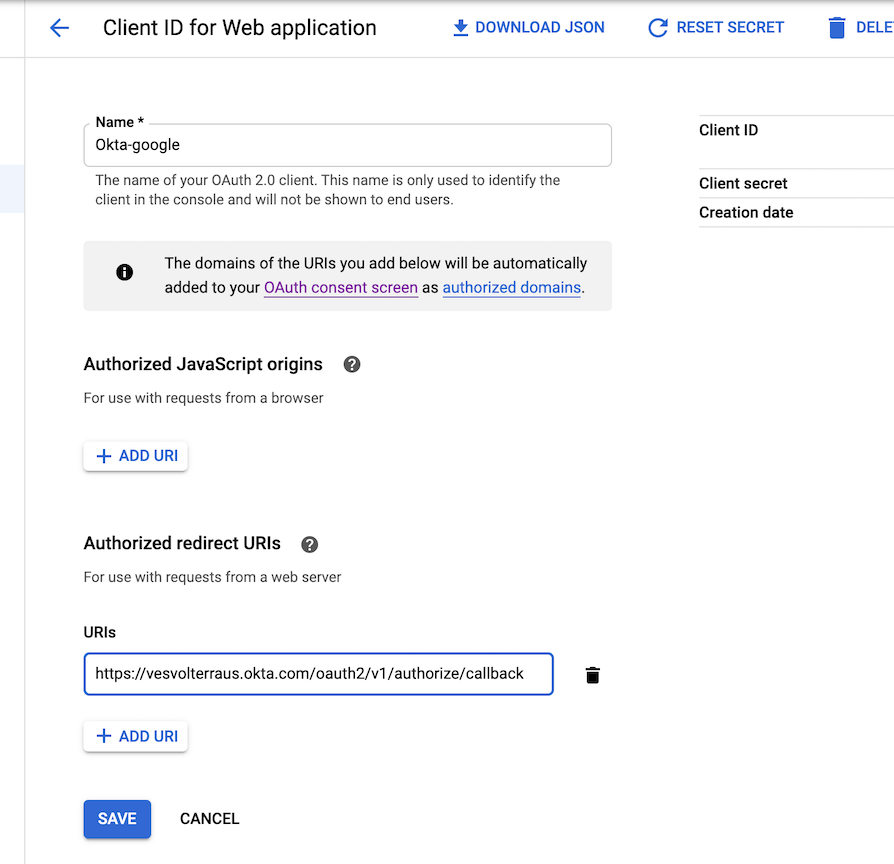
Figure: Redirect URI Addition to Google
- Select Save.
Note: Above steps assumes Okta account is ready and user can login. If your Okta account needs integration with other identity providers, or if Okta is being used as broker, admin can refer at Okta Integration Guide or OpenID Connect for (SAML) to connect to external identity providers.
Step 4: Create application for SSO in Okta.
-
Select Applications > Applications.
-
Select Create App Integration button.
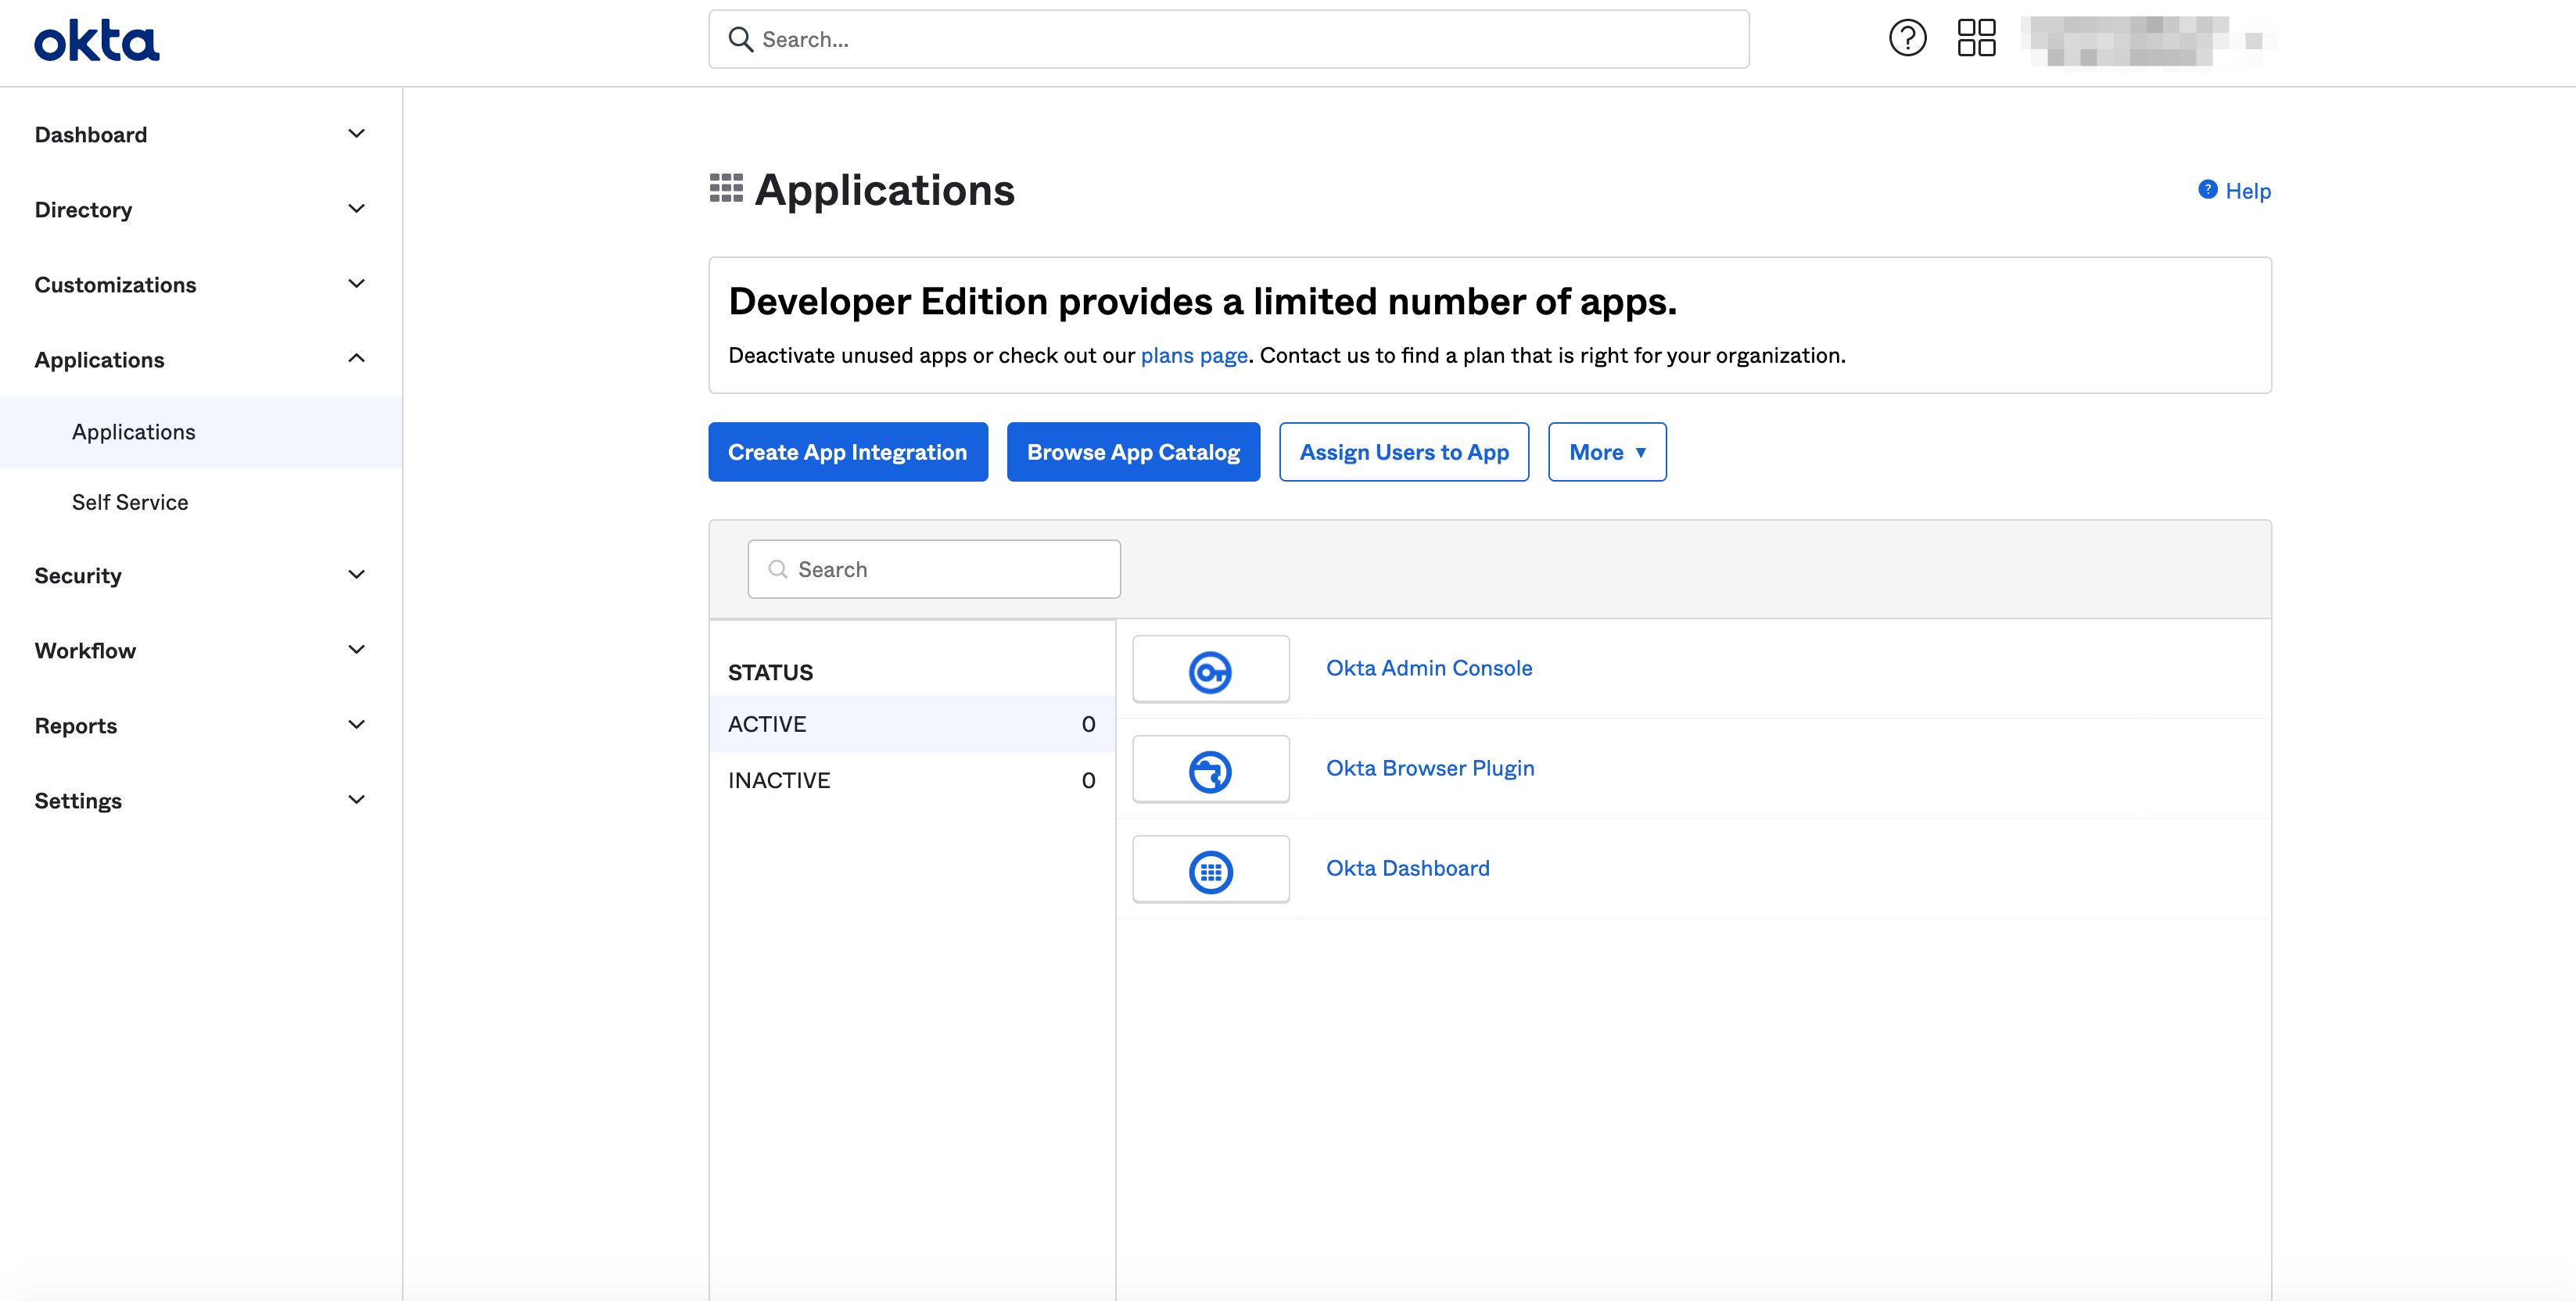
Figure: User Assignment
- Select OICD - Open ID Connect in Sign-in method section.
Note: App section appears below when Sign-in method selection is made.
-
Select Web Application in Application Type section.
-
Select Next button.
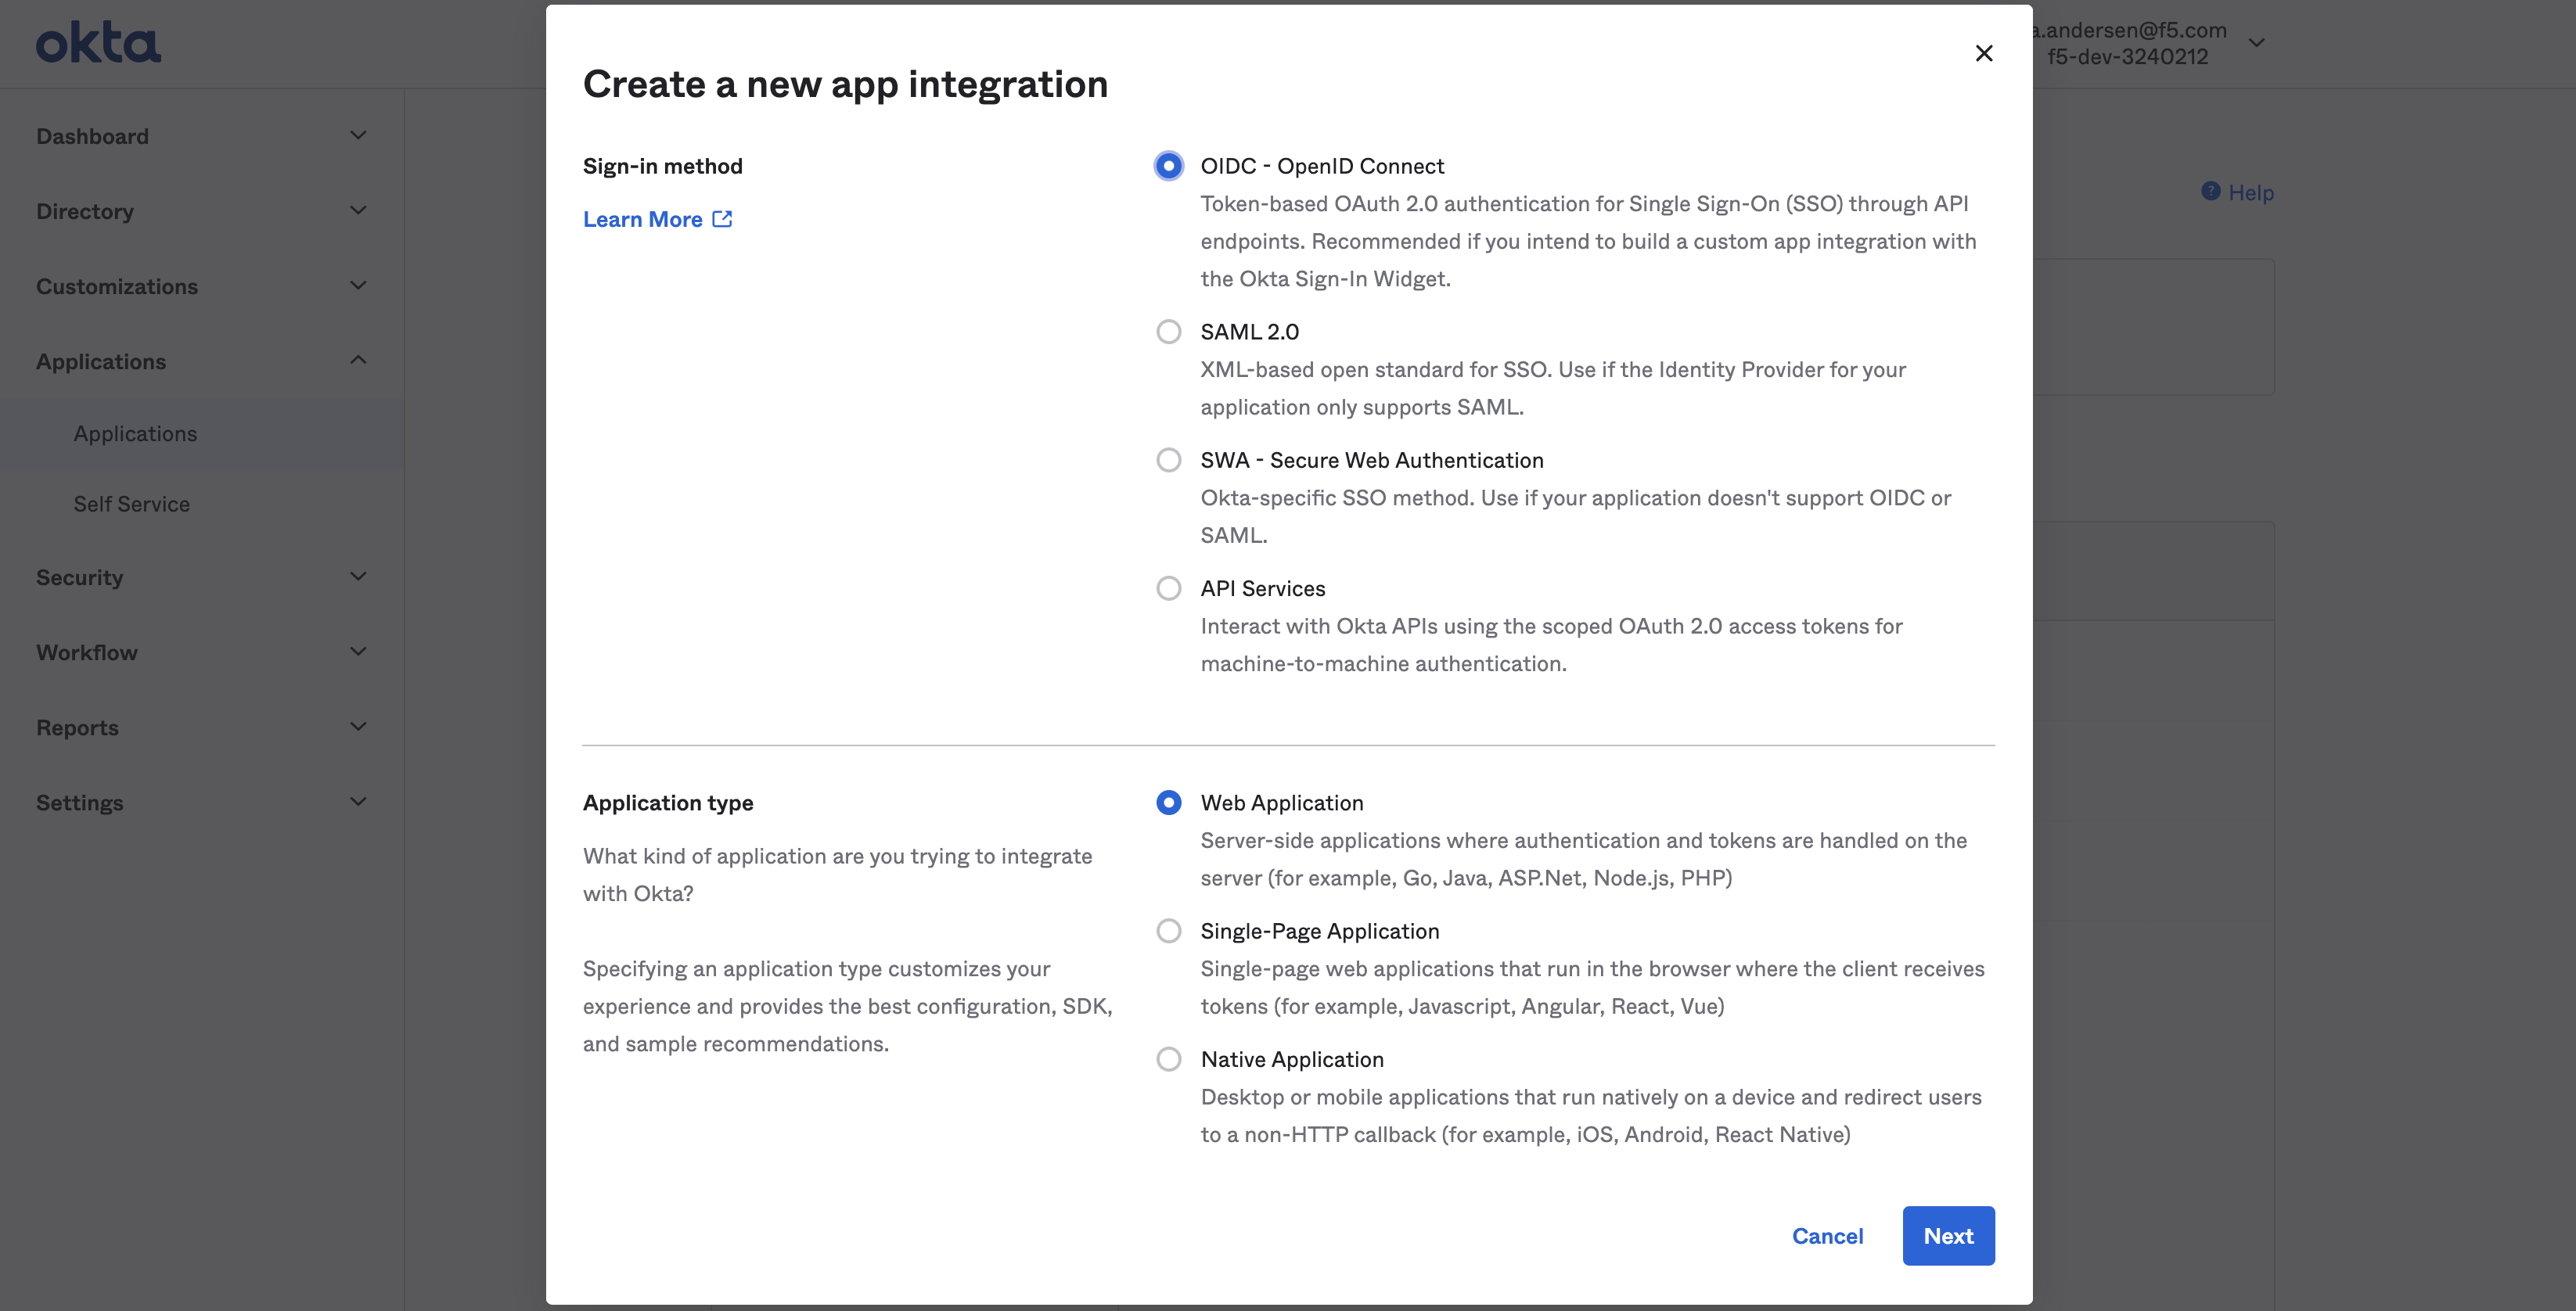
Figure: OIDC Integration Creation
-
Enter an application name.
-
Enter URL in Login redirect URIs box.
-
Select Save.
Note: The application gets created.

Figure: OIDC Integration Creation
-
Select General settings tab of created application.
-
Scroll down to Client Credentials box.
-
Note down the values of the Client ID and Client secret boxes.
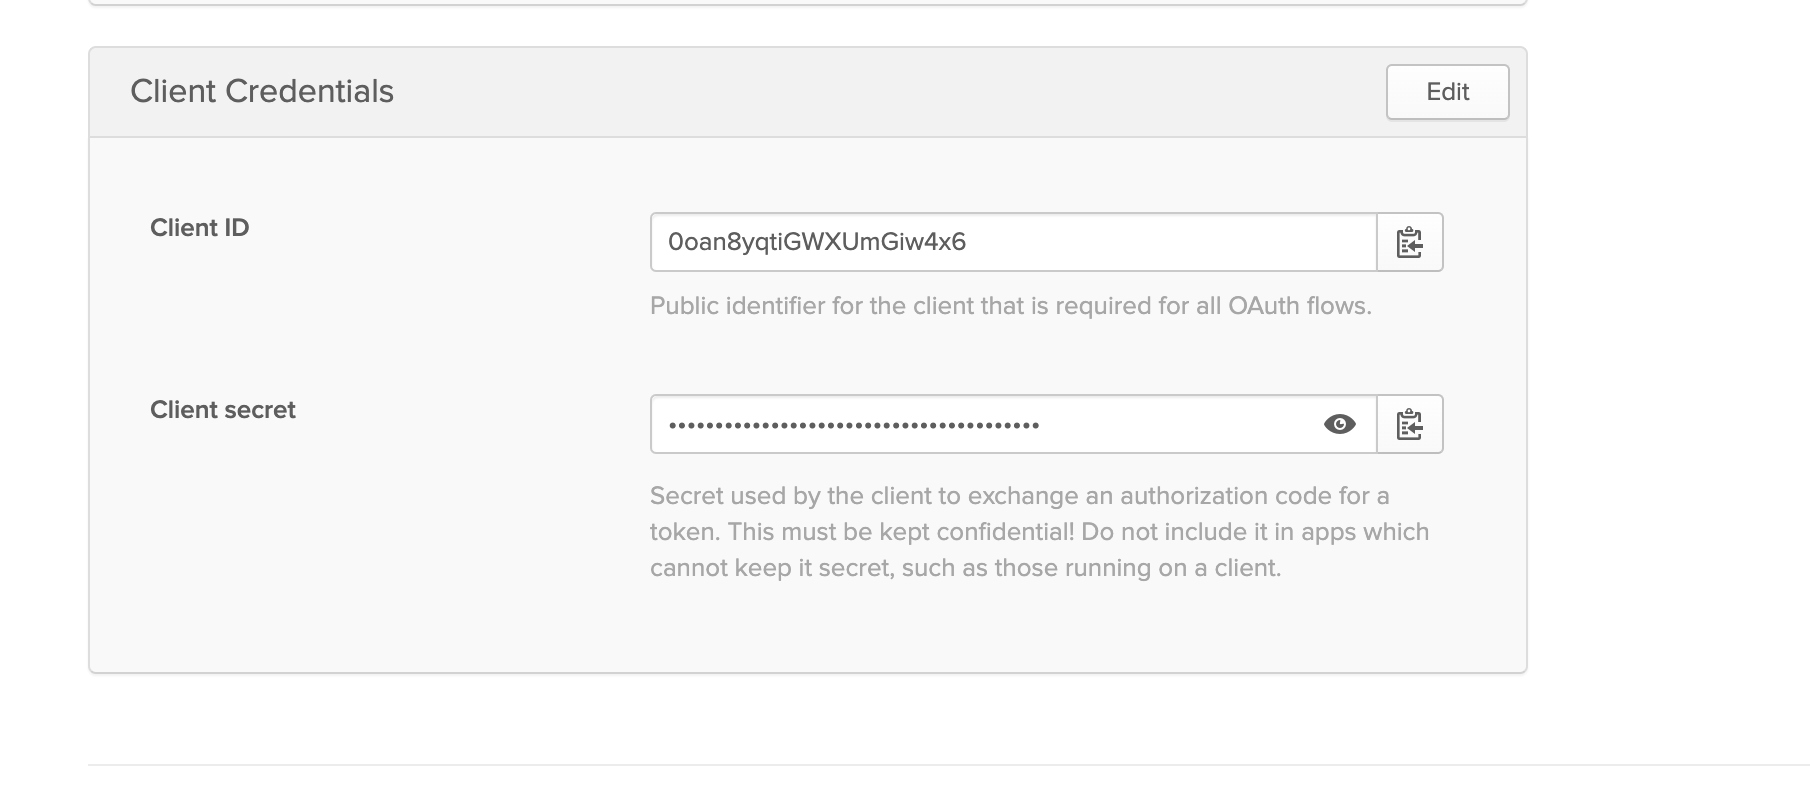
Figure: Client ID and Secret Values
- Obtain the well-known URL for your Okta account.
Note: The following is an example well-known URL for Okta where the
vesvolterrausrepresents the subdomain part for a sample account.
https://vesvolterraus.okta.com/.well-known/openid-configuration
Note: The client ID, client secret, and well-known URL fields are required in SSO configuration in F5® Distributed Cloud Console.
Step 5: Configure user and group settings in Okta.
-
Select Security > Identity Providers.
-
Select the Routing Rules tab.
-
Select Add Routing Rule and configure rules for users.
-
Select the identity provider you created in the THEN field.
-
Select Create Rule button.
-
Select Activate rule in pop-up window.
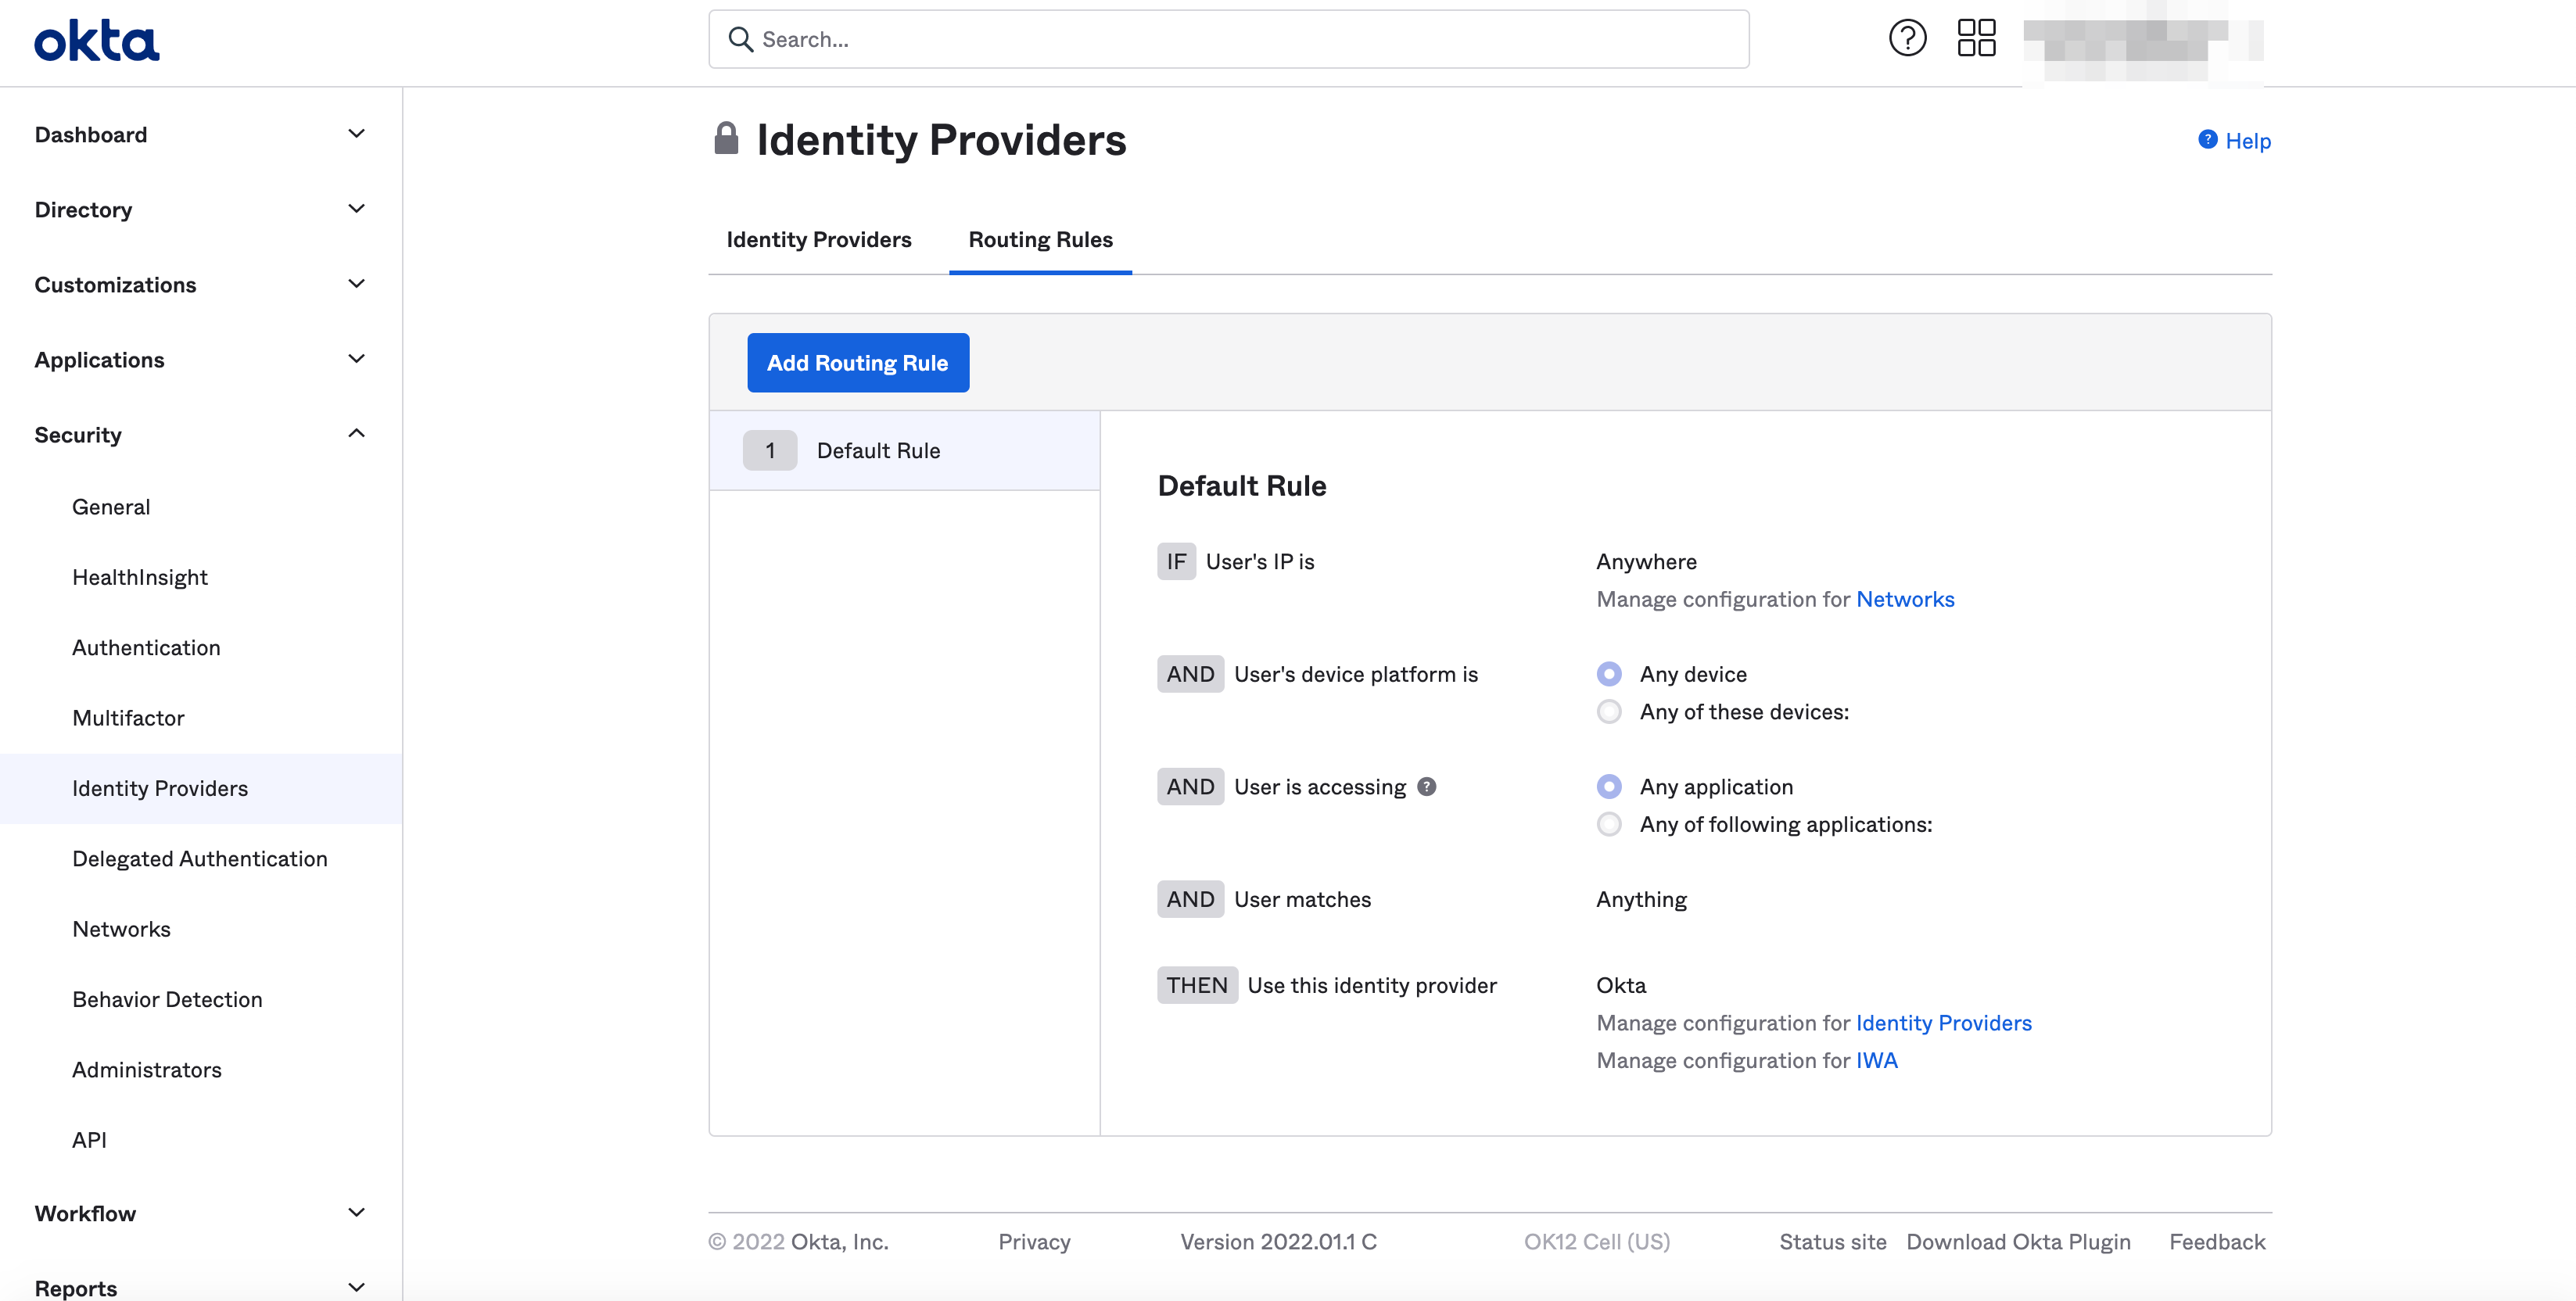
Figure: Rule Creation
-
Optionally, specify users and groups for which Okta-based SSO needs to be enabled. Perform the following:
-
Select Applications > Applications.
-
Select Assign Users to App button.

Figure: User Assignment
-
Check box in Applications options as needed.
-
Check box in People options as needed.
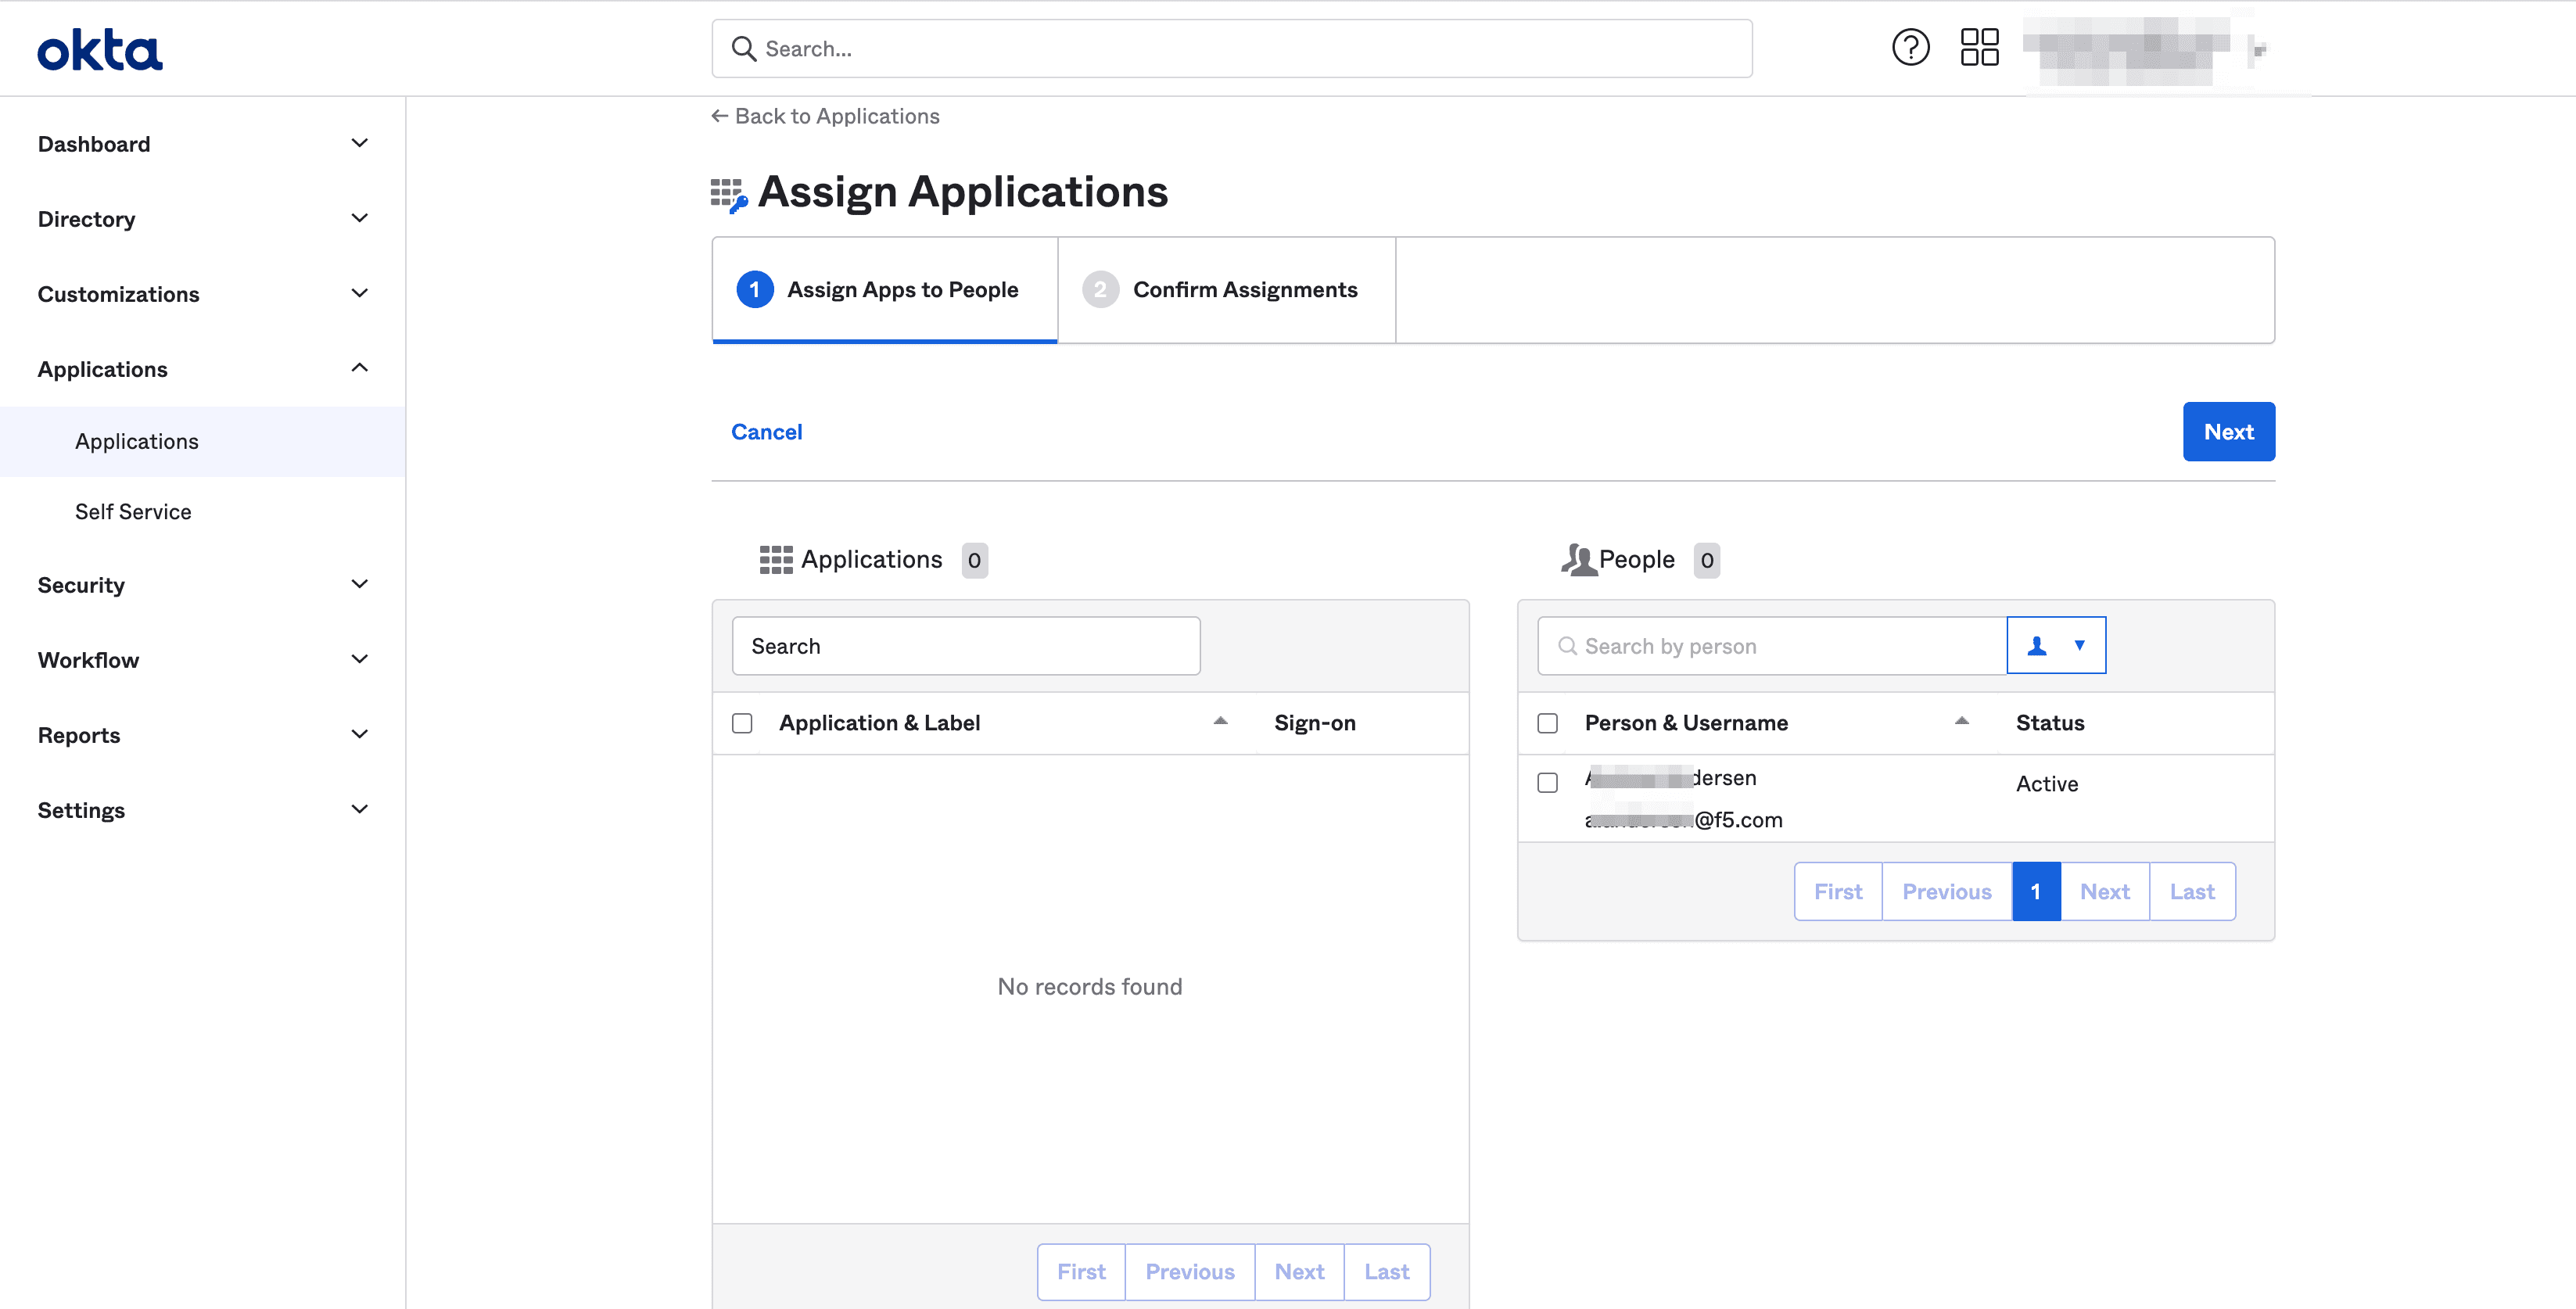
Figure: User Assignment
-
Select Next button.
-
Complete setup process.
-

Enable SSO Using Okta in Console
Step 1: Start SSO setup in the F5 Distributed Cloud Console.
Features can be viewed, and managed in multiple services.
This example shows SSO setup in Administration.
- Open F5 Distributed Cloud Console homepage, select Administration box.
Note: Homepage is role based, and your homepage may look different due to your role customization. Select All Workspaces drop-down menu to discover all options. Customize Settings: Administration > Personal Management > My Account > Edit work domain & skills button > Advanced box > check Work Domain boxes > Save changes button.
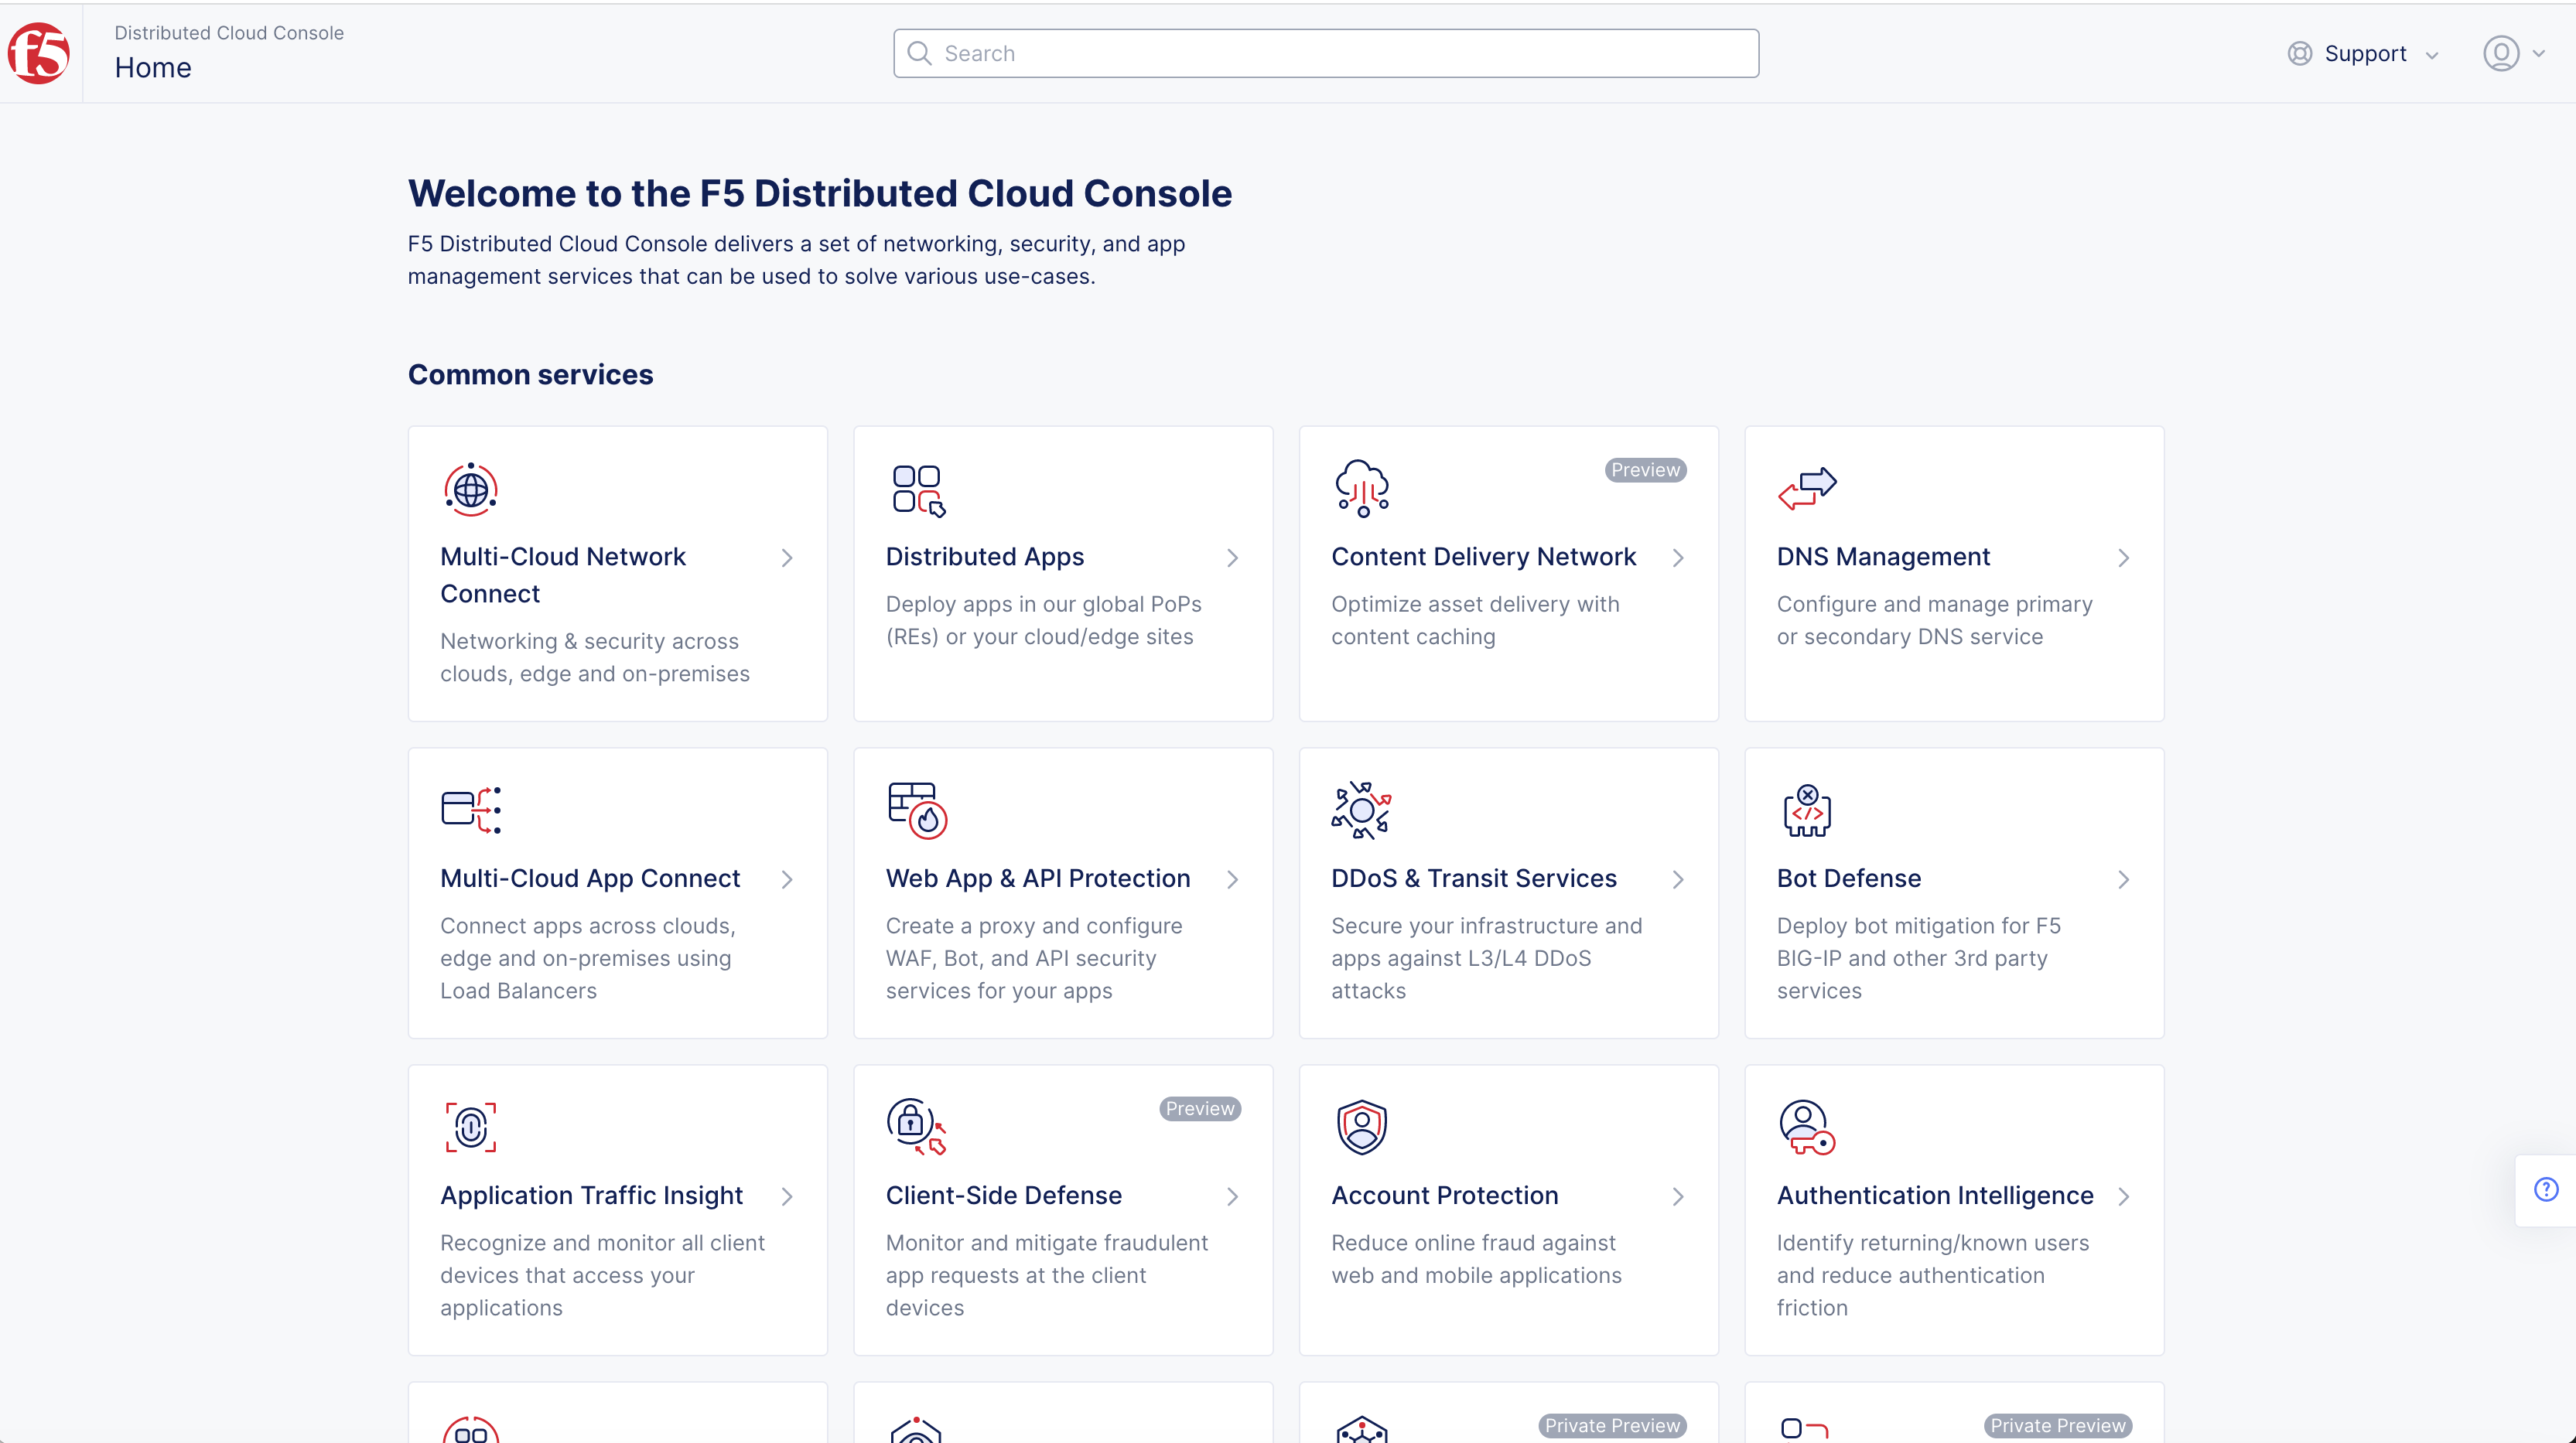
Figure: Homepage
Note: Confirm Namespace feature is in correct namespace, drop-down selector located in upper-left corner. Not available in all services.
- Select Login Options in Tenant Settings.
Note: If options are not showing available, select Show link in Advanced nav options visible in bottom left corner. If needed, select Hide to minimize options from Advanced nav options mode.
- Select Set Up SSO button.
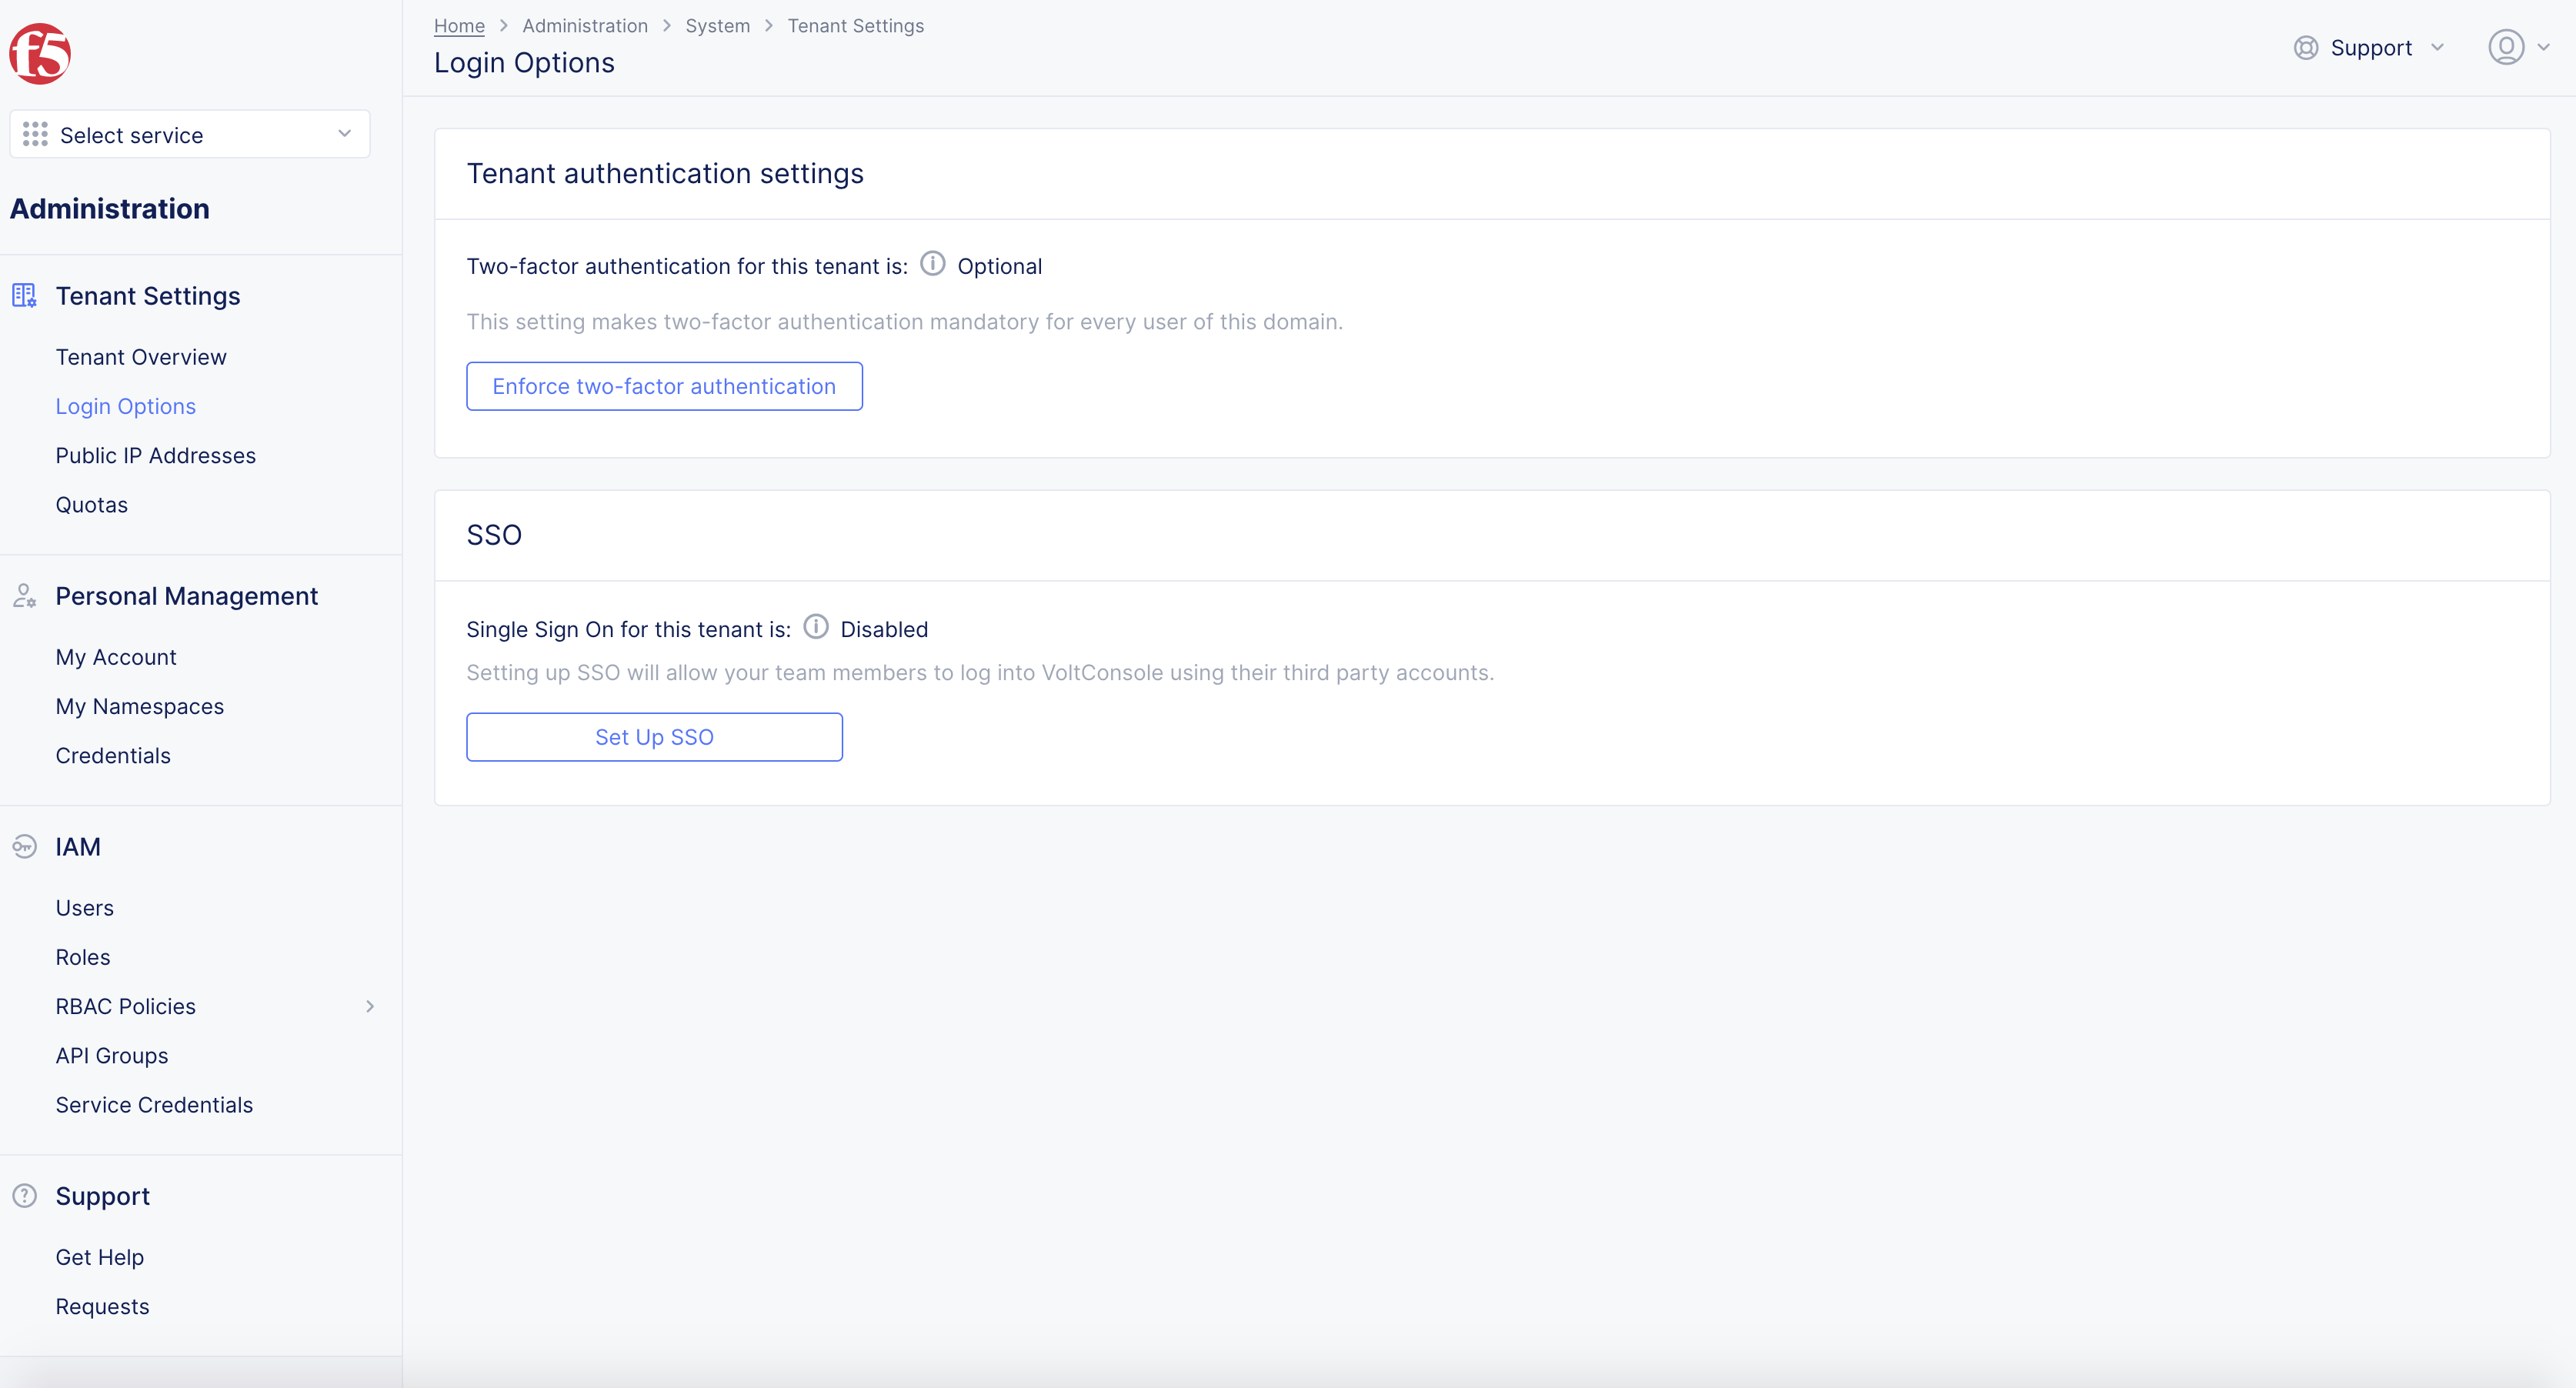
Figure: SSO
-
Select Okta in Select Service Provider in pop-up window.
-
Select Next button.
Step 2: Setup clients identity.
In Set Up SSO screen, setup client ID and client secret.
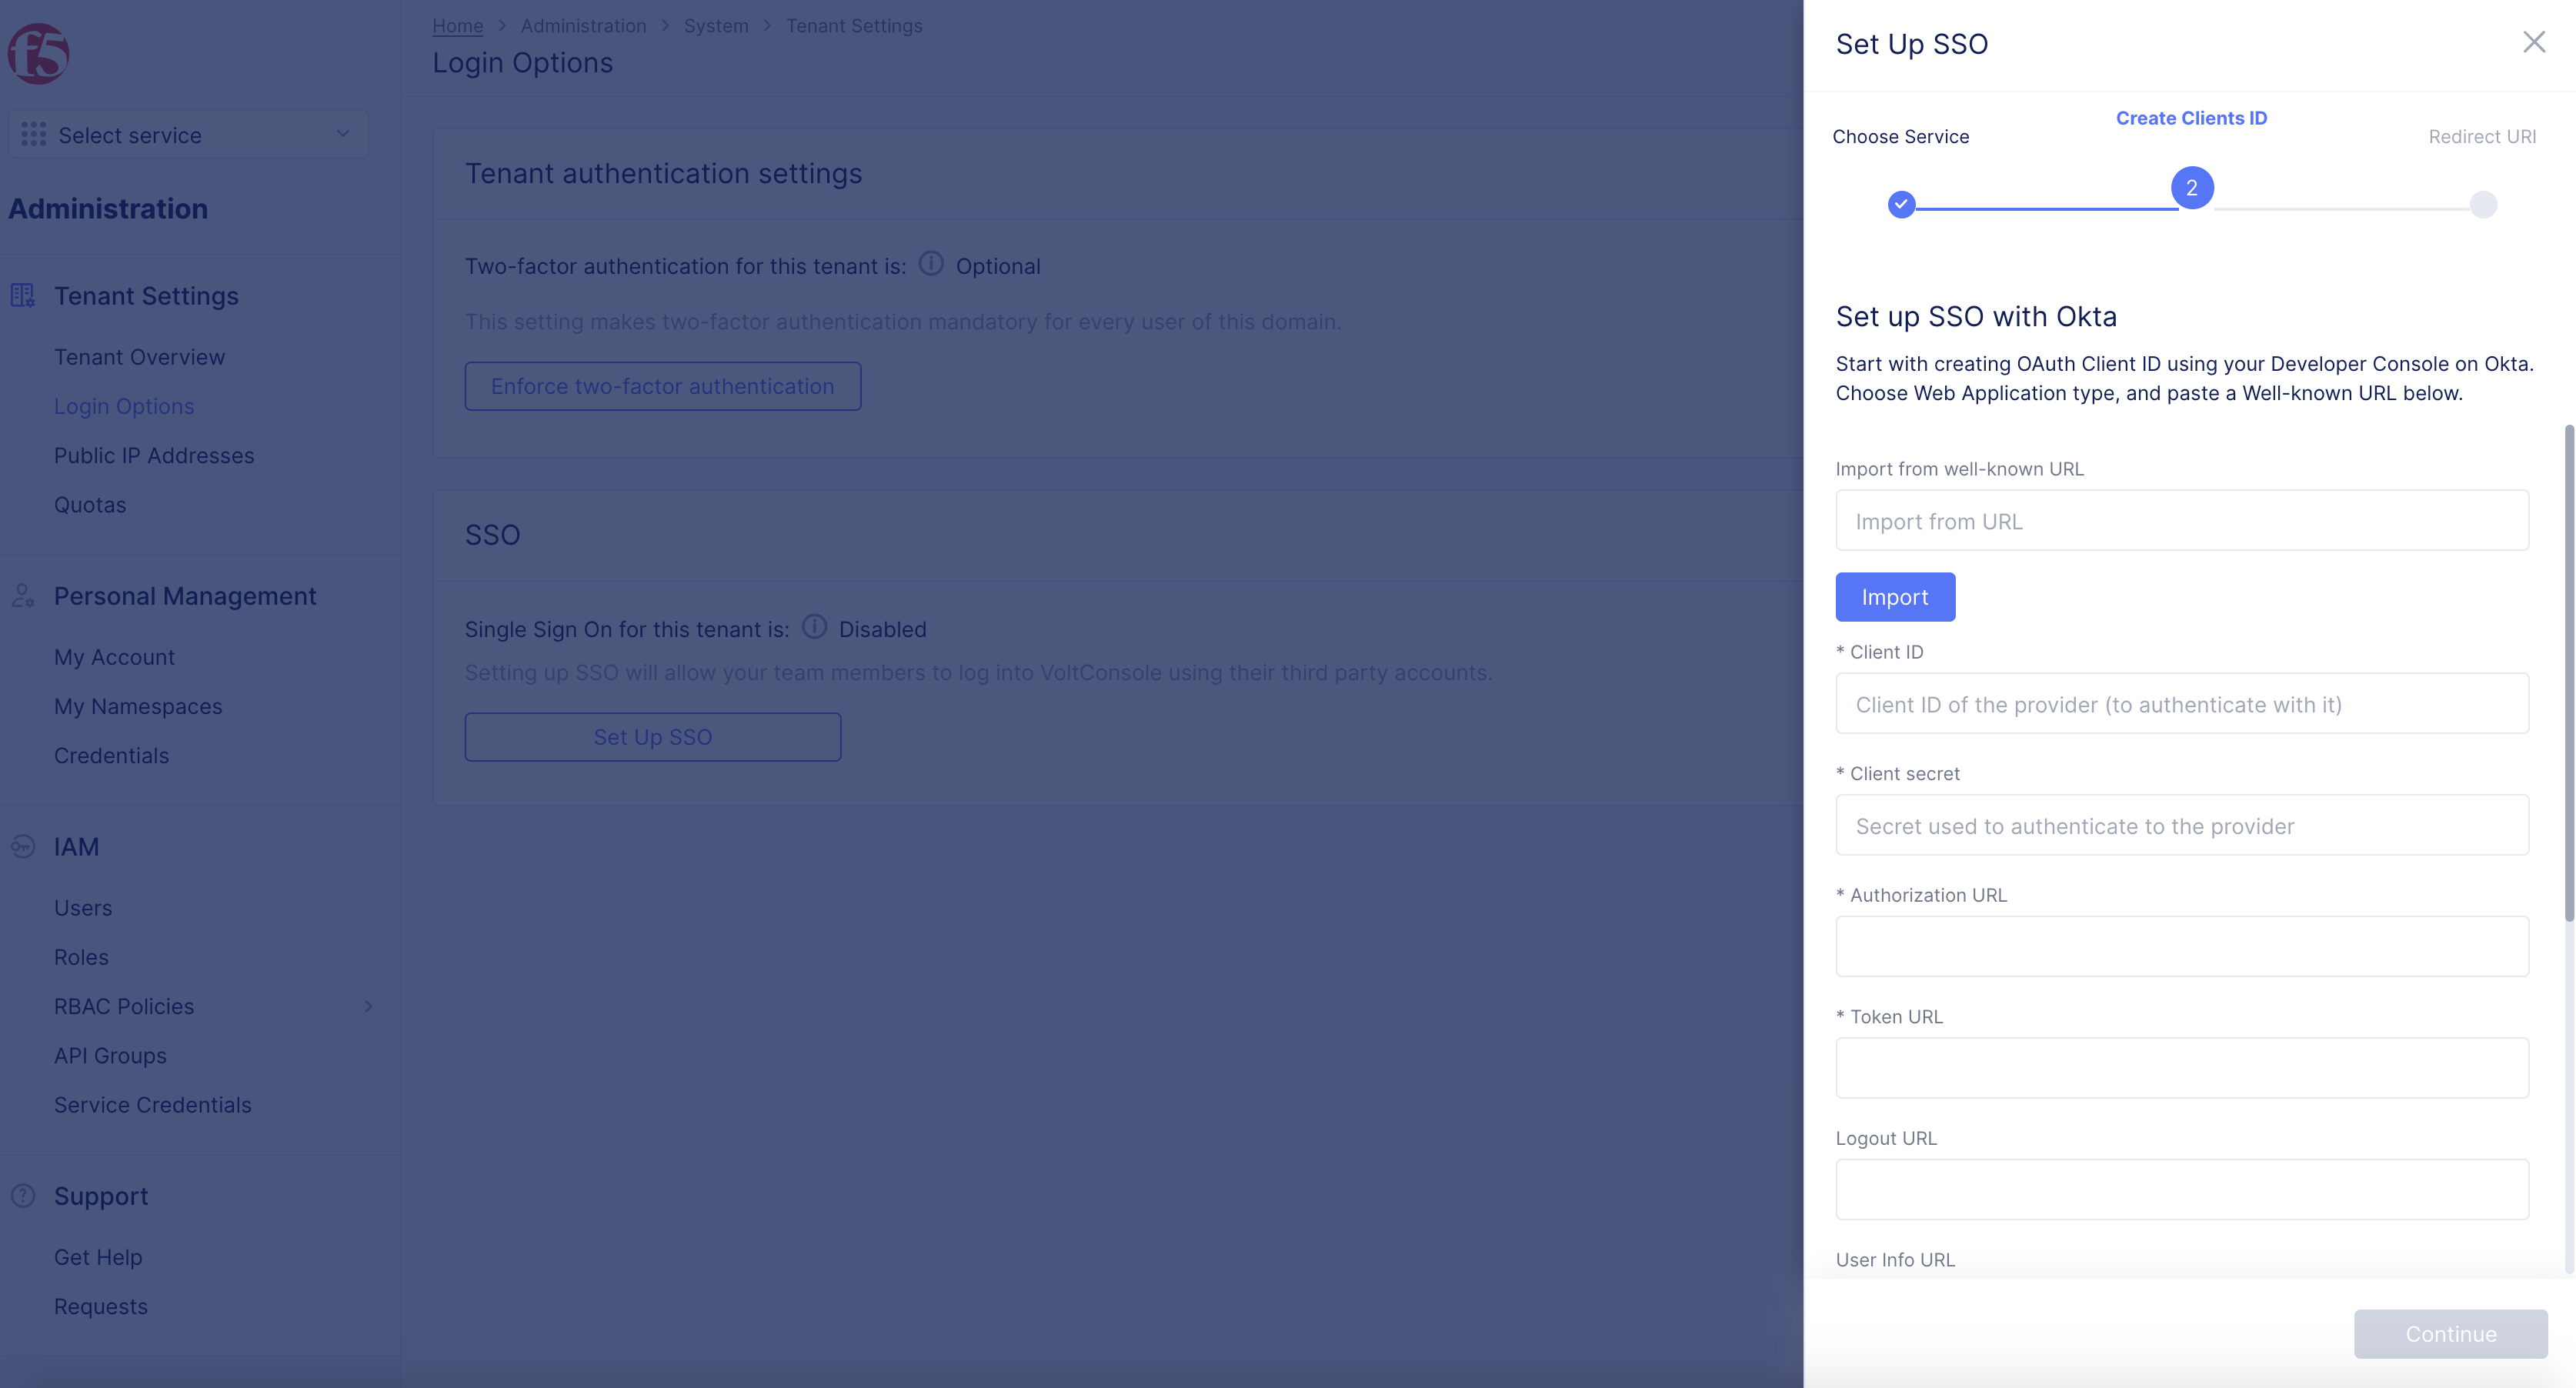
Figure: SSO Create Clients ID
-
Import from Well-Known URL obtained in Step 4 of the Configure OIDC Authentication Application in Okta.
-
Select Import.
Note: Authorization URL and Token URL auto-generate.
-
Enter Client ID and Client Secret obtained in Step 4 of Configure OIDC Authentication Application in Okta.
-
Enter Logout URL, as needed.
-
Enter Backchannel Logout, as needed.
-
Enter User Info URL, as needed.
-
Enter Issuer, as needed.
-
Enter Prompt, as needed.
-
Enter Default Scopes, as needed.
-
Enter JWKS URL, as needed.
-
Select Next button.
Step 3: Copy Redirect URL.
- Copy displayed values of Redirect URL to Redirect URI screen.
Note: This is used in next step.
- Select Done button.
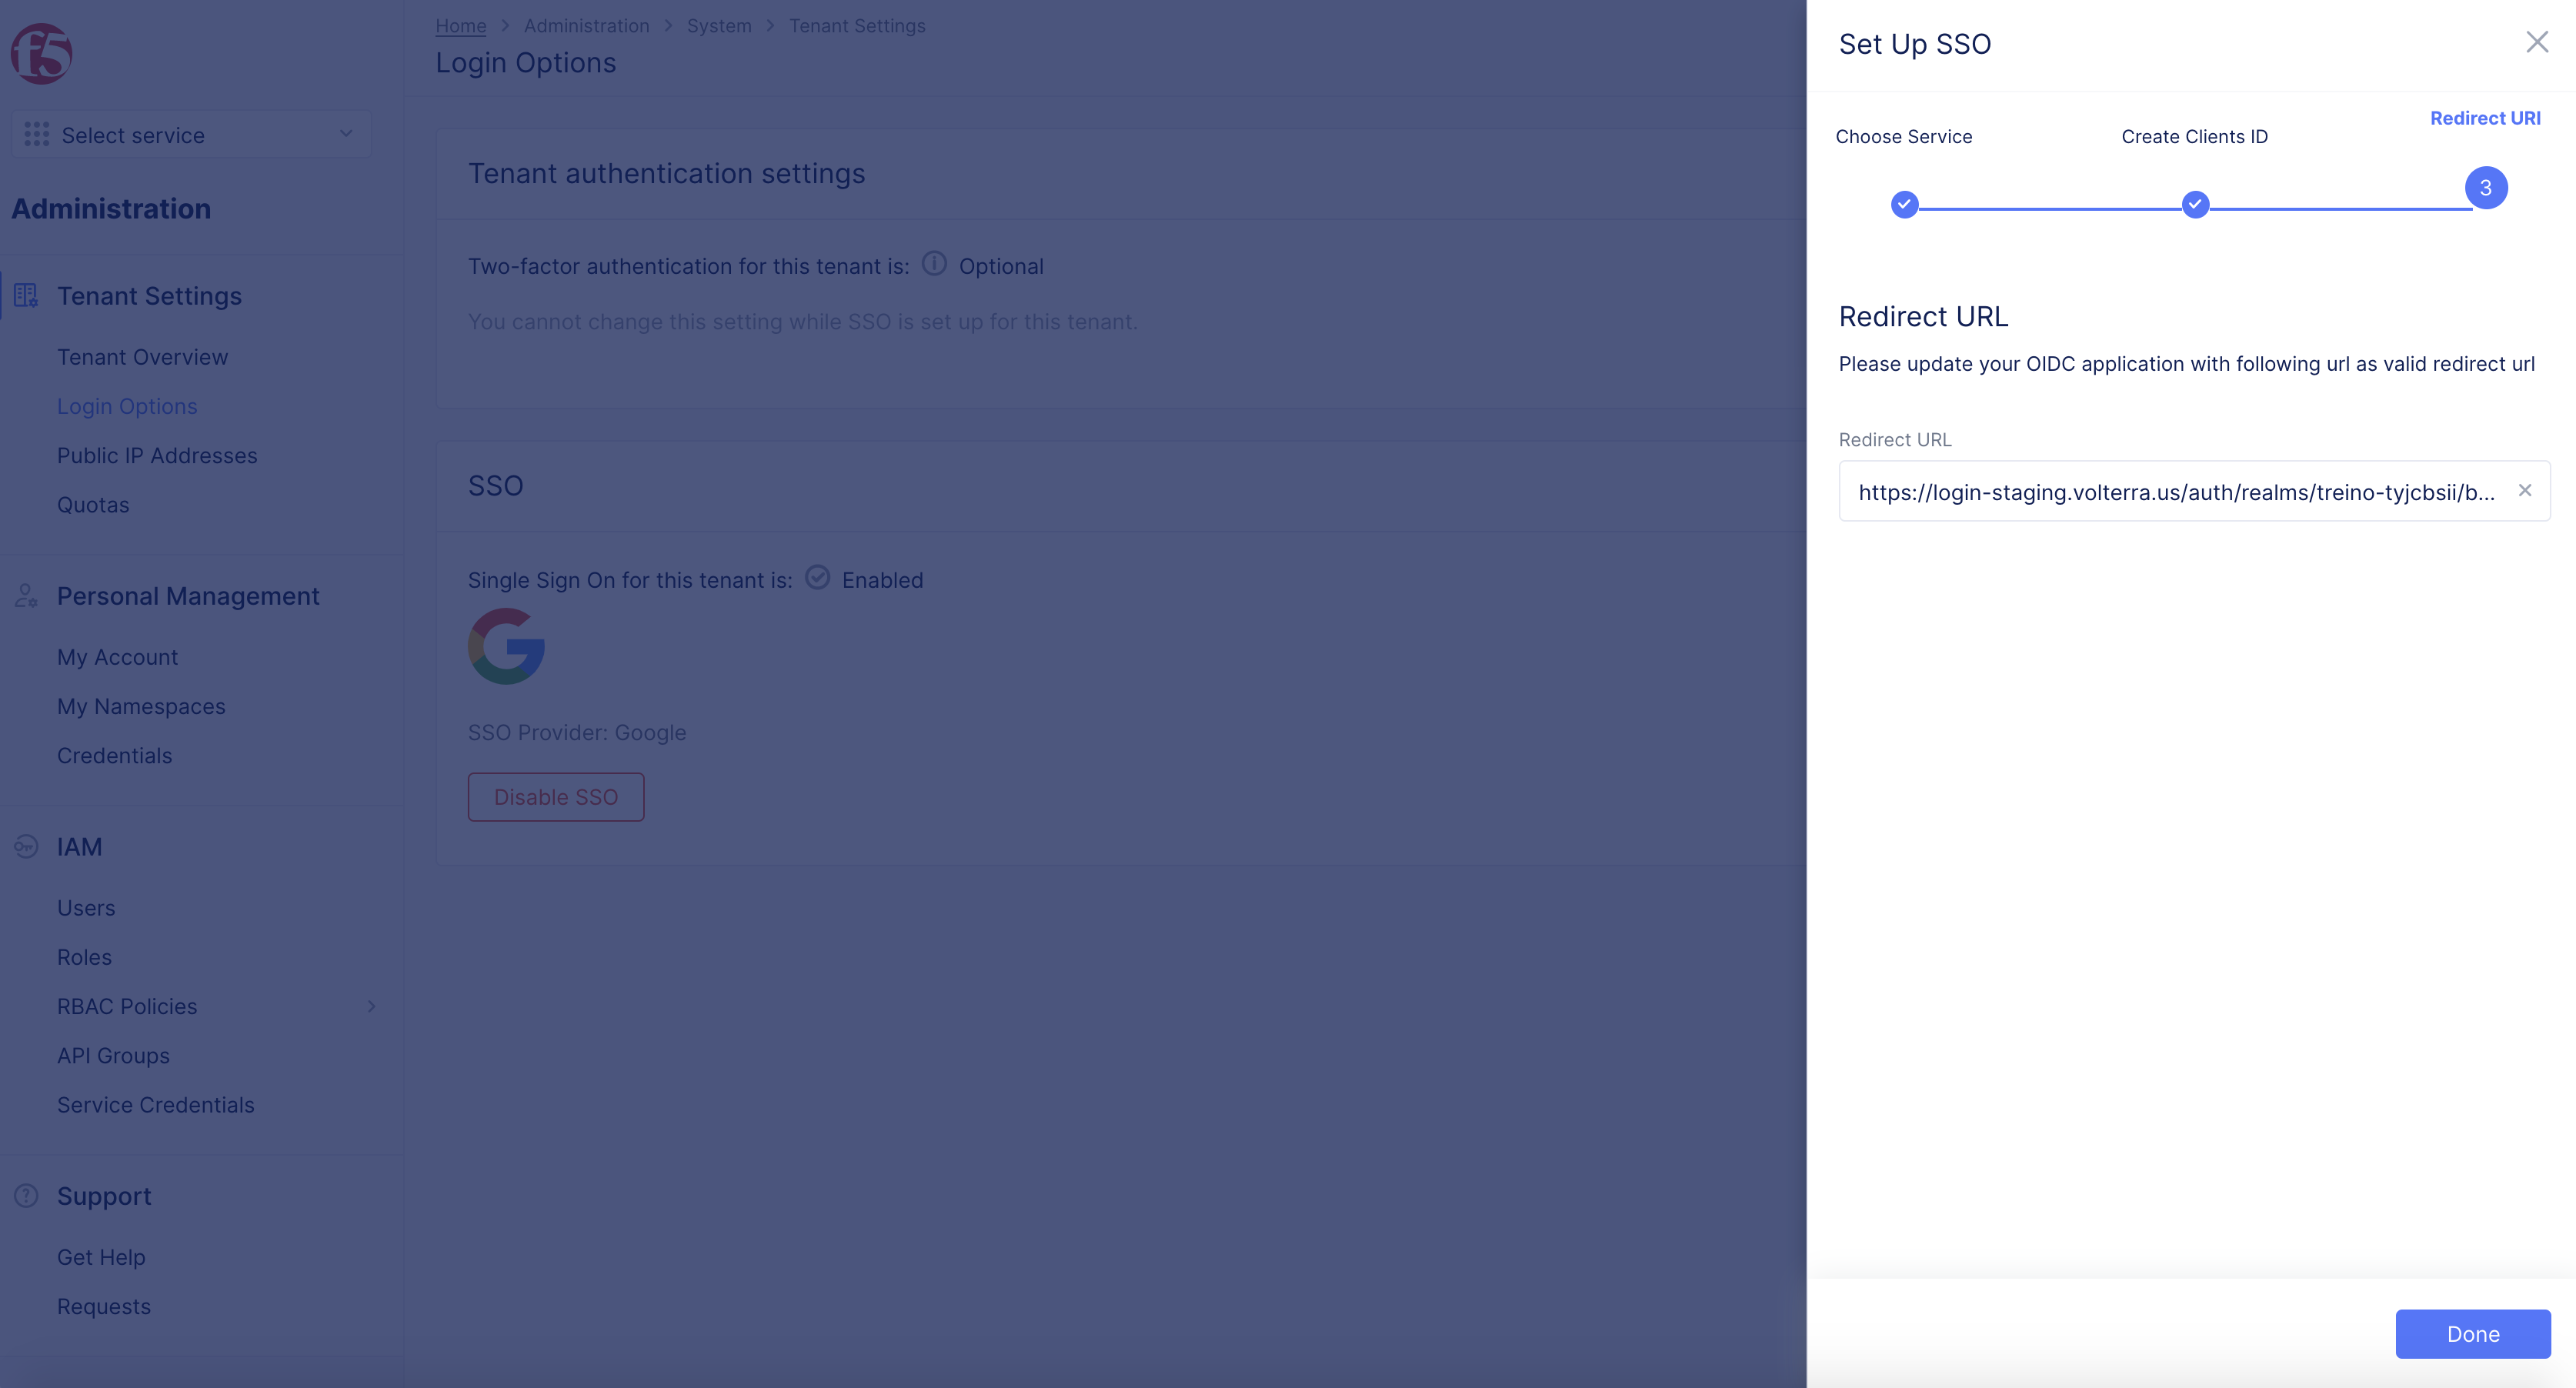
Figure: Redirect URL
Step 4: Add Redirect URL in Okta Application Settings.
-
Log into Okta, open General tab of your application settings.
-
Select Edit.
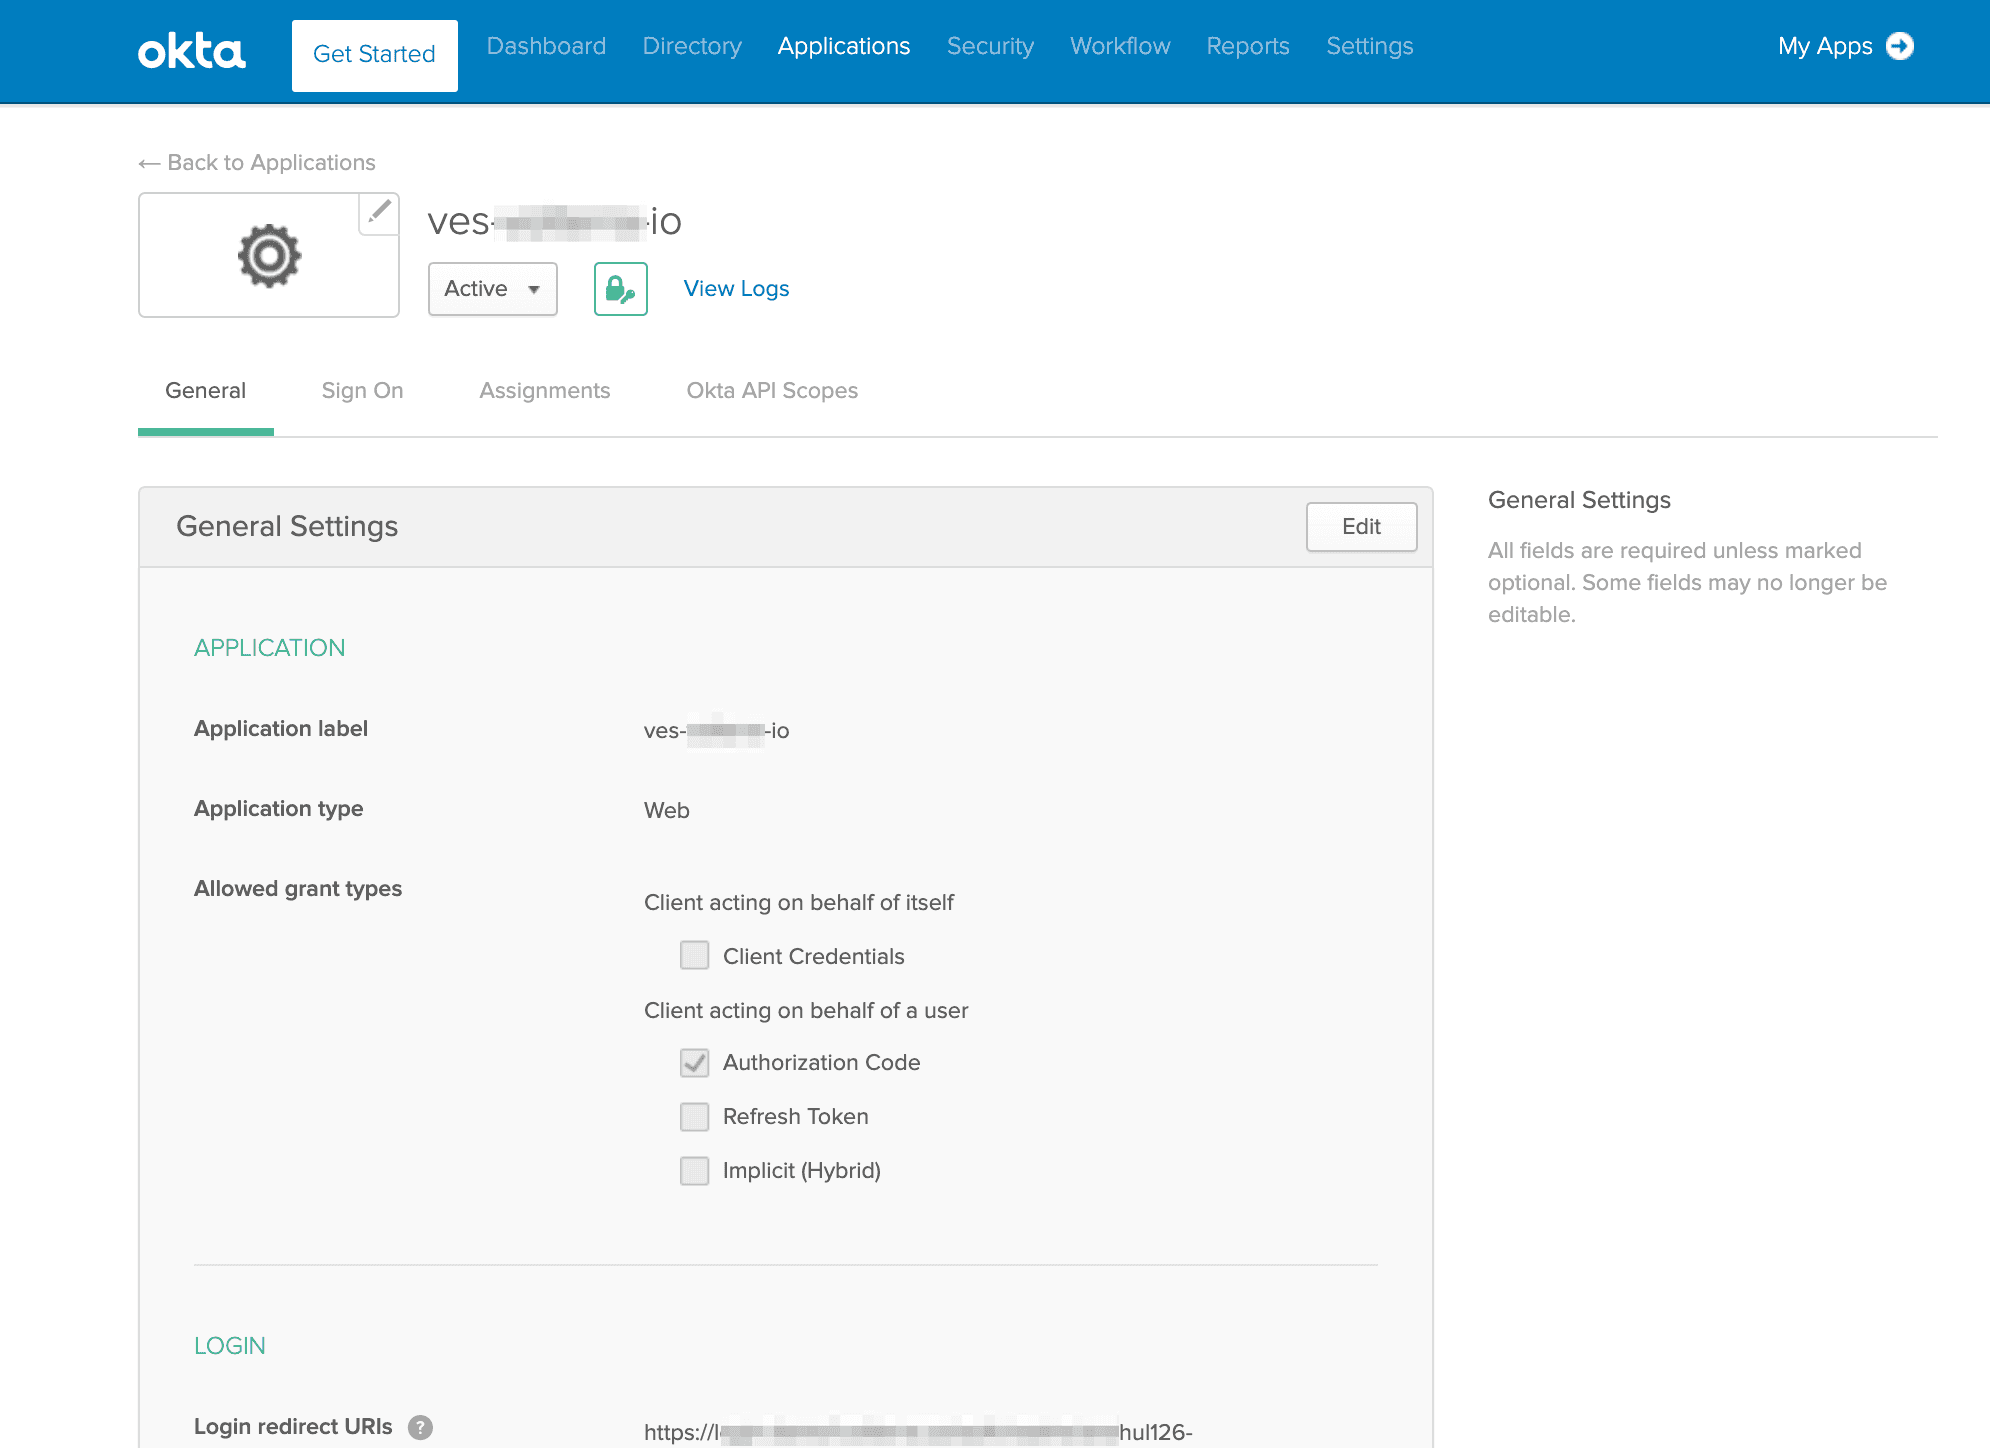
Figure: Okta Application General Settings
-
Navigate to LOGIN section in, enter the redirect URL copied in previous step to the Login redirect URIs box.
-
Add the value of call back url to Initiate login URI box.

Note: You can obtain this from the settings of your identity provider by navigating to Security > Identity Providers.
-
Confirm Okta configuration that you have the same customer login link in the following fields: Sign-in Redirect URIs, Sign-out Redirect URIs and Initiate Login URI.
-
Confirm Login initiated is set as App Only.
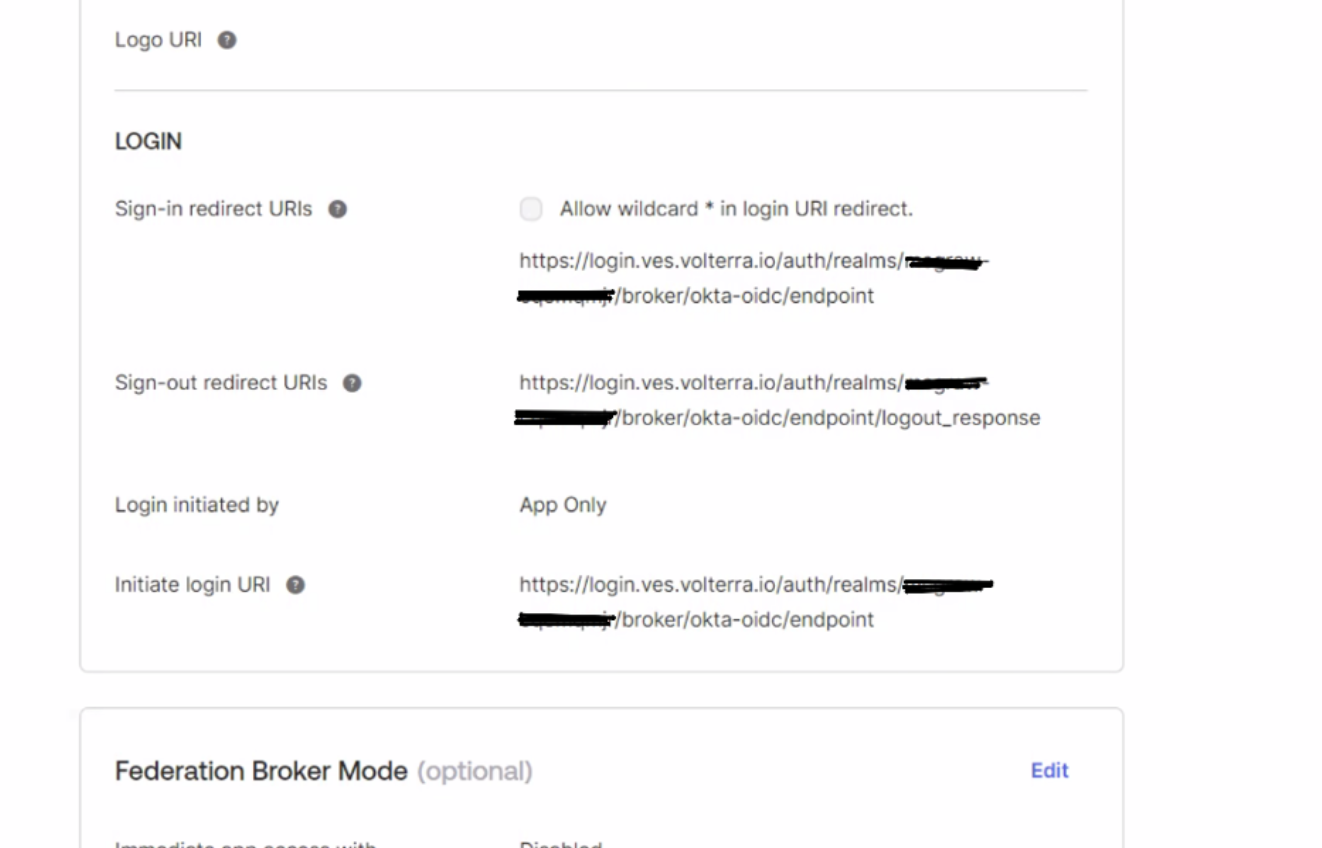
Figure: Redirect URI from Identity Provider Creation
- Save the settings.
Note: The field Logout redirect URIs gets automatically populated.
Step 5: Complete SSO Setup.
Log out of F5 Distributed Cloud Console.
Note: The subsequent logins get serviced through Okta.