Isolate Apps with Implicit Namespace Labels
Objective
This document provides instructions on how to set implicit namespace labels in vK8s network policies and service policies to control communication between applications deployed in different namespaces. To learn more about labels, see Labels. To learn more about network policies and service policies, see Network Policy and Service Policy.
An implicit namespace label is a label with key-value pair in the name.ves.io/namespace=<user namespace> format. All objects in a user namespace implicitly get this label, and users cannot modify these labels. Security administrators can use these labels in the vK8s network policy and service policy to set controls for communication between applications in different namespaces.
Using the instructions provided in this document, you can apply implicit namespace label inside vK8s network policy and service policy to restrict communication between namespaces.
Note: The instructions presented in this guide only cover applying of implicit namespace labels to the vK8s network policy and service policy. For detailed instruction on creating a vK8s network policy, see vK8s Network Policy and Service Policy, respectively.
Prerequisites
-
An F5® Distributed Cloud Services Account. If you do not have an account, see Getting Started with Console.
-
One or more cloud or edge locations with a Distributed Cloud Services Site. Install the node or cluster image for your Customer Edge Site.
-
Apps deployed in two or more namespaces. See vK8s Deployment.
Apply Implicit Namespace Labels
You can apply the implicit namespace labels from a vK8s network policy and/or a service policy. The instructions provided in this guide cover both scenarios and assume sample applications are deployed in two different namespaces.
The following image is a graphical representation of the configuration presented in this guide:
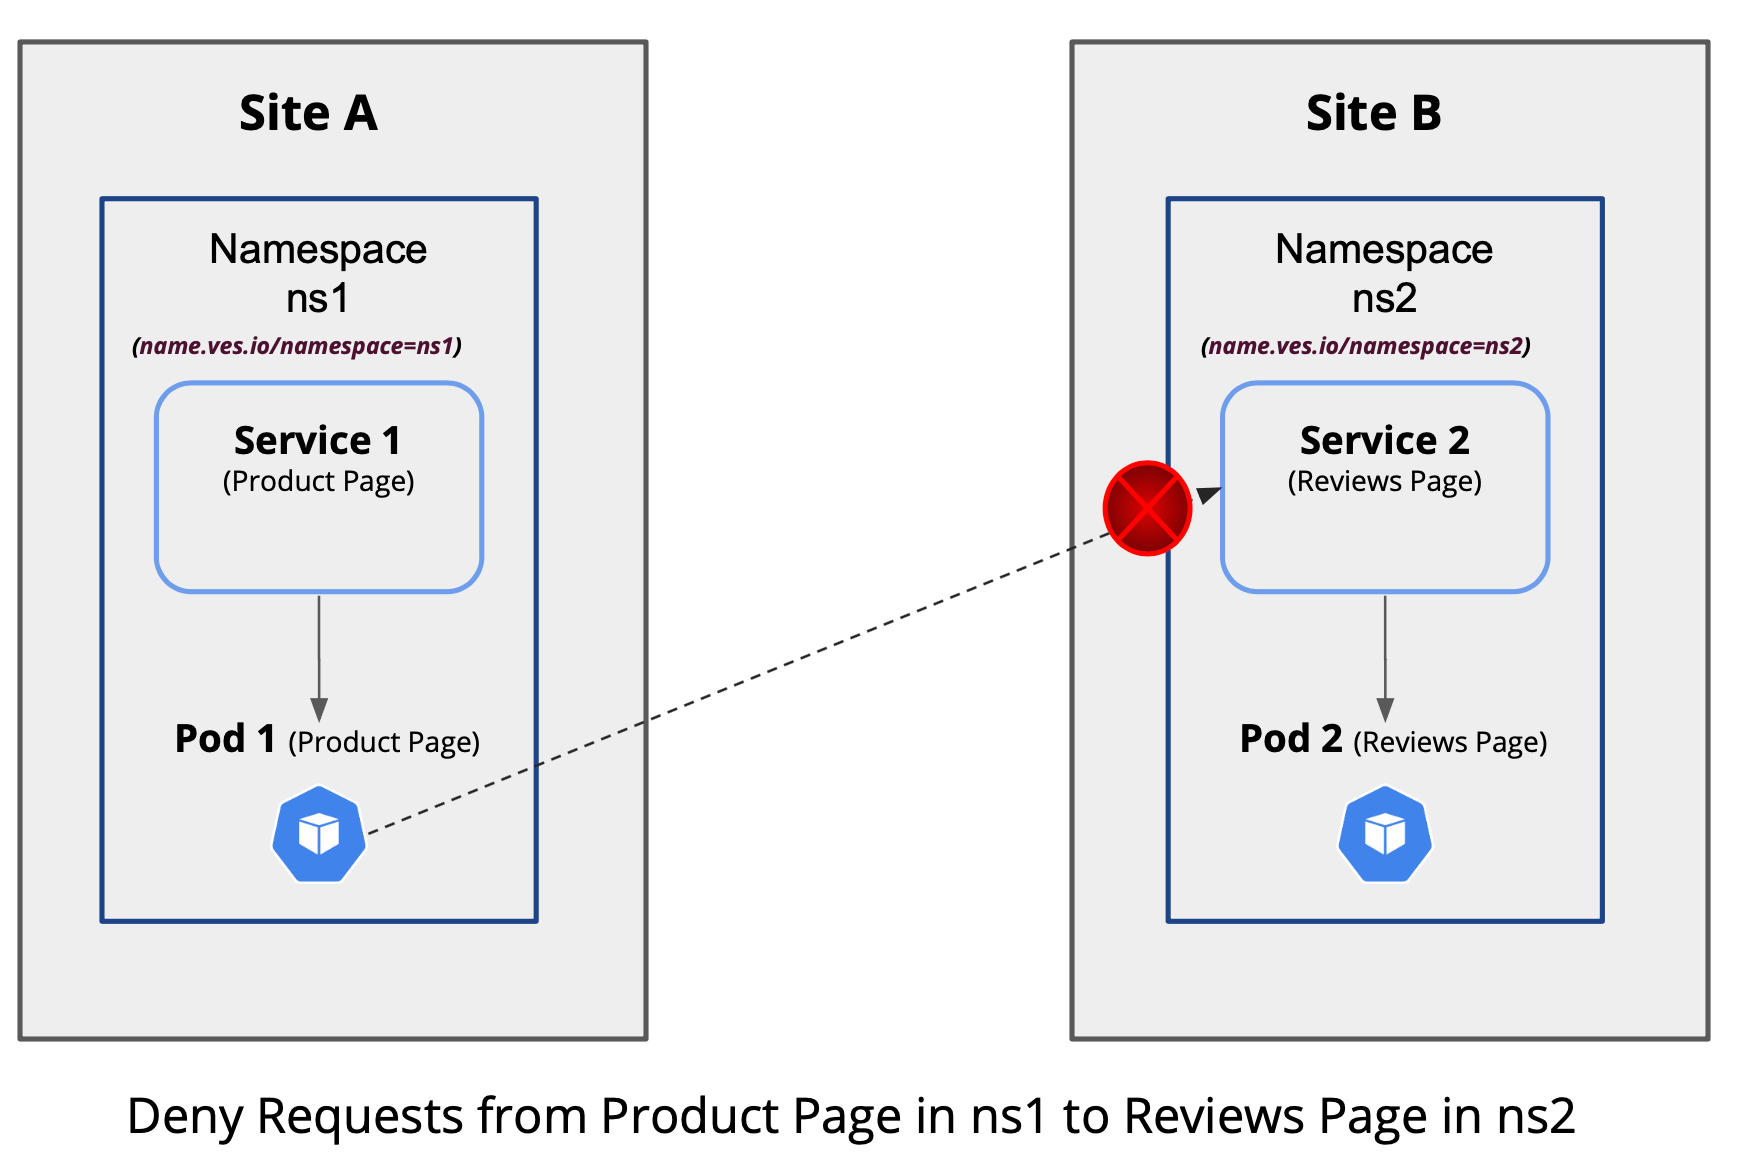
Figure: Implicit Namespace Label to Control Communication
Note: You can use the implicit label in either the label selector or label matcher portions of policy configuration. Label matcher only requires key matching and label selector requires a match with the key-value pair.
Apply Label in vK8s Network Policy
Step 1: Start creating vK8s network policy.
-
Log into F5® Distributed Cloud Console (Console).
-
Click
Distributed Apps.
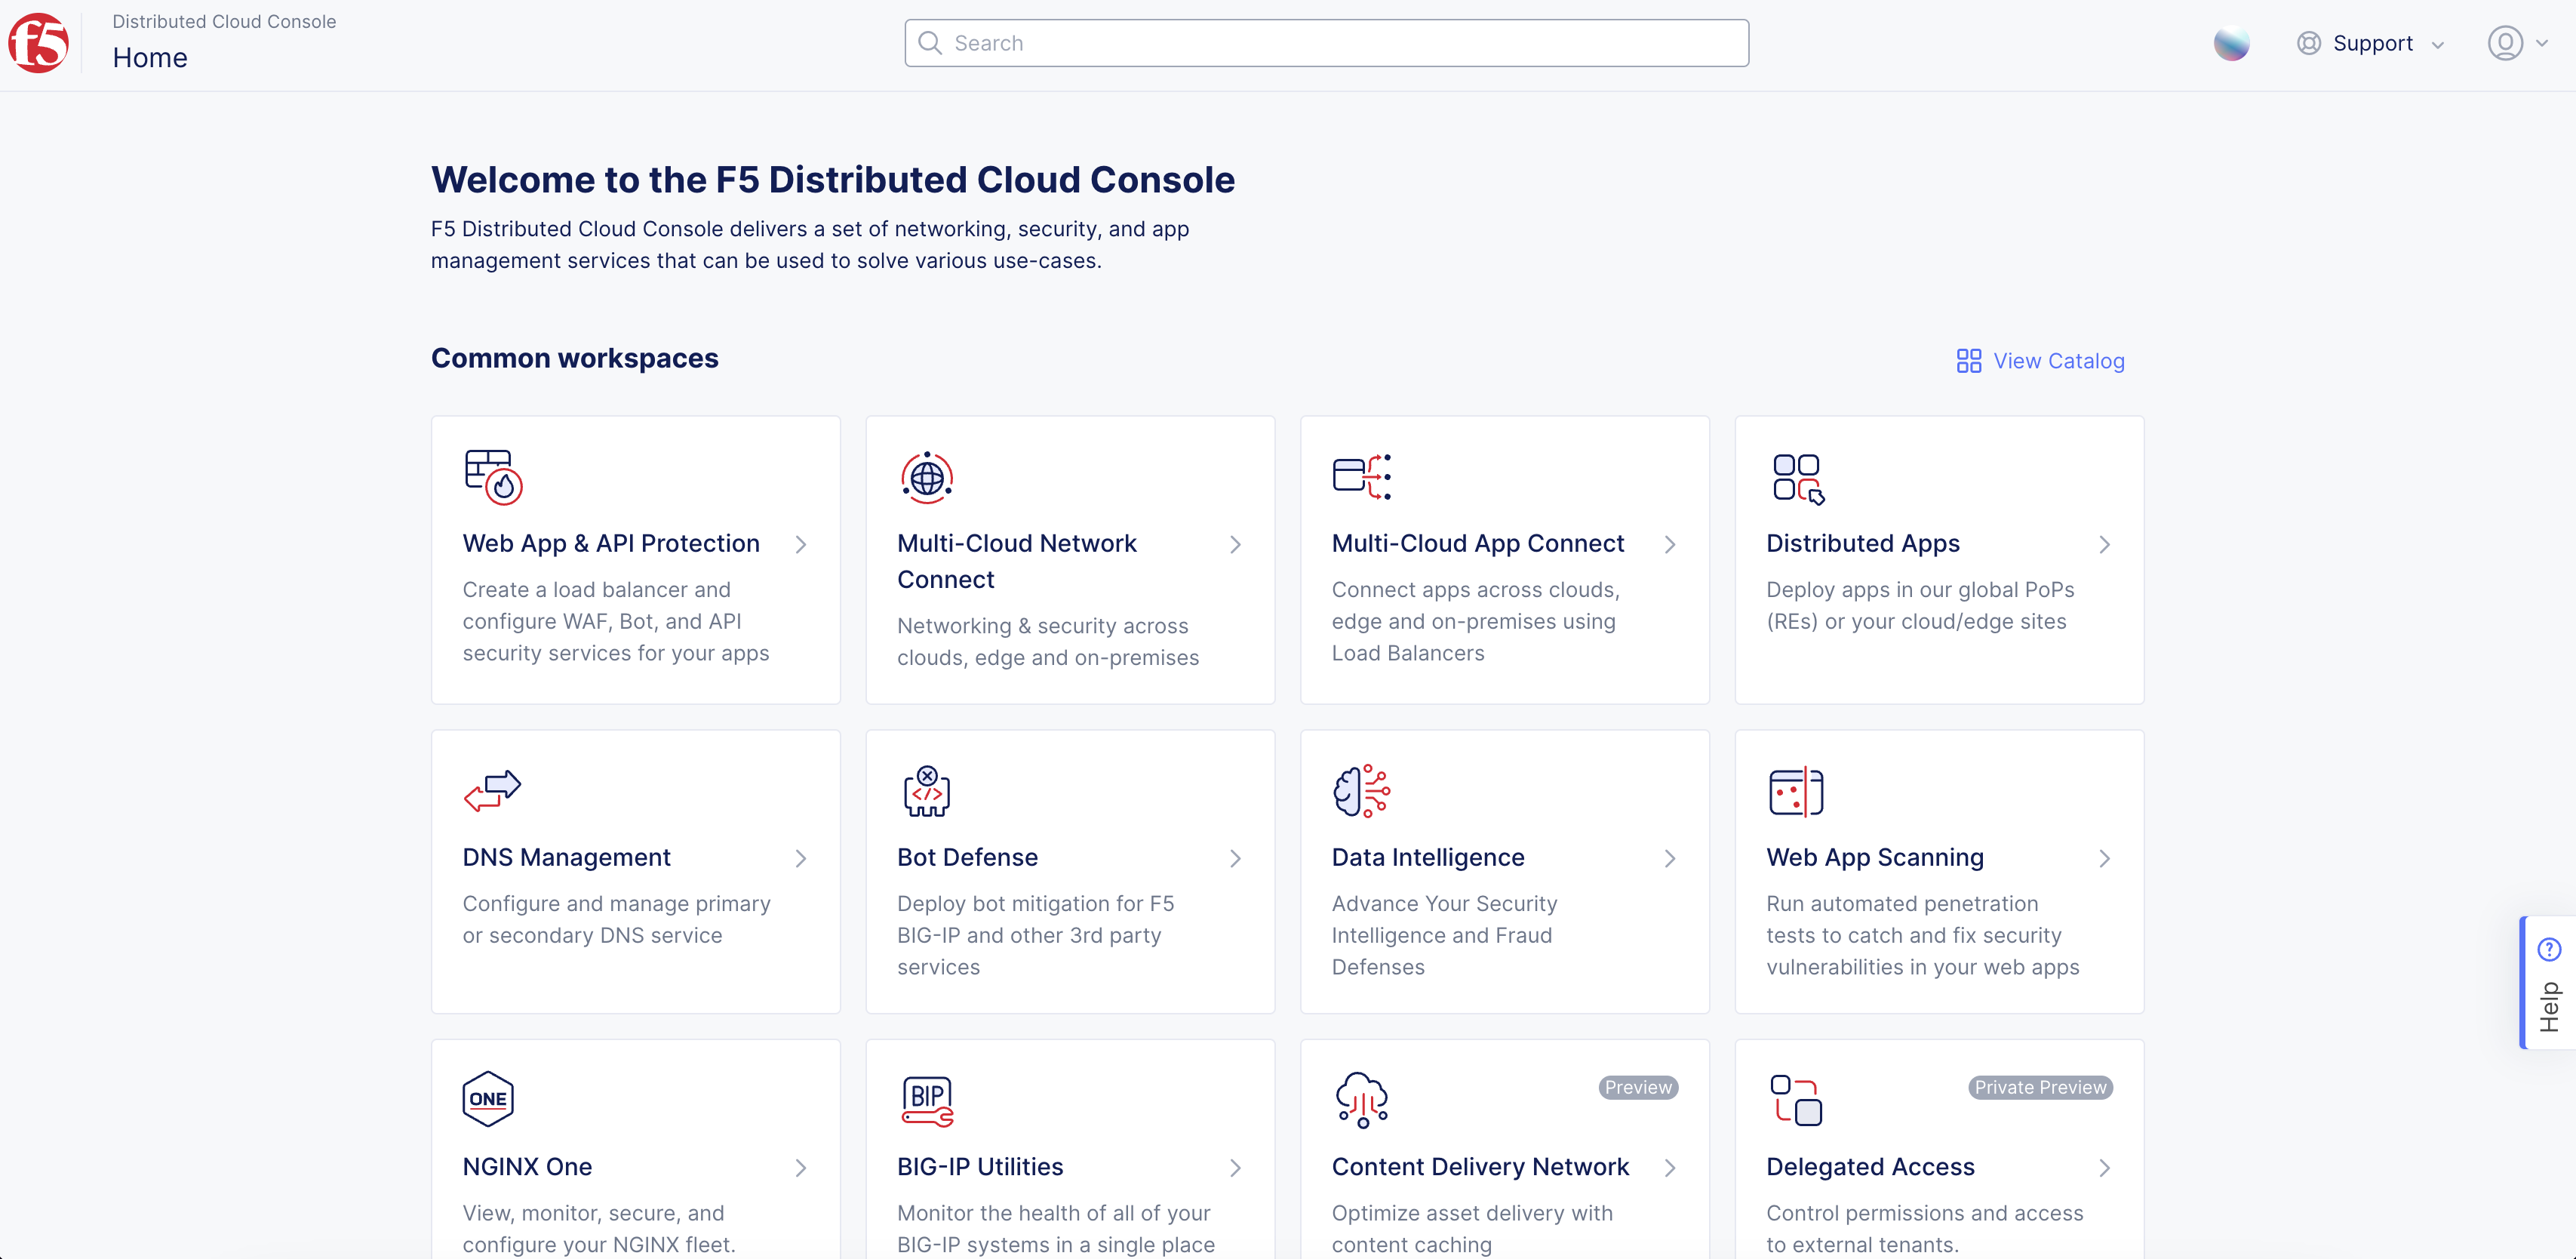
Figure: Console Homepage
-
Select your application namespace from the namespace drop-down menu.
-
Click
Manage>vK8s Network Policies>Active Network Policies.
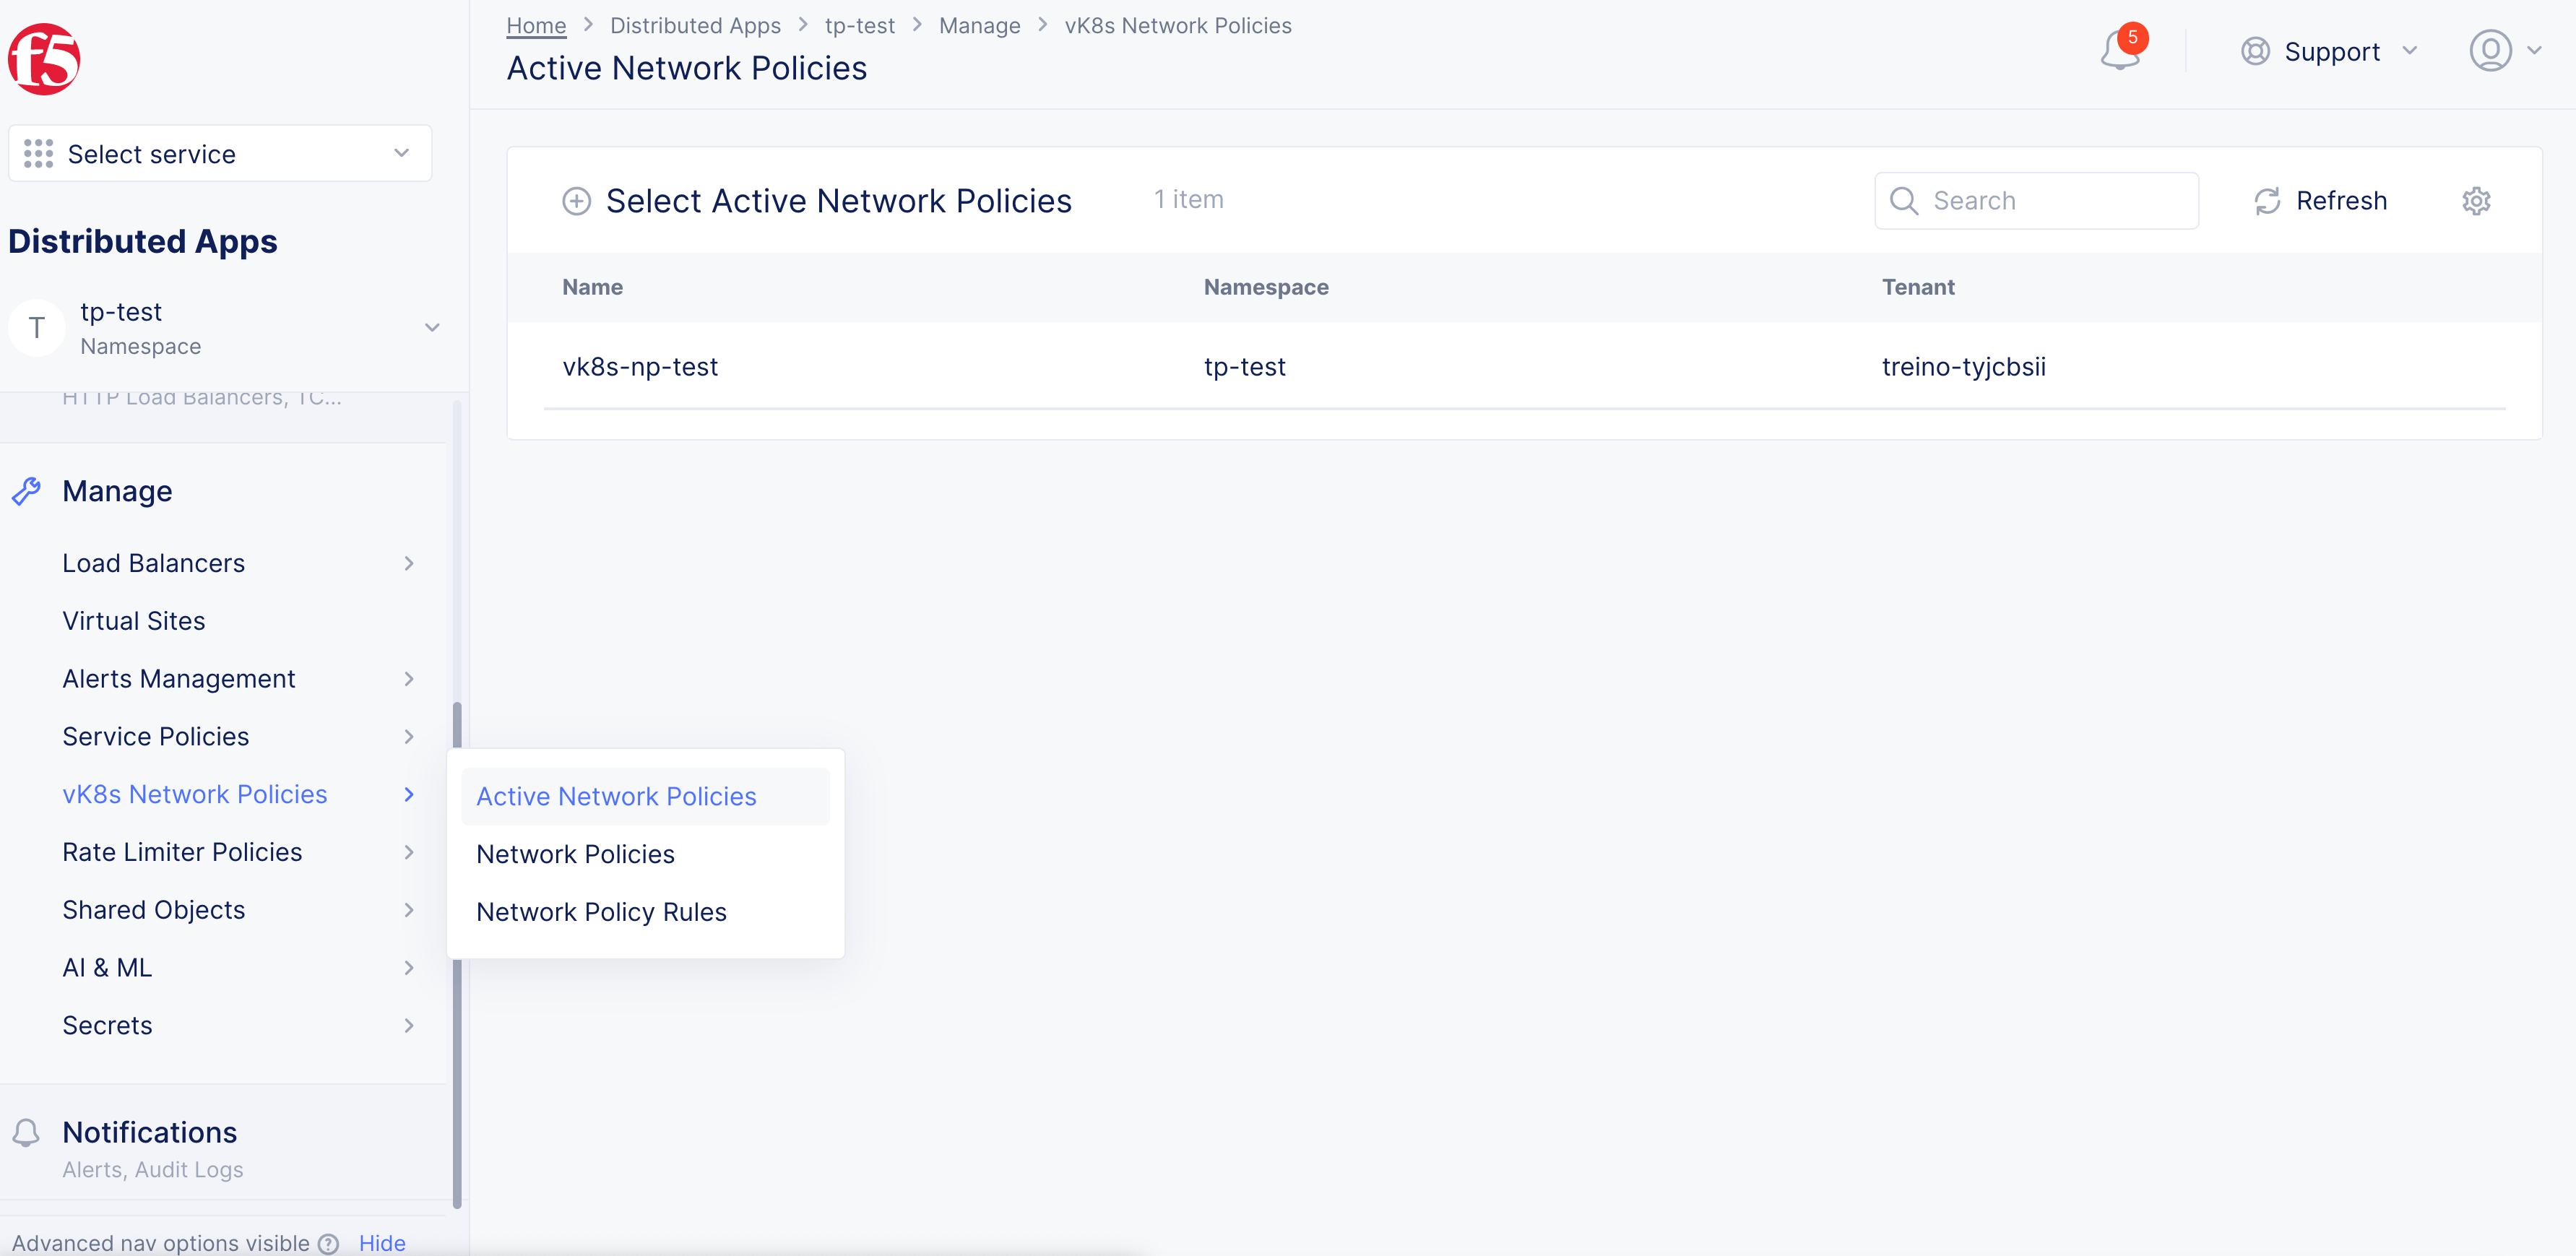
Figure: Active Network Policies
-
Click
Select Active Network Policies. -
Click
Add Item. -
From the menu, select
Add Itemto open the network policy configuration page.
Step 2: Set metadata and endpoint policy.
-
Enter a name in the
Namefield. -
From the
Endpoint(s)menu, selectAny Endpoint.
Step 3: Configure ingress rules.
Perform the following in the Connections To and From Endpoints section:
-
In the
Ingress Rulesfield, clickConfigure. -
Click
Add Item. -
Enter a name in the
Namefield under theMetadatasection. -
From the
Actionmenu, select whether toDenyorAllow. -
From the
Select Other Endpointmenu, select source endpoint for session initialization. -
From the
Select Type of Traffic to Matchmenu, select the type of traffic to match. -
In the
Label Matchersection, clickAdd Item. -
In the
Keysmenu, enter key names to match. -
Click
Apply. -
Click
Apply.
Step 4: Complete network policy creation.
-
Click
Continue. -
Click
Save and Exitto complete creating active policy.
Apply Label in Service Policy
Step 1: Start creating service policy.
-
In Console, click
Distributed Apps. -
Select your application namespace from the namespace drop-down menu.
-
Click
Manage>Service Policies>Service Policies. -
Click
Add Service Policy.
Step 2: Set metadata and start configuring policy rules.
-
Enter a name in the
Namefield. -
Optionally, add a description and select labels.
-
In the
Rulessection, perform the following:-
From the
Select Policy Rulesmenu, selectCustom Rule List. -
Click
Configure.
-
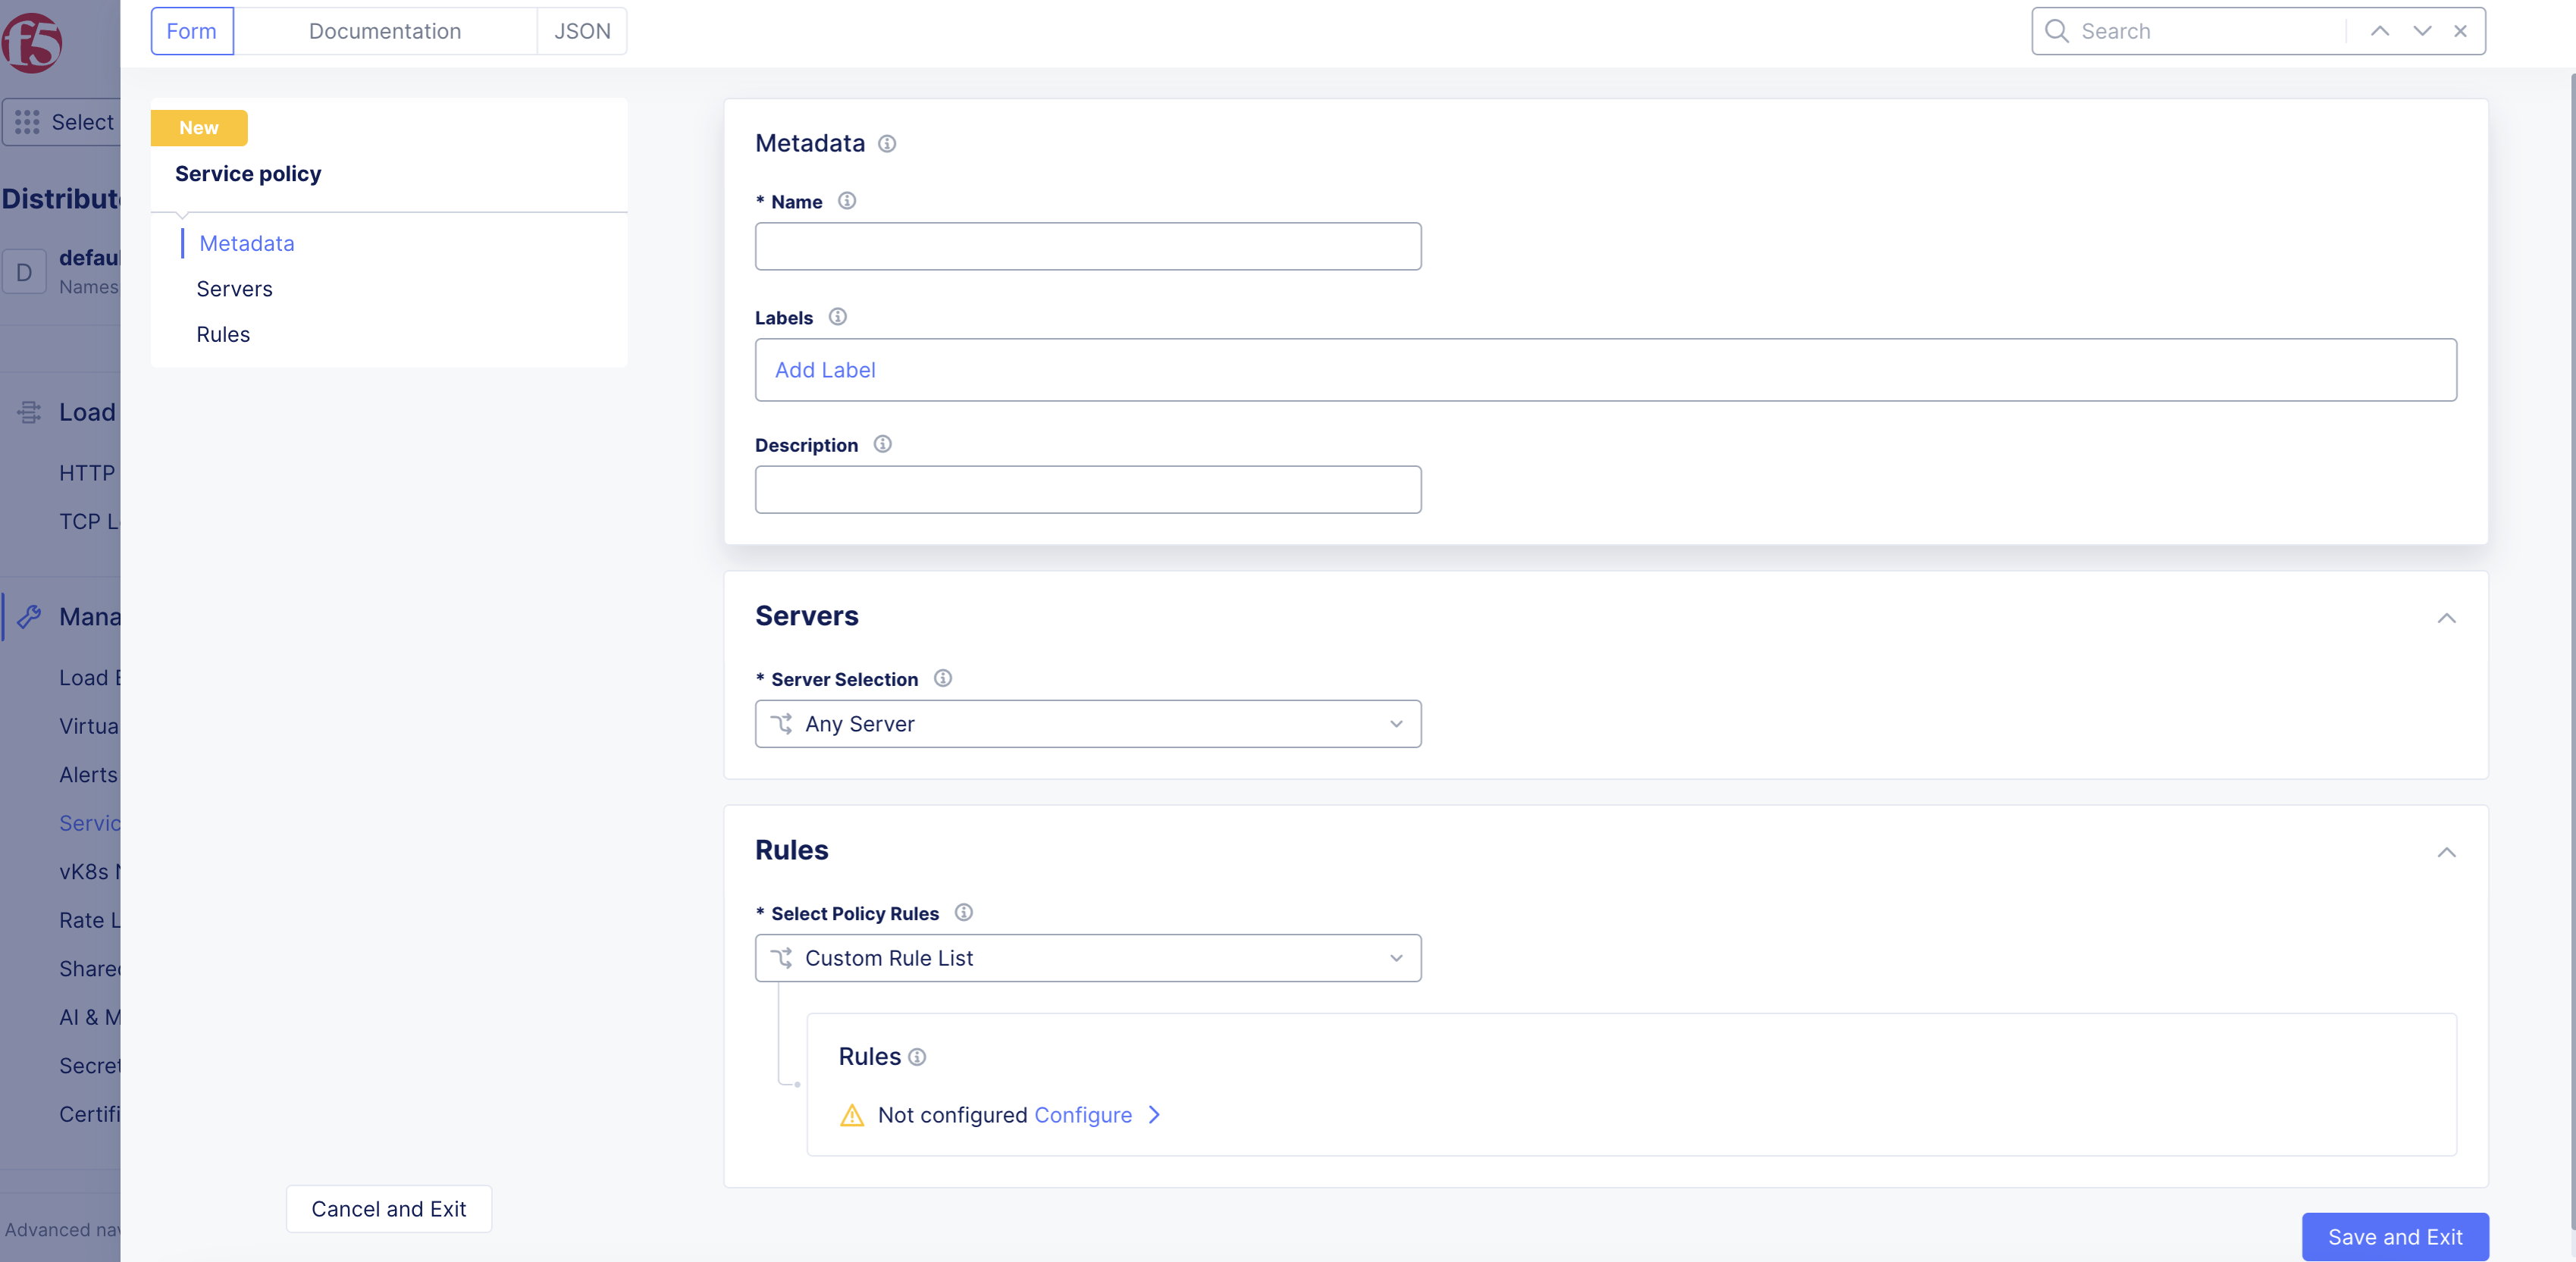
Figure: Configure Service Policy Rules
- Click
Add Item.
Step 3: Configure rules.
You can configure the rules using either the label selector option or the label matcher option.
-
Enter a name for the rule in the
Namefield. -
In the
Rule Specificationfield, clickConfigure.
Label Selector option
-
From the
Client Selectionmenu in theClientssection, selectGroup of Clients by Label Selector. -
Click on the
Selector Expressionmenu and configure the following:-
Select from the list or type
name.ves.io/namespaceas the key and selectInas the operator for selector expression. -
Start typing your namespace name for the
Valueand select from the displayed list. -
Click
Apply.
-
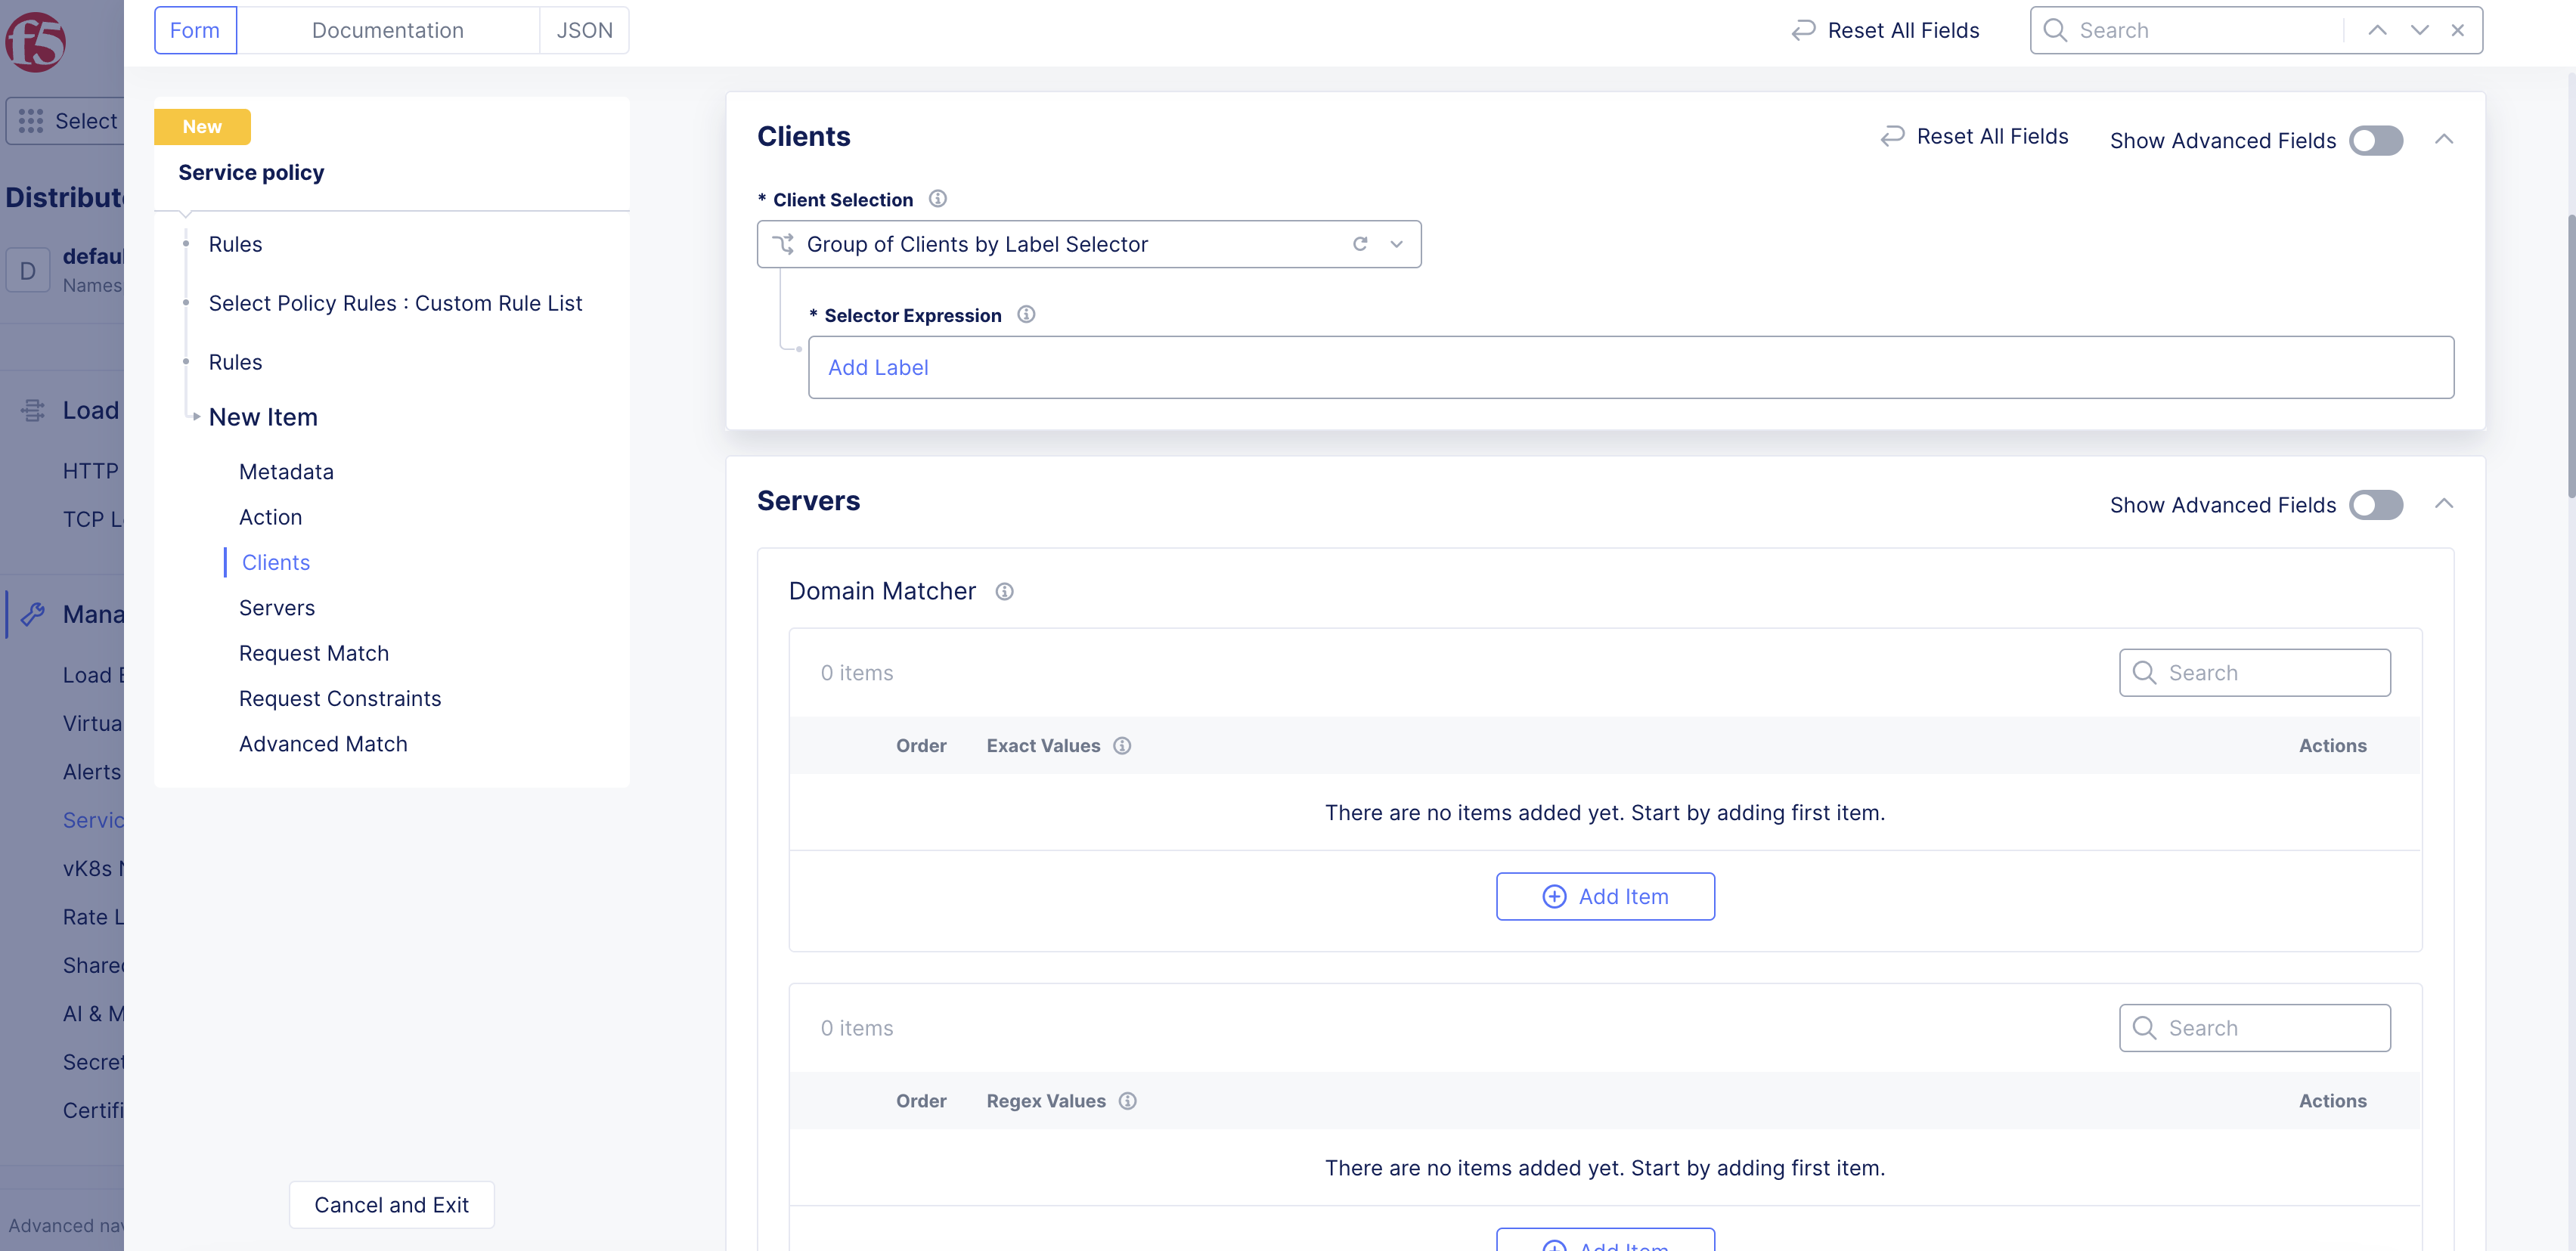
Figure: Namespace Label for Service Policy Rule
Label Matcher option
The label matcher field requires only the key of the implicit namespace label. However, this will block requests from any client with the implicit namespace label.
-
Go to
Advanced Matchsection and clickAdd itemunder theLabel Matcherfield. -
Select
name.ves.io/namespacefrom the list. -
Click
Apply. -
Click
Add Item. -
Click
Apply. -
Click
Save and Exitto complete creating active service policy.
Step 4: Complete service policy creation and activation.
-
Click
Manage>Service Policies>Active Service Policies. -
Click
Select Active Service Policies. -
Click
Add Item. -
Select the service policy and then click
Save and Exit.
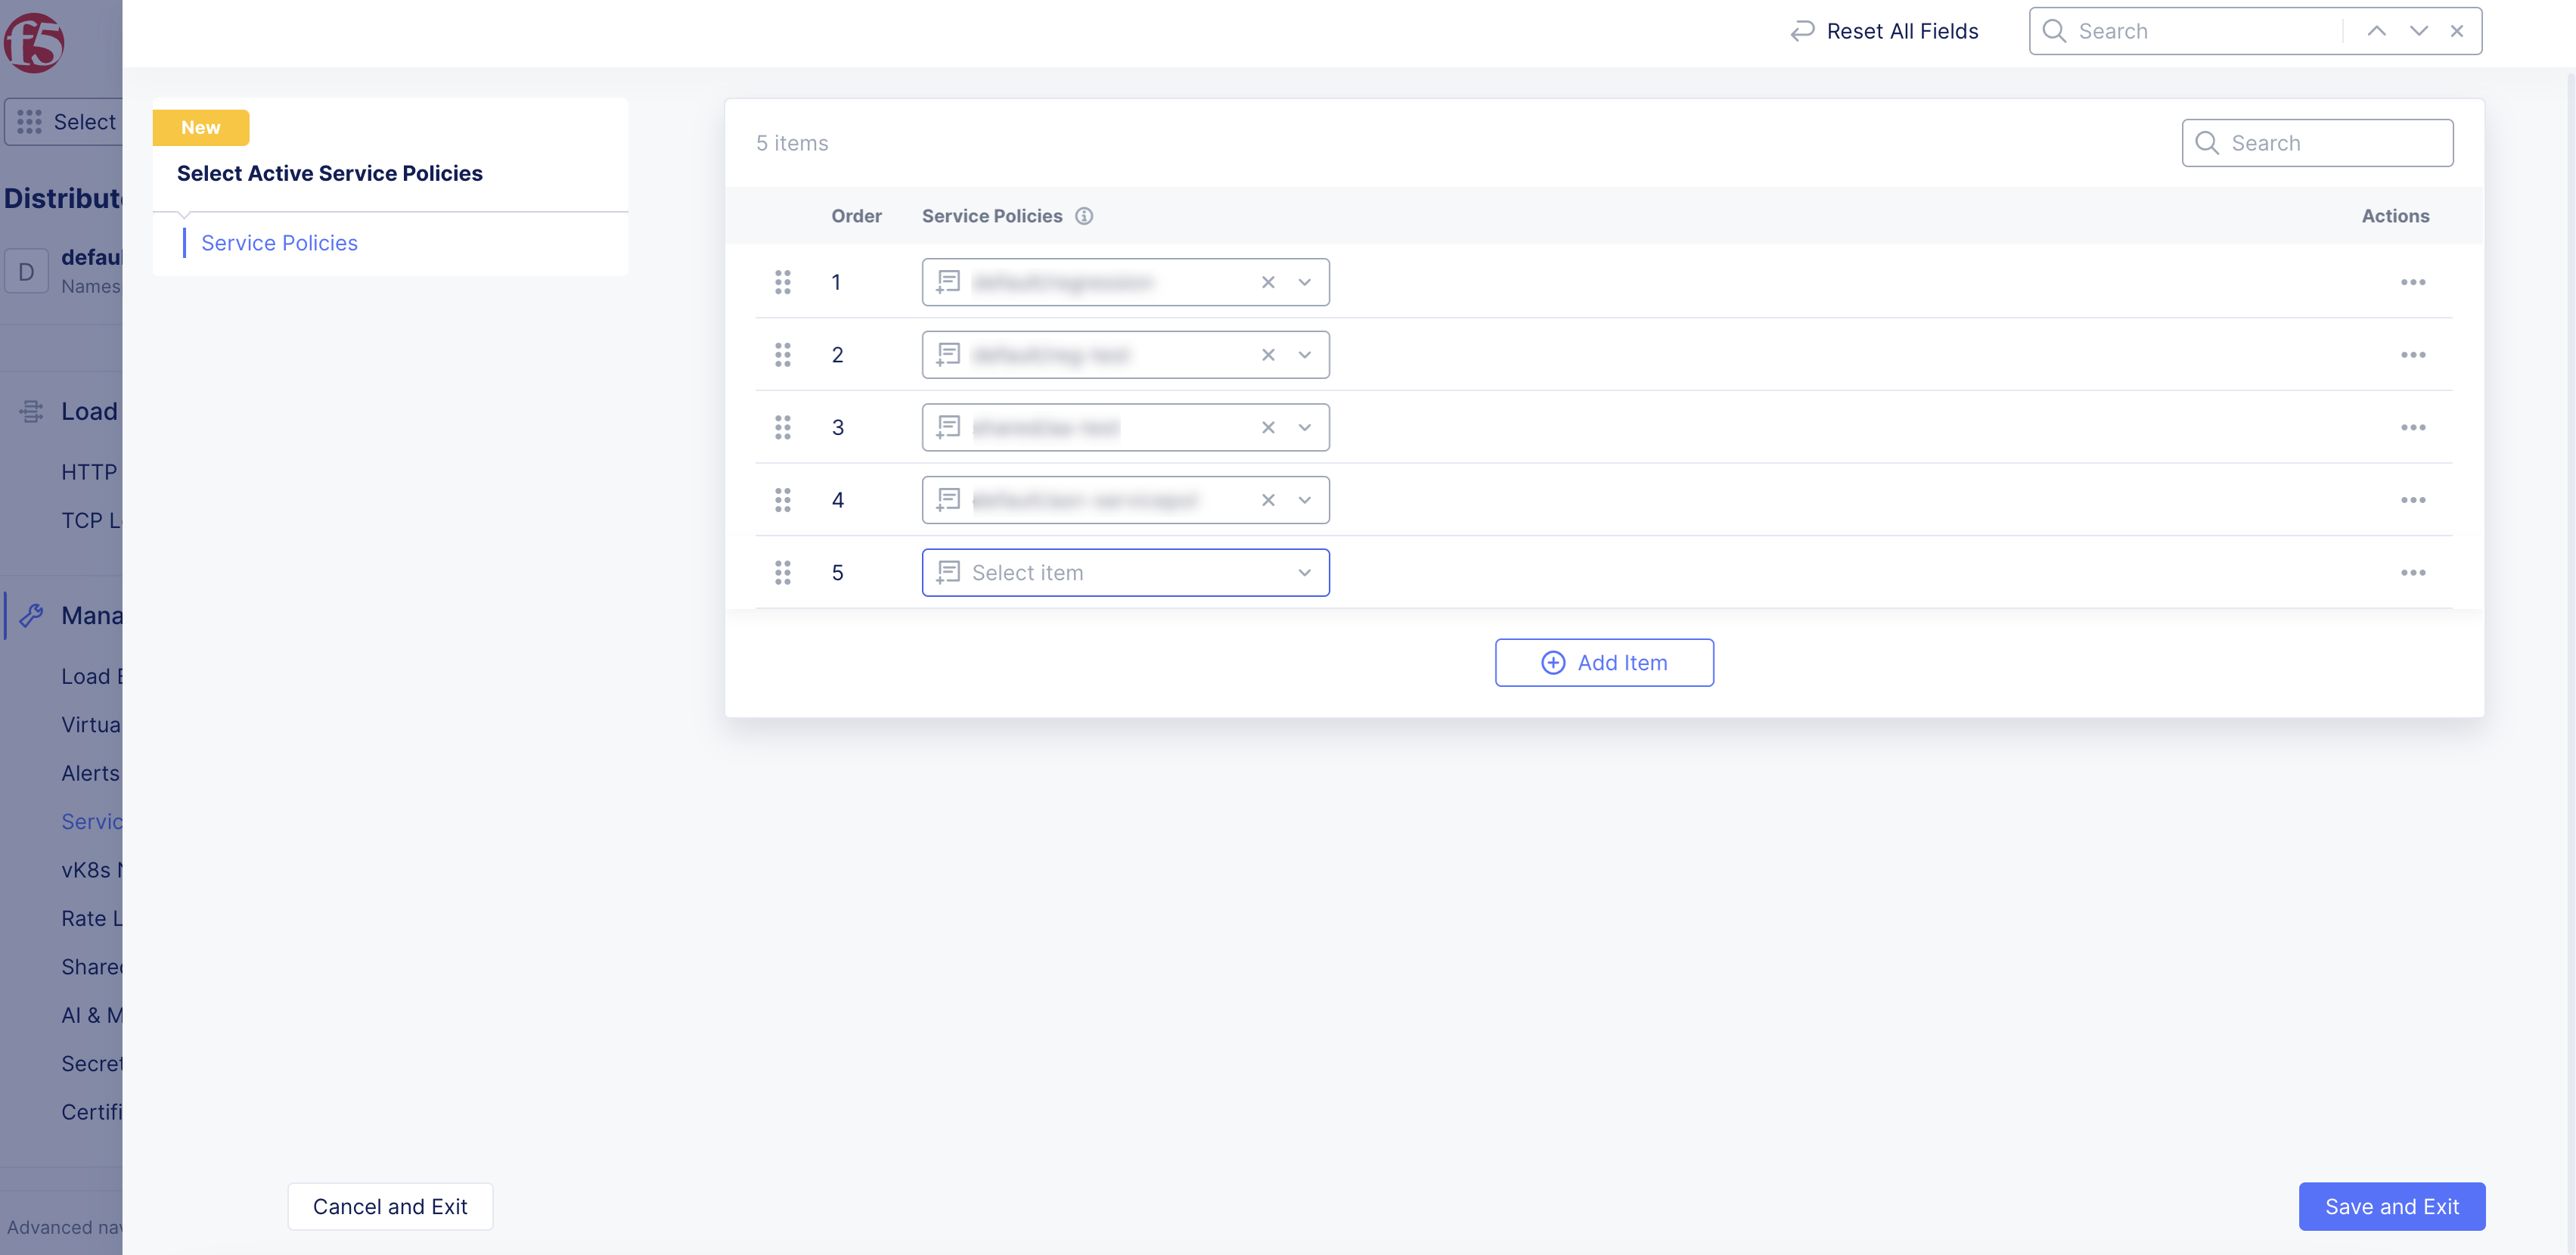
Figure: Select Active Service Policy
Verify the Policy Operation
Perform the following to verify the policy operation:
-
Send a request to your application in the namespace from which you set up the service policy.
-
Under
Distributed Apps, clickManage>vK8s Network Policies>Network Policies. Or clickManage>Service Policies>Service Policiesfrom underWeb App & API Protection. -
Check the
Hitsfield for your policy to view how many times the policy was applied. -
Click on the value in the
Hitsfield to view the rule hits.