Manage Multiple Custom Certificates
Objective
This guide provides instructions for associating multiple TLS certificates with a single HTTP or TCP Load Balancer, and also shows how you can manage TLS certificates and intermediate certificate chains from a central place in the F5® Distributed Cloud Console. Therefore, you can simply host multiple domains with separate certificates from a single load balancer, instead of having to create multiple load balancers for multiple domains.
The TLS certificates and chains can also be shared across multiple load balancers. This also reduces the need for re-minting certificates to contain wildcards or multiple subject alternate names.
Using the instructions provided in this guide, you can perform the following in the Console:
-
Create TLS certificates and optionally associate them with an intermediate chain.
-
Attach certificates to an HTTP load balancer.
Note: This feature is only supported for TLS custom certificates, also known as Bring Your Own Certificates (BYOC). Also, the support includes only HTTP Load Balancers and TCP Load Balancers advertised publicly.
Prerequisites
The following prerequisites apply:
-
A Distributed Cloud Services Account. If you do not have an account, see Create an Account.
-
One or more DNS domains for your web application. Obtain a domain from the Internet domain registrar.
-
One or more TLS certificates of type PEM or PKCS12.
Configuration
Managing multiple TLS custom certificates includes creating TLS certificate object along with uploading the certificate, and applying the certificate to a load balancer during its creation. You can find certificate management configuration in Multi-Cloud App Connect, Web App & API Protection, Distributed Apps, and Shared Configuration services. This guide presents the steps in Multi-Cloud App Connect service.
Note: This guide presents only the certificate management part of HTTP load balancer configuration. See HTTP Load Balancer and TCP Load Balancer guides for detailed HTTPS and TCP load balancer configuration steps such as origin pools, advertisement, etc.
Create TLS Certificates
Log into F5 Distributed Cloud Console and do the following:
Step 1: Navigate to certificate management and start creating TLS certificate.
-
Select
Multi-Cloud App Connectservice in the home page. -
Select
Certificate Managementfrom the left menu and selectTLS Certificates. -
Click
Add TLS Certificate.
Step 2: Configure certificate properties and upload the certificate.
-
Enter a name in the
Namefield of the metadata section. -
Optionally, set labels and add a description for your chain.
-
In the
Certificatefield, clickImport from File. -
In the import window, click
Upload Fileto upload the certificate file in PEM or PKCS12 format. The page will display password and key configuration settings according to the certificate format.
Note: In case of PKCS12 format, the certificate and key are in the same file, so the key field is not displayed, but password field is displayed and needs to be entered. In case of PEM format, you will be required to upload a key file, but password is not required. This example shows PKCS12 format.
-
Enter password in the
Passwordfield. -
Optionally, select a key choice for the
Key Typefield. Blindfold is selected by default. -
Optionally, select a policy choice for the
Policy Typefield. A default built-in policy is selected by default. If you chooseCustom, select a policy from theCustom Policydrop-down.
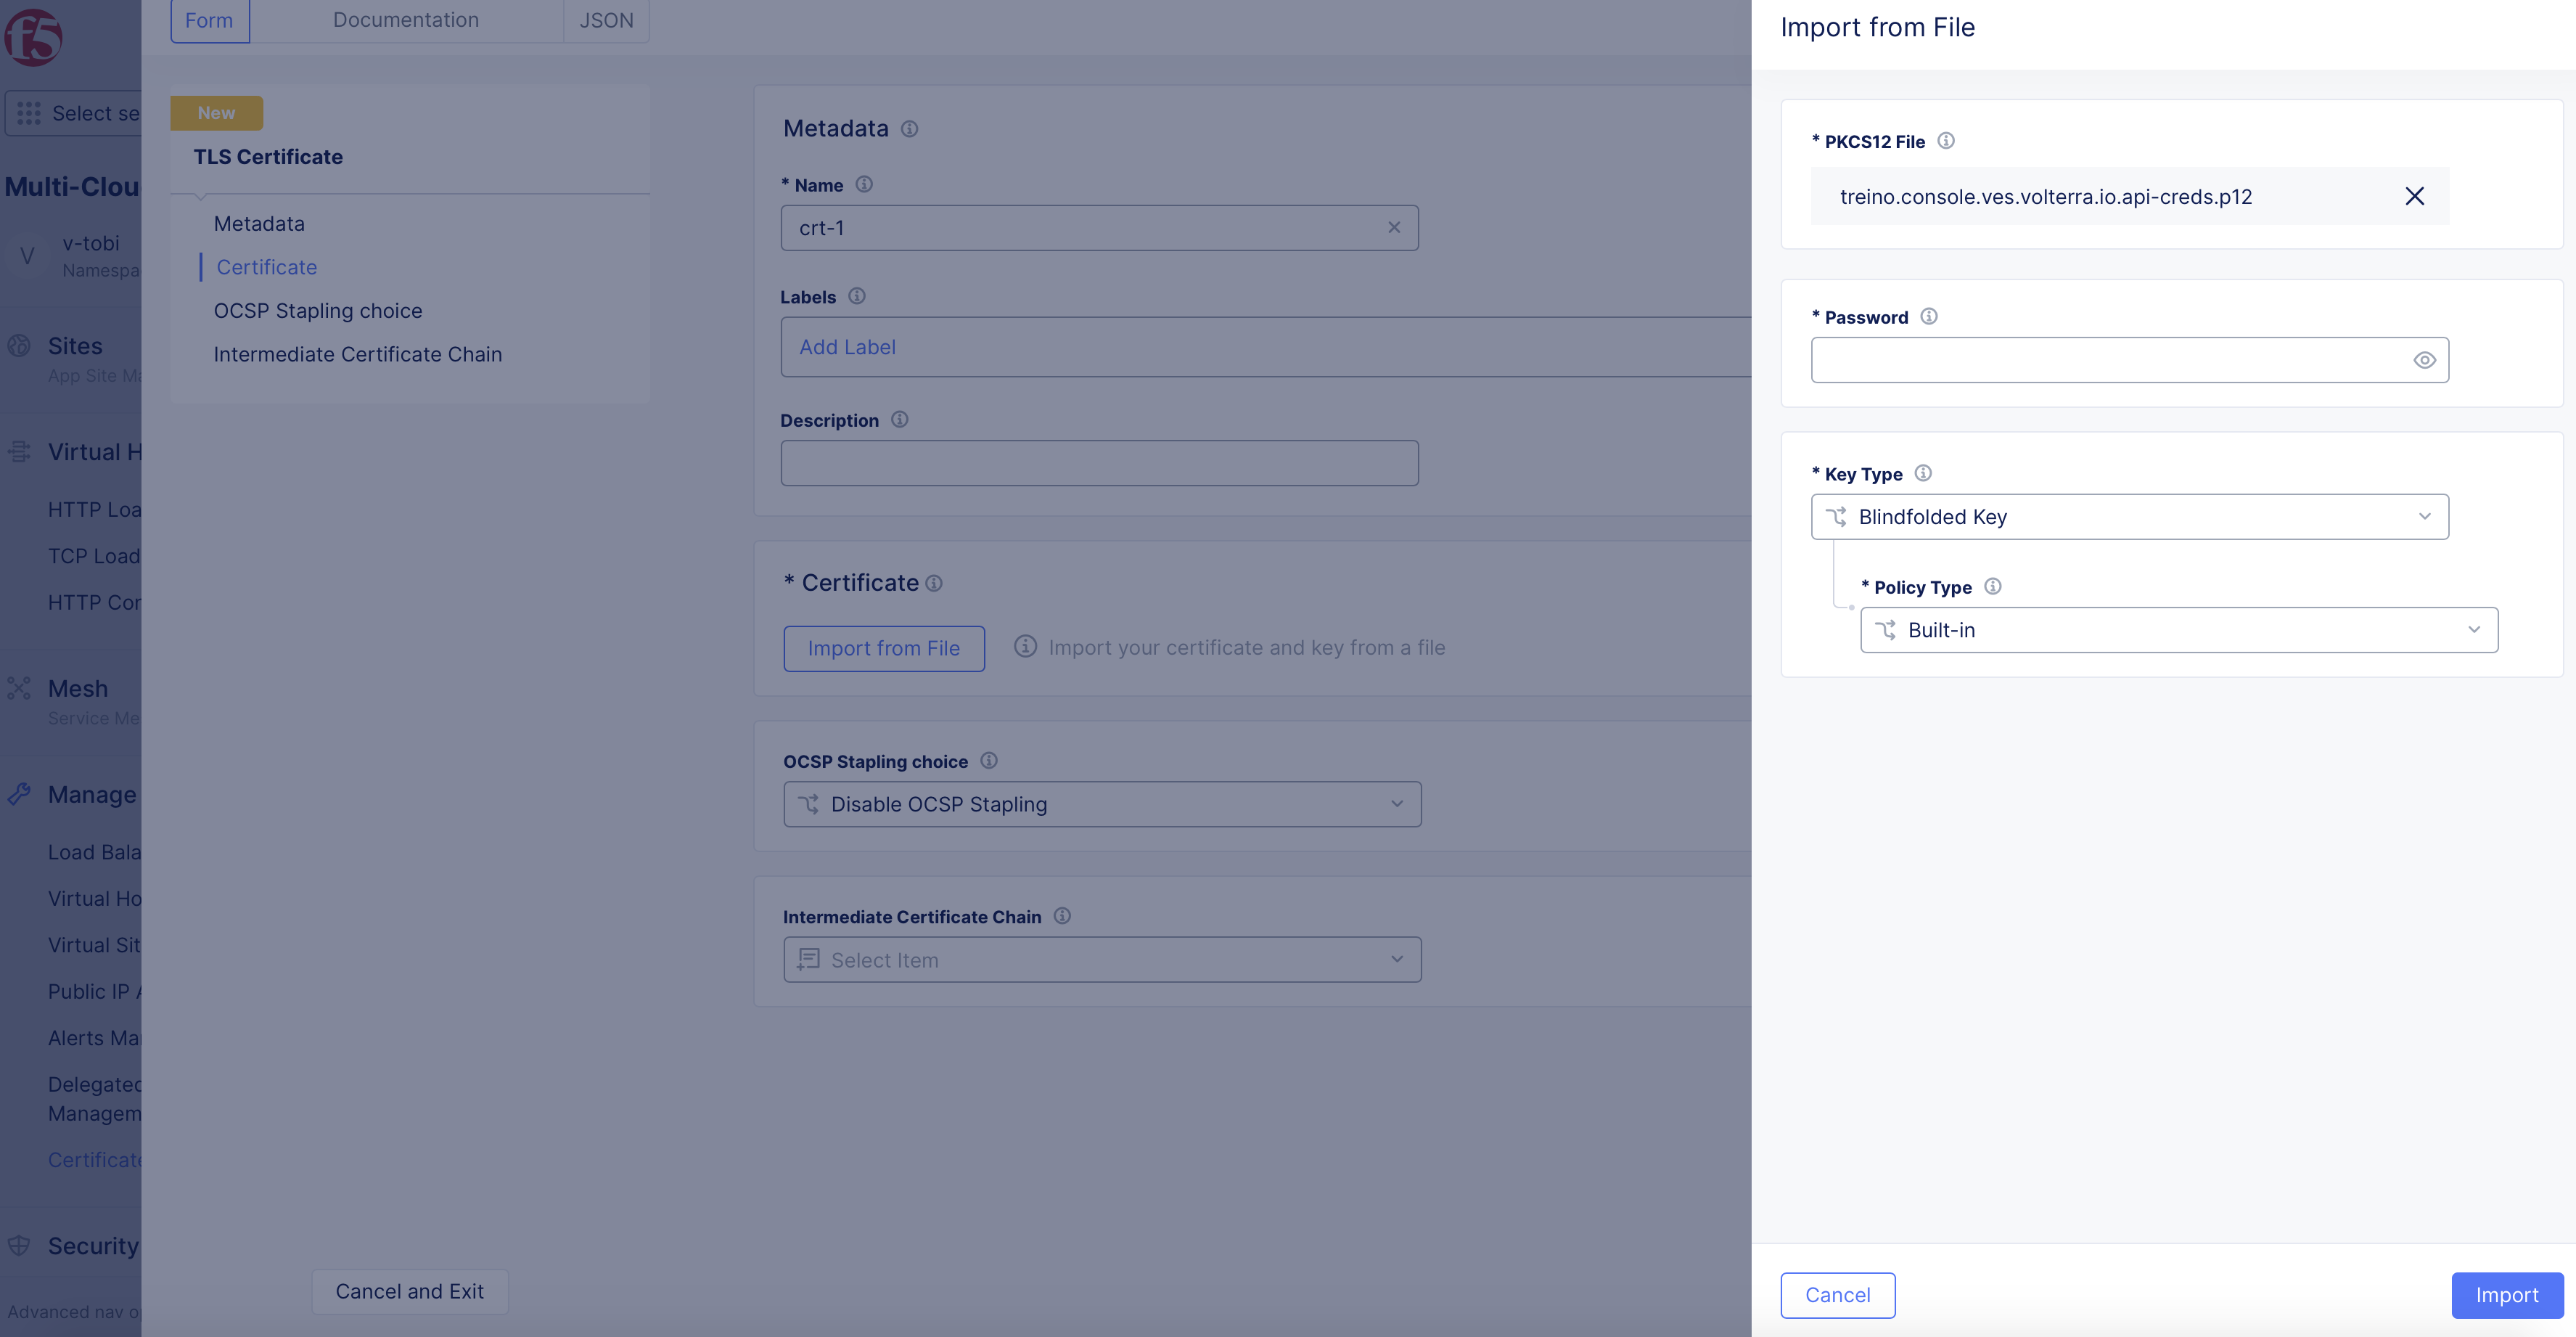
Figure: Upload Certificate File
- Click
Import. The certificate data gets imported.
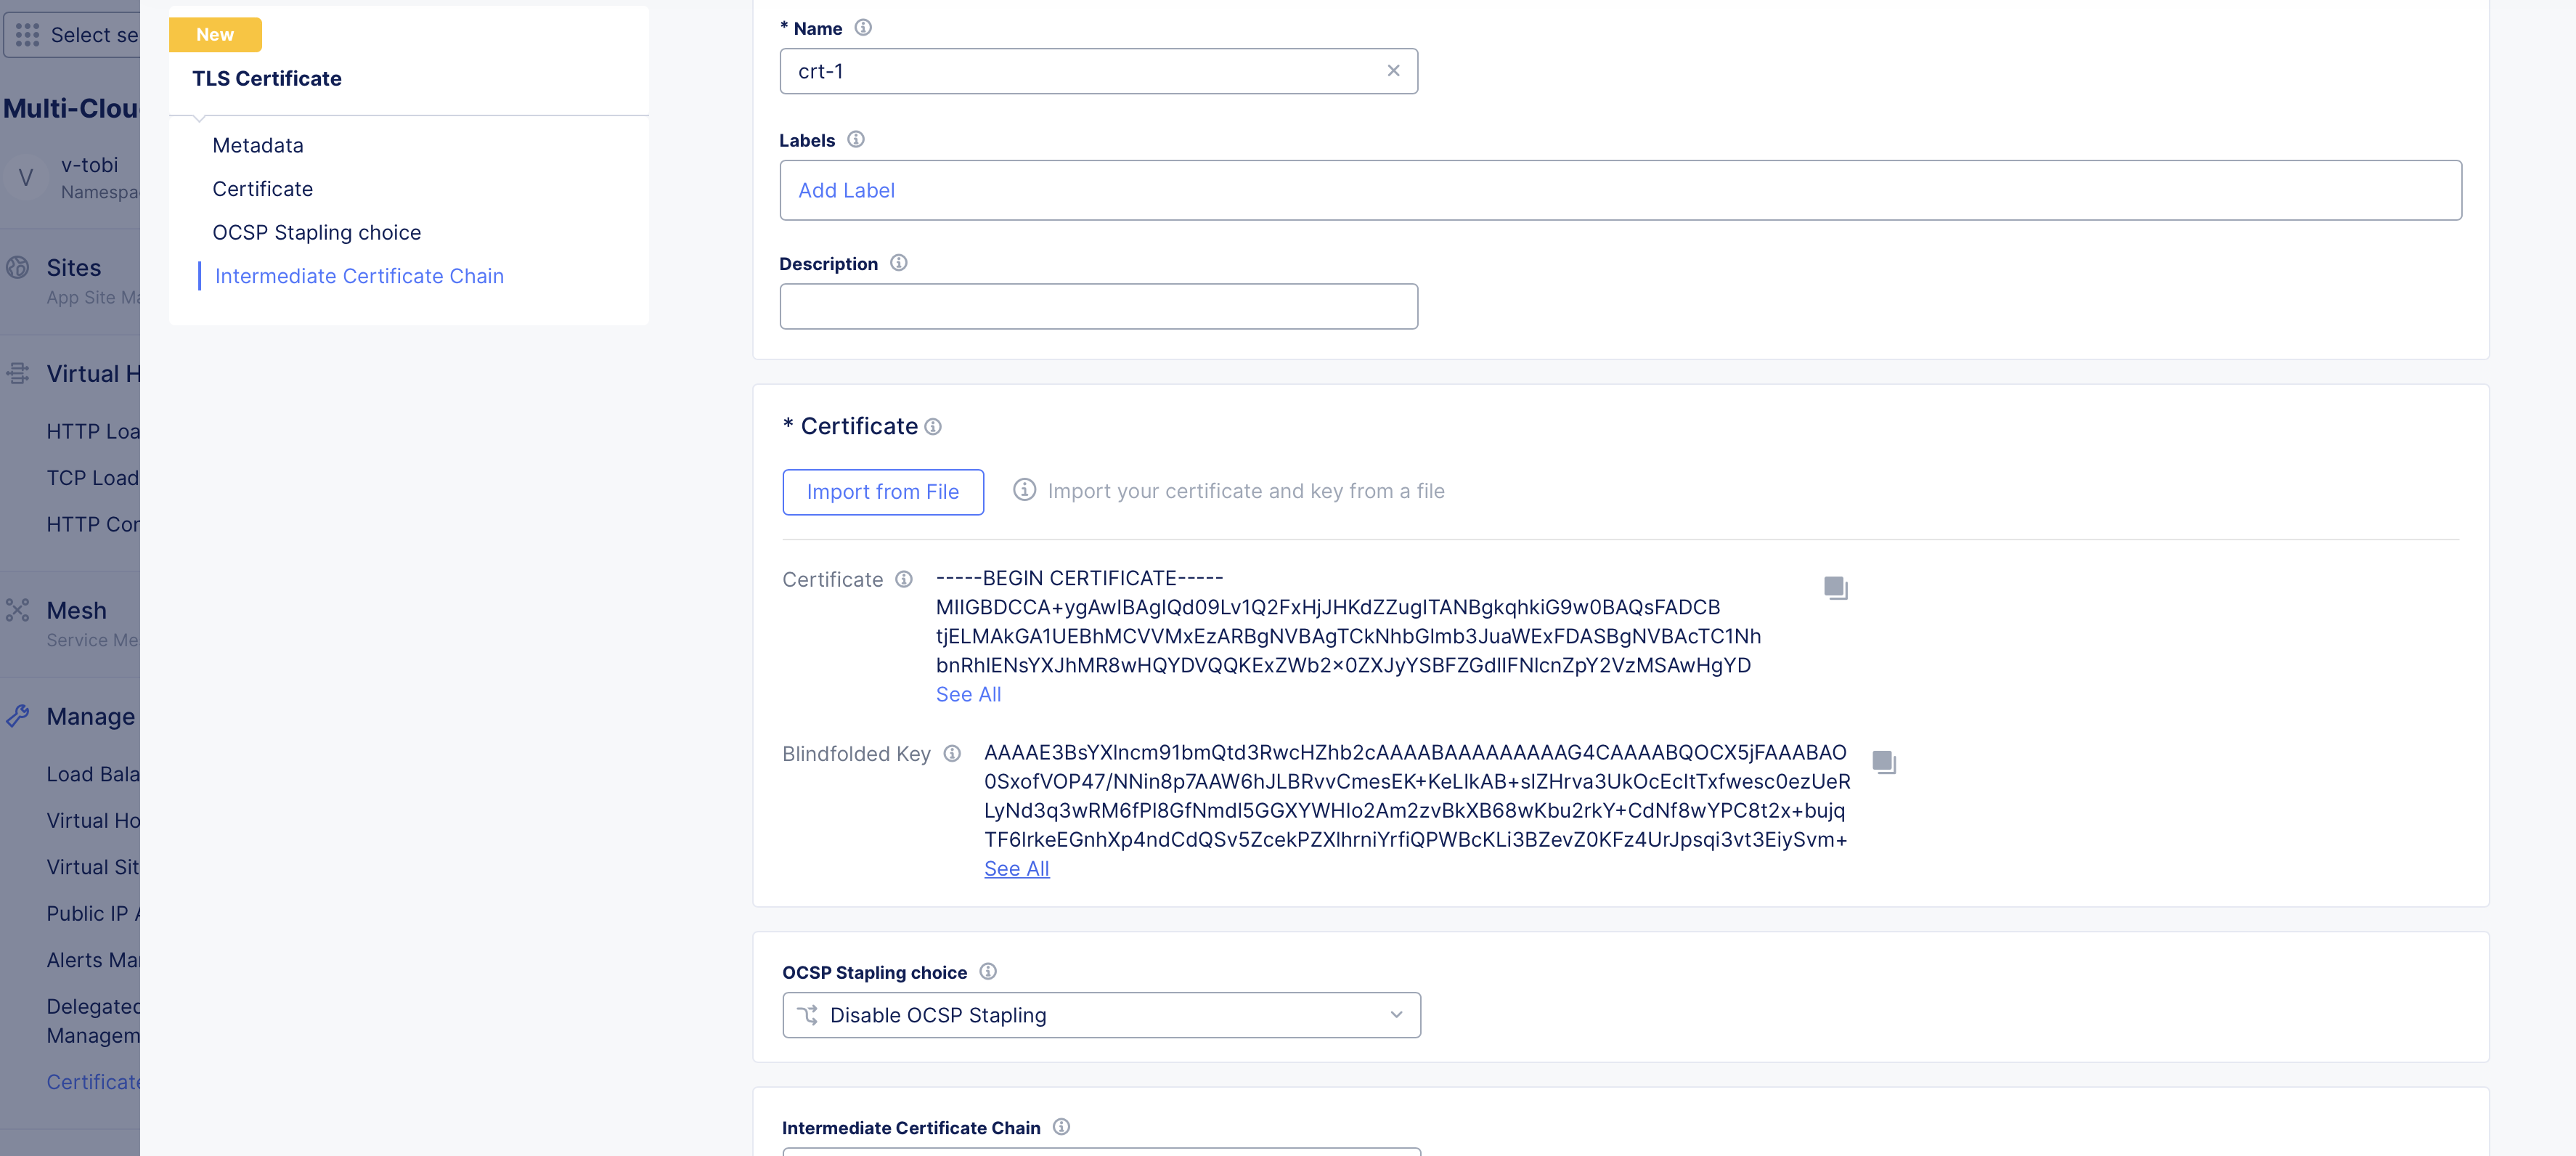
Figure: Certificate Imported
Step 3: Optionally, configure OCSP stapling and intermediate chain.
-
Select one of the following for the
OCSP Stapling choicefield:Fetch with F5XC default settings- Staples OCSP response using the F5 Distributed Cloud default settings.Disable OCSP Stapling- This is set by default and disables OCSP stapling.Use hash algorithms in custom order- Fetches the response in the specified order of algorithms. Specify the order by selecting choices in theHash Algorithmsfield.
Note: See OCSP Stapling for more information on generating certificates with OCSP Stapling.
Creating Intermediate Chain
A user may choose to create an intermediate chain certificate or may combine both in one single TLS certificate file. Therefore, creating intermediate chain object is optional. The following steps show how to create intermediate chain object and associate it with the TLS certificate:
- Click on the
Intermediate Certificate Chainfield and clickAdd Itemto create a new chain and apply it.
Note: You can also select an existing chain object from the displayed list.
-
Enter a name in the
Namefield of the metadata section. -
Optionally, set labels and add a description for your chain.
-
In the
Certificatefield, either enter the intermediate chain string or clickUpload Fileto upload the chain certificate in PEM format.
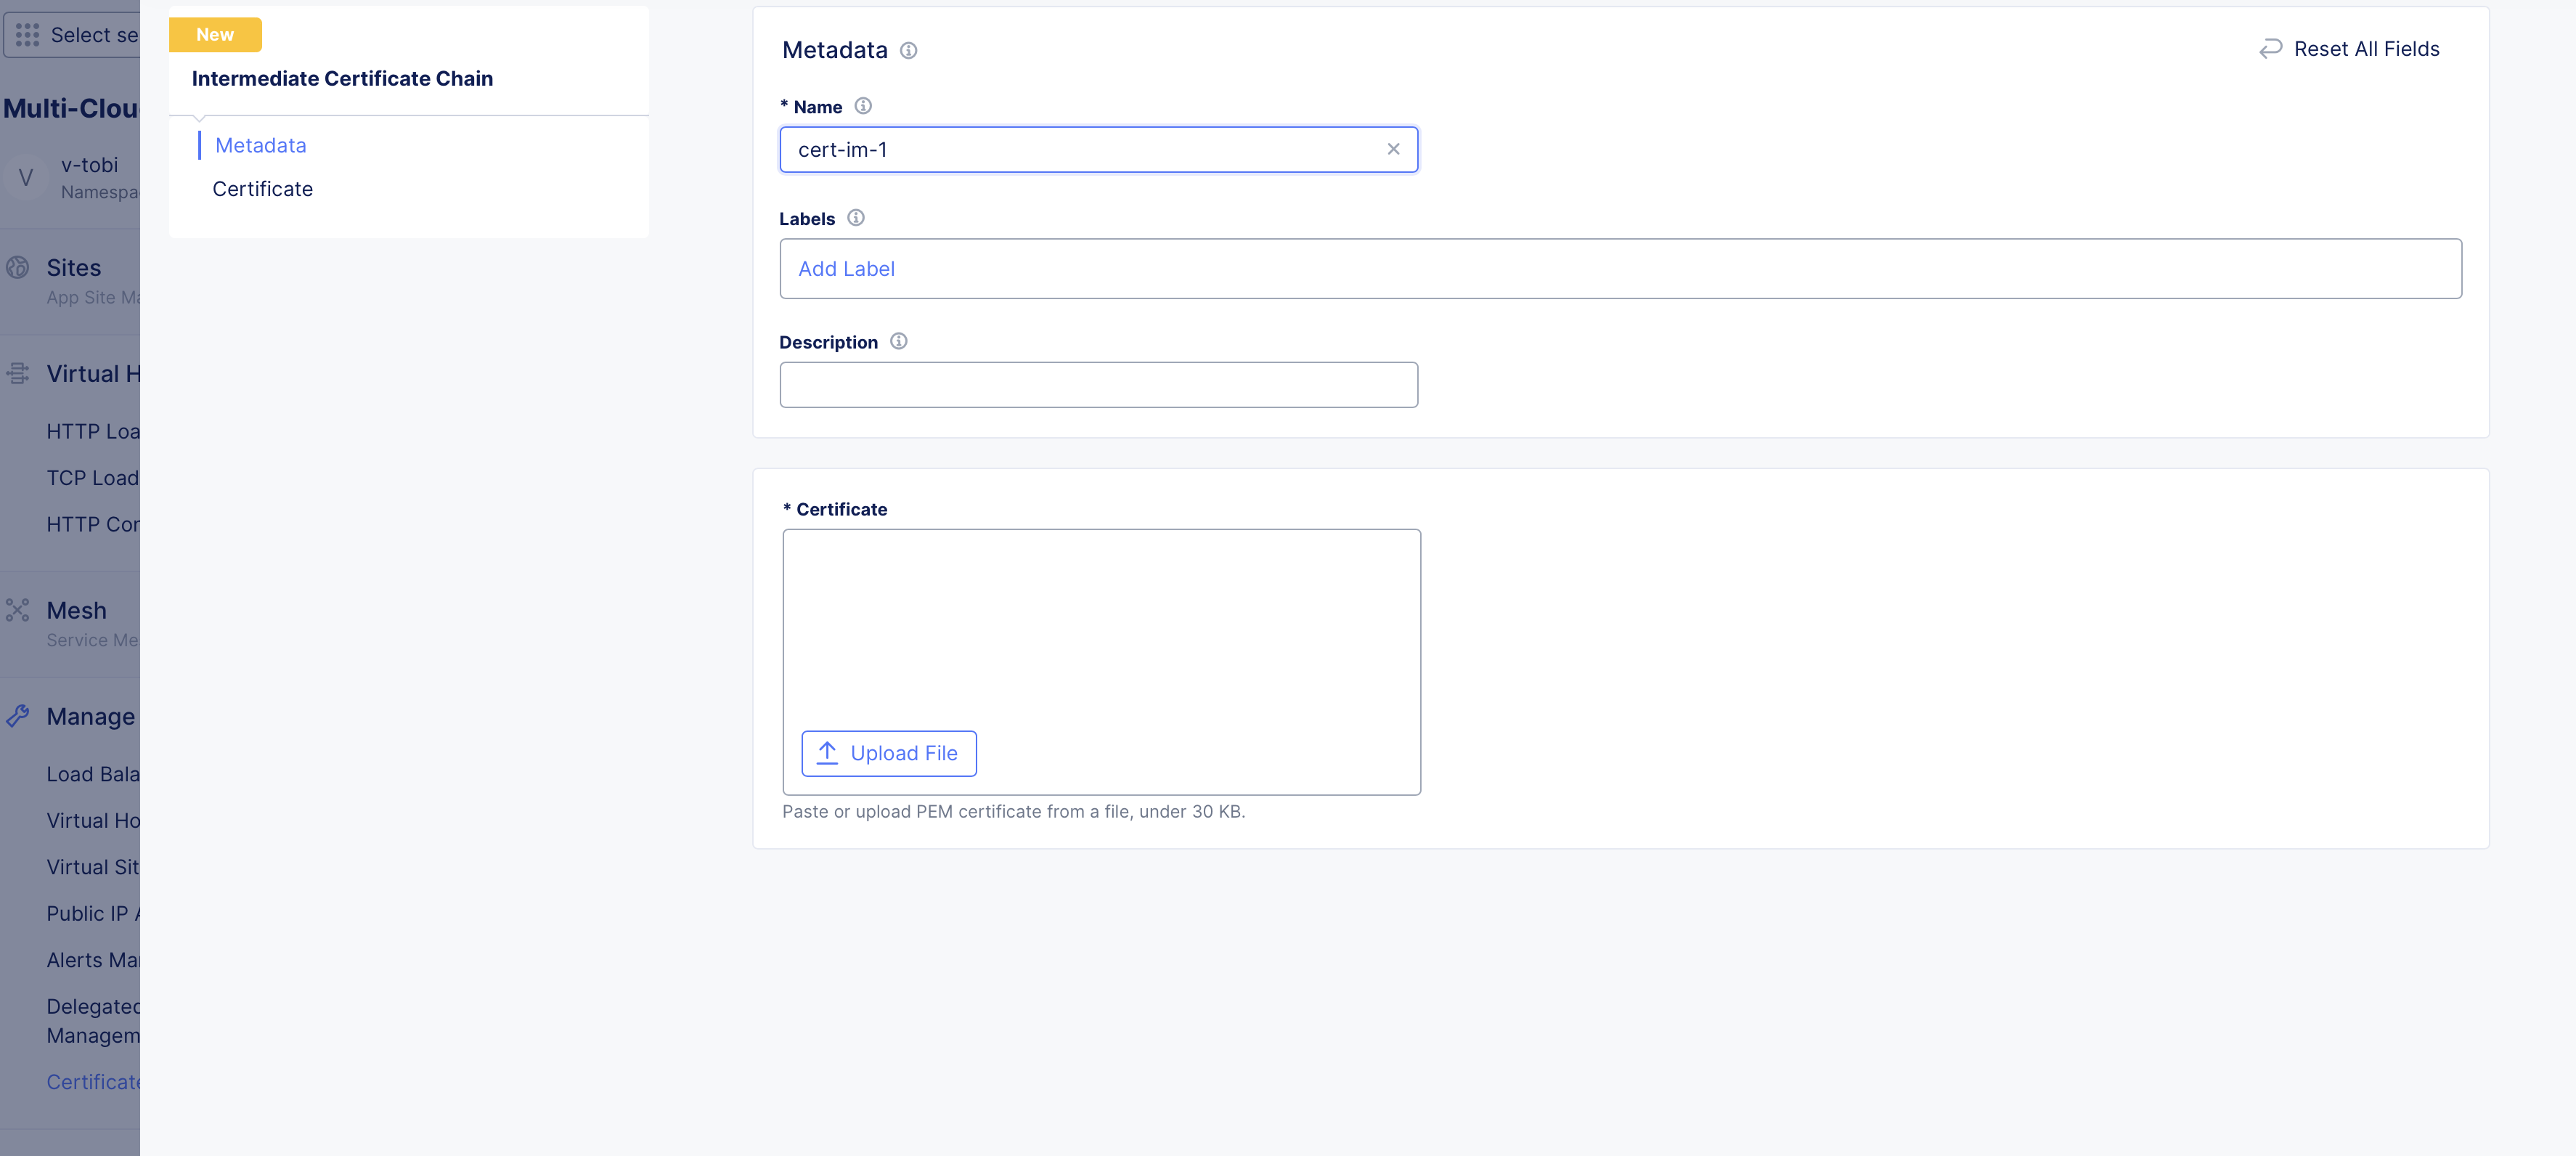
Figure: Upload Chain Certificate File
- Click
Save and Exitto complete creating the chain object.
Step 4: Complete creating the TLS certificate.
Click Save and Exit to complete creating the TLS certificate.
Note: Perform Step 1 to Step 4 to create more certificates as per your requirement.
Attach Certificates to Load Balancer
Log into F5 Distributed Cloud Console and do the following:
Step 1: Start creating load balancer.
-
Select
Multi-Cloud App Connectservice in the home page. -
Select
Manage>Load Balancers>HTTP Load Balancers. -
Click
Add HTTP Load Balancer. -
In the
Namefield, enter a name for the new load balancer. -
In the
Domainsfield, enter a domain name. You can use wildcards to catch prefixes and suffixes. ClickAdd itemto add more domains, if needed. -
Select
HTTPS with Custom Certificatefor theLoad Balancer Typefield.
Step 2: Add TLS certificates.
-
Select for
Multiple Certificatesfor theTLS Configurationfield and clickConfigureunder theMultiple Certificatesfield. -
In the TLS parameters page, click on the drop-down list in the
Certificatesfield and select the certificate created in the previous chapter. Alternatively, you can also useAdd Itemin the drop-down to create a new certificate and apply.
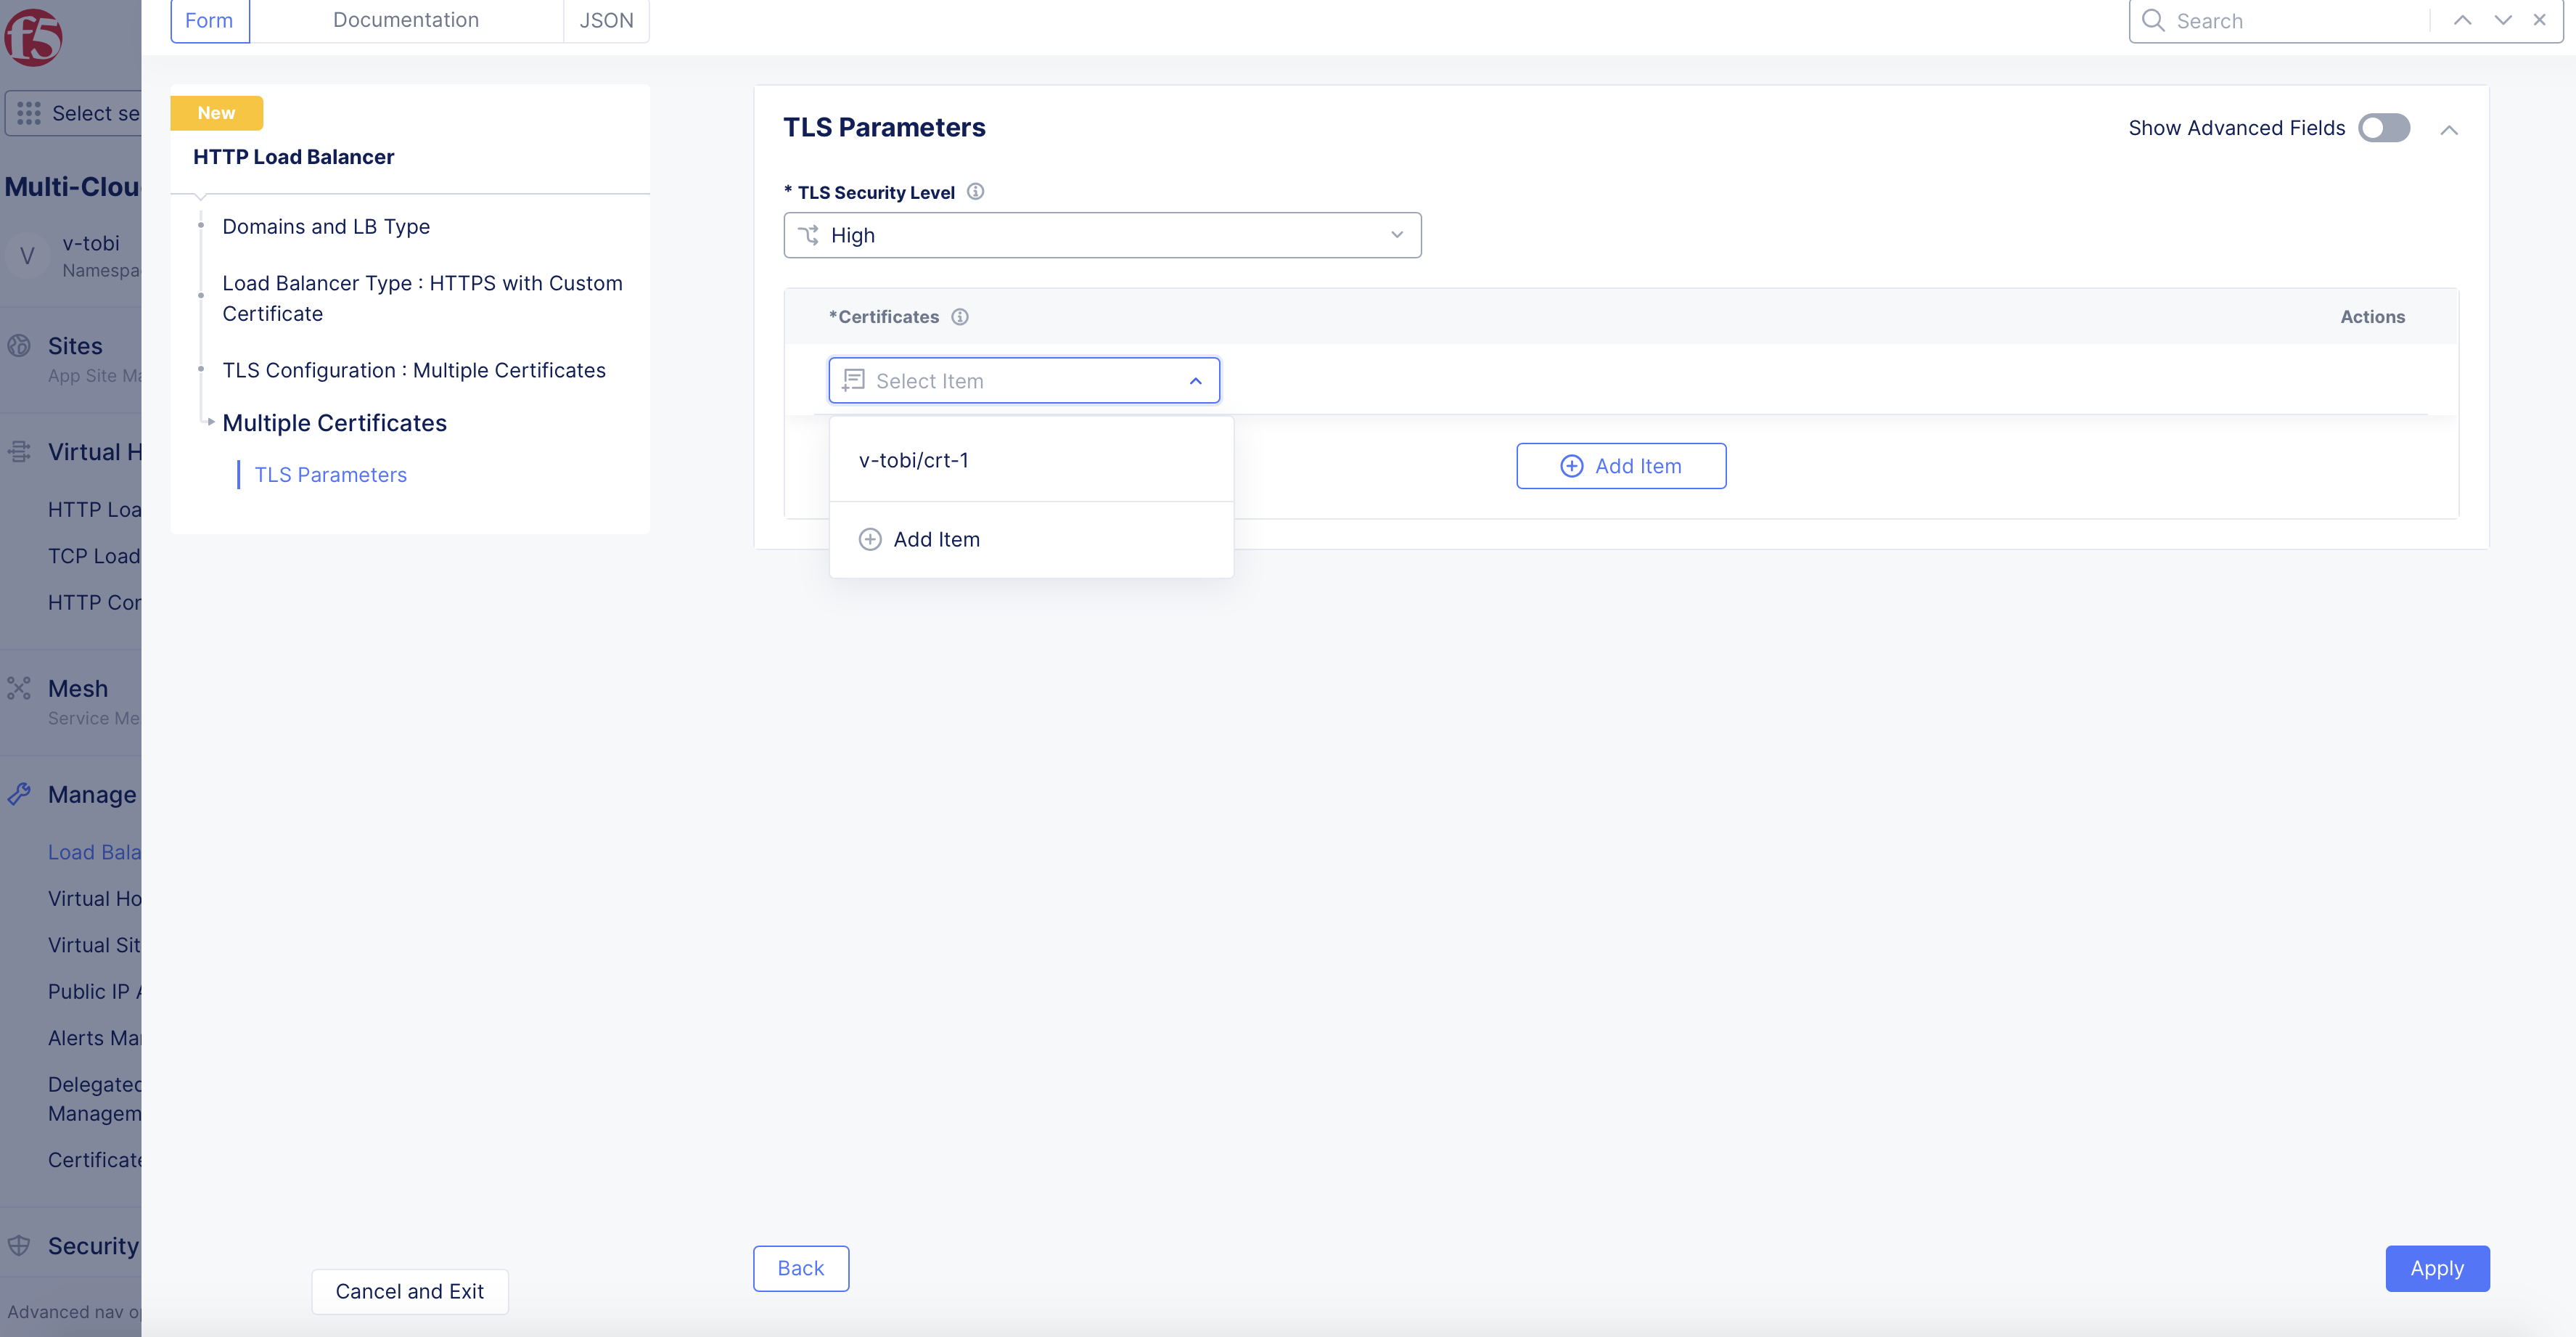
Figure: Add TLS Certificate to Load Balancer
-
Use the
Add Itemin theCertificatesfield to add more than one certificate. -
After adding certificates, click
Applyto add certificates to the load balancer TLS configuration.
Note: Ensure that there is a certificate for each domain. A domain can have multiple certificates and a certificate can be mapped to multiple domains. The following order of priority is considered while mapping each domain to a TLS certificate:
- Choose non-wildcard certificate over wildcard certificate
- Choose certificate with the latest expiration date
- Choose certificate matching CN over the one matching only via SAN
Step 3: Complete creating load balancer.
-
Continue configuring the settings such as origin pools, security settings, advertisement, etc. For more information, see HTTP Load Balancer guide.
-
Click
Save and Exitto complete creating the load balancer.
Note: In the load balancer, if you select
Yesfor theDefault Load Balancerfield (this is visible if you enableShow Advanced Fieldstoggle), the first domain in the list of domains configured in the load balancer is used to pick the certificate attached to the default load balancer.