Configure IP Prefix Sets
Objective
This document provides instructions on how to create IP prefix sets, and apply them to service policies to control application traffic originating from or reaching the sets of IP addresses in F5® Distributed Cloud Services. To know more about service policies, see Service Policy.
Using the instructions provided in this guide, you can create IP prefix sets and configure a service policy to add the IP addresses to an allowlist or denylist so that traffic is allowed or blocked, respectively.
Prerequisites
The following prerequisites apply:
-
An F5 Distributed Cloud Account. If you do not have an account, see Getting Started with Console.
-
An application running on vK8s or deployed on an edge site. If you do not have an application running on vK8s, see vK8s Deployment.
Configuration Sequence
Configuring IP prefix sets and applying them in service policy requires performing the following sequence of actions:
| Phase | Description |
|---|---|
| Create IP Prefix Sets | Create IP prefix sets from the security options in the Console. |
| Create Service Policy Rules | Create policy rules to permit traffic from one IP prefix set and drop traffic from another. |
| Create Service Policy | Create a policy with the configured rules. |
Create IP Prefix Sets
IP prefix sets can be viewed and managed in multiple services: Multi-Cloud Network Connect, Distributed Apps, Shared Configuration, Web App & API Protection, and Multi-Cloud App Connect.
This procedure shows the IP Prefix Set configuration in Shared Configuration.
Step 1: Log into F5 Distributed Cloud Console.
- Open F5 Distributed Cloud Console homepage, select Shared Configuration.
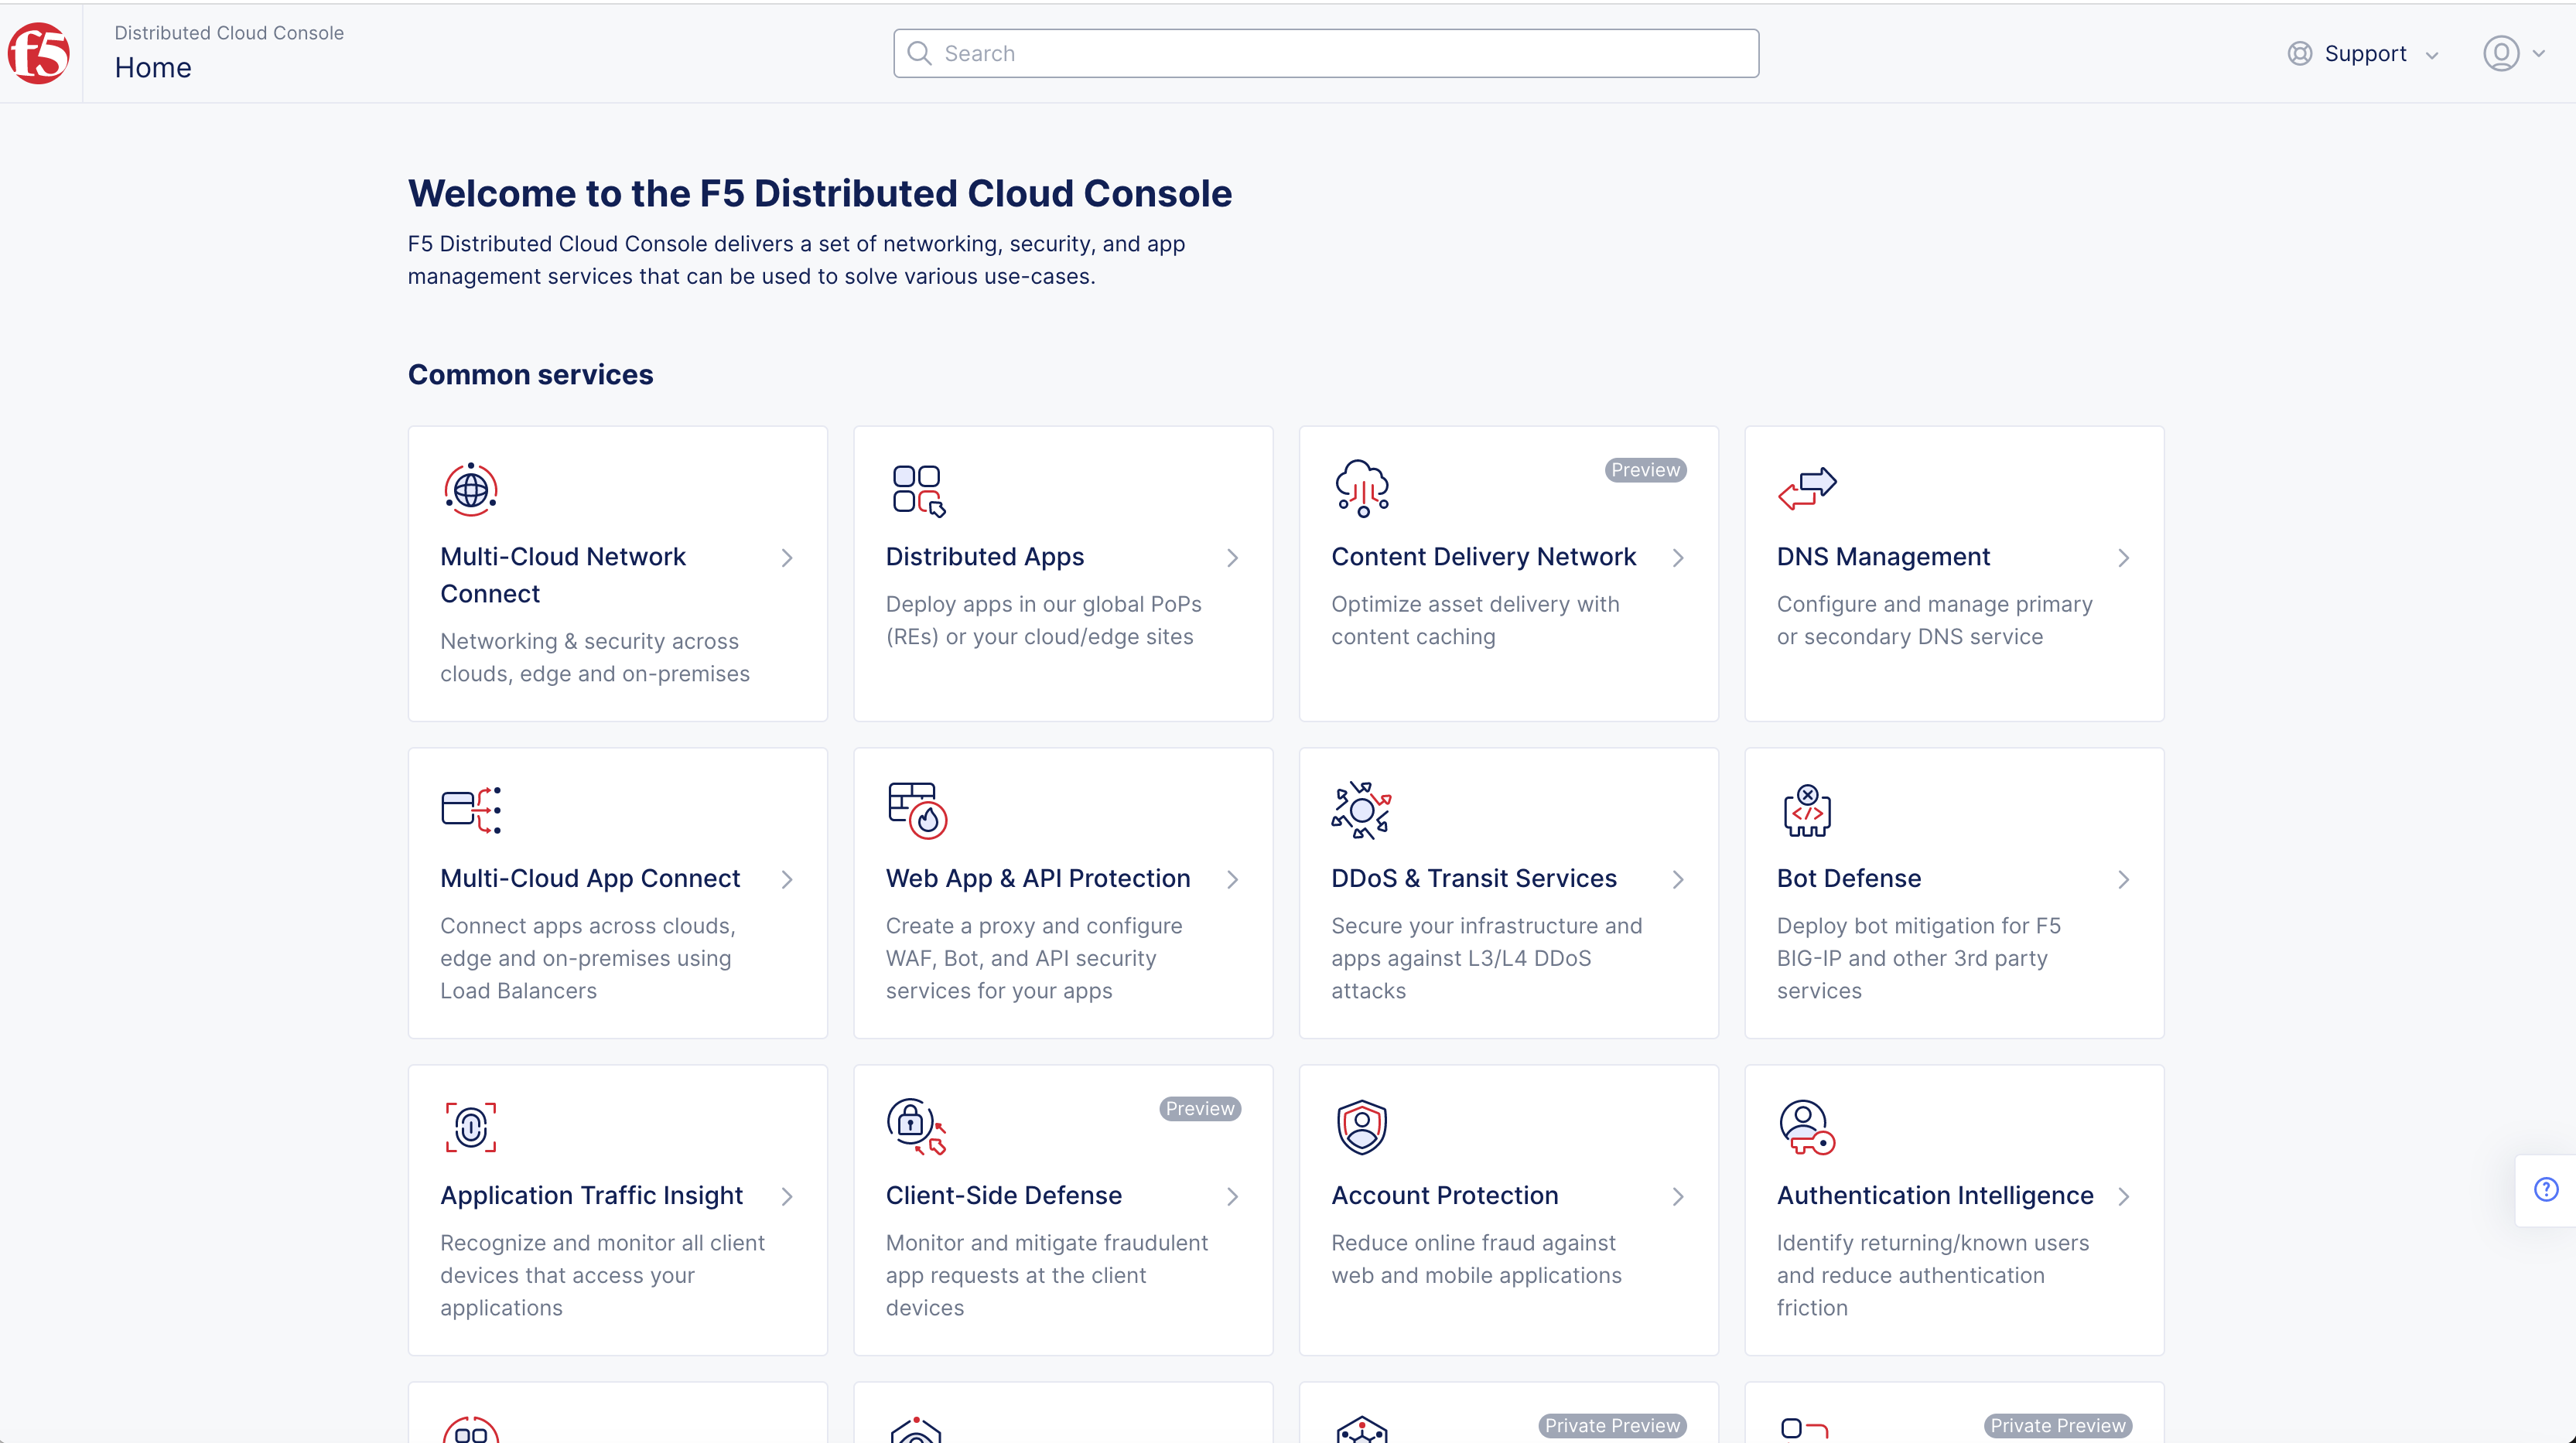
Figure: Homepage
- Select Security > Shared Objects in left column menu. Then select IP Prefix Sets.
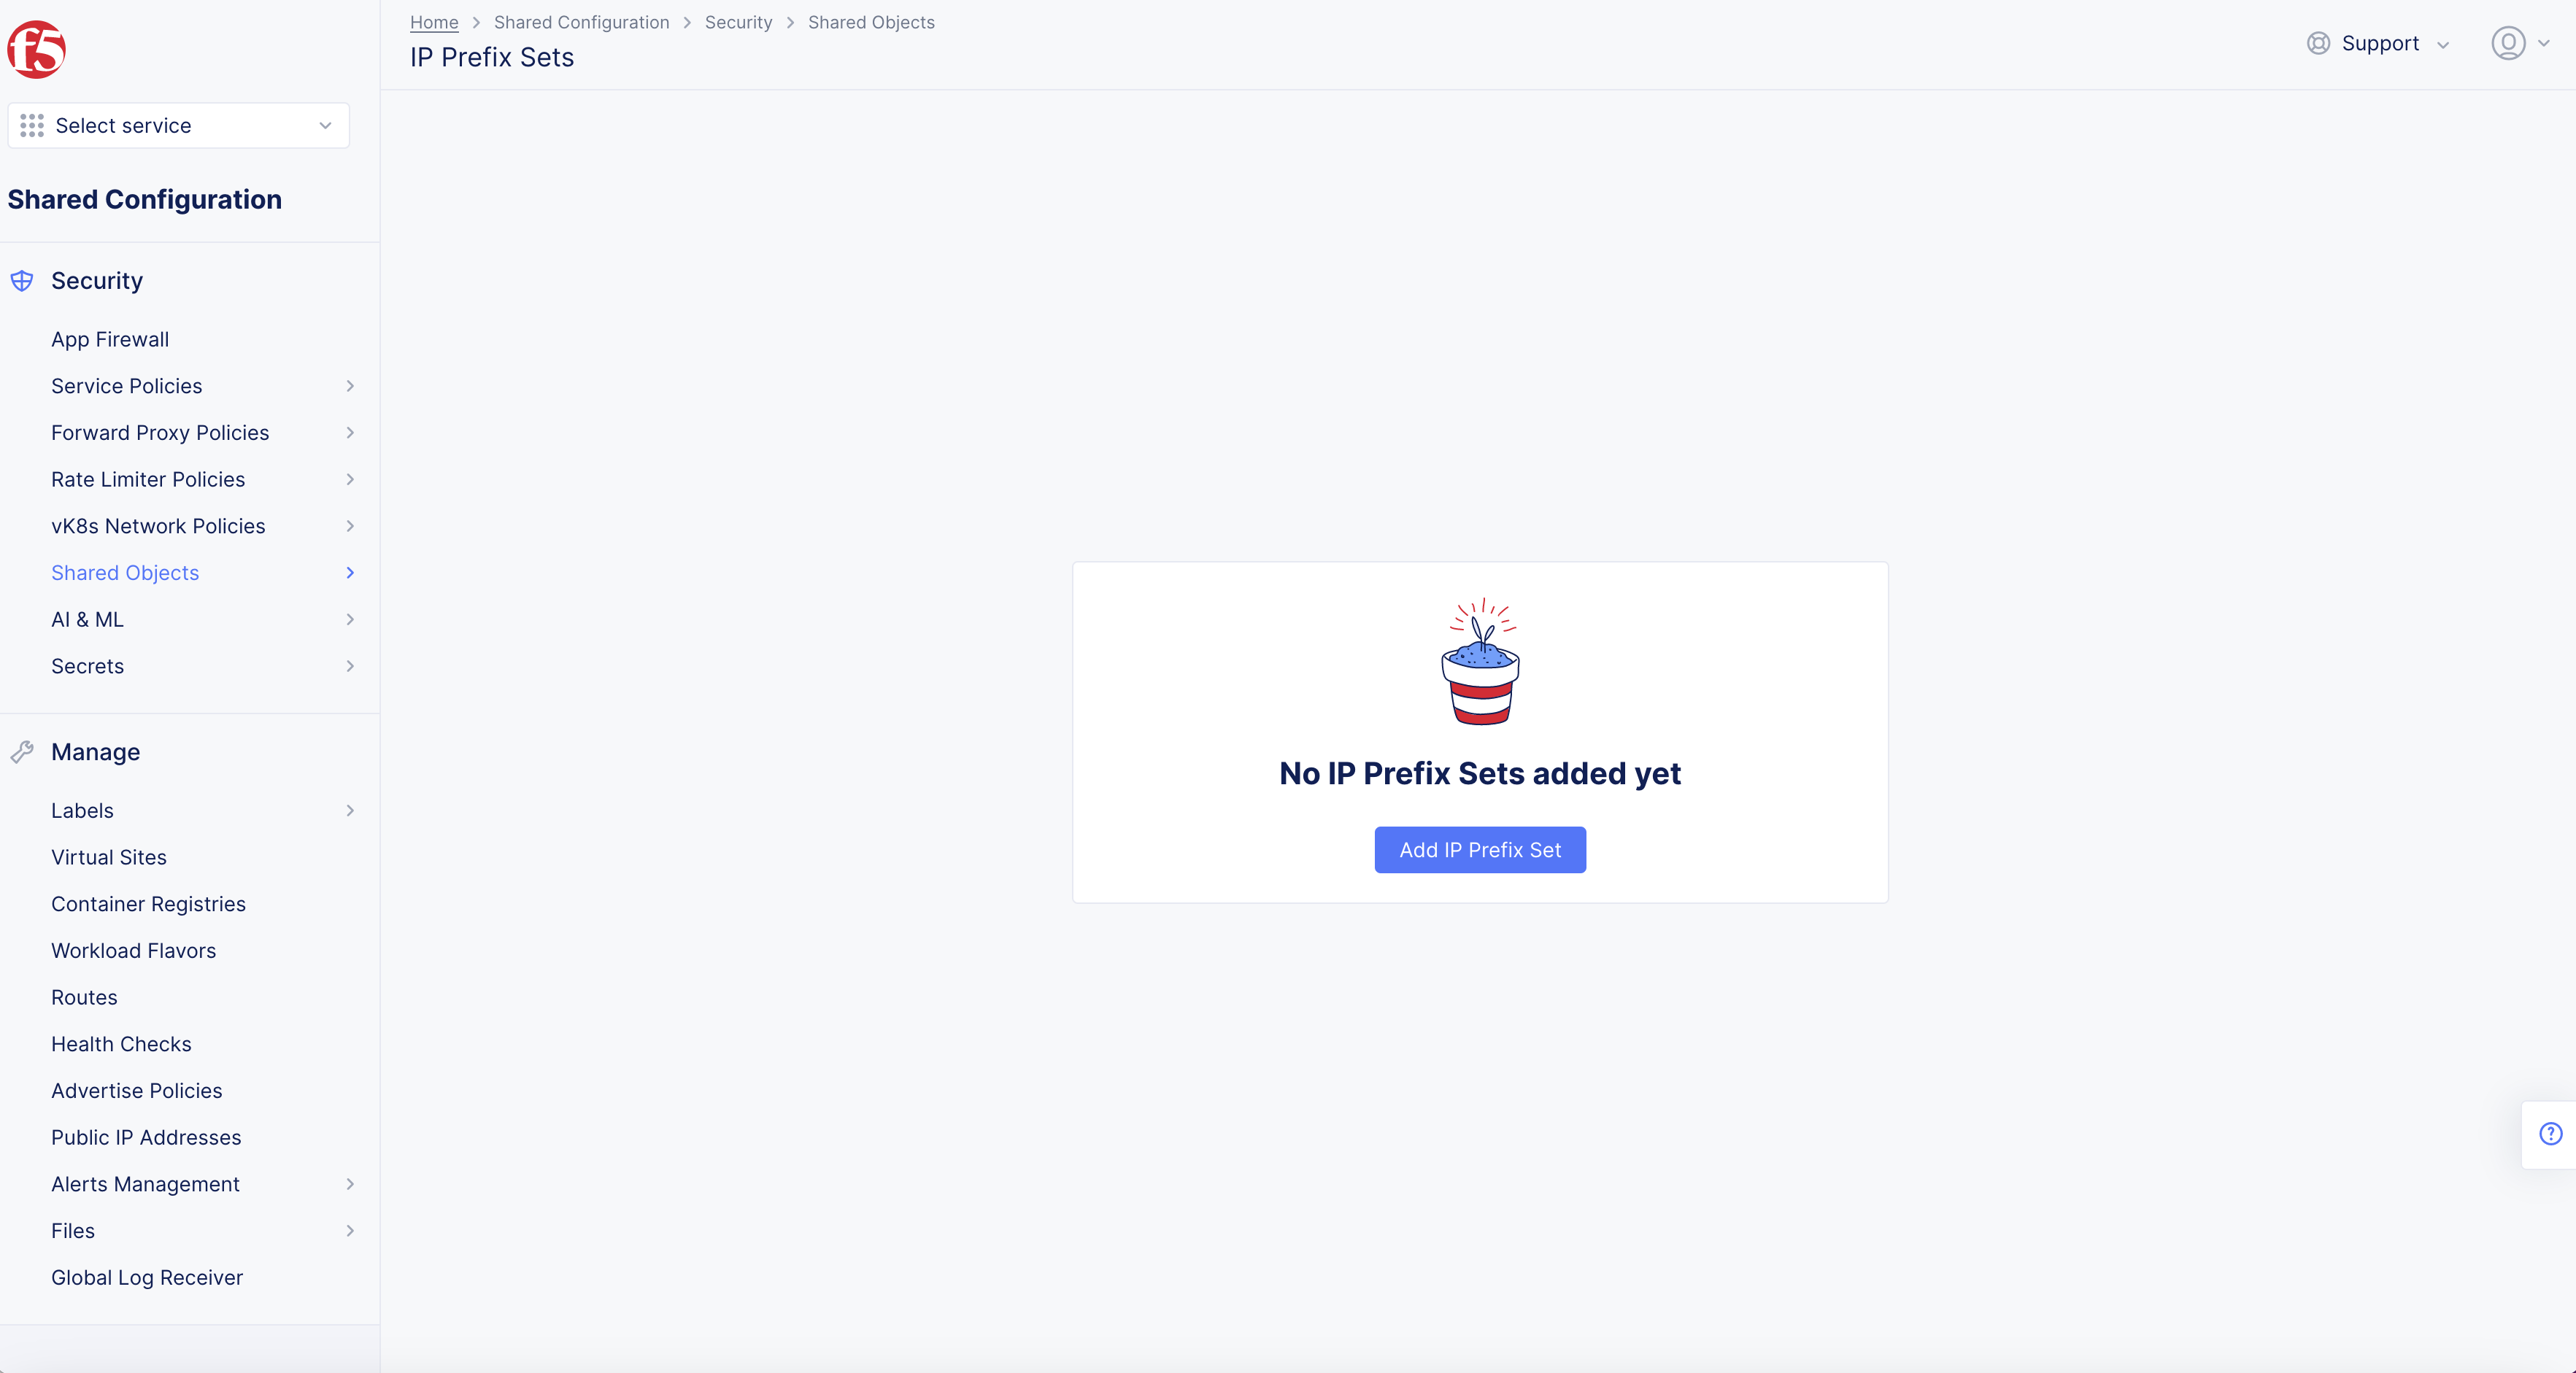
Figure: IP Prefix Set Locations
- Select Add IP Prefix Set.
Step 2: Name the prefix, set labels, and add a description.
-
Enter Name.
-
Enter Labels and Description as needed.

Figure: IP Prefix Set Creation
Step 3: Select the prefix, and enter the prefix from which you want to allow traffic.
-
Select Add Item in IPv4 Prefix or IPv6 Prefix fields as needed.
-
Enter Prefix in field.
Figure: IP Prefix Set Creation
Step 4: Save the IP prefix set.
Select Save and Exit.
Step 5: Create another IP prefix set from which you want to block the traffic.
Repeat Step 1 to Step 4 above.
Create Service Policy Rules
Service policy rules are used in controlling the traffic based on various conditions. This example shows you how to allow or block traffic coming from specific IP addresses. For more information on service policies and rules, see Create Service Policy Rule.
Step 1: Select service policy rules.
- From the Console homepage, select Shared Configuration.
Figure: Homepage
- Select Security in left column menu > select Service Policies > Service Policies.
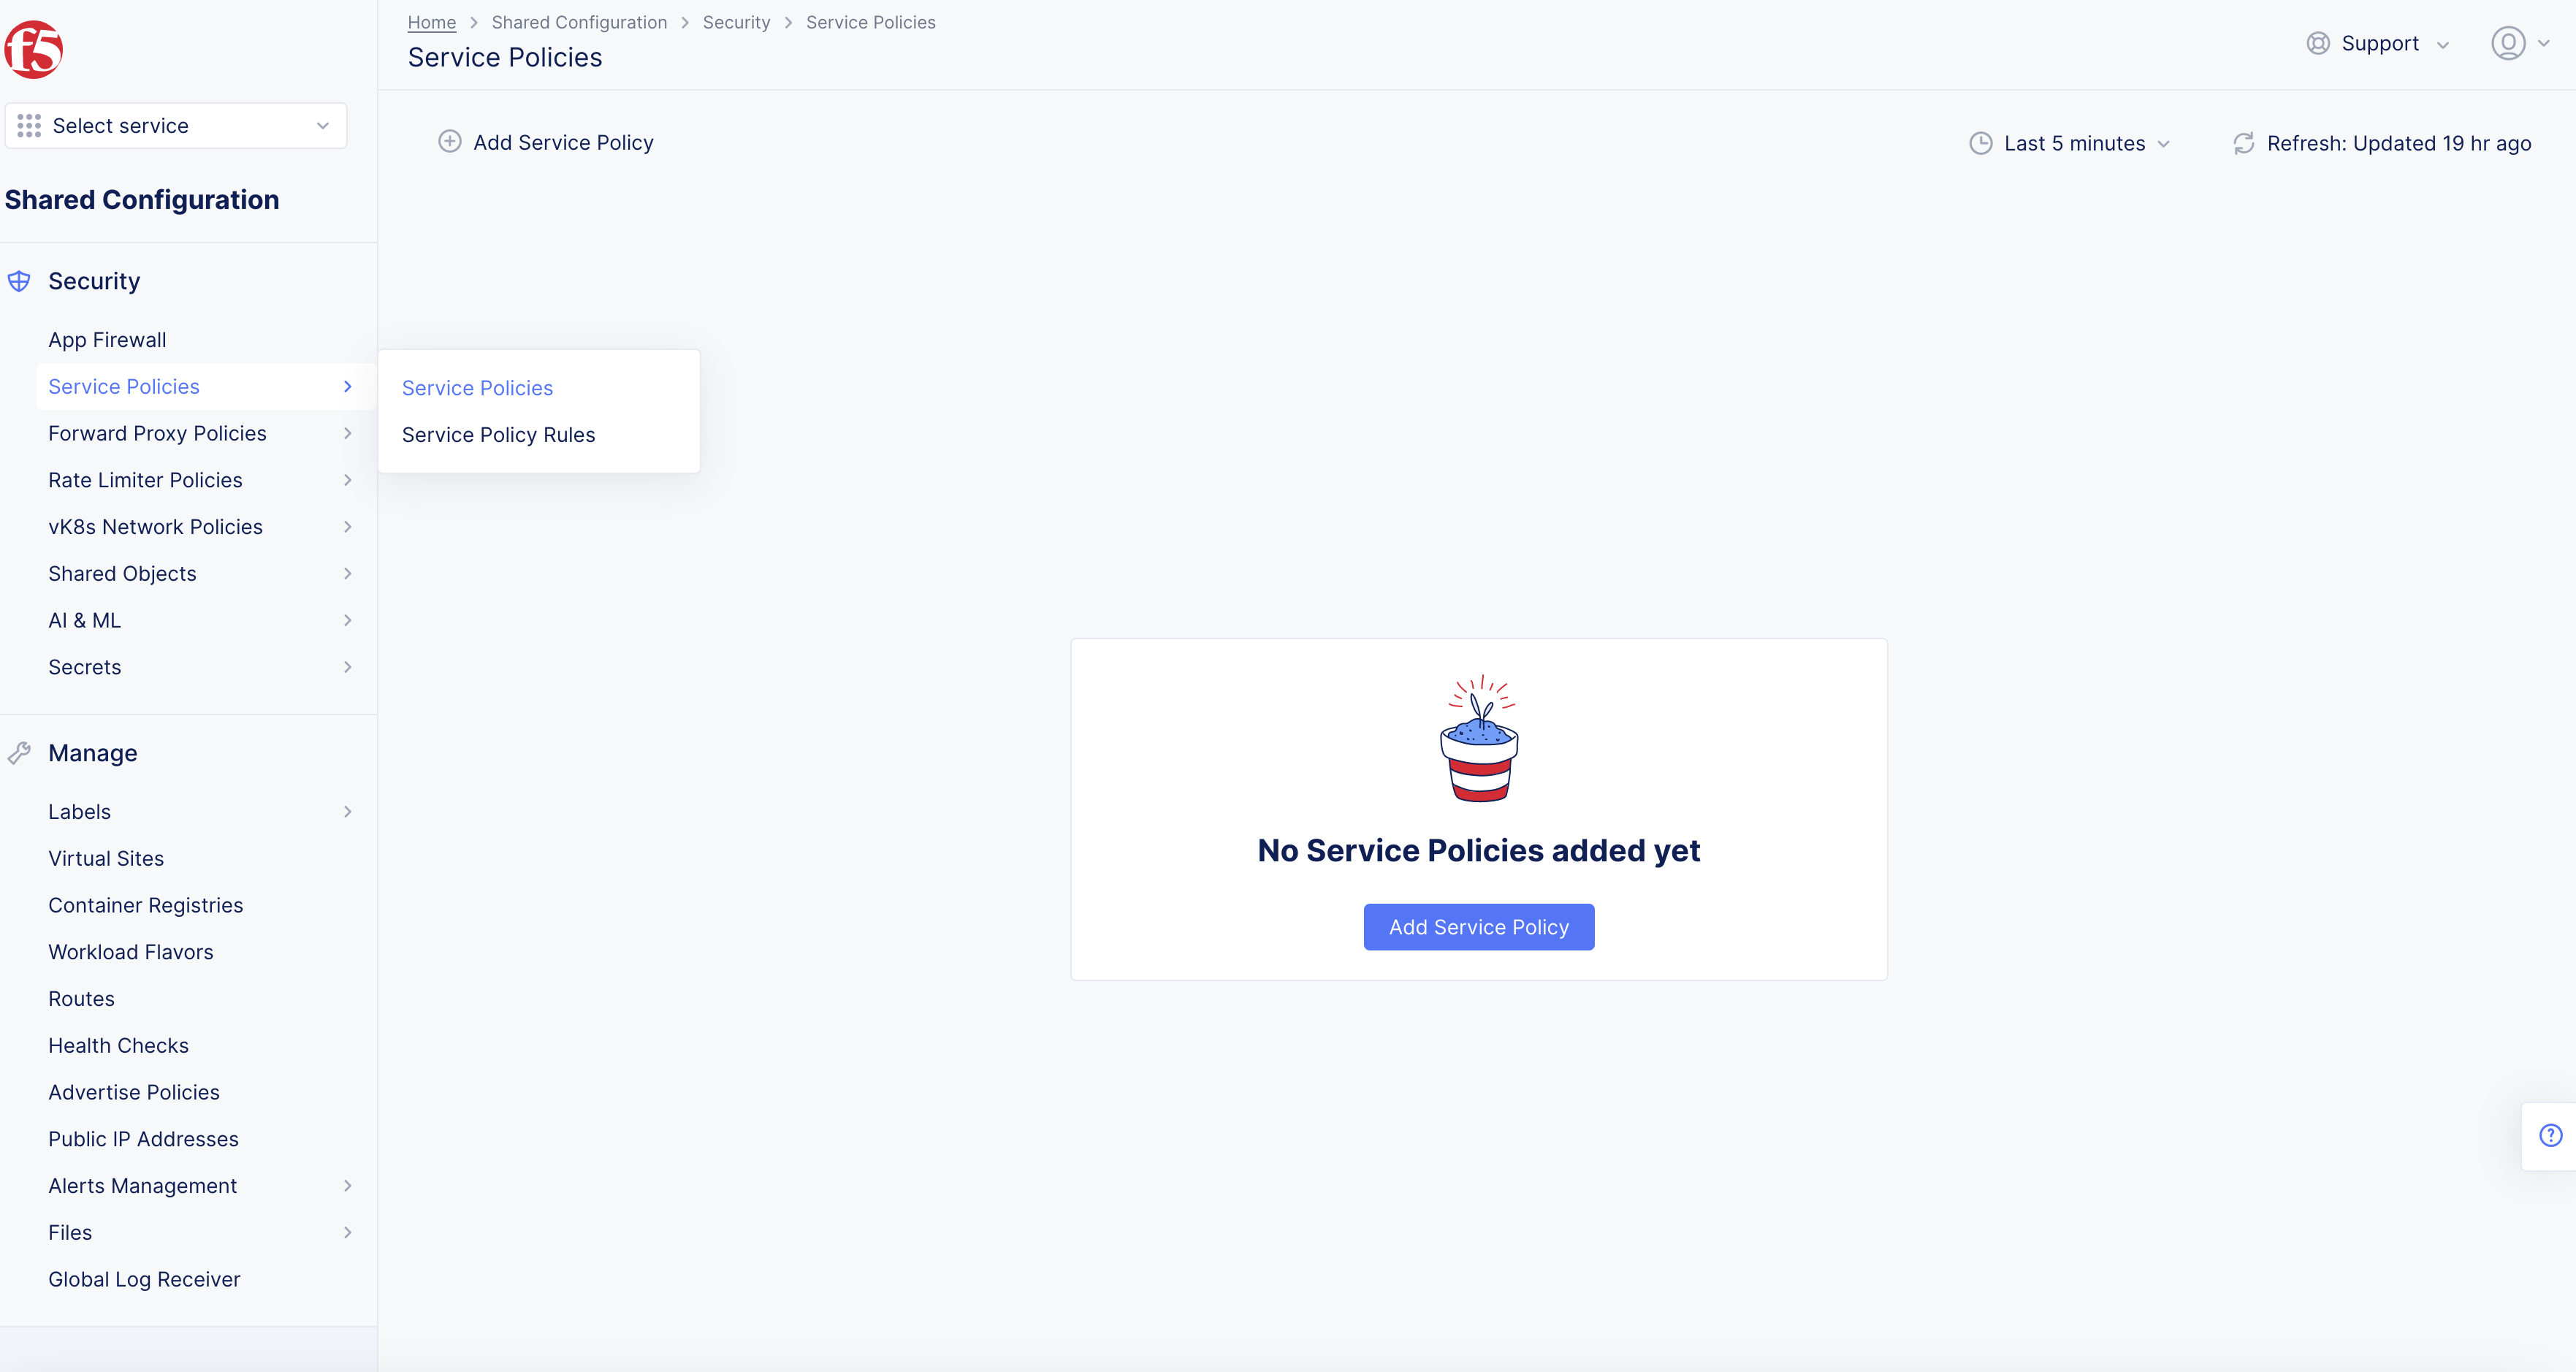
Figure: Service Policies
- Select Add Service Policy.
Step 2: Enter metadata and configure to allow traffic.
-
Enter Name.
-
Enter Labels and Description as needed.
-
From the Server Selection menu, select an option.
-
From the Select Policy Rules menu, select Allowed Sources.
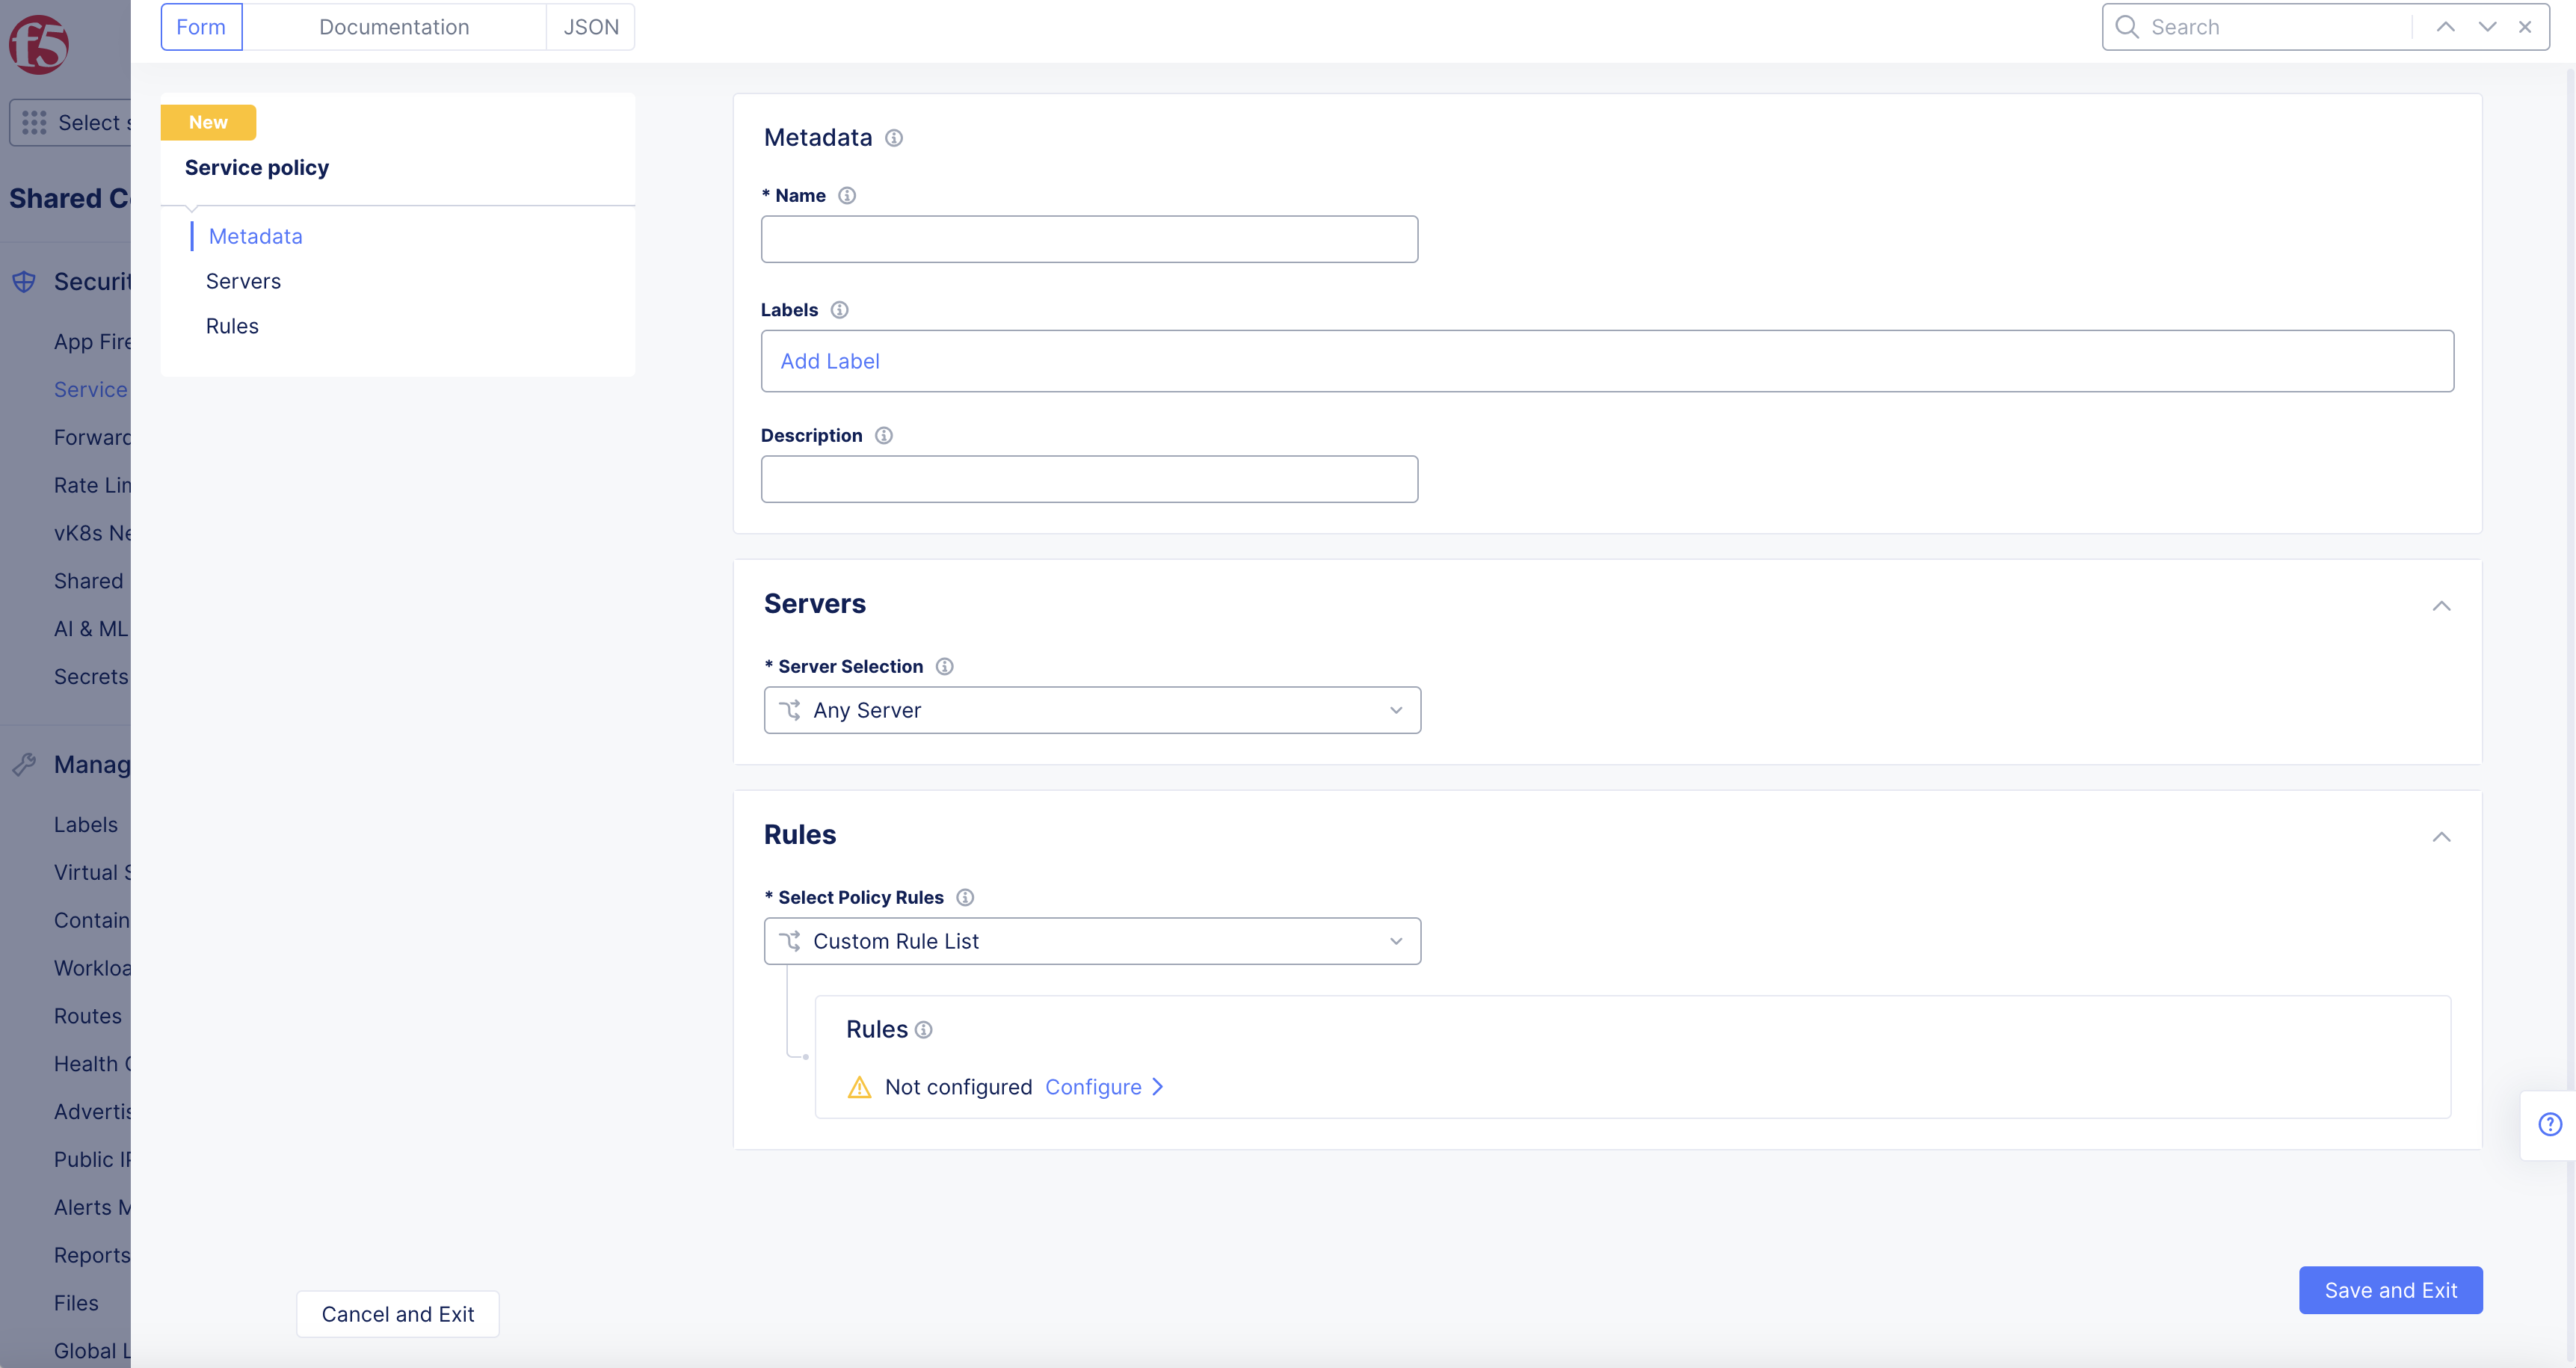
Figure: Service Policies
- From the Default Action drop-down menu, select Allow.
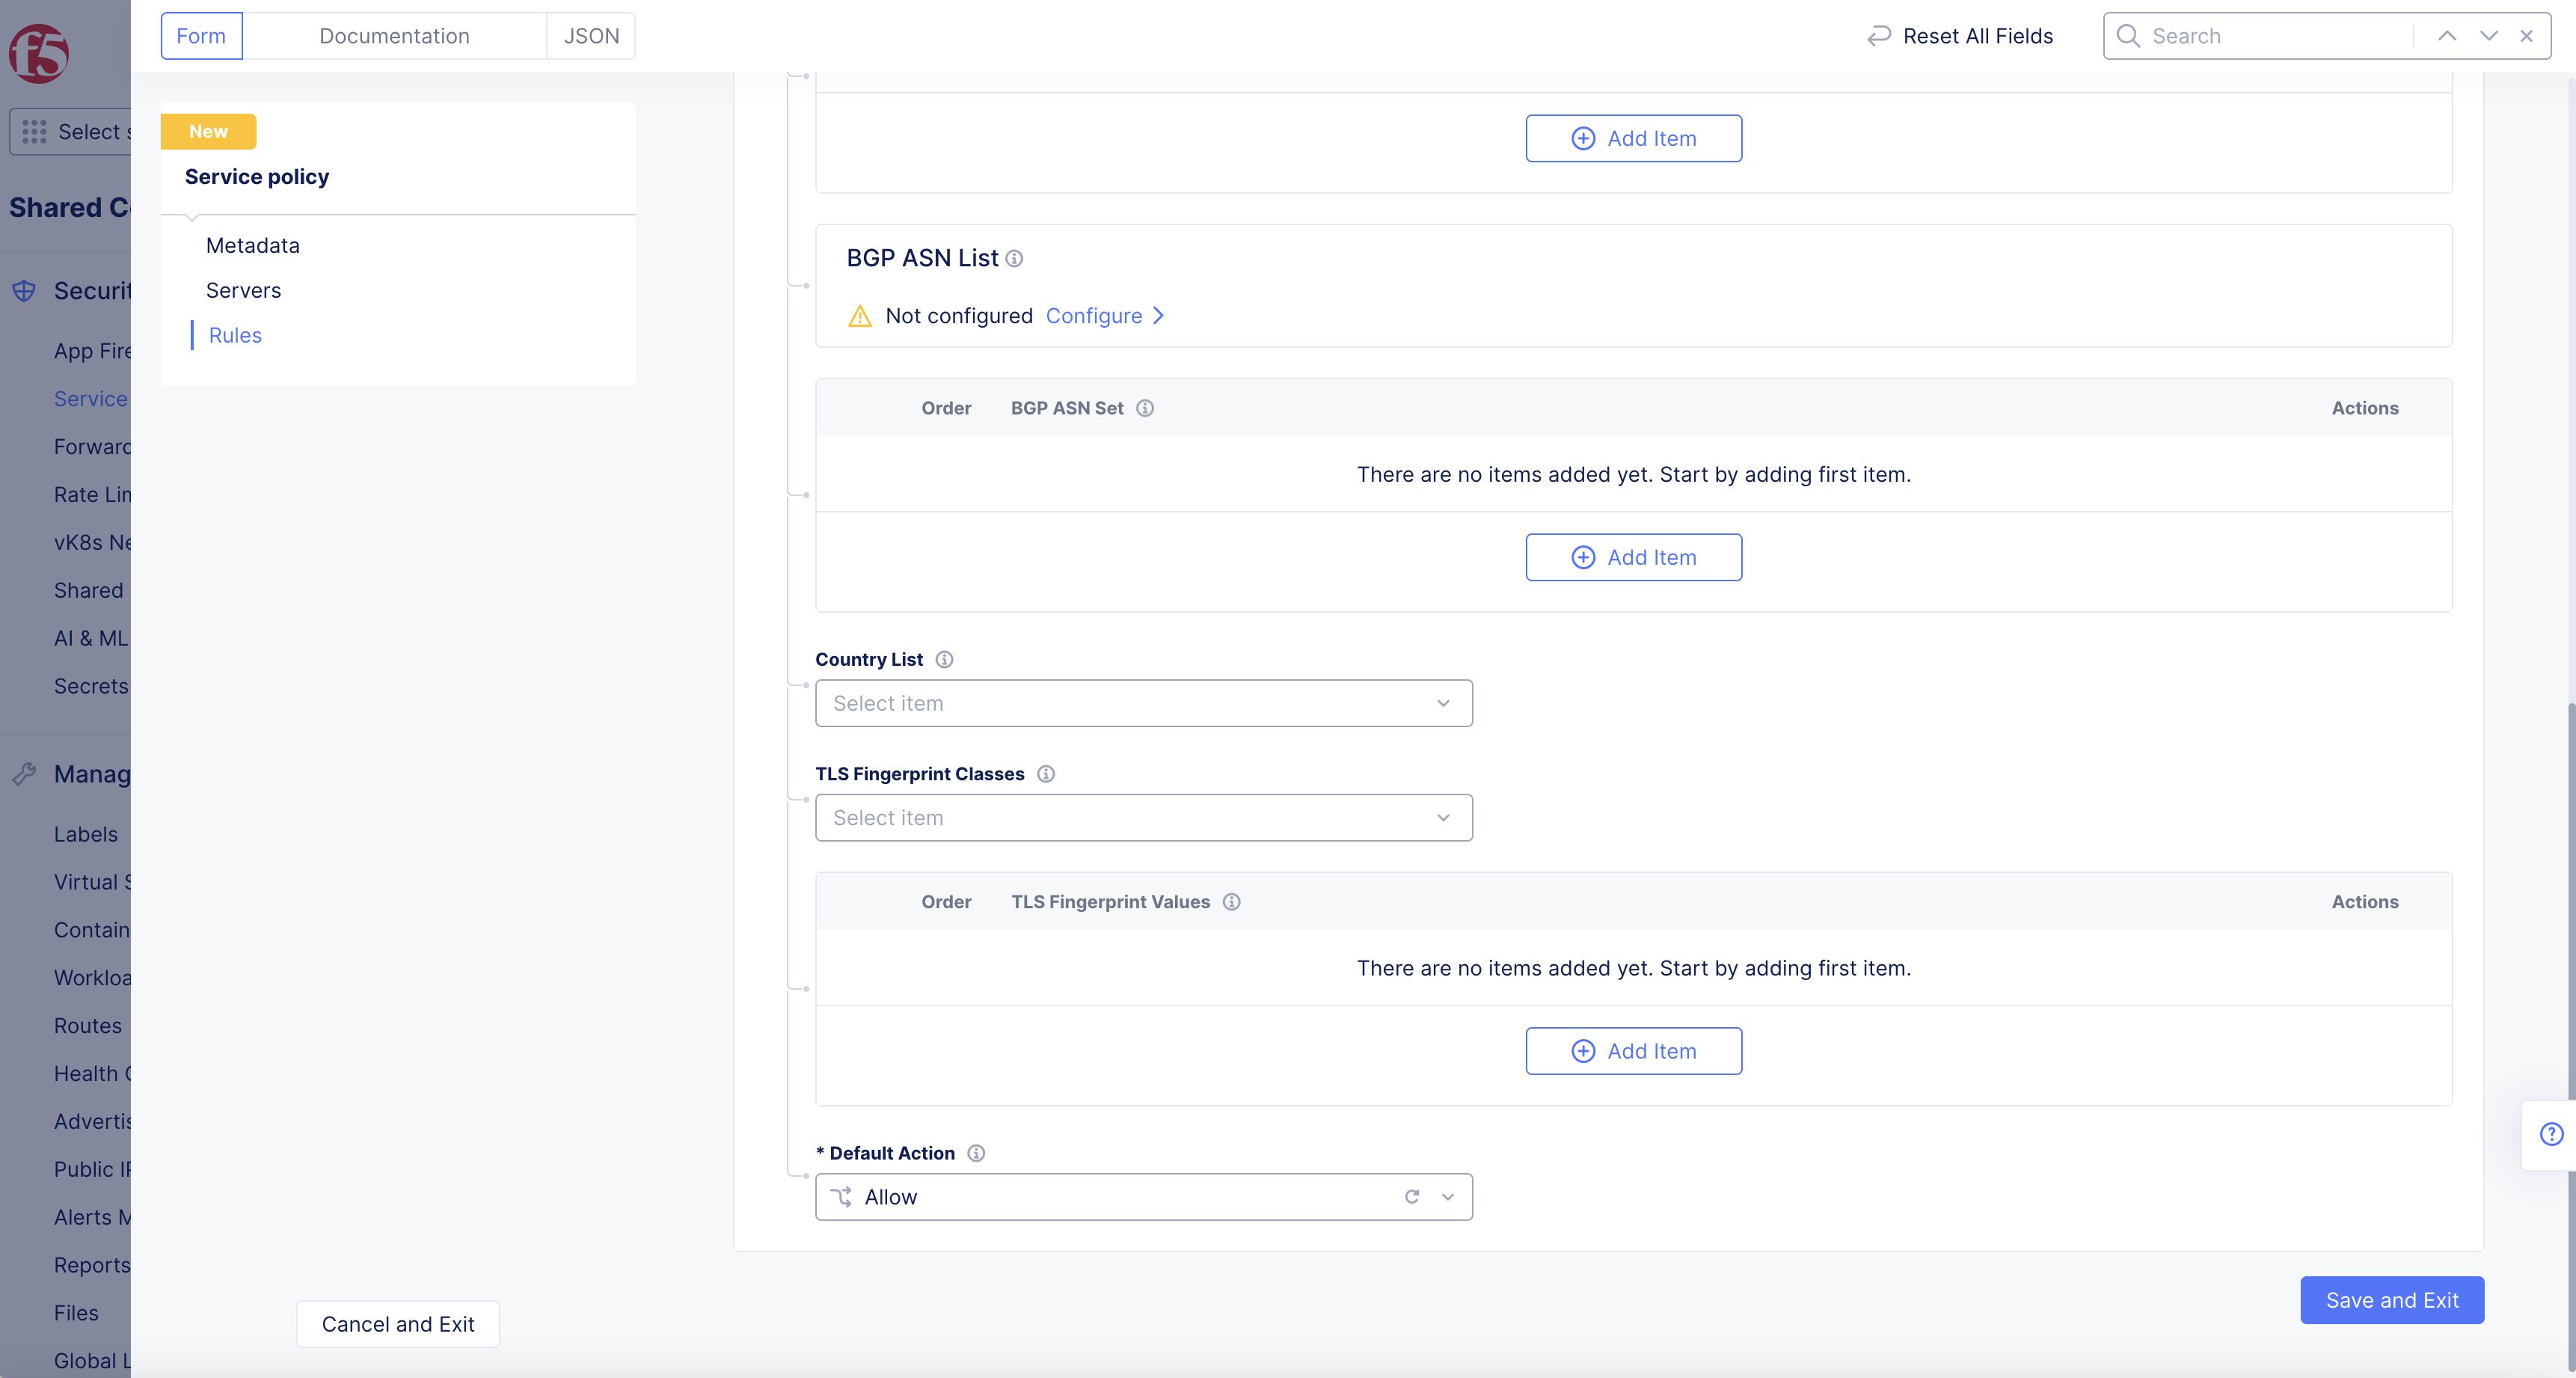
Figure: Service Policies Default Action
- Select Save and Exit.
Step 3: Create new service policy.
- From the Console homepage, select Multi-Cloud Network Connect.
Figure: Homepage
-
Select Manage > select Firewall.
-
Select Service Policies > Add Service Policy.
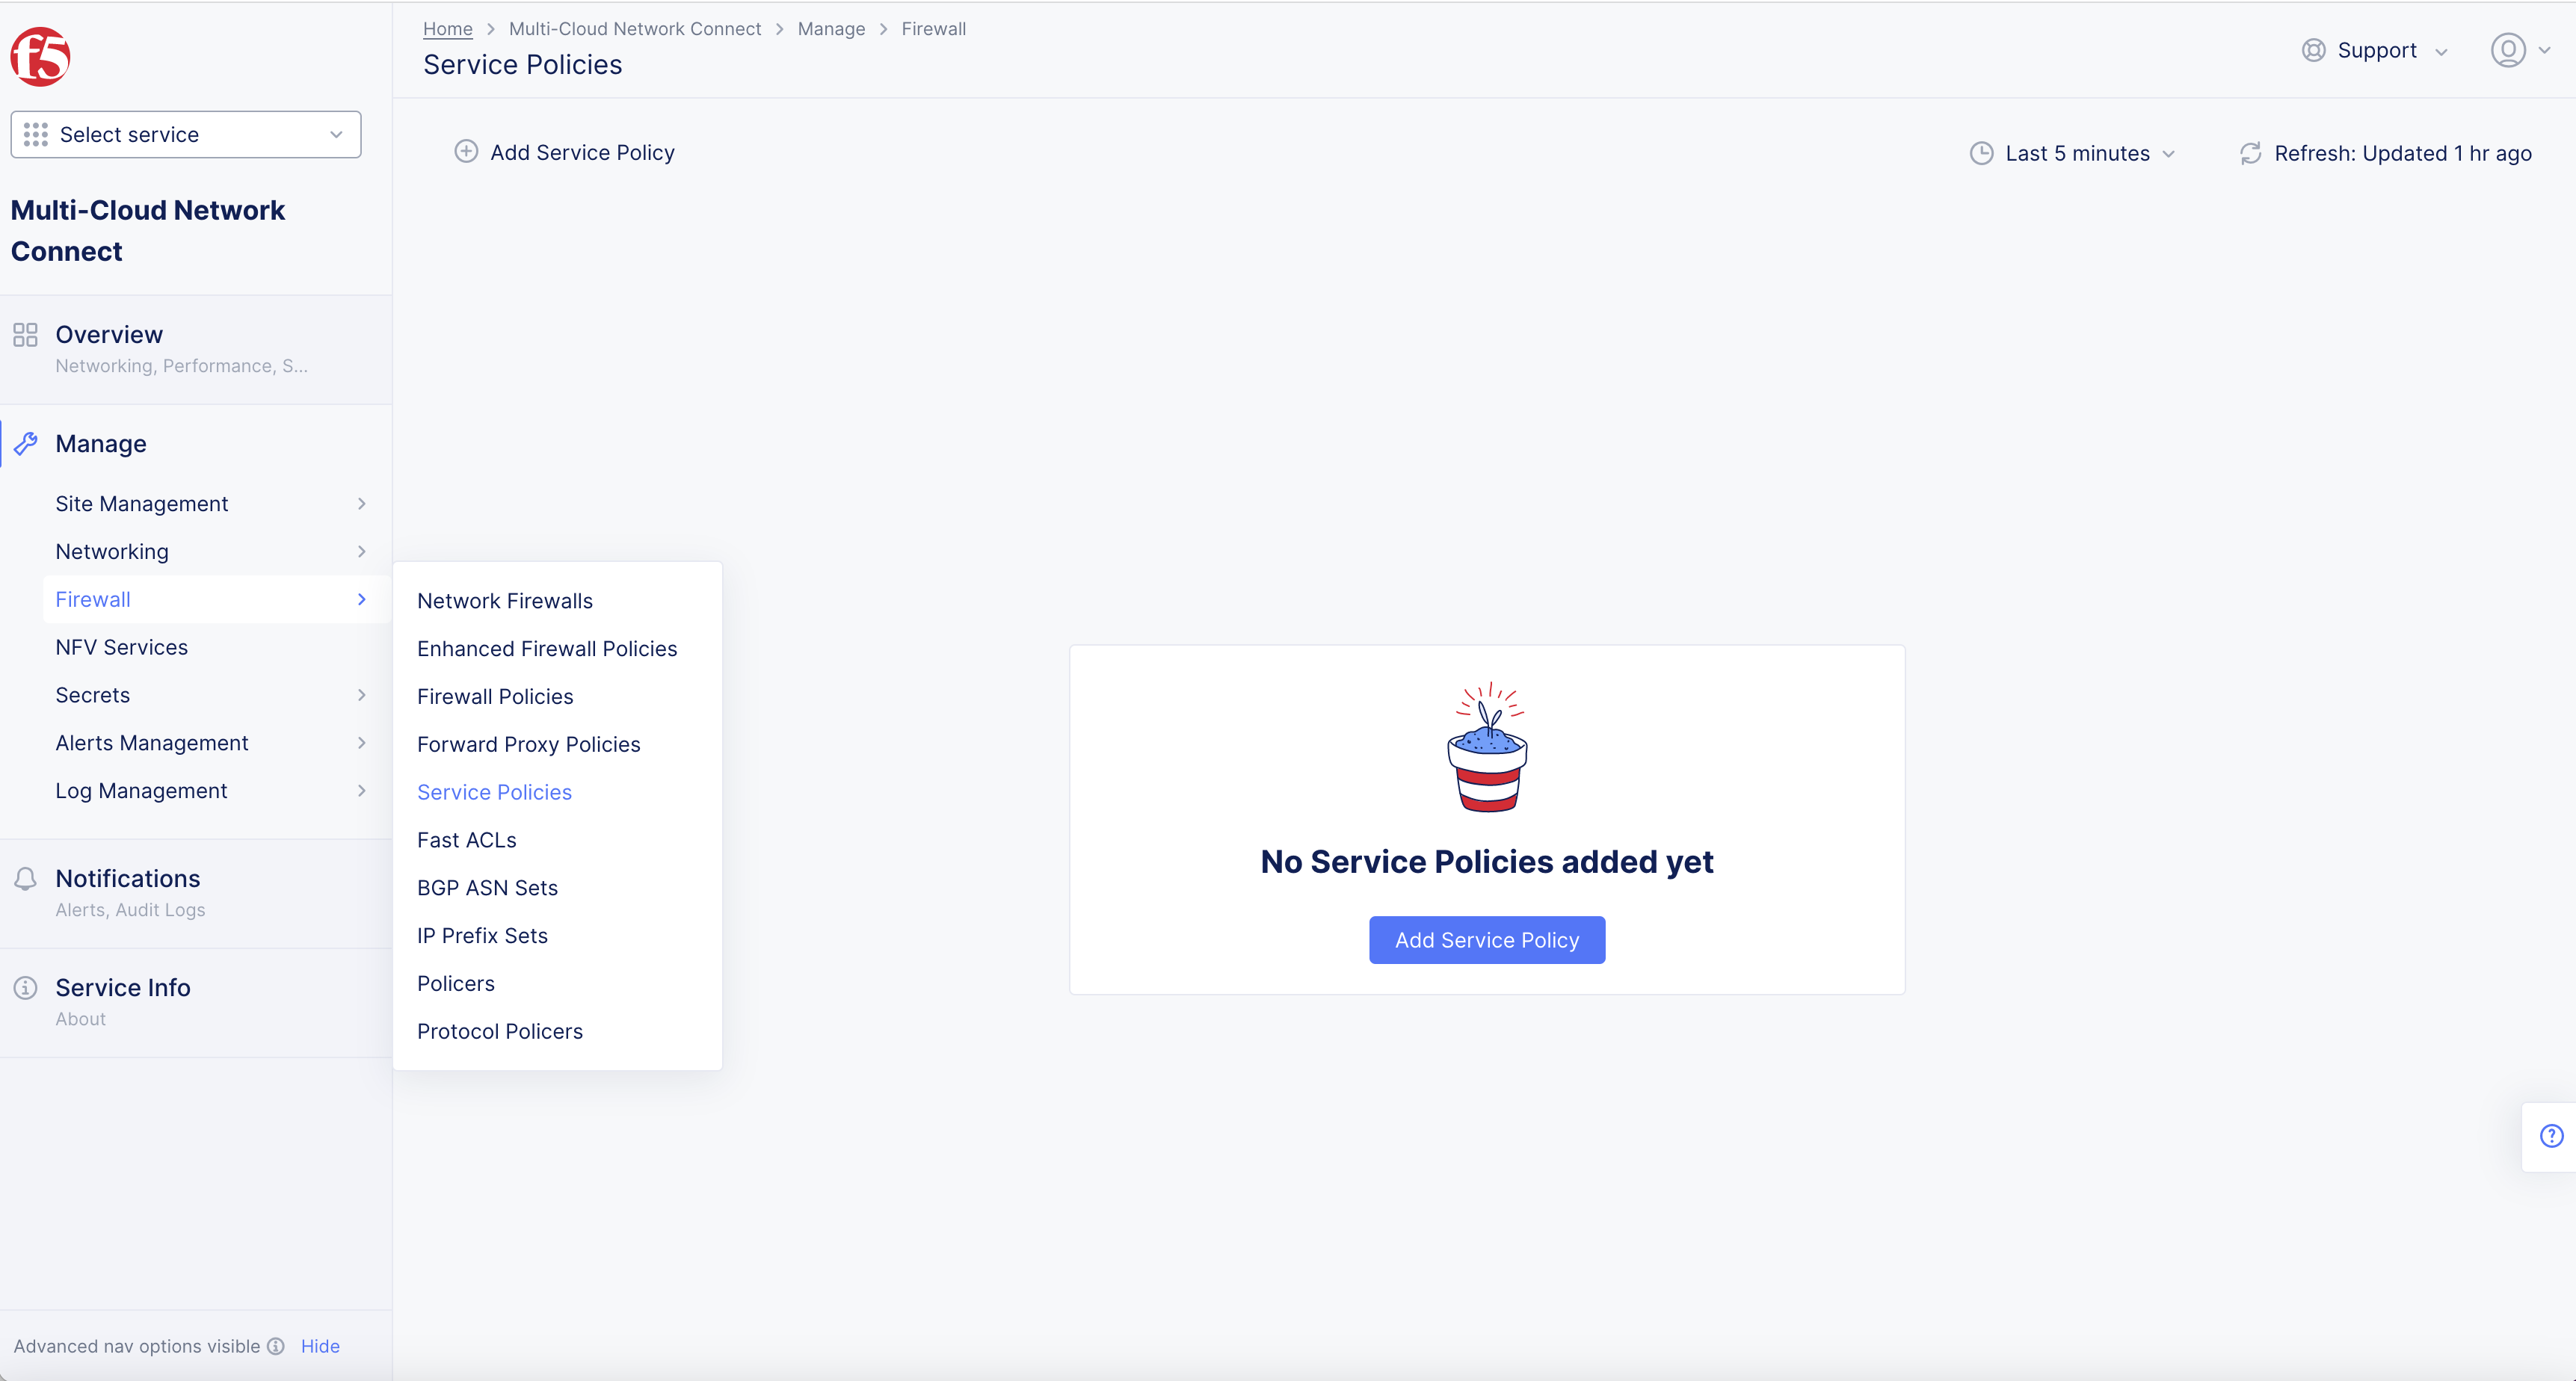
Figure: Service Policy
Step 3.1: Configure new service policy.
-
Enter Name.
-
Select Configure link in Rules field.
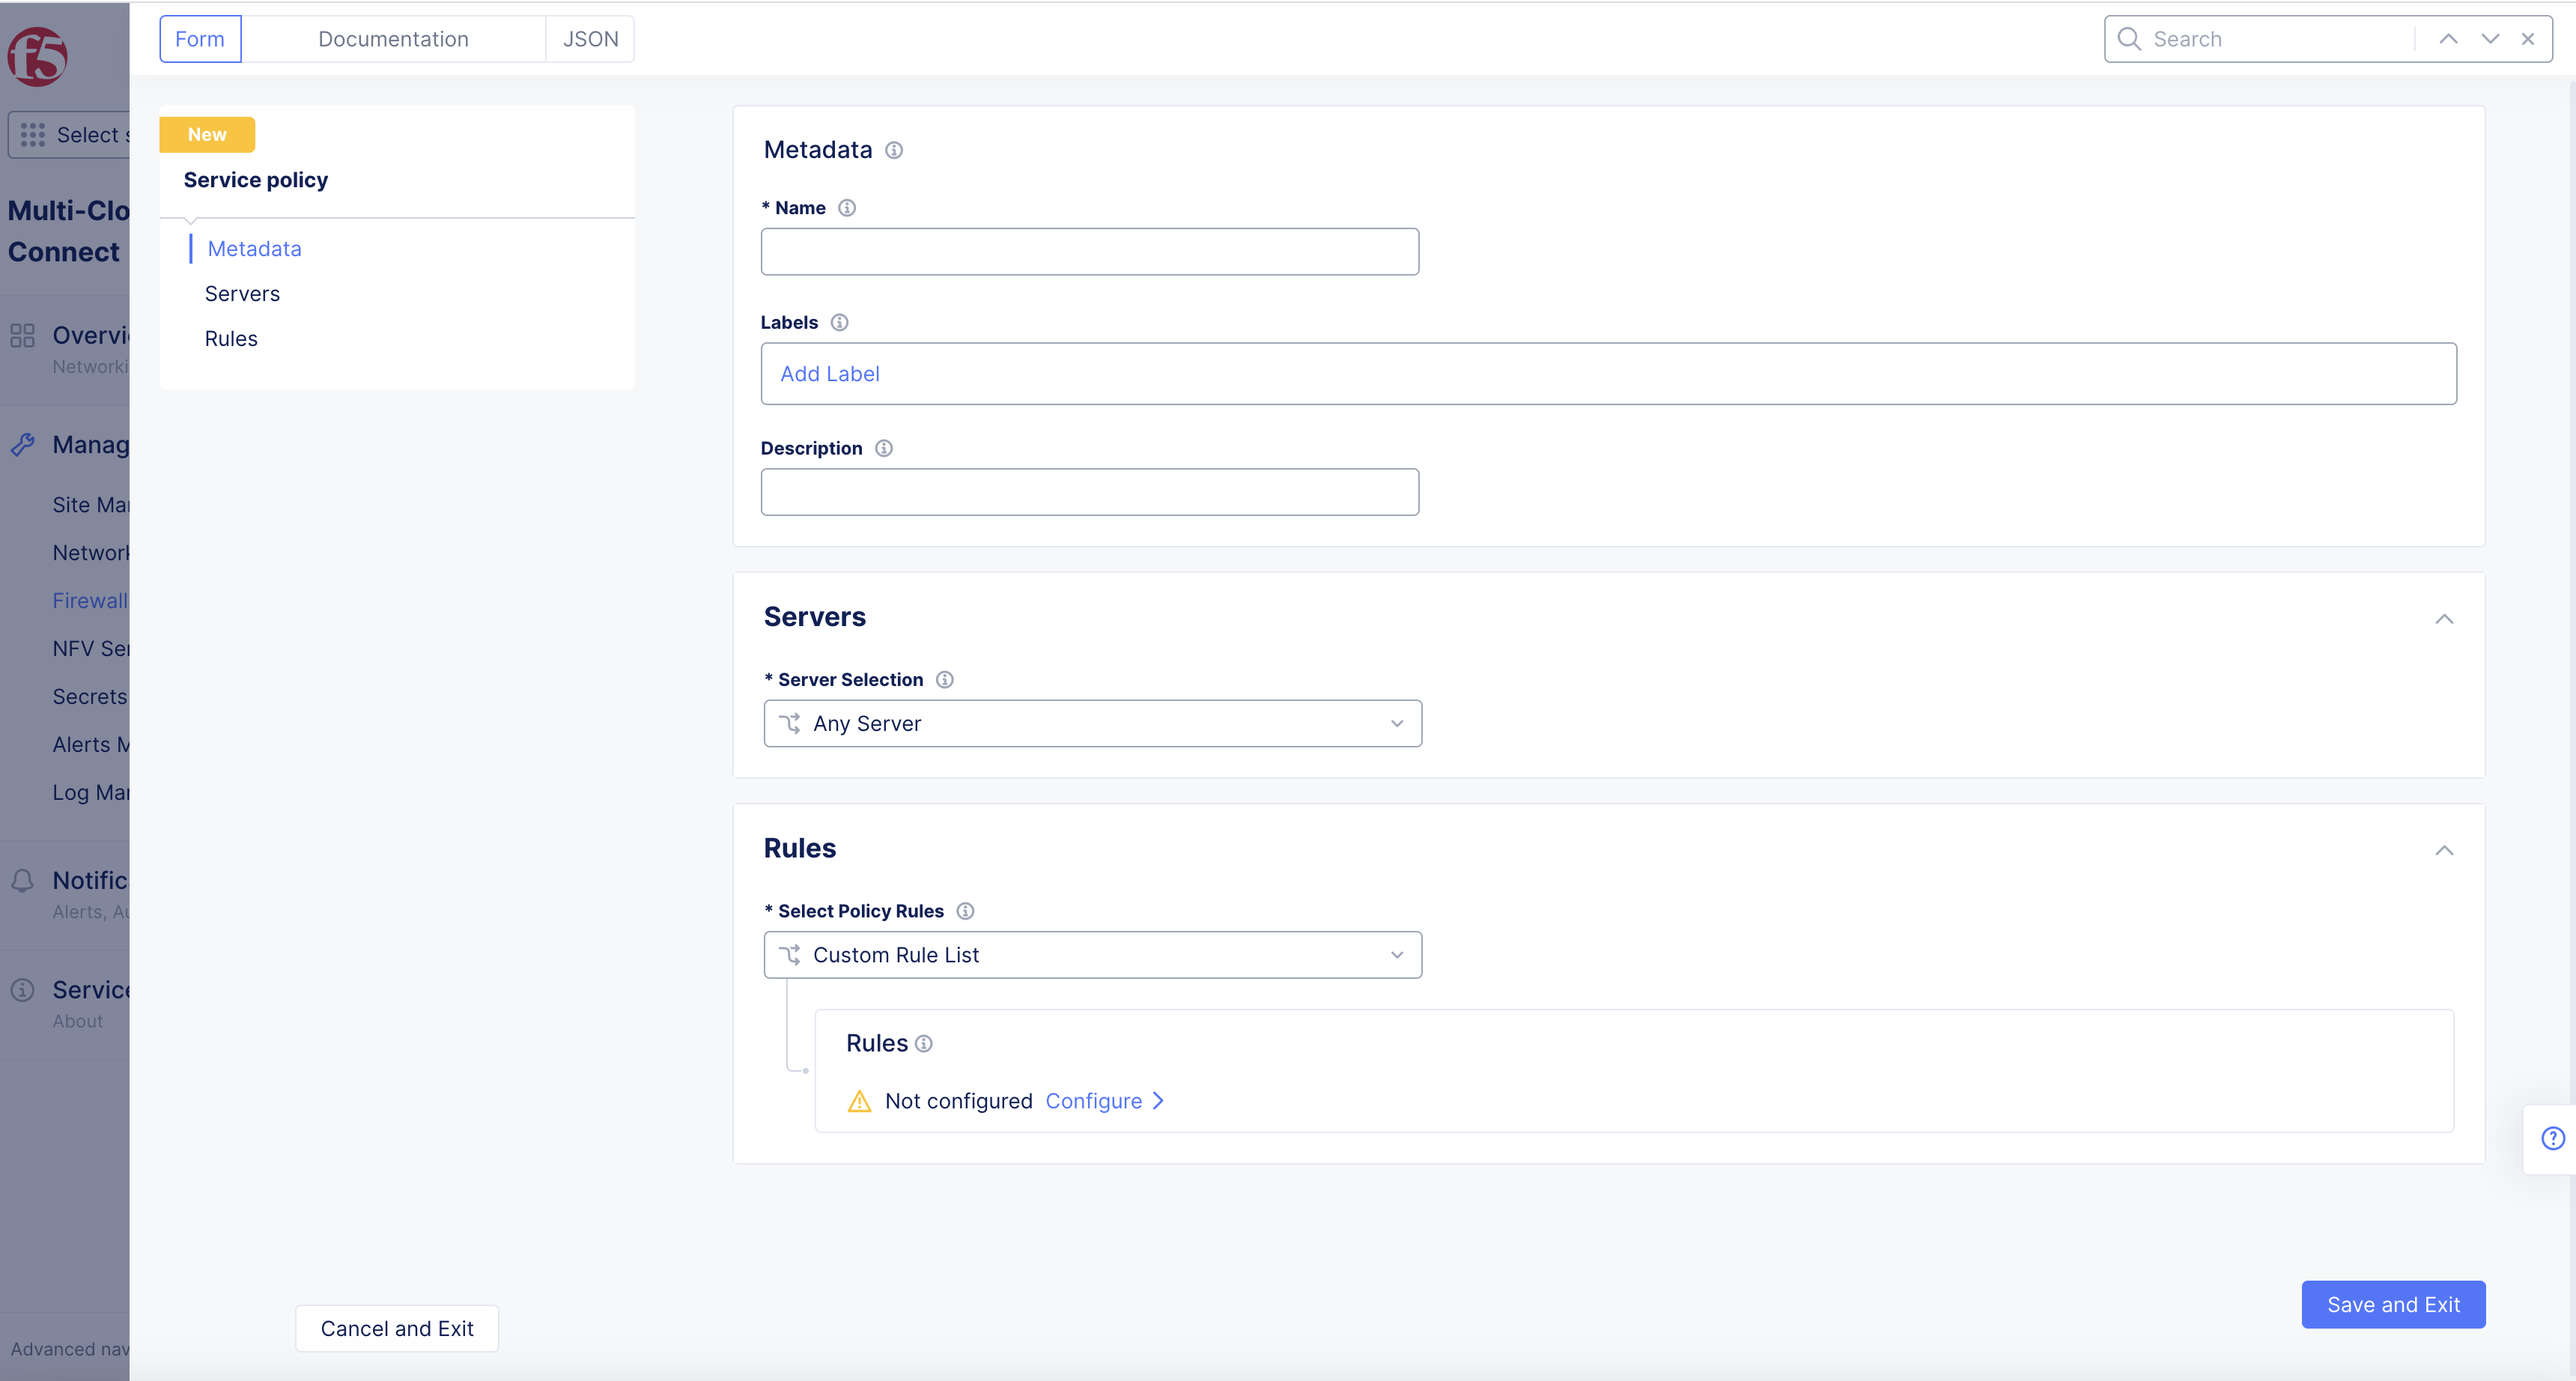
Figure: Service Policy Form
- Select Add Item in new Rules page.
Step 3.2: Add rule.
-
Enter Name for new rule.
-
From the Action drop-down menu, select Allow.
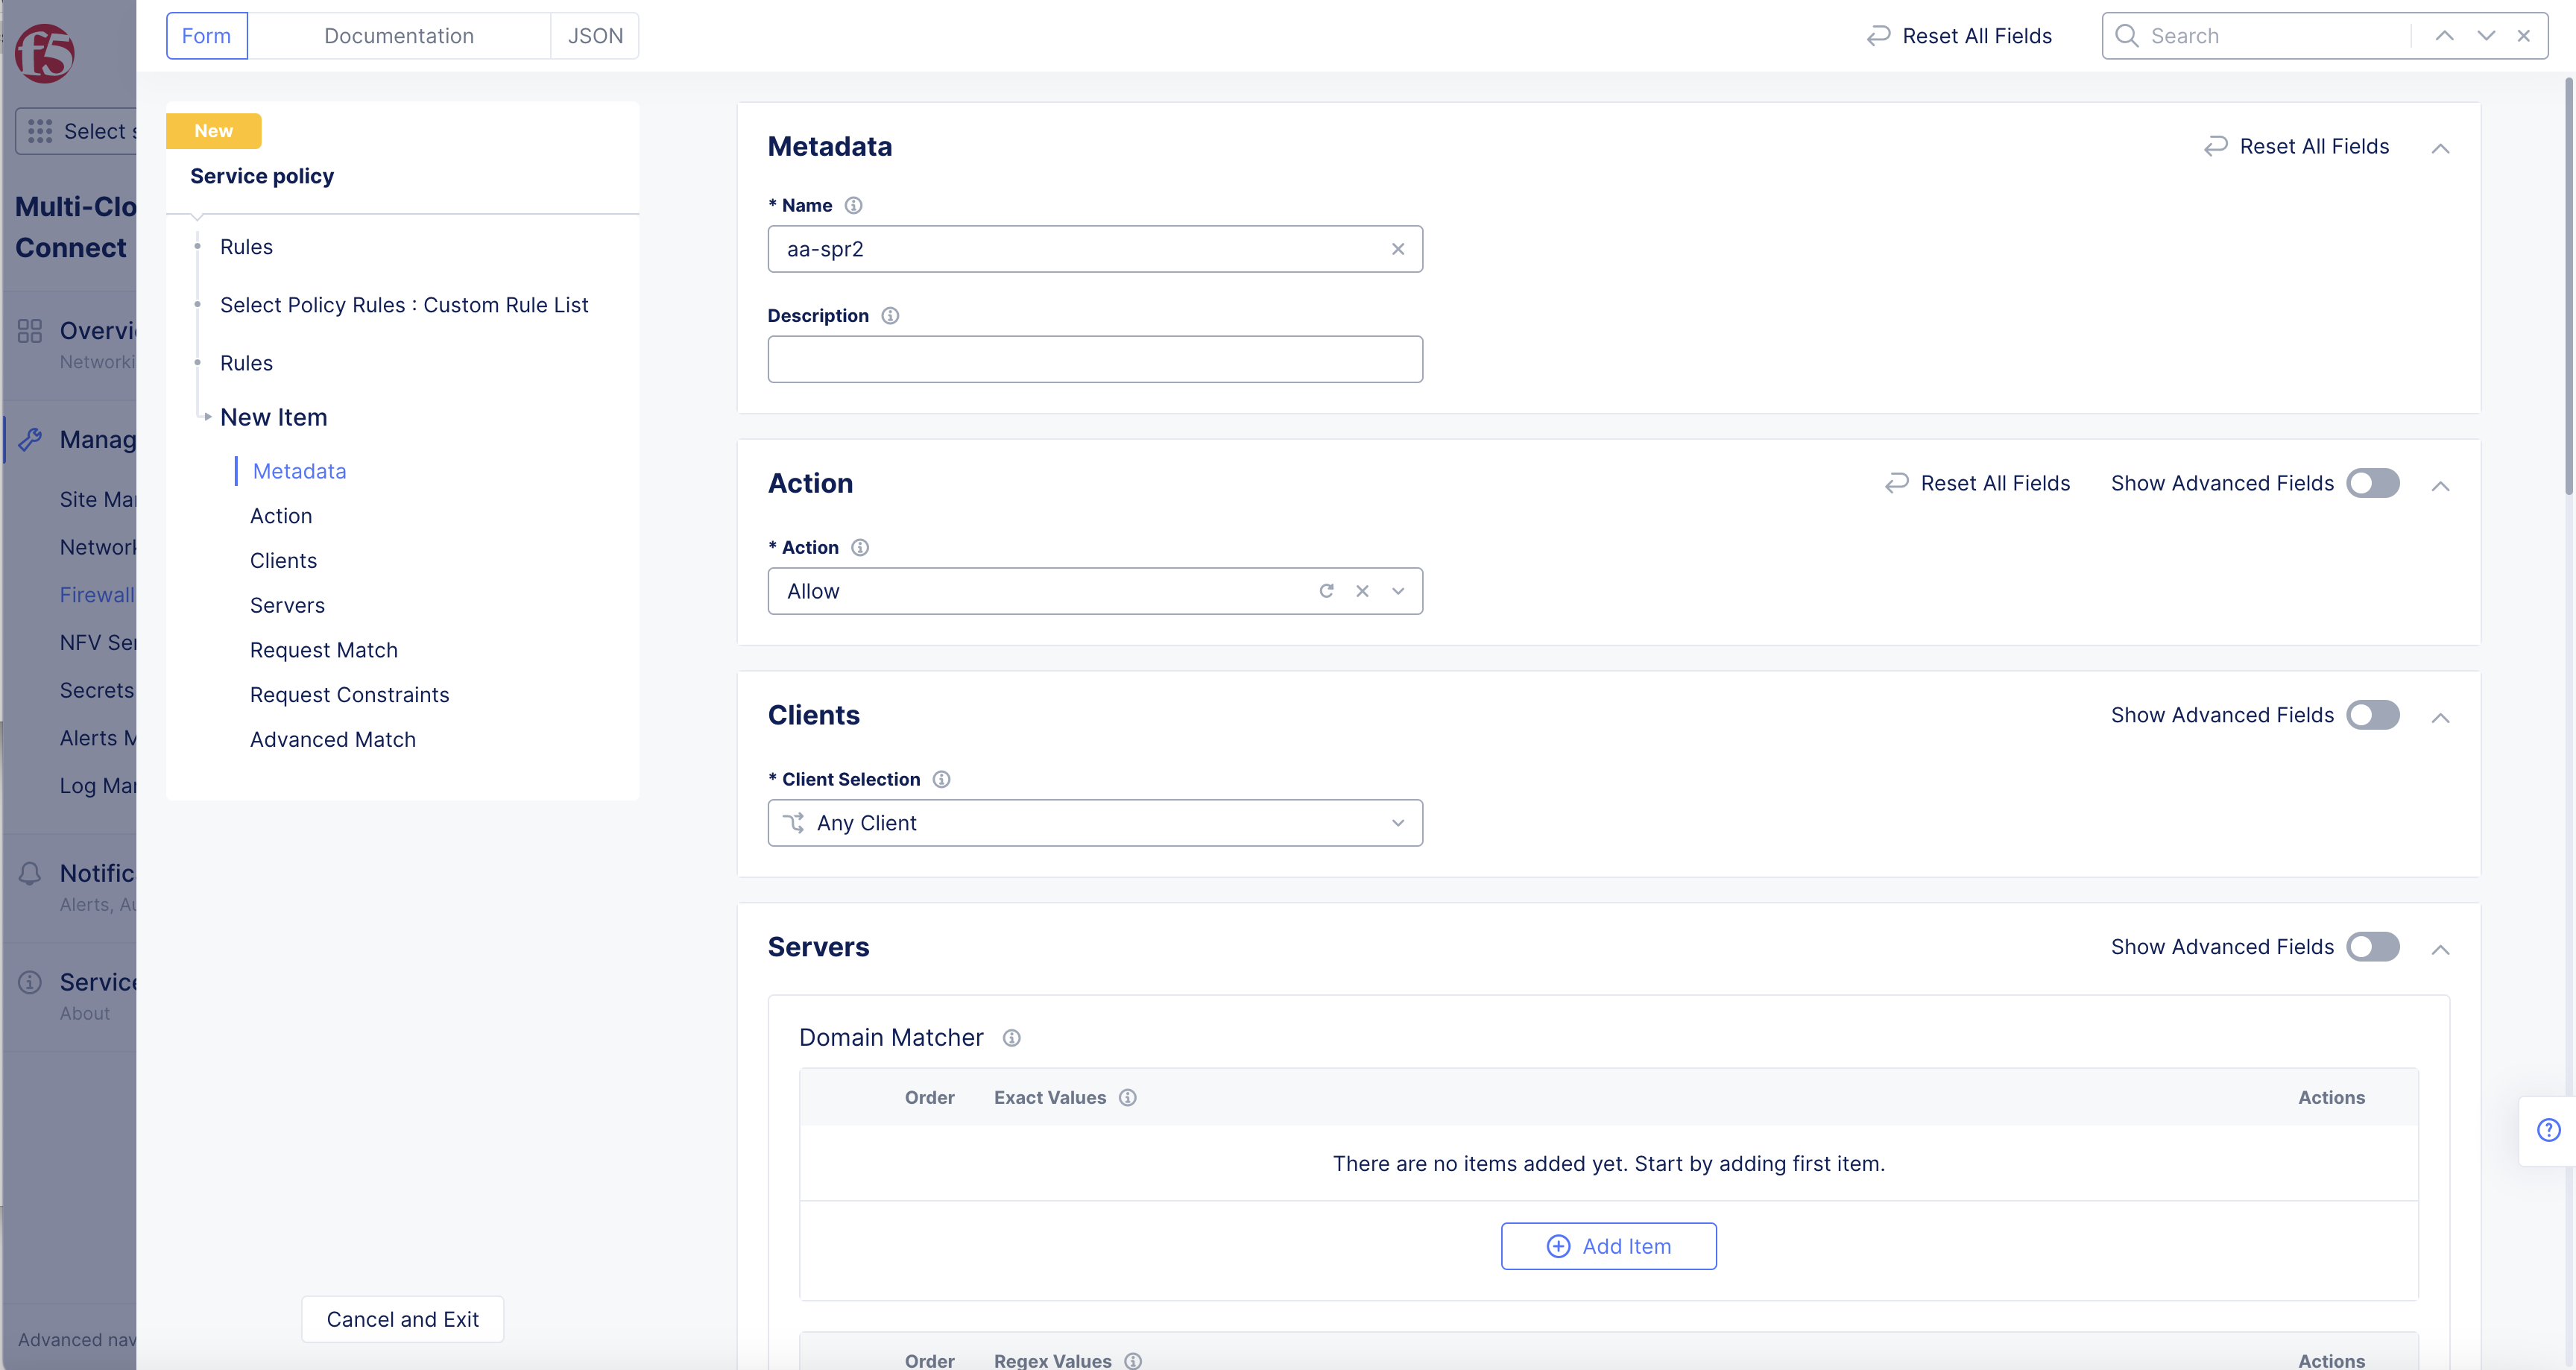
Figure: Service Policy Form
Step 3.3: Configure the HTTP path.
-
Toggle Show Advanced Fields in the Request Match section.
-
Select the Configure link in the HTTP Path section.
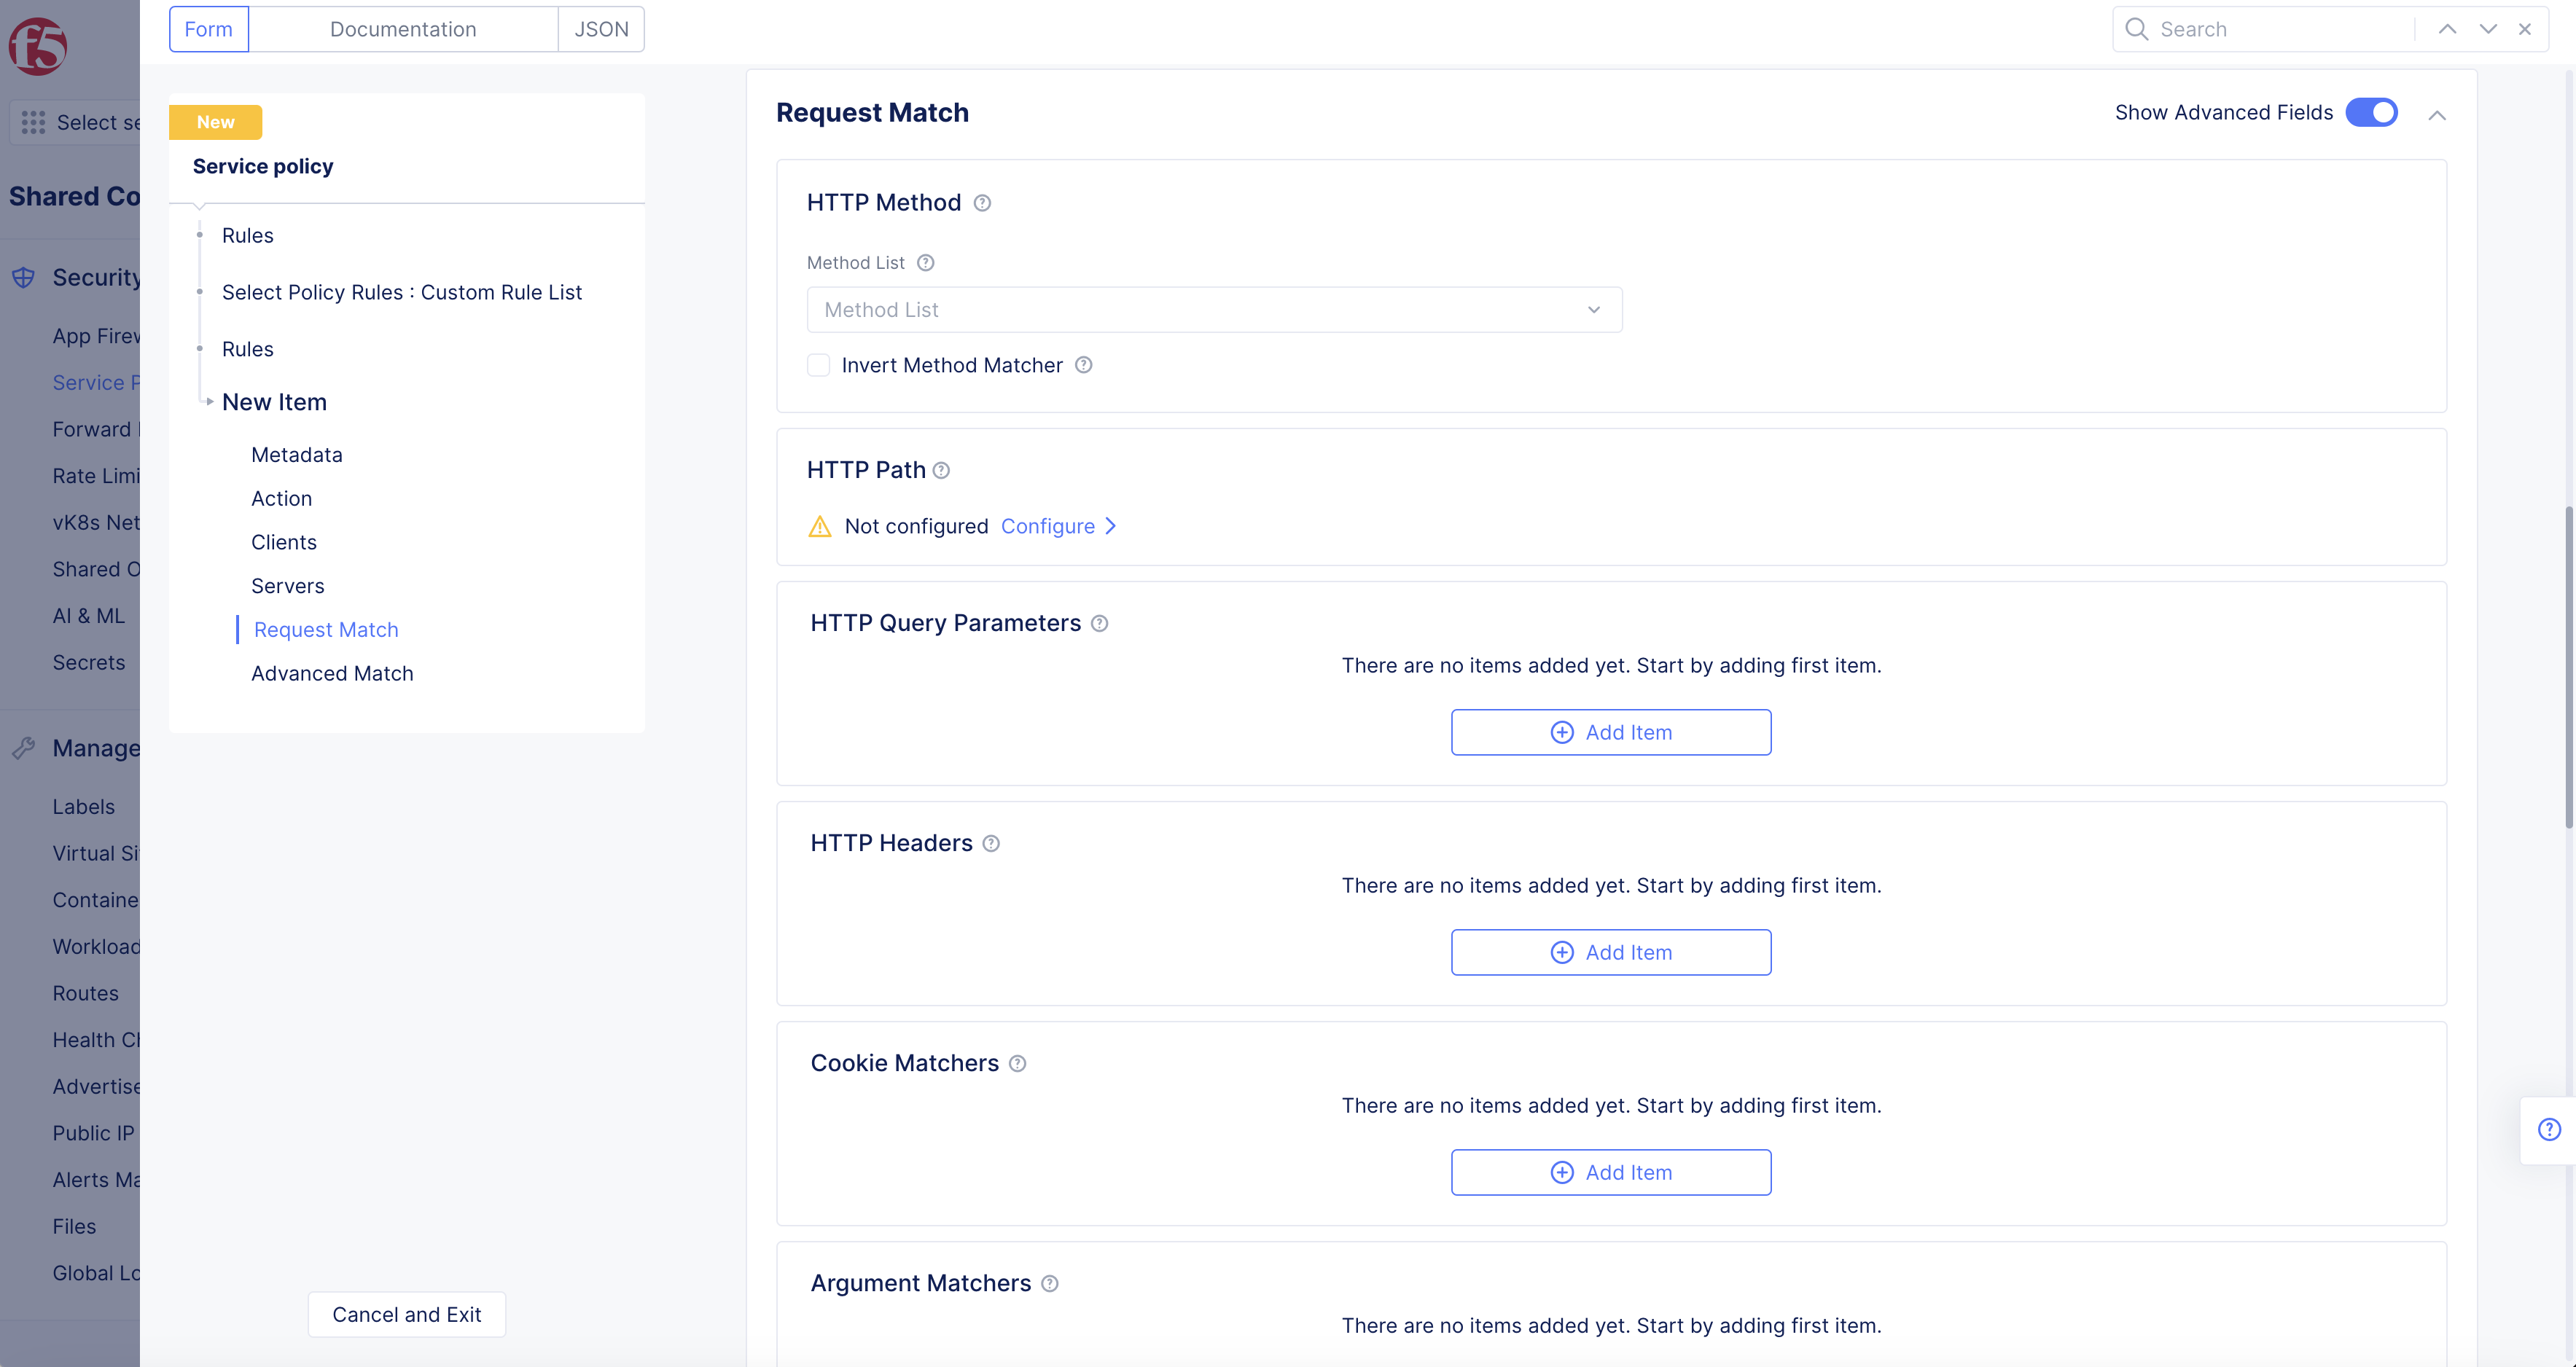
Figure: Service Policy Rule IP Prefix Matcher
-
Under Prefix Values, select Add Item.
-
Enter values in the Prefix Values field. See HTTP Path for valid format examples.
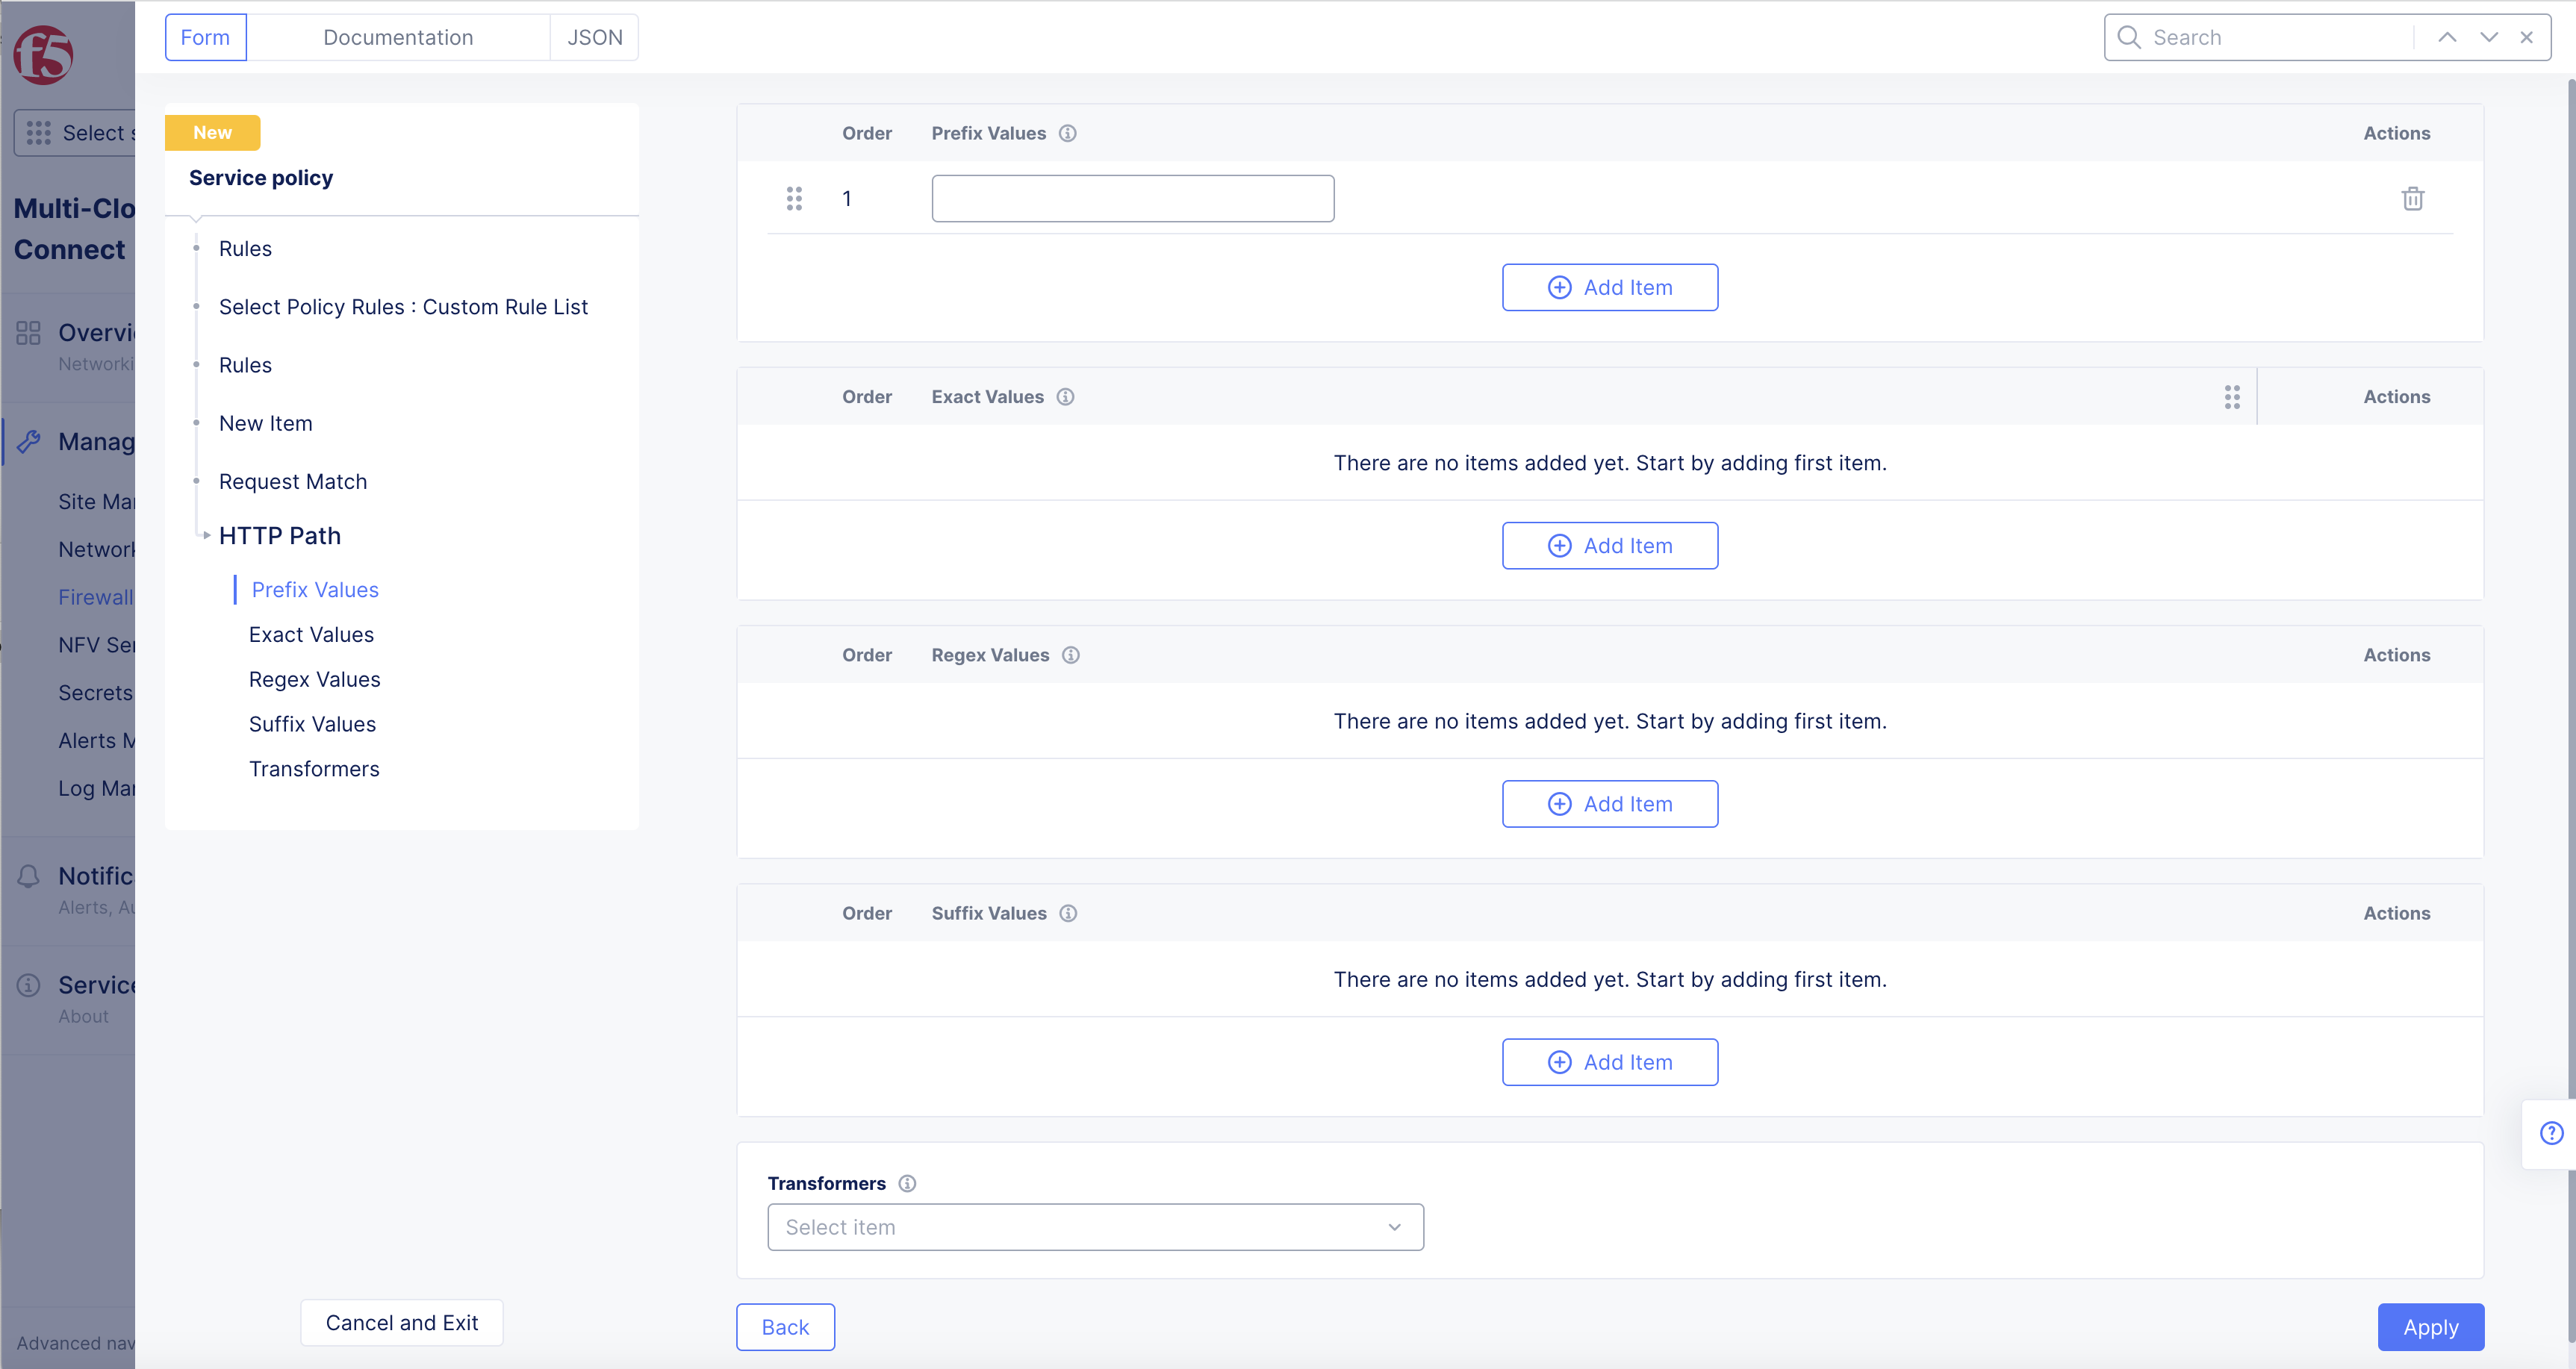
Figure: HTTP Path Prefix Value
-
Select Apply.
-
Select Apply.
-
Reorder the new rule (or rules) as desired using the ... > Move to another spot option.
-
Select Apply to add the new rule.
Step 5: Complete creating the service policy rule.
- Select Save and Exit.
Step 6: Create a rule to block traffic from the second prefix set.
Repeat Step 1 to Step 5 above. Ensure that you set the Action as Deny.
Create Service Policy
Service policies apply rules in the order as per the specified configuration. For more information on service policies, see Configure Service Policy.
Step 1: Open service policy.
Select the same namespace where you created your service policy rule. Select Security from the configuration menu and Network Security from the options pane. Select Service Policies and select Add service policy. The policy creation form gets loaded.
-
In F5 Distributed Cloud Console, select Multi-Cloud App Connect.
-
Select Namespace where you created your service policy rule.
Figure: Homepage
-
Select Security > Service Policies > Active Service Policies.
-
Click Select Active Service Policies.
Step 2: Create service policy.
Enter a name for the policy, and set First Rule Match for the Rule Combining Algorithm field.
-
Select Service Policies drop-down menu to select service policy.
-
Select Add Item in Service Policies drop-down menu to create another service policy.
-
Enter Name.
-
Enter Labels and Description as needed.
Step 3: Select rule.
Select rule and add the rules created in the Create Service Policy Rules chapter.
-
Select Policy Rules drop-down menu. Select an option:
-
Custom Rule List > Configure.
-
Allowed Sources > Configure.
-
Denied Sources > Configure.
-
Allow All Requests
-
Deny All Requests
-
Note: It is recommended to first add the rule that allows traffic from set of IP prefixes, and then add the rule that drops traffic from the other set.
- Select Server Selection drop-down menu to select Servers, Any Server is default.
Note: For granular control you can use other fields of service policy creation, such as Server Selection. For more information, see Configure Service Policy.
- Select Continue to finish the form.
Step 4: Complete service policy creation.
You can use this policy in a service policy set and apply the IP Prefix sets to control your application traffic. For more information on service policy set configuration, see Configure Service Policy Set.