Configure API Protection Rules
Objective
This guide provides instructions on how to enable the API Protection Rules feature in an HTTP/HTTPS load balancer using F5® Distributed Cloud Console (Console). These rules provide you with configurable options to allow or block API endpoints from reaching your application. You can configure these rules using one of two methods (or categories): (1) configure rules using API endpoints, or (2) configure rules using server URLs and API groups. If a client request matches any rule created using the first category, then the second category rules are not evaluated.
Prerequisites
The following prerequisites apply:
-
An F5 Distributed Cloud Account. If you do not have an account, see Getting Started with Console.
-
An HTTP load balancer. See HTTP Load Balancer and vK8s Deployment guides for more information.
Configuration
Configure API protection rules using one of two methods available.
Configure Rules Using API Endpoints
If you are configuring rules using API endpoints, perform the following:
Step 1: Navigate to load balancer.
- From the Console homepage, click
Multi-Cloud App Connect.

Figure: Homepage
-
Select your application namespace.
-
Navigate to
Manage>Load Balancers>HTTP Load Balancers. -
Click
...for your load balancer and selectManage Configurationto open the load balancer configuration form. -
Click
Edit Configurationin the top right corner of the form.
Step 2: Start configuring API protection rules.
- In the
API Protectionsection, clickConfigurein theAPI Protection Rulesfield.

Figure: Security Configuration Section
-
Under the
API Endpointssection, clickConfigure. -
Click
Add Item.

Figure: API Endpoints Section
-
In the
Namefield, enter a name for this API protection rule. -
Under the
Actionsection, select whether toAlloworDenyfrom theActionmenu.
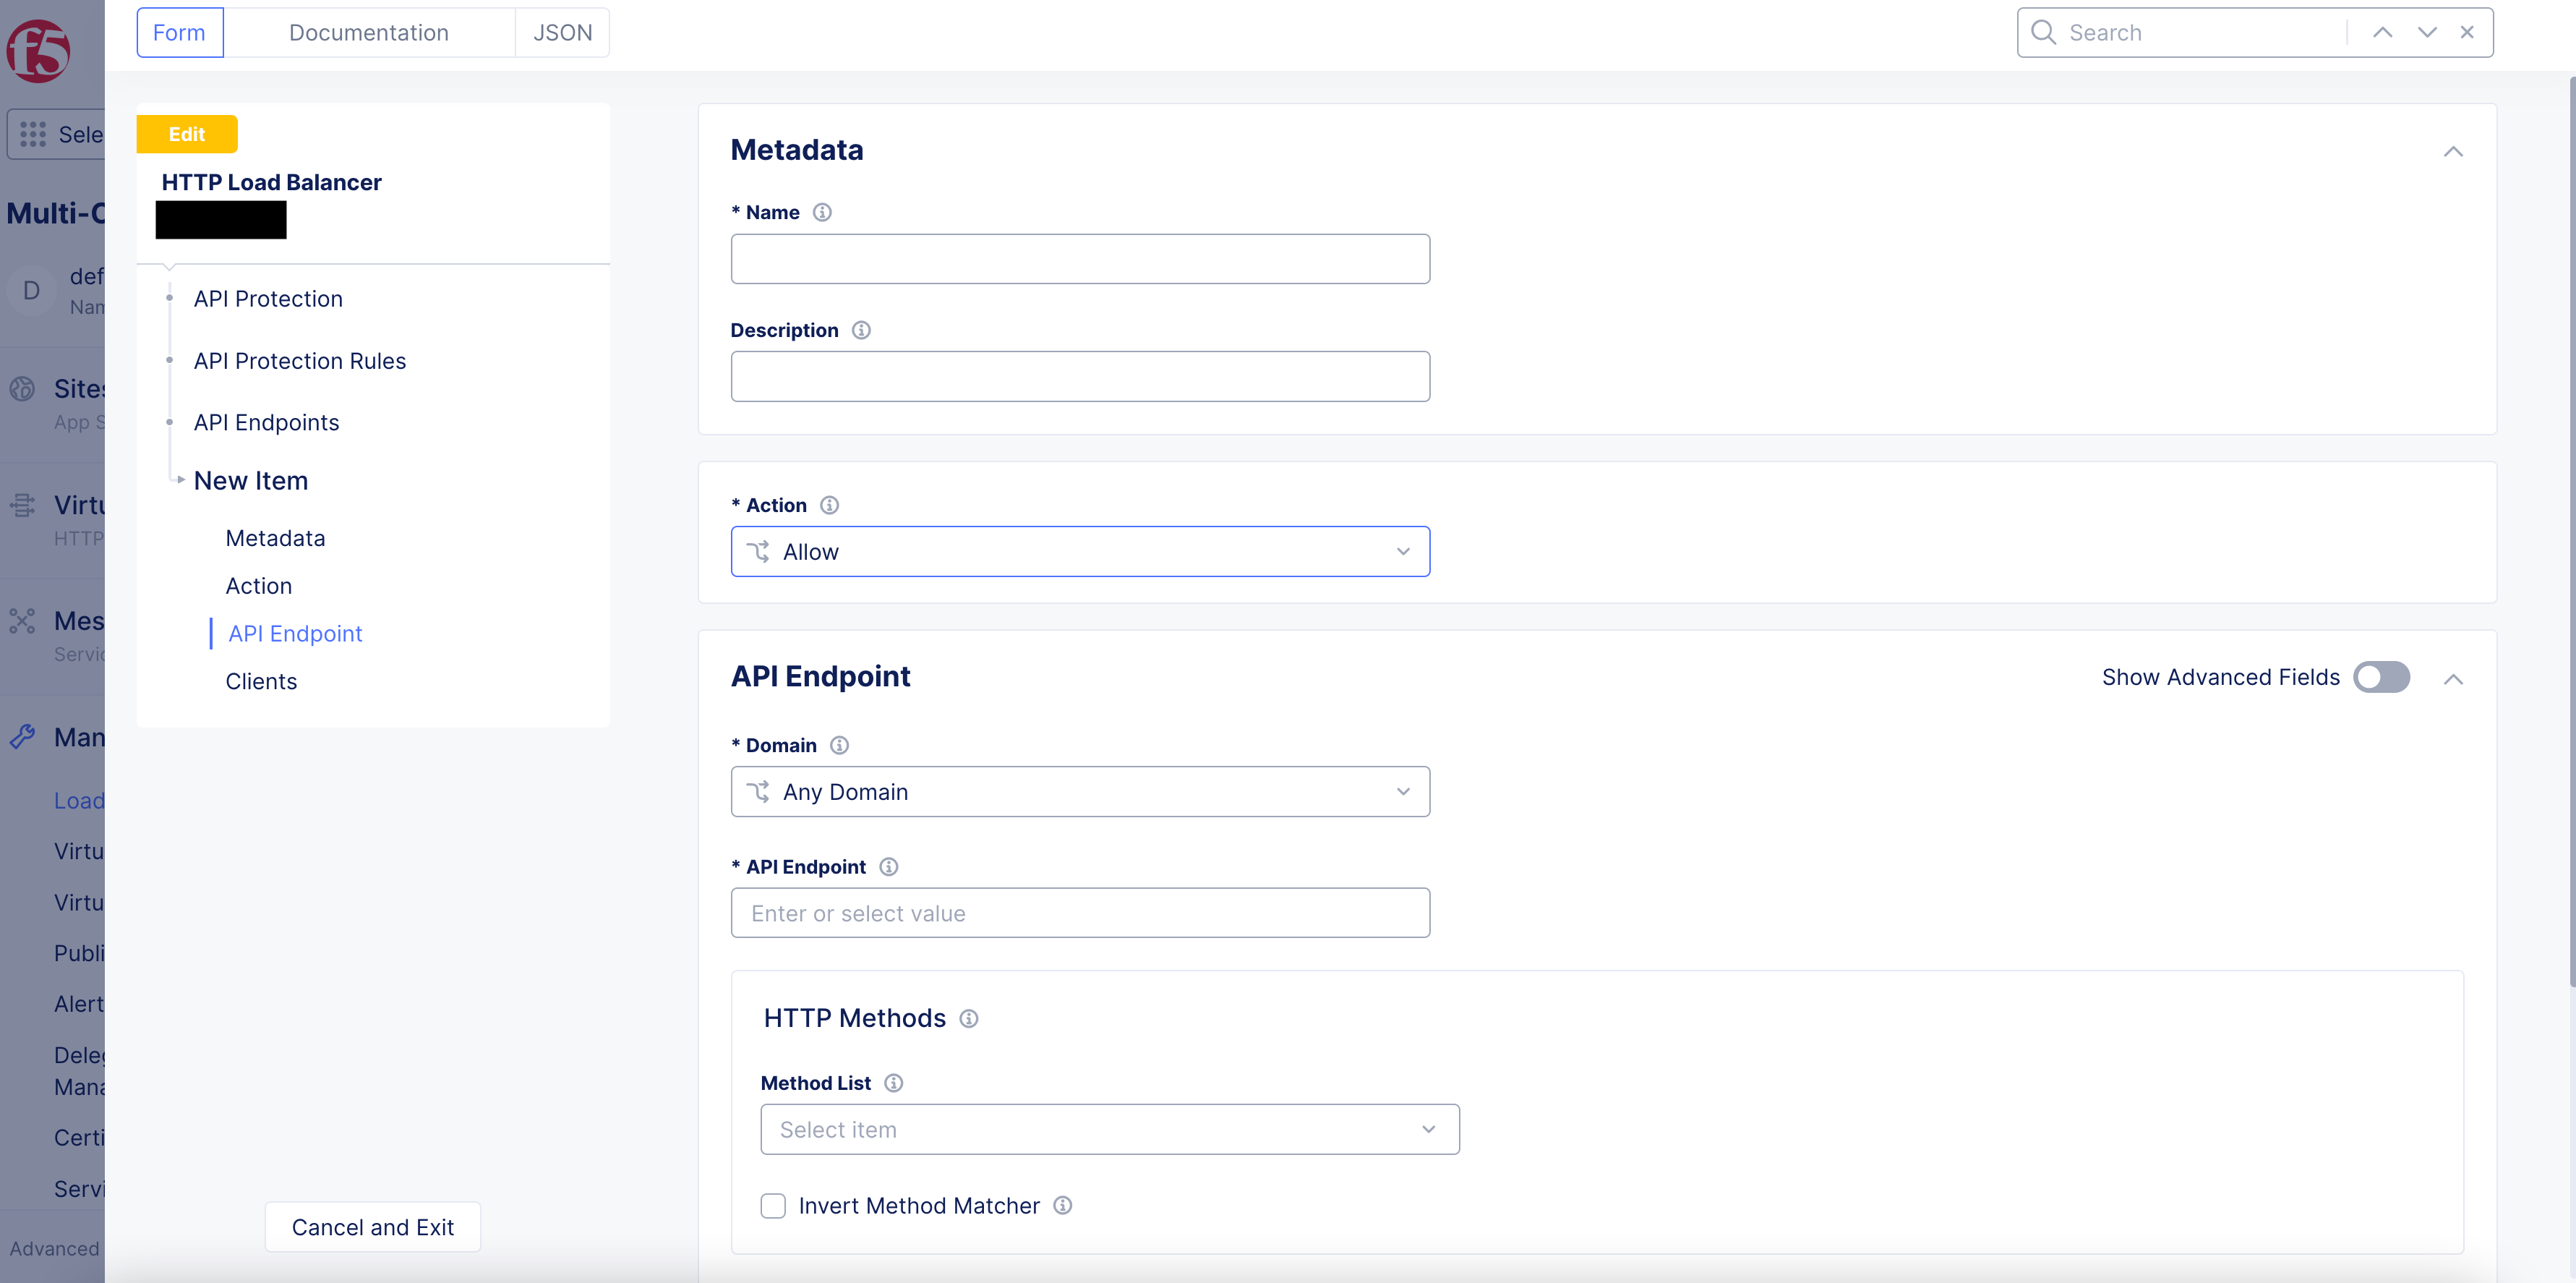
Figure: Action Selection
-
In the
API Endpointsection, enable theShow Advanced Fieldsoption. -
From the
Domainmenu, select an option:-
Any Domain: default option. -
Specific Domain: enter the domain in theSpecific Domainfield.
-
-
From the
API Endpointmenu, select a specific API endpoint path. ClickSee Suggestionsto display suggested list of paths and endpoints.
Note: The suggestions are shown only if you have configured an API definition. To learn how to create and configure API definitions, see Import Swagger and Define APIs.

Figure: Path Selection
- Under
HTTP Methods, select the methods for which the API protection rules are to be applied fromMethod List. You can select more than one method.
Note: If no HTTP methods are selected, then the behavior is that all methods (
ANY) will be matched by default.
- Optionally, select the
Invert Method Matcheroption to invert the match result.
Step 3: Optionally, configure API request parameters.
Perform the following:
-
In the
HTTP Query Parametersfield, clickAdd Item. Follow the guided wizard to complete the match criteria for query parameters. -
In the
HTTP Headersfield, clickAdd Item. Follow the guided wizard to complete the match criteria for HTTP header parameters. -
In the
Cookie Matchersfield, clickAdd Item. Follow the guided wizard to complete the match criteria for web cookie parameters.

Figure: Request Parameters
Step 4: Configure client match parameters.
-
In the
Clientssection, enable theShow Advanced Fieldsoption. -
From the
Clientsmenu, select which clients will match to this rule:-
Any Client: Default option. -
List of IP Threat Categories: Select clients based on known IP threat categories. -
Group of Clients by Label Selector: Select clients based on label selectors and expressions.
-

Figure: Client Selection
-
From the
Source IPv4/Asn Matchmenu, select an option to match the client request from.Any Source IPis the default option. However, you can select an option to match by IPv4 prefix, IP prefix, ASN list, or BGP ASN sets. -
Optionally, configure the TLS fingerprint match parameters:
-
From the
TLS fingerprint classesmenu, select a TLS fingerprint class. -
For the exact values, click
Add item. From the menu, clickSee Common Valuesto select an exact fingerprint to match from the class previously selected. You can add a fingerprint option even if no classes were selected from theTLS fingerprint classesmenu.
-

Figure: Fingerprint Selection
-
For the excluded values, click
Add item. From the menu, clickSee Common Valuesto select an exact fingerprint to exclude from the class previously selected. -
Click
Apply.
Step 5: Confirm rule order and save the new settings.
-
Check the order of the rules. You can reorder them by selecting a rule and moving it up or down the list.
-
After you finish, click
Apply.

Figure: Apply Protection Rule
-
Click
Apply. -
Click
Save and Exit.
Configure Rules Using Server URLs and API Groups
If you are configuring rules using server URLs and API groups, perform the following:
Step 1: Navigate to load balancer.
- From the Console homepage, click
Multi-Cloud App Connect.
Figure: Homepage
-
Select your application namespace.
-
Navigate to
Manage>Load Balancers>HTTP Load Balancers. -
Click
...for your load balancer and selectManage Configurationto open the load balancer configuration form. -
Click
Edit Configurationin the top right corner of the form.
Step 2: Start configuring API protection rules.
- In the
API Protectionsection, clickConfigurein theAPI Protection Rulesfield.
Figure: Security Configuration Section
-
Under the
Server URLs and API Groupssection, clickConfigure. -
Click
Add Item. -
In the
Namefield, enter a name for this API protection rule. -
From the
Actionmenu, select whether toAlloworDeny.

Figure: Action Selection
-
Under the
API Group/ Base Pathsection, enable theShow Advanced Fieldsoption. -
From the
Domainmenu, select an option:-
Any Domain: default option. -
Specific Domain: enter the domain in theSpecific Domainfield.
-
-
From the
Base Pathmenu, select a server endpoint path. ClickSee Suggestionsto display suggested list of paths and endpoints. -
From the
API Groupmenu, select the API group based on a previously configured API definition. The suggestions are shown only if you have configured an API definition. To learn how to create and configure API definitions, see Import Swagger and Define APIs.

Figure: Path Selection
Step 3: Configure client match parameters.
-
In the
Clientssection, enable theShow Advanced Fieldsoption. -
From the
Clientsmenu, select which clients will match to this rule:-
Any Client: Default option. -
List of IP Threat Categories: Select clients based on known IP threat categories. -
Group of Clients by Label Selector: Select clients based on label selectors and expressions.
-
-
From the
Source IP/Asn Matchmenu, select an option to match the client request from.Any Source IPis the default option. However, you can select an option to match by IP prefix list, IP prefix sets, ASN list, or BGP ASN sets. -
Optionally, configure the TLS fingerprint match parameters:
-
From the
TLS fingerprint classesmenu, select a TLS fingerprint class. -
For the exact values, click
Add item. From the menu, clickSee Common Valuesto select an exact fingerprint to match from the class previously selected. You can add a fingerprint option even if no classes were selected from theTLS fingerprint classesmenu. -
For the excluded values, click
Add item. From the menu, clickSee Common Valuesto select an exact fingerprint to exclude from the class previously selected.
-
-
Click
Apply.

Figure: Fingerprint Selection
Step 4: Confirm rule order and save the new settings.
-
Check the order of the rules. You can reorder them by selecting a rule and moving it up or down the list.
-
After you finish, click
Apply.

Figure: Apply Protection Rule
-
Click
Apply. -
Click
Save and Exit.