Verify Application in Web App Scanning
Objective
This article describes how to verify an application by proving your domain ownership in F5® Distributed Cloud Web App Scanning.
For security reasons, you can only run penetration tests on applications hosted on domains you own. To verify your ownership, we offer three different verification methods:
- DNS Verification. To verify your domain ownership, you can set a TXT record at the root of the DNS zone for your domain. This is often the simplest and quickest approach.
- File Upload. If you cannot add a DNS record, you can upload a text file to the root of your web server. The file must have a specific file name and contain a verification code generated by F5® Distributed Cloud Web App Scanning.
- Manual Verification. If the available domain verification methods cannot be used, raise a support ticket with F5 Support. The SOC team will validate the request and open a Jira ticket to complete the manual domain verification process.
Note: If you create an application (e.g., hosted on
https://customerportal.acmeinc.com), we will request that you verify your ownership of the apex domain the app is hosted on (e.g.,acmeinc.com). All subsequent applications you would like to test that are hosted under the same apex domain will automatically be verified in the future.
Verify Your Domain Ownership
To verify your domain ownership, follow the steps outlined below.
Step 1: Log into the Distributed Cloud Web App Scanning Console and to the verification page.
-
Log into the Distributed Cloud Web App Scanning Console.
-
Click on Applications in the menu.
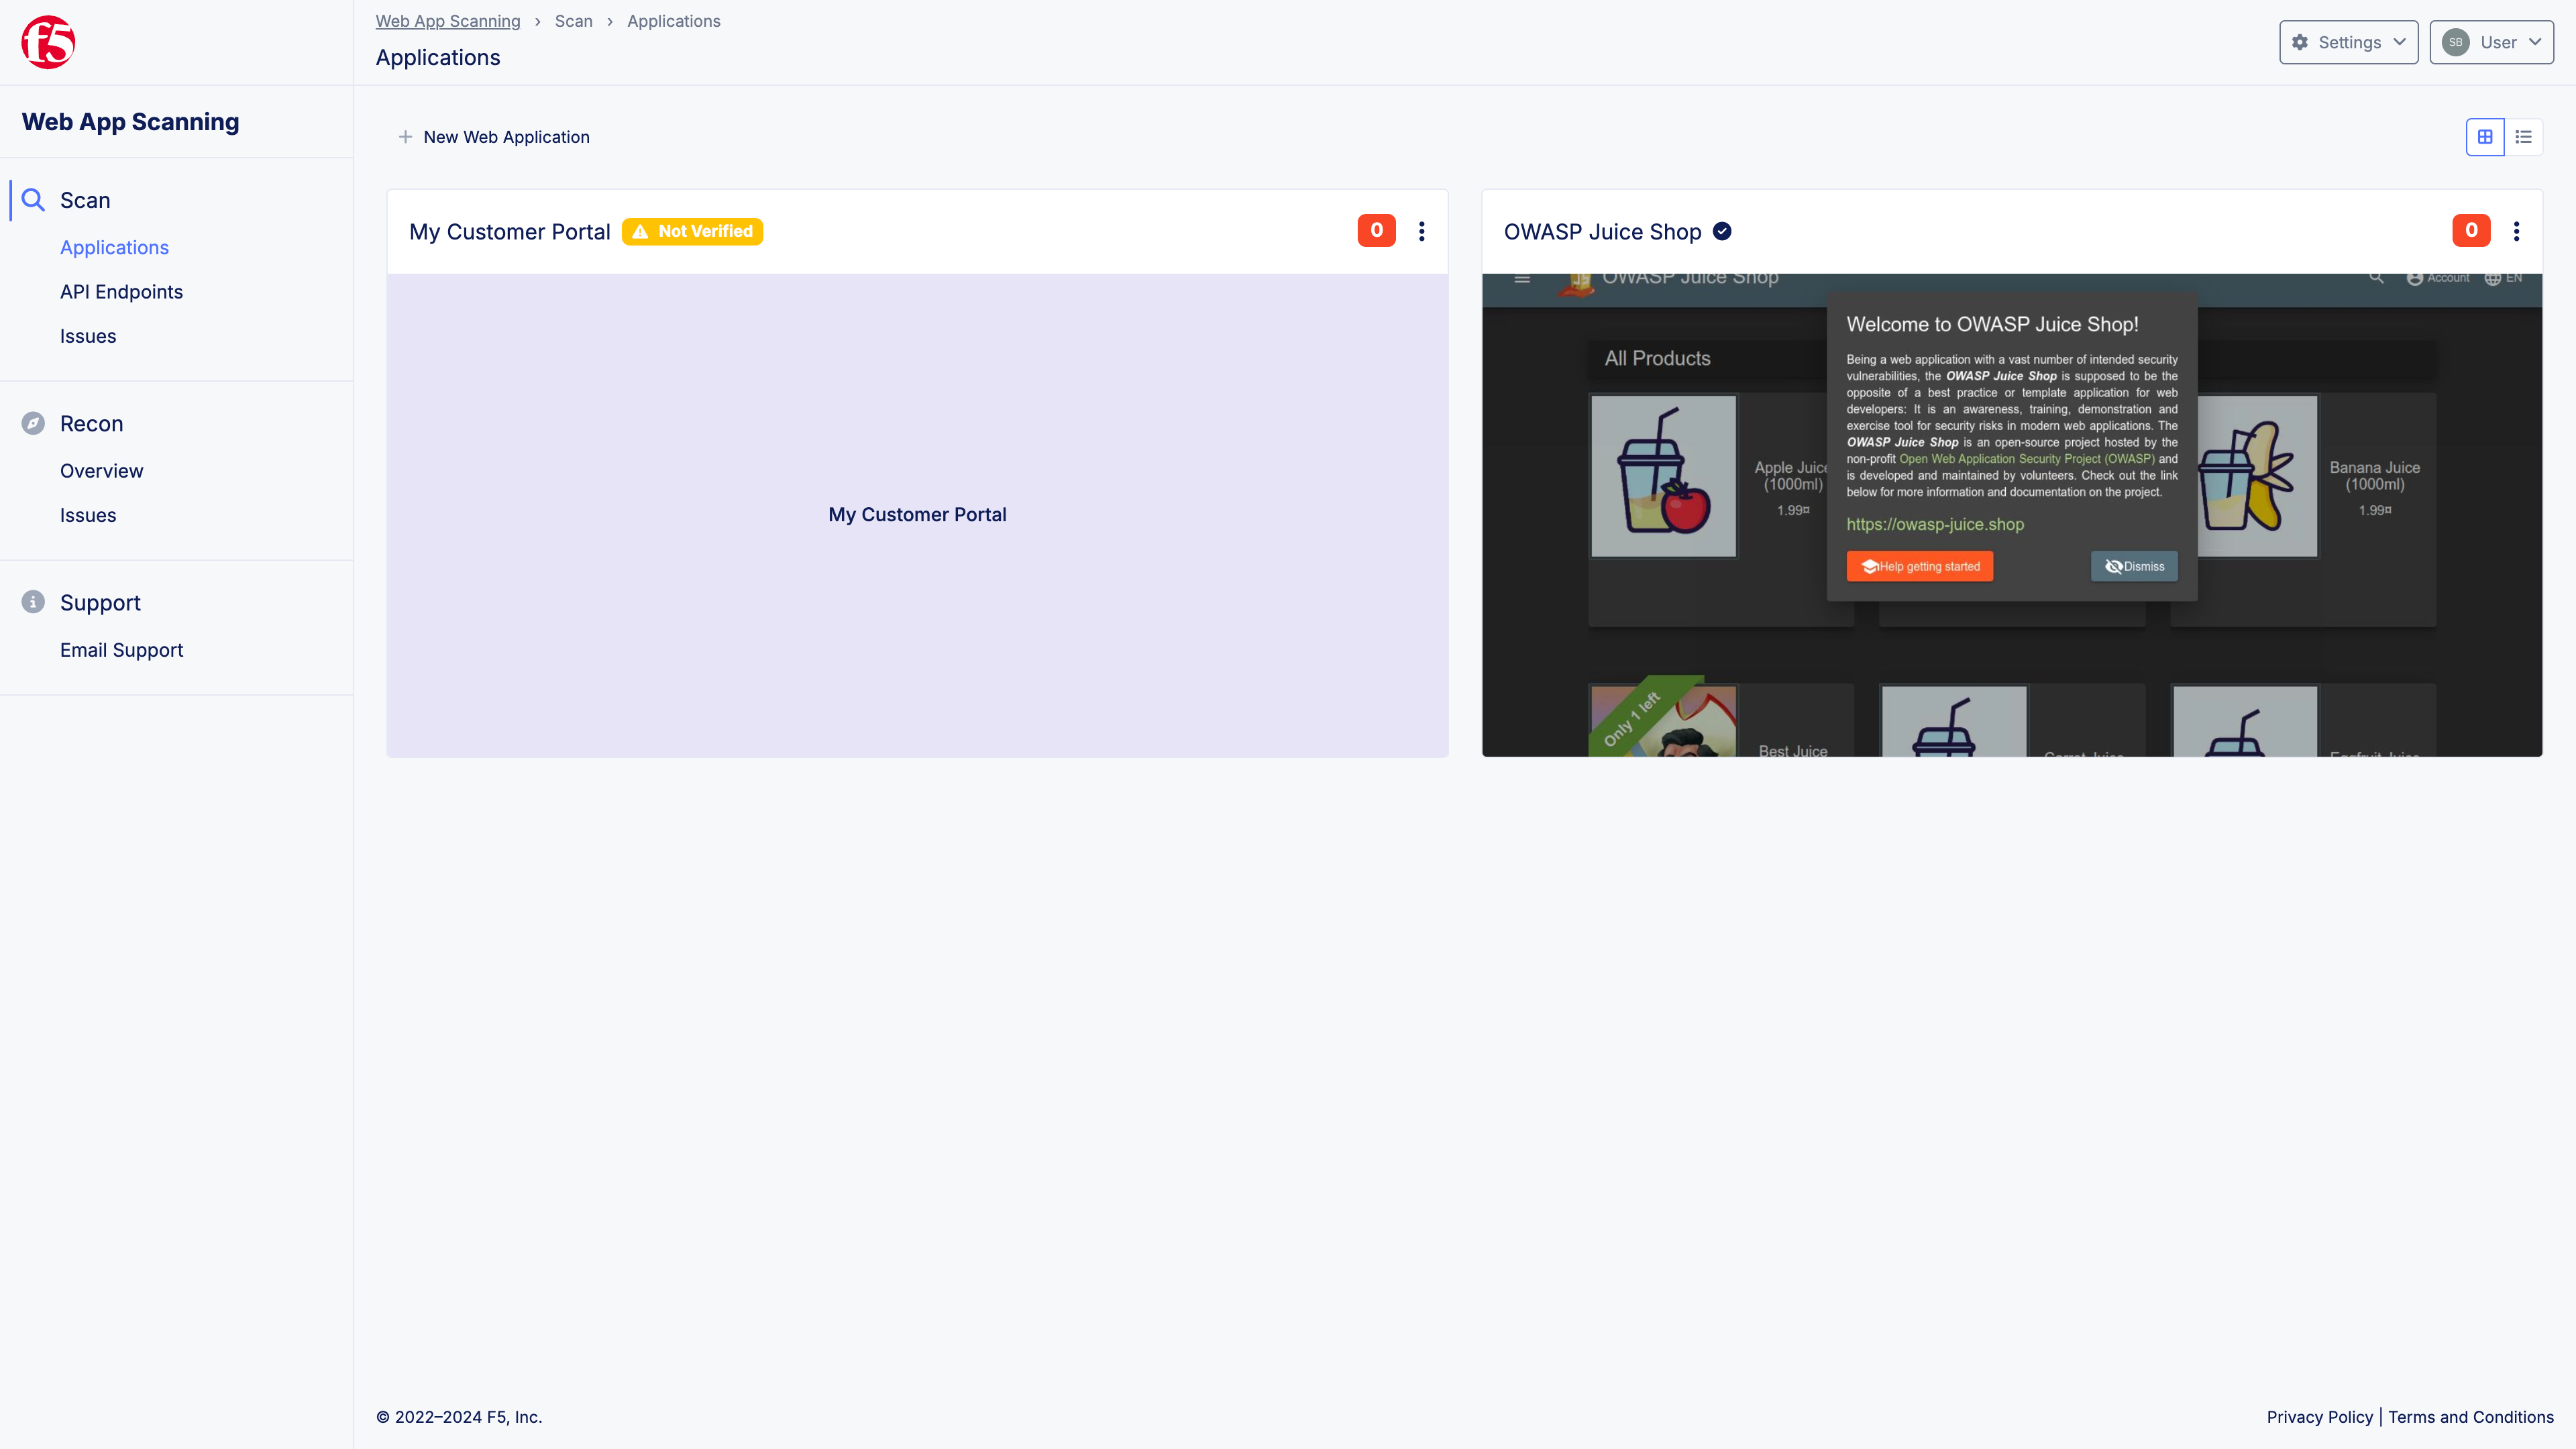
Figure: Applications
- Click on the Not Verified label on the application you would like to verify.
Step 2a: Verify your ownership by setting a DNS record.
-
On the verification page, choose the DNS option to the left.
-
Copy the value of the TXT record you must set to verify your ownership.
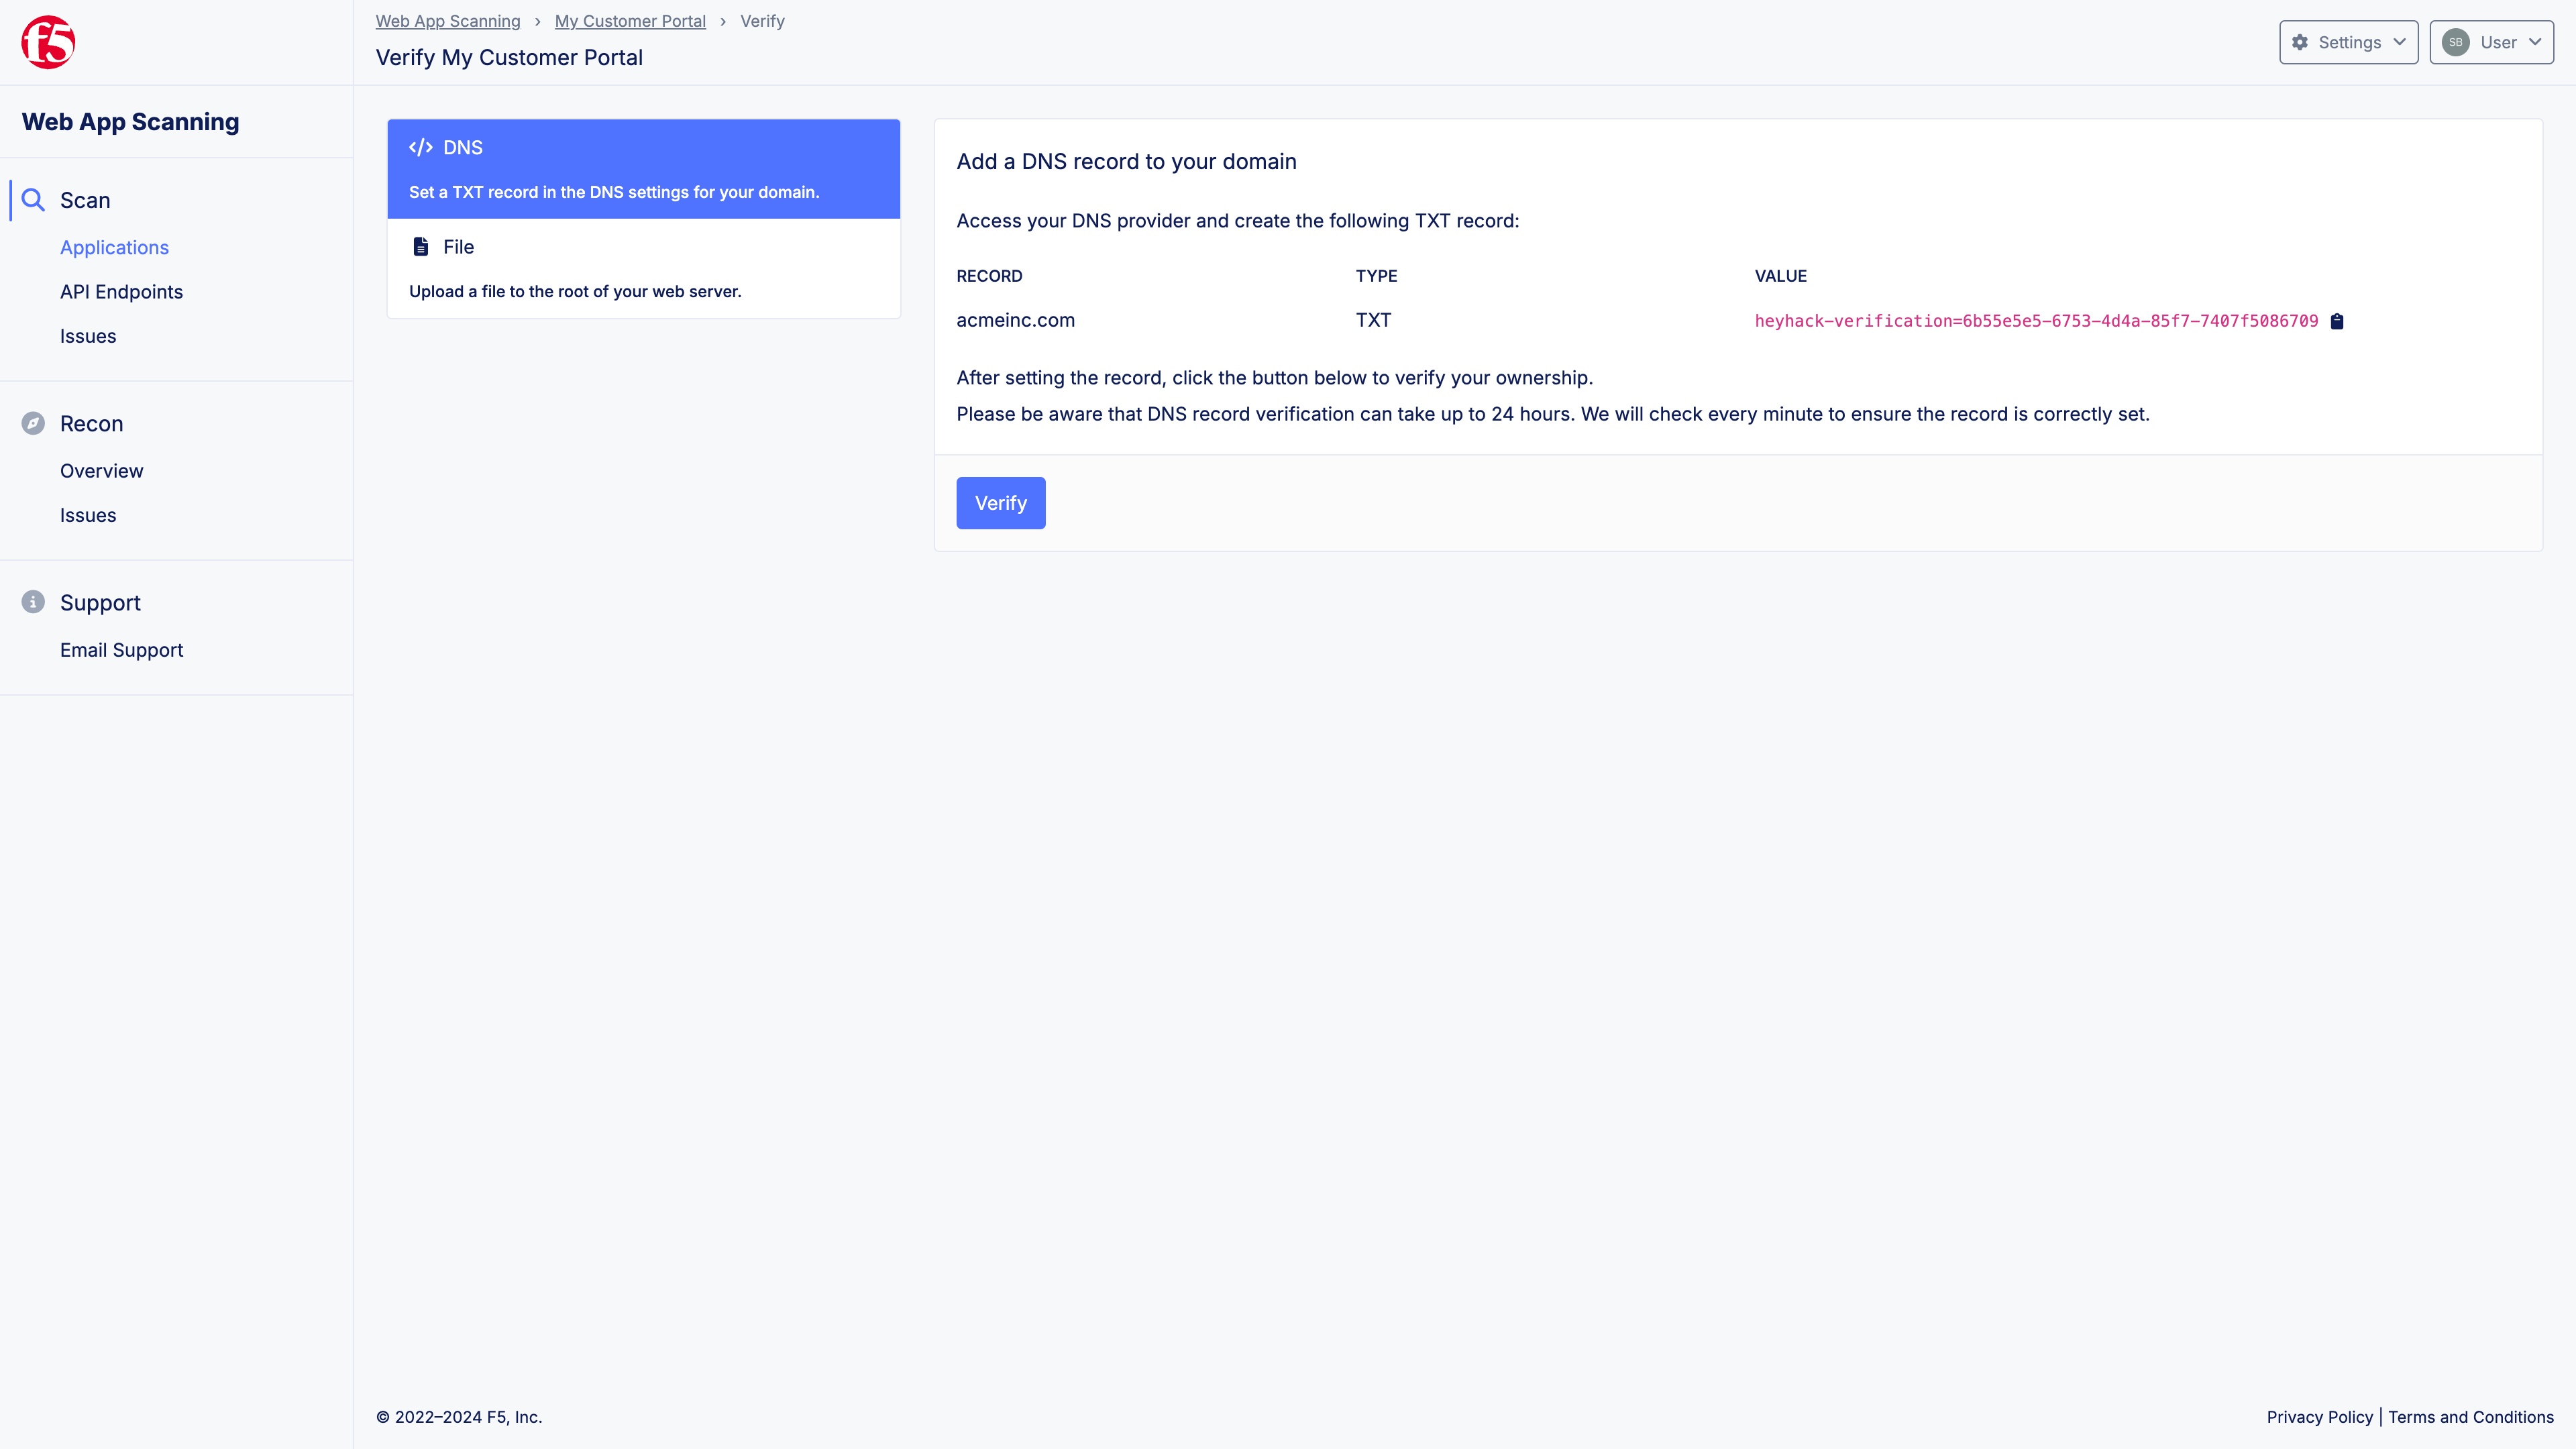
Figure: DNS Verification
-
Sign in to your domain registrar/DNS hosting service and navigate to the DNS management page. This page might be called "Manage DNS" or "DNS Settings", depending on your provider.
-
Create a new TXT record at the root of your domain. Paste in the value you copied from F5® Distributed Cloud Web App Scanning.
-
Save the record.
-
Return to F5® Distributed Cloud Web App Scanning and click on Verify.
-
DNS changes can take up to 48 hours to propagate. If you use F5® Distributed Cloud DNS, the change will typically happen within a few minutes.
-
Once the DNS record becomes publicly available, F5® Distributed Cloud Web App Scanning will automatically verify your domain. If you have enabled email notifications, you will receive an email notifying you of the successful verification.
Note: Once the domain verification process completes, you can safely remove the TXT record from your DNS zone.
Step 2b: Verify your ownership by uploading a text file.
-
On the verification page, choose the File option to the left.
-
Click on Download verification file to download the text file.
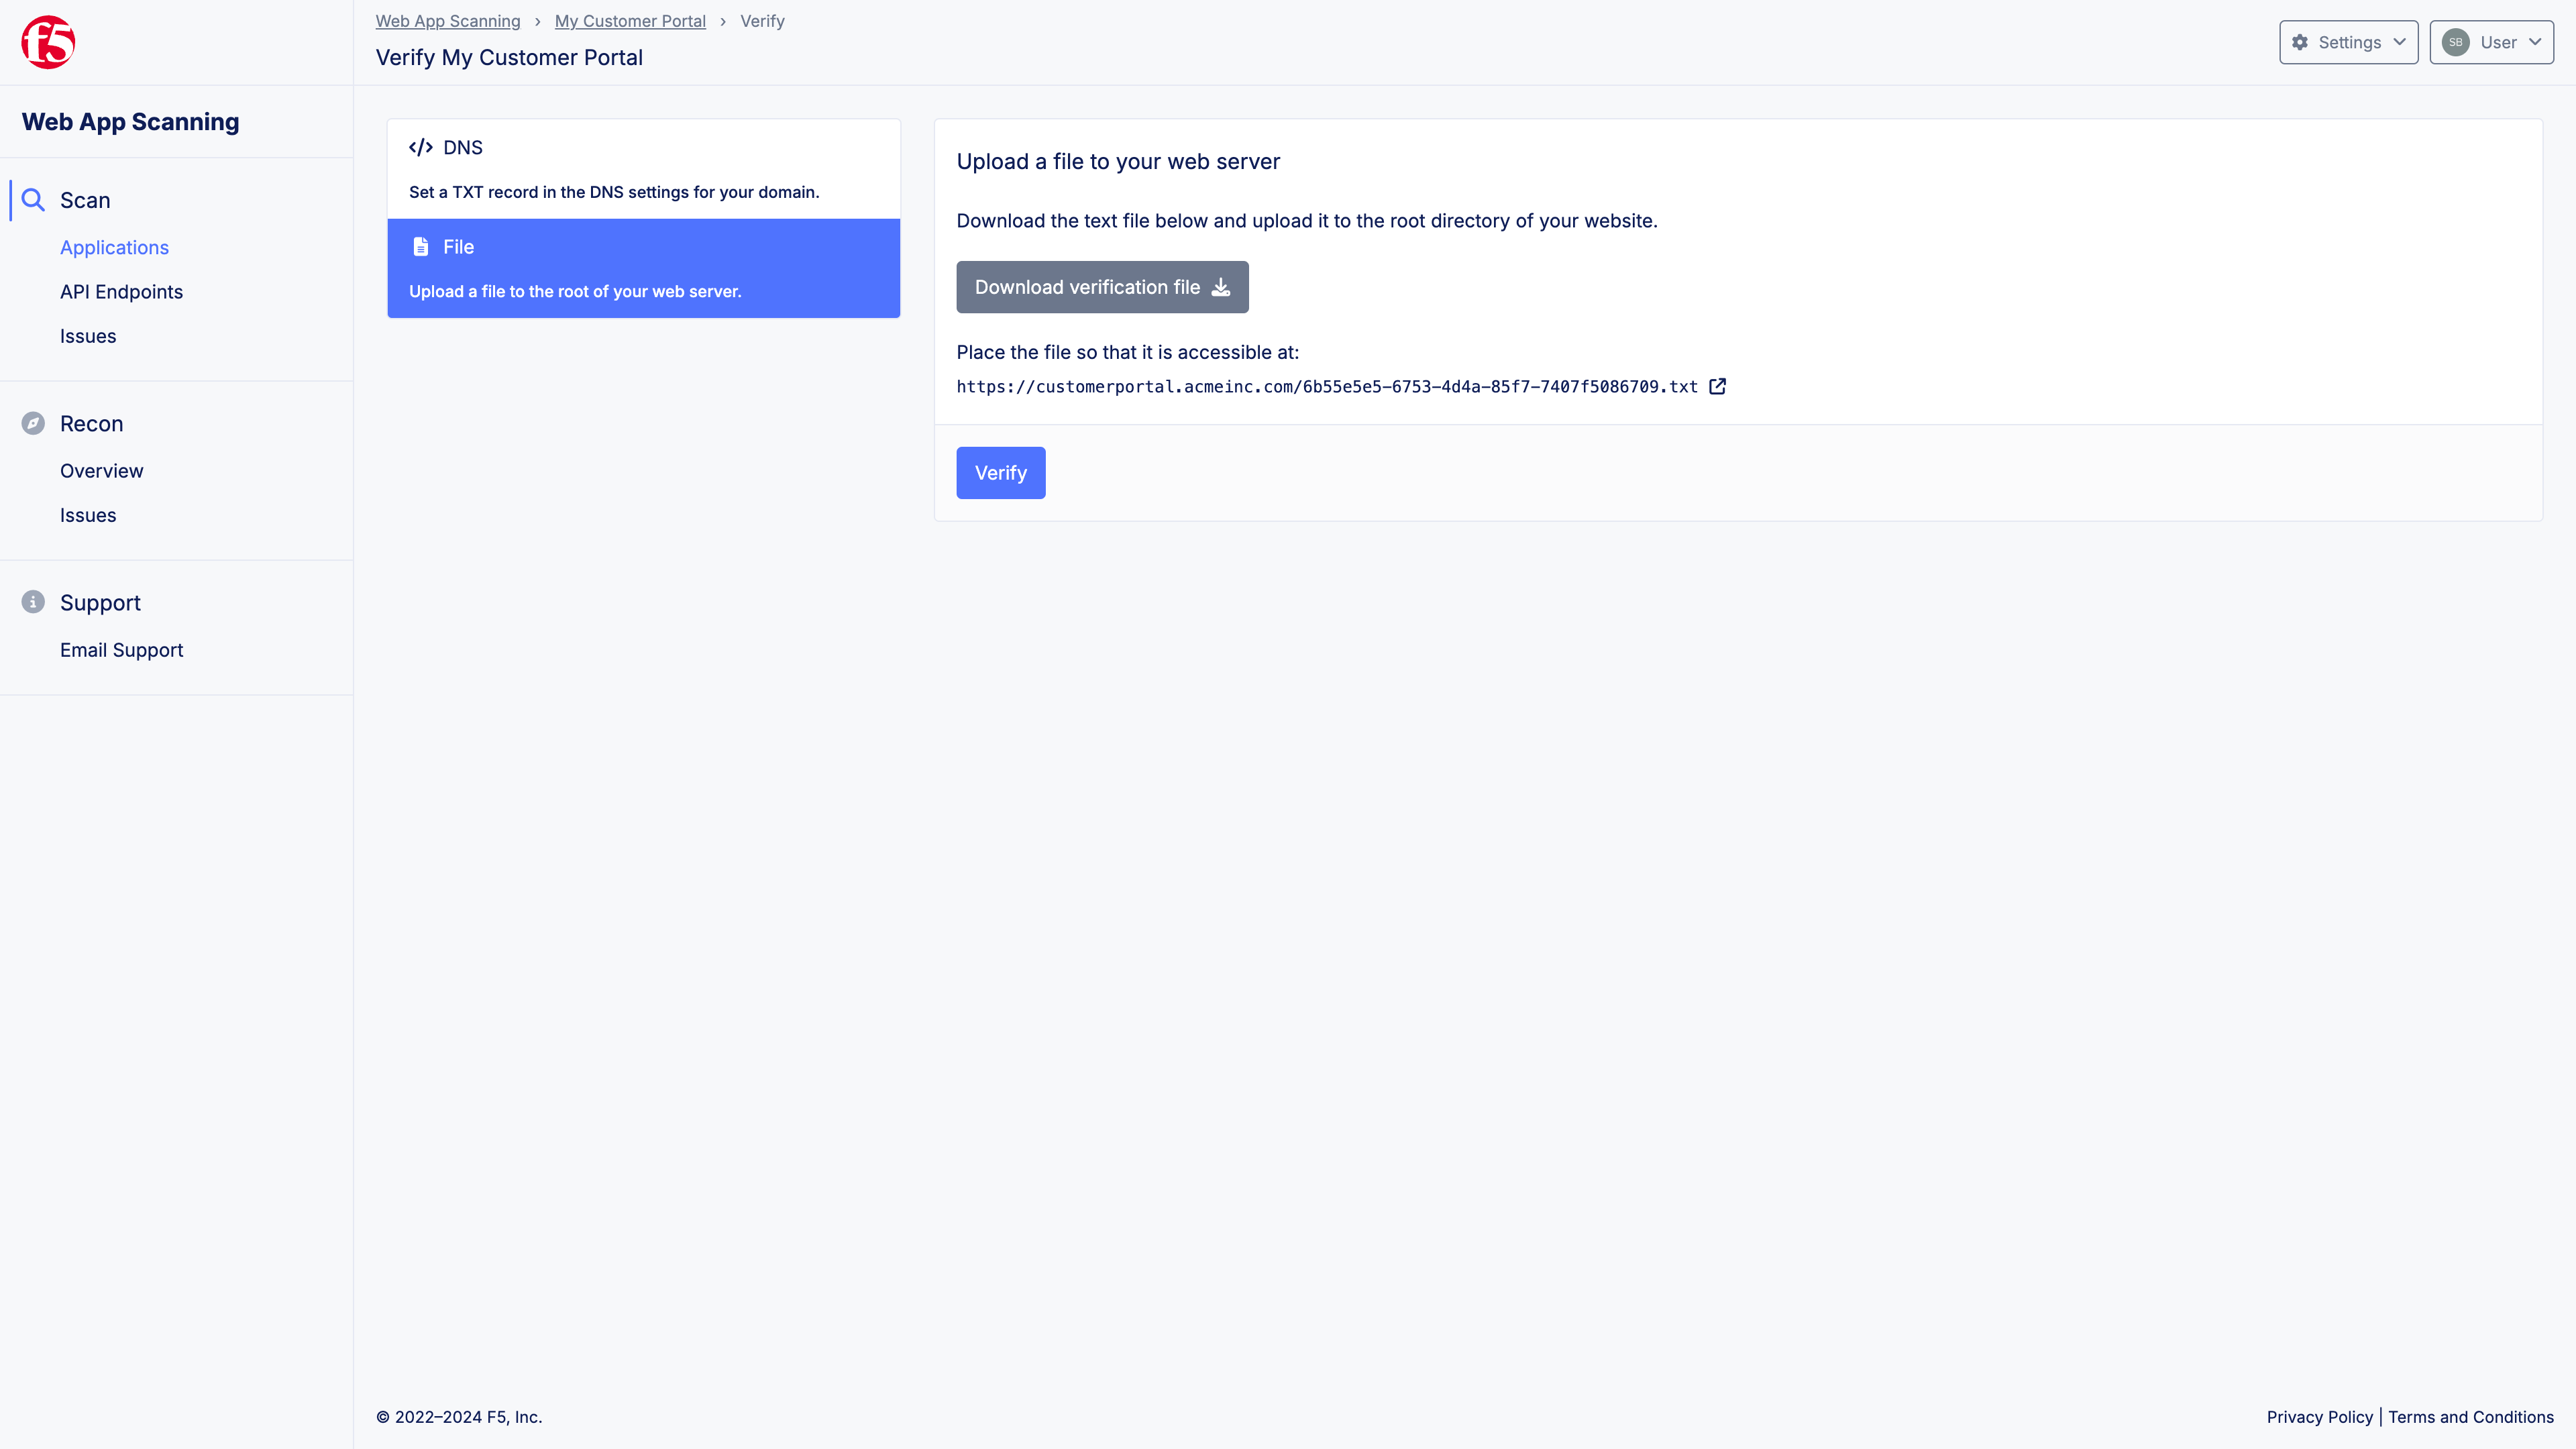
Figure: File Upload
-
Upload the file to your web server so that it is publicly available via the link shown on the screen.
-
Once you have uploaded the file, click on Verify.
-
F5® Distributed Cloud Web App Scanning will check whether the file is available. If it is, F5® Distributed Cloud Web App Scanning will automatically verify your domain. If you have enabled email notifications, you will receive an email notifying you of the successful verification.
Note: Once the domain verification process completes, you can safely remove the text file for your web server.