Configure Alert Notifications for Webhook
Objective
This document provides instructions on how to configure alert notifications in F5® Distributed Cloud Services to route alert messages to your webhook. For information on alerts, see Alerts.
Prerequisites
-
A valid Account is required. If you do not have an account, see Getting Started with Console.
-
A webhook.
Configuration
Configuring to send alerts requires you to create alert receiver, and policy in the F5® Distributed Cloud Console.
Alerts can be created in different workspaces and namespaces. Alert functionality is available in Multi-Cloud Network Connect, Multi-Cloud App Connect, Web App & API Protection, Distributed Apps, Audit Logs and Alerts and Shared Configuration.
This example shows alert notifications for Webhook setup in Shared Configuration.
Step 1: Create Alert Policy.
- Open
F5 Distributed Cloud Consolehomepage, selectShared Configurationbox.
Note: Homepage is role based, and your homepage may look different due to your role customization. Select
All Workspacesdrop-down menu to discover all options. Customize Settings:Administration>Personal Management>My Account>Edit work domain & skillsbutton >Advancedbox > checkWork Domainboxes >Save changesbutton.
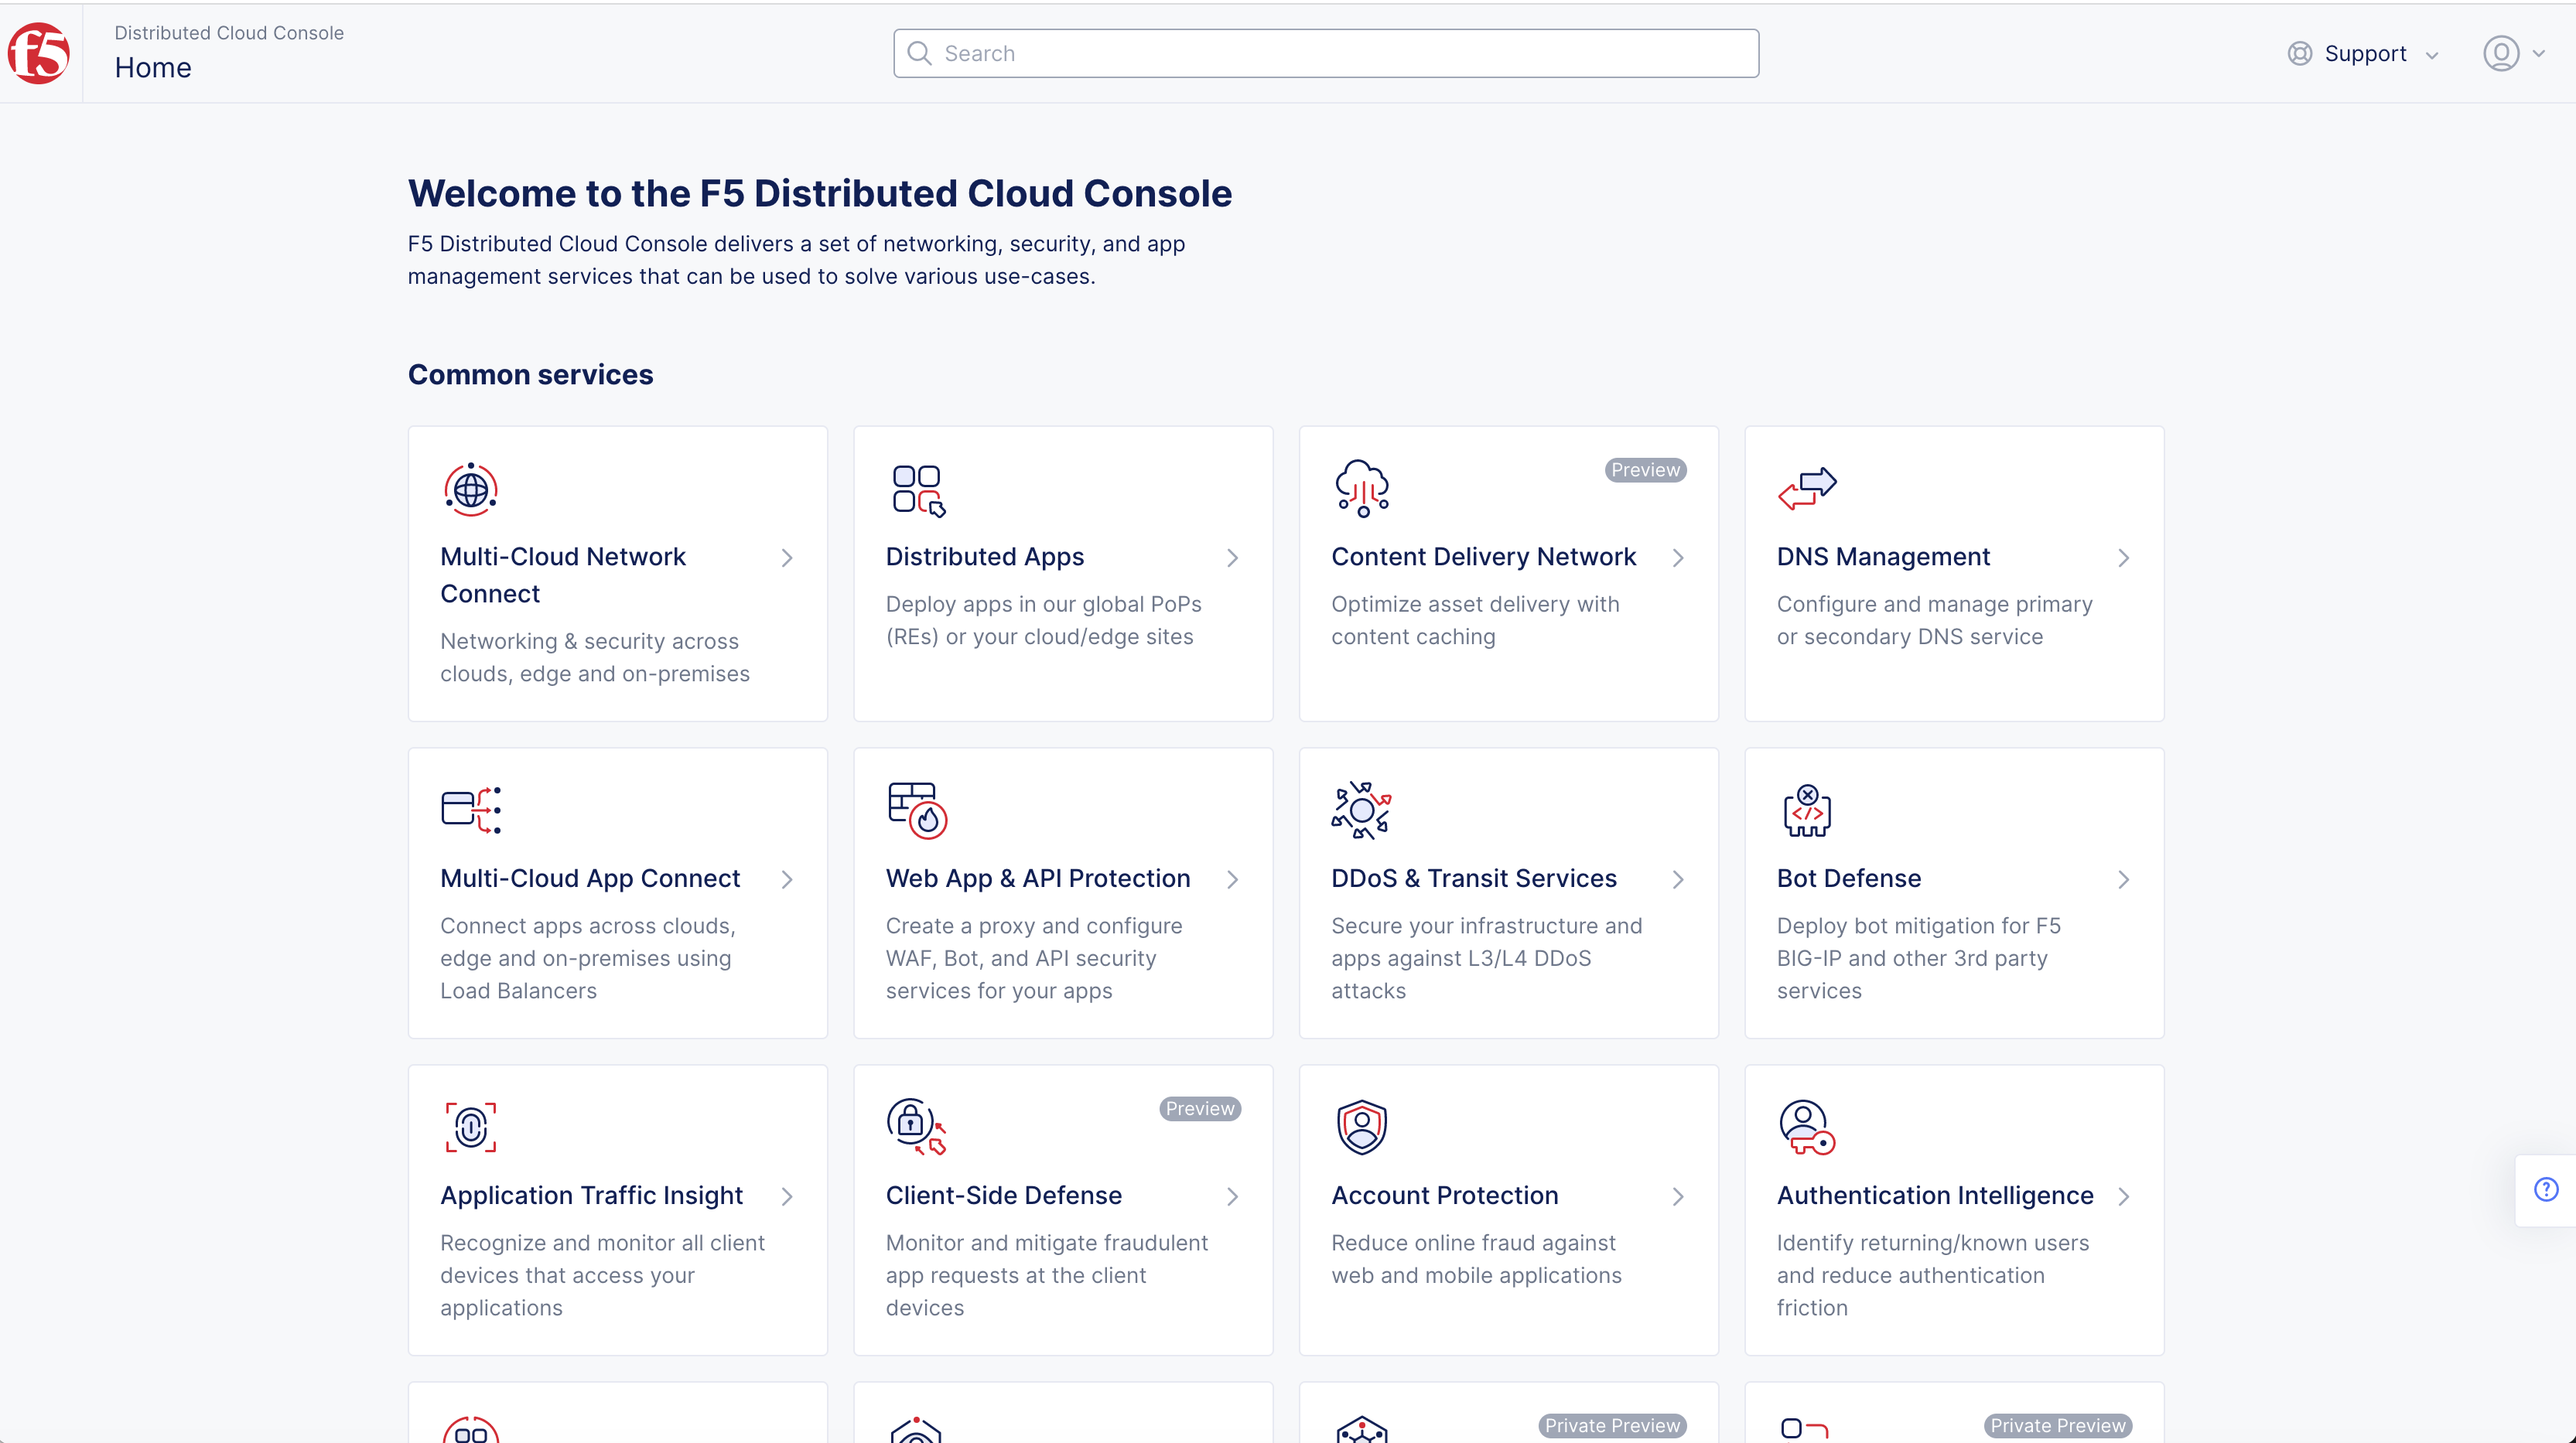
Figure: Homepage
Note: Confirm
Namespacefeature is in correct namespace, drop-down selector located in upper-left corner. Not available in all services.
- Select
Managein left column menu > selectAlerts Management>Alert Policies.
Note: If options are not showing available, select
Showlink inAdvanced nav options visiblein bottom left corner. If needed, selectHideto minimize options from Advanced nav options mode.
- Select
+ Add Alert Policybutton.
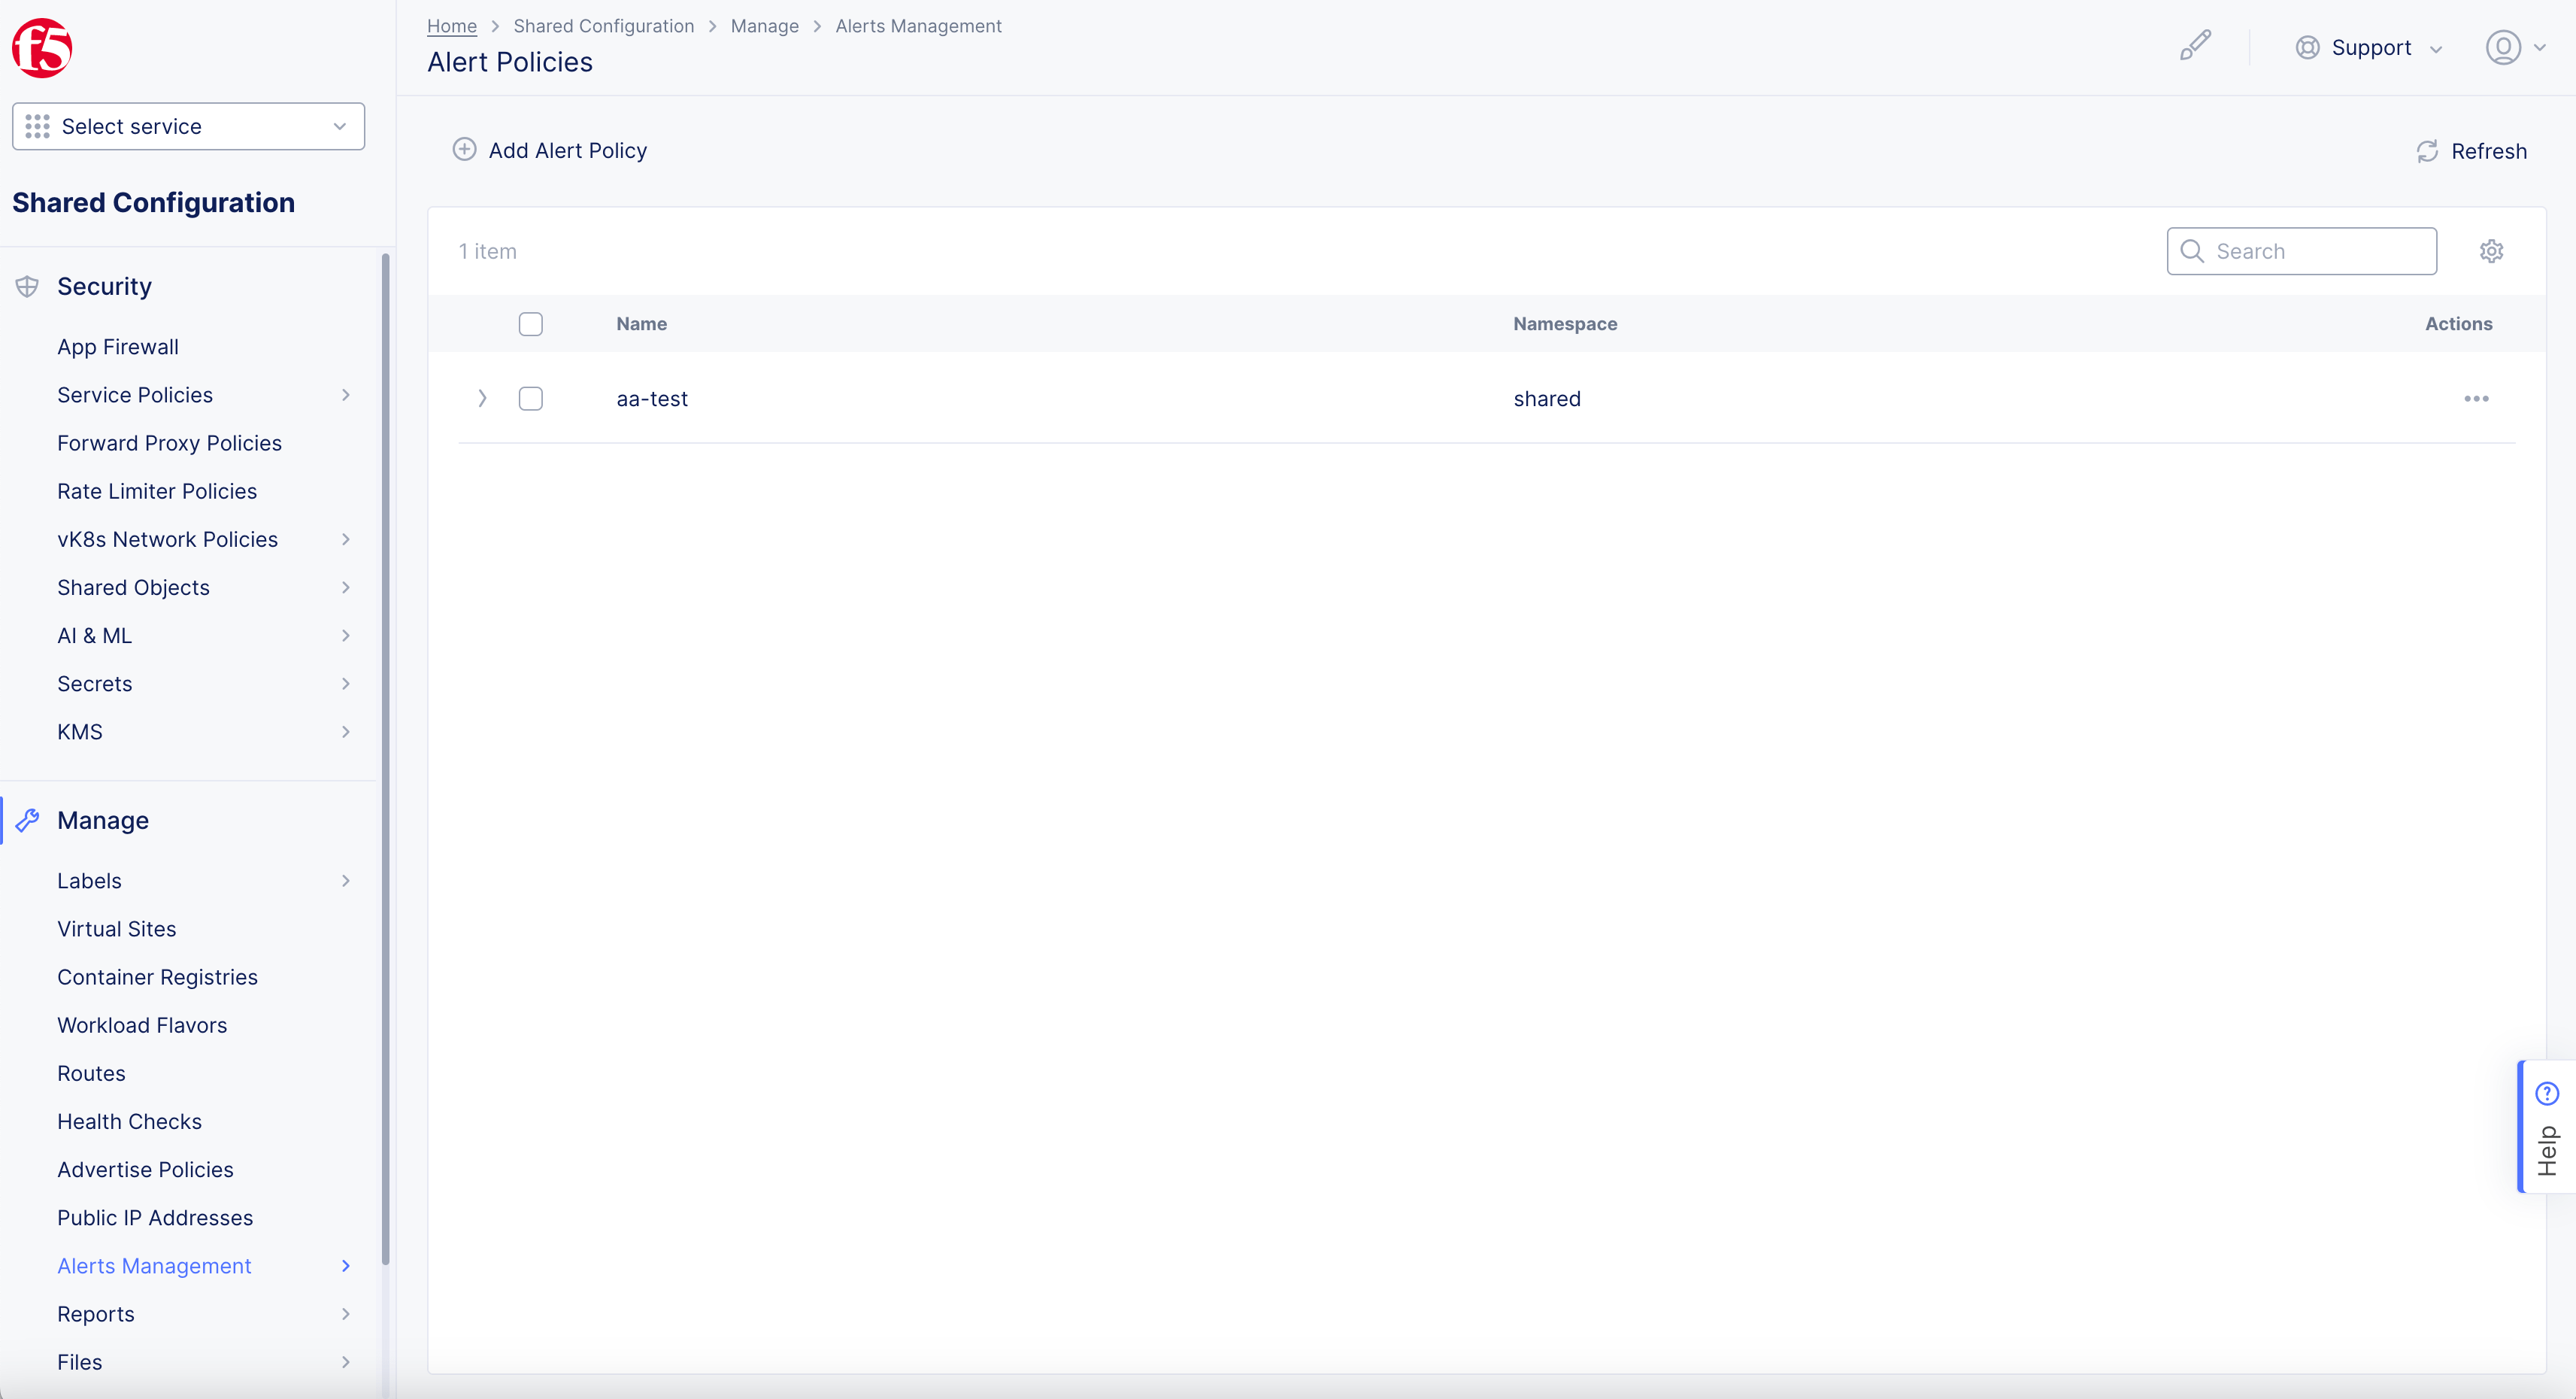
Figure: Alert Receiver
Step 2: Setup Alert Policy.
-
Enter
Name. -
Enter
LabelsandDescriptionas needed.
Note: Toggle
Show Advanced Fieldsto showConfigureReceiver Default Notification Parameters.
-
Select IteminAlert Receiversdrop-down menu inAlert Receivers Configurationbox. -
Select your
Alert Receiversif available in list you created in Create Alert Receiver chapter. -
Select
+ Add Itembutton inAlert Receiverspage to Create Alert Receiver.
Note:
+ Add Itembutton inAlert Receivers Configurationbox to add multiple Alert Receivers.
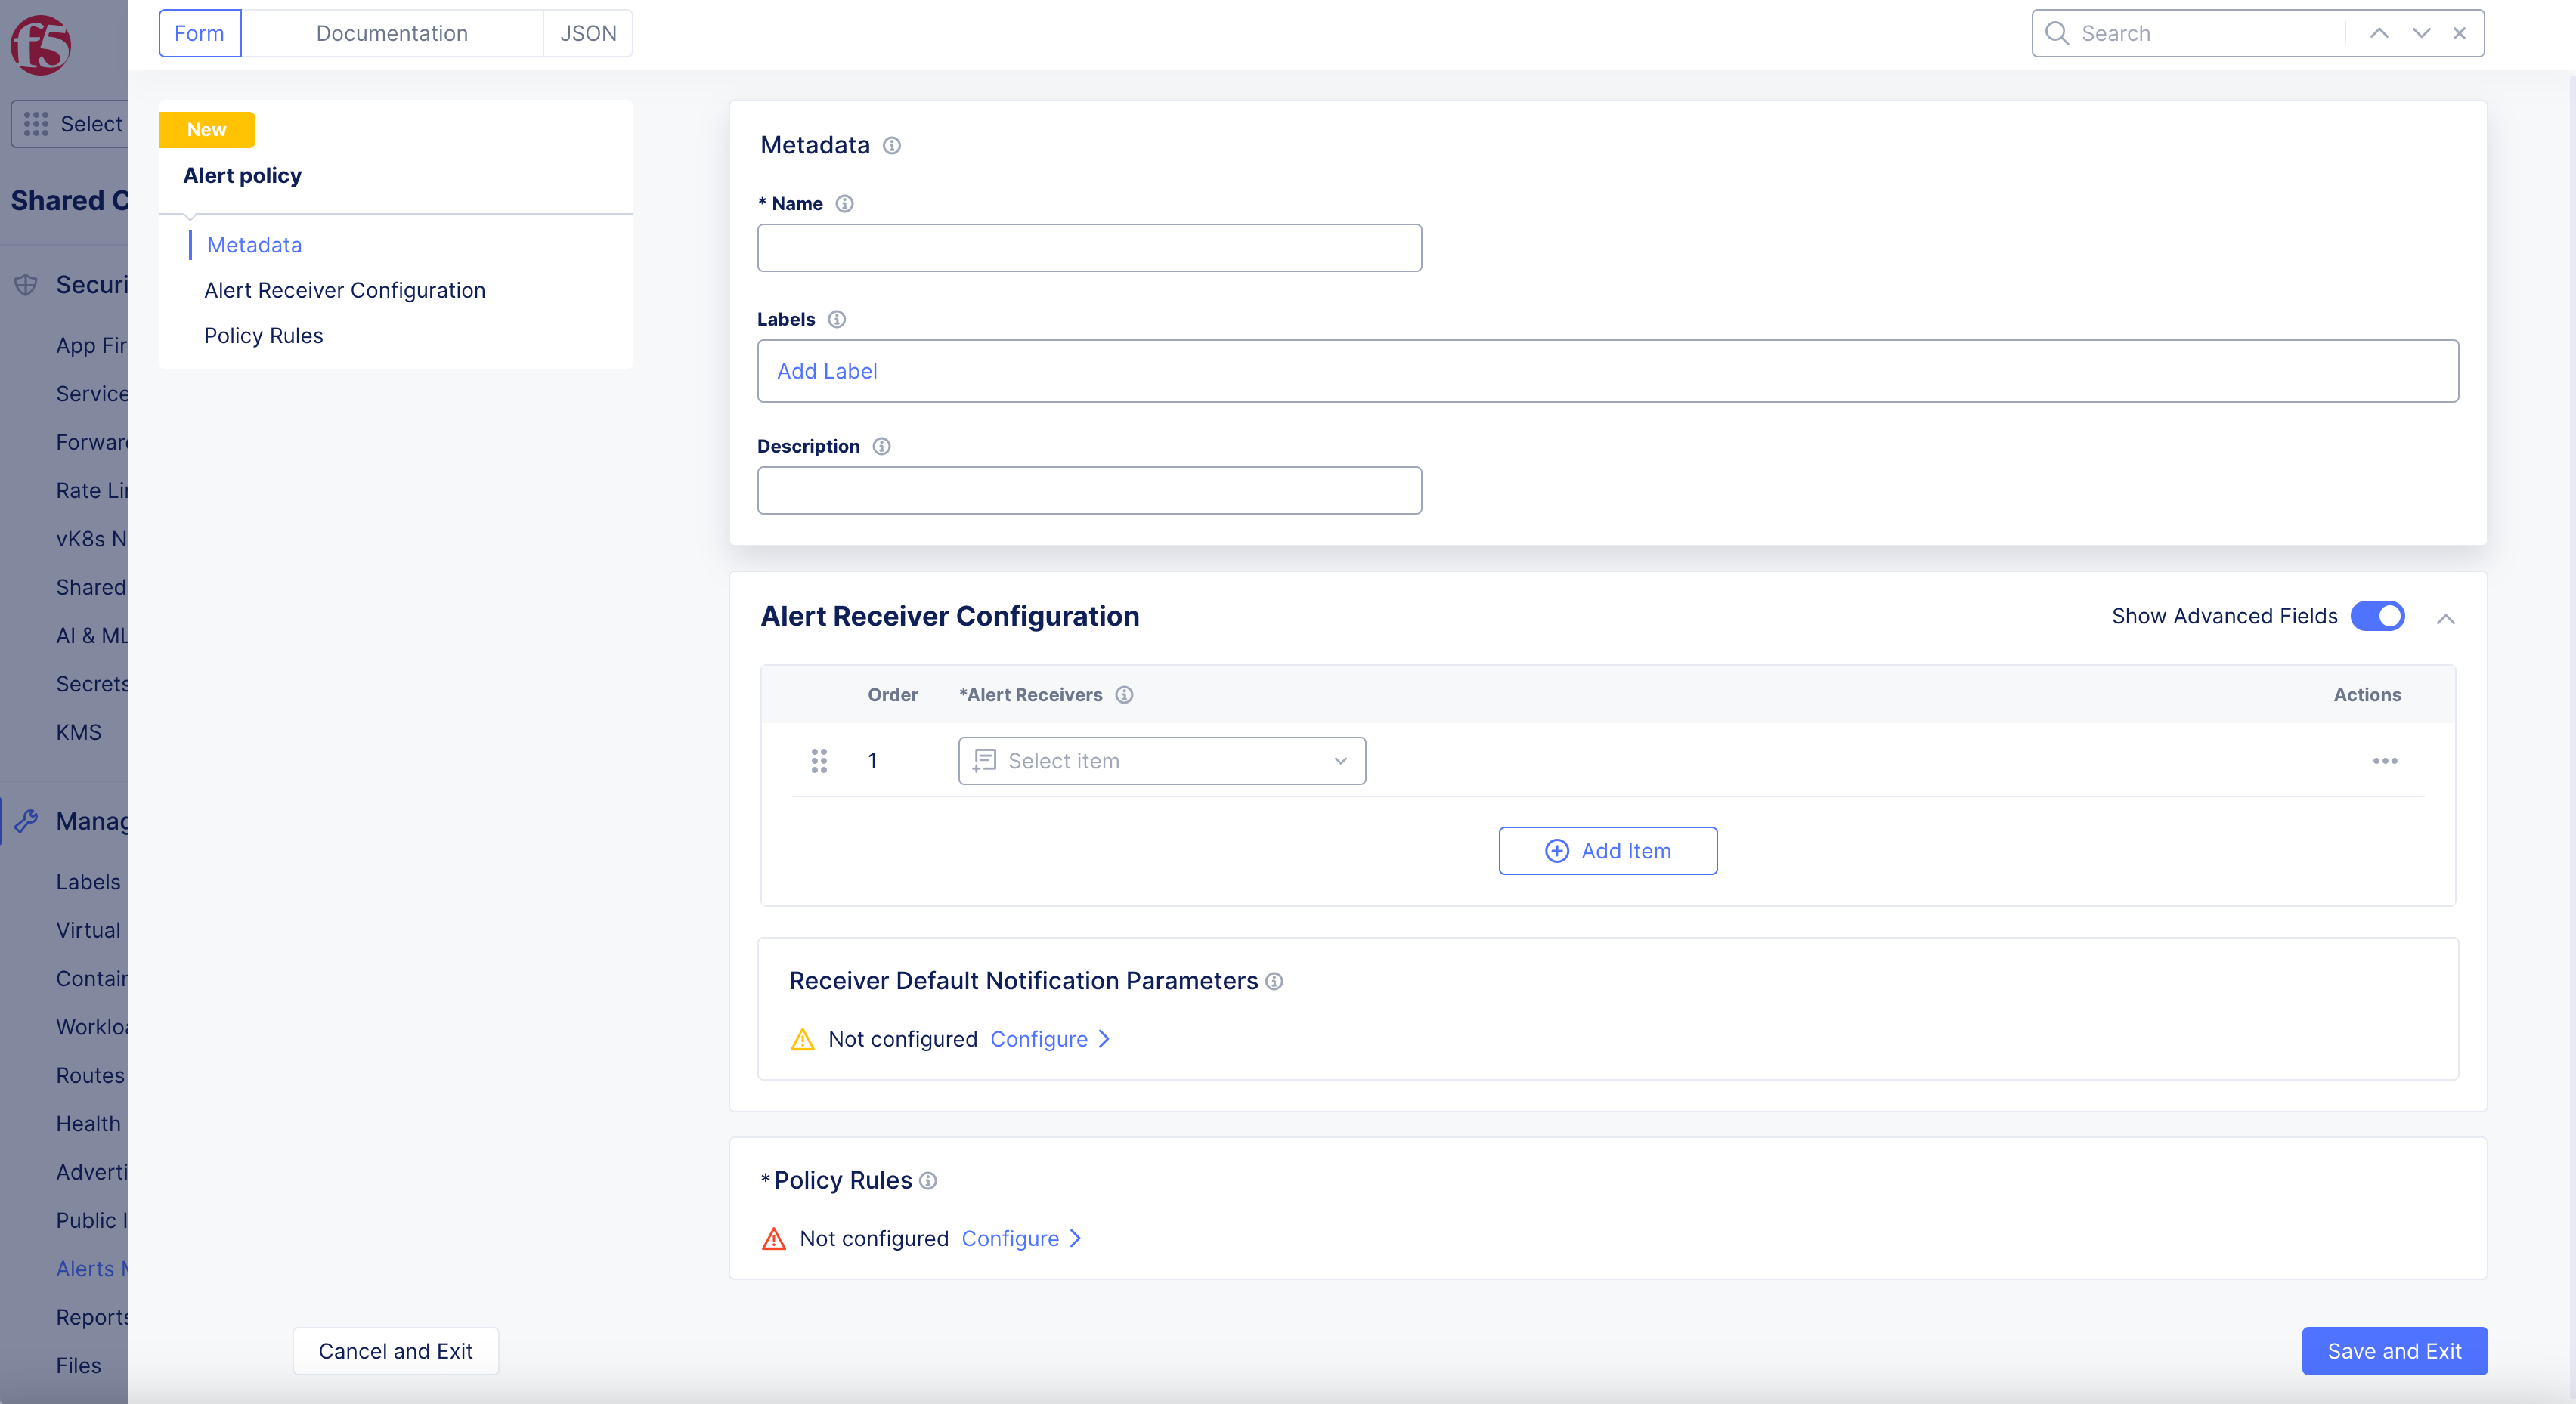
Figure: Alert Policy Configuration
Step 3: Start configuring Alert Receiver.
-
Enter
Name. -
Enter
LabelsandDescriptionas needed. -
Select
WebhookinReceiverdrop-down menu.
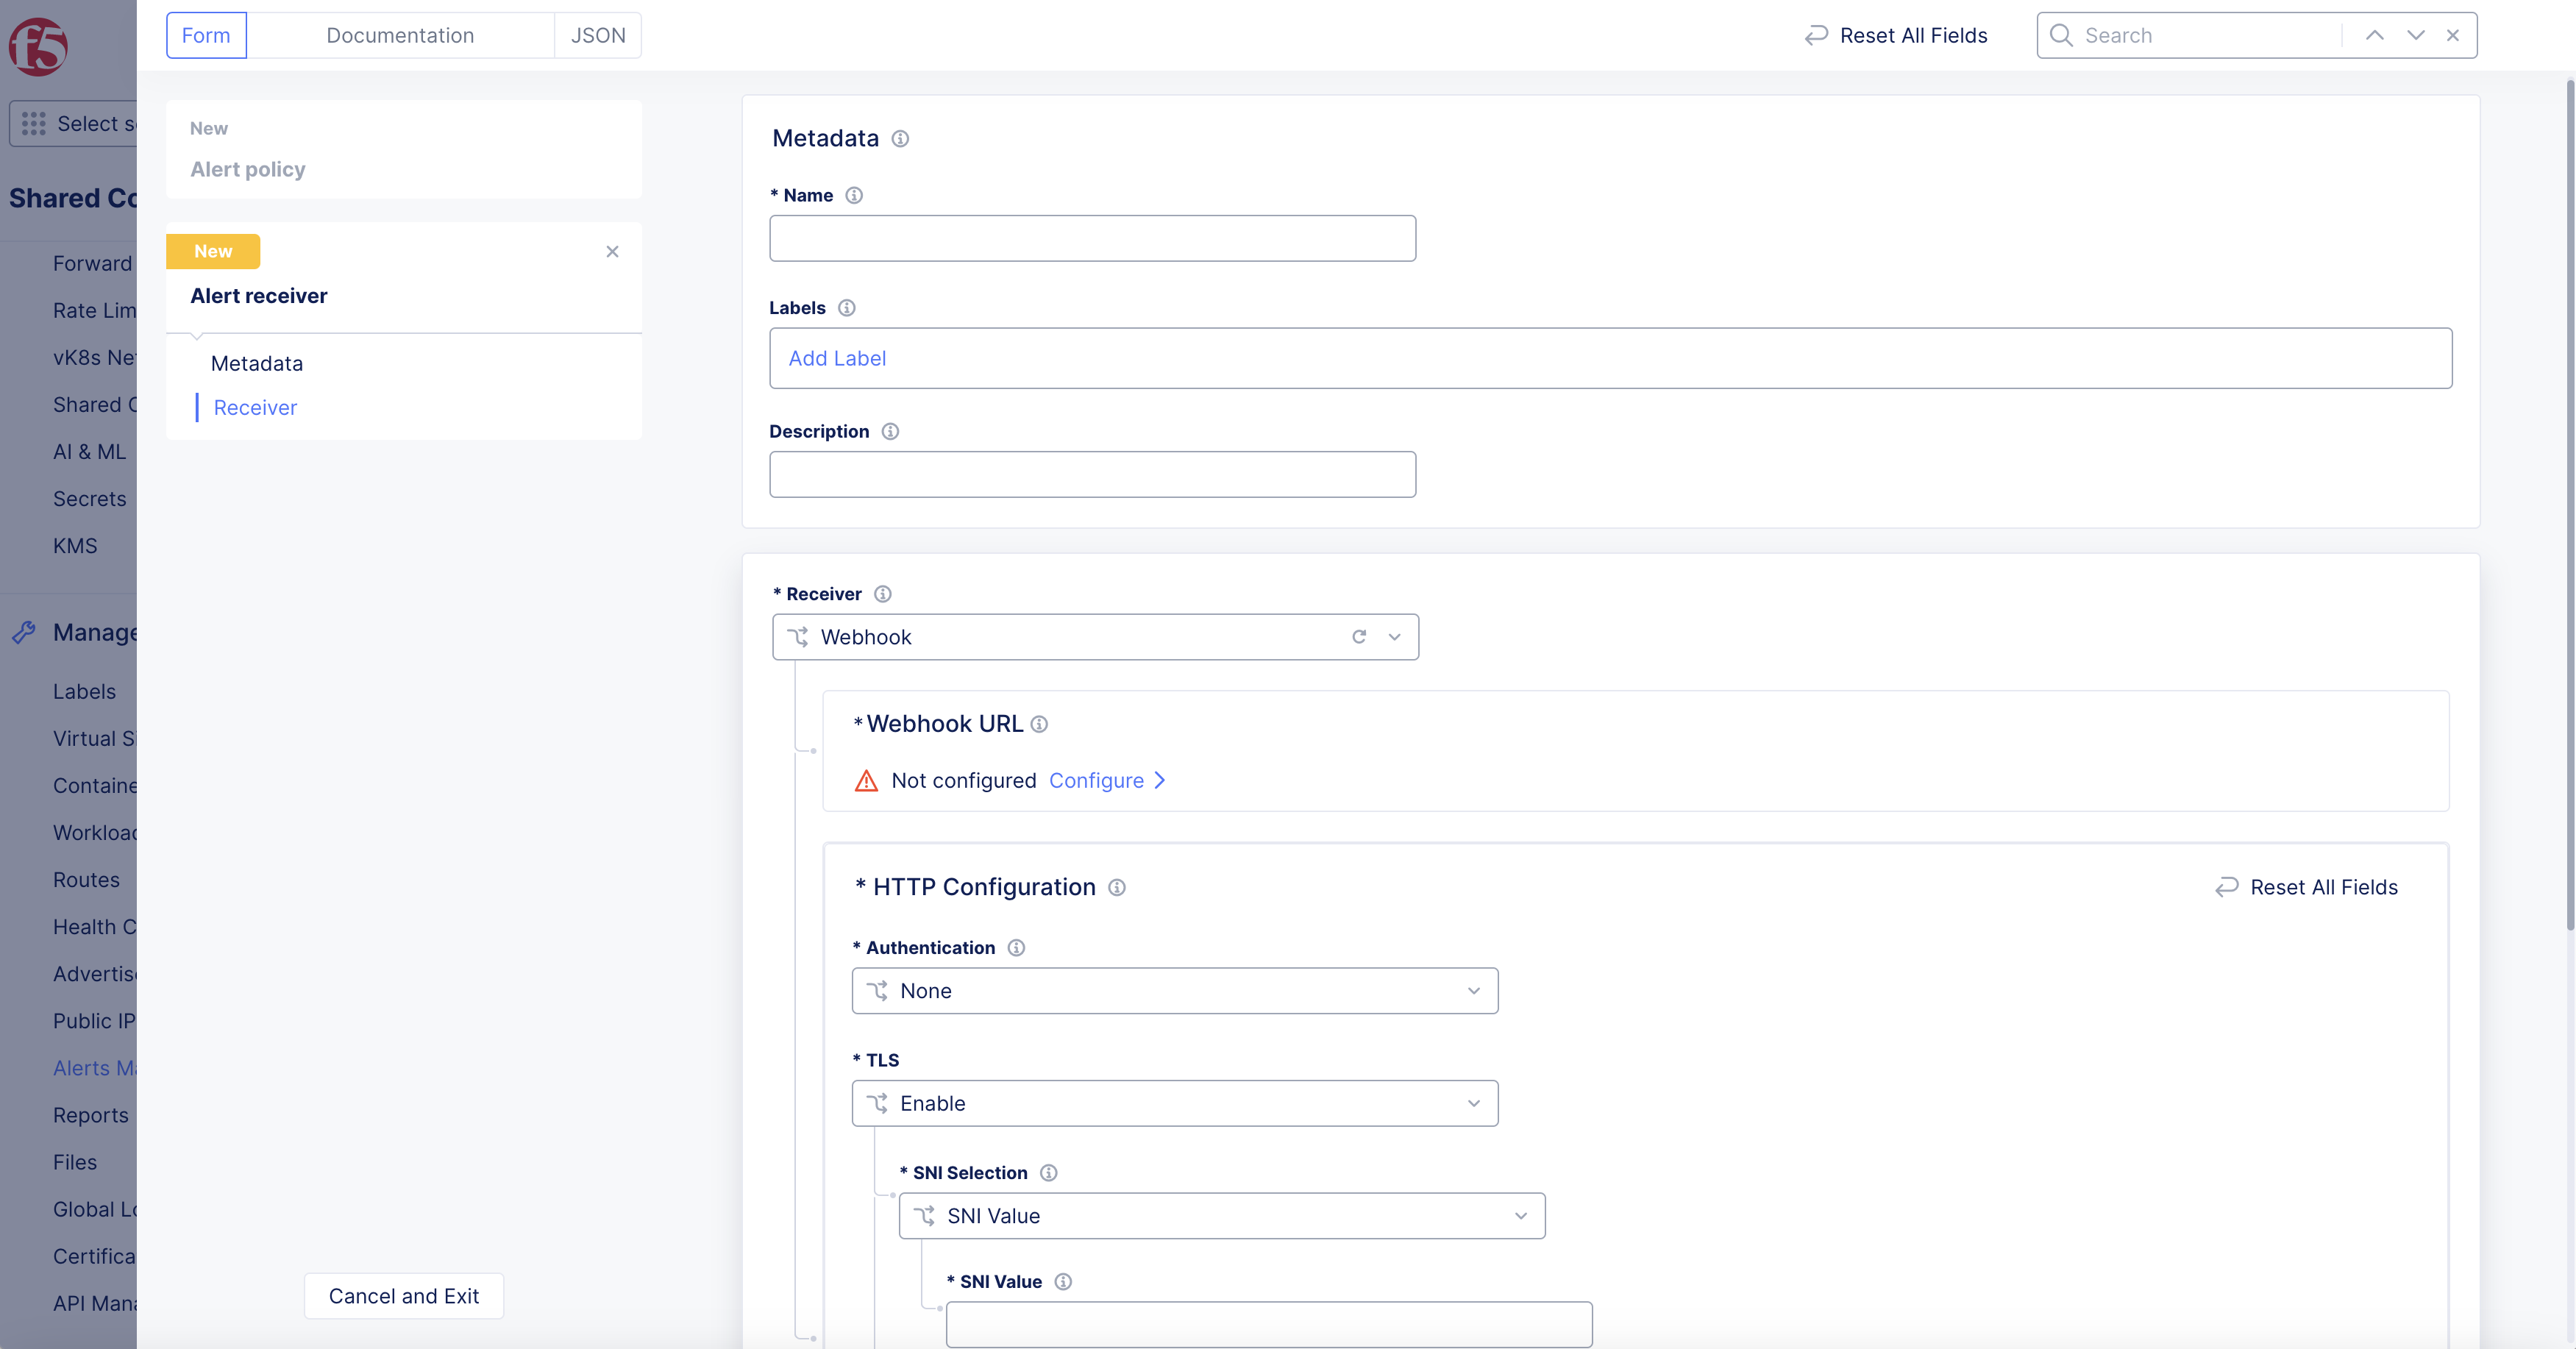
Figure: Alert Receiver Name and Receiver Type
- Select
Configurelink inWebhook URLbox.
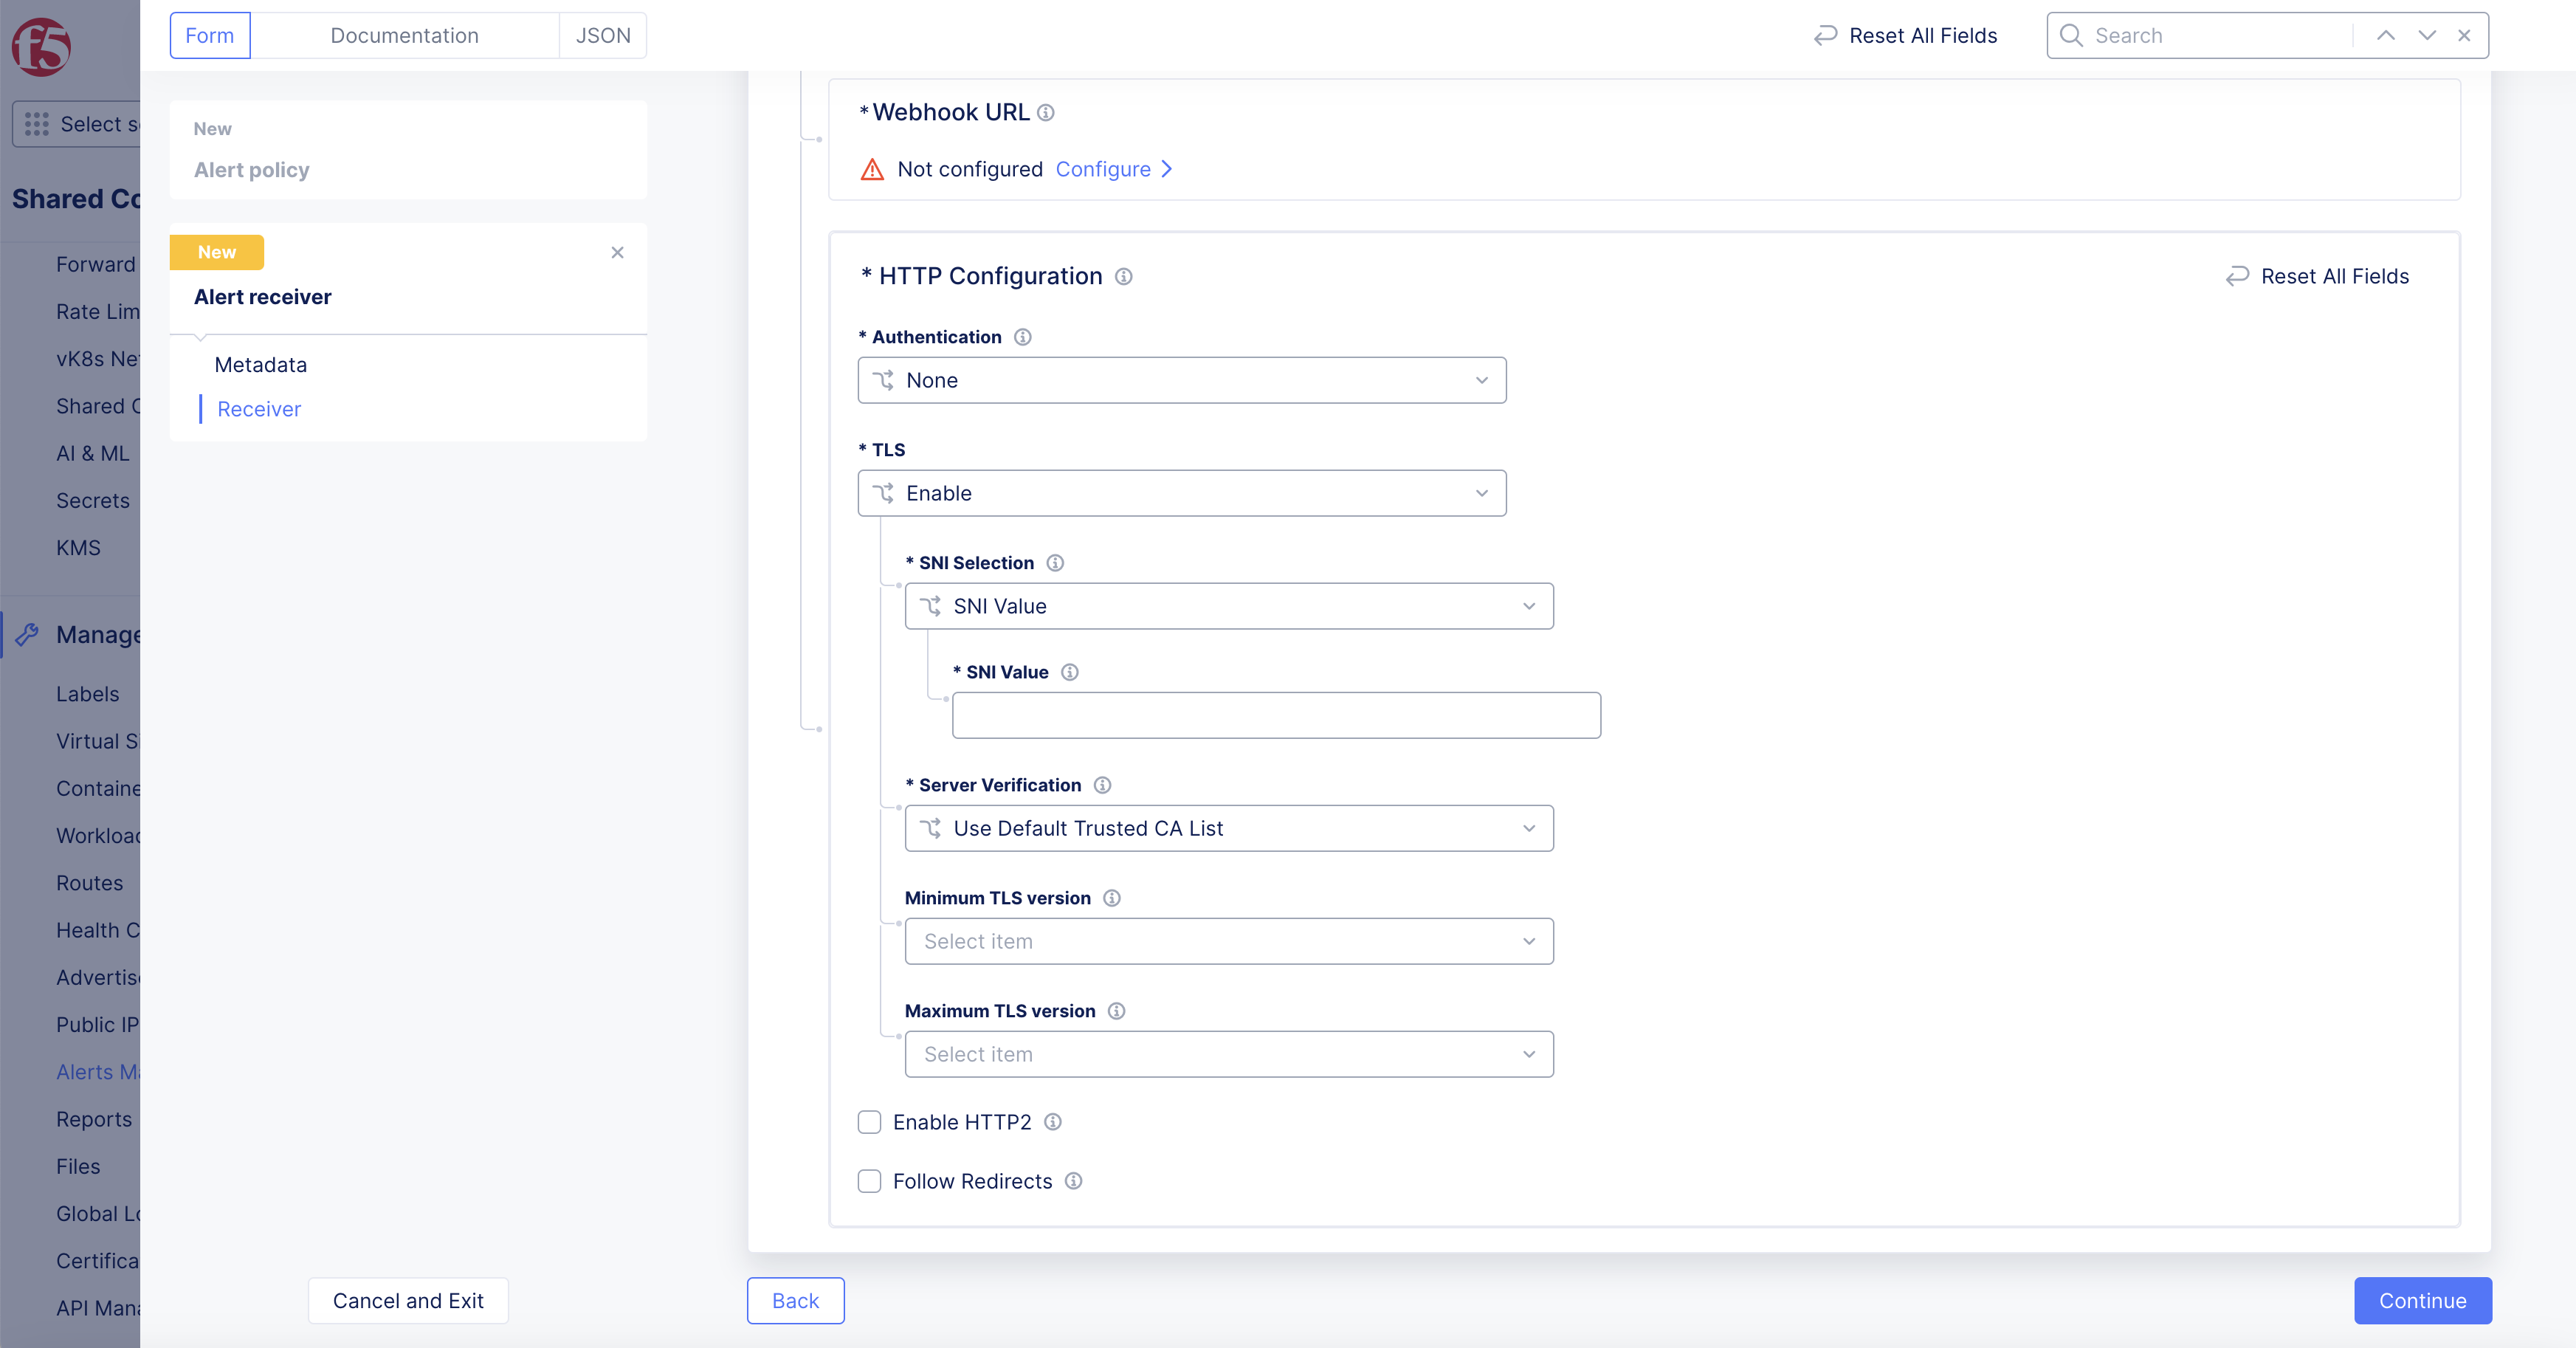
Figure: Alert Receiver
-
Select
Secret Typein drop-down menu.-
Select
Actionin drop-down menu. -
Select
Policy Typeif needed, -
Enter
Secret to Blindfoldin box. -
Select
Applybutton.
-
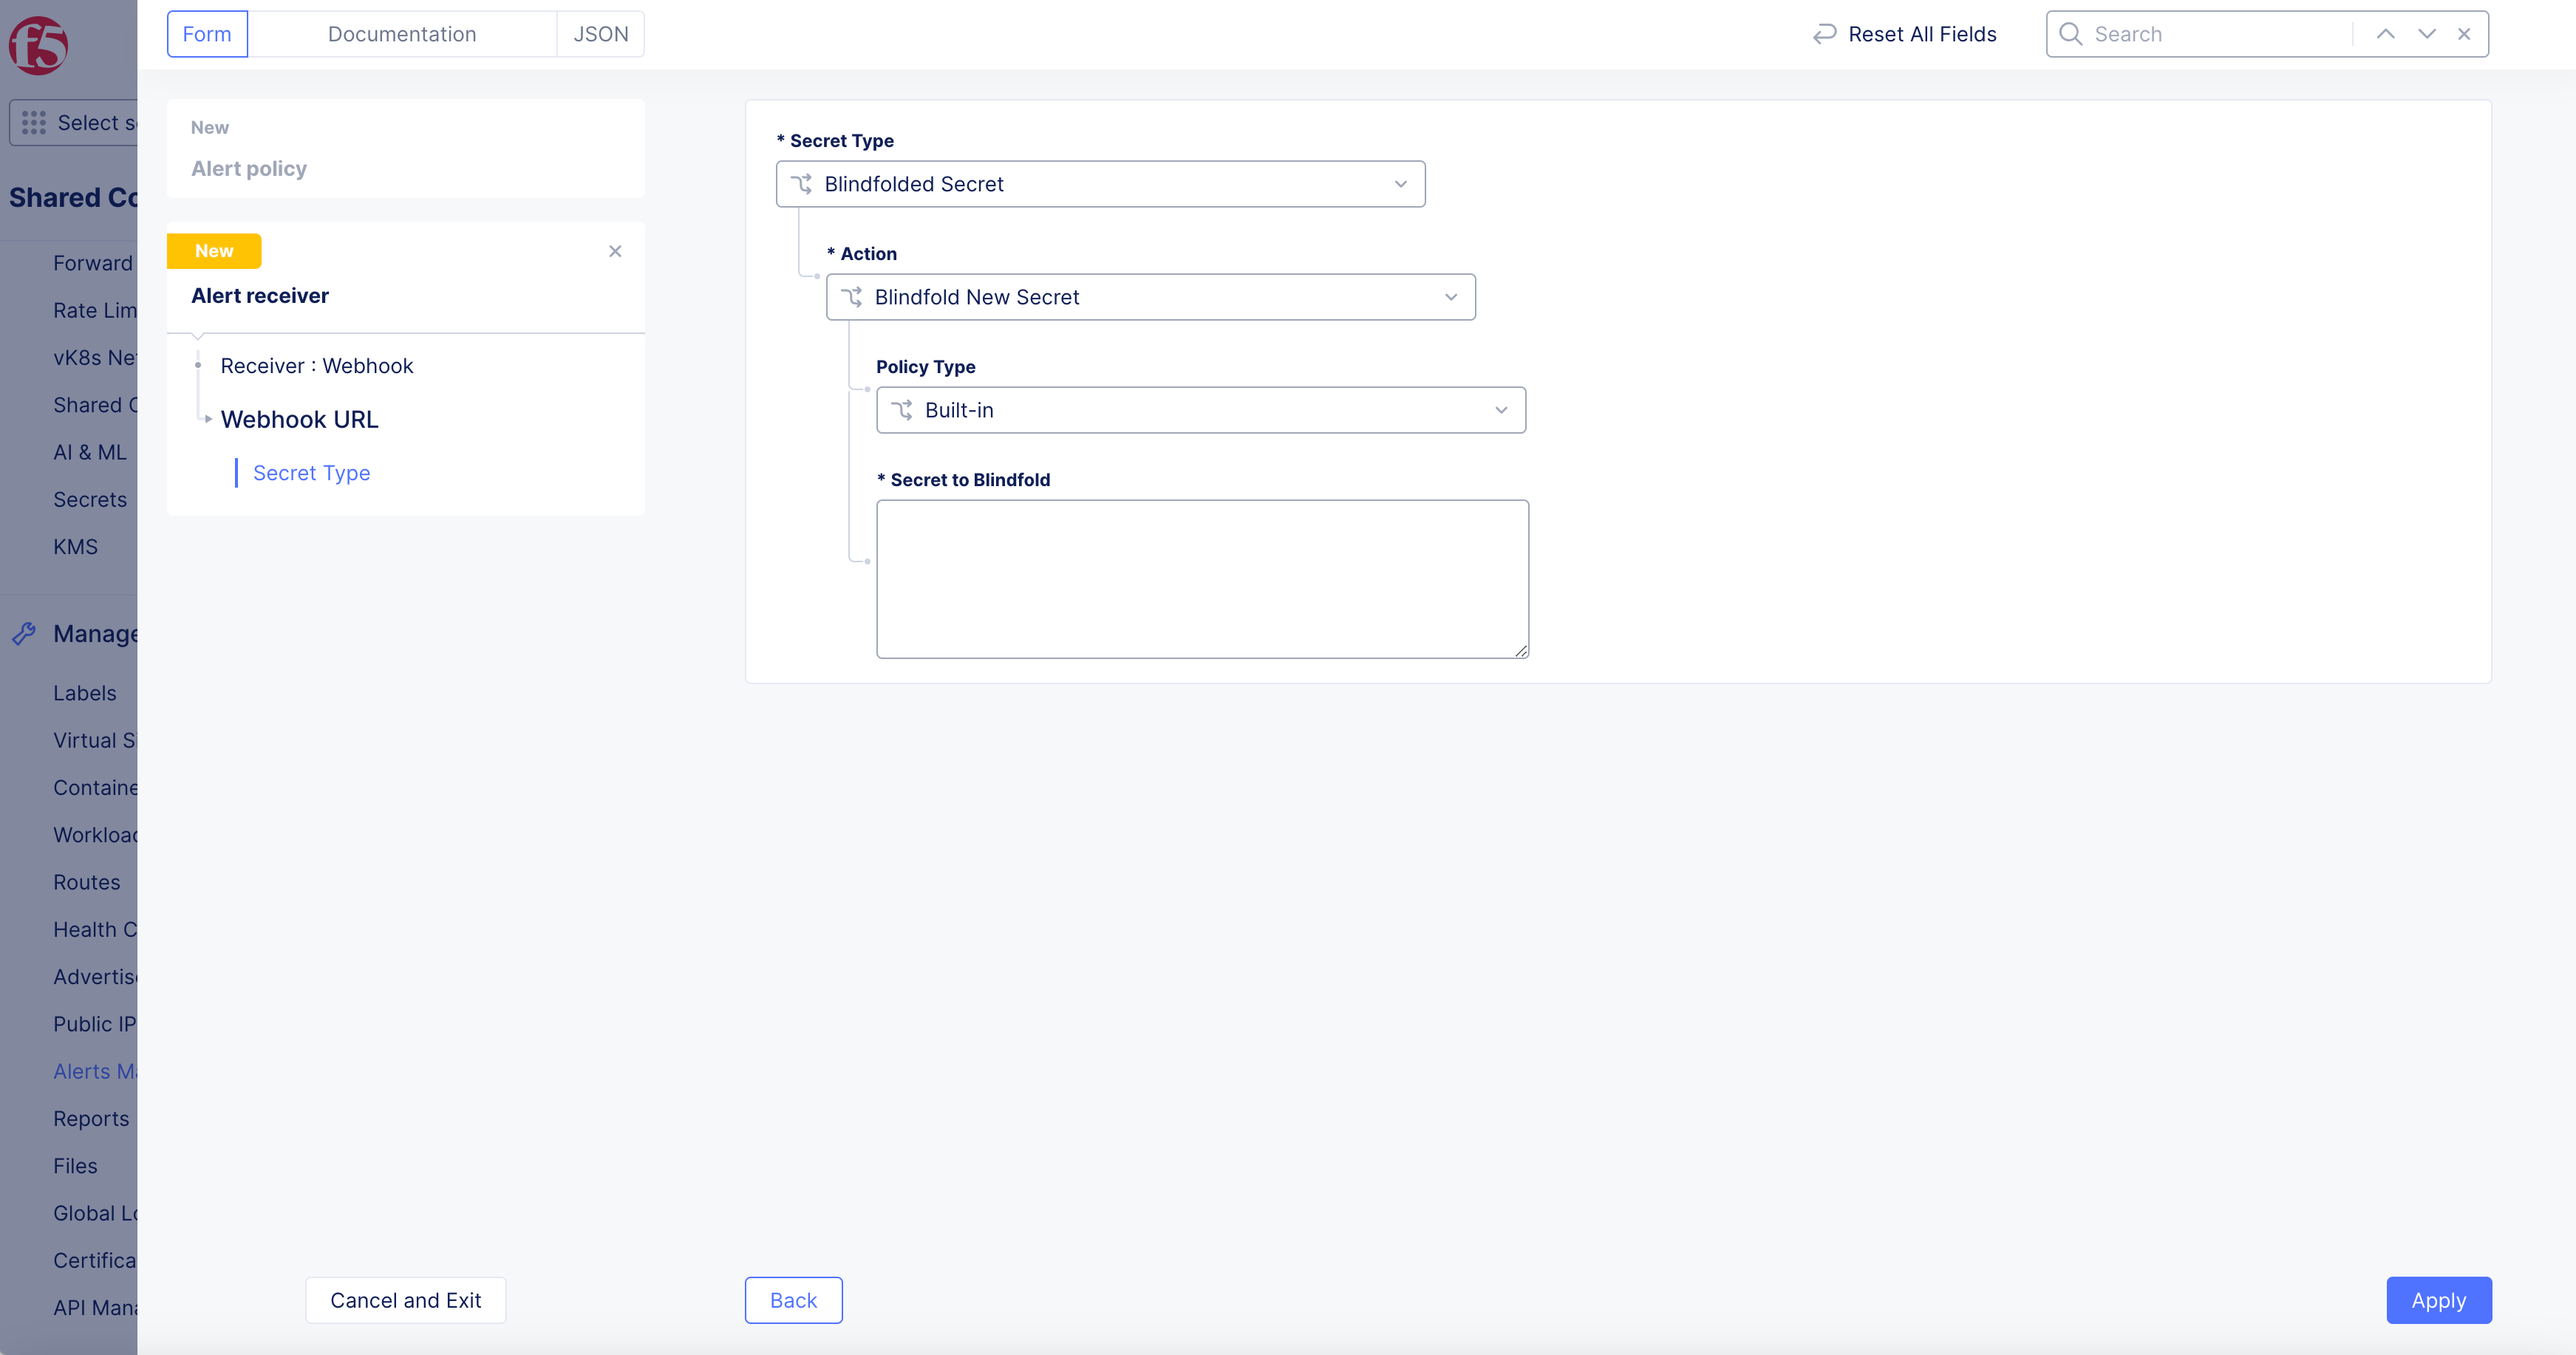
Figure: Alert Receiver
-
Select
Authenticationdrop-down menu option:-
None. -
Basic Authentication. -
Token Authentication. -
Enable TLS Wuth With Certificate Object.
-
-
Select
TLSdrop-down menu option:-
Enable -
Disable.
-
-
Select
SNI Valuedrop-down menu option:-
SNI Value: SNI value to be used. EnterSNI Valuein box below. -
No SNI: Do not use SNI.
-
-
Select
Server Verificationdrop-down menu option:-
Use Default Trusted CA List -
Use Custom CA List> selectCertificate Objectdrop-down menu inTrusted CA Listbox.
-
-
Select
Minimum TLS versiondrop-down menu option:-
Automatic, F5 Distributed Cloud will choose the optimal TLS version. -
TLSv1.0 -
TLSv1.1 -
TLSv1.2 -
TLSv1.3
-
-
Select
Maximum TLS versiondrop-down menu option:-
Automatic, F5 Distributed Cloud will choose the optimal TLS version. -
TLSv1.0 -
TLSv1.1 -
TLSv1.2 -
TLSv1.3
-
-
Check
Enable HTTP2orFollow Redirectsboxes if needed. -
Select
Continuebutton.
Figure: Alert Receiver
Step 4: Setup Receiver Default Notification Parameters.
-
Toggle
Show Advanced FieldsinAlert Receiver Configurationbox toConfigureReceiver Default Notification Parameters.- Select
Configurelink.
- Select
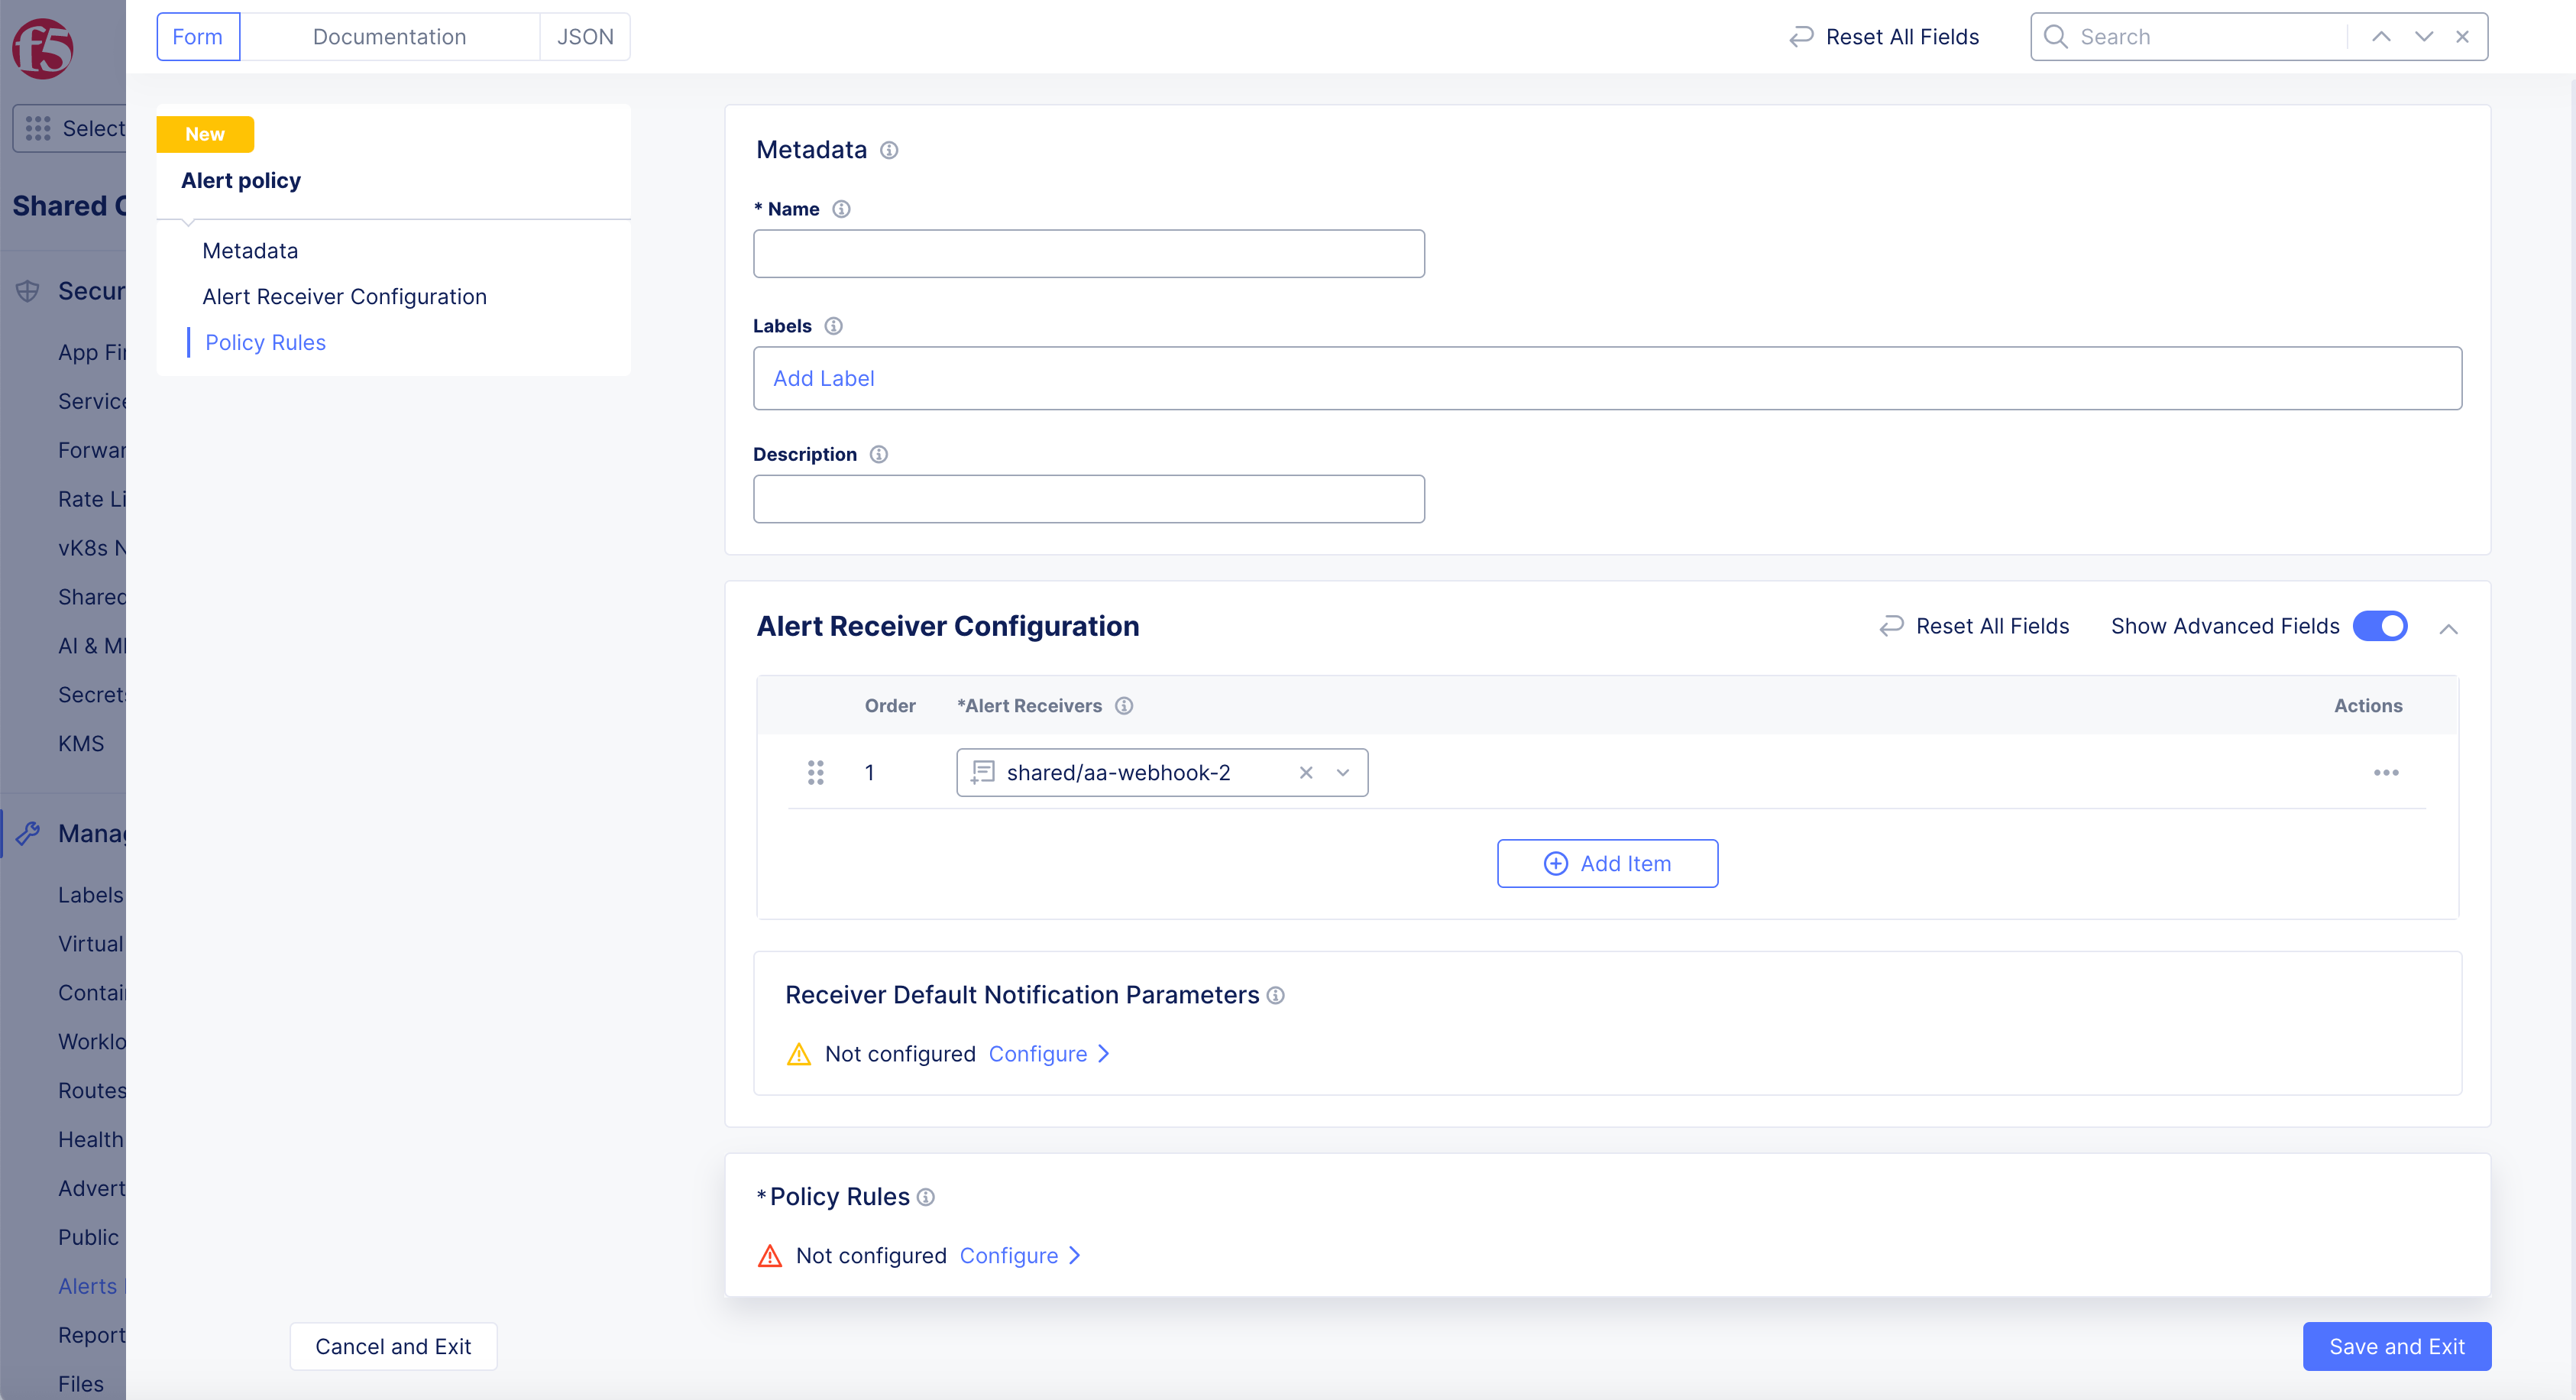
Figure: Alert Policy Receiver
-
Toggle
Show Advanced FieldsinNotifications ParametersandNotifications Groupingand select notification intervals in boxes provided. -
Confirm
Notification ParametersandNotification Groupingis in two number format. Example: 60m not 1h. -
Toggle
Show Advanced FieldsinNotification Groupingto showGroup Notifications Bydrop-down menu.Note: Update from default
Individualif you want to receive alerts.-
Individual: This option disables grouping of alerts. -
F5XC Defined Group: Group the alerts by severity, group name and alert name. -
Custom: Specify set of labels for grouping the alerts. -
Default: Group the alerts by severity, group name and alert name.
-
Note: All fields must be in 2-digit form (60m, 60s) in
Policy Rule Notification Parametersfor intervals and group notifications for your policy rules to apply correctly and not error.
- Select
Applybutton.
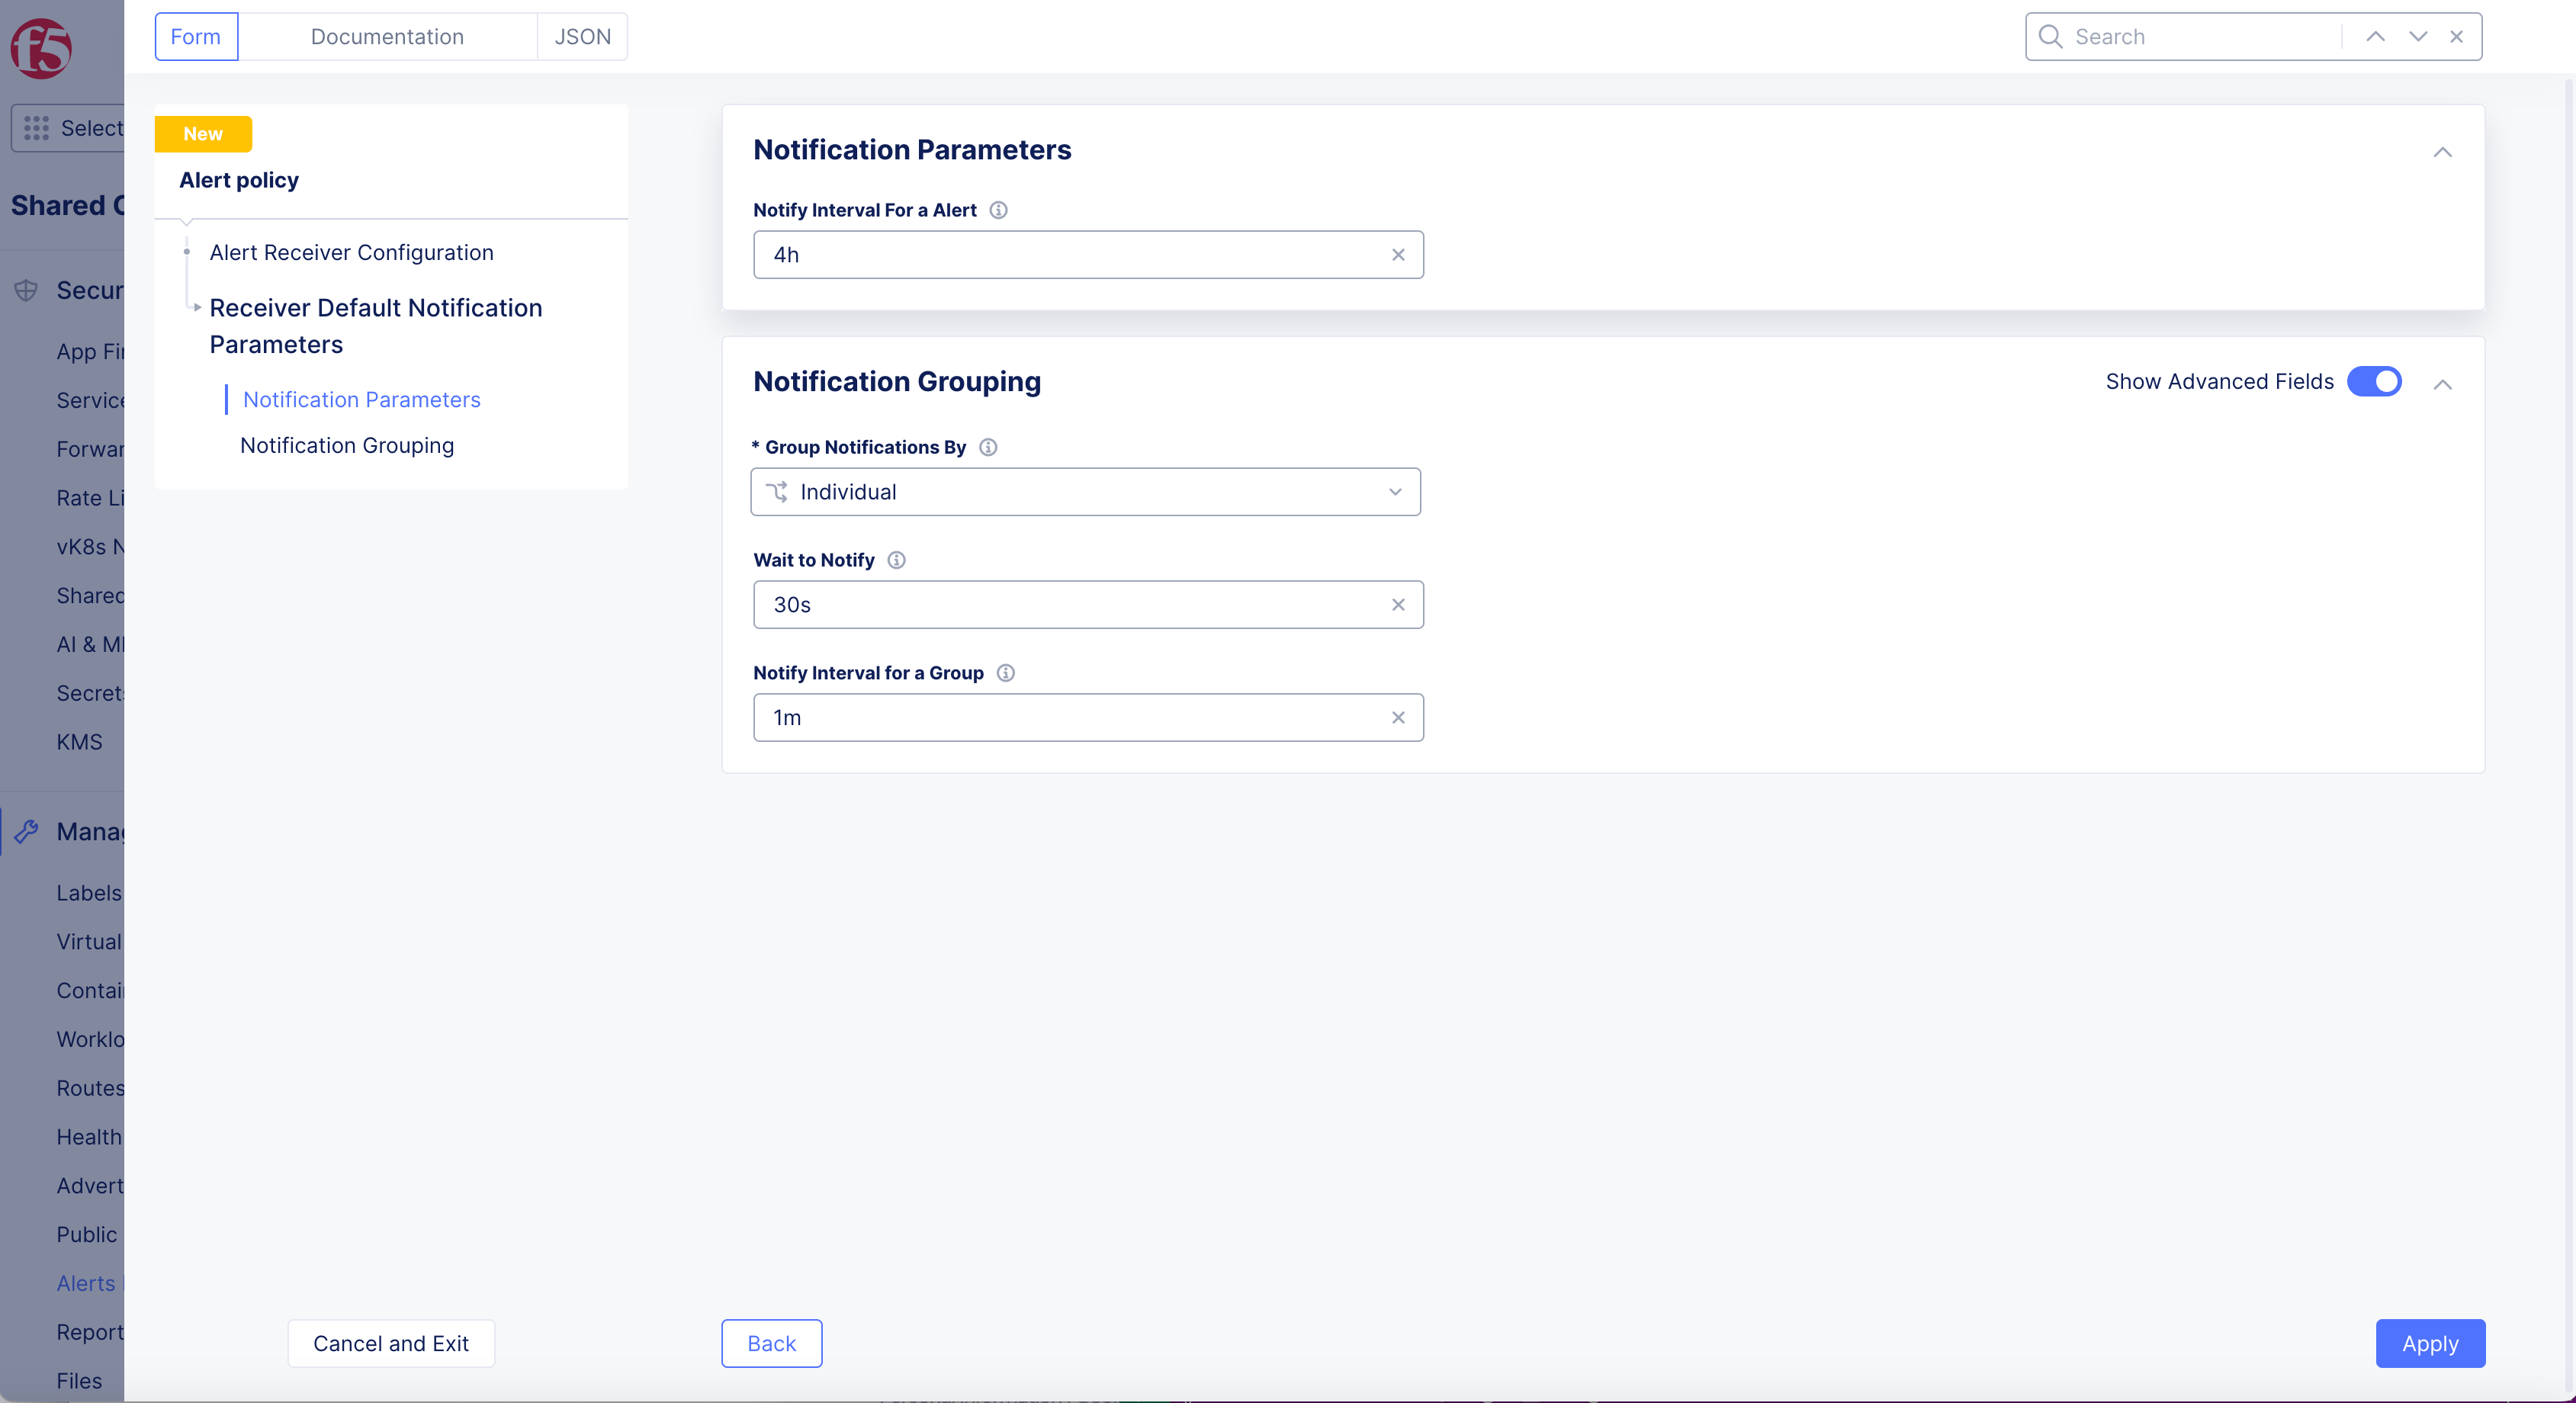
Figure: Alert Policy Receiver
Step 5: Setup Policy Rules.
A minimum of one policy rule is populated by default with Any as match condition, and Send as Action. You can select different match conditions, and actions from the drop-down list for the Select Alerts and Action fields respectively. You can use combination of more than one policy rule. Select Add item to add more policy rules.
- Select
Configurelink inPolicy Rulesbox.
Figure: Alert Policy
- Select
+ Add Itembutton.
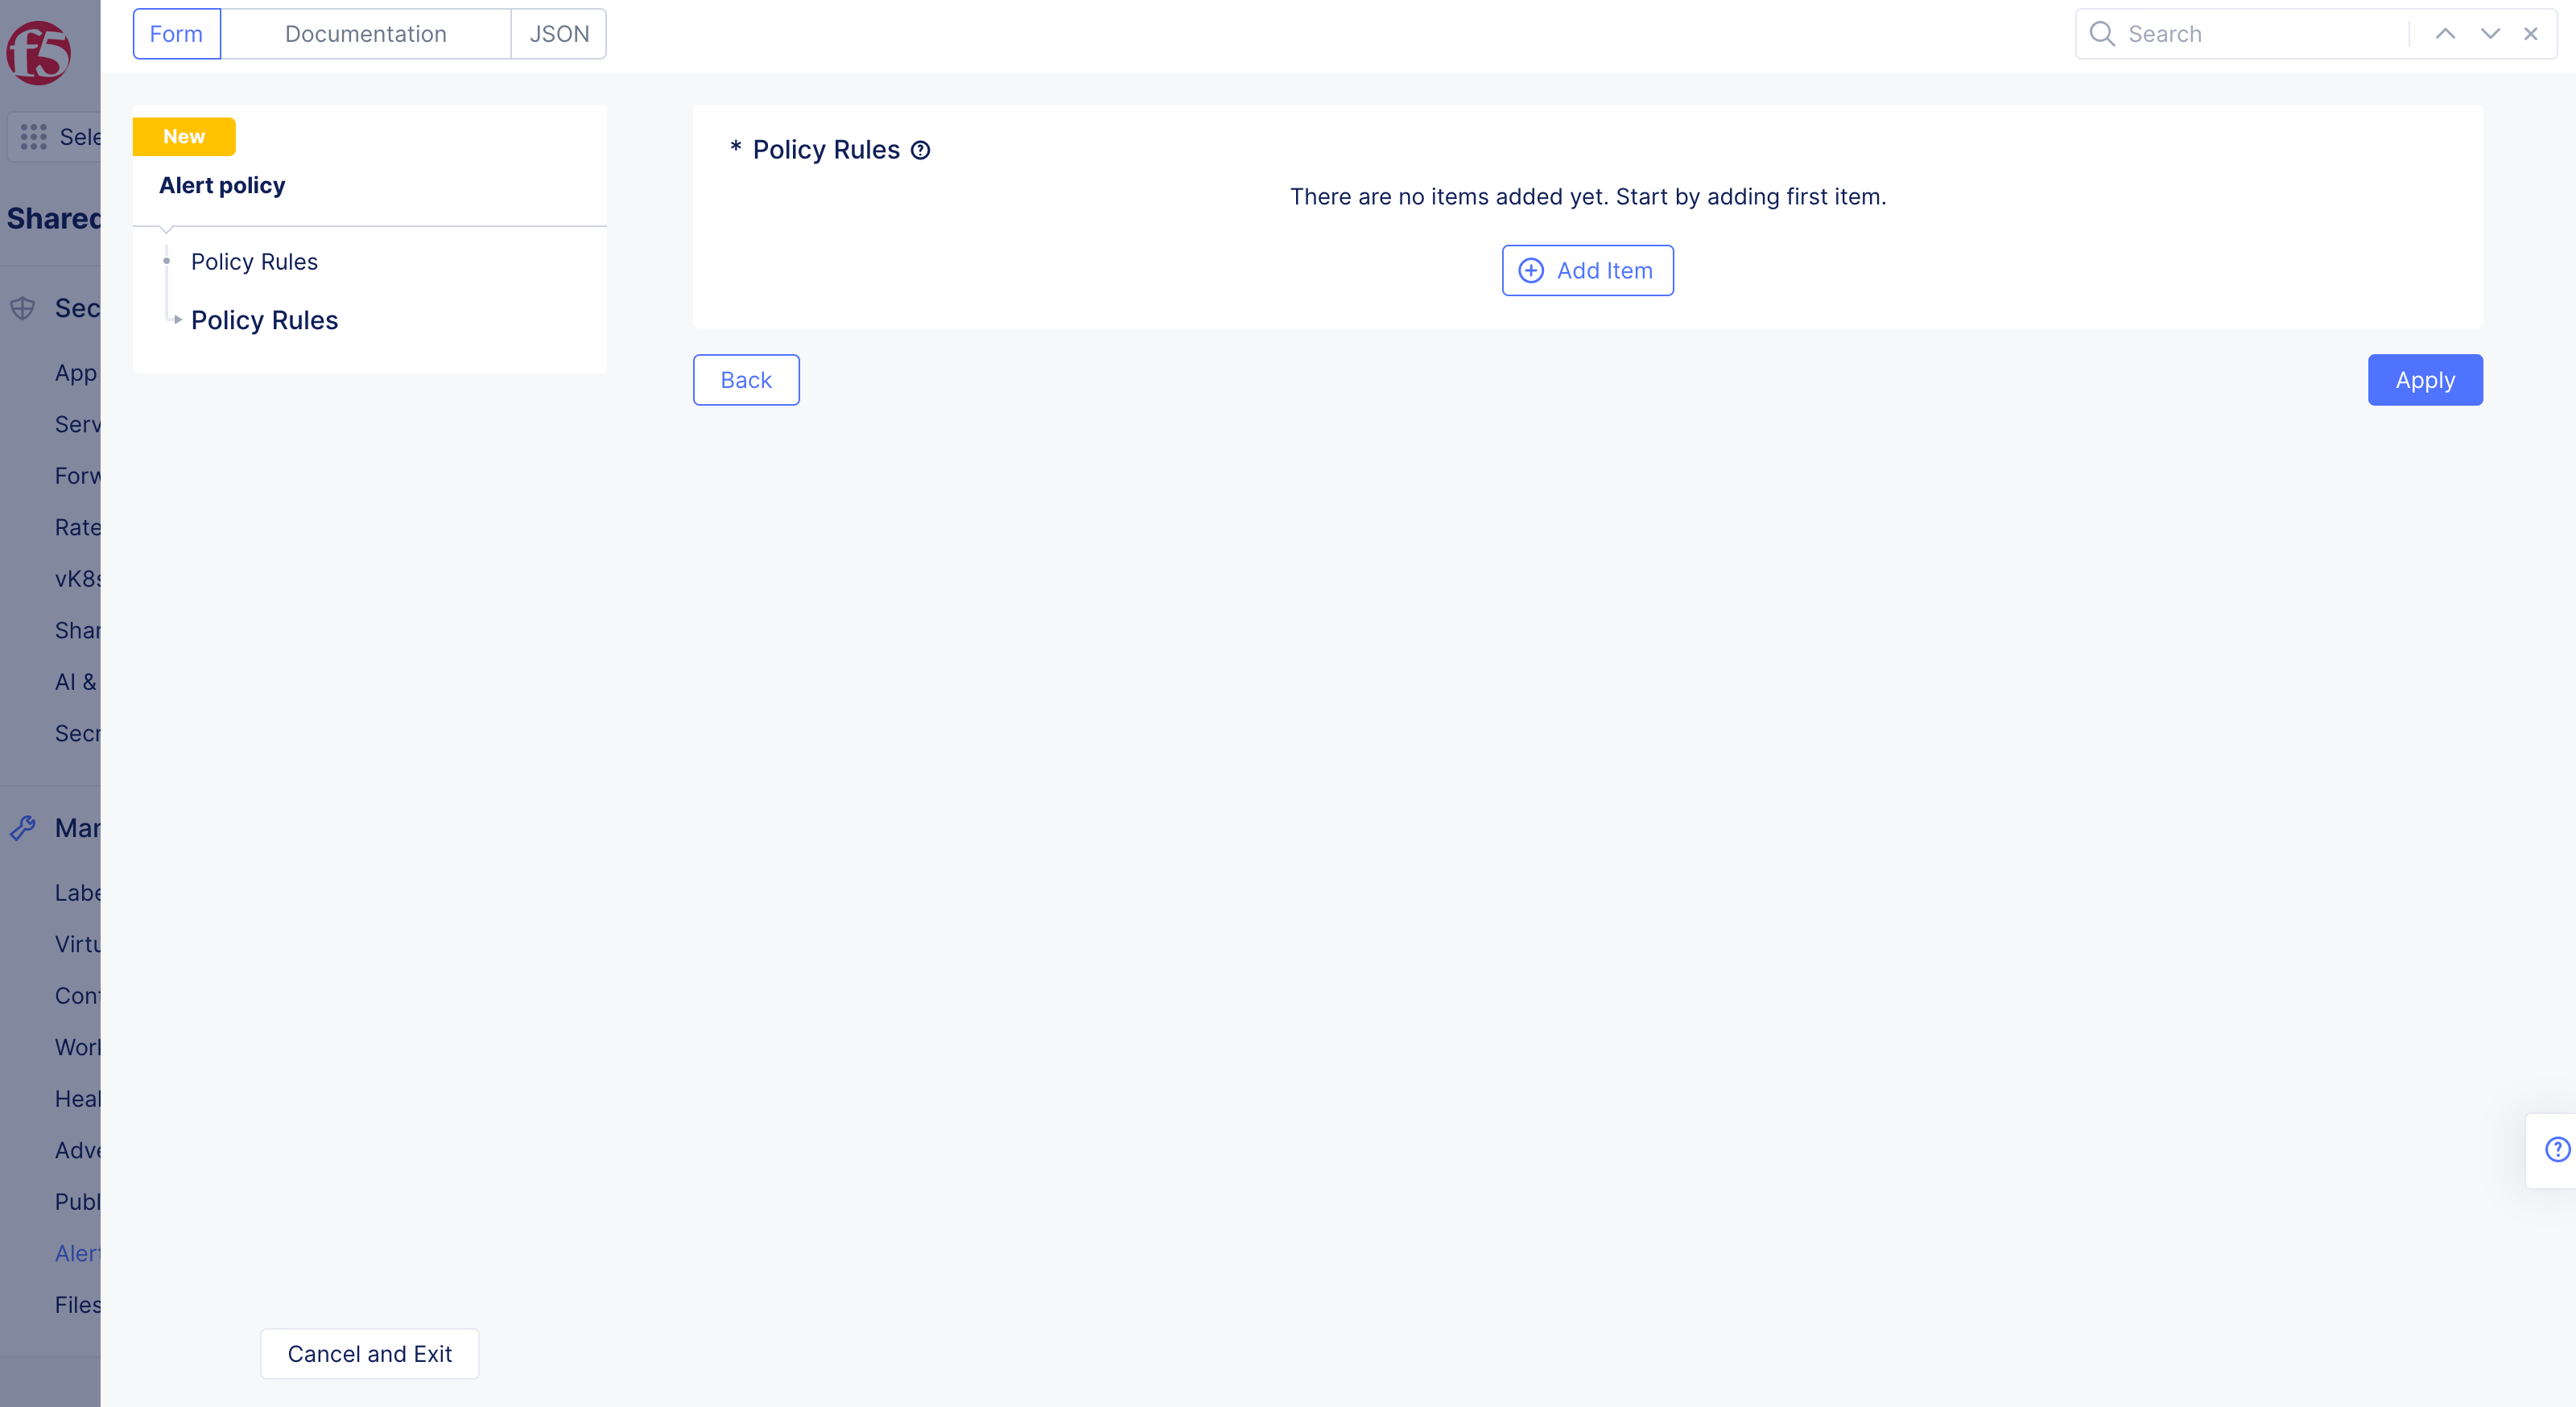
Figure: Alert Policy Created
Select Alertsdrop-down menu option.
Note:
Matching Custom Criteria>AlertnameConfigurelink >Select Matcher Type> selectApplybutton > selectApplybutton.
-
Select
Actiondrop-down menu option. -
Toggle
Show Advanced Fieldsto showPolicy Rule Notification ParameterstoConfigure. -
Confirm
Notification ParametersandNotification Groupingis in two number format. Example: 60m not 1h.
Note: All fields must be in 2-digit form (60m, 60s) for intervals and group notifications for your policy rules to apply correctly and not error.
-
Toggle
Show Advanced Fieldsto showGroup Notifications Bydrop-down menu.- Update from default
Individualif you want to receive alerts.
- Update from default
-
Select
Applybutton. -
Order rules by dragging in
Policy Rulespage.
Note: Select
+ Add Itembutton to add additional rules.
- Select
Applybutton, order rules by dragging.
Note: This applies the policy object to the policy set configuration and returns to the policy page.
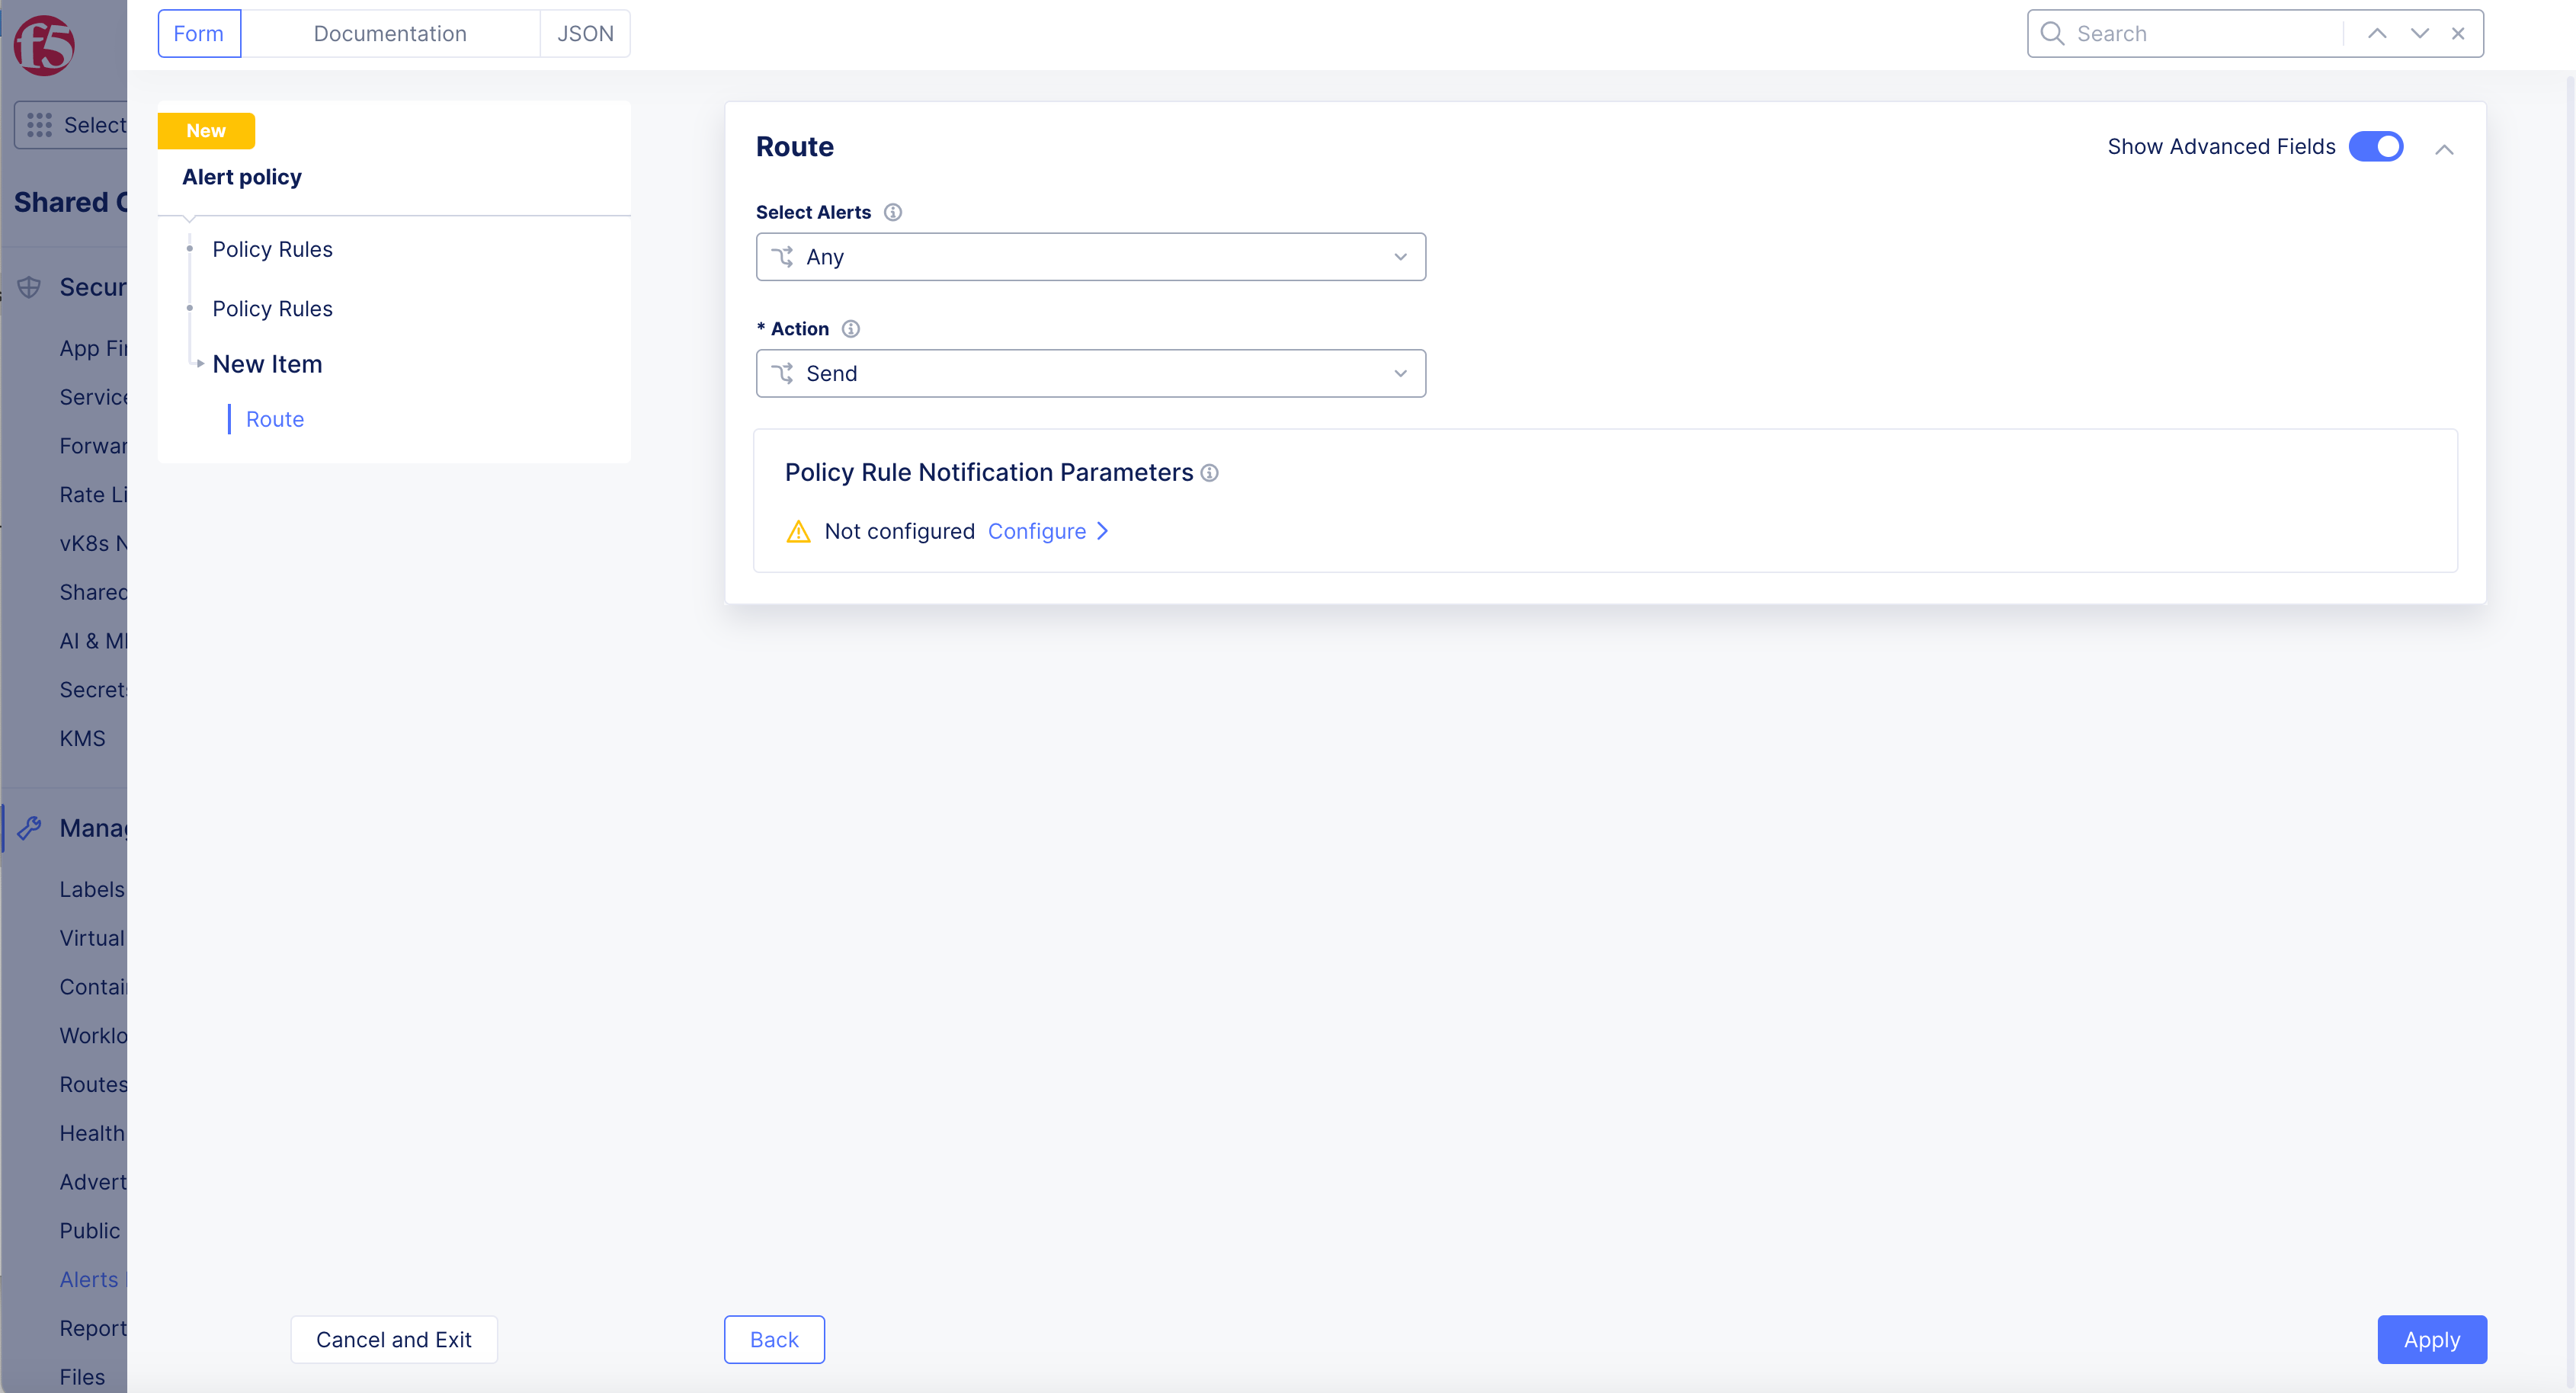
Figure: Alert Policy
Step 6: Complete creating Alert Policy.
Select Save and Exit button to create policy.
Step 7: Verify alerts are sent.
Select Manage > Alerts Management > select Alert Receivers.
Step 7.1: Verify receiver.
-
Depending on your receiver type, do one of the following:
-
Select
...>Verify Webhookfor receiver of webhook type.- Select
Send Webhookbutton in confirmation box.
- Select
-
-
Obtain verification code from verification email or SMS sent to your email address or phone number.
-
Select
...>Enter Verification Codefor your receiver object. -
Enter
codeinVerify Receiverwindow. -
Select
Verify Receiverbutton.
Note: Wait for the notification that the verification is successful.
Step 7.2: Send test alert.
-
Select
...>Send Test Alertfor your receiver object or SMS. -
Select
Send Test Alertbutton in confirmation window. -
Check your inbox, verify alert is received.
Create Active Alert Policies
Step 1: Start creating active alert policies.
- In
Multi-Cloud Network Connect> SelectManage.
Note:
Active Alert Policiescan be created and edited inMulti-Cloud Network Connect,Multi-Cloud App Connect,Web App & API Protection, andDistributed Appsworkspaces by selectingManage>Alerts Management>+ Select Active Alert Policies.
-
Select
Alerts Management> selectActive Alert Policies. -
+ Select Active Alert Policies.
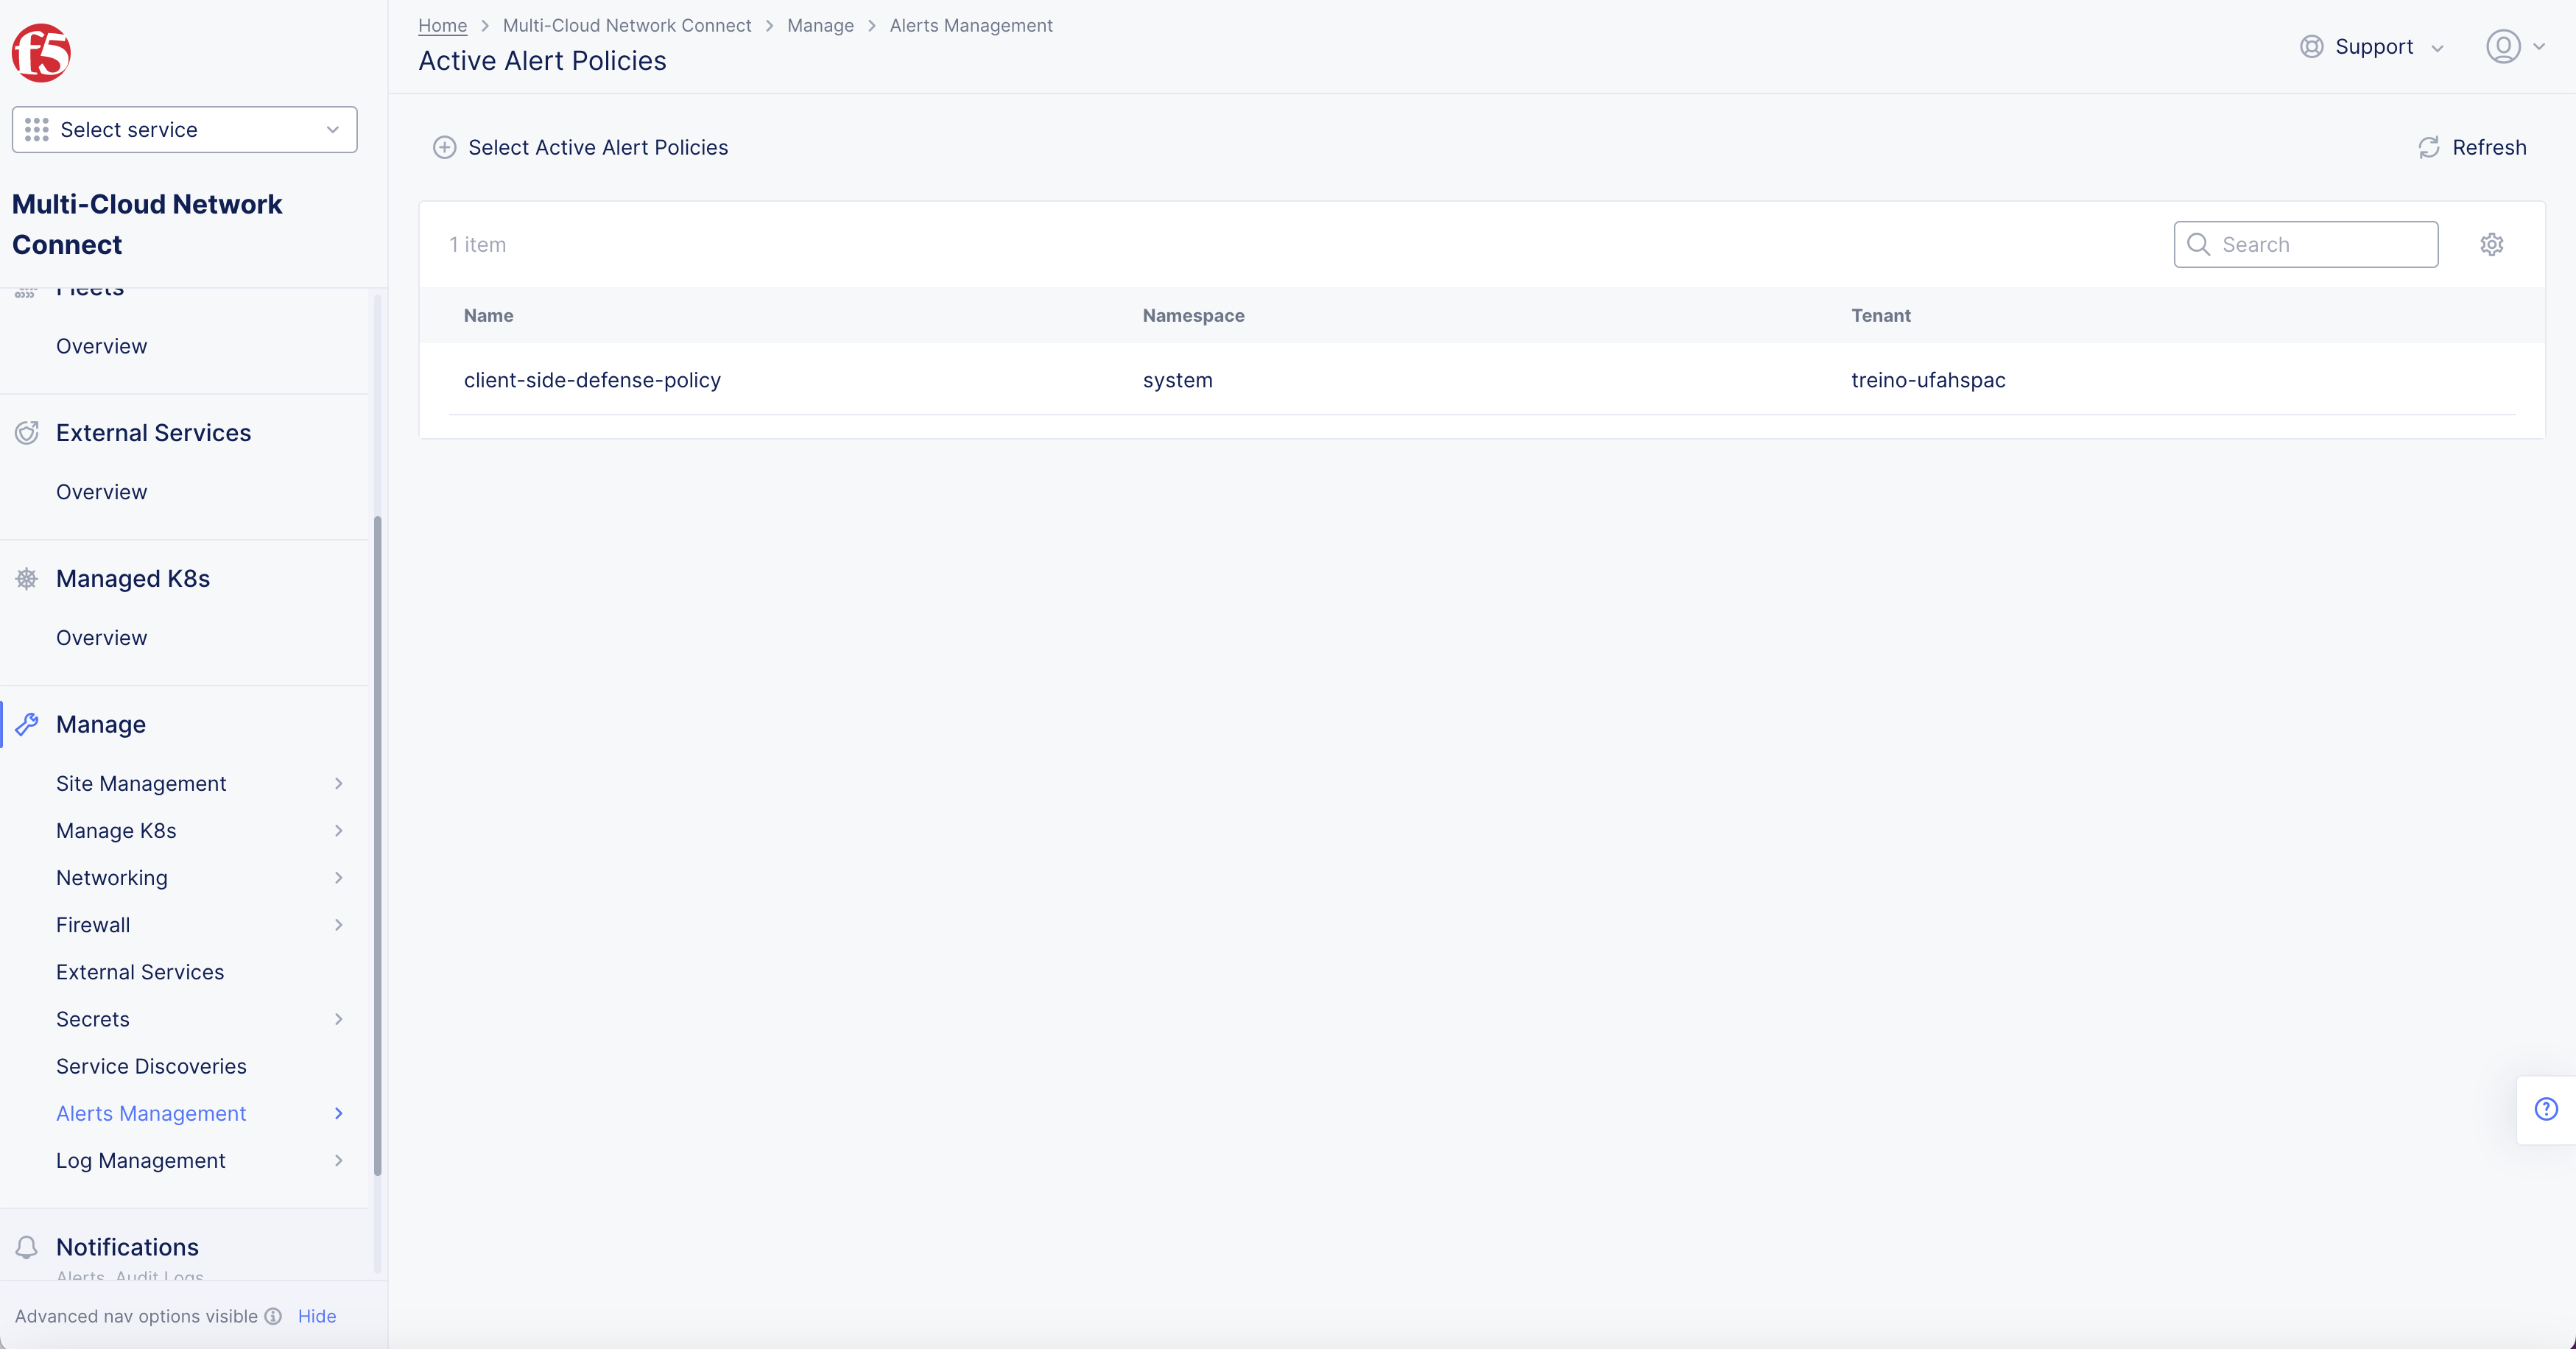
Figure: Active Alert Policy Configuration
Step 2: Add active alert policies to the policy.
-
Select Itemdrop-down menu to select created alert policy needed. -
+ Add Itembutton inActive Alert Policiespop-up window to add policy selection drop-down menus.
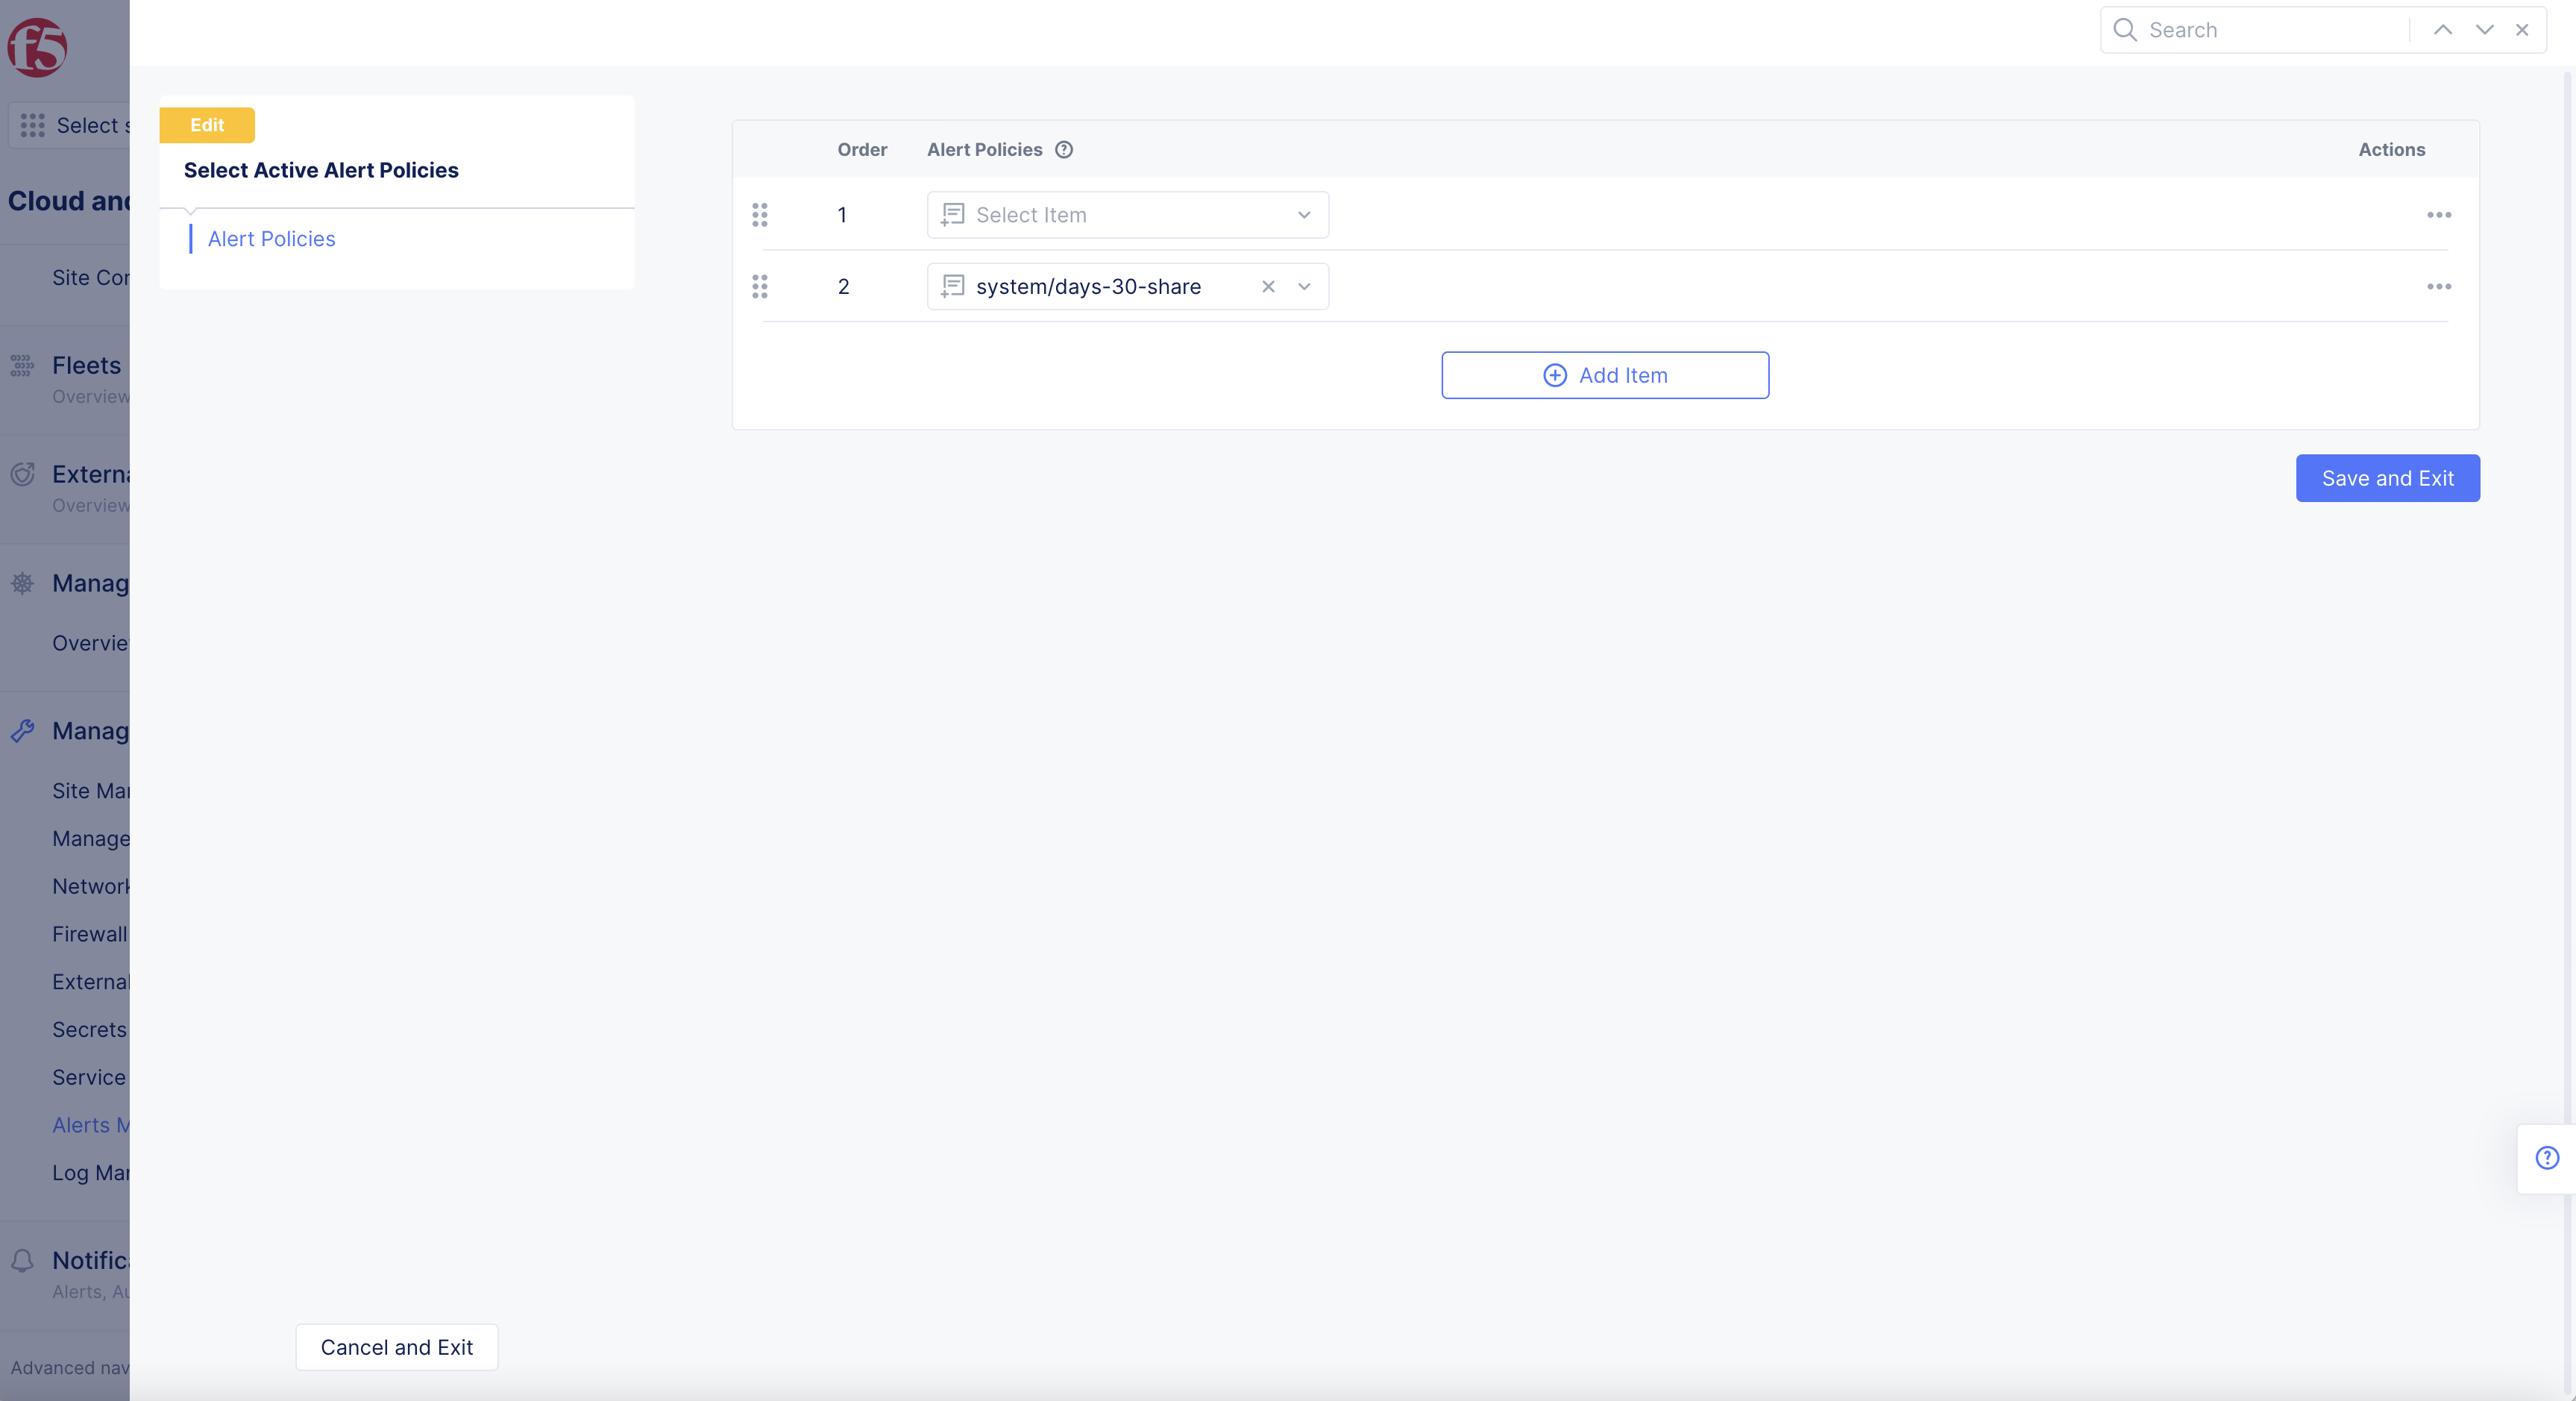
Figure: Active Alert Policy Configuration
Step 3: Complete creating the active alert policies.
Select Save and Exit button to complete creating the alert policy.