Configure Alert Notifications for OpsGenie
Objective
This document provides instructions on how to configure alert notifications in F5® Distributed Cloud Services to route the alert messages to your OpsGenie service. For information on alerts, see Alerts.
Prerequisites
-
A valid Account is required. If you do not have an account, see Getting Started with Console.
-
A OpsGenie account with administrative privileges to service configuration settings.
Configuration
Configuring to send alerts to the OpsGenie service requires you to first generate webhook for your OpsGenie service. After that, create alert receiver, and policy in the Console.
Create Webhook for OpsGenie Service
OpsGenie supports webhooks by providing integration via API. This example shows instructions on generating the webhook configuration for a OpsGenie service.
Step 1: Generate webhook configuration in OpsGenie.
-
Log into your enterprise
OpsGenieportal, selectSettings. -
Navigate to
Integrations>Integrations listlocated in left menu. -
Create an
integration.
Note: You can also use an existing created integration or the
Default APIintegration.
Step 2: Navigate to configured integrations, obtain webhook configuration.
Note down API key for your integration.
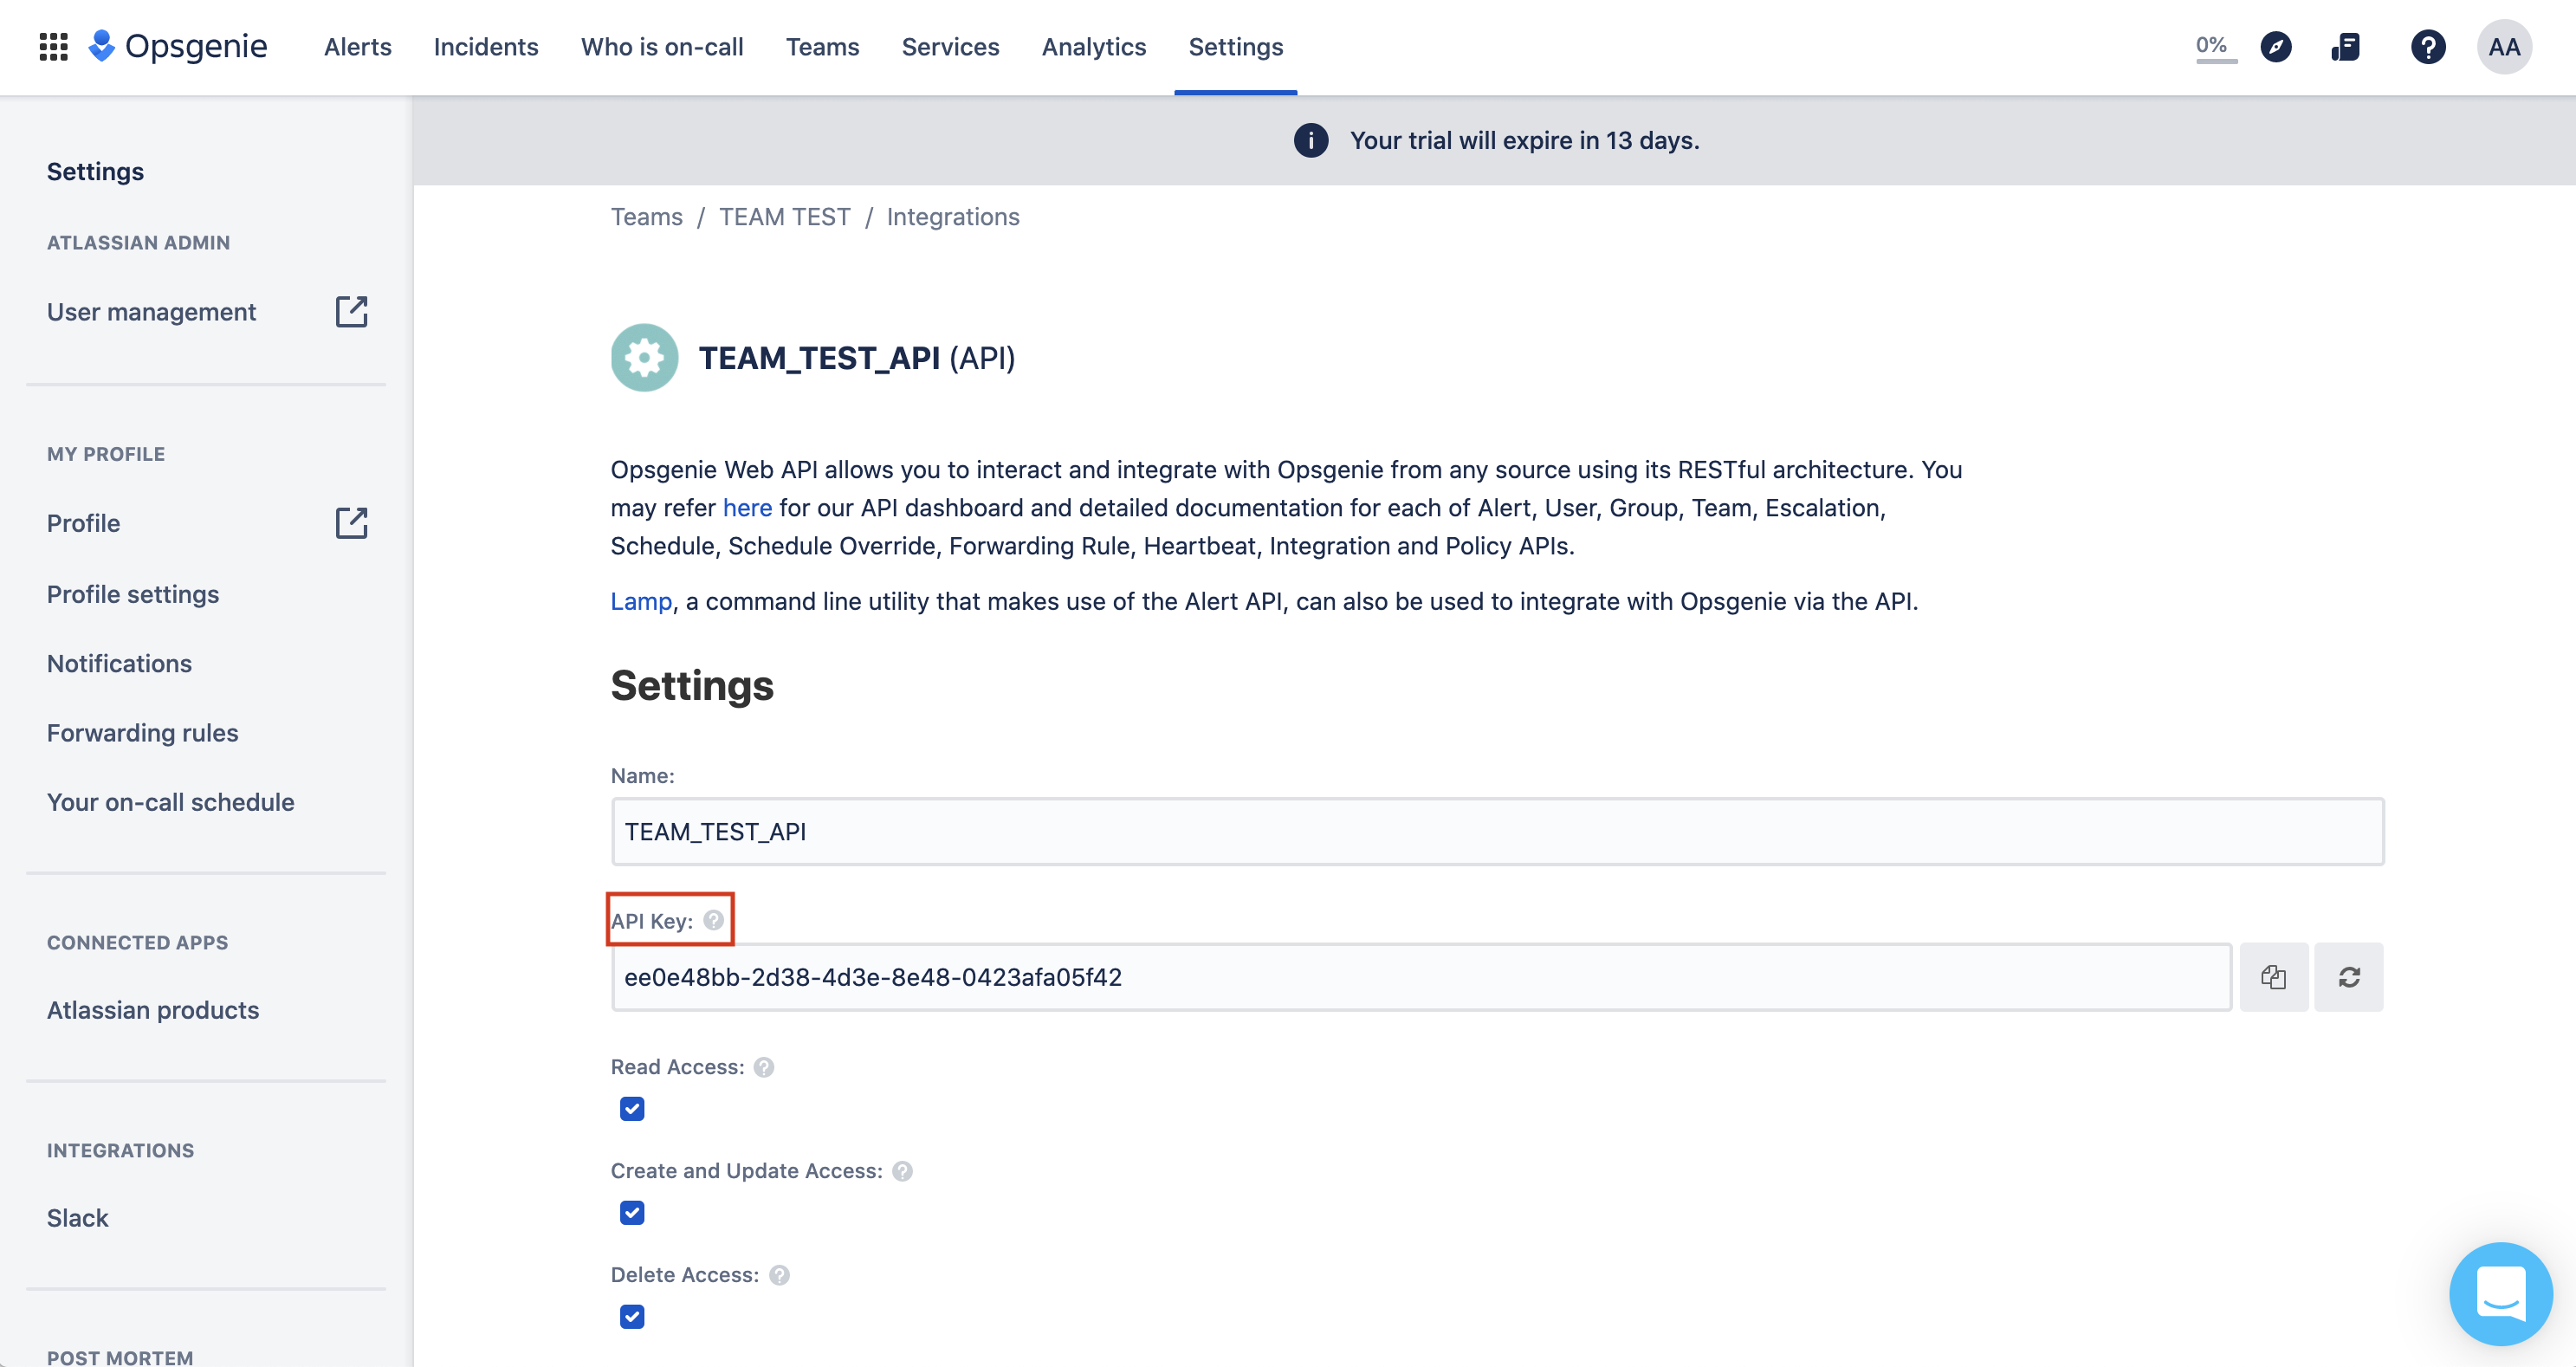
Figure: OpsGenie Integration Configuration
Note: Ensure that you have create and update access enabled for your integration.
Create Alert Receiver
Alerts can be created in different services and namespaces. Alert functionality is available in Multi-Cloud Network Connect, Multi-Cloud App Connect, Web App & API Protection, Distributed Apps, Audit Logs and Alerts, and Shared Configuration.
This example shows alert notifications for OpsGenie setup in Shared Configuration.
Step 1: Start generating Alert Receiver in F5® Distributed Cloud Console.
- Open
F5® Distributed Cloud Consolehomepage, selectShared Configurationbox.
Note: Homepage is role based, and your homepage may look different due to your role customization. Select
All workspacesdrop-down menu to discover all options. Customize Settings:Administration>Personal Management>My Account>Edit work domain & skillsbutton >Advancedbox > checkWork Domainboxes >Save changesbutton.
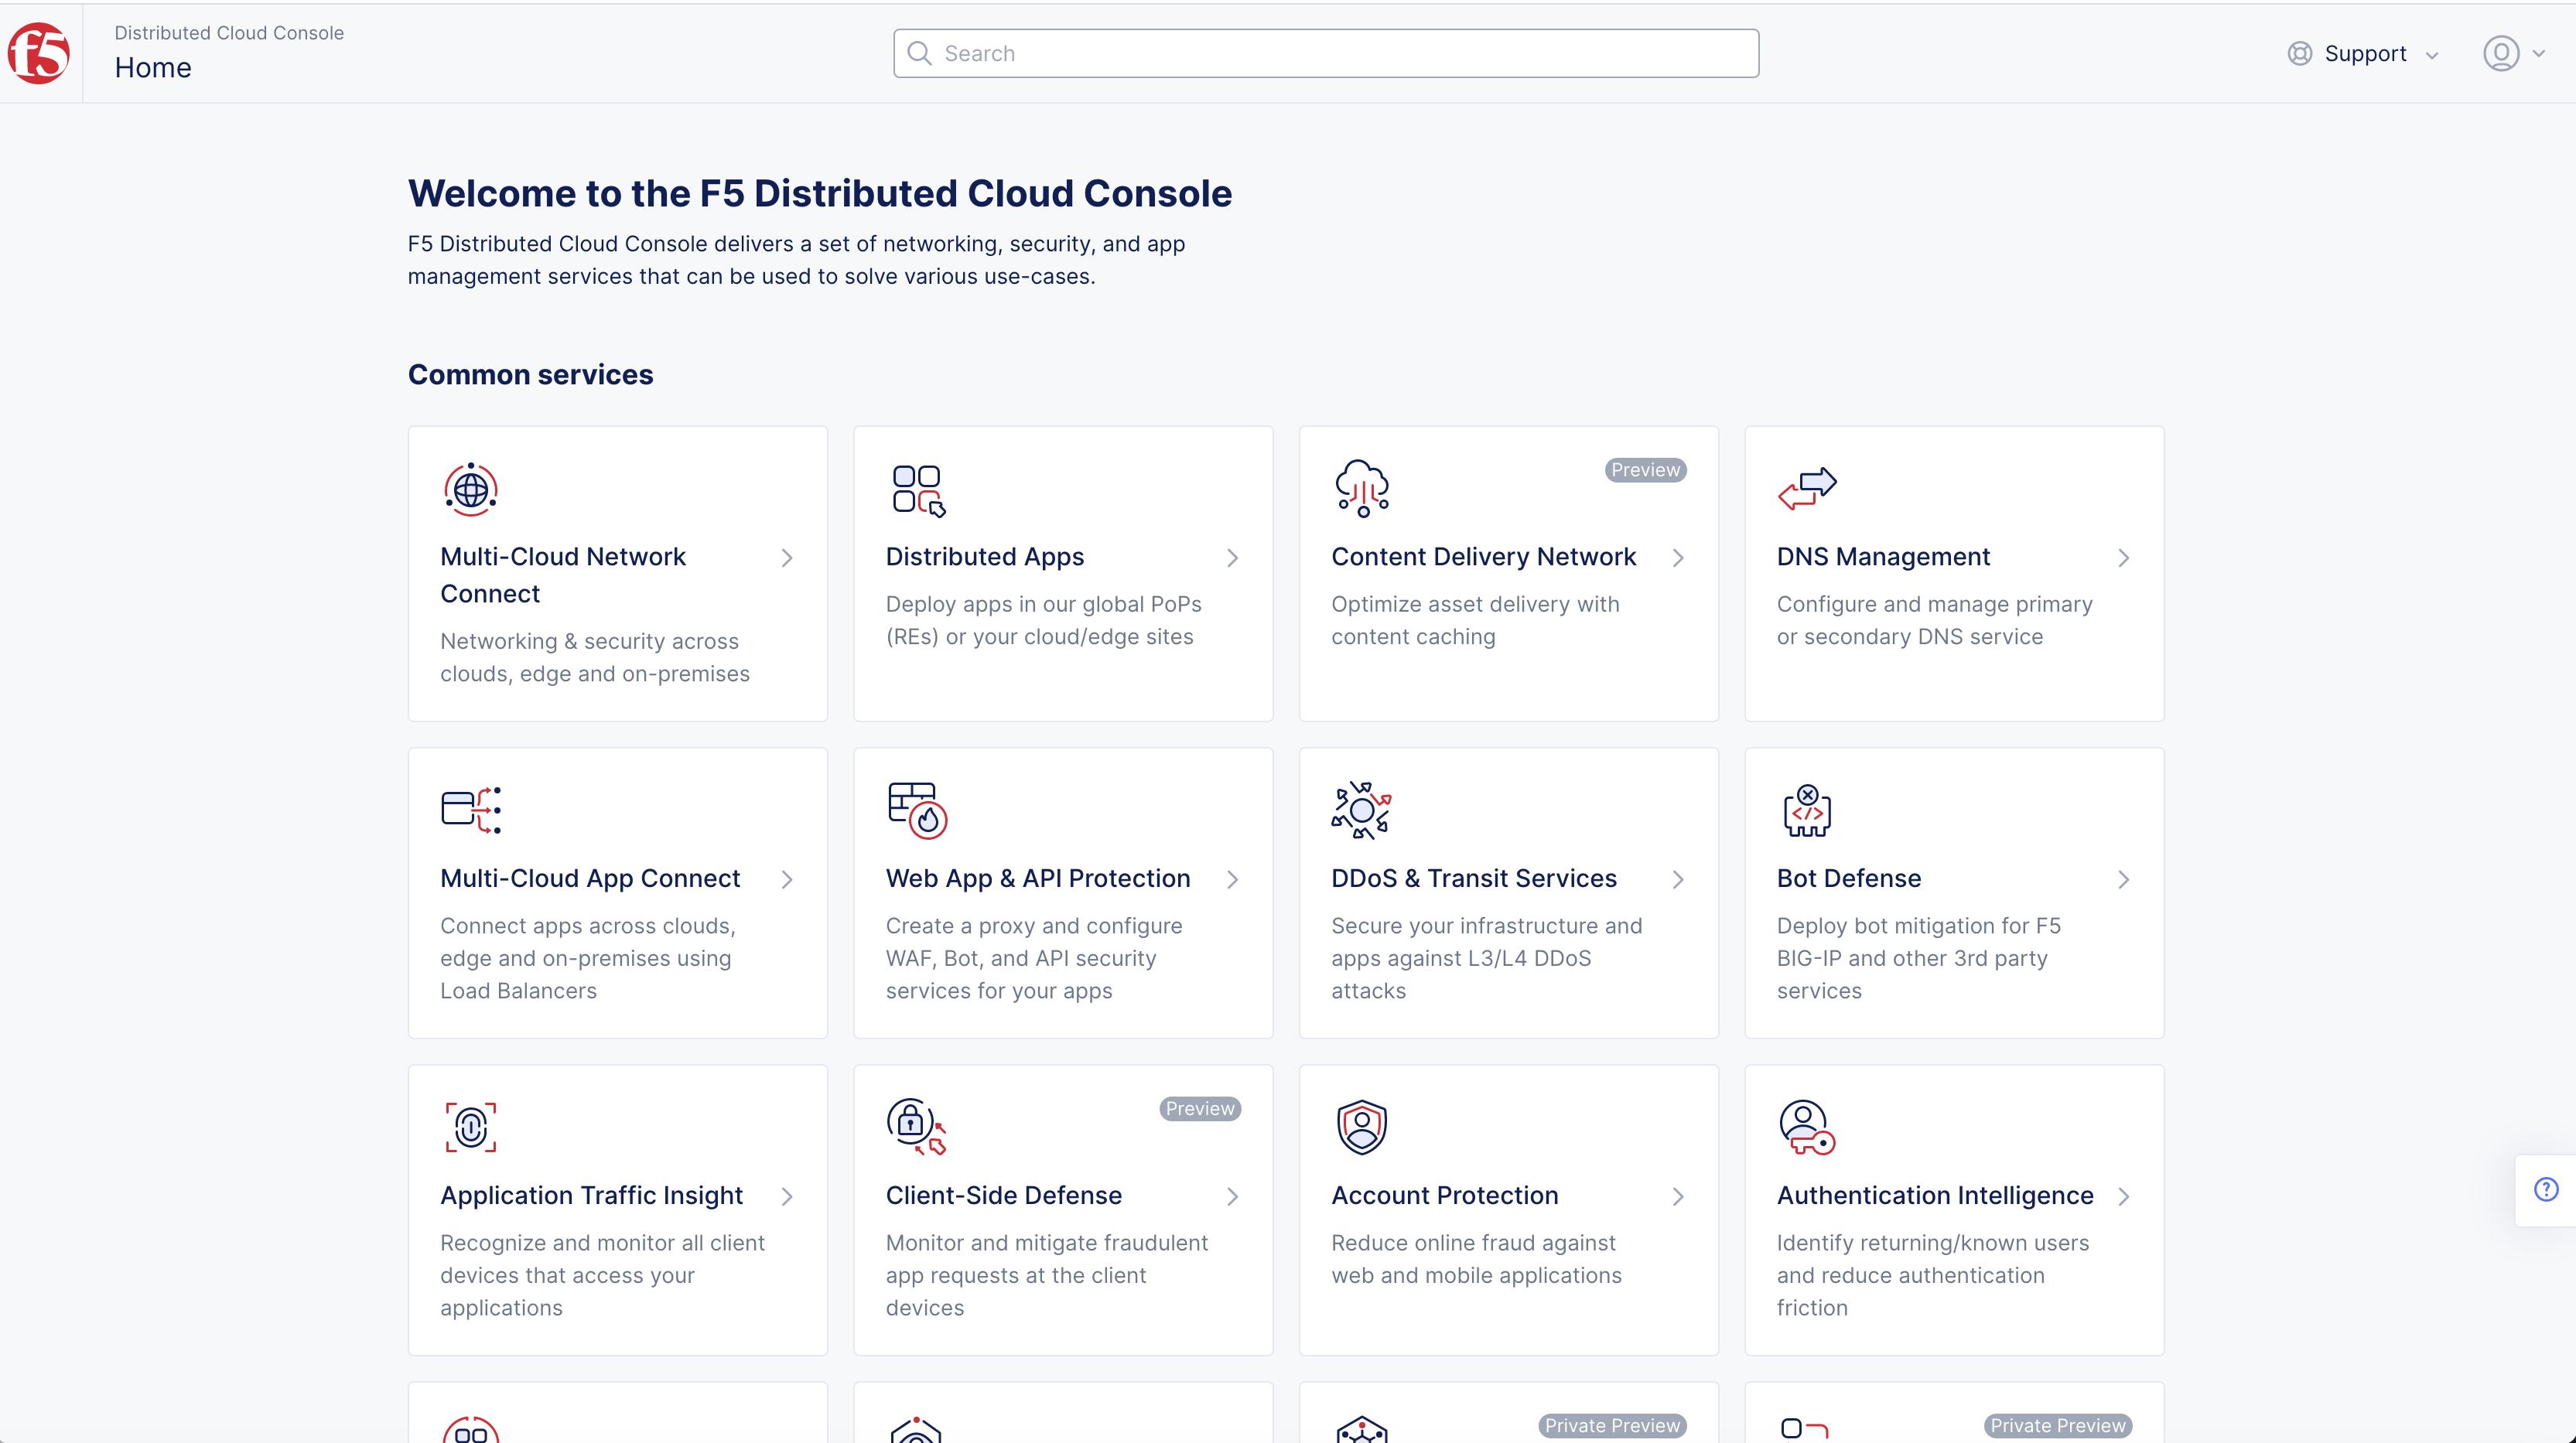
Figure: Homepage
Note: Confirm
Namespacefeature is in correct namespace, drop-down selector located in upper-left corner. Not available in all services.
- Select
Managein left column menu > selectAlerts Management>Alert Receivers.
Note: If options are not showing available, select
Showlink inAdvanced nav options visiblein bottom left corner. If needed, selectHideto minimize options from Advanced nav options mode.
- Select
+ Add Alert Receiverbutton.
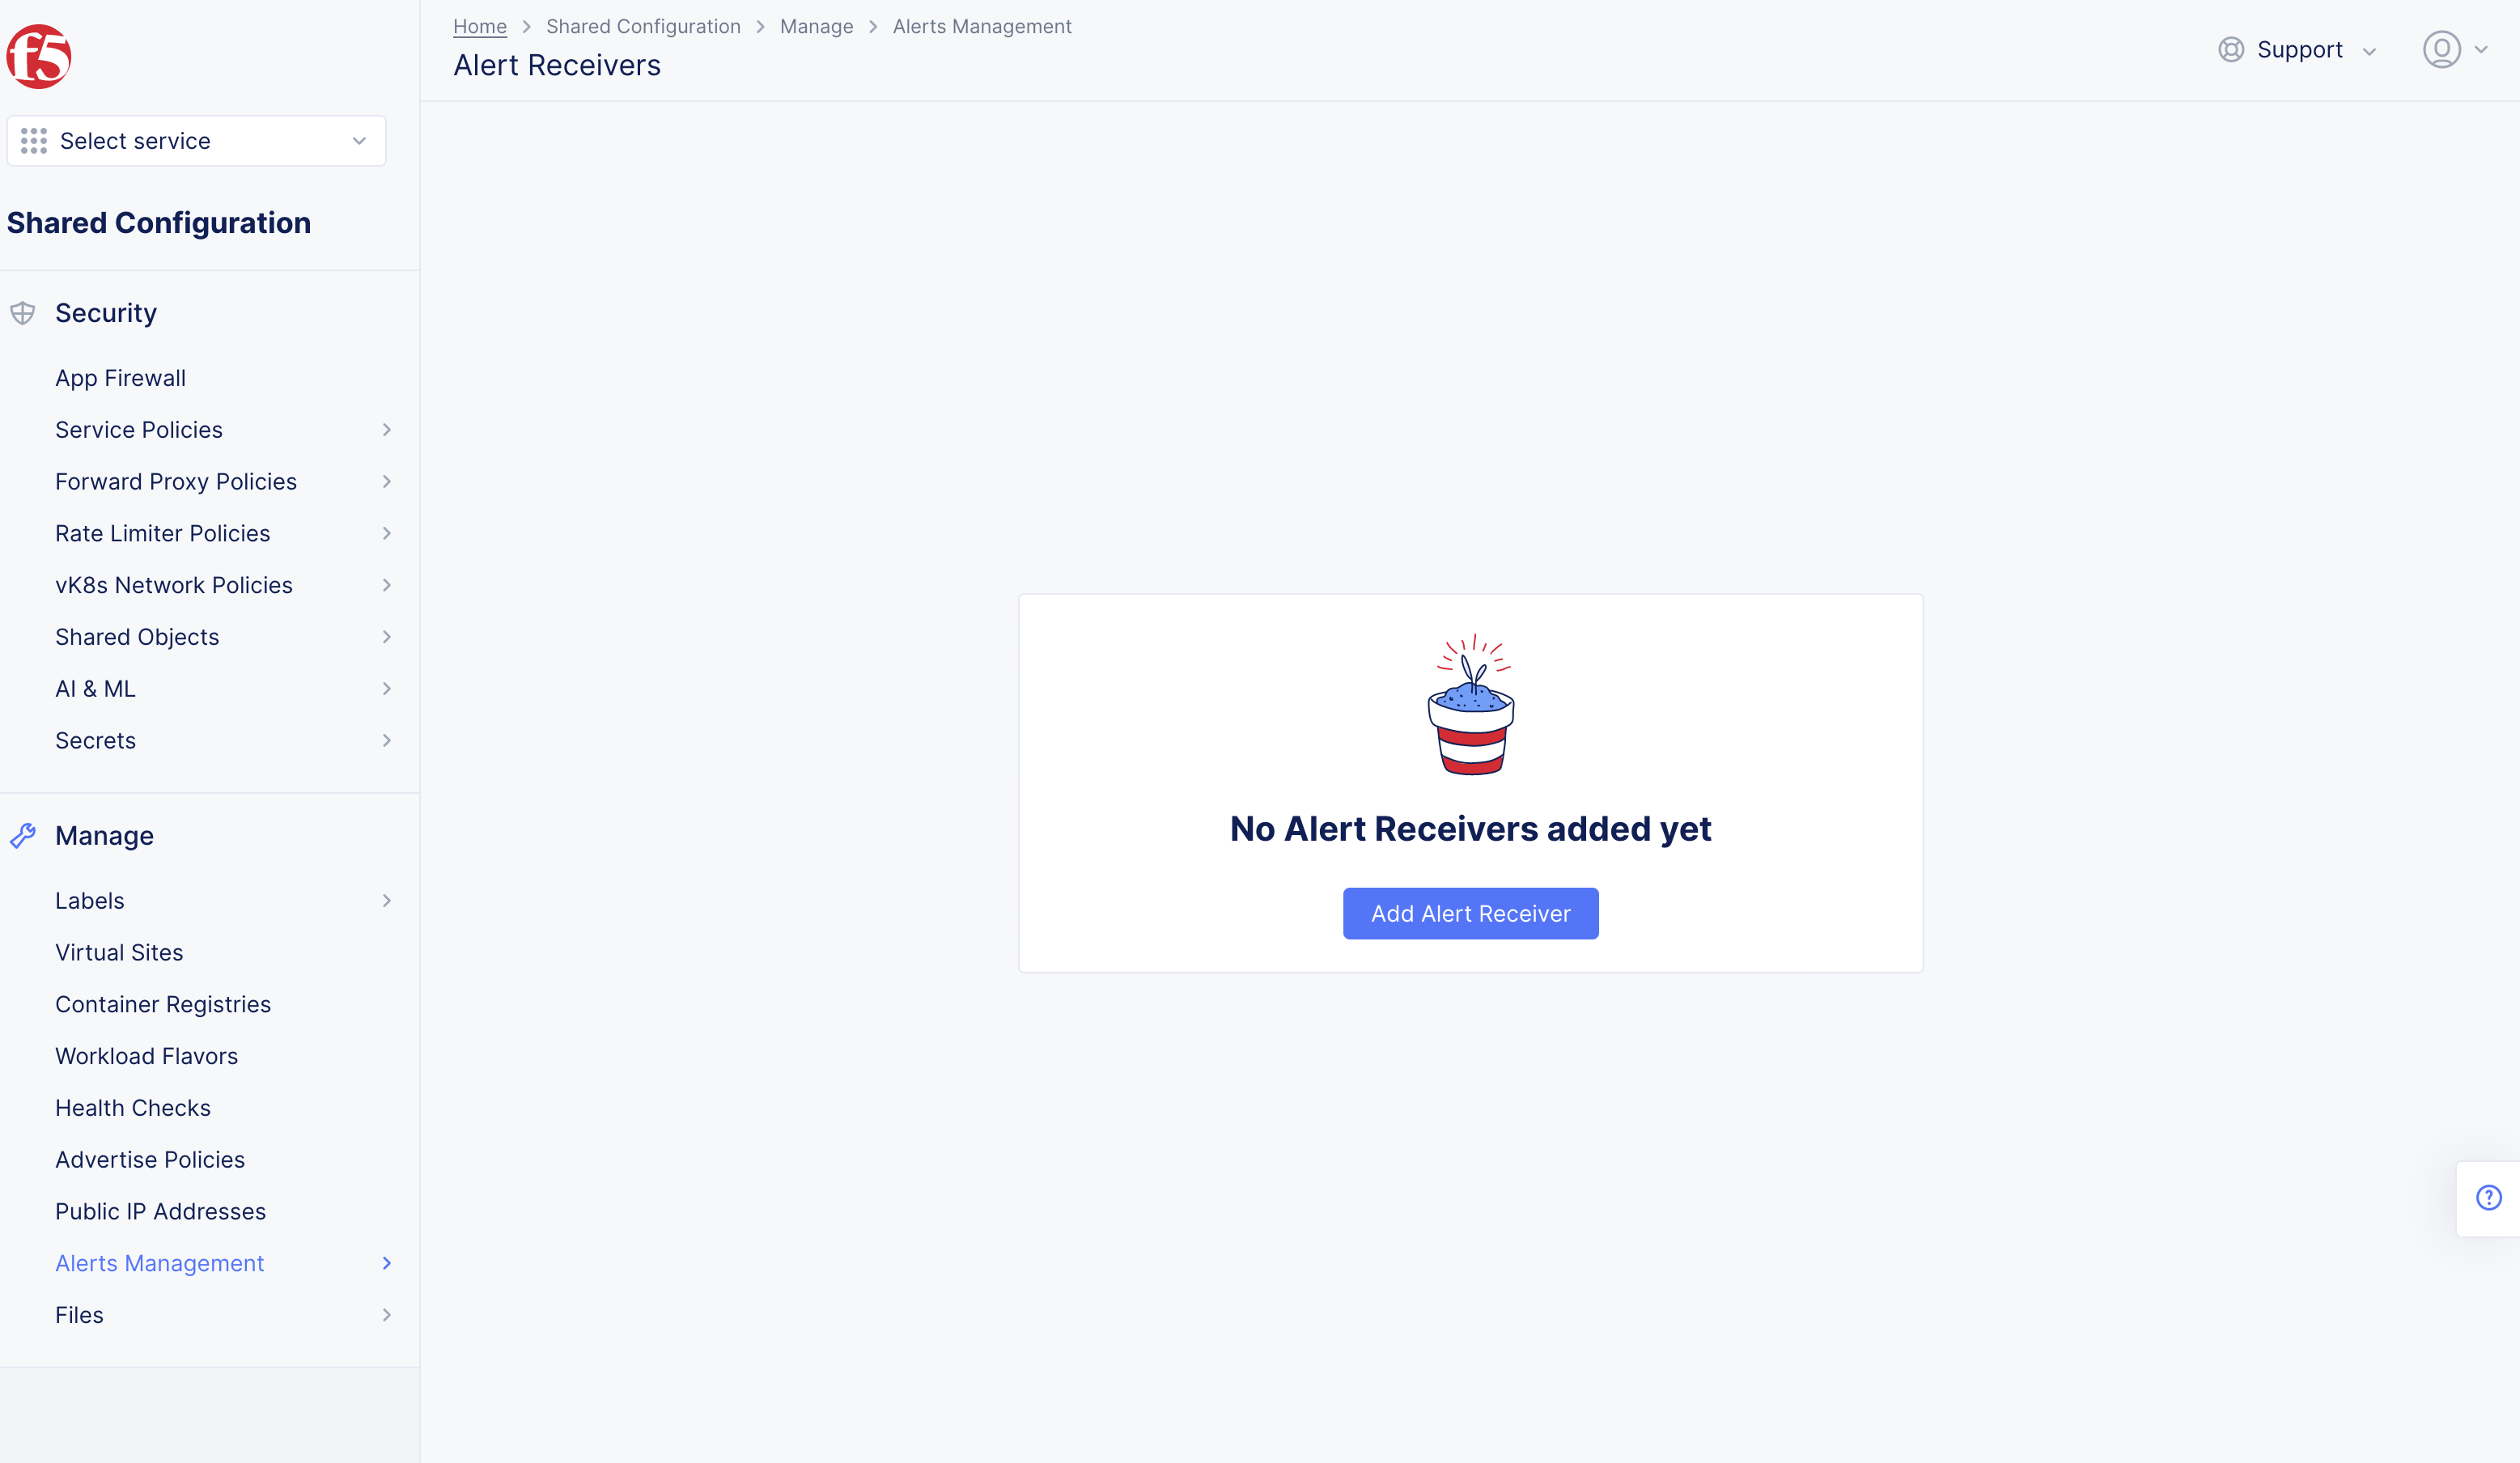
Figure: Alert Receiver
Step 2: Set OpsGenie as receiver.
-
Enter
Name, enterLabelsandDescriptionas needed. -
Select select
OpsGenieinReceiverdrop-down menu.
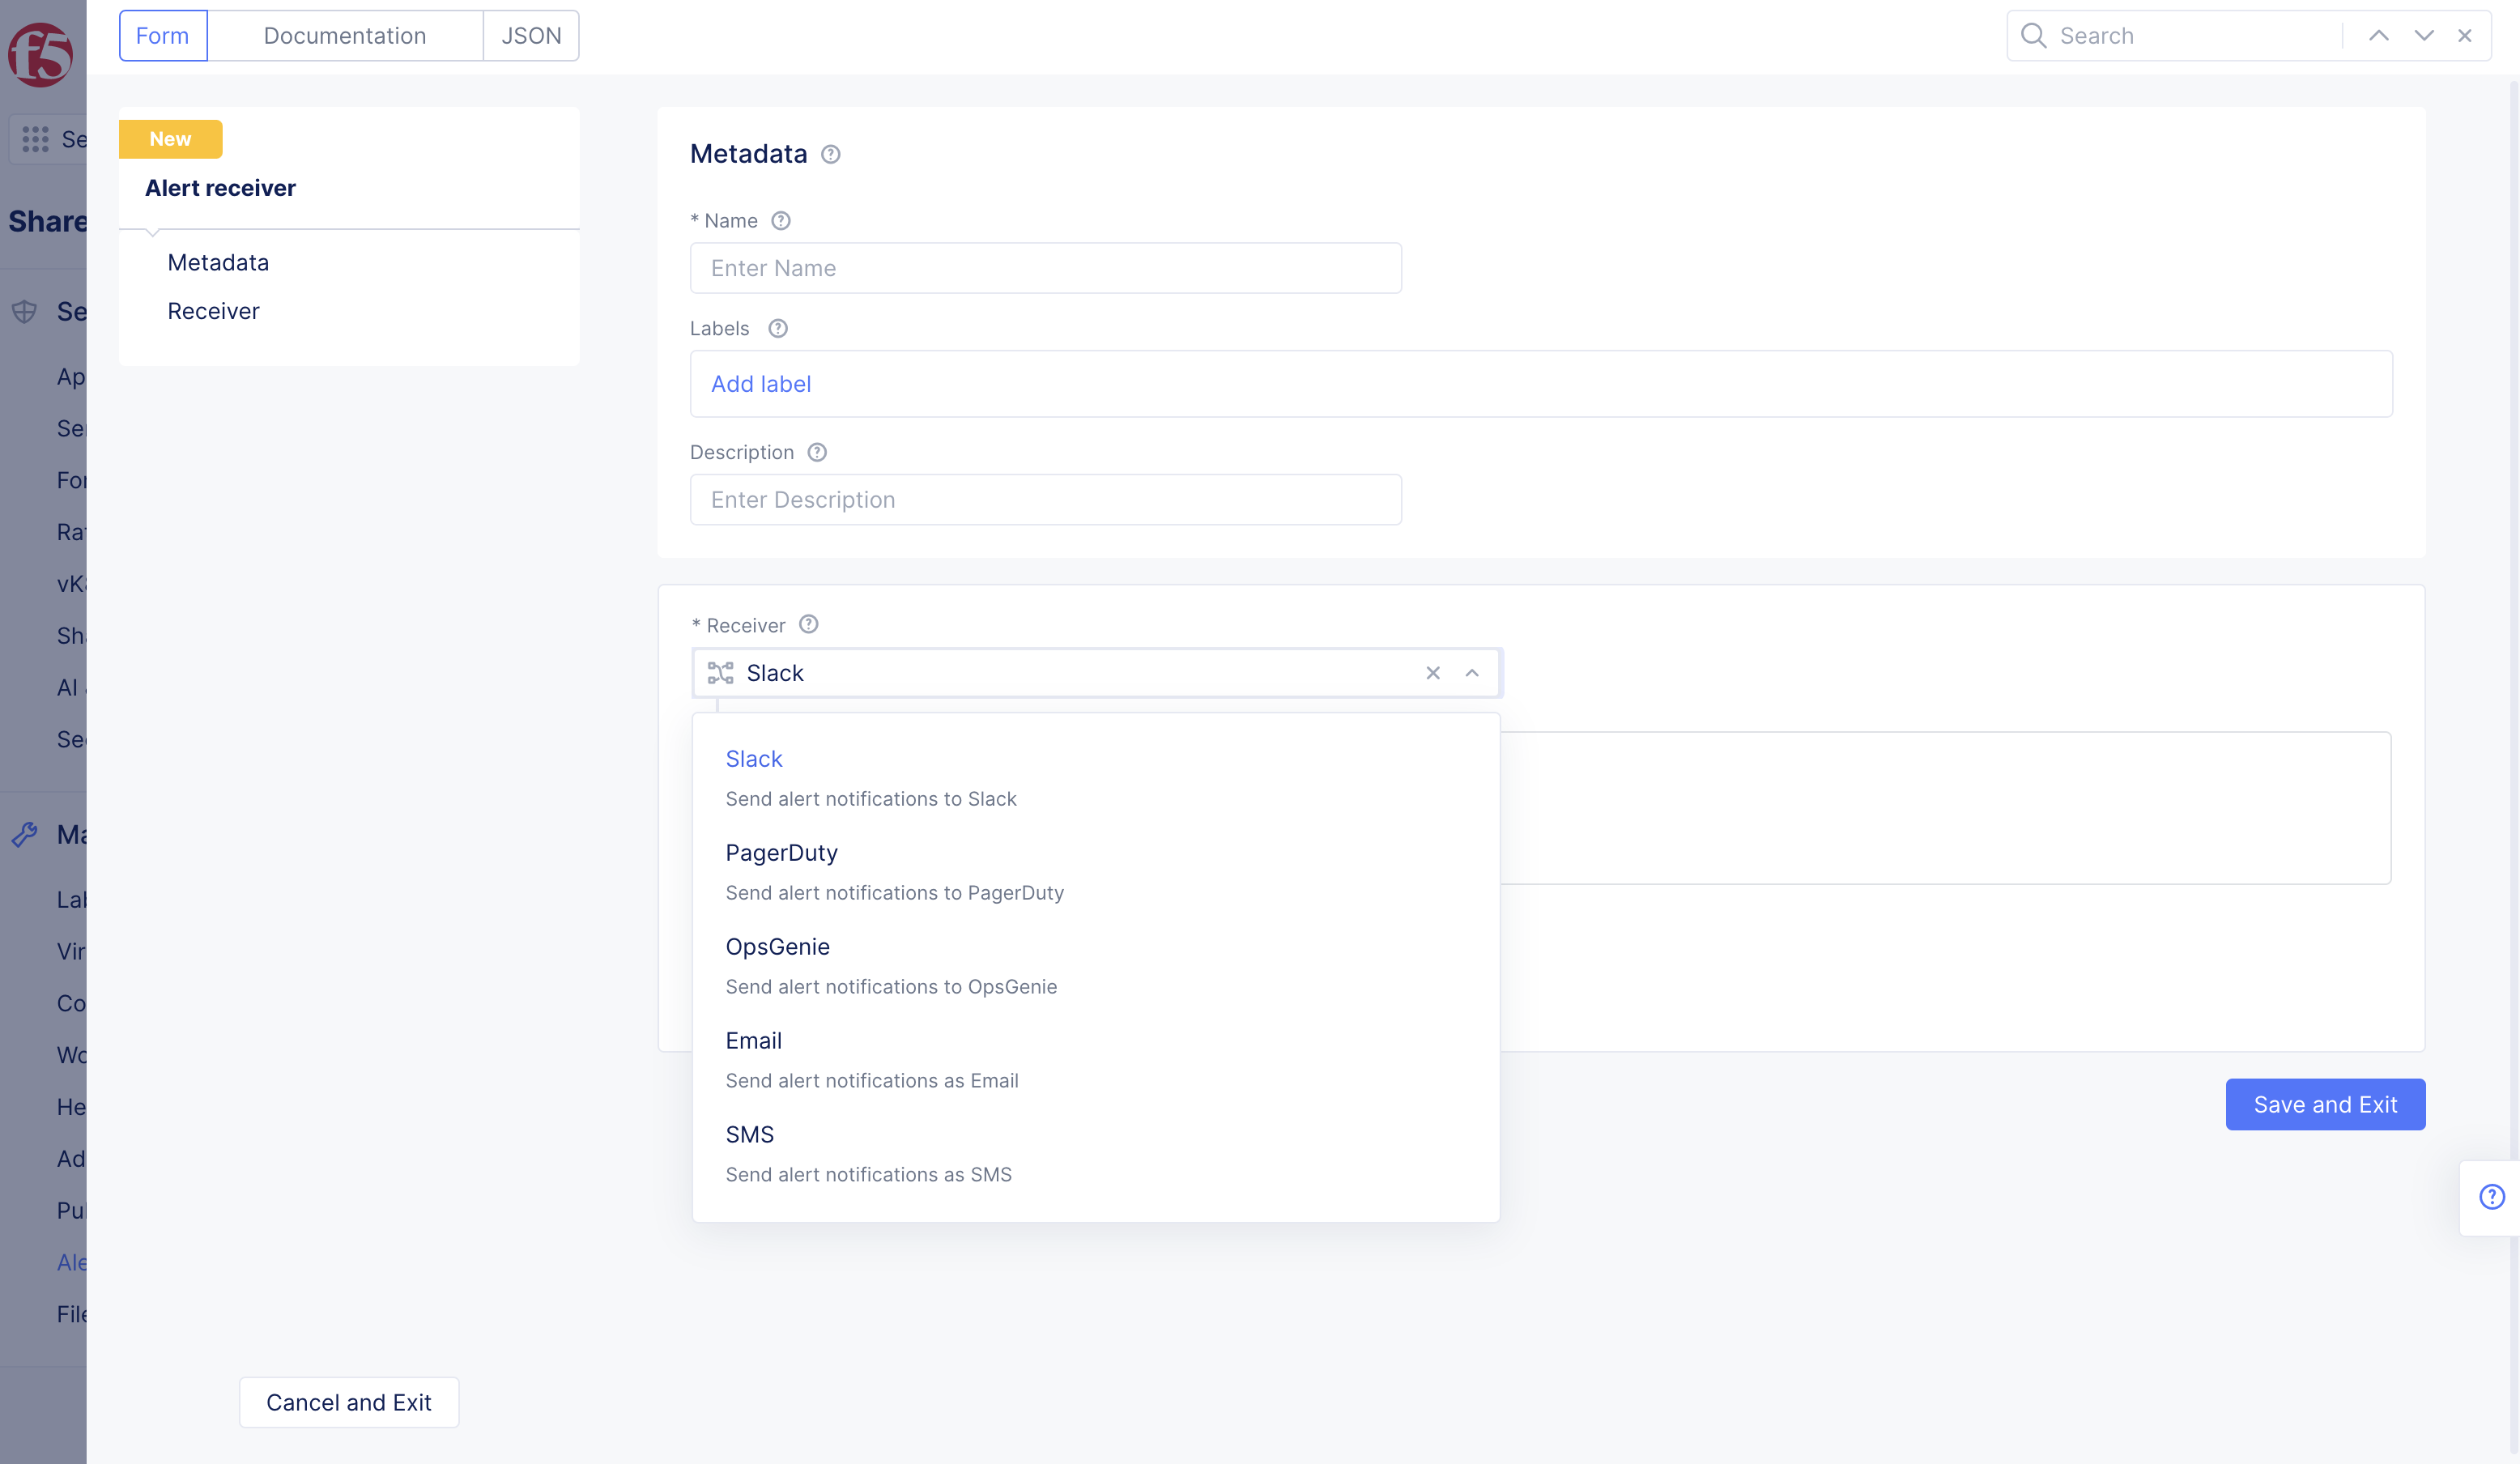
Figure: Alert Receiver Configuration
Step 3: Configure secret for OpsGenie service.
-
Select
Configurelink inAPI Keysection. -
Select
Blindfold Secretbubble forTypeinSecret infosection. -
Enter string you copied in text box obtained from applying Blindfold to webhook configuration.
-
Select
Applybutton.
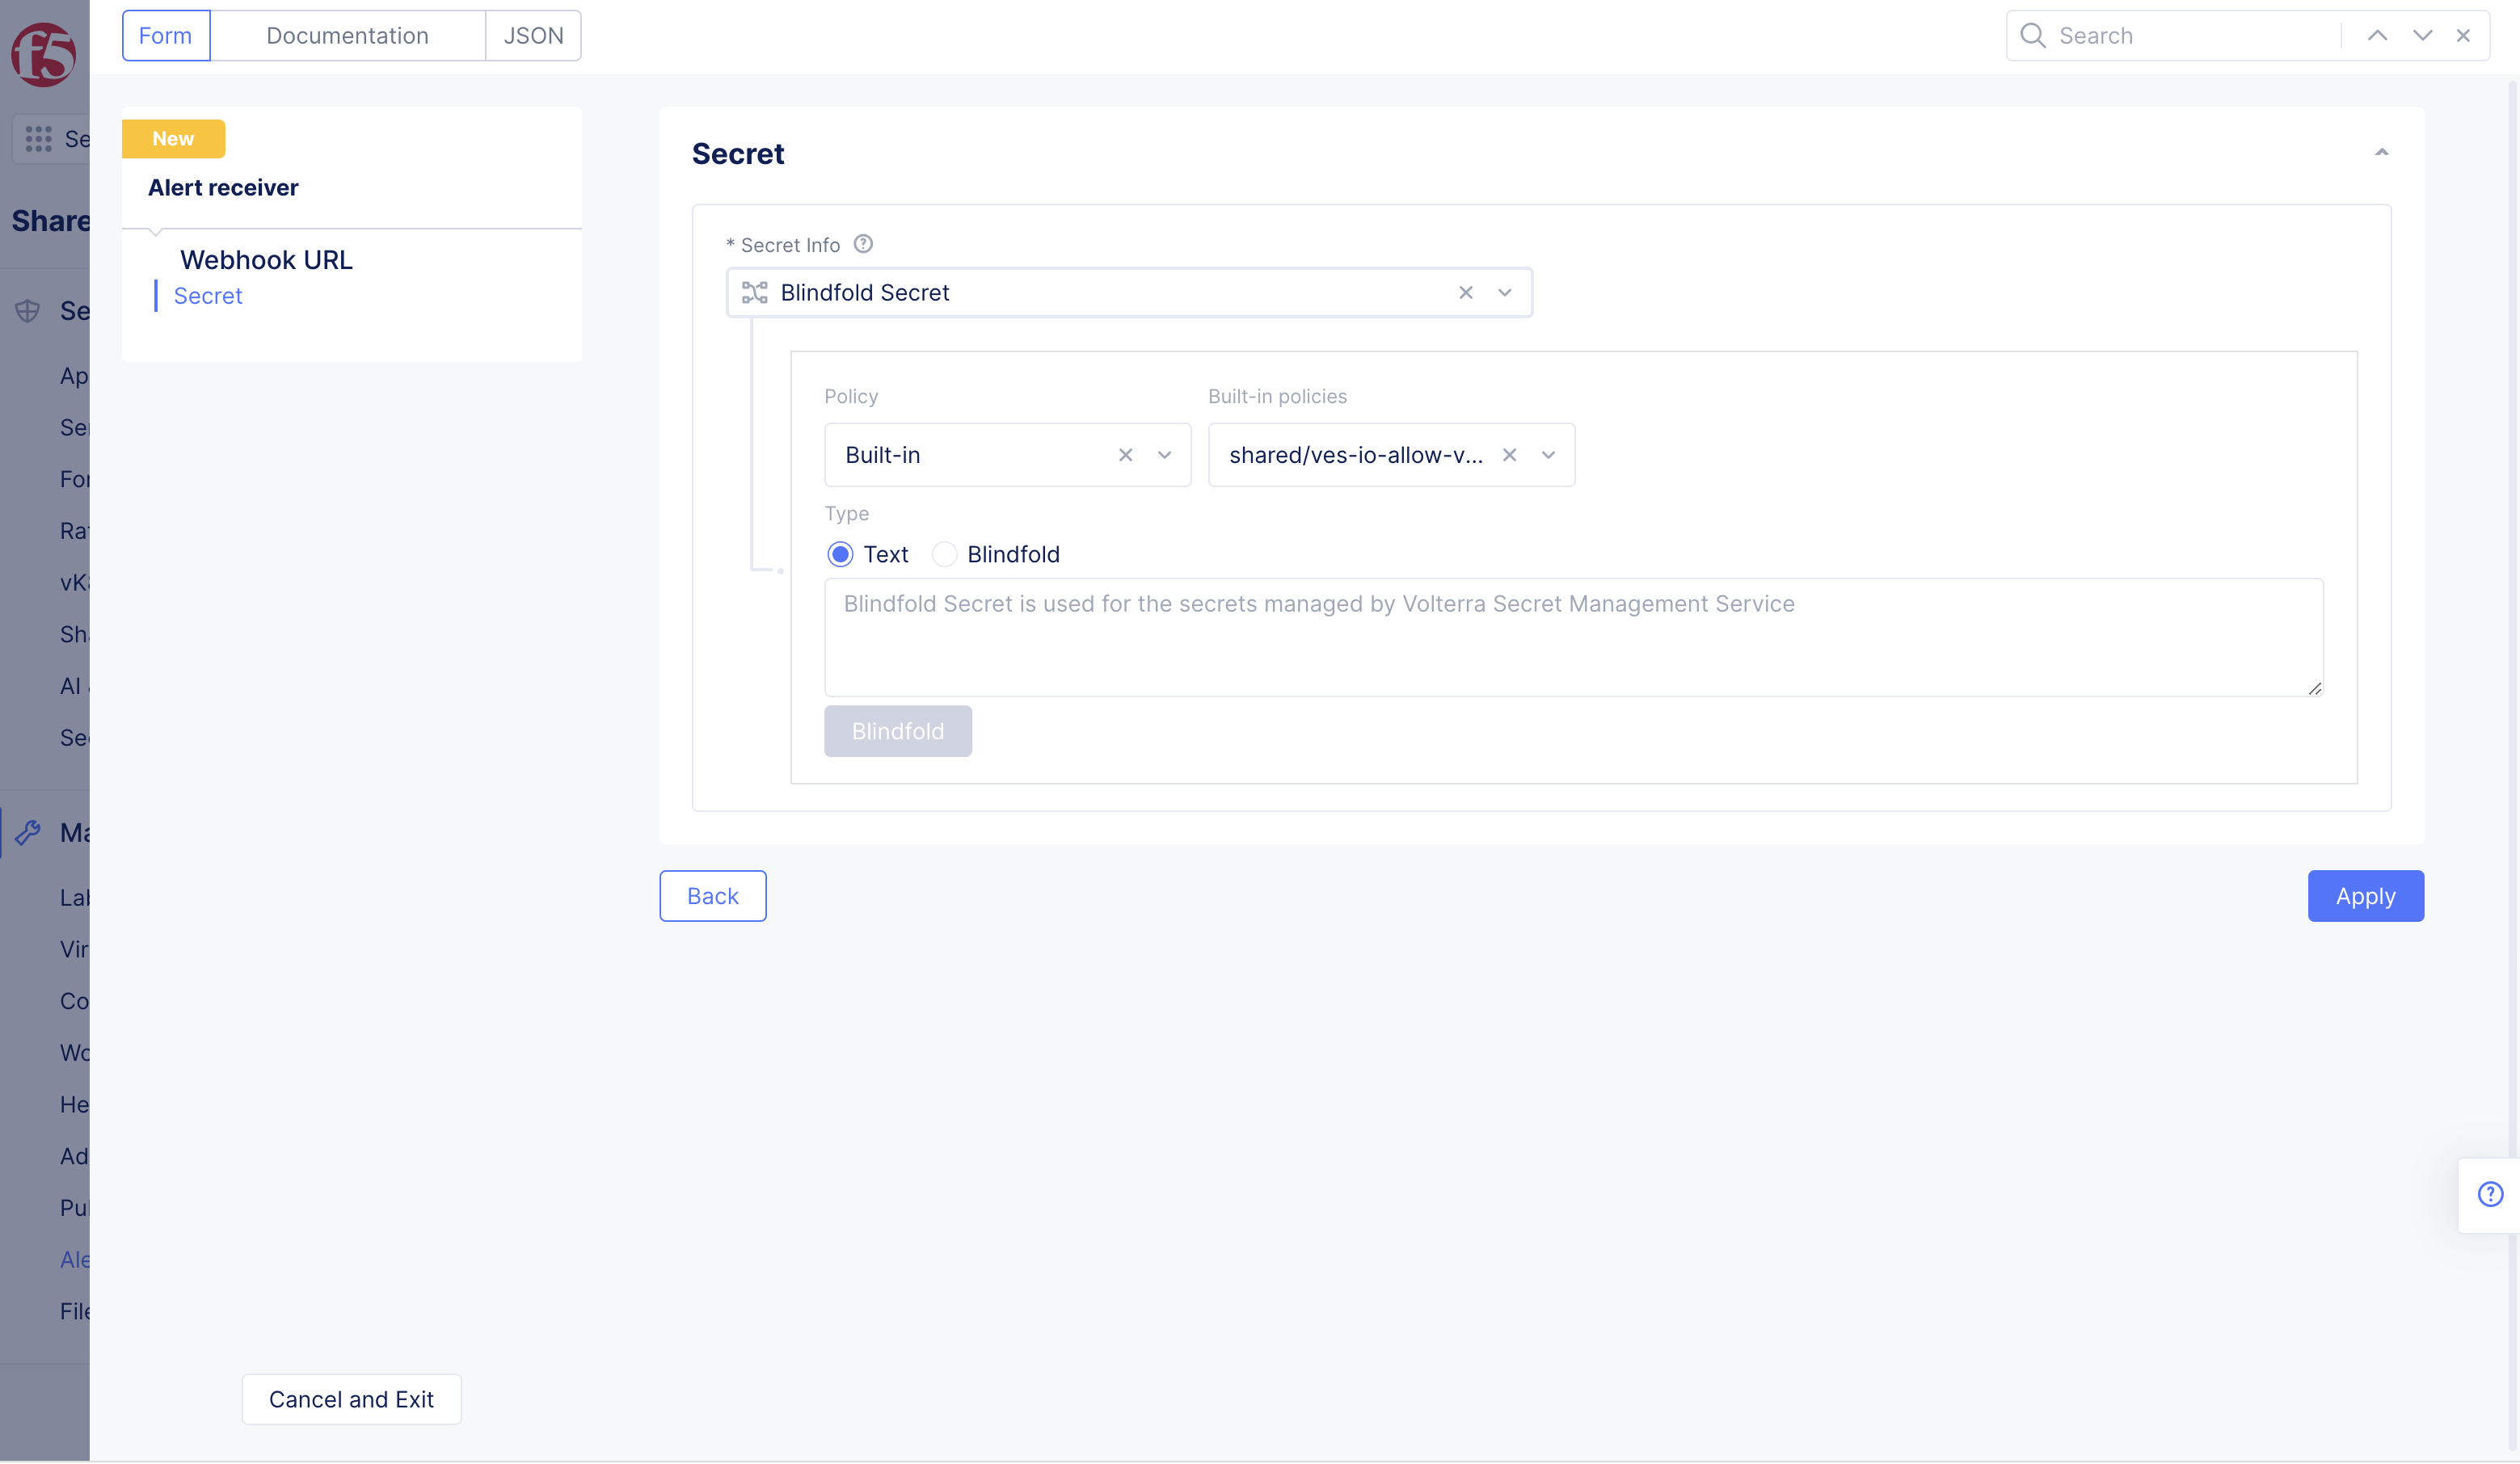
Figure: Configure Secret
Note: See Blindfold your Application Secrets for information on how to encrypt your application secrets.
Step 4: Specify API URL for OpsGenie service, complete creating receiver.
-
Enter
https://api.opsgenie.cominAPI URLbox. -
Select
Save & Exitbutton to complete creating alert receiver.
Note: Only the
https://api.opsgenie.comAPI is supported.
Create Alert Policy
Step 1: Start creating Alert Policy.
-
Select
Manage>Alerts Management>Alert Policies. -
Select
+ Add Alert Policybutton.
Step 2: Add receiver to policy.
- Enter
Name, enterLabelsandDescriptionas needed.
Note: Toggle
Show Advanced Fieldsto showConfigureReceiver Default Notification Parameters.
-
+ Select Itemdrop-down menu inAlert Receiver Configurationbox. -
Select
receiveryou created in Create Alert Receiver chapter. -
Select
+ Add itembutton inAlert Receiverspage. -
Select your receiver if available in list.
Note:
+ Add itembutton to add multiple Alert Receivers.
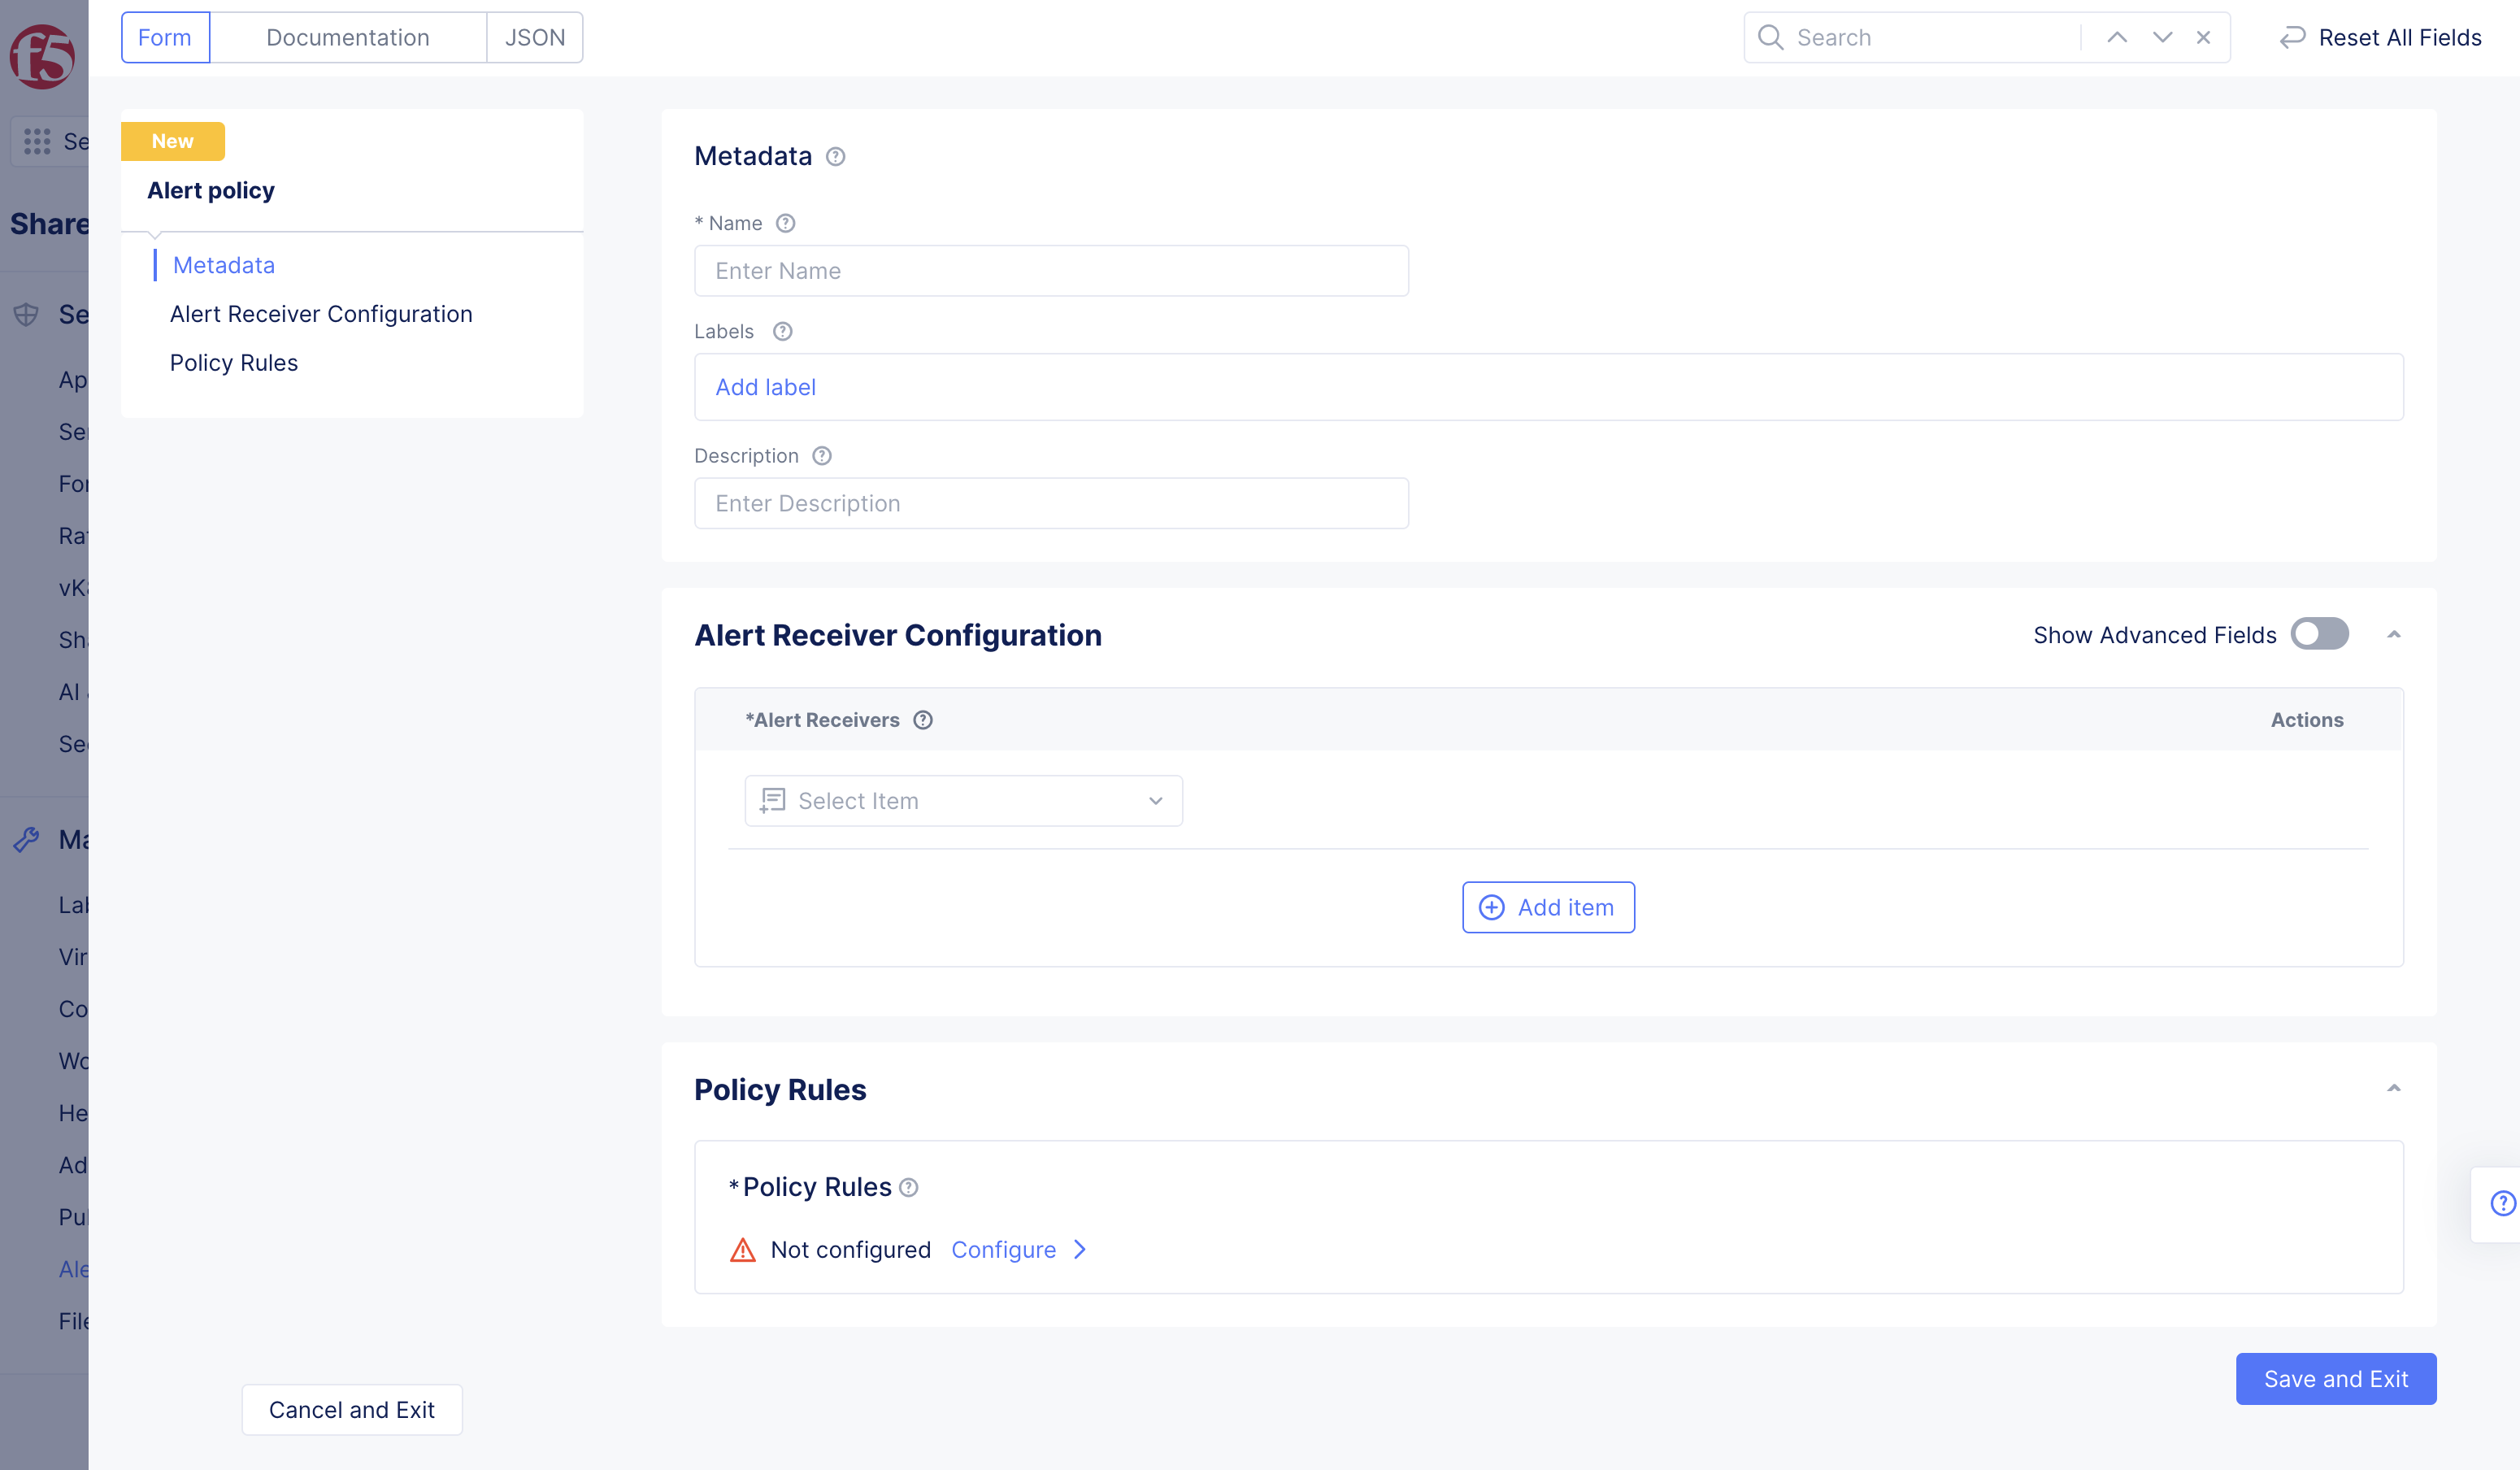
Figure: Alert Policy Receiver Configuration
Step 3: Set notification intervals.
Enable Show Advanced Fields option in the Alert Receiver Configuration section.
-
Select
Configurelink inReceiver Default Notification Parameterssection. This opens notification parameter configuration. -
Enter configuration for the
Notification Parameters. -
Toggle
Show Advanced Fieldsin both sections to open configuration options. -
Enter a value in the
[0-9][smhd]format inNotify Interval for a Alert. The[smhd]specifies seconds, minutes, hours, and days. An example value is60mand default is4h. -
Enter a value in the
[0-9][smhd]format inWait to Notify. The[smhd]specifies seconds, minutes, hours, and days. An example value is2mand default is30s. -
Enter a value in the
[0-9][smhd]format inNotify Interval for a Group. The[smhd]specifies seconds, minutes, hours, and days. An example value is5mand default is1m.
Note: All fields must be in 2-digit form (60m, 60s) in
Policy Rule Notification Parametersfor intervals and group notifications for your policy rules to apply correctly and not error.
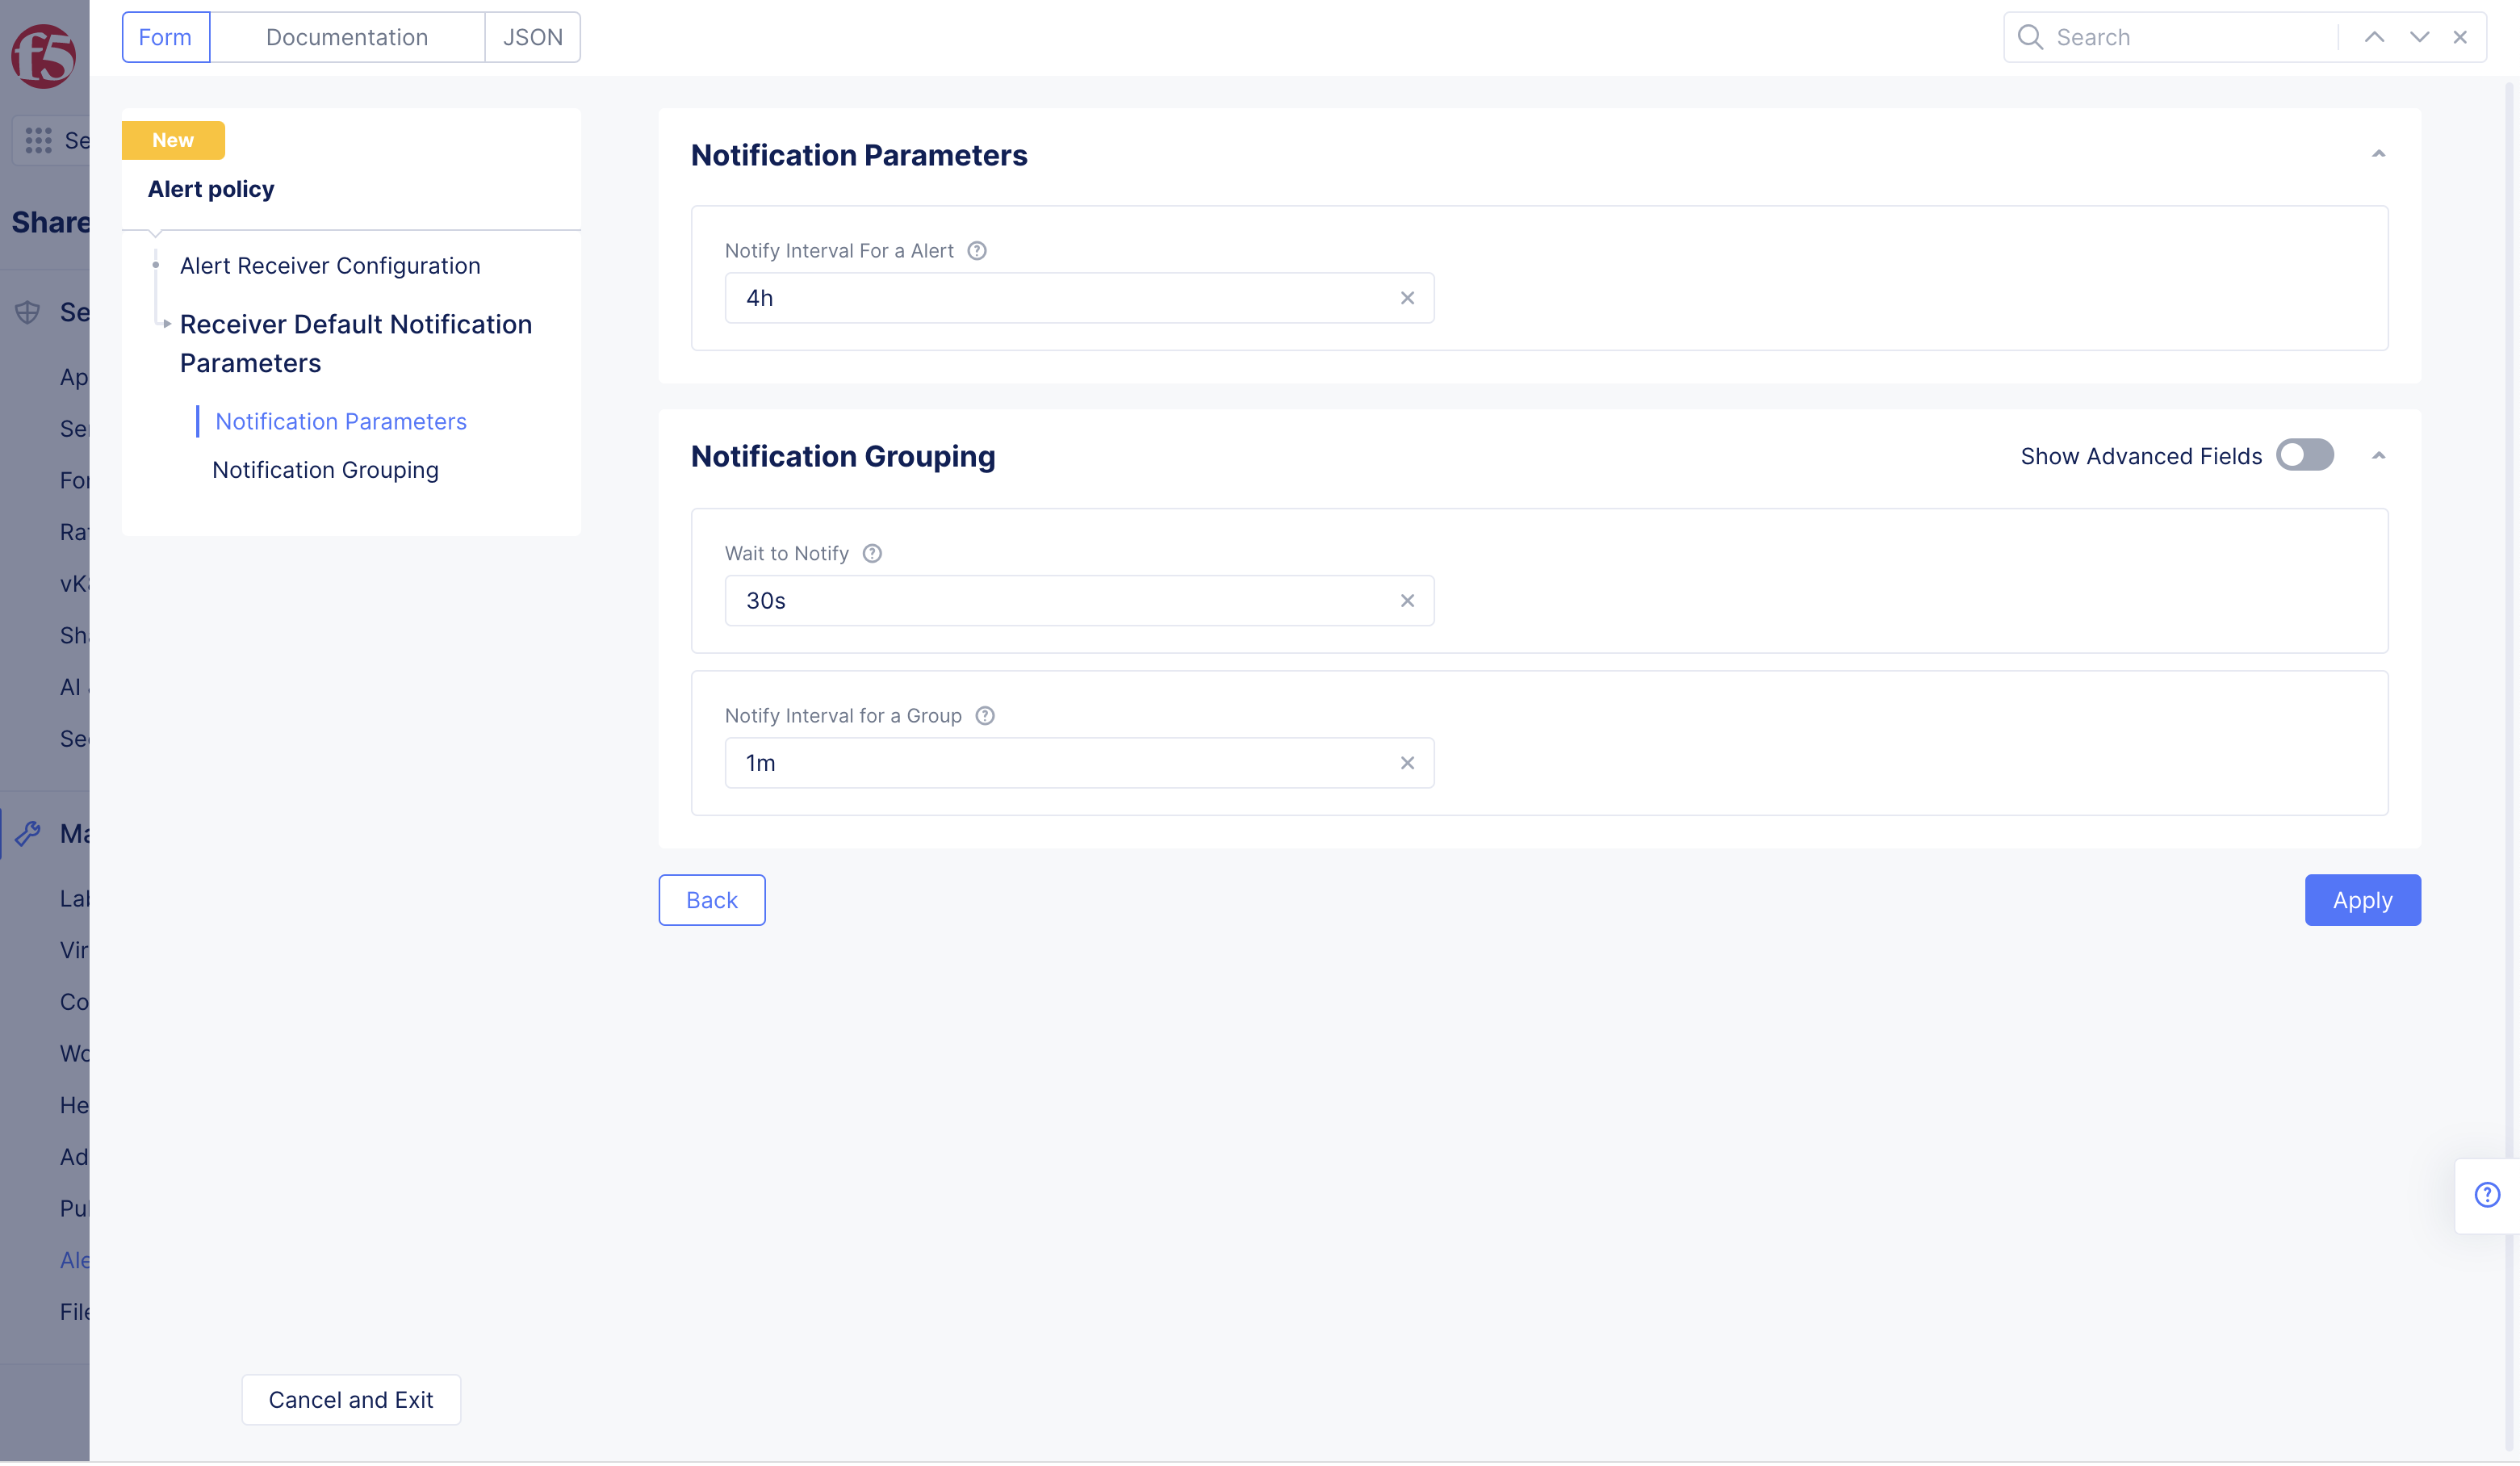
Figure: Alert Policy Route Configuration
- Select
Applyto apply the notification parameters, and return to the policy configuration.
Step 4: Set alert match conditions and associated actions.
-
Select
Configurelink inPolicy Rulesbox. -
Select
+ Add Itembutton. -
Select Alertsdrop-down menu option,Anyoption is default.
Note:
Matching Custom Criteria>AlertnameConfigurelink >Select Matcher Type> selectApplybutton > selectApplybutton.
-
Select
Actiondrop-down menu option,Sendis default. -
Select
Applybutton. -
Order rules by dragging in
Policy Rulespage. -
Select
Applybutton, order rules by dragging.
Note: You can also set the match conditions based on the severity, group name, and alert name.
Step 5: Optionally, add policy rules.
Select + Add item button to add more policy rules.
Step 6: Complete creating the alert policy.
Select Save and Exit button to complete creating the alert policy.
Create Active Alert Policies
Step 1: Start creating active alert policies.
- In
Multi-Cloud Network Connect> SelectManage.
Note:
Active Alert Policiescan be created and edited inMulti-Cloud Network Connect,Multi-Cloud App Connect,Web App & API Protection, andDistributed Appsworkspaces by selectingManage>Alerts Management>+ Select Active Alert Policies.
-
Select
Alerts Management> selectActive Alert Policies. -
+ Select Active Alert Policies.

Figure: Active Alert Policy Configuration
Step 2: Add active alert policies to the policy.
-
Select itemdrop-down menu to select created alert policy needed. -
+ Add Itembutton inActive Alert Policiespop-up window to add policy selection drop-down menus.
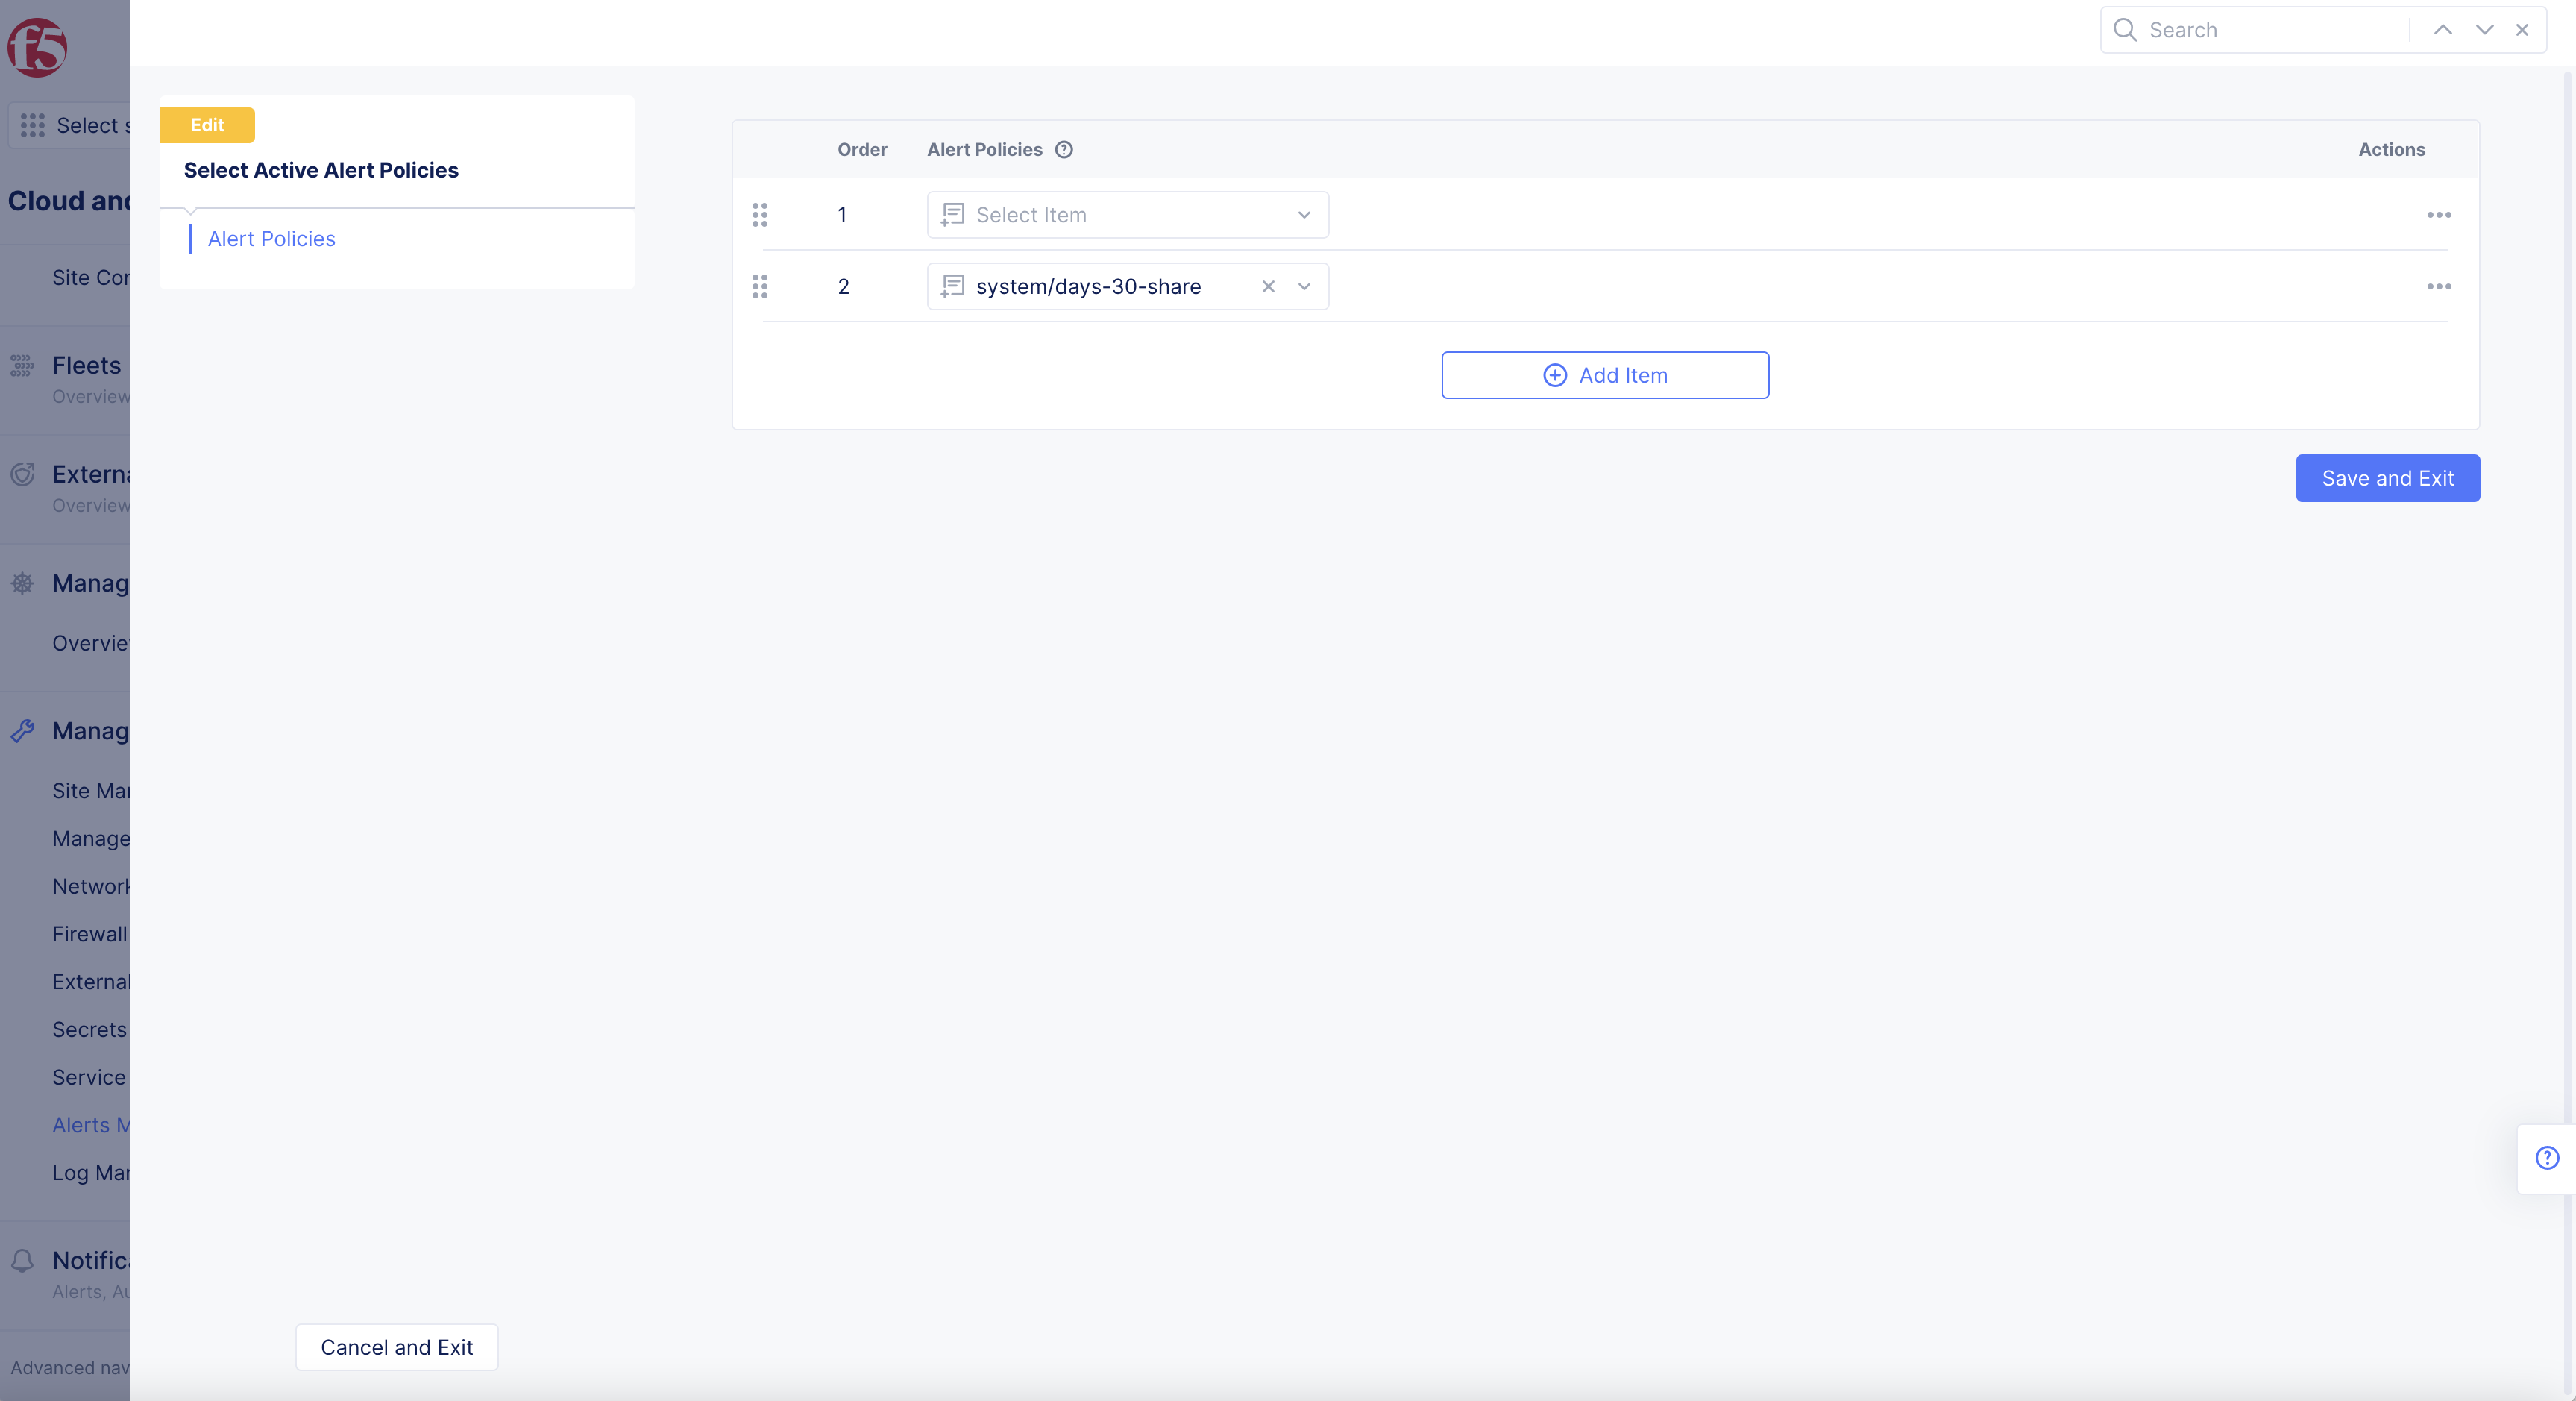
Figure: Active Alert Policy Configuration
Step 3: Complete creating the active alert policies.
Select Save and Exit button to complete creating the alert policy.
Verification and Example
You can now verify alert notifications by visiting your OpsGenie service page. The following image shows a sample of alerts sent to OpsGenie service:
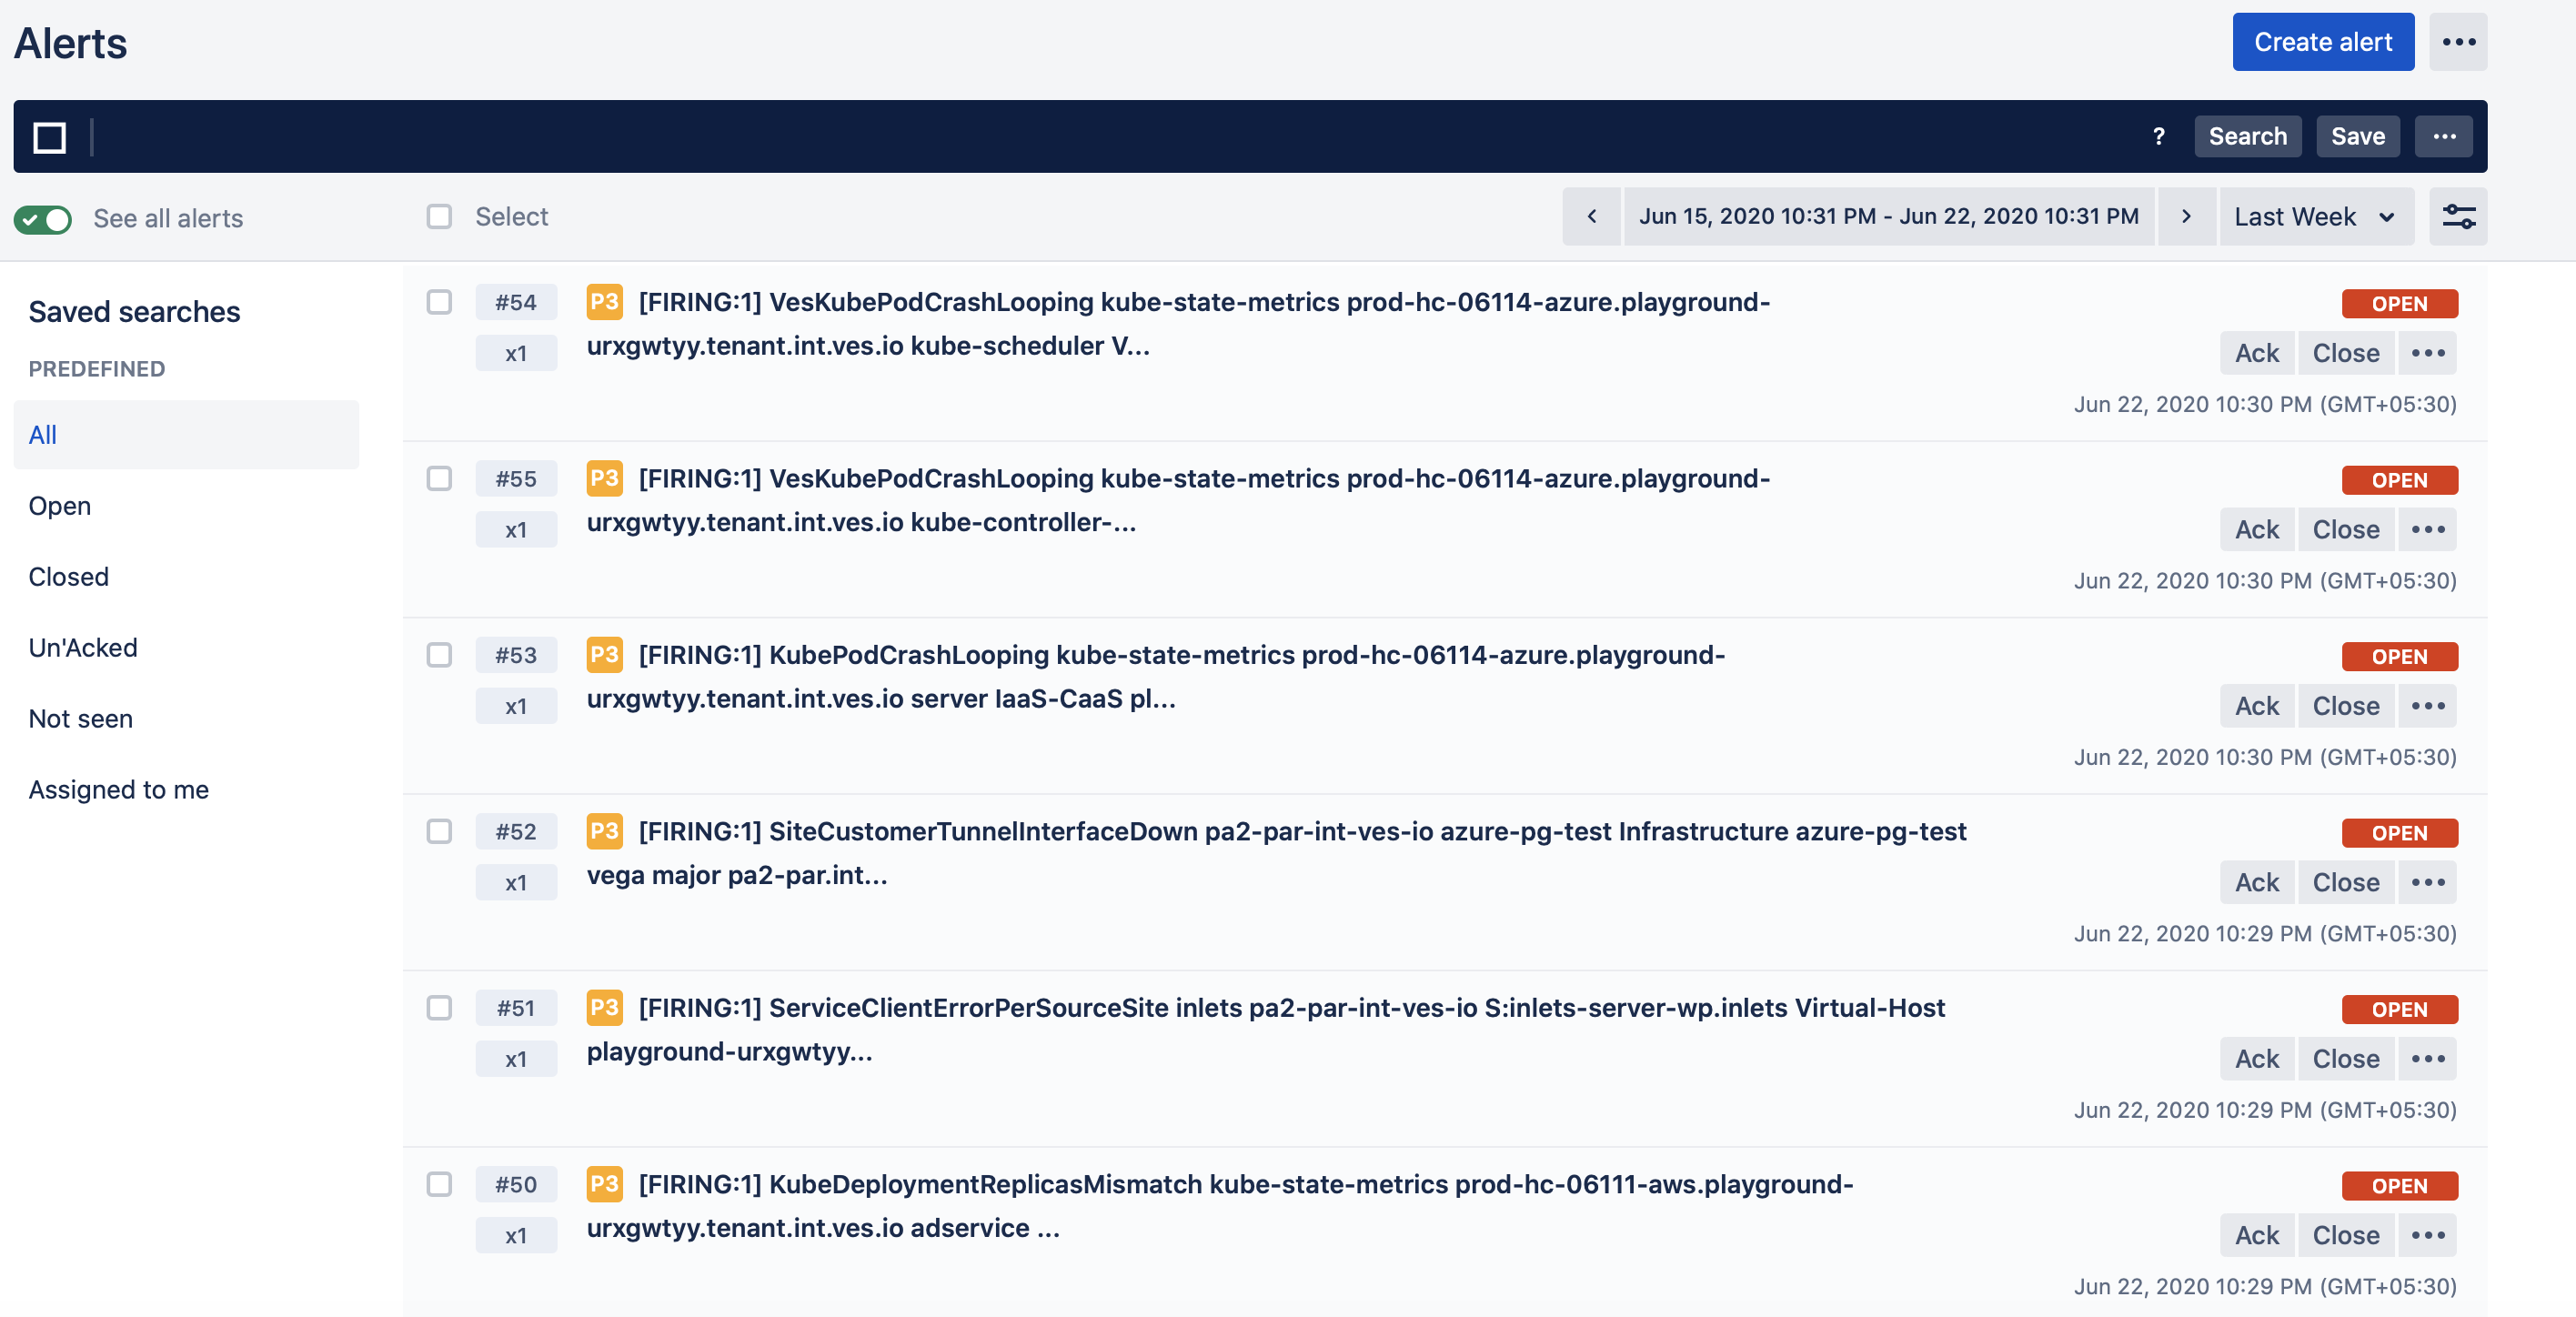
Figure: Post of Alerts to OpsGenie Service