Steps To Activating a Distributed Cloud Tenant
Objective
This document provides information on setting up your account. Now that you have successfully purchased your Distributed Cloud Services Tenant, the next step is to set up your account. Follow these detailed instructions to complete the setup process.
The AWS PayGo tenant activation includes a few additional steps. Initially, you will be prompted to provide some tenant information. This information is collected by the partner or seller you are working with for the Term Subscription and Flexible Consumption Programs.
AWS PayGo Tenant Creation Starts Here
Step 1: Create your Distributed Cloud Tenant.
You will be asked to create your Distributed Cloud Tenant. This process typically takes 30 seconds to 1 minute. Soon, you'll see the Let's get you started with F5 Distributed Cloud Services page.
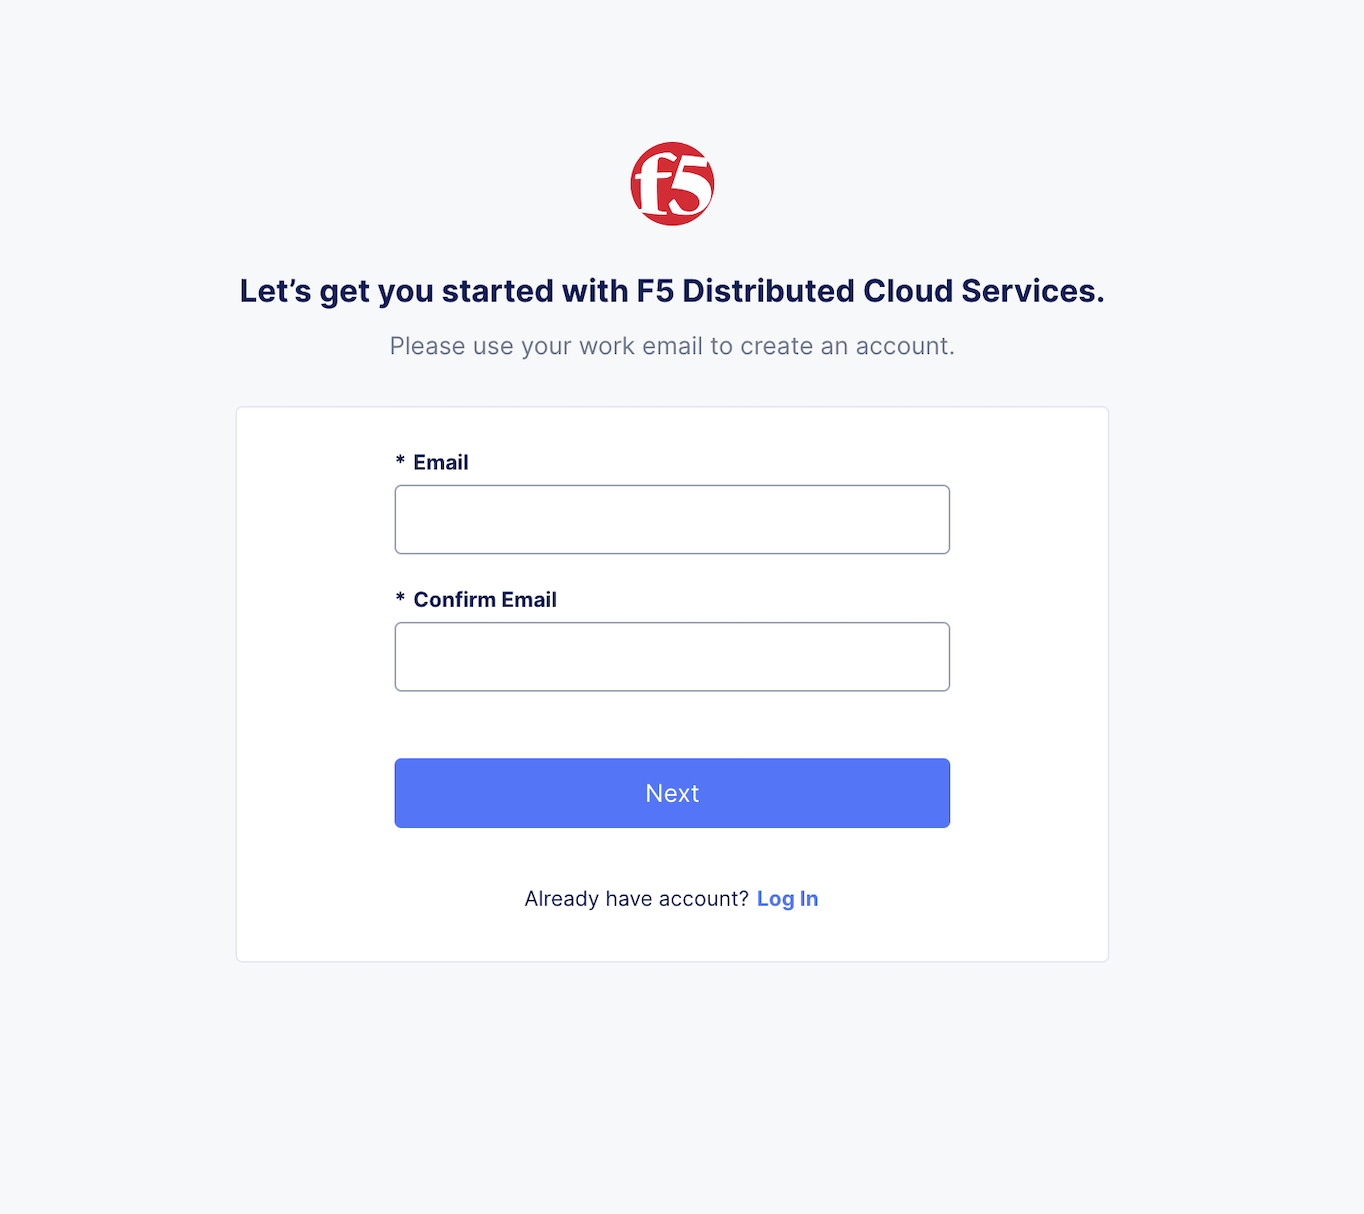
Figure: Tenant Login Page
Step 2:Temporary error page will be resolved shortly.
If you encounter an error page, don't worry, it's temporary and will be resolved within a few minutes as the system prepares your tenant.
Step 3: Setting up your tenant and password.
You will receive a series of prompts and emails designed to guide you through the process of providing the necessary information and setting up your tenant and password. These steps are documented here to ensure a smooth setup experience.
Step 3.1: Prompt for more information about you and your company.
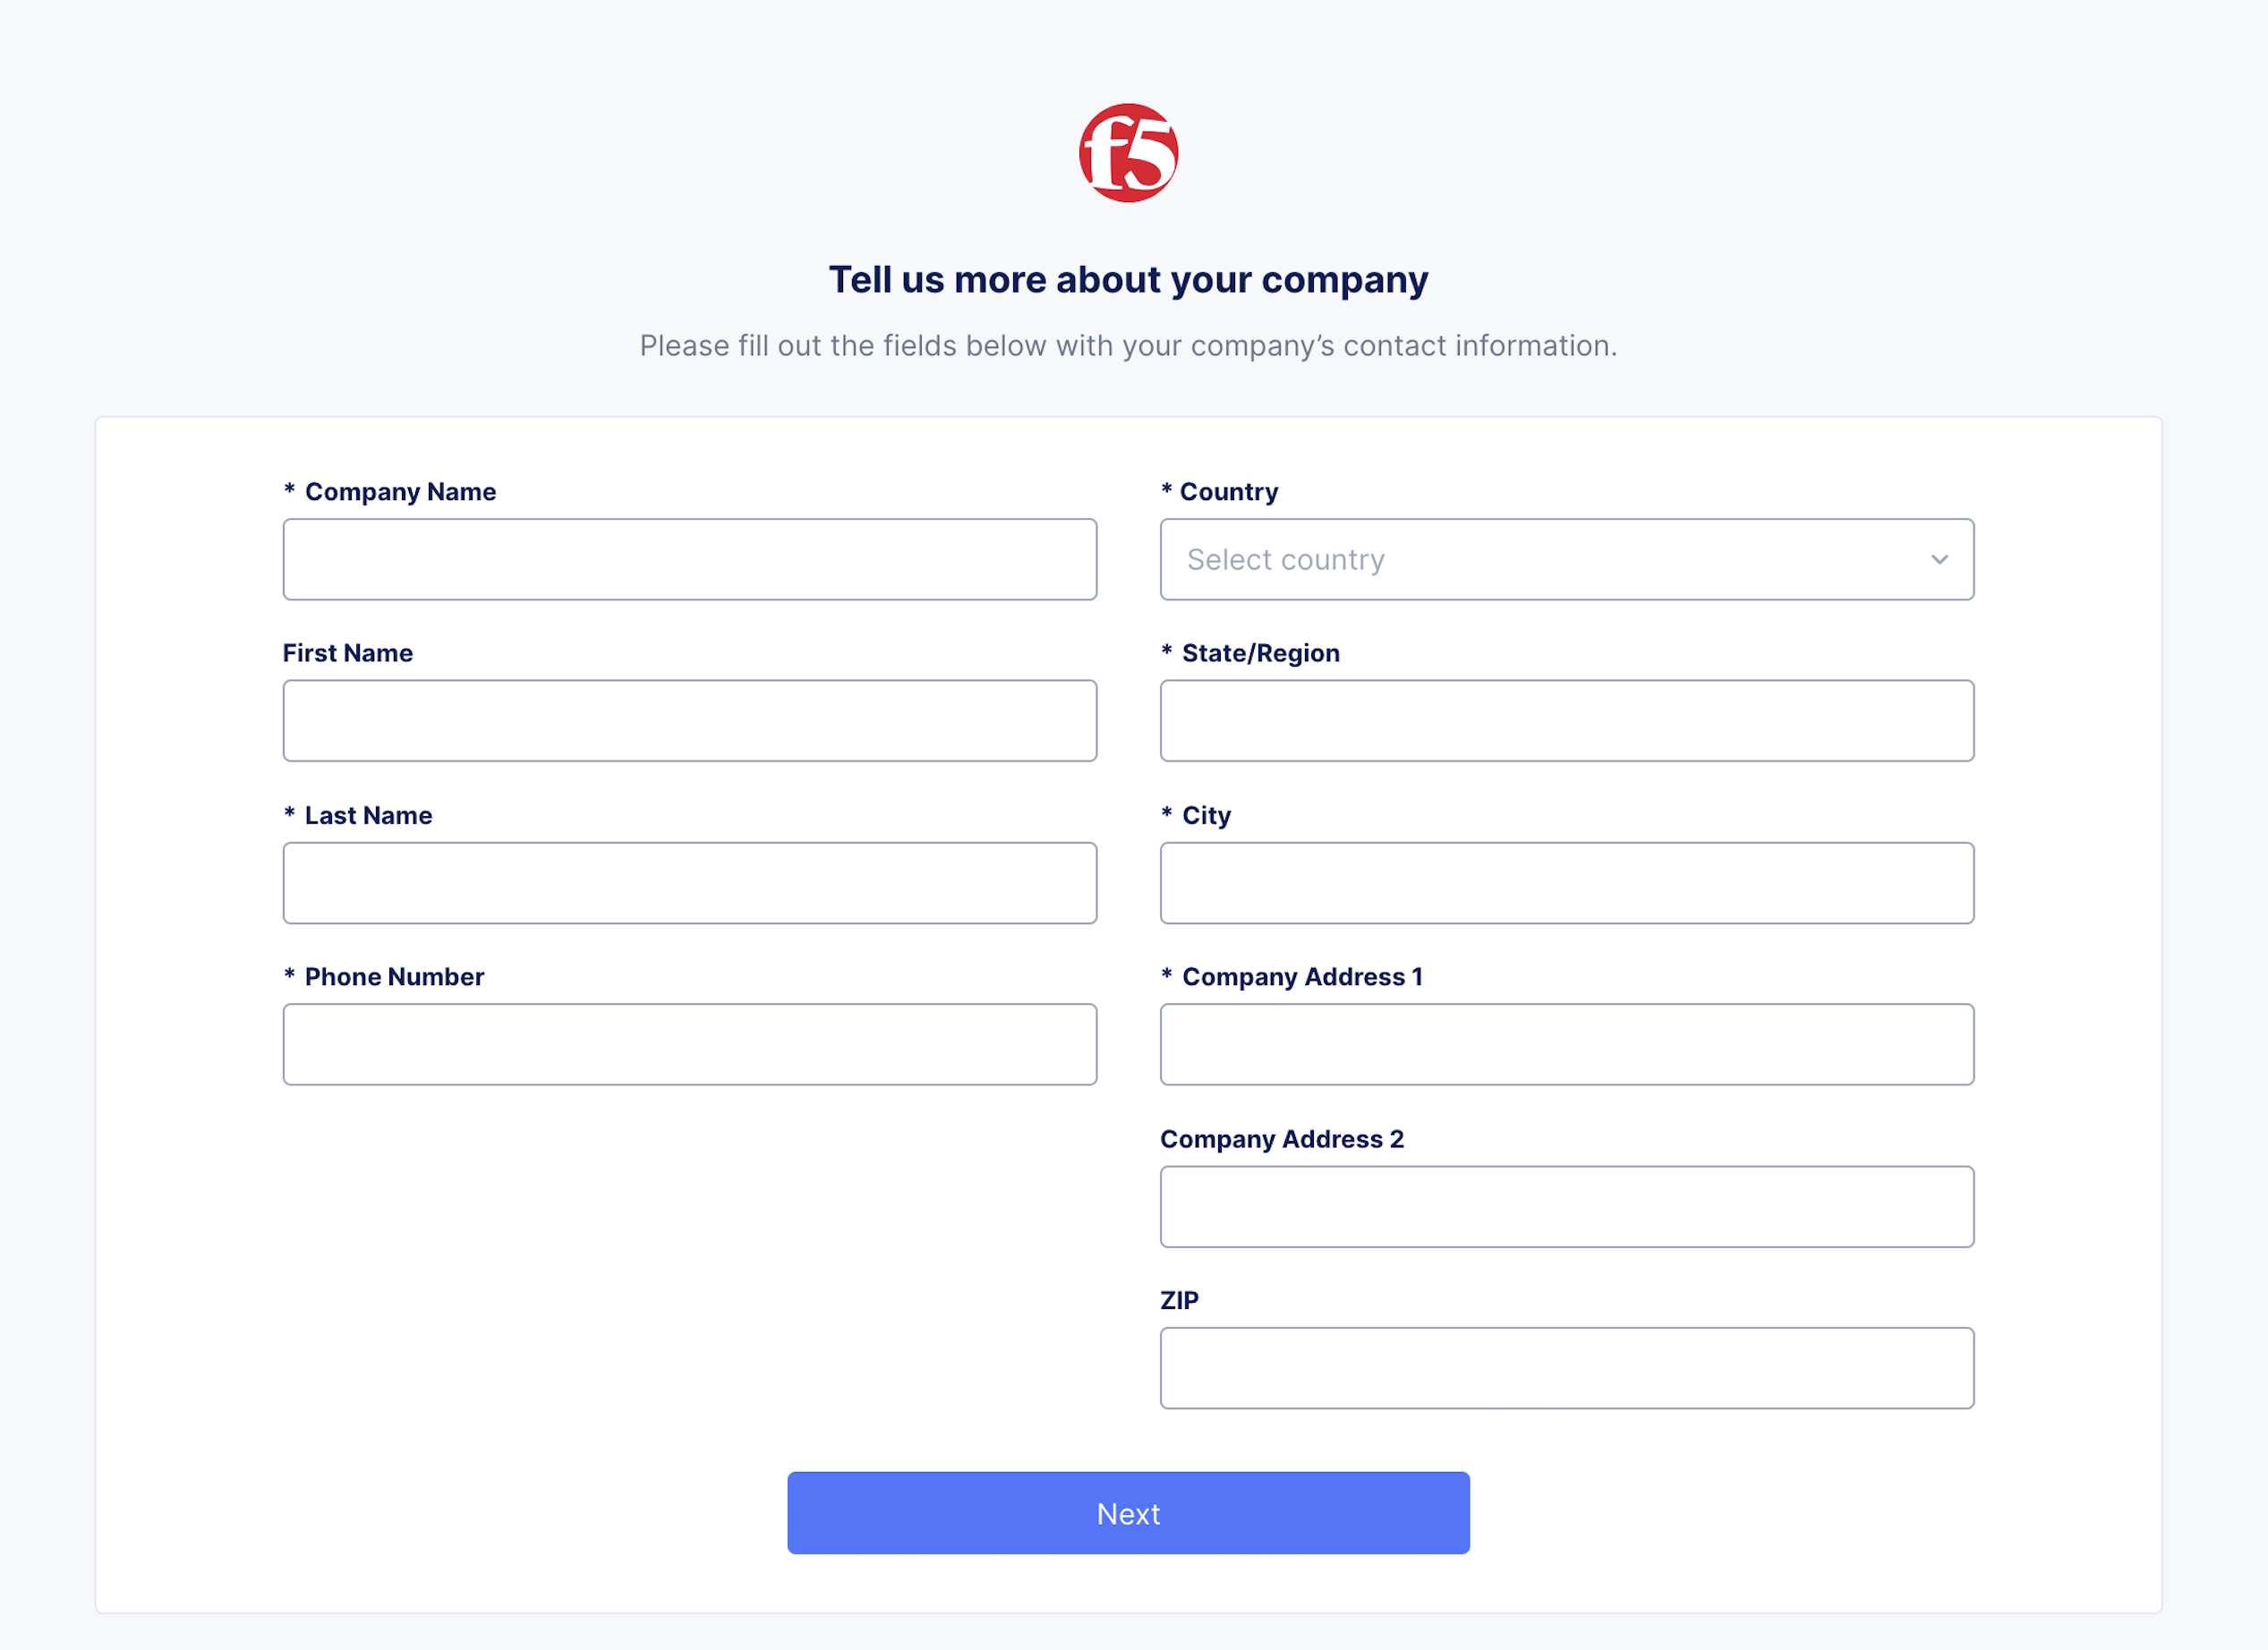
Figure: Add More Information Here
Step 3.2: Prompt for your chosen company domain name.
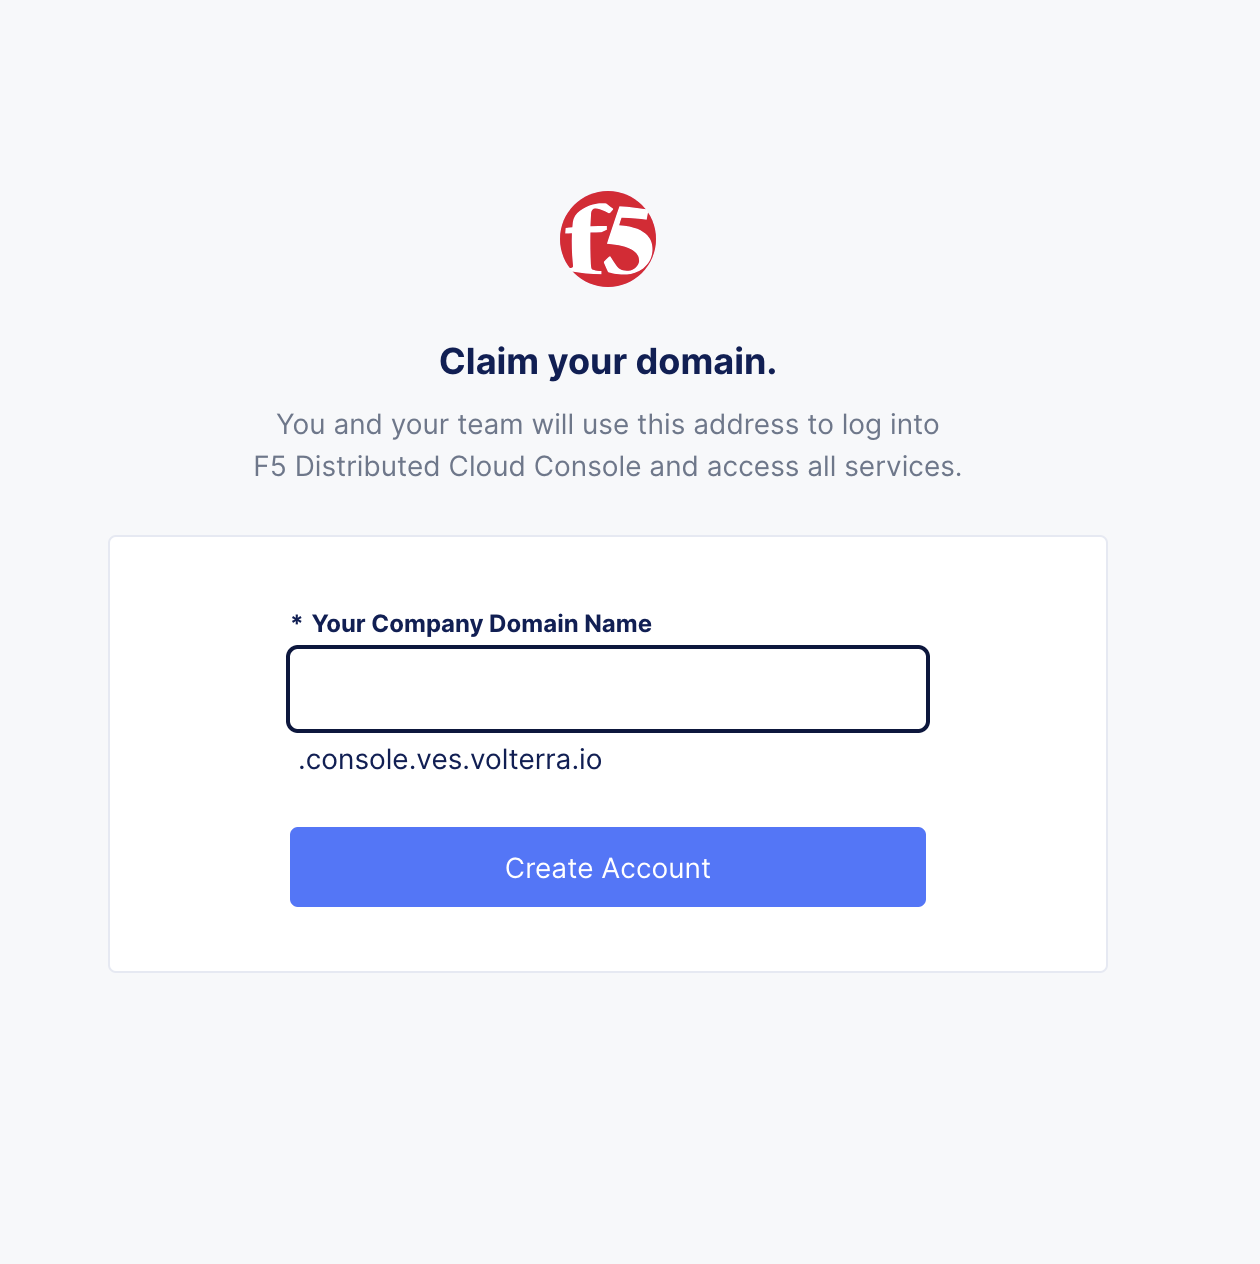
Figure: Claim Your Domain
Step 3.3: Message letting you know that we are processing your request, and you will receive an email with instructions.
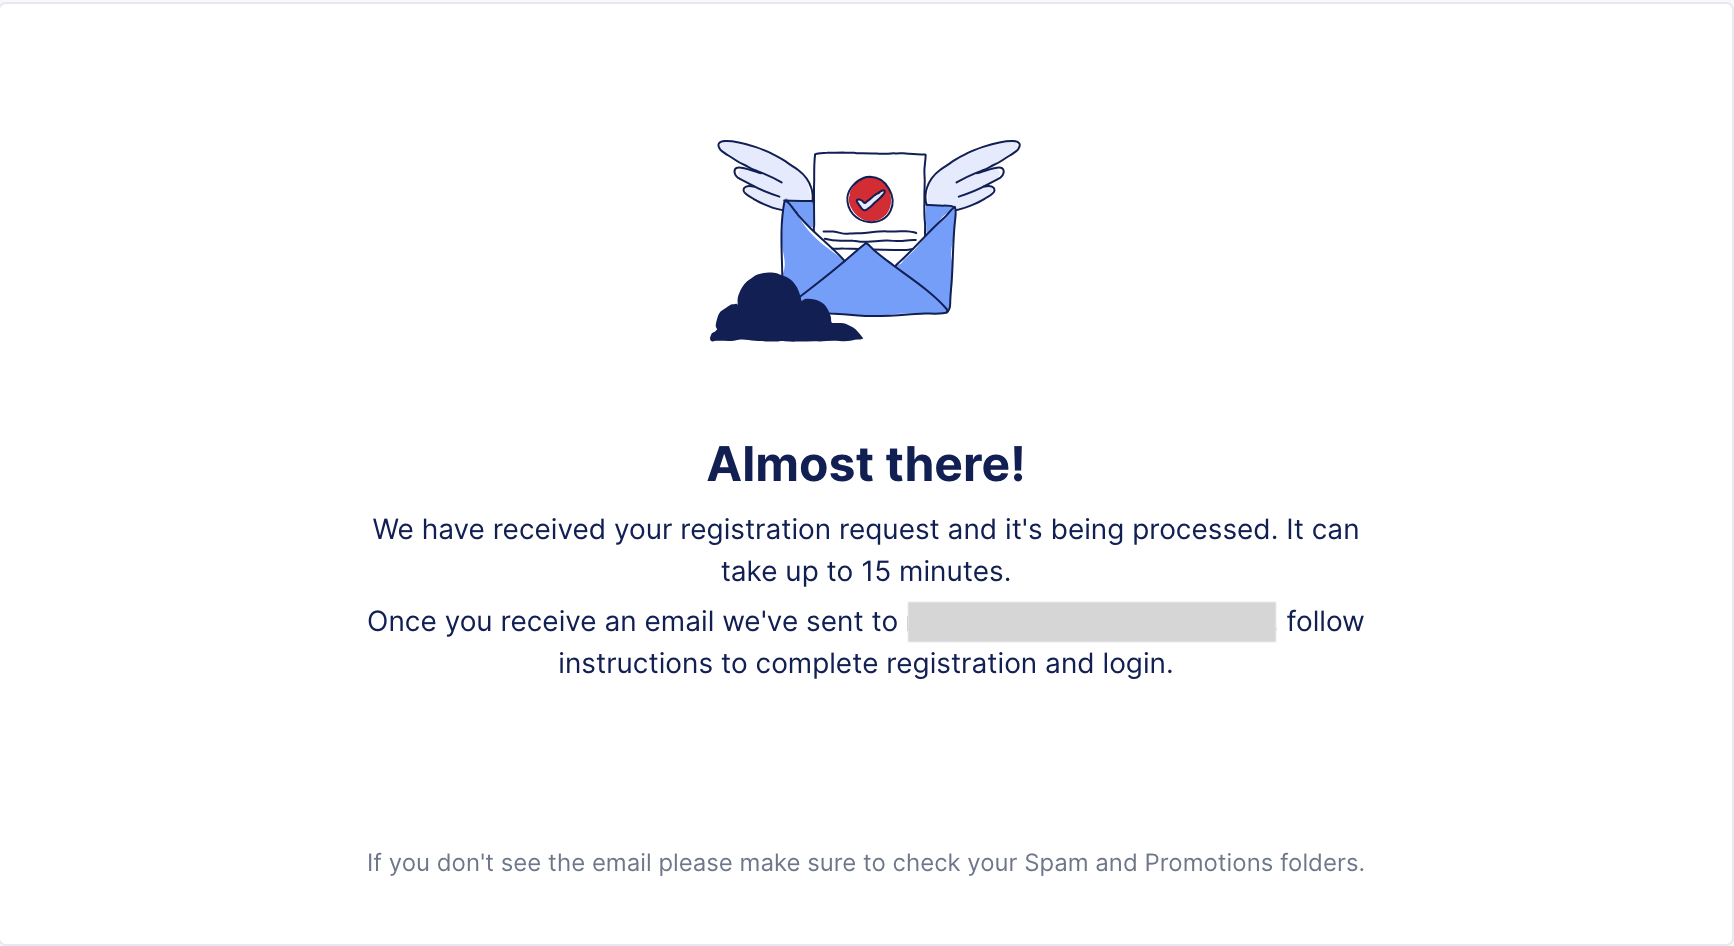
Figure: Confirmation Notification
Term Subscription and FCP-B Starts Here (PayGo Continues Here)
Step 1: You will receive an email letting you know your account is being set up.
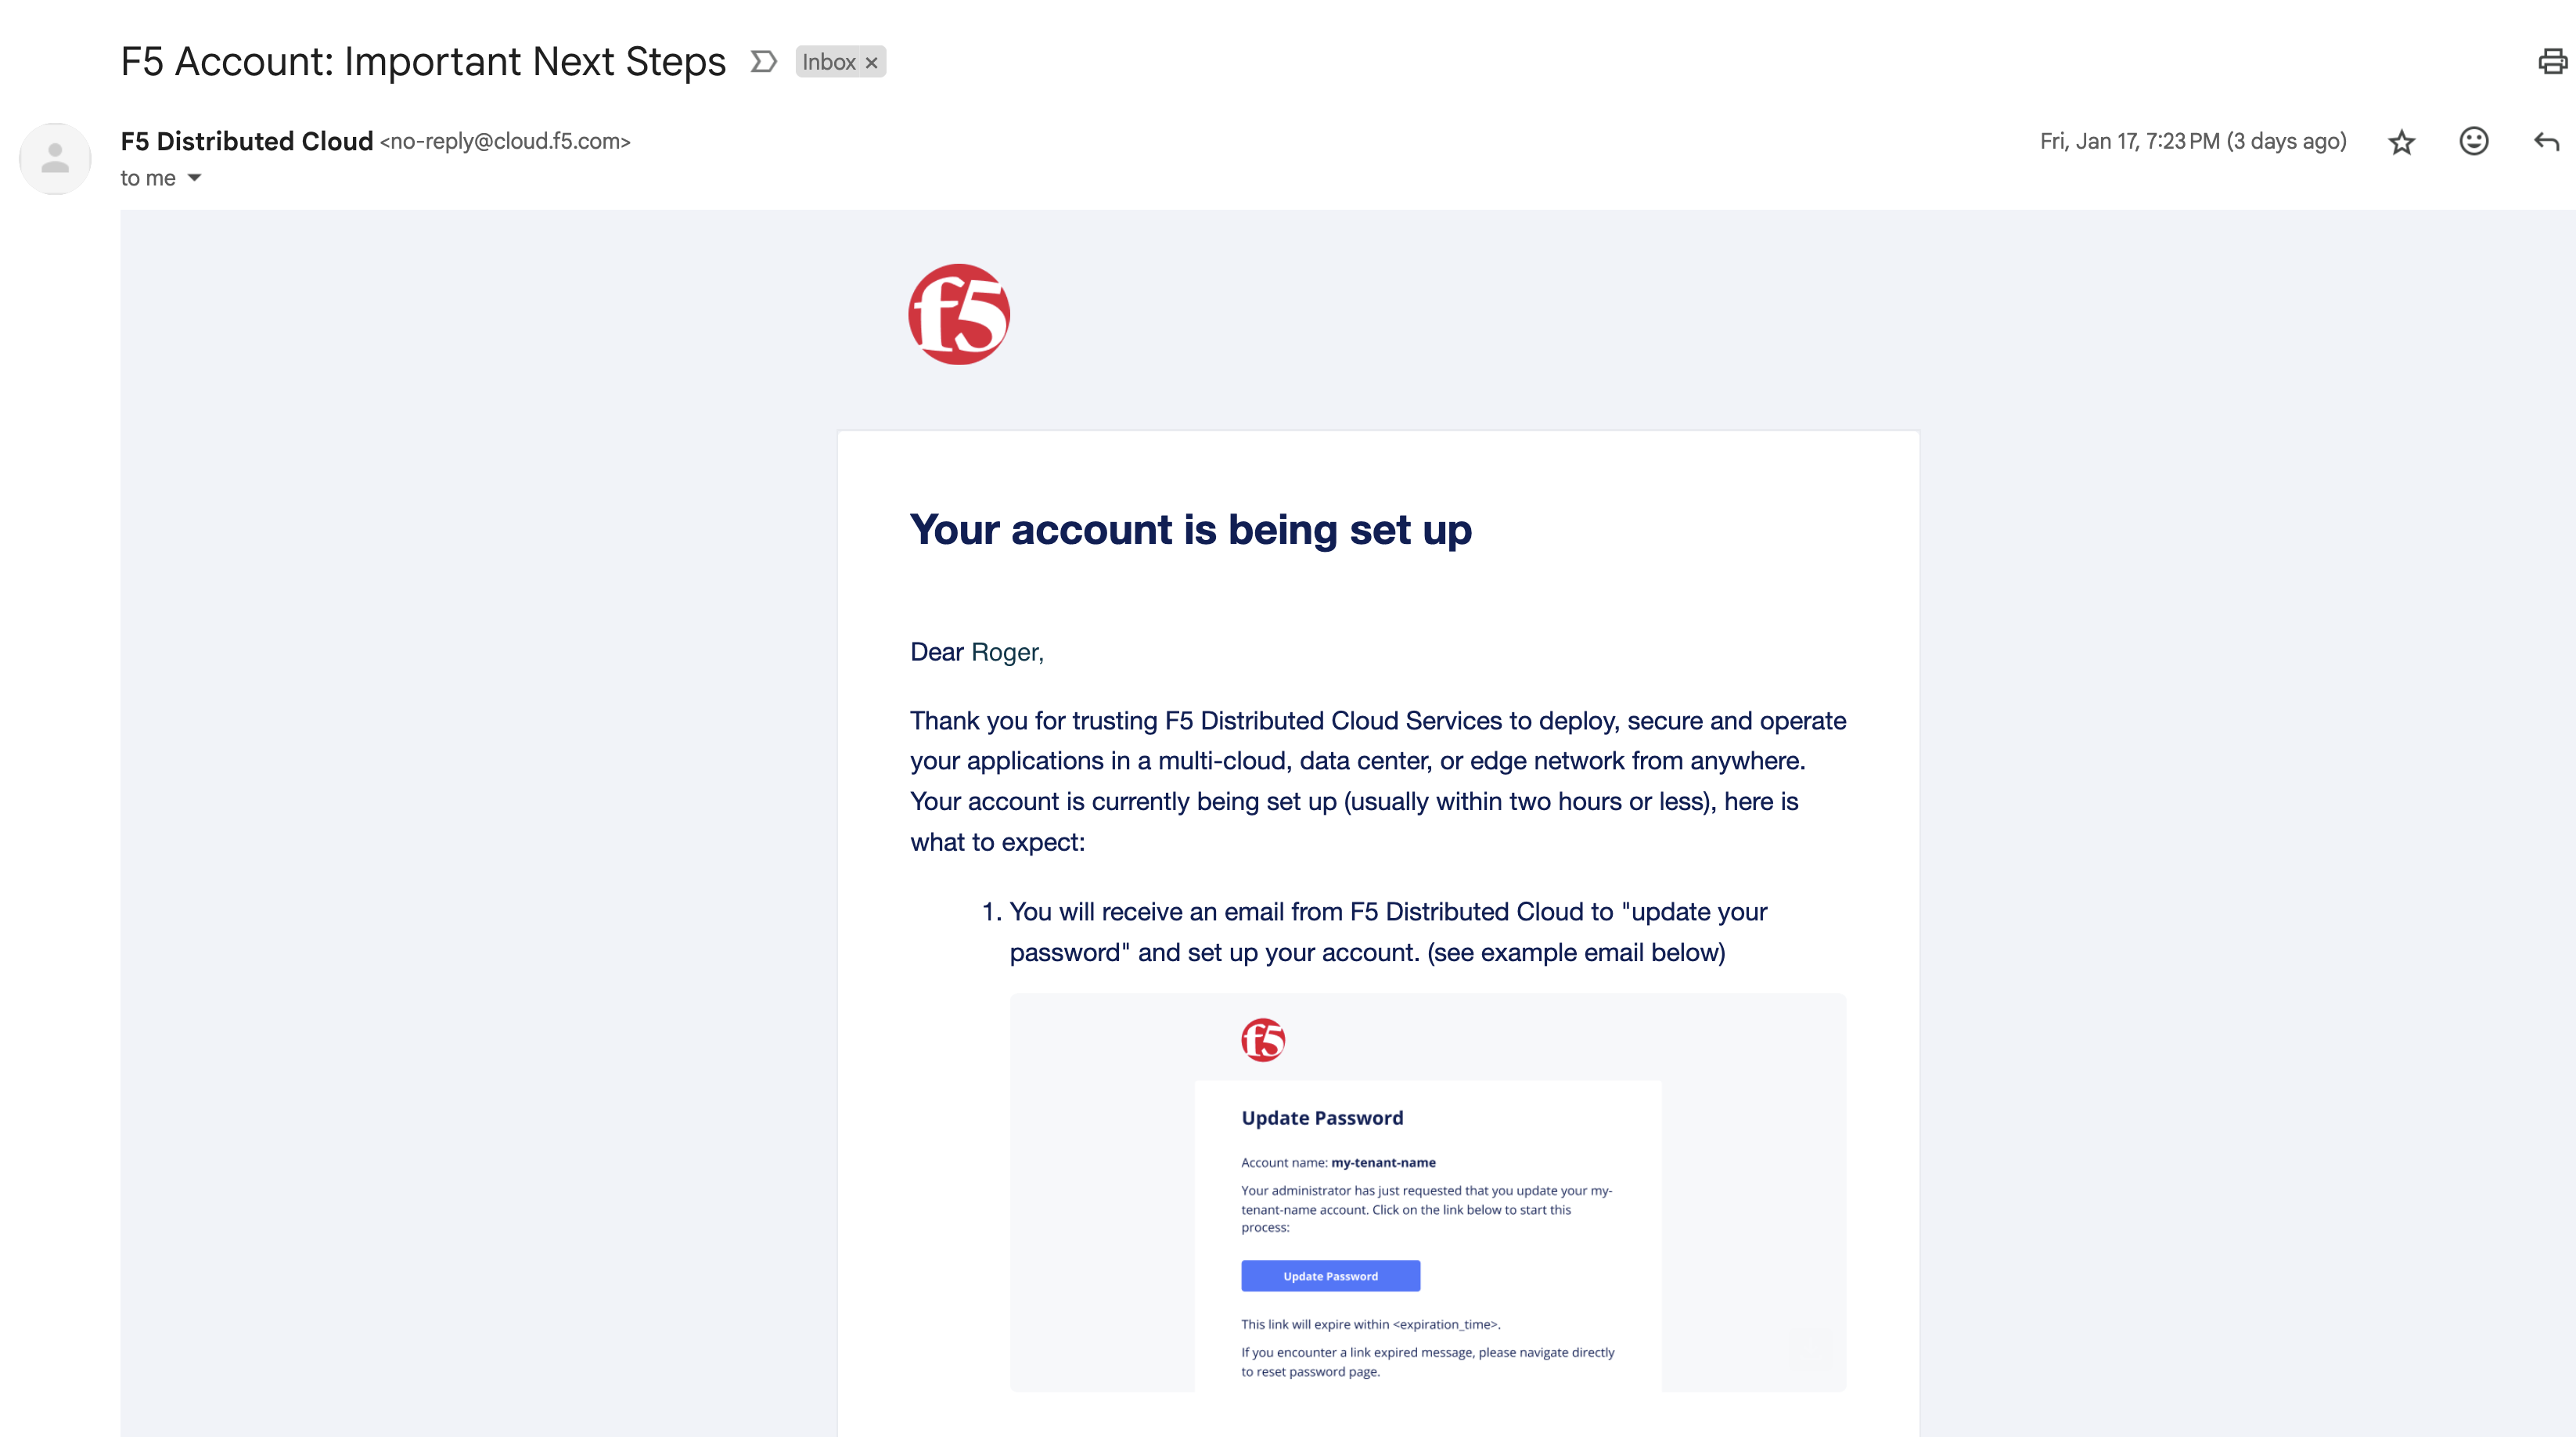
Figure: Email Confirmation
Step 2: Email to update your password.
Then, you will receive a follow-up email requesting you to update your password. Click on the Update Password box.
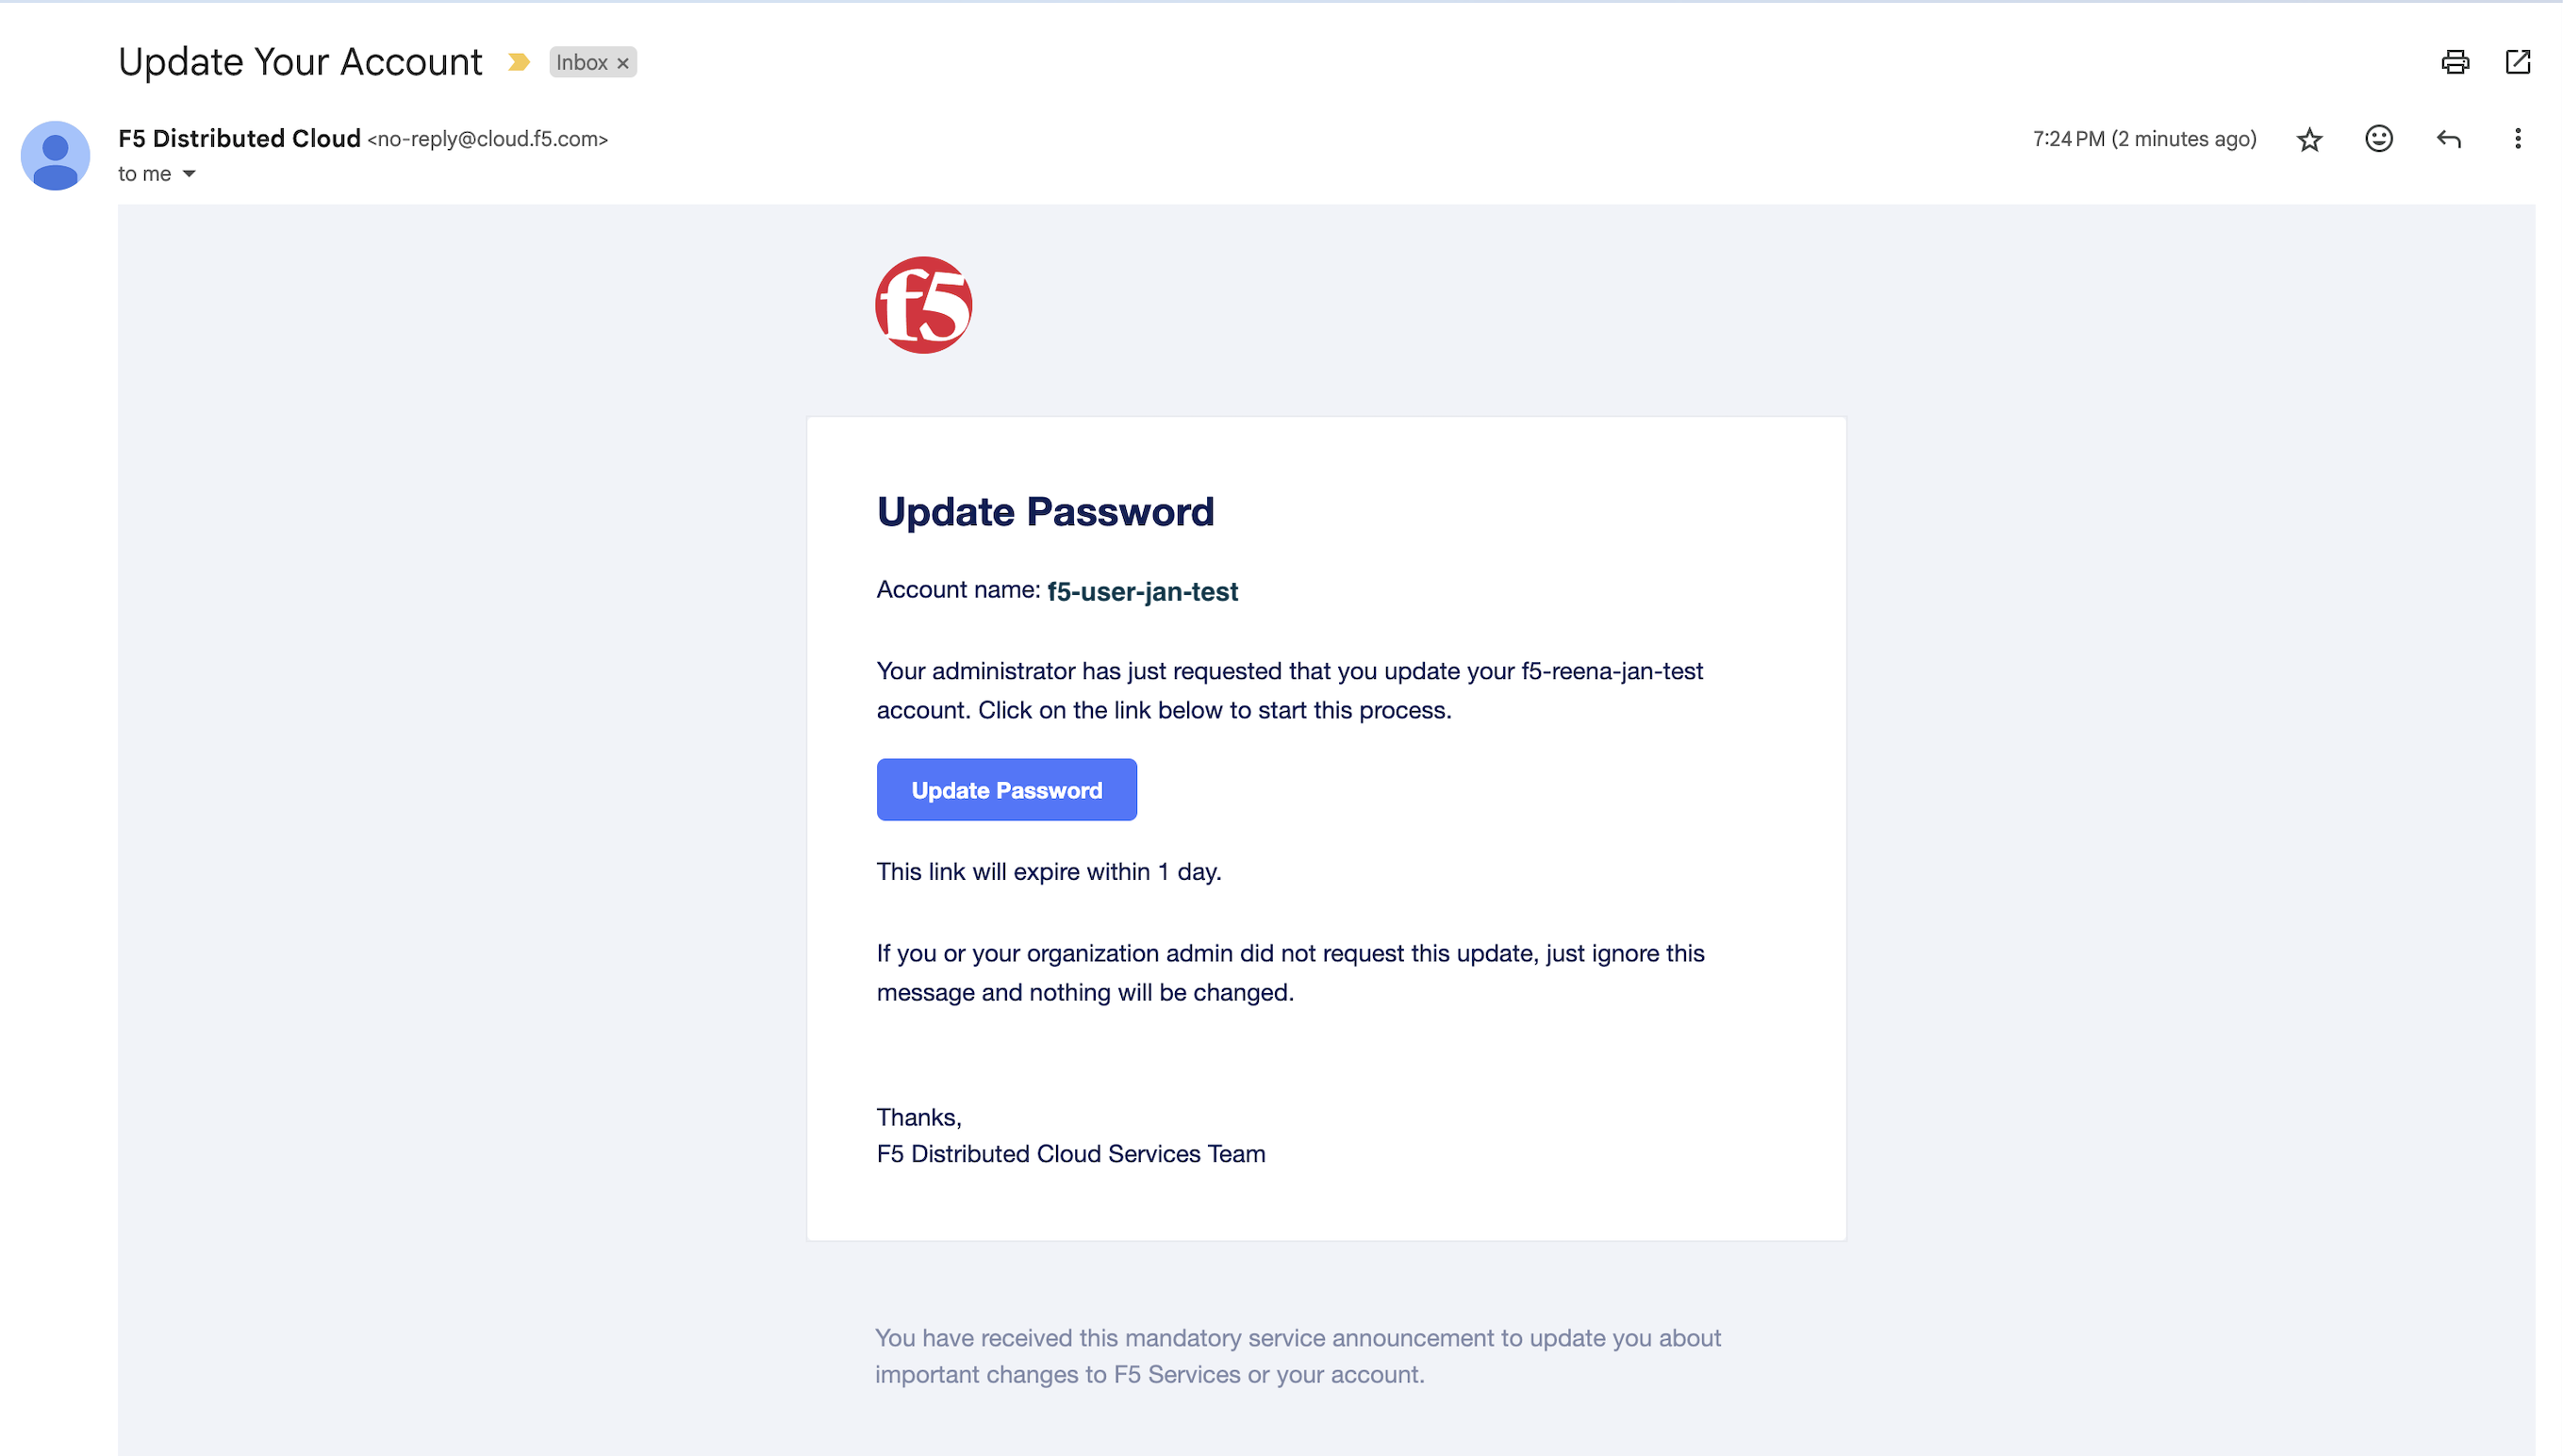
Figure: Update Password Email
Step 3: Update your password.
Next, you will be prompted to update your password. Click on the Click here to proceed box and then update your password.
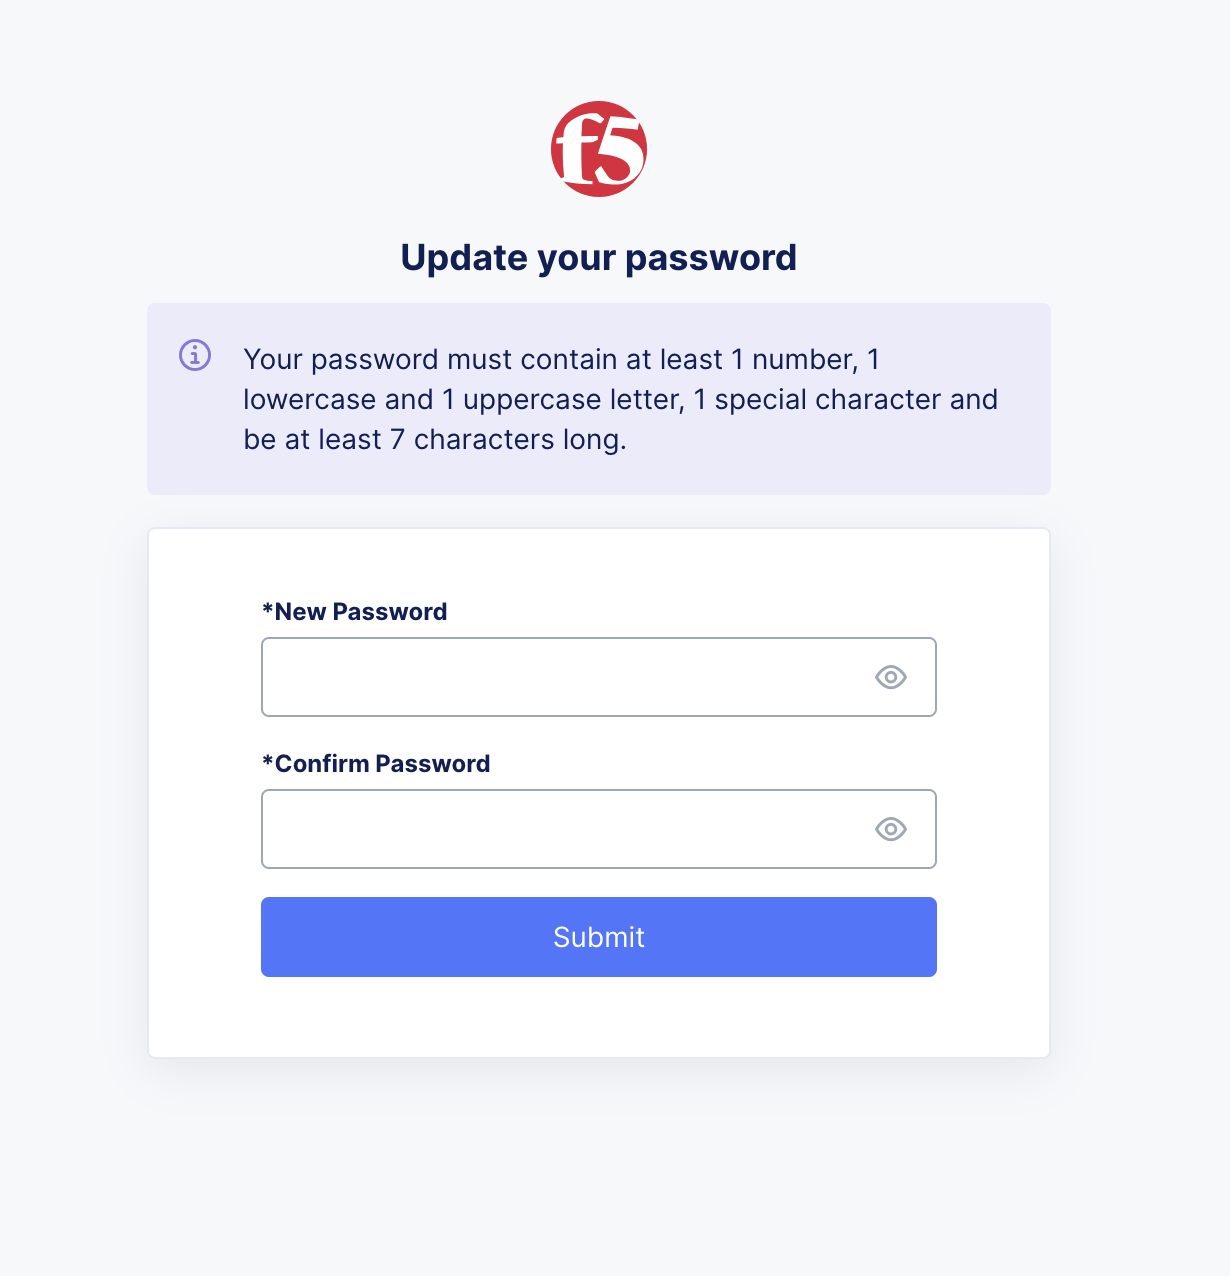
Figure: Update Your Password
Step 4: Account update message.
Finally, you will receive a message confirming that your account has been updated. Click Log In to access your tenant.
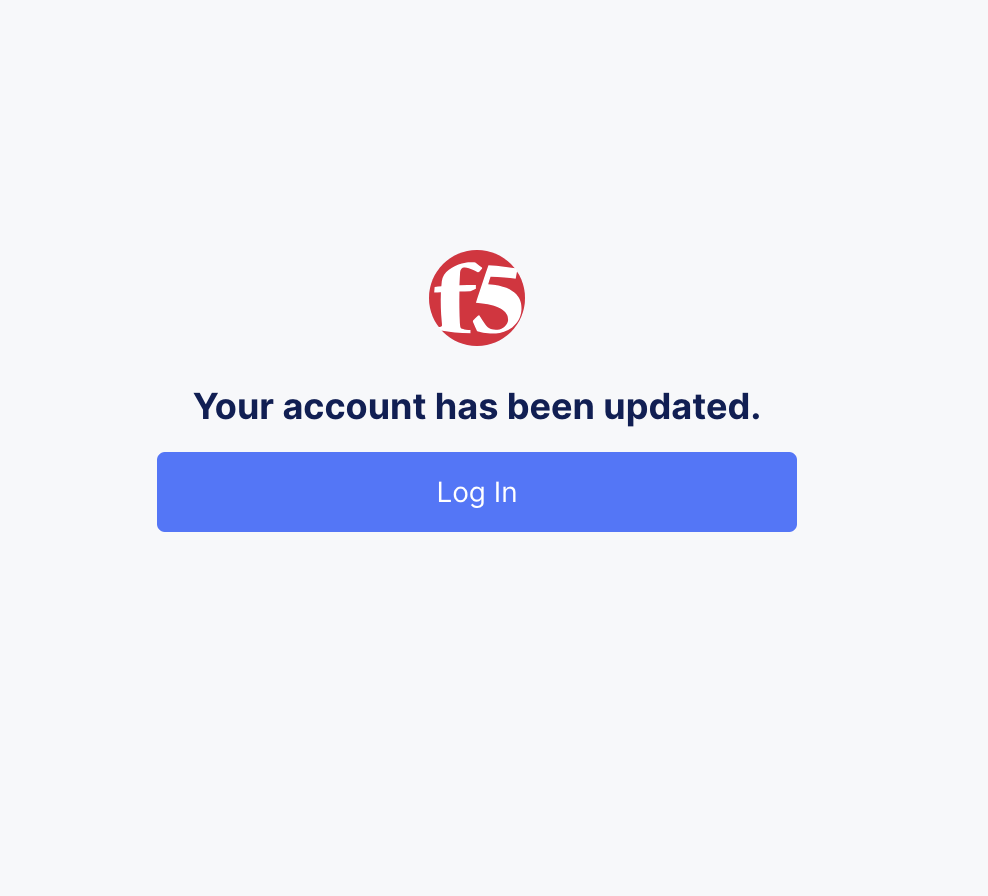
Figure: Account Update
Step 5: F5's Terms of Service and Privacy Policy.
At the end of this setup process, you will be asked to accept F5's Terms of Service and Privacy Policy. Once accepted, you will gain access to the Distributed Cloud Console.
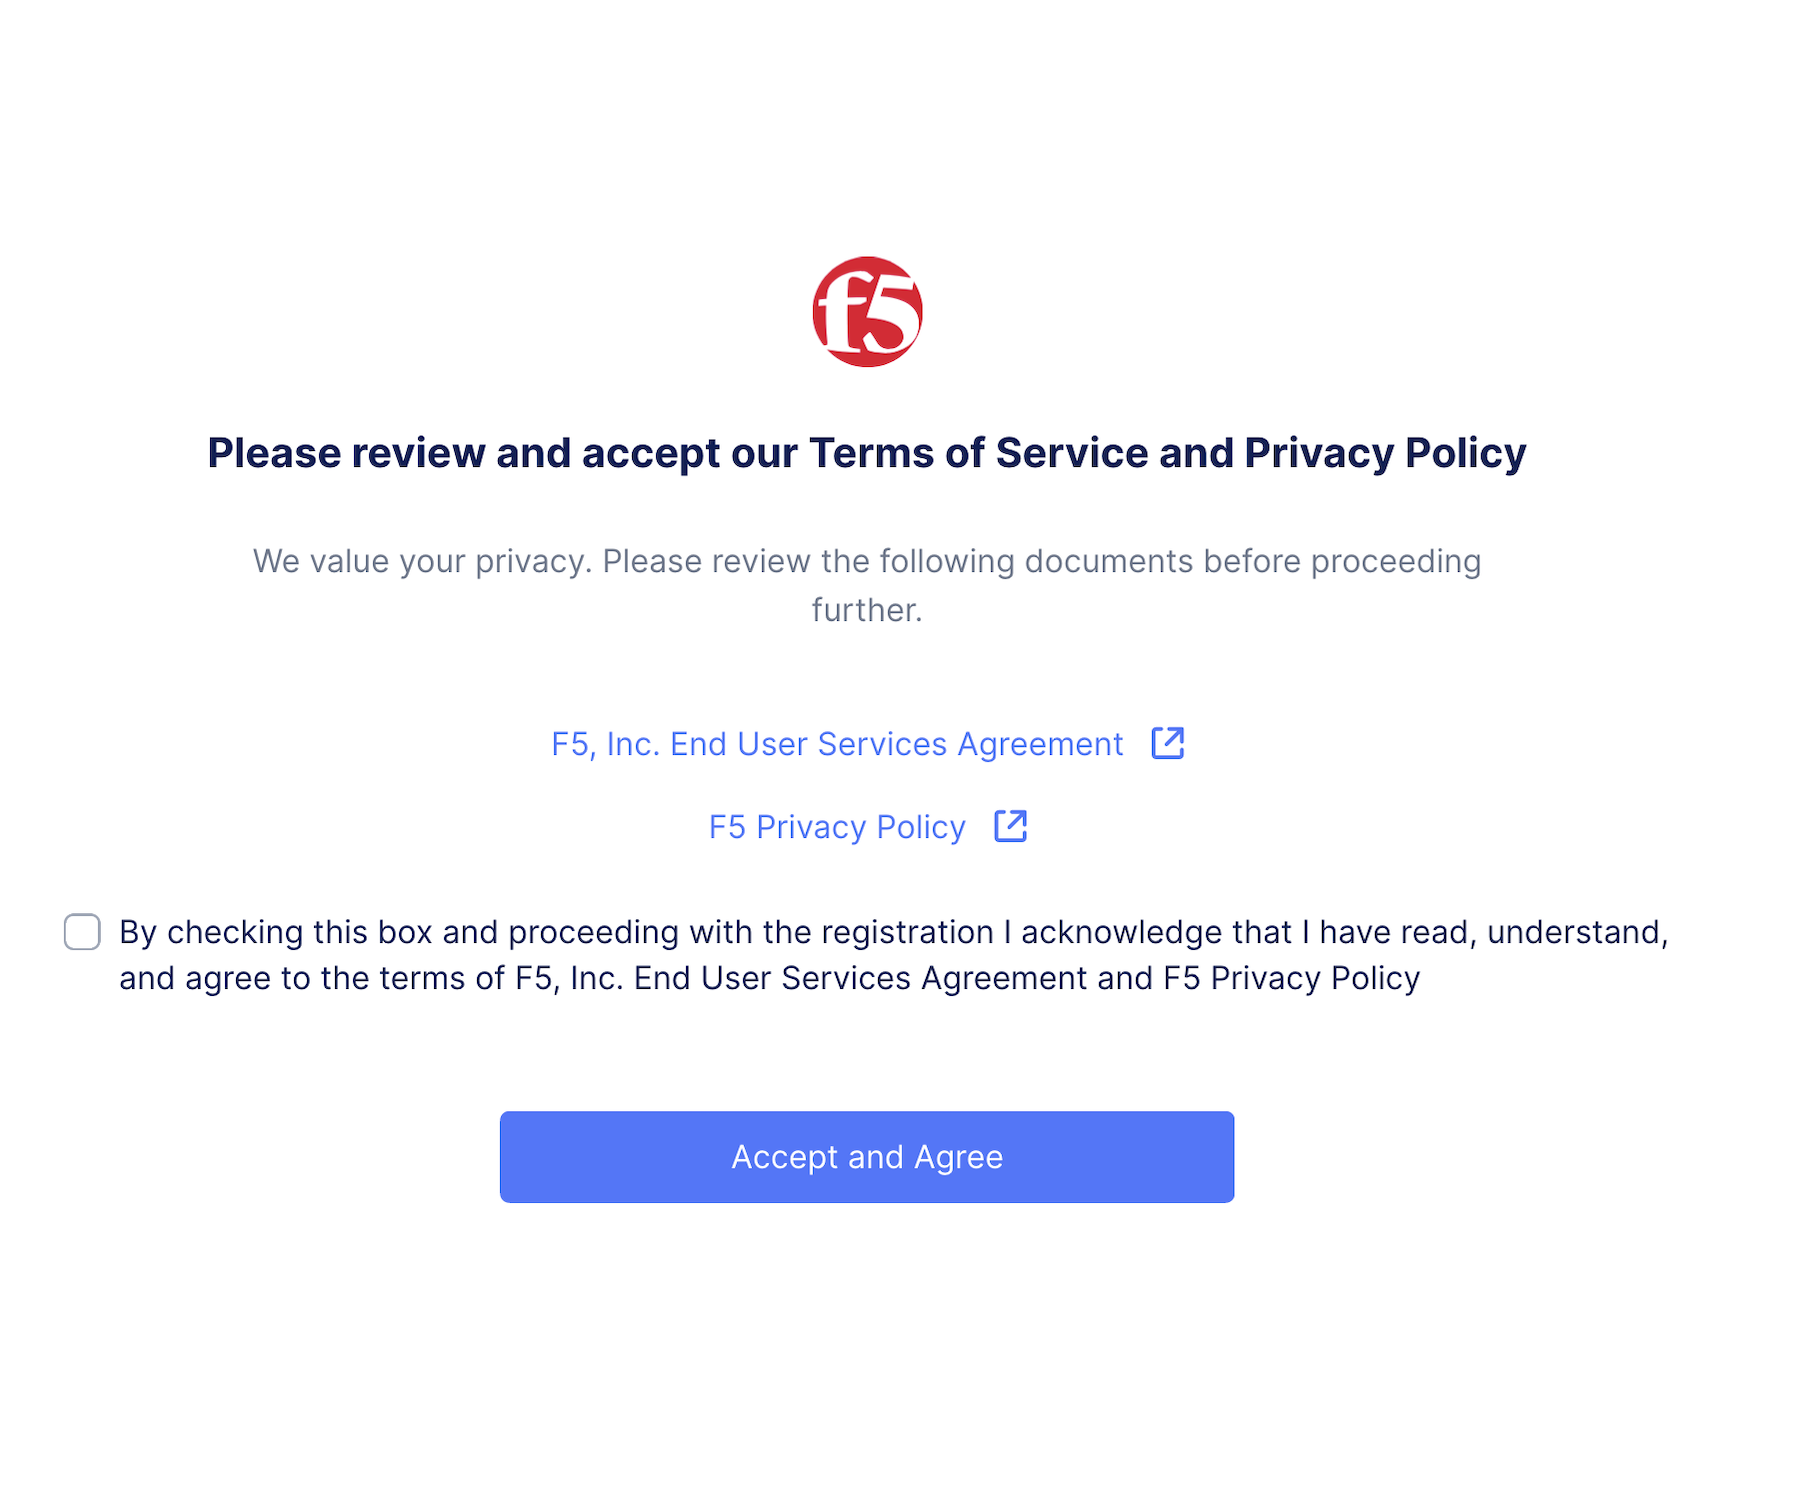
Figure: Accept Terms of Service
You are now in your tenant and will be prompted to answer a few questions to optimize your experience.