Create Dynamic Reverse Proxy
Objective
This guide provides instructions on how to create a Dynamic Reverse Proxy (DRP) using the guided wizards in F5® Distributed Cloud Services.
A Dynamic Reverse Proxy operates between the sending Web server and your receiving Web client. It starts by attracting the requests to itself, instead of the final destination (meaning that traffic from a client will hit the Proxy itself), and then triggers a dynamic discovery of the requested endpoint by doing SNI routing or by using host headers.
Dynamic Reverse Proxy solves the problem of connecting to SaaS providers privately without the need of creating complex routing relationships and especially without the need to advertise Public IP Space inside Organizations' Corporate Networks.
On the reverse direction, Dynamic Reverse Proxy also solves the problem related to the need of advertising Organizations' Private IP Space into the SaaS Provider's Network by implementing Forward Proxy and NAT Capabilities.
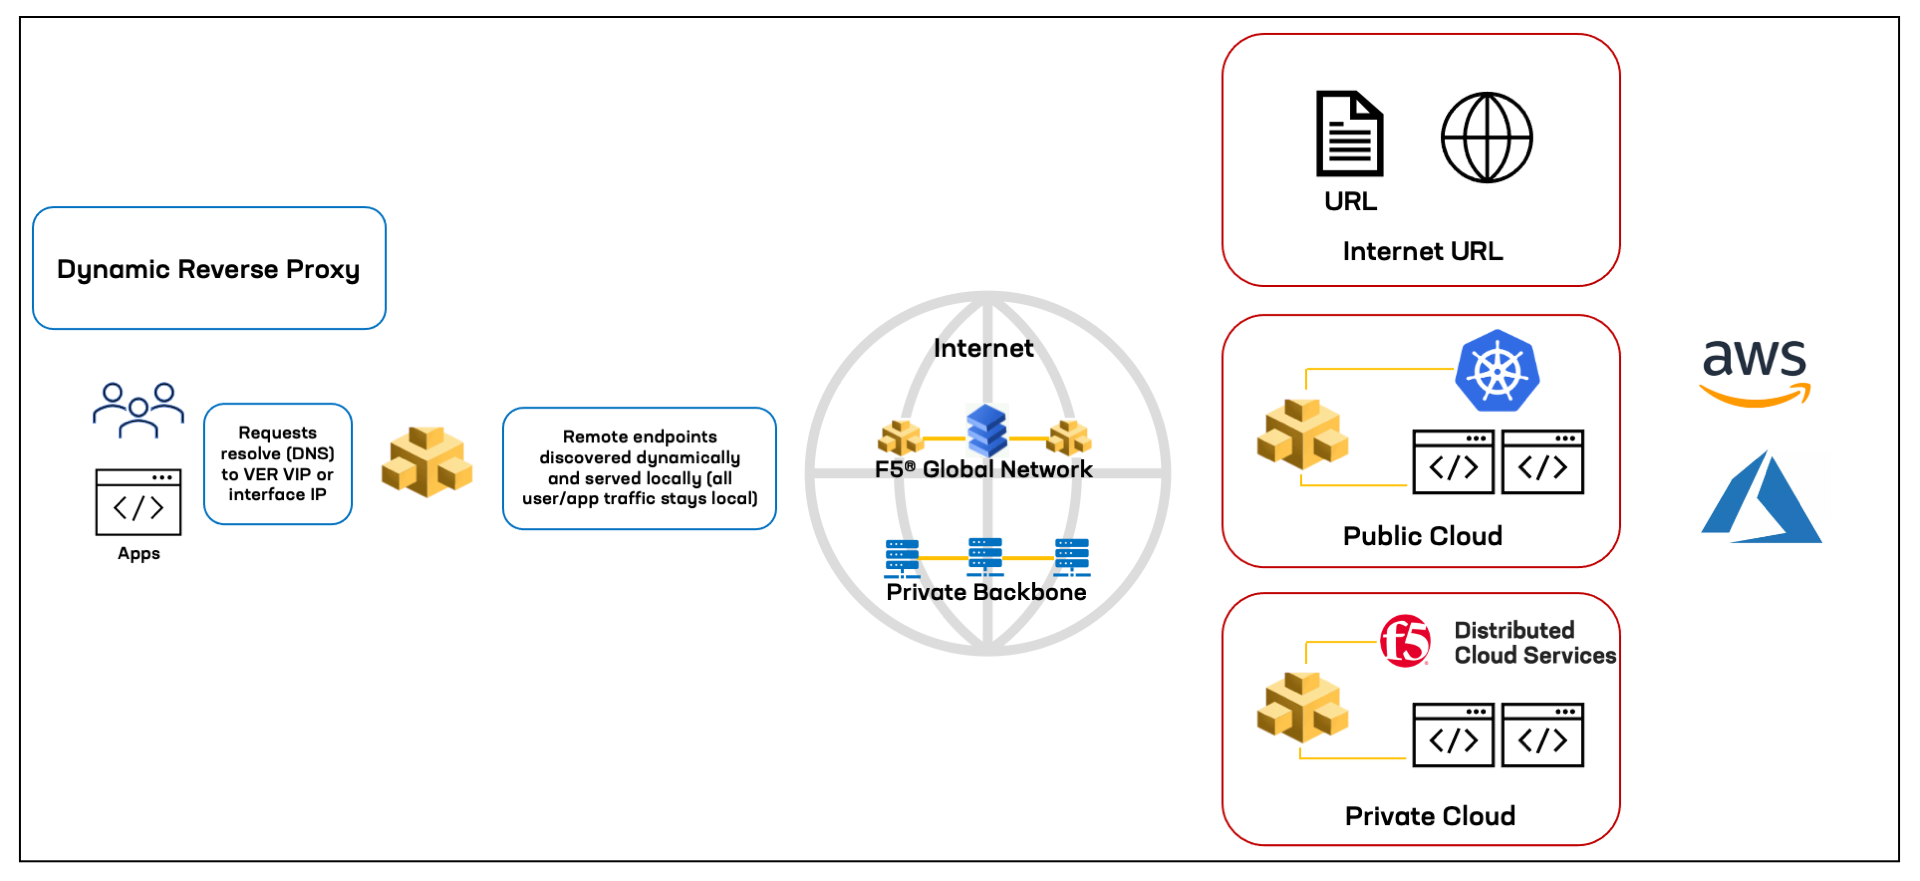
Figure: DRP Overview
Using the instructions provided in this guide, you will be able to create a Dynamic Reverse Proxy.
Prerequisites
The following prerequisites apply:
- A valid Account is required. If you do not have an account, see Create an Account.
Configuration
Create a Dynamic Reverse Proxy (DRP)
Features can be viewed, and managed in multiple services.
This example shows Dynamic Reverse Proxy setup in Multi-Cloud App Connect.
Step 1: Log into F5 Distributed Cloud Console, start DRP object creation.
- Open
F5 Distributed Cloud Console> selectMulti-Cloud App Connectbox.
Note: Homepage is role based, and your homepage may look different due to your role customization. Select
All Servicesdrop-down menu to discover all options. Customize Settings:Administration>Personal Management>My Account>Edit work domain & skillsbutton >Advancedbox > checkWork Domainboxes >Save changesbutton.
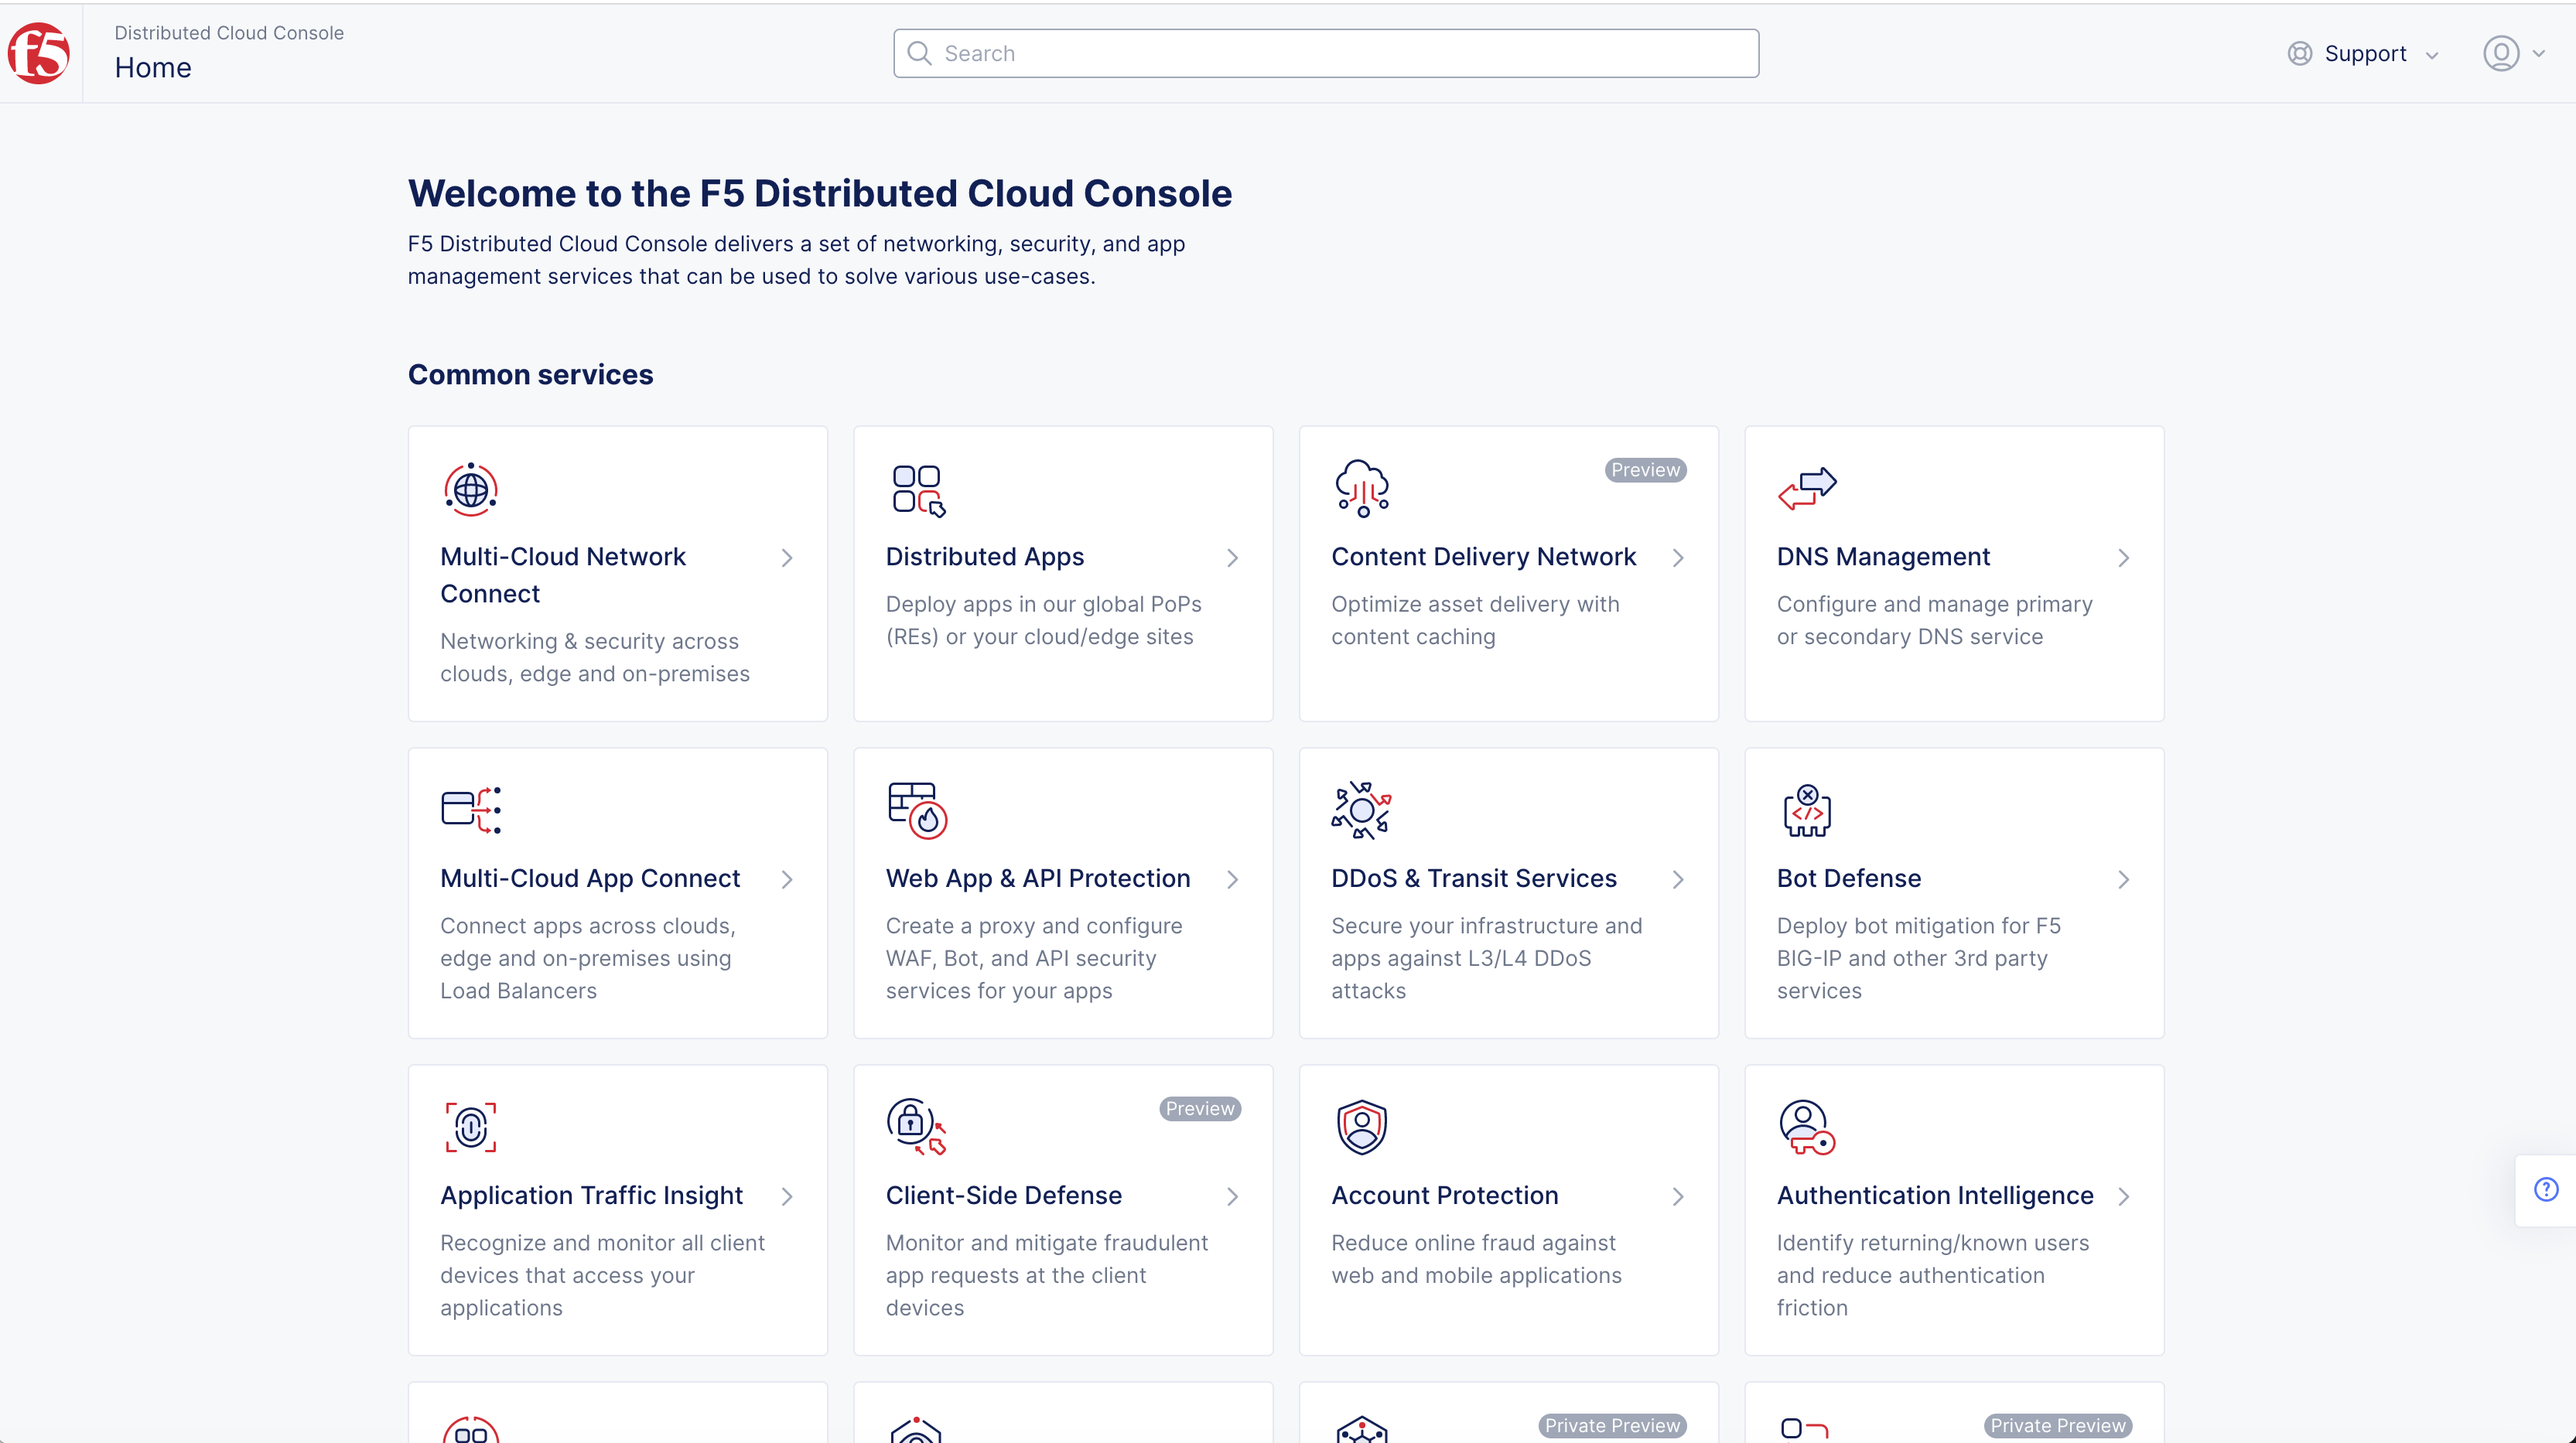
Figure: Homepage
Note: Confirm
Namespacefeature is in correct namespace, drop-down selector located in upper-left corner. Not available in all services.
-
Change to your application namespace in the namespace selector in the primary navigation bar.
-
Select
Managein left-menu > selectLoad Balancers>HTTP Connect & DPRs.
Note: If options are not showing available, select
Showlink inAdvanced nav options visiblein bottom left corner. If needed, selectHideto minimize options from Advanced nav options mode.
- Select
Add HTTP Connect & DRPbutton.

Figure: HTTP Connect & DRP
Step 2: Configure meta data, and proxy type.
Enter the configuration parameters.
-
Set a name for your DRP object in the
Namebox. -
Optionally, set label key-value pairs in the
Labelsbox.
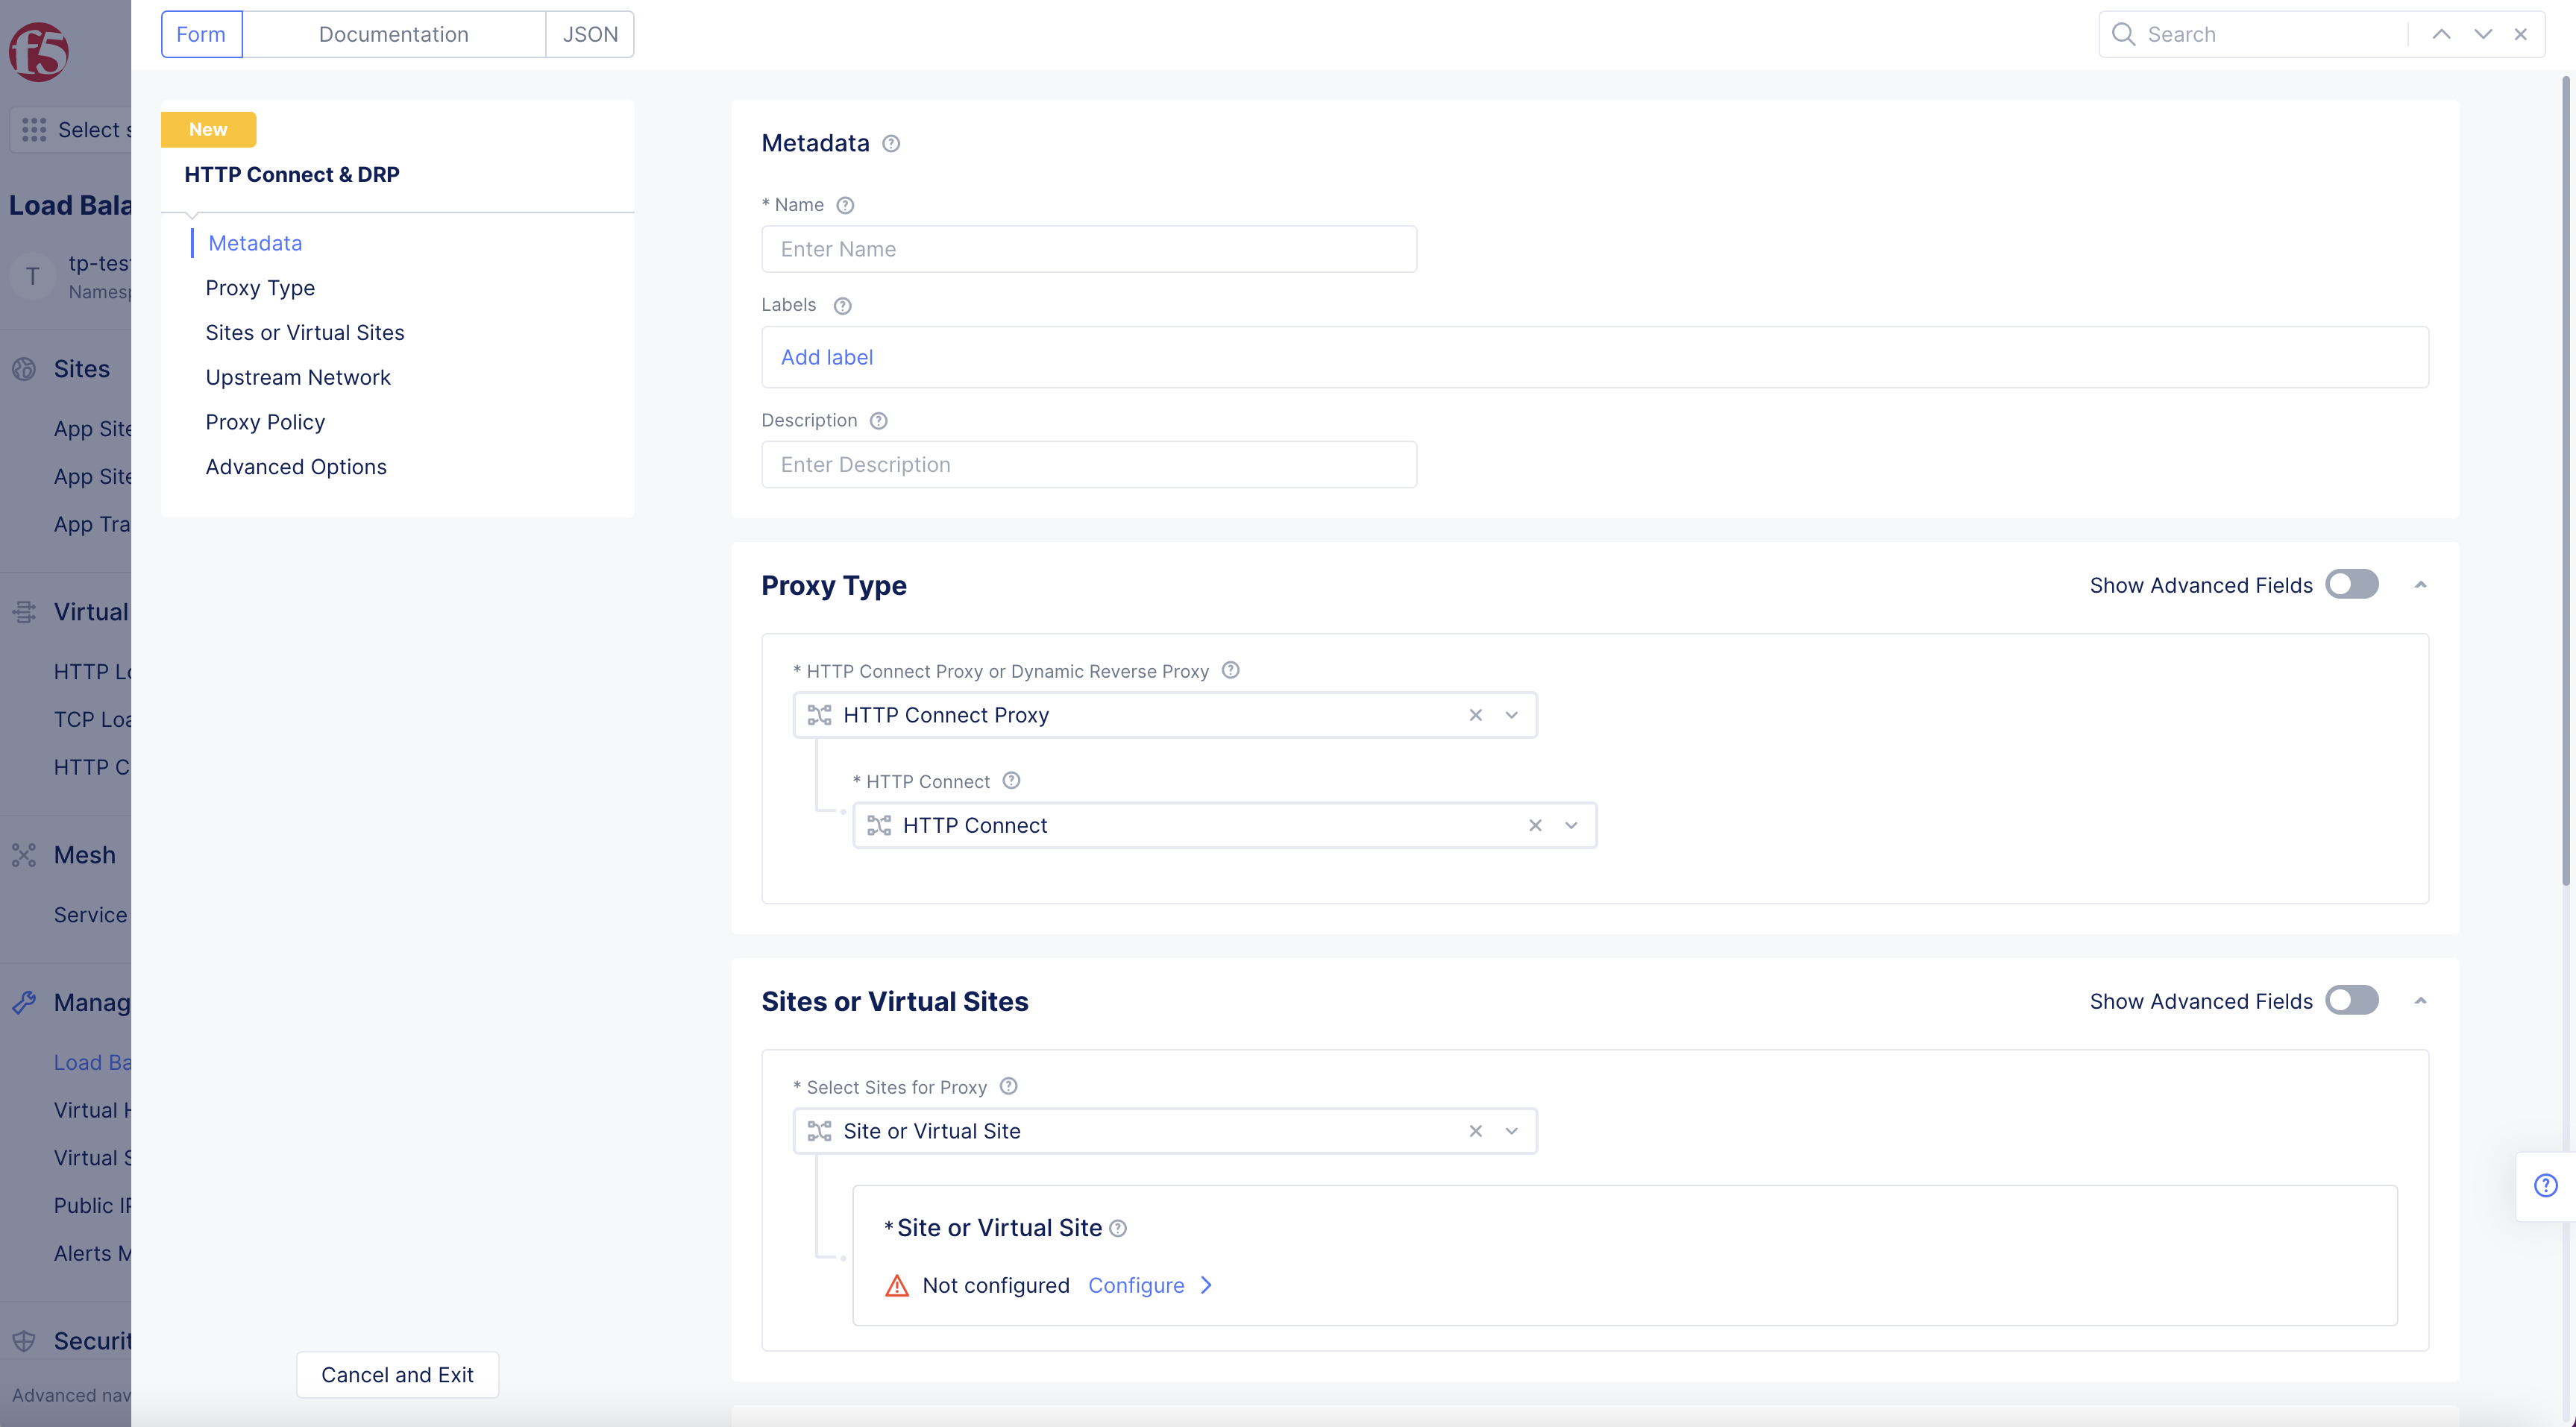
Figure: Proxy Type
-
In
Proxy type,HTTP Connect Proxy or Dynamic Reverse ProxyhasHTTP Connect ProxyandDynamic Reverse Proxyas options. -
Select
Dynamic Reverse Proxy. -
Enter list of
Domainsto be proxies.
Note: Wildcards are supported.
-
Select
+ Add Itemto add more domains to your list. -
Select one of the following in the
Select Method to determine Destinationdrop-down menu:-
SNI proxy: Destination discovered based on SNI in TLS Connections.- Enter
Idle Timeout.
- Enter
-
HTTP Proxy: Destination discovered based on Host Header in HTTP Connections.- Select
ConfigureinAdvanced Options.
- Select
-
HTTPS Proxy: Destination discovered based on SNI in TLS Connections and Host Headers in HTTP Connections.-
Select
ConfigureinDown Stream TLS Parameters. -
Select
ConfigureinAdvanced Options.
Note: Select
Show Advanced Fieldsto showHTTPS proxy. -
-
-
Select one of the following for
Select DNS Masquerade for Domainsdrop-down menu:-
Enable DNS Masquerade: DNS queries for proxy domains will be resolved to proxy VIP. -
Disable DNS Masquerade: DNS queries for proxy domains will not be resolved to proxy VIP.
-
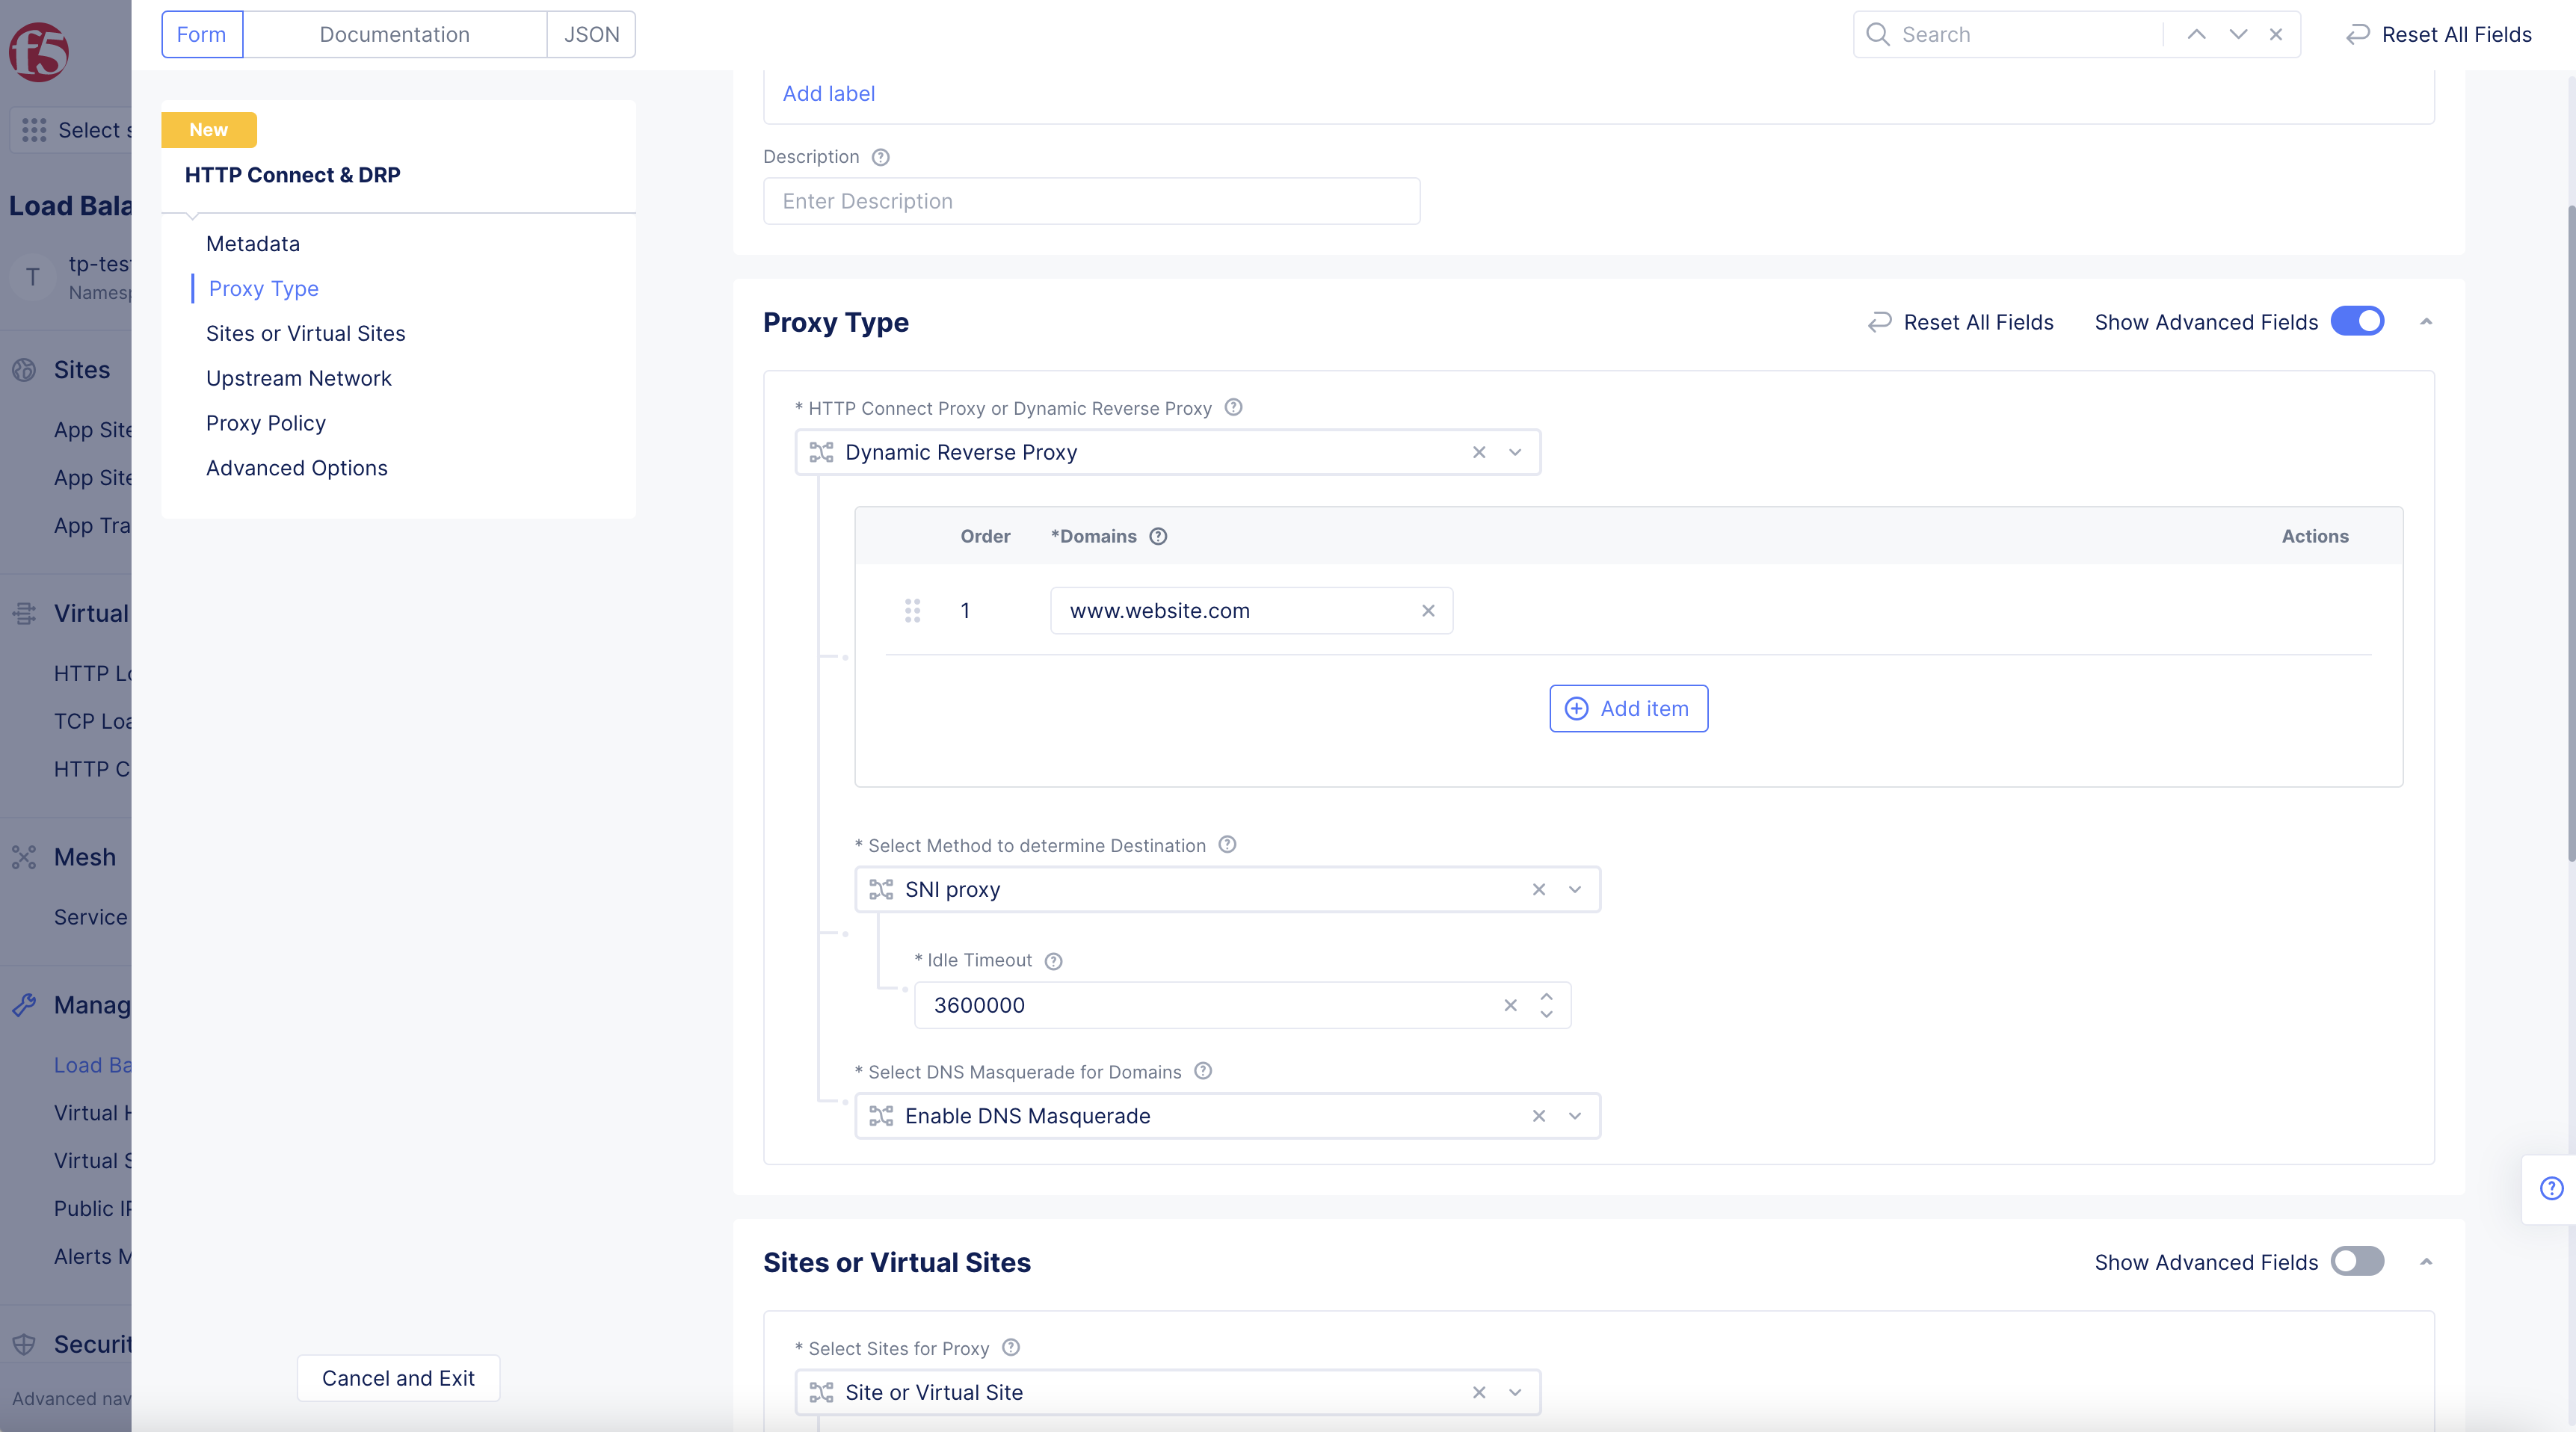
Figure: Proxy Type
Step 3: Set sites or virtual sites for proxy.
Select sites or virtual sites where you want to install this proxy.
- The
Select Sites for Proxydrop-down menu hasSites or Virtual Sitespopulated by default.
Figure: Sites or Virtual Sites Configuration
- Toggle
Show Advanced FieldsinSites or Virtual Sitesbox to showDo Not Instantiateoption.
Note:
Do Not Instantiateis the other Site Proxy option in the drop-down menu.

Figure: Sites or Virtual Sites Configuration
- Select
Configurelink inSite or Virtual Sitessection.
Figure: Sites or Virtual Sites Configuration
-
The
Custom Advertise VIP Configurationpage opens. -
Select
+ Add Itembutton.
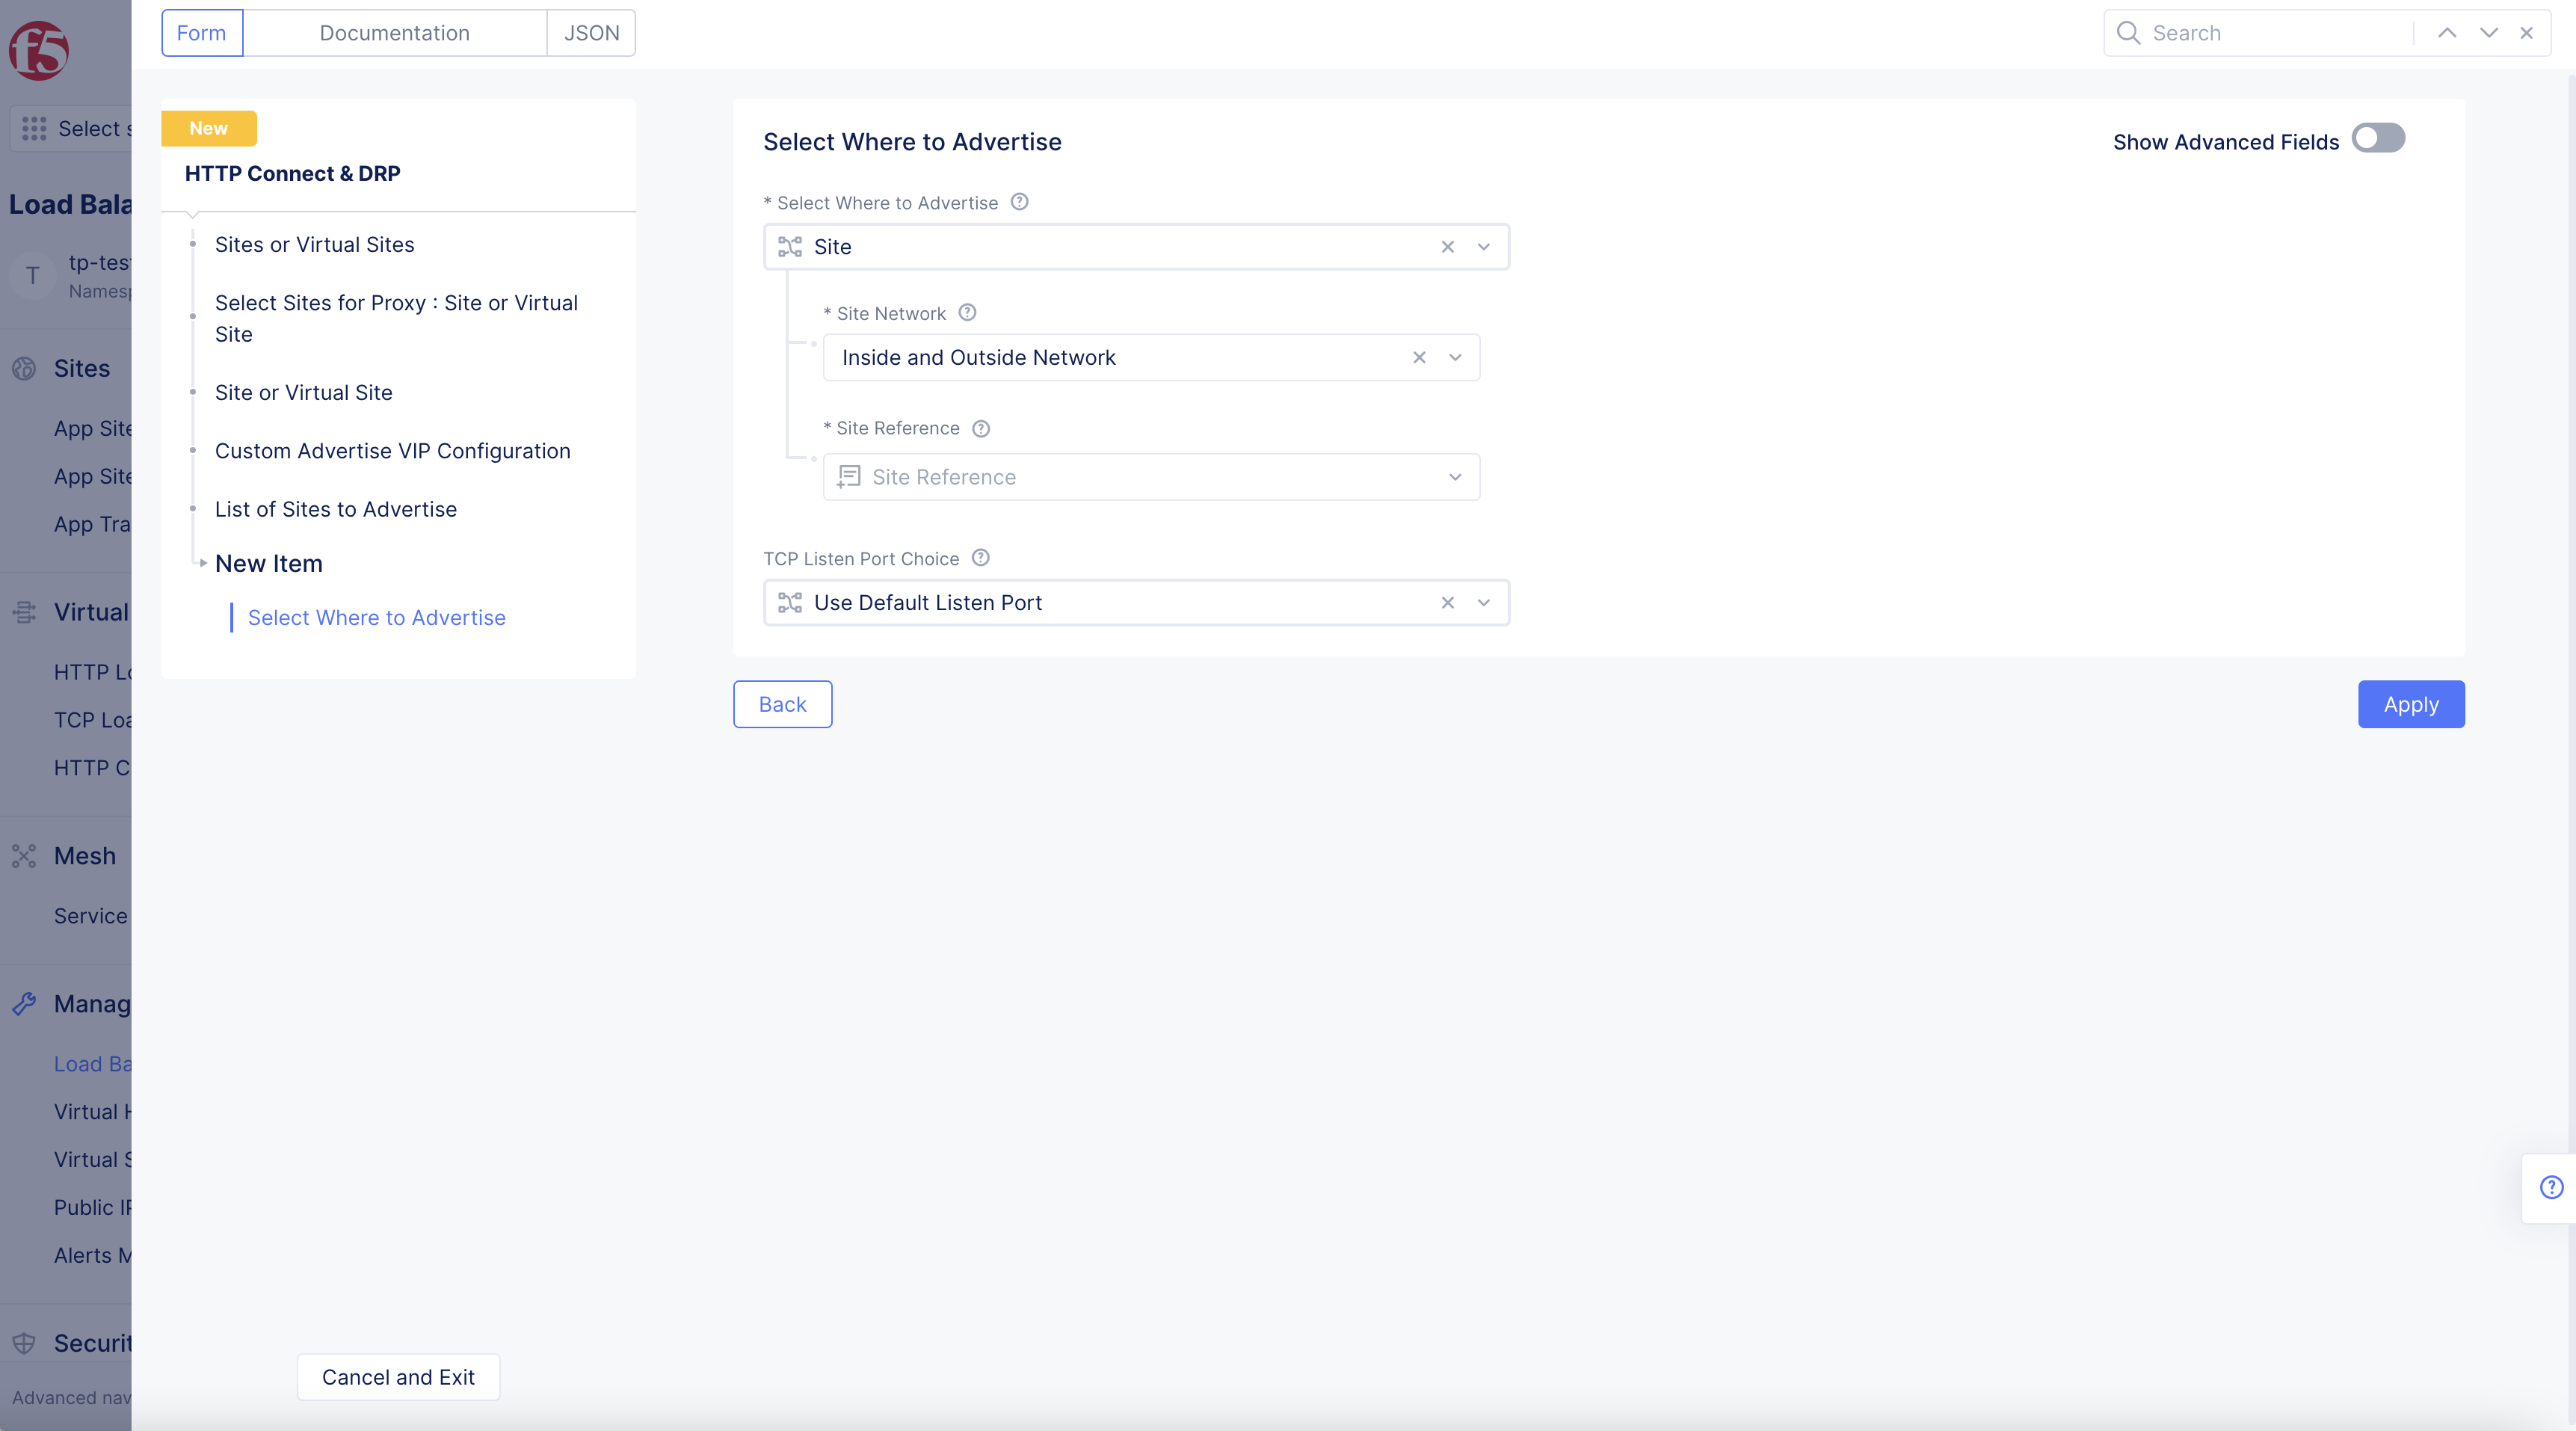
Figure: Sites or Virtual Sites Custom Advertise VIP Configuration
-
Select Where to Advertiseoption in drop-down menu:-
Select
Siteto install the proxy on a site. -
Select
Virtual Siteto install the proxy on a virtual site.
-
-
Select one of the following options for the
Site Networkdrop-down menu:-
Inside and Outside Network -
Inside Network -
Outside Network
-
-
Select
Virtual Site ReferenceorSite Referencedrop-down menu option.
Note: Option dependent on
Select Where to Advertiseoption selected.
Note: Select
Virtual Siteyou have created, or+ Create new Virtual Sitewith button at the bottom of pop-up menu.
- Toggle
Show Advanced Fieldsoption to showIP Addressbox.
Note:
IP Addressbox is only available whenSiteoption is selected.
-
TCP Listen Port Choicedrop-down menu populates withTCP Listen Portoption by default.Use Default Listen Portoption available. -
Select the port for your DRP in
TCP Listen Portbox.
Note: Default is port 80 for HTTP requests or port 443 for HTTPS requests.
Note: This is the port for your HTTP Connect Proxy to listen to requests.
- Select
Add Itembutton.
Note: You can add more sites or virtual sites to advertise using the
Add itemoption.
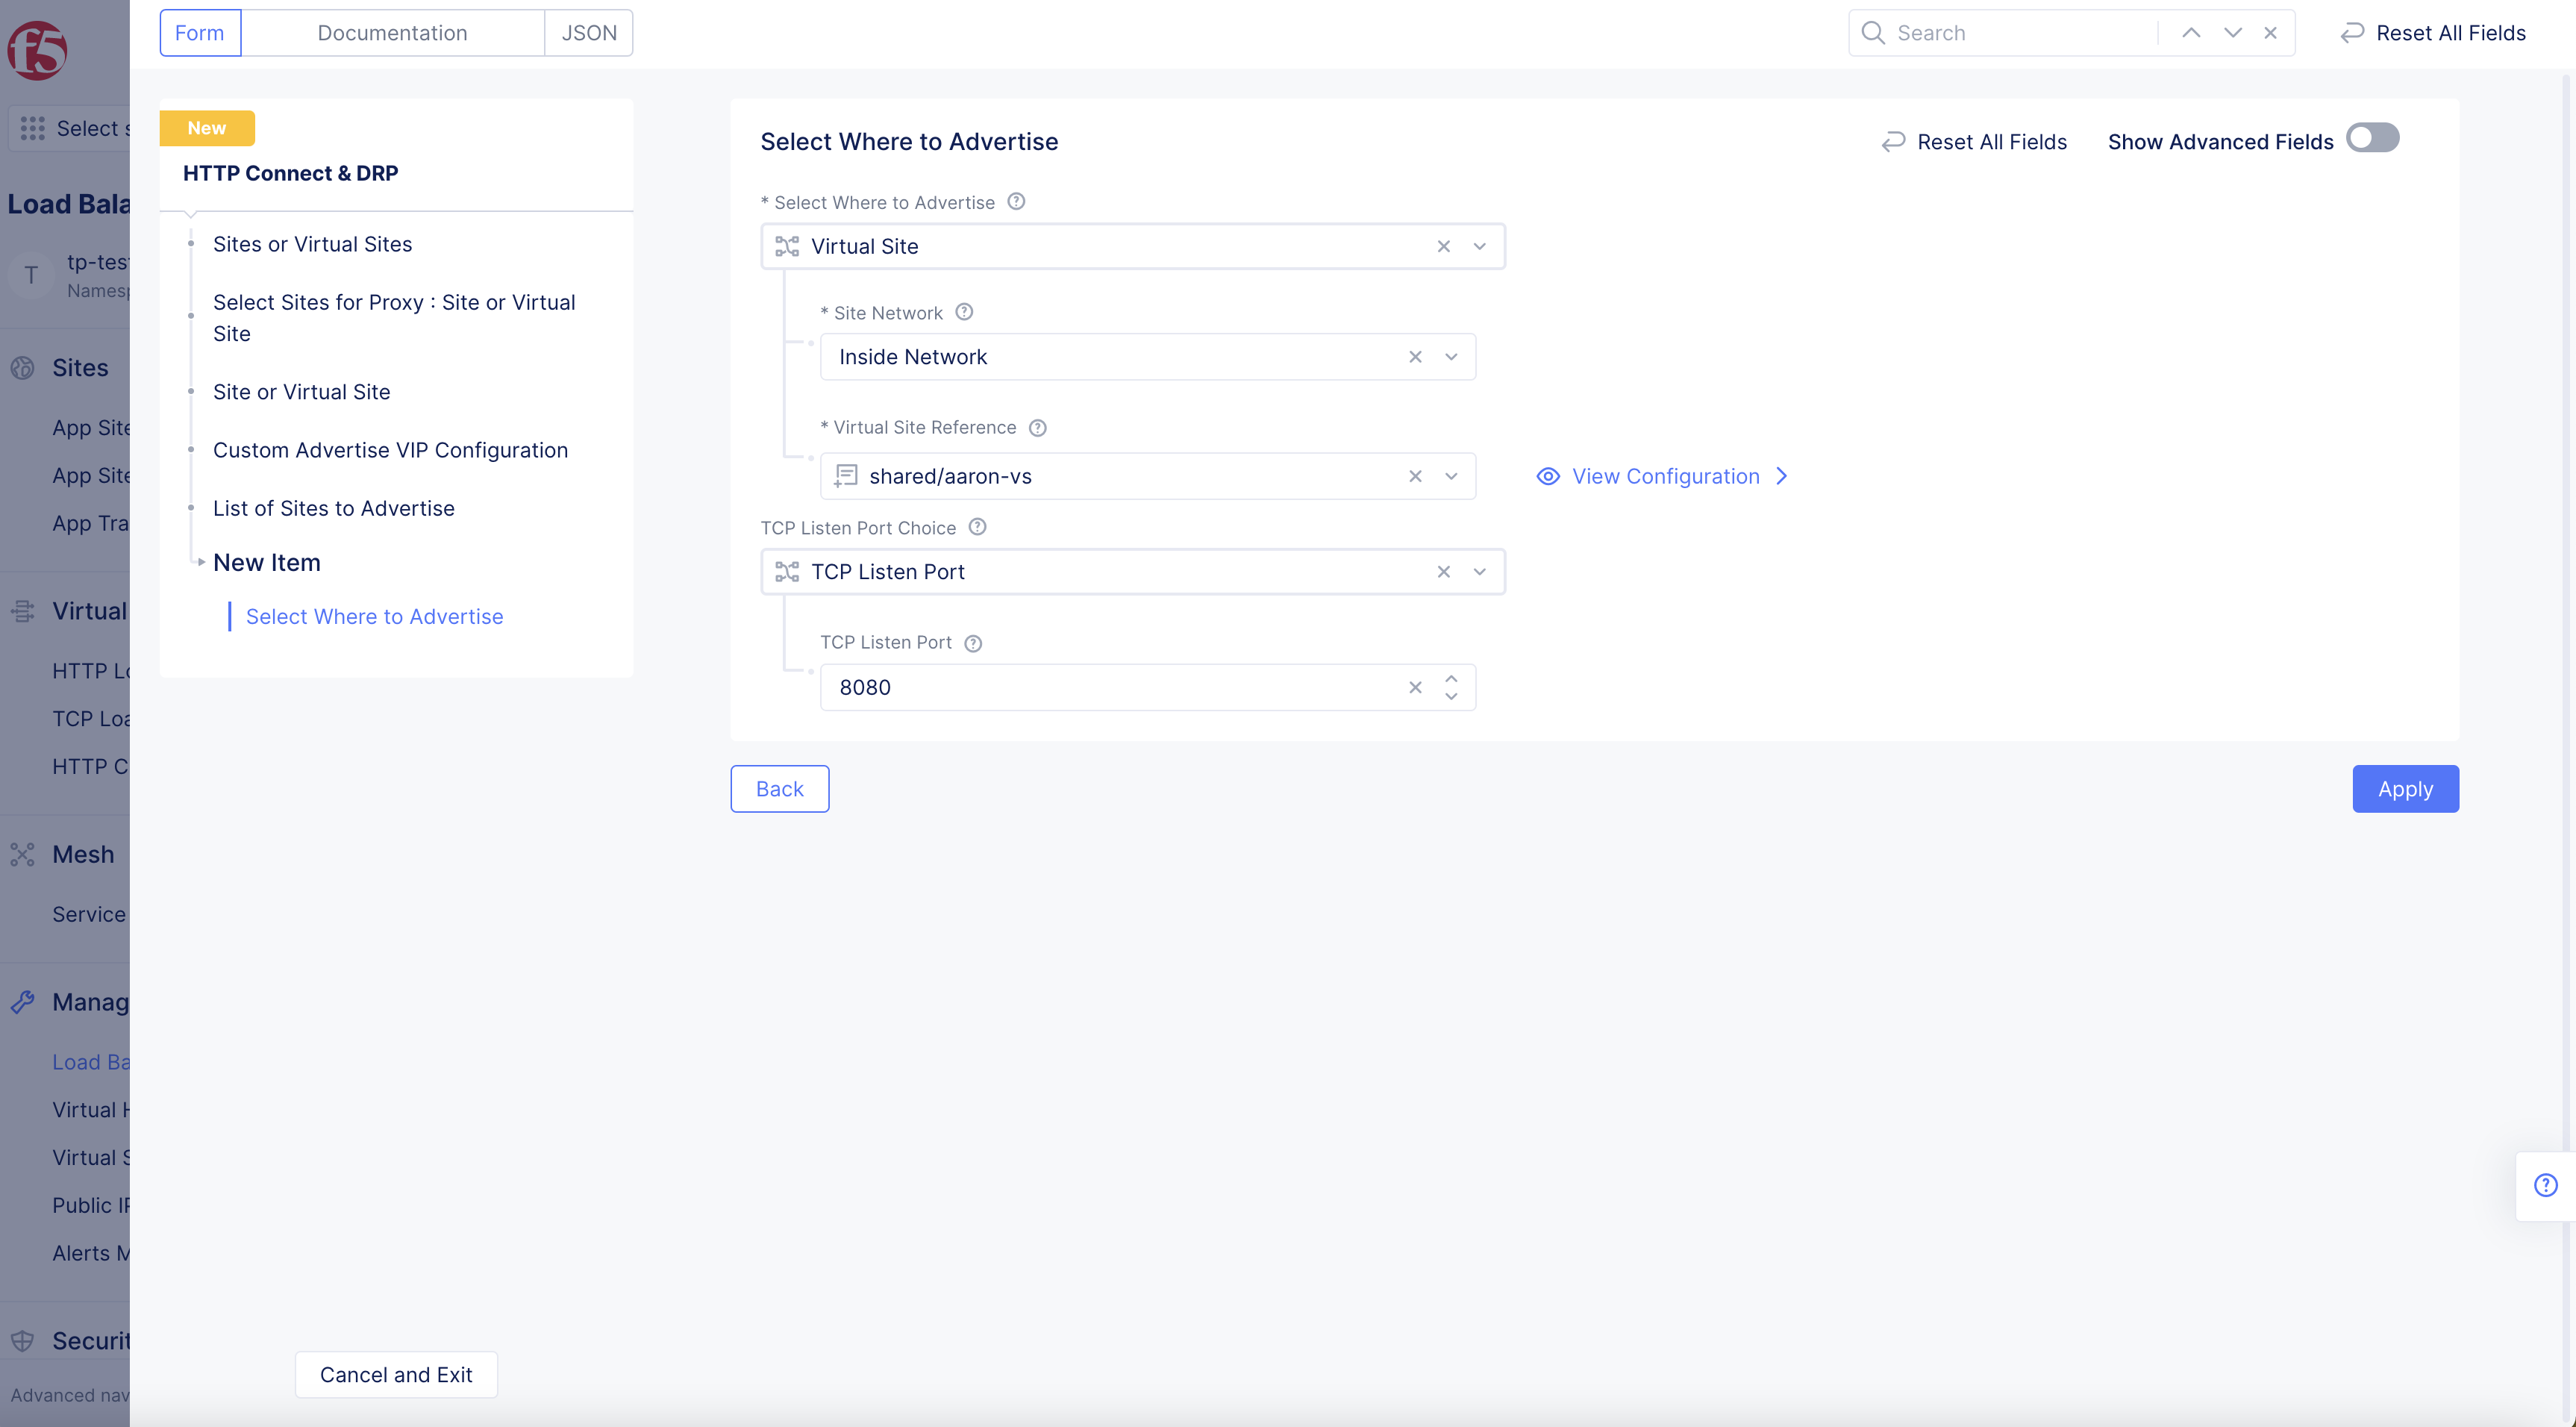
Figure: Advertise policy configuration
- Select
Applybutton.
Step 4: Set network for upstream connections.
Select which network is going to be used to discover and send the request to your final endpoint.
-
Select Upstream Networkoption in drop-down menu inUpstream Networksection.-
Site Local Network (Outside): Real endpoint is reachable via outside interface. -
Site Local Network Inside: Real endpoint is reachable via inside interface.
-
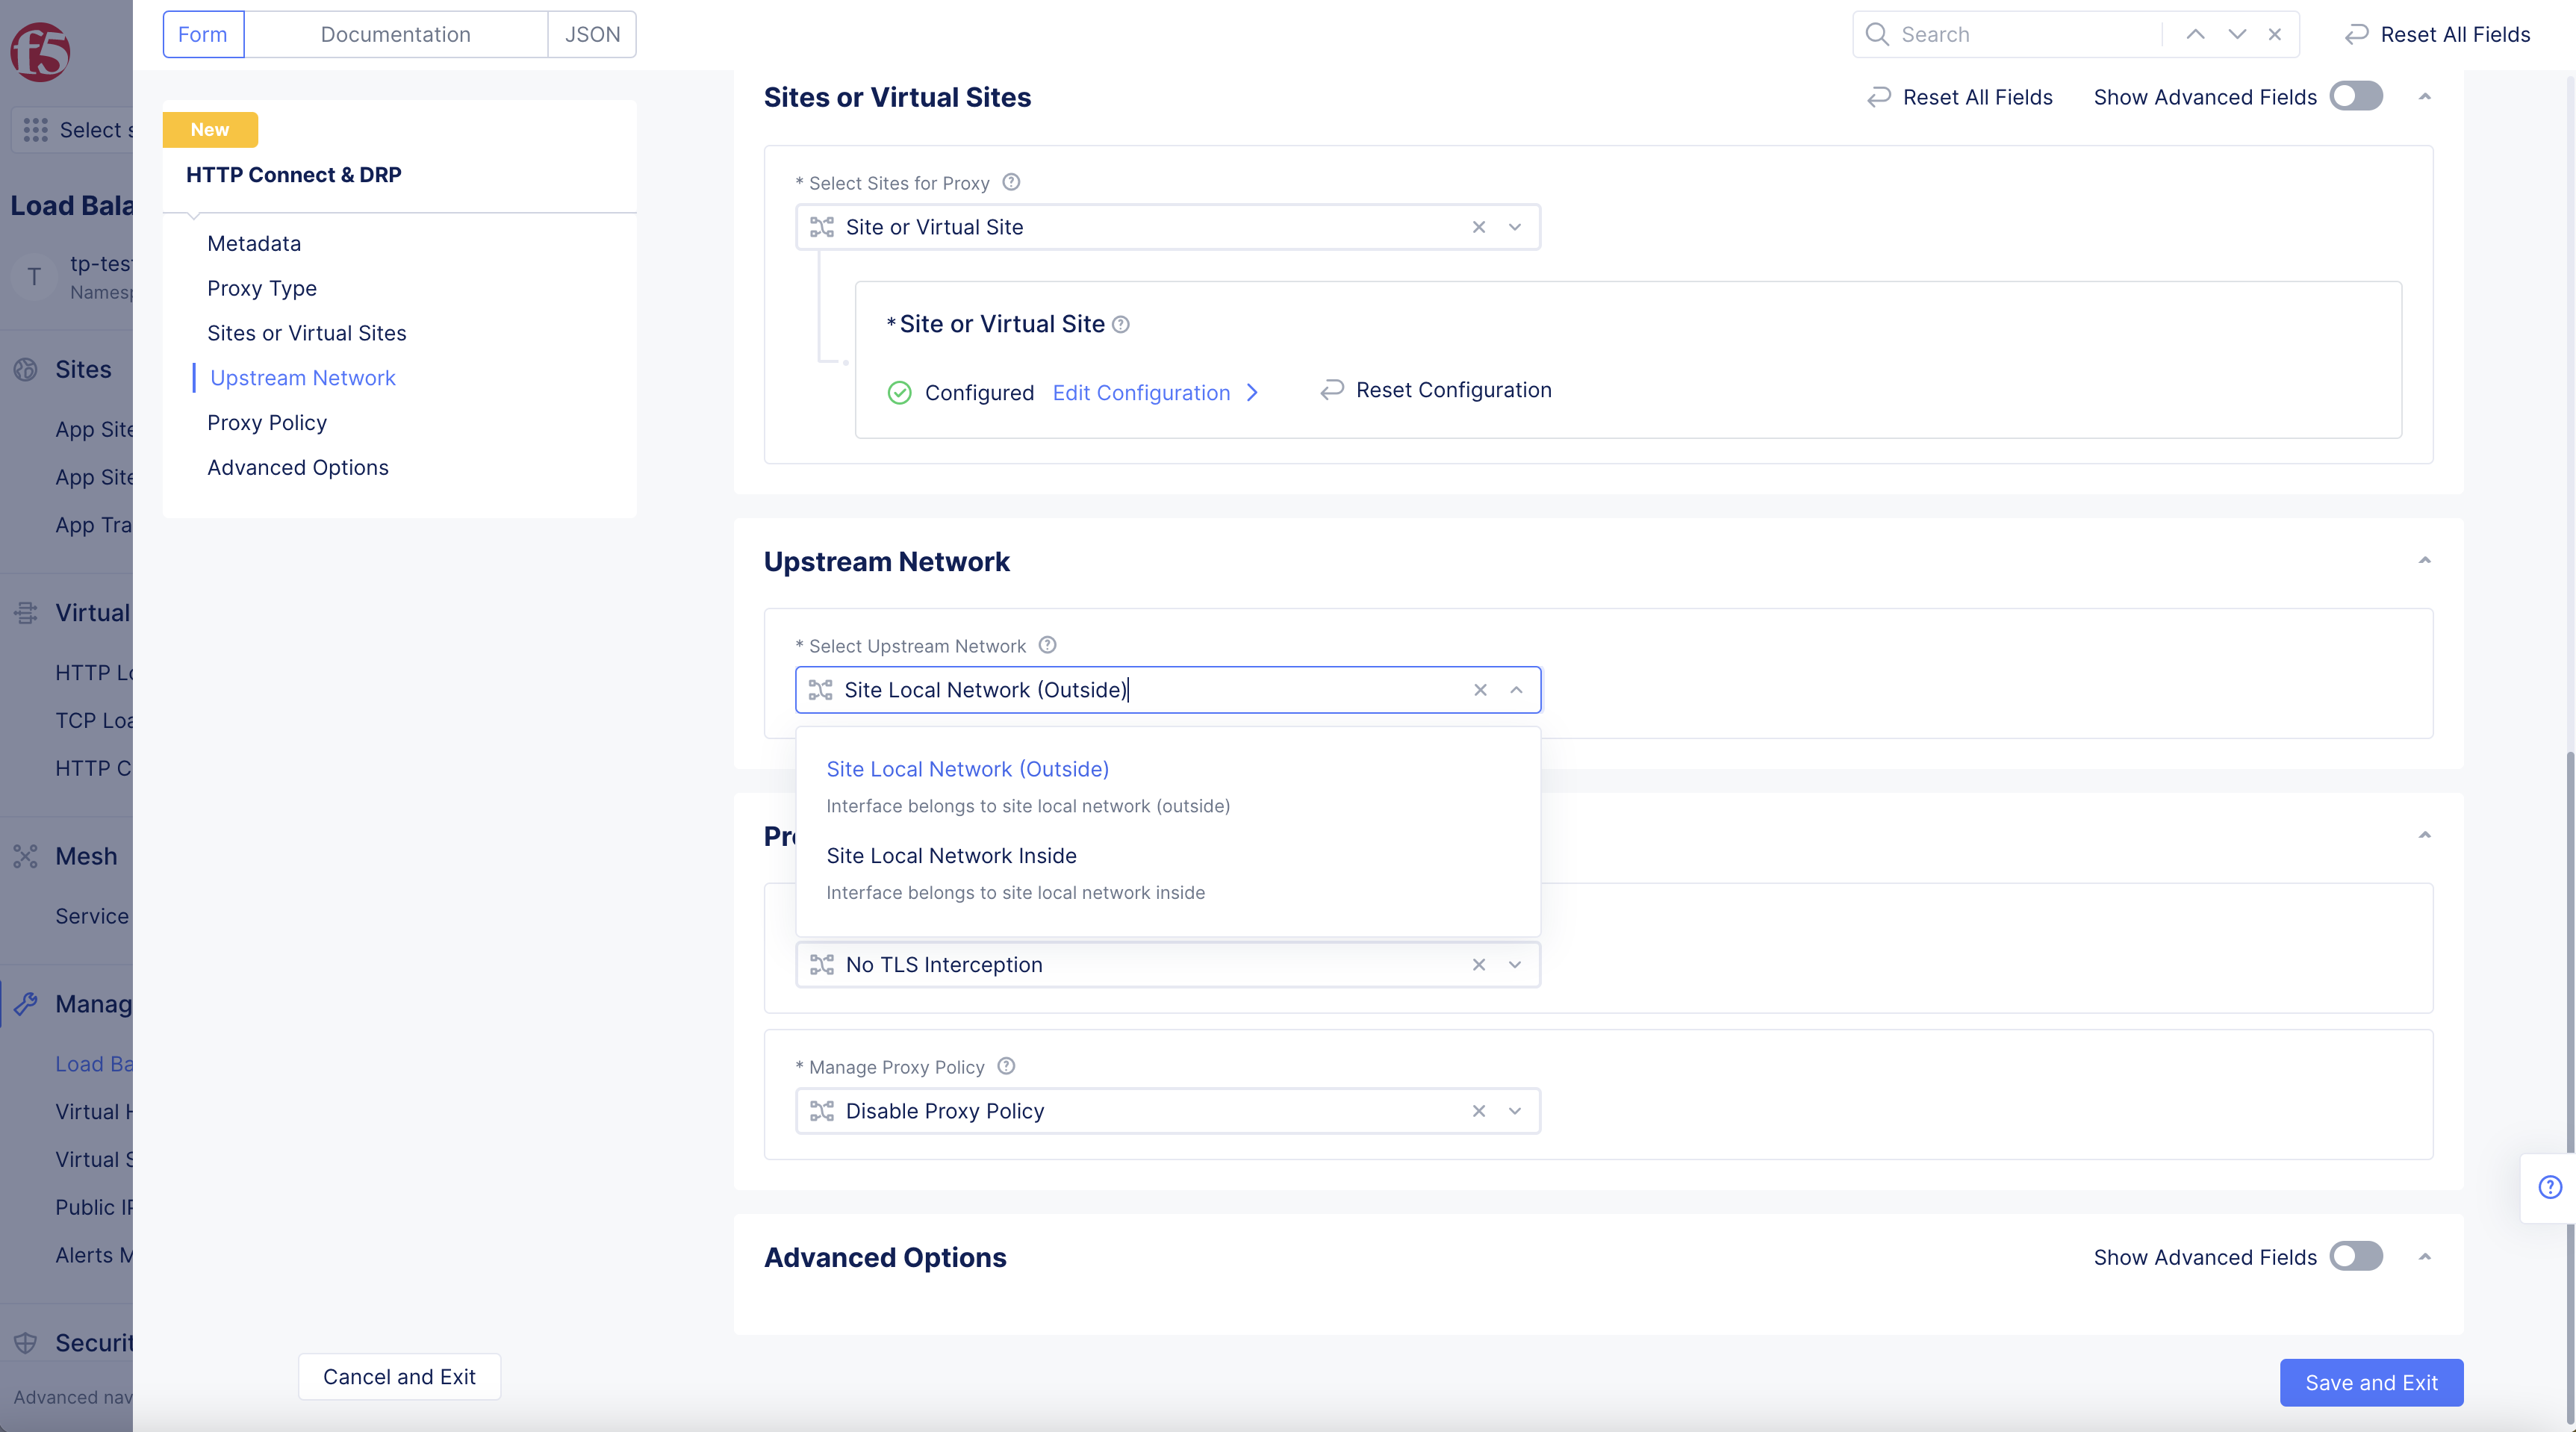
Figure: Upstream Network
Step 5: Configure proxy policy.
Configure policies for this proxy. Go to Proxy Policy section, and select an option for the Manage Proxy Policy field.
Note: Proxy Policy is to establish TLS connections using certificates.
-
Select
TLS Interception choicedrop-down option.-
No TLS Interception -
TLS Interception
Note: Establishing TLS connections using certificates.
-
-
Select
Manage Proxy Policiesoption in drop-down menu:-
Disable proxy policy: With this option, no policies are installed on this proxy. -
Active proxy policies: To set a policy. From the options for theForward Proxy Policiesfield, select an existing forward proxy policy, or selectCreate new forward proxy policyto create and apply a new policy.
-
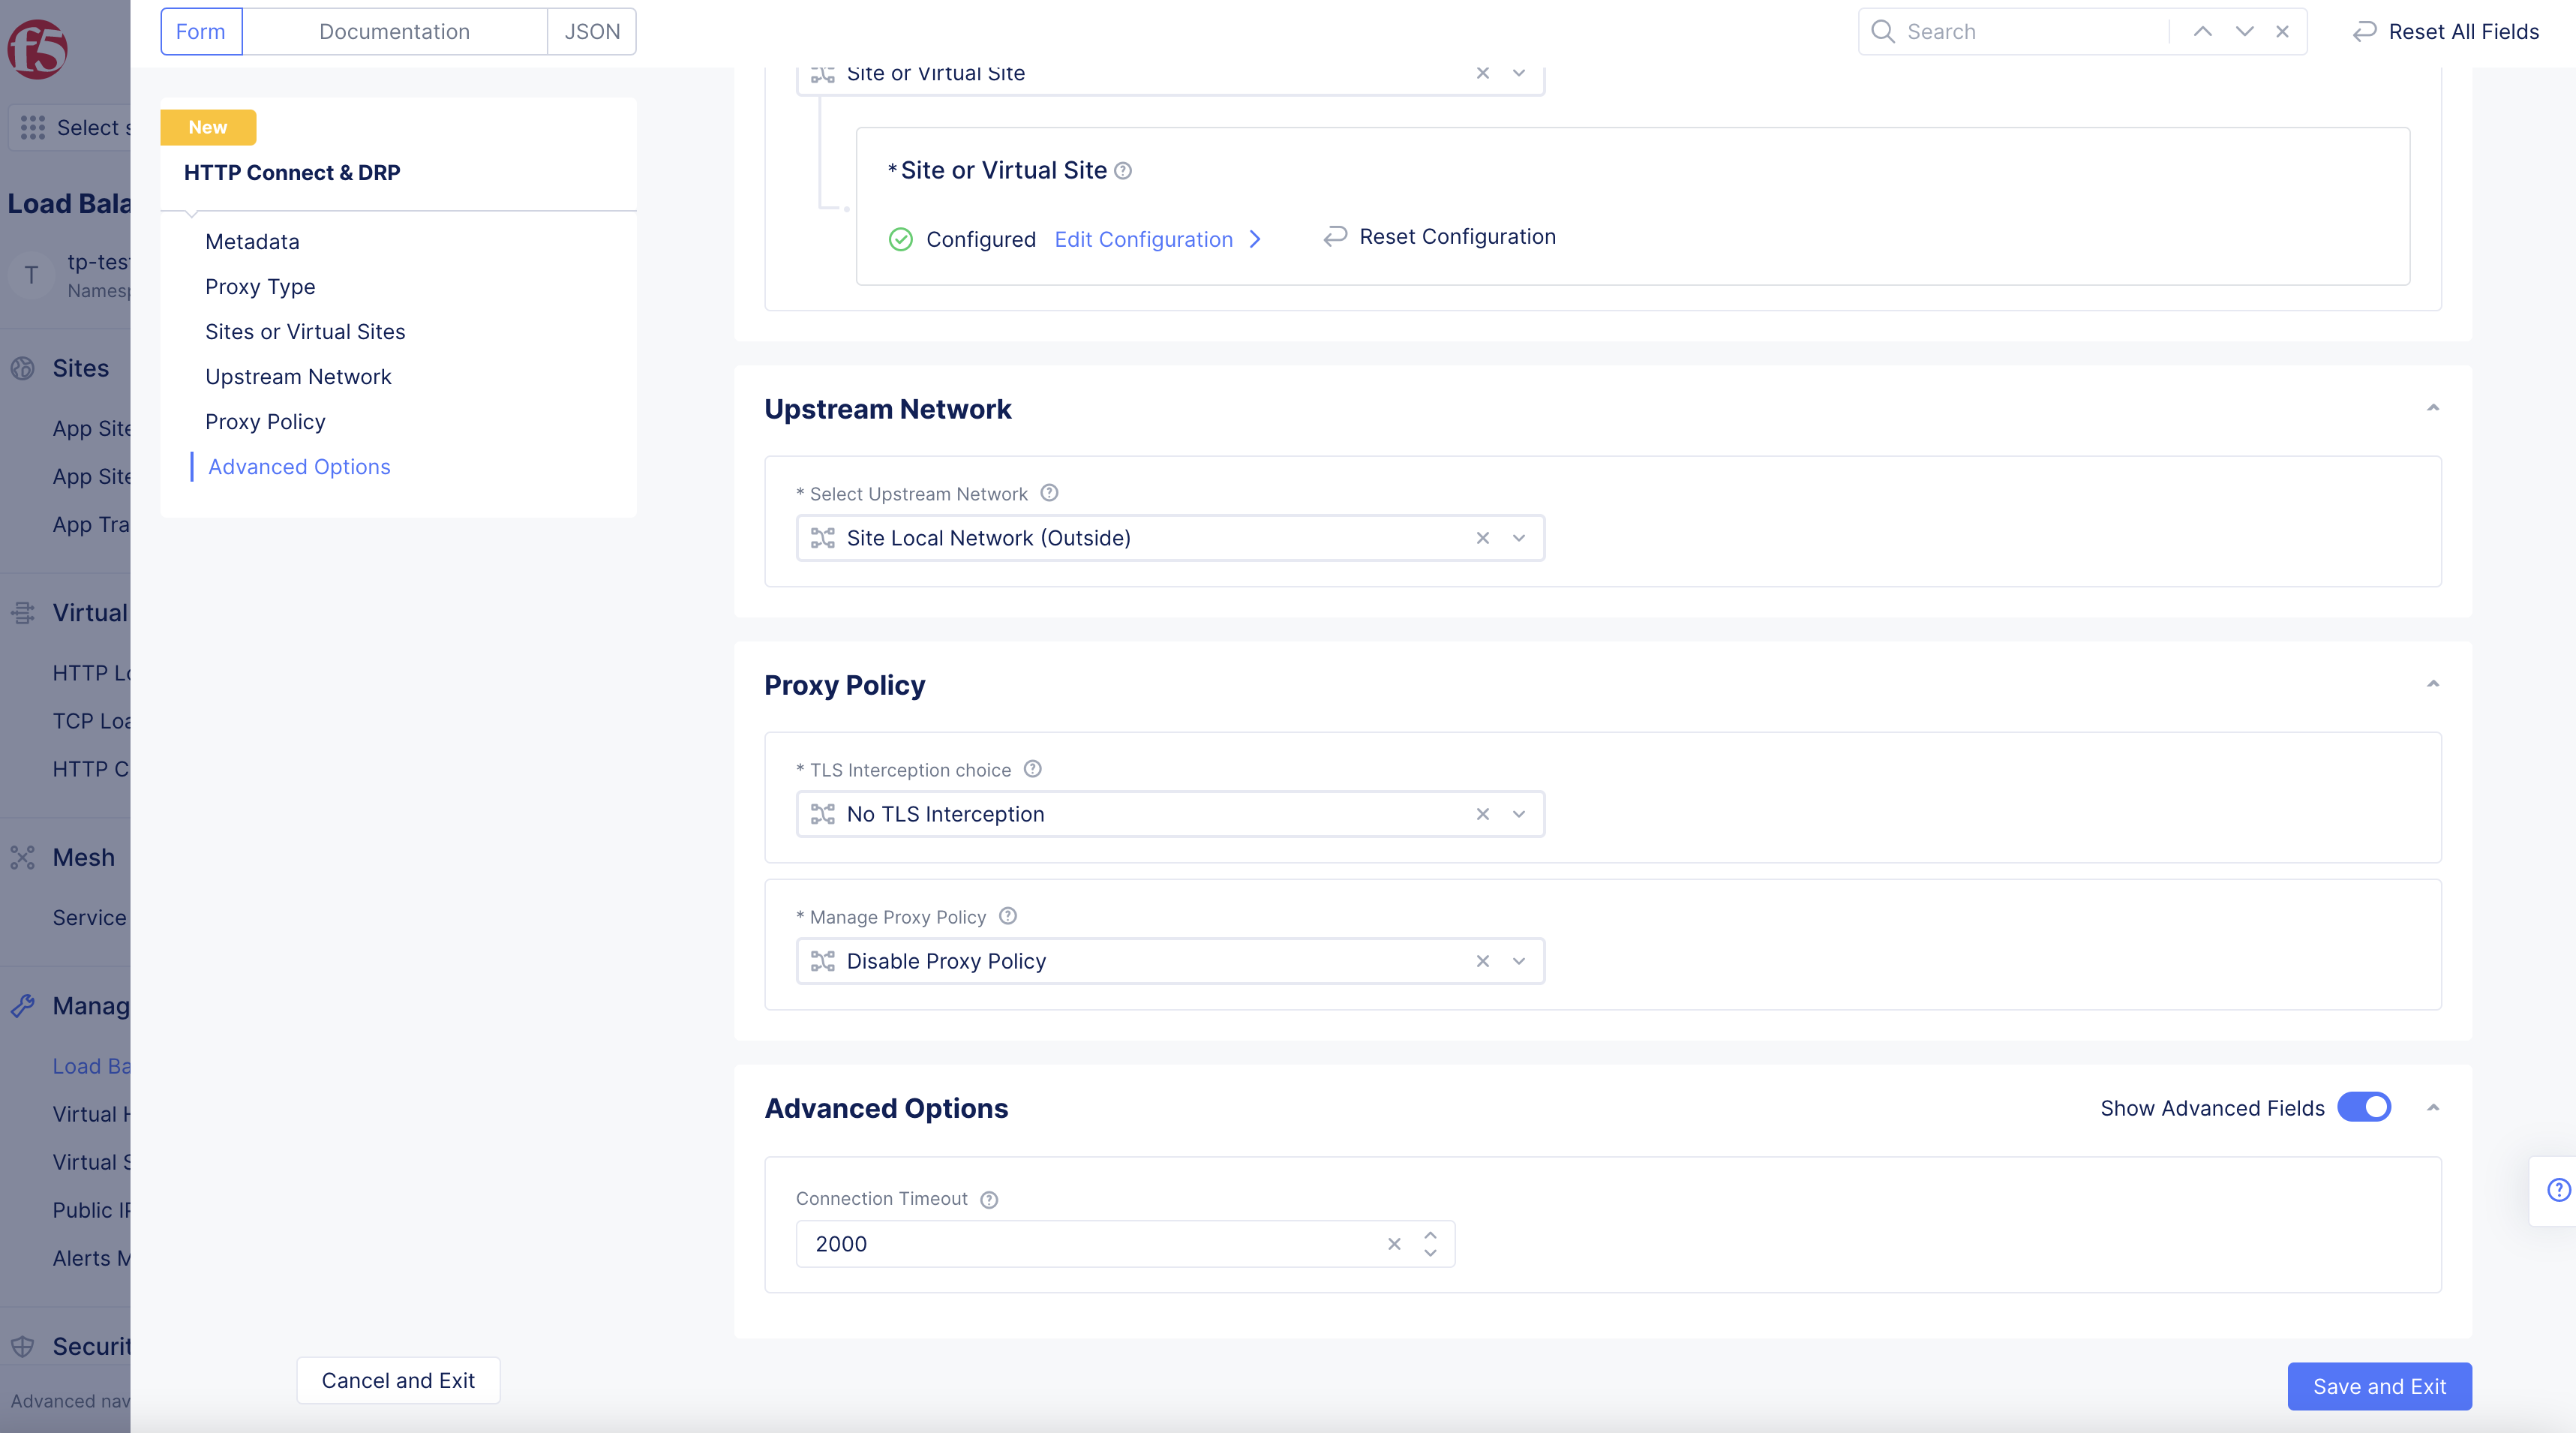
Figure: Proxy Policy
Step 6: Configure Connection Timeout in Advanced Options.
-
Toggle
Show Advanced FieldsinAdvanced Optionsto showConnection Timeoutoption. -
Enter
Connection Timeoutvalue.

Figure: Connection Timeout
Step 7: Complete creating the DRP object.
- Select
Save and Exitbutton to complete creating the DRP object.
Note: You can monitor the DRP in the F5® Distributed Cloud Console. Navigate to the
Virtual Hosts>HTTP Connect & DRPpage in your application namespace and select on your DRP object in the displayed list of objects.