Kubernetes Service Discovery
Objective
This document provides instructions on how to discover services from an external Kubernetes (K8s) cluster. K8s service discovery enables users to discover and deliver services on multiple K8s clusters from the central F5 distributed cloud (XC) console.
The feature discovers services of type ClusterIP, NodePort, and LoadBalancer. Users can then use the discovered services as Origin pool endpoints to load balance traffic to them. Although discovering Ingress resources is not supported, users can configure HTTP load balancing, L7 routing, and security for the discovered services from the XC console.
To know more information about service discovery, see Service Discovery.
Using the instructions provided in this guide, you can create a discovery object for a Kubernetes cluster and an endpoint for an Origin using the service name.
Prerequisites
The following prerequisites apply:
-
A valid Account is required. If you do not have an account, see Create an Account.
-
An existing Kubernetes cluster with a service or application reachable from a CE Site.
Configuration Workflow Updates
Following the F5 Distributed Cloud upgrade on November 16, 2025, an enhancement has been introduced for Kubernetes Service Discovery. This update enables users to map Kubernetes namespaces to F5 Distributed Cloud namespaces and leverage Role Based Access Control to manage access to discovered services.
As part of this change, the existing Service Discovery objects, created before this release, have been relocated to the system namespace.
- Going forward, users may create new Kubernetes Service Discovery objects only within an App Namespace or under Shared Configurations.
- Users cannot create new objects in the system namespace. The console does not provide a Create New option for the system namespace, to prevent the creation of new K8s Service Discovery objects.
- Namespace mapping must not be configured for the Service Discovery objects in the system namespace.
- New Discovered Services that are generated by the K8s Service Discovery objects located in the system namespace are also created in the system namespace, and may be referenced by Origin Pools in any application namespace.
- Existing Origin Pools that reference Discovered Services in the system namespace will continue to function without any changes.
- Users can add Discovered Services from the system namespace to new Origin Pools in any app namespace by typing it in the service-name in the k8s-namespace:cluster-identifier format. For example: acme-service.frontend:prodcluster
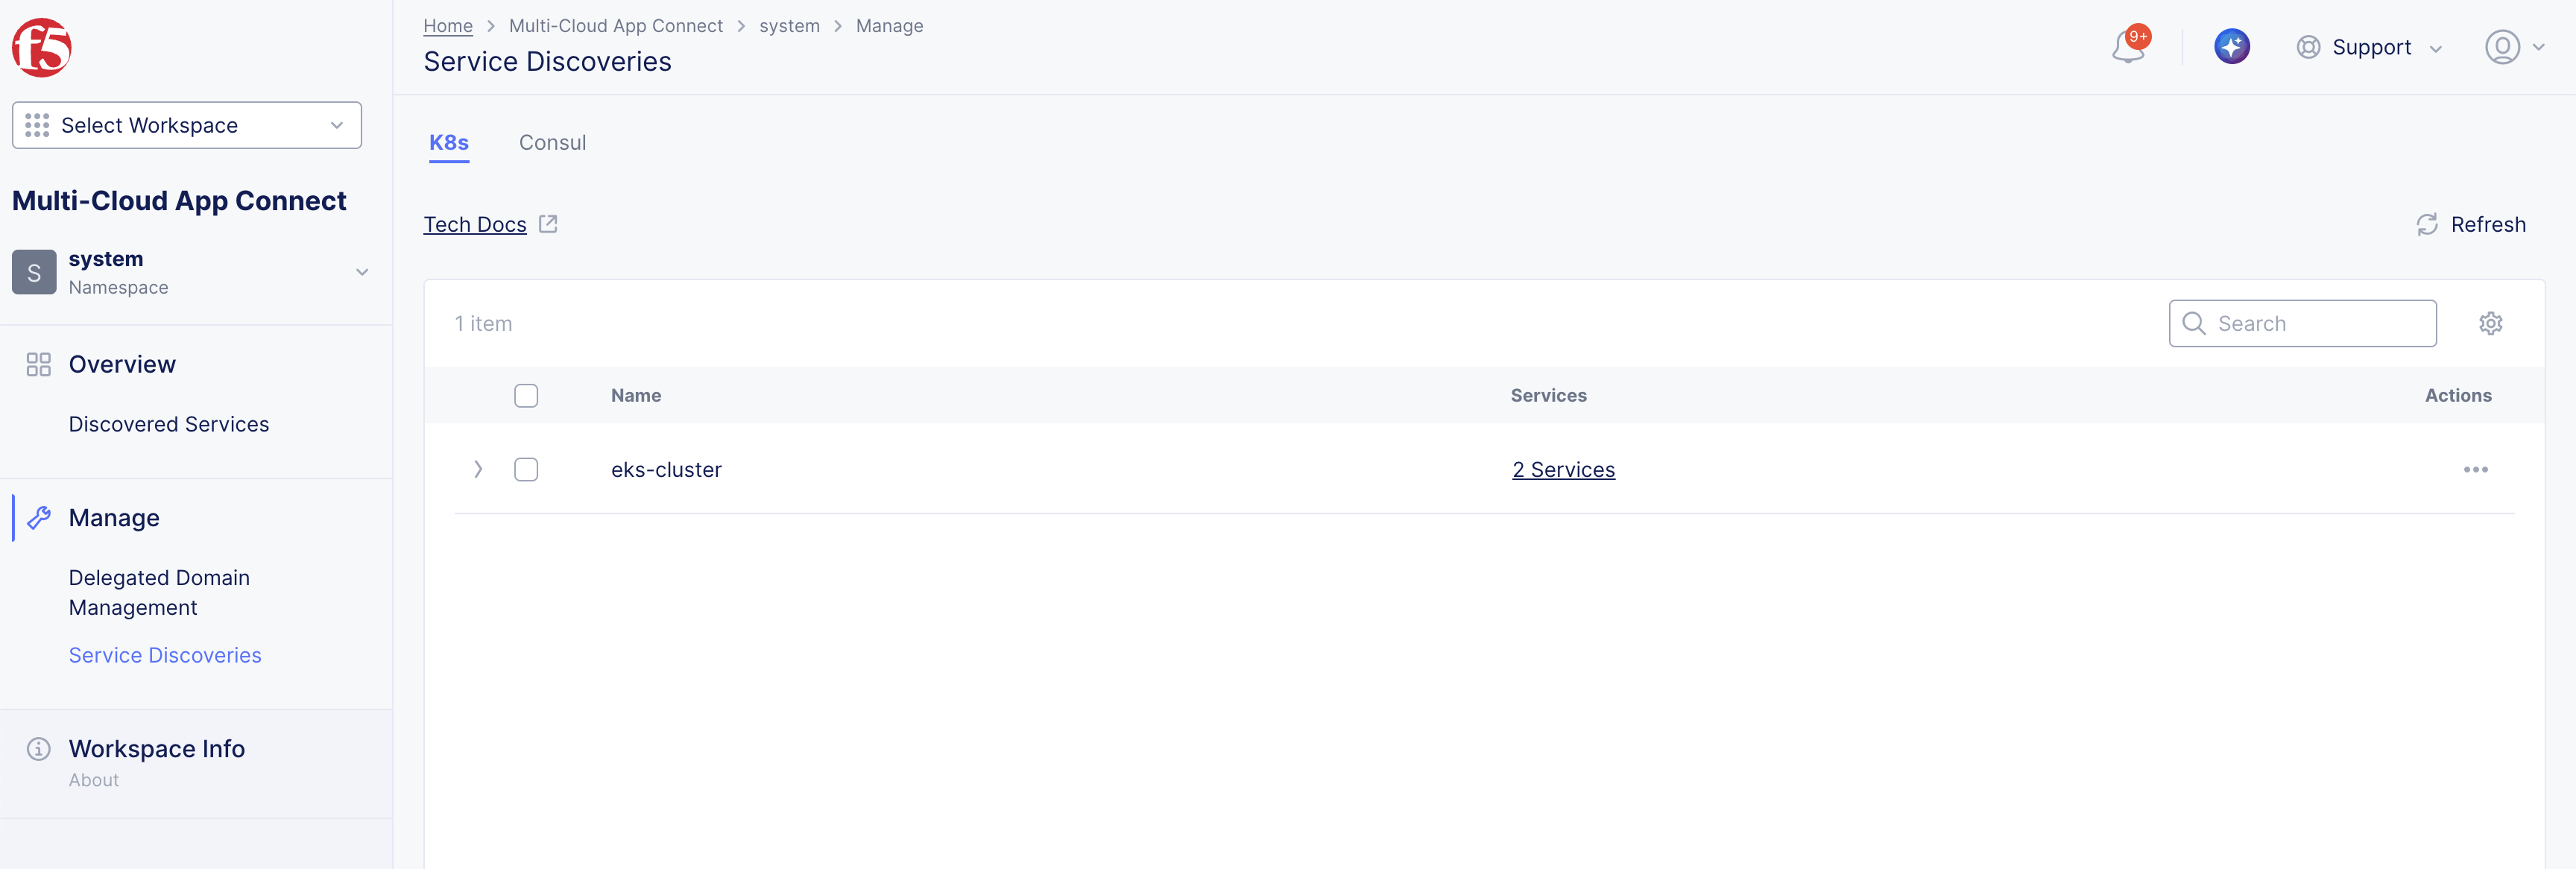
Figure: K8s Service Discovery in System Namespace
Note: The UI and API capabilities to edit or delete existing Service Discovery objects remain unchanged and fully supported. Discovered service objects created by Kubernetes Service Discovery before the release are also unaffected and may continue to be used until their corresponding Service Discovery configuration is deleted.
Configuration Options
Kubernetes (K8s) Service Discovery can be configured either under Shared Configurations or within an Application Namespace, depending on whether the K8s cluster is treated as a shared or dedicated resource.
K8s Cluster as a Shared Resource
Users can create K8s Service Discovery under the Shared Configurations > Manage > Service Discoveries > K8s section, and configure the namespace mapping in the following scenarios:
- Discovered services from certain k8s namespaces must be discovered into a particular F5® Distributed Cloud Services App Namespace.
- User wants to leverage F5® Distributed Cloud Services Role Based Access Control to allow only the users with access to a certain app namespace to view and use the discovered service in Origin Pool configuration.
Namespace mapping allows discovered services from a k8s namespace to be created only in the mapped F5® Distributed Cloud Services App Namespace. This can be useful if different teams use a common k8s cluster and need management isolation for their Load Balancers on F5® Distributed Cloud Services.
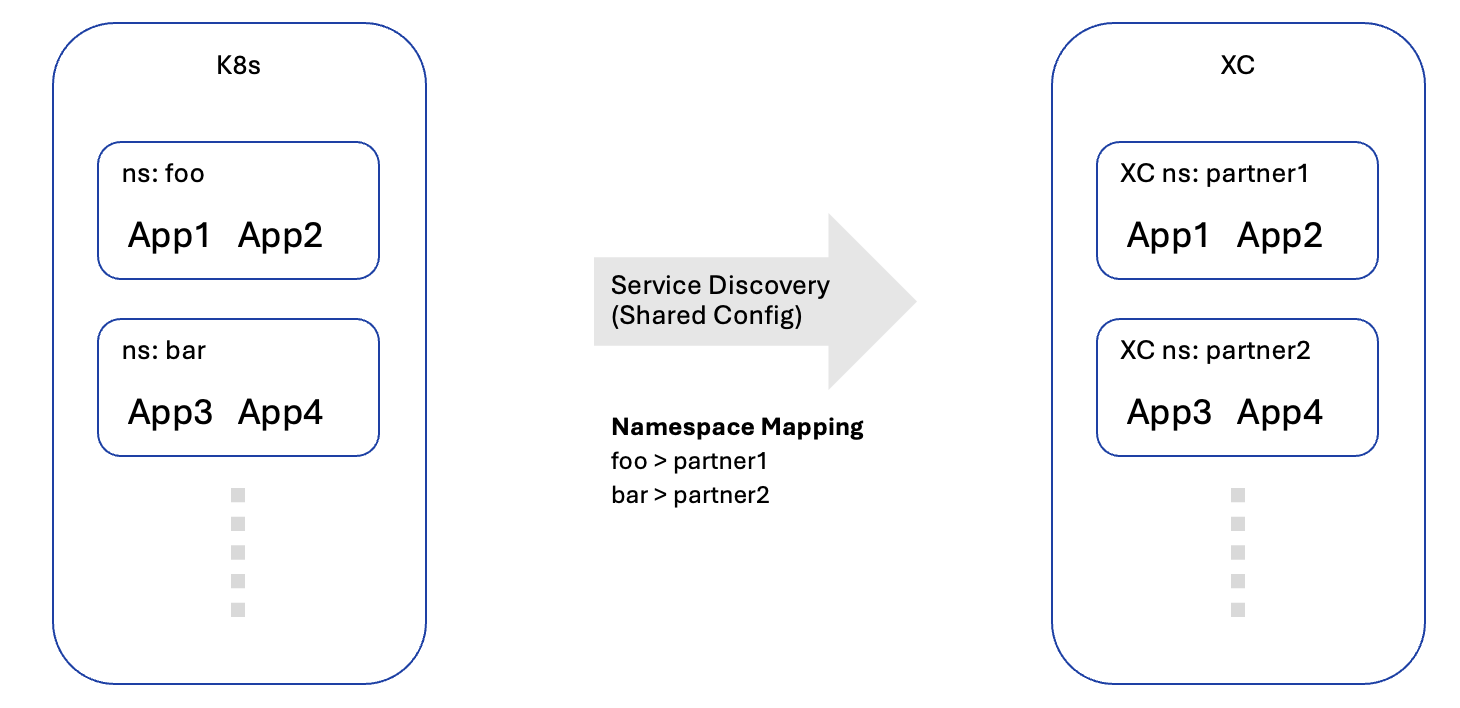
Figure: K8s Cluster as a Shared Resource
K8s Cluster as a Dedicated Resource
Users can create K8s Service Discovery under the Multi-Cloud App Connect > [choose the namespace] > Manage > Service Discoveries > K8s section, and configure namespace mapping in the following scenarios:
- If services across all K8s namespaces must be discovered in only one App Namespace.
- A user with write access to a certain app namespace wants to manage the service discovery for their K8s cluster in their own app namespace.
Namespace mapping allows users to filter/choose the Kubernetes namespaces from which they want the services to be discovered.
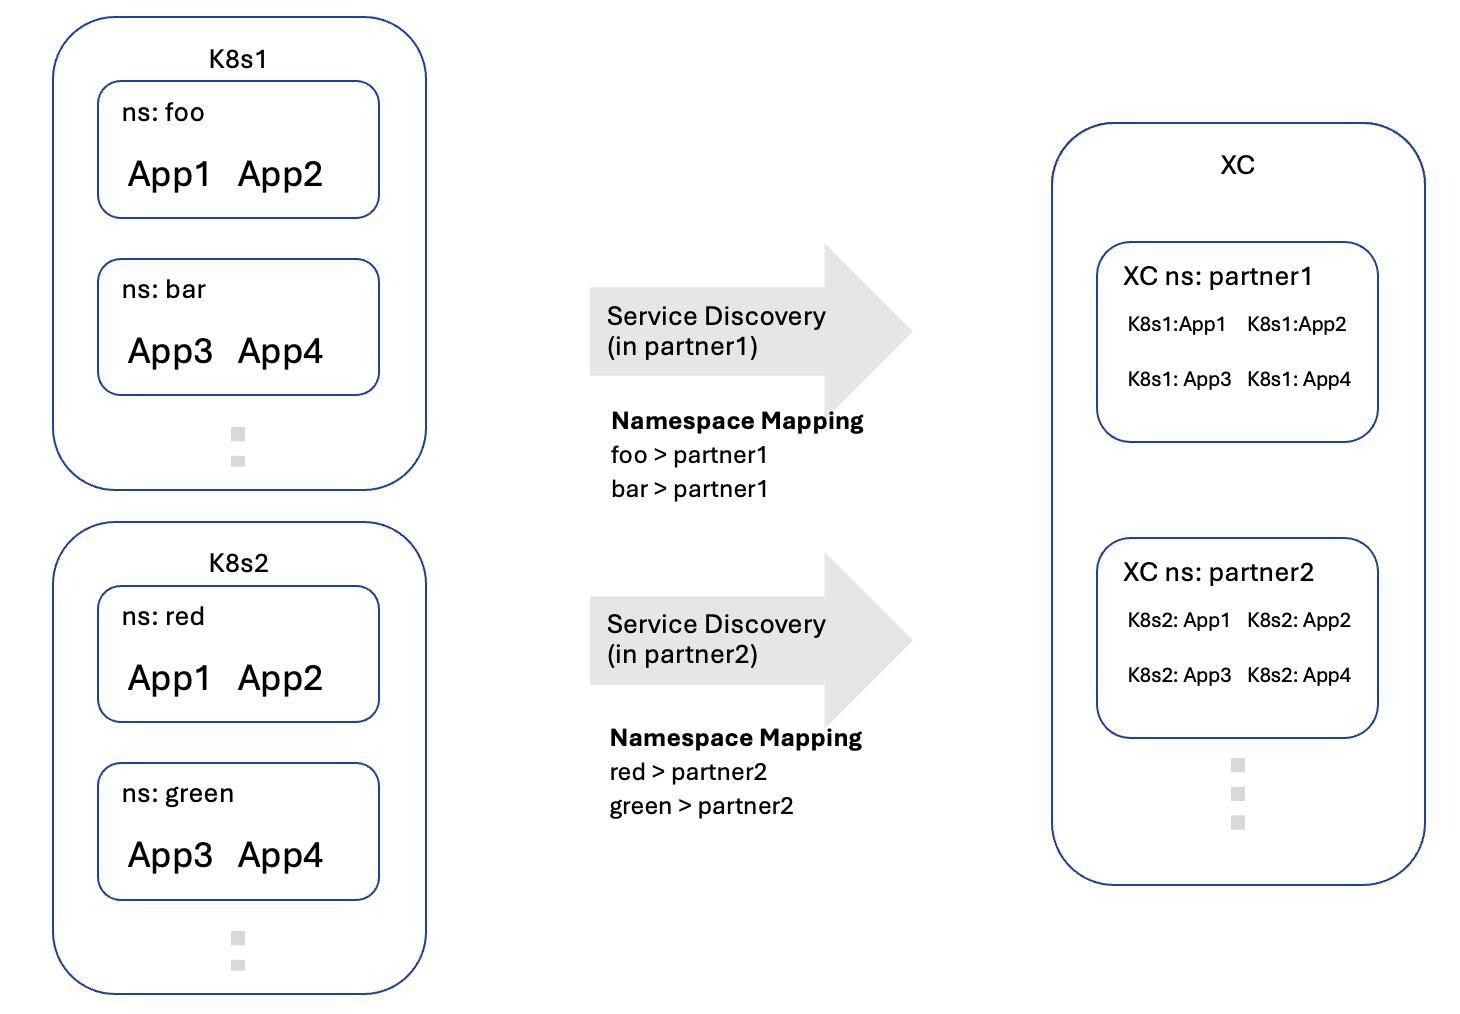
Figure: K8s Cluster as a Dedicated Resource
Configuration Sequence
Discovering services using the Kubernetes service information requires performing the following sequence of actions:
- Obtain the kubeconfig file for the K8s Cluster
- Create the K8s Service Discovery
- Verify the Discovered Services
- Use the Discovered Services in Origin Pool
Obtain the kubeconfig file for the K8s Cluster
The service kubeconfig file is required to authenticate the Service Discovery with the Kubernetes API endpoint. As the method for obtaining this file varies across Kubernetes distributions, please refer to the documentation specific to your distribution for instructions on how to download the kubeconfig file.
Create the K8s Service Discovery
This example shows the Service Discovery setup in Multi-Cloud App Connect.
Step 1: Create a new service discovery configuration object.
- On the F5 Distributed Cloud Console, navigate to the Multi-Cloud App Connect workspace.
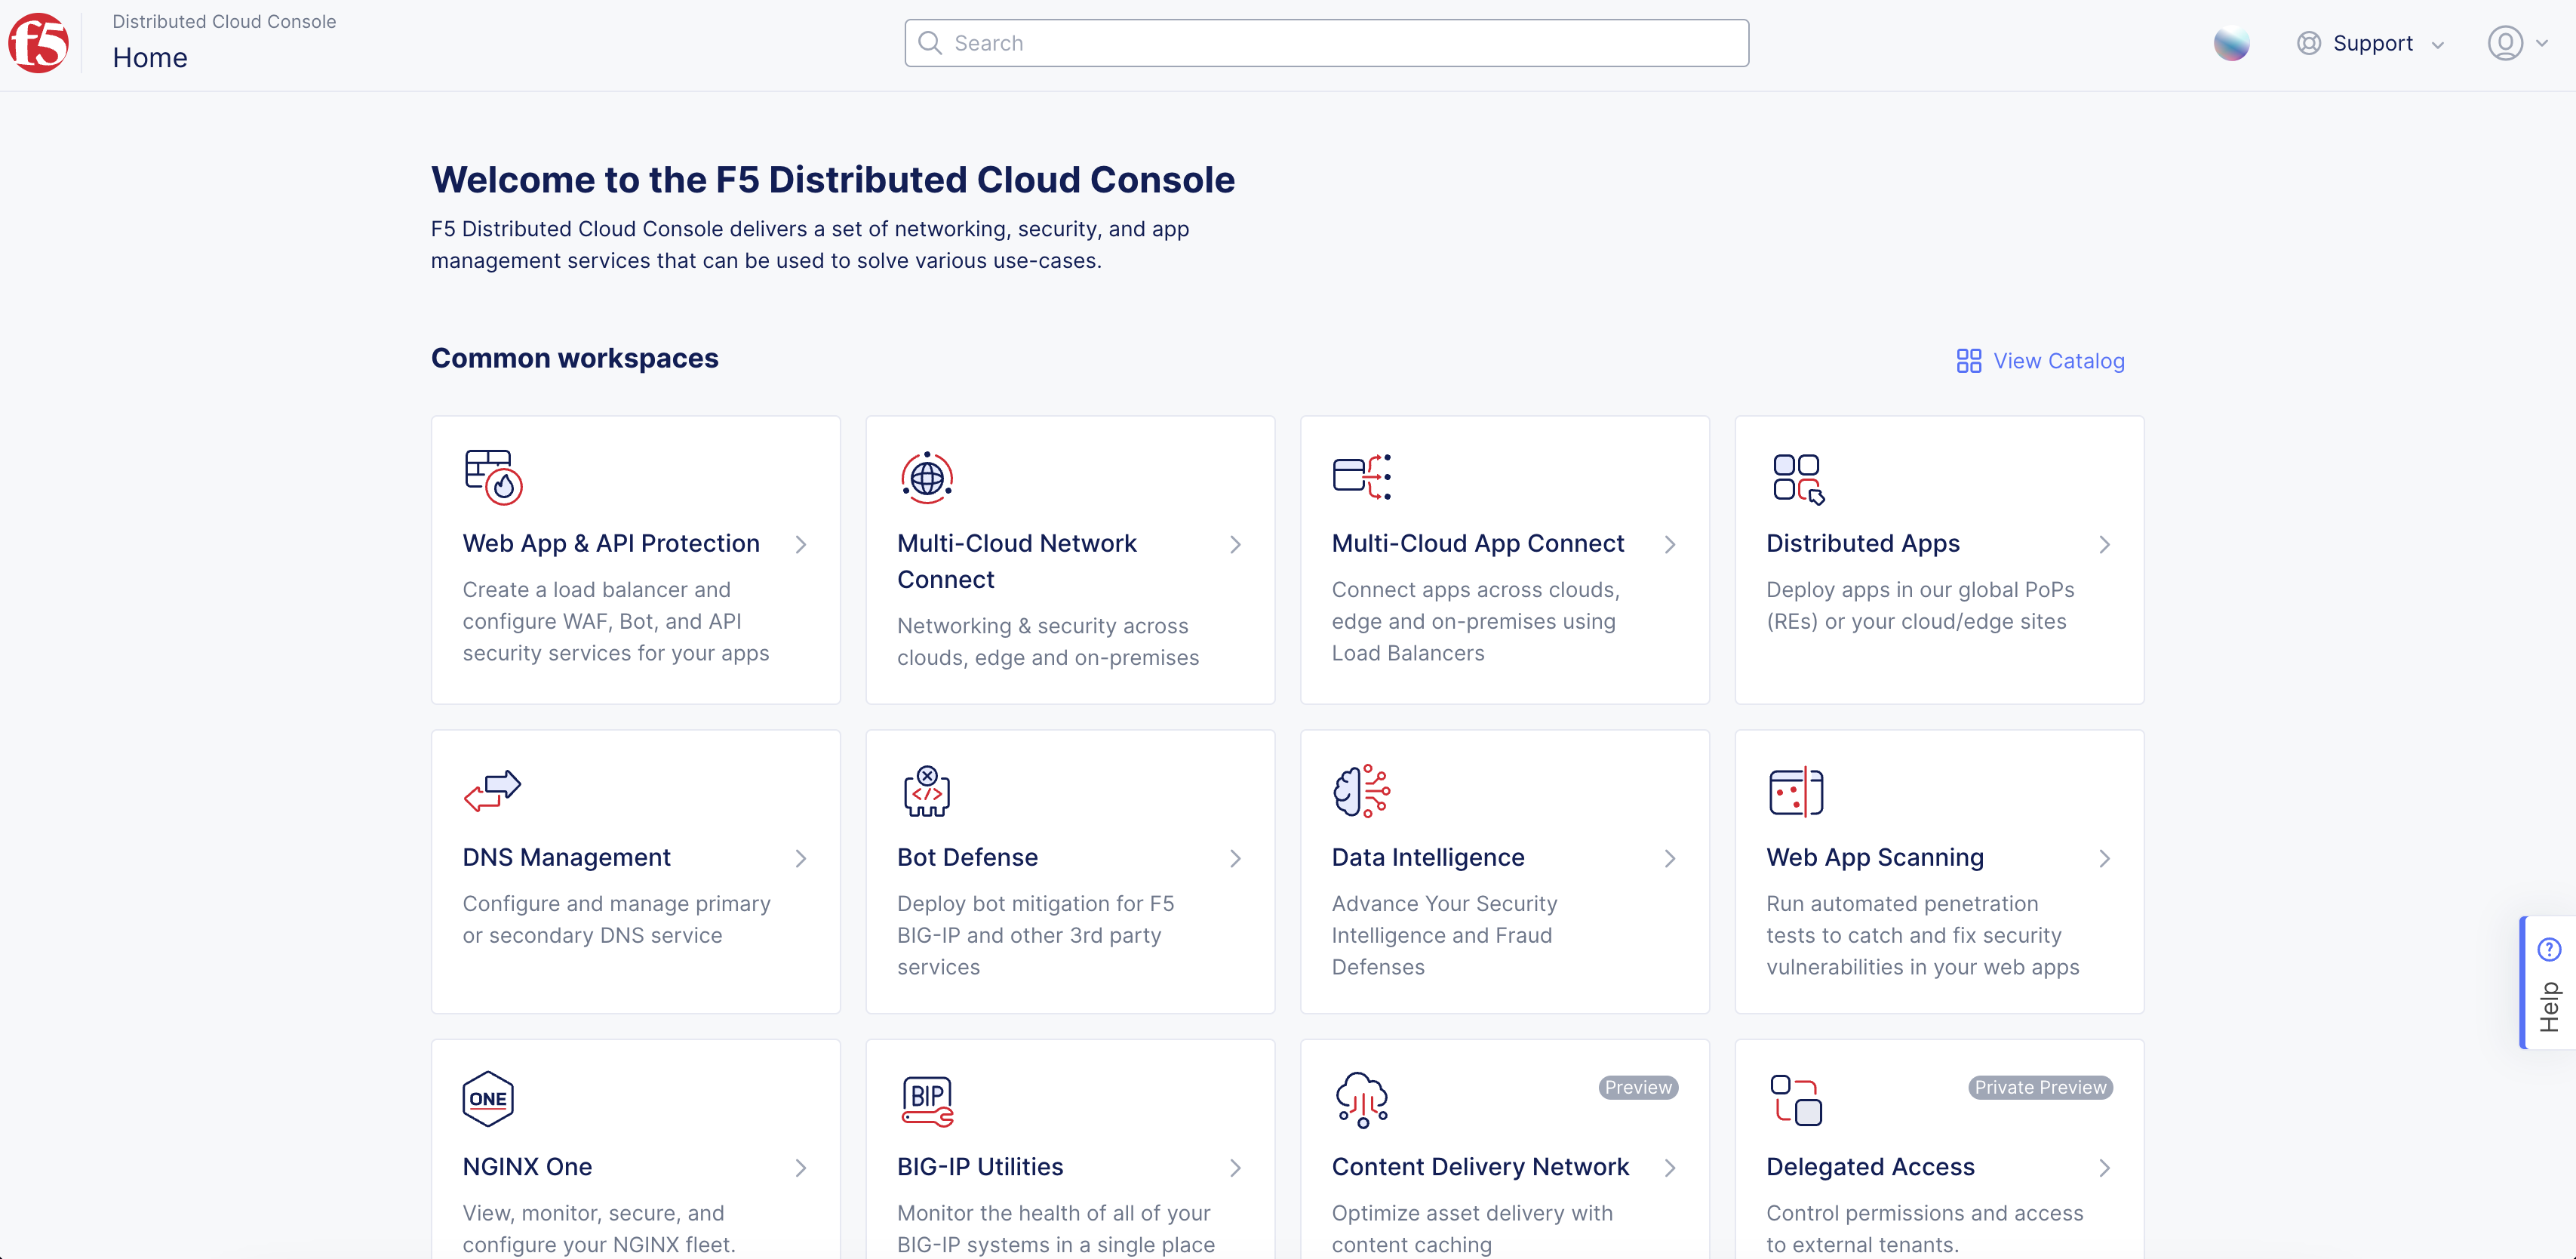
Figure: Homepage
-
Select an app namespace from the left navigation pane, such as the default namespace.
-
In the left menu, select Manage > Service Discoveries.
-
Select the K8s tab.
-
Select Add K8s Service Discovery.
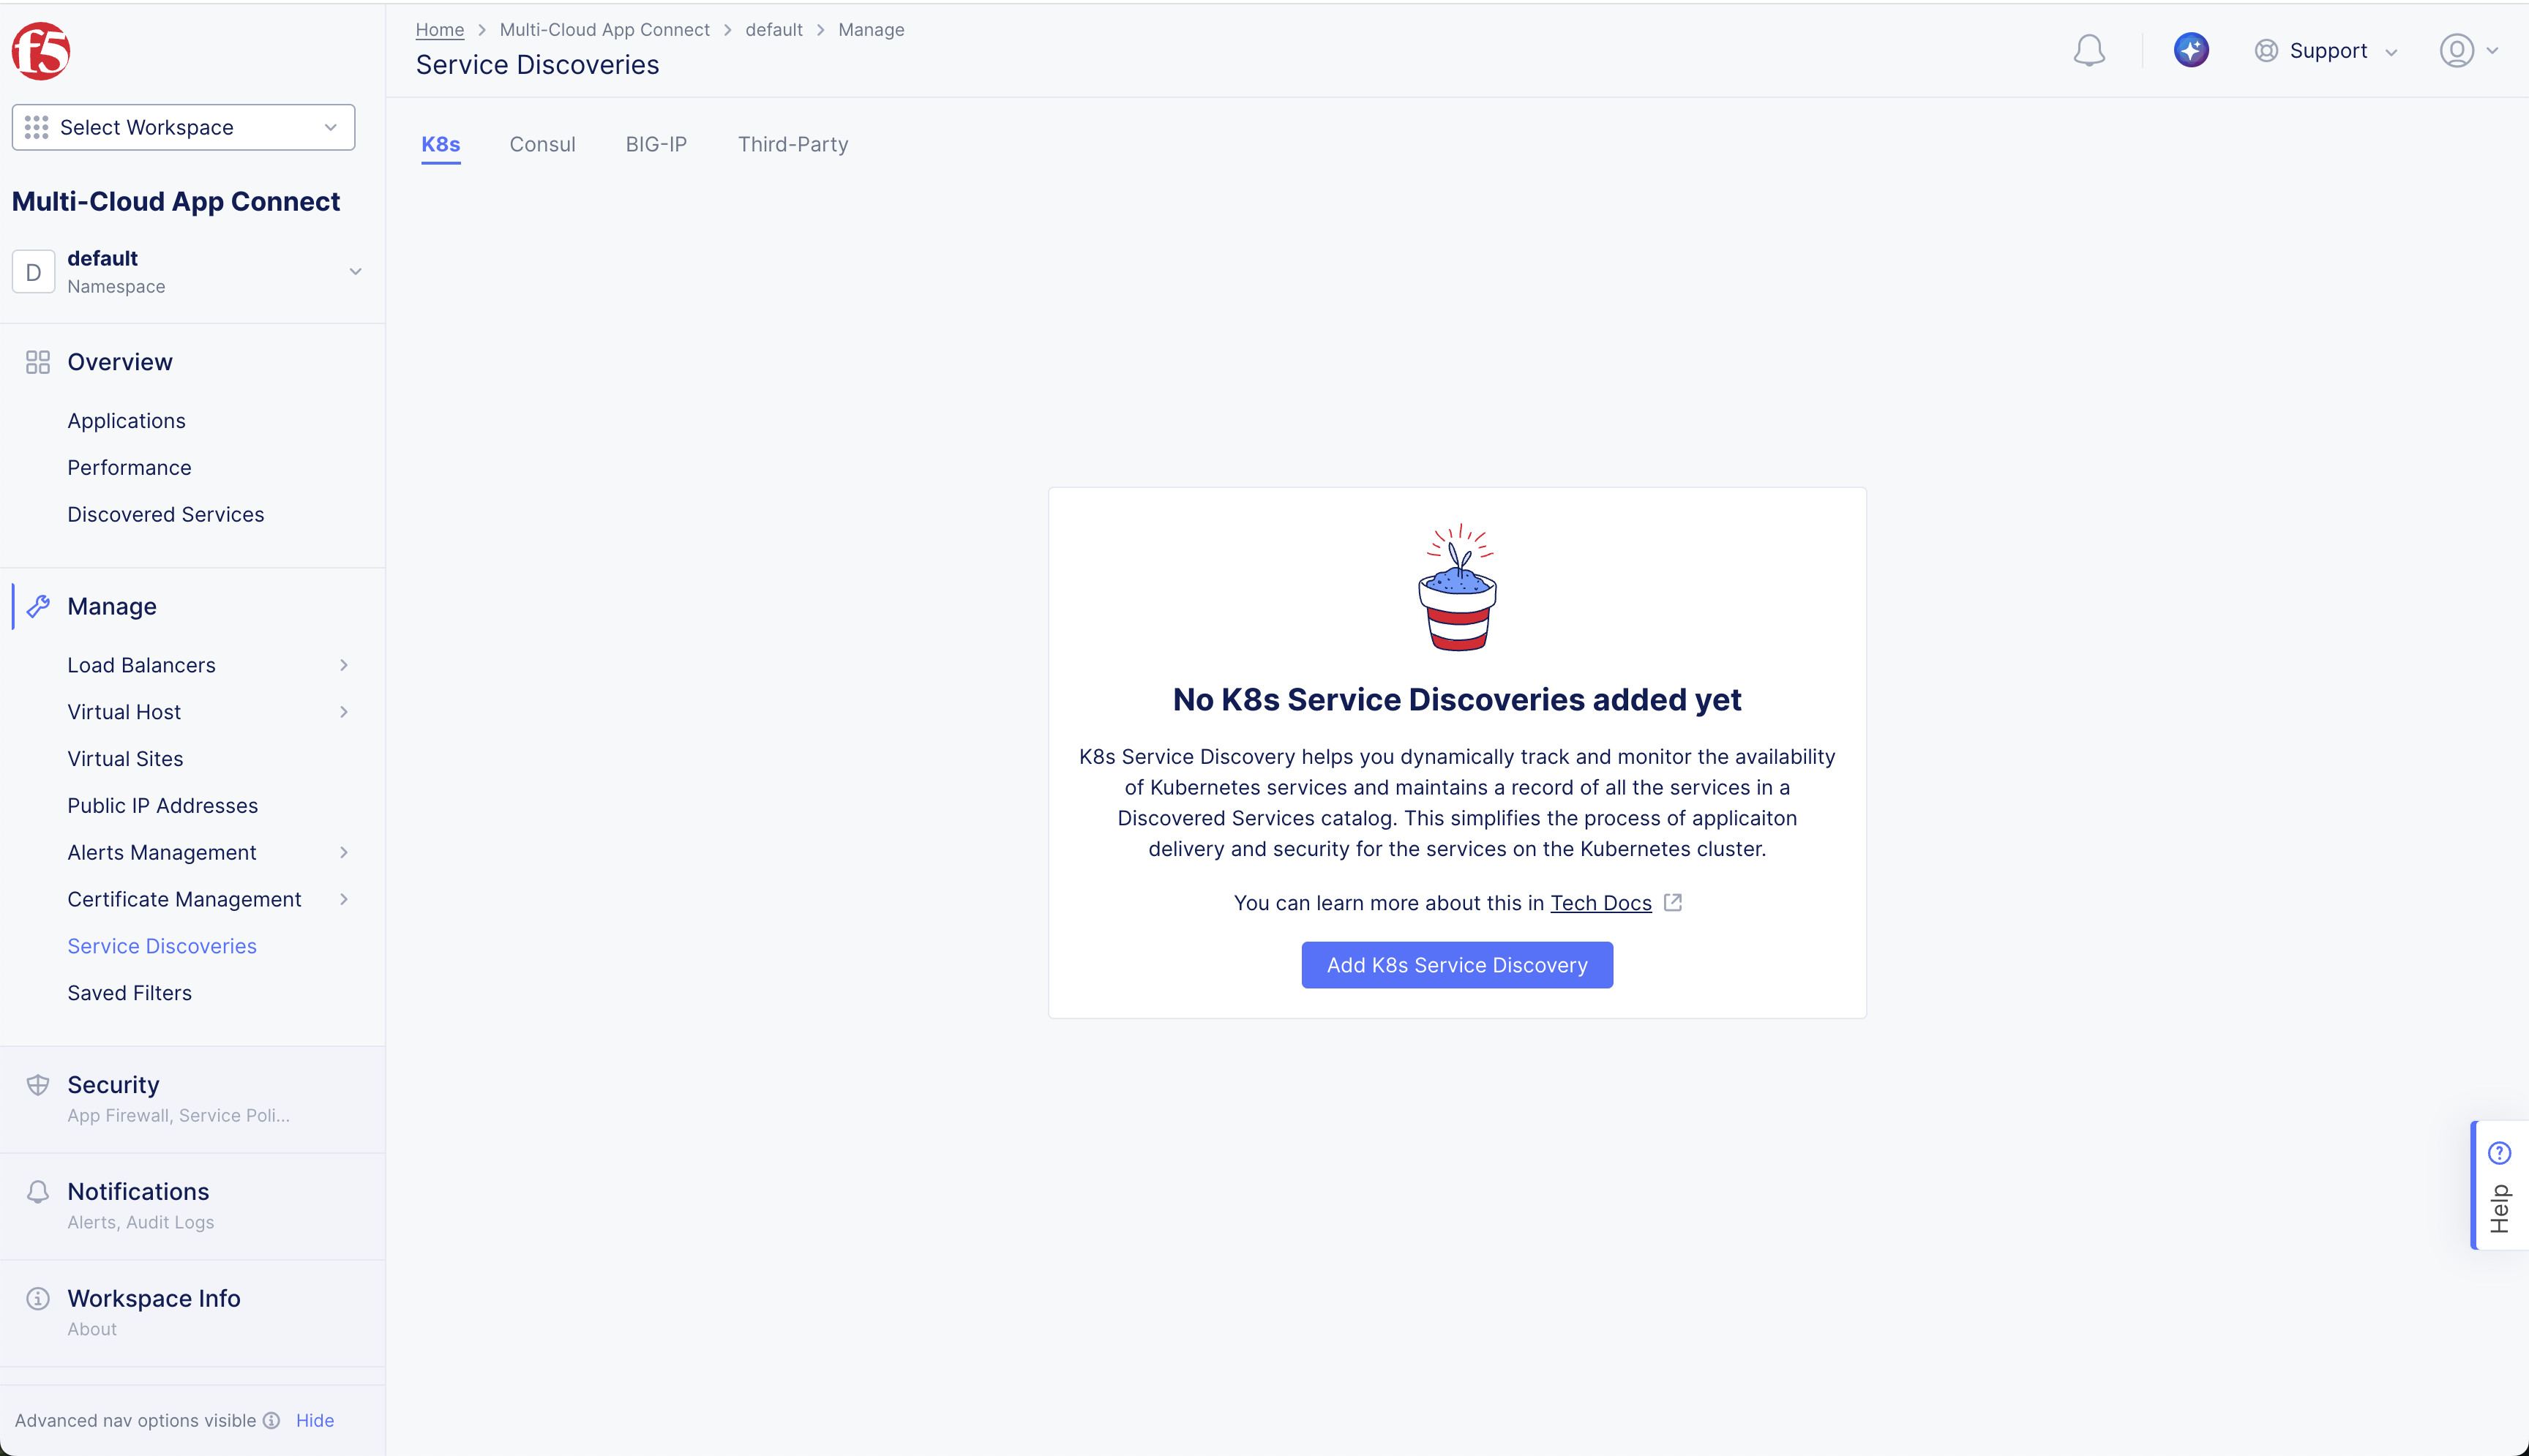
Figure: Create K8s Service Discovery
Step 2: Configure the Metadata.
-
Enter Name.
-
Optionally, Add Labels and enter a Description.
Step 3: Configure where the discovery configuration is applicable.
-
In the Virtual-Site or Site or Network dropdown, select the Site or Virtual Site that must run the discovery process.
-
In the Reference drop-down menu, select the name of the site or virtual site. The Kubernetes API server must be reachable from one of the interfaces of this site.
-
In the Network Type drop-down menu, select the network from which the API server is reachable. (For example, Site Local Inside Network).
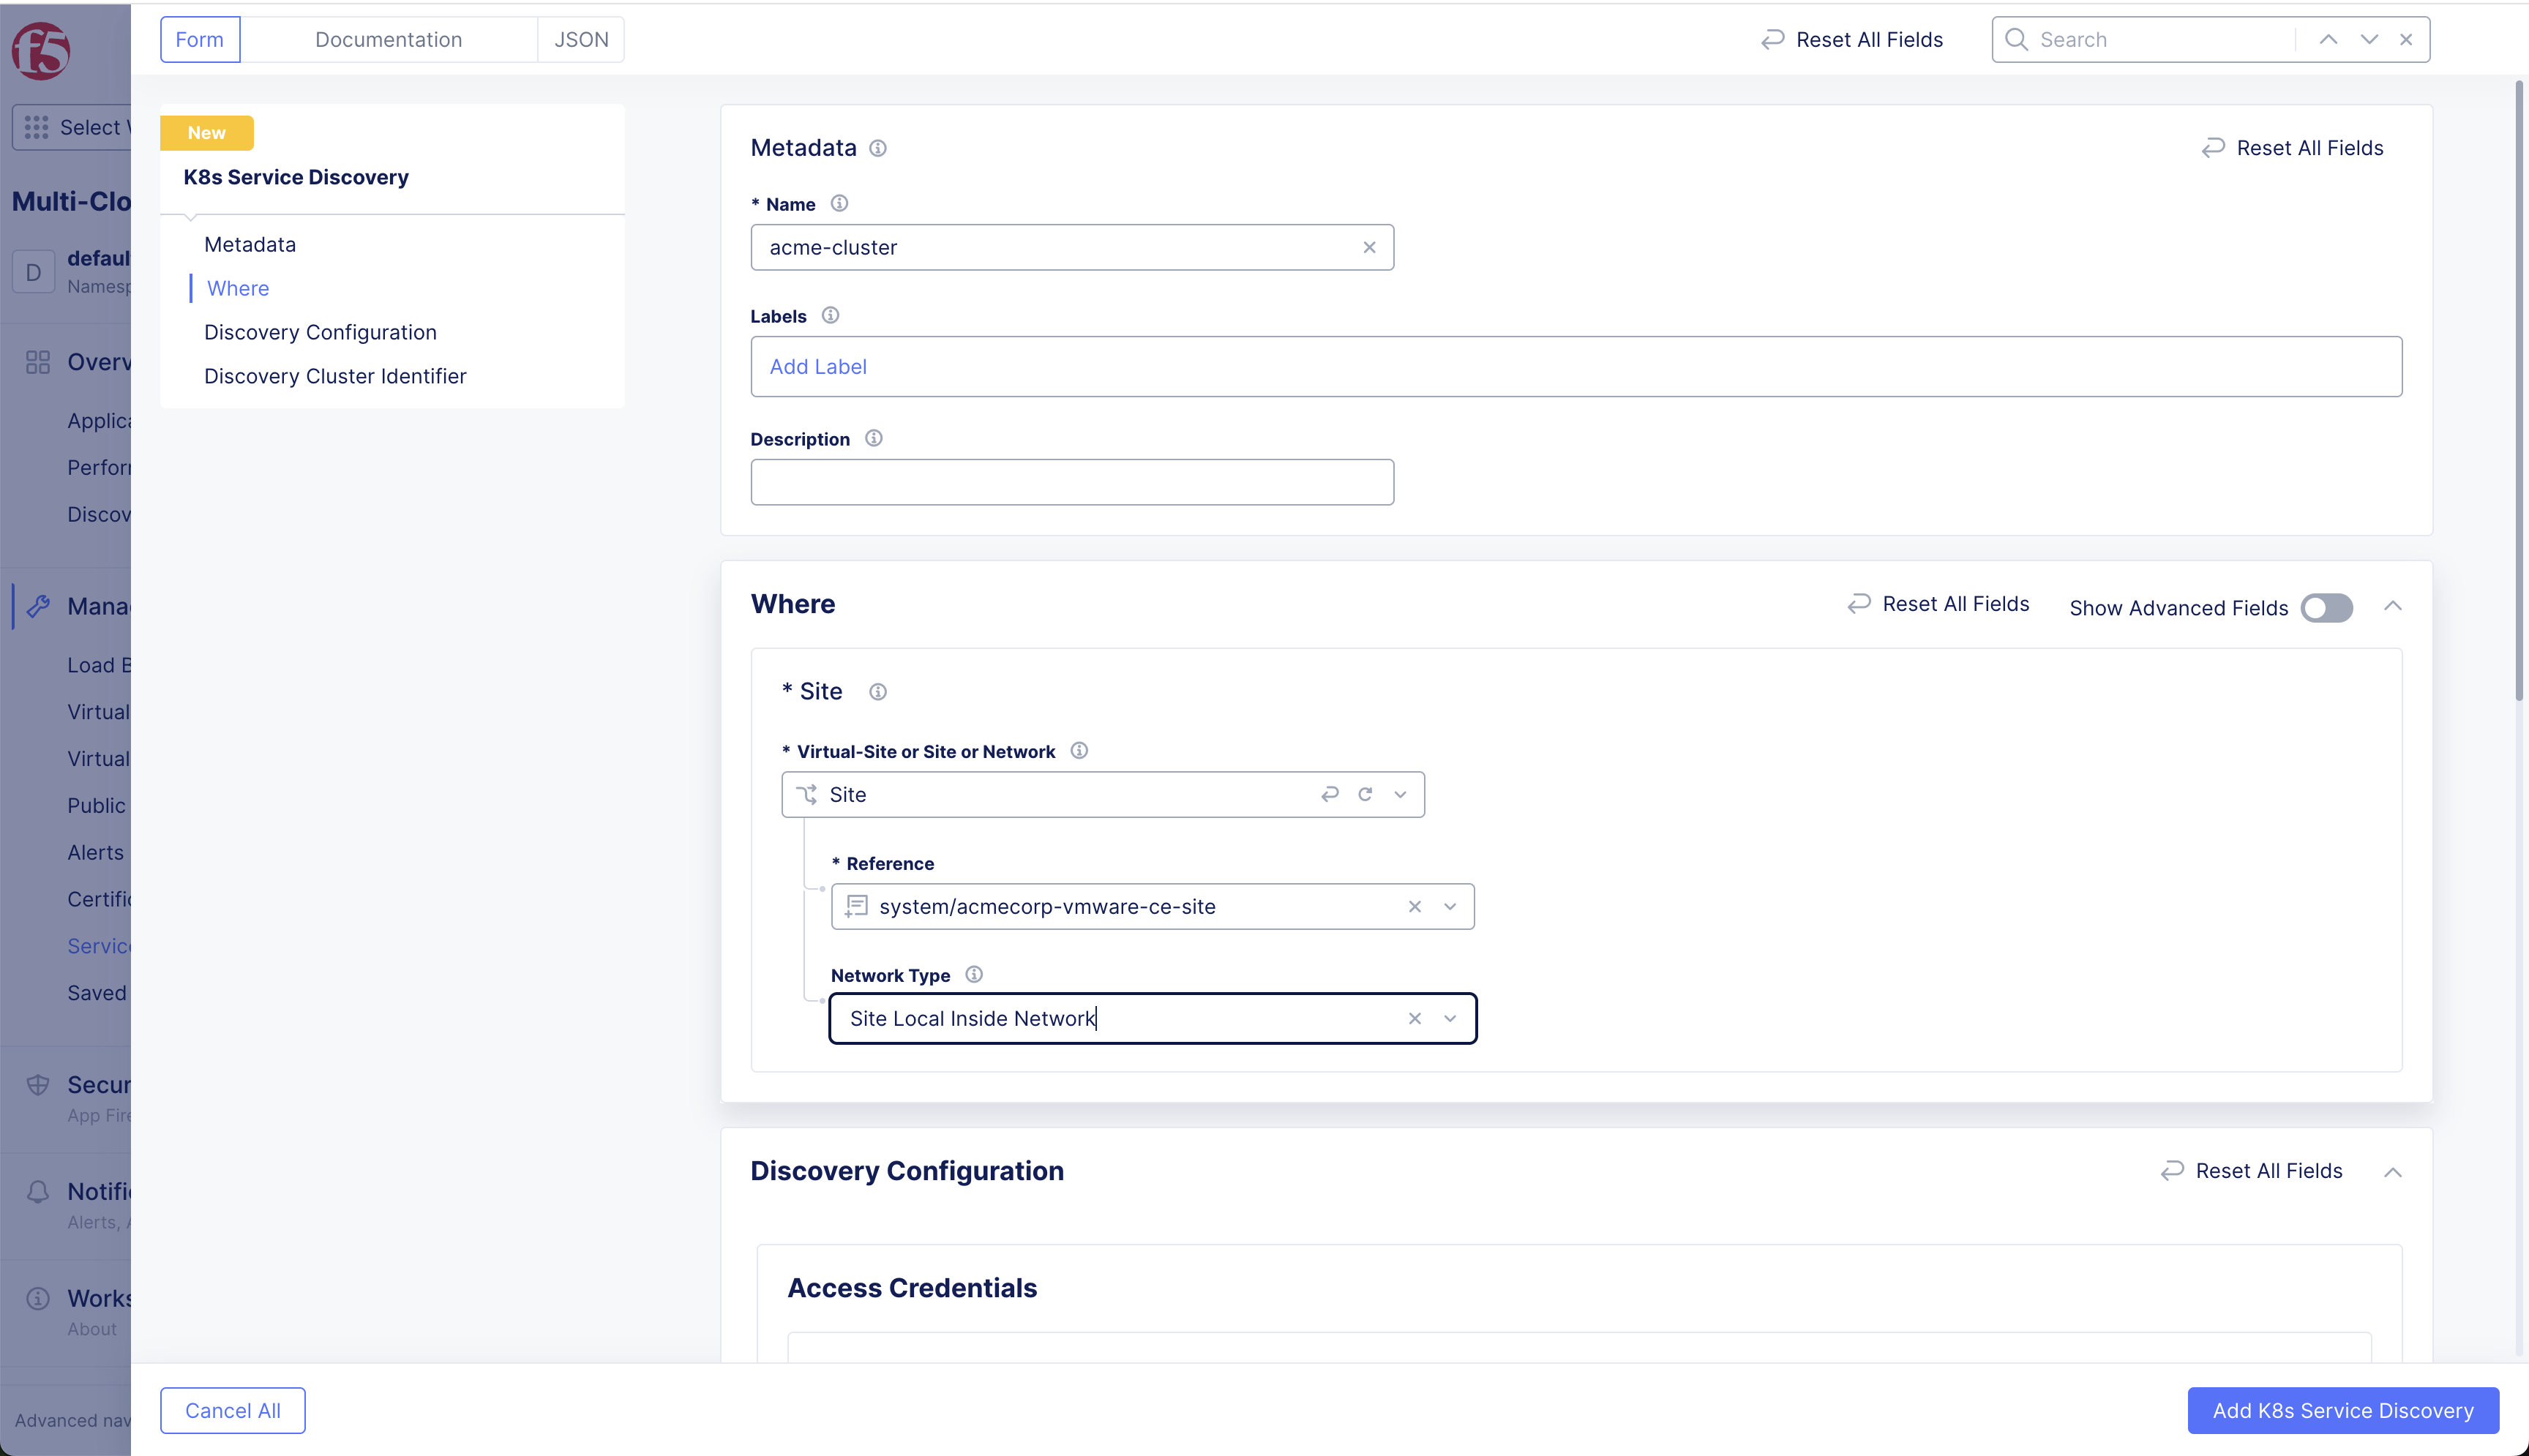
Figure: Service Discovery Config Options
Step 4: Configure access credentials.
-
In the Access Credentials box, from the Select Kubernetes Credentials drop-down menu, select Kubeconfig or TLS parameters for HTTP REST.
-
For the Kubeconfig option, select Configure. Configure secret information, and then click Apply.
-
For the TLS parameters for HTTP REST option, enter the value for the API Server and Port.
-
Select the Configure link in the TLS parameters box.
- Enter the SNI name.
- In the Server Parameters box, configure the SNI name and Server CA Certificates.
- In the Client Parameters box, configure the Client Certificate encoded in PEM or Base64 format and the Client Private Key.
- Select Apply.
-
In the Kubernetes POD network reachability drop-down menu, select one of the following options:
- Select Kubernetes POD is isolated if CNI does not make Pods routable outside the k8s cluster.
- Select Kubernetes POD reachable if CNI makes Pods routable outside the k8s cluster.
Note: When you select the Kubernetes POD is isolated option, only NodePort type discovered services can be configured as endpoints in the Origin pool, as Pod IPs are not reachable from the CE site. When Kubernetes POD reachable is selected, ClusterIP type services can be configured as endpoints in the Origin pool, as Pod IPs are reachable from the CE site.
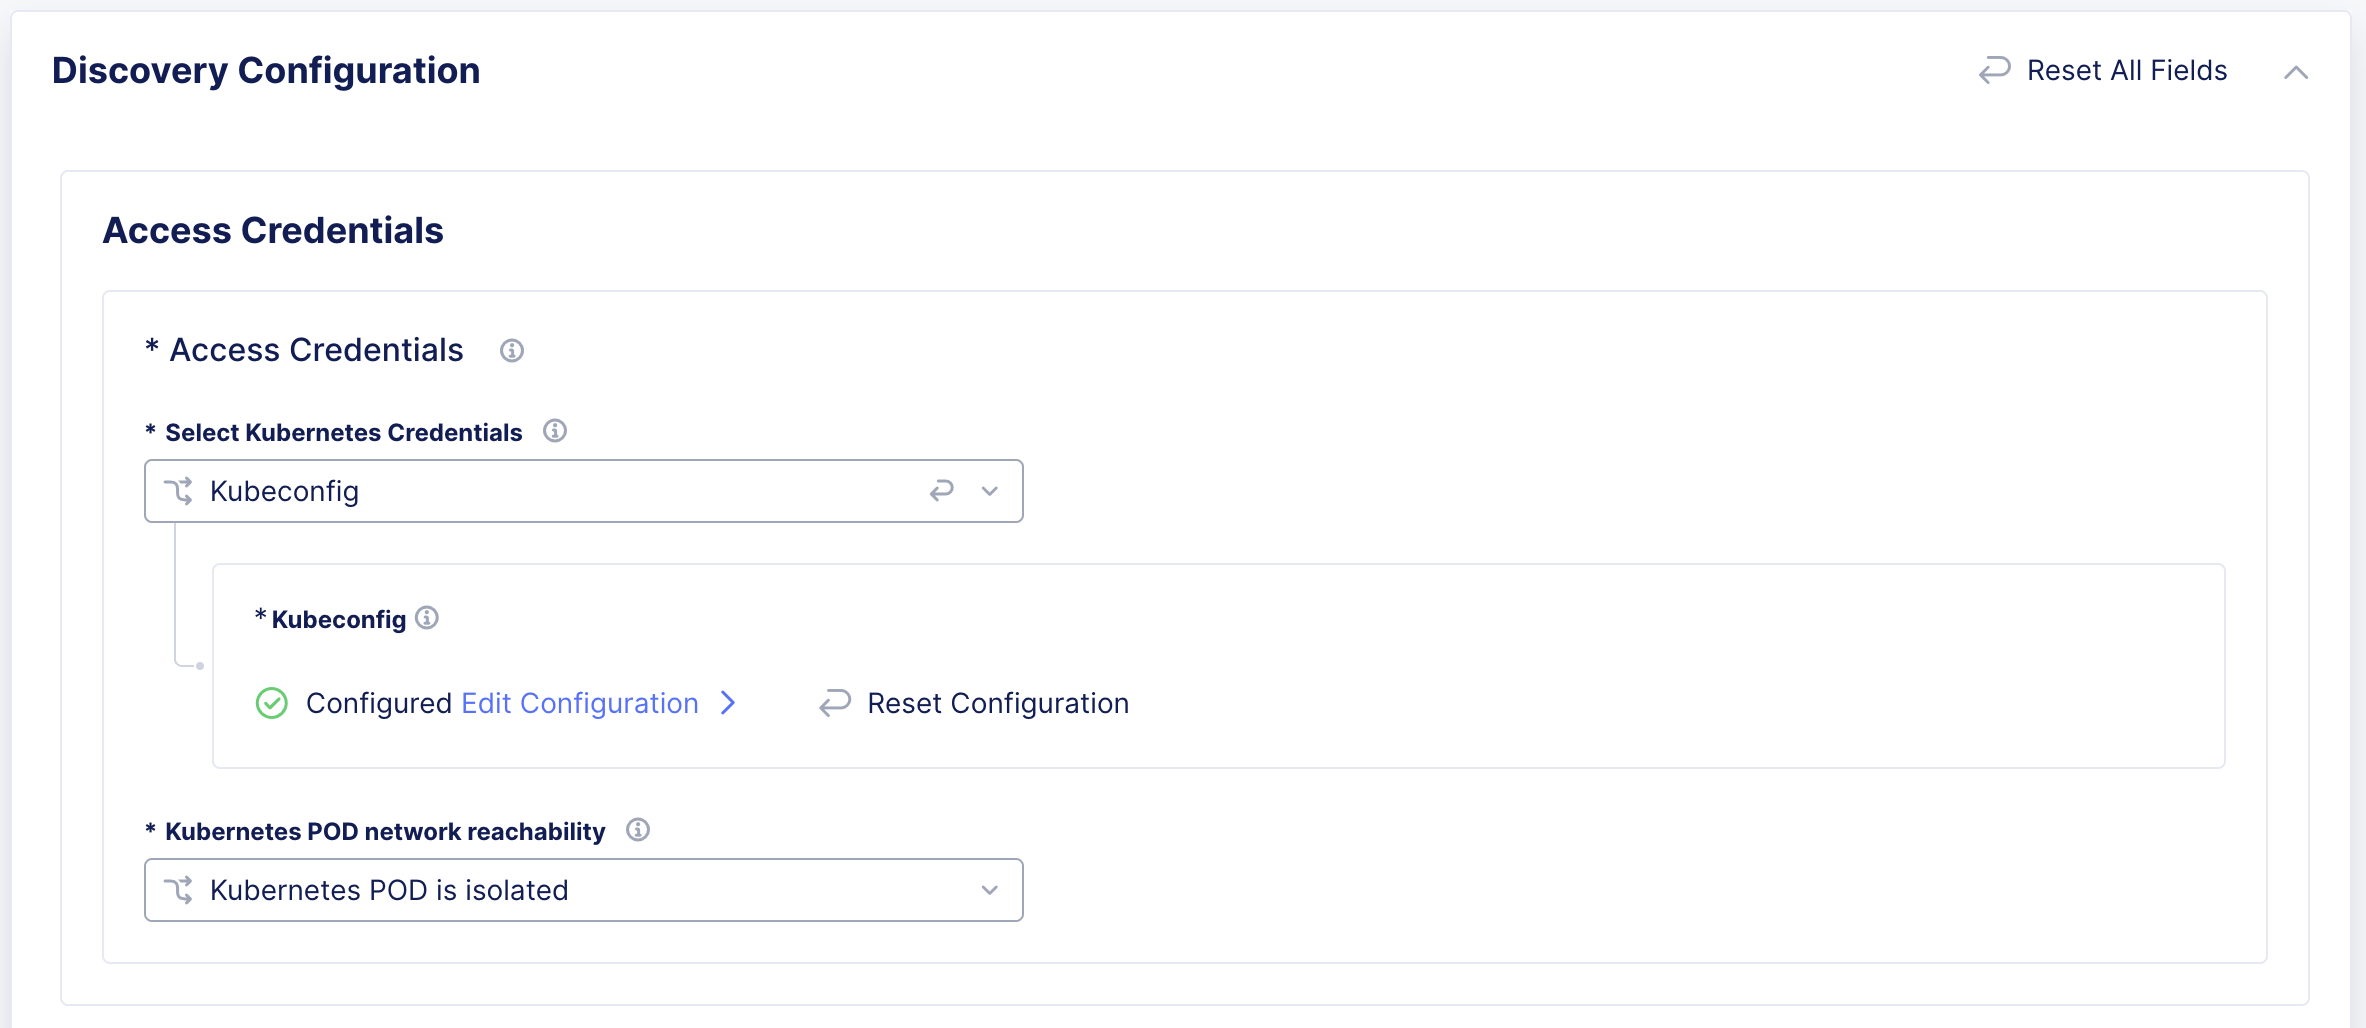
Figure: Configure Access Credentials
Step 5:Configure VIP Publishing
-
Select the VIP Publishing or DNS Delegation drop-down menu option in the VIP Publishing Configuration box.
- Disable VIP Publishing and DNS Delegation.
- Publish the domain to VIP mapping, and enter the Default Namespace.
- Publish the Fully Qualified Domain to VIP mapping.
- DNS Delegation > enter Subdomain > select DNS Mode drop-down menu option: Core DNS or K8s DNS.
Step 6:Configure Namespace Mapping.
-
In the Mapping Preference drop-down, select one of the following options:
-
Automatic: To discover all the services across all namespaces in the k8s cluster to the current app namespace.
-
Custom: To discover all the services from selected namespaces in the k8s cluster to the current namespace. For this, enter the name of the k8s namespace (For example, ‘default’) or a regular expression to match multiple namespaces (For example, ‘prod.*’)
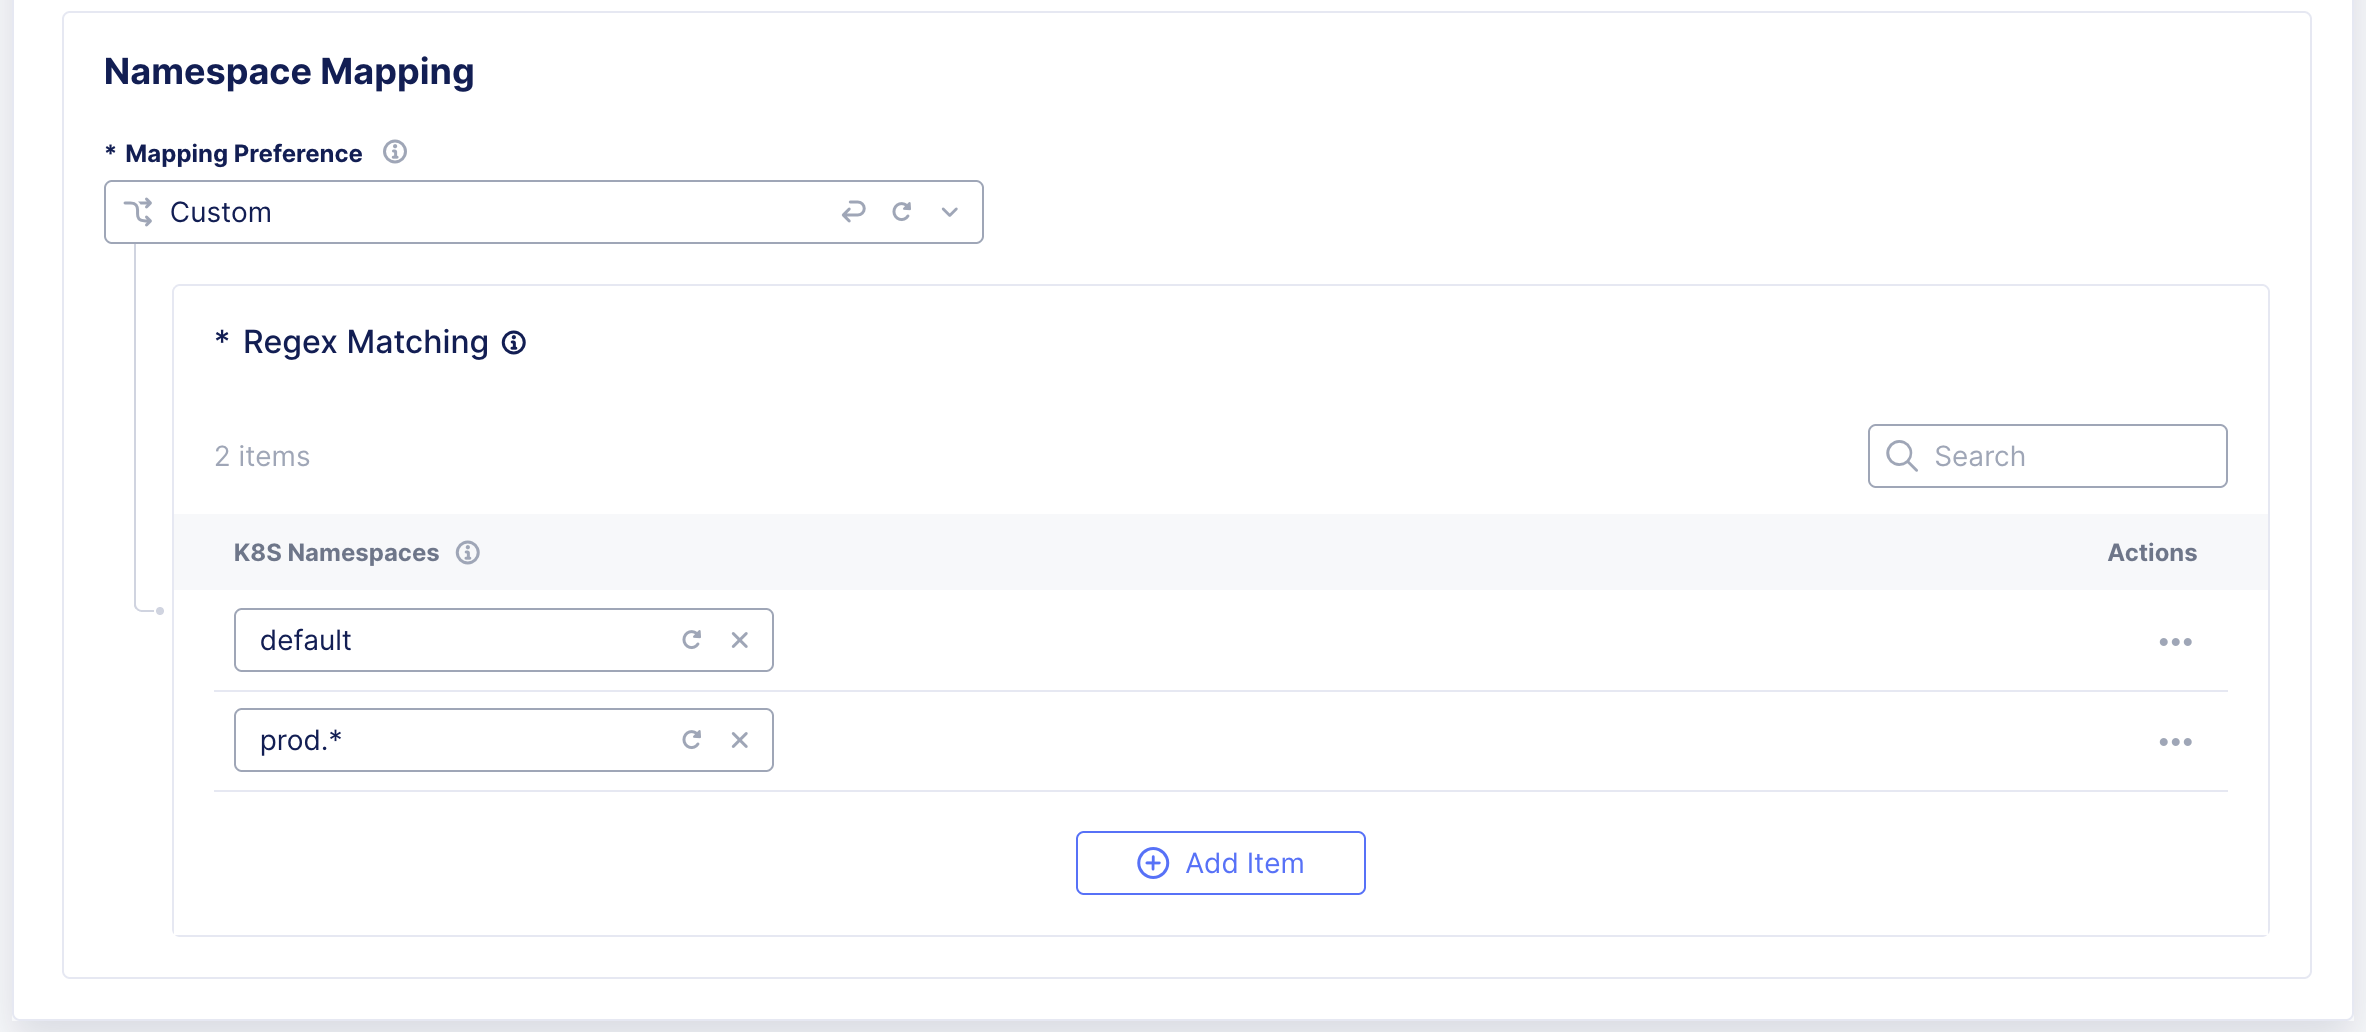
Figure: Configure Namespace Mapping
Step 7: Configure the cluster identifier.
From the Select Discovery Cluster Identifier menu, select an option:
- No cluster identifier: Default option.
- Discover cluster identifier: Enter the identifier information.

Figure: Discover Cluster Identifier
Note: It is possible for two discovered services from different clusters to share the same name and namespace. To avoid ambiguity when referencing these services in Origin configurations, it is recommended to configure the Discovery Cluster Identifier for each cluster.
Step 8: Complete creating the discovery object.
- Select Save and Exit to create the discovery object.
Create K8s Service Discovery in Shared Configuration
This example shows the Service Discovery setup in Shared Configuration.
Step 1: Create a new service discovery configuration object,
- On the F5 Distributed Cloud Console, navigate to the Shared Configuration workspace.
Figure: Homepage
-
In the left menu, select Manage > Service Discoveries.
-
Select the K8s tab.
-
Select Add K8s Service Discovery.
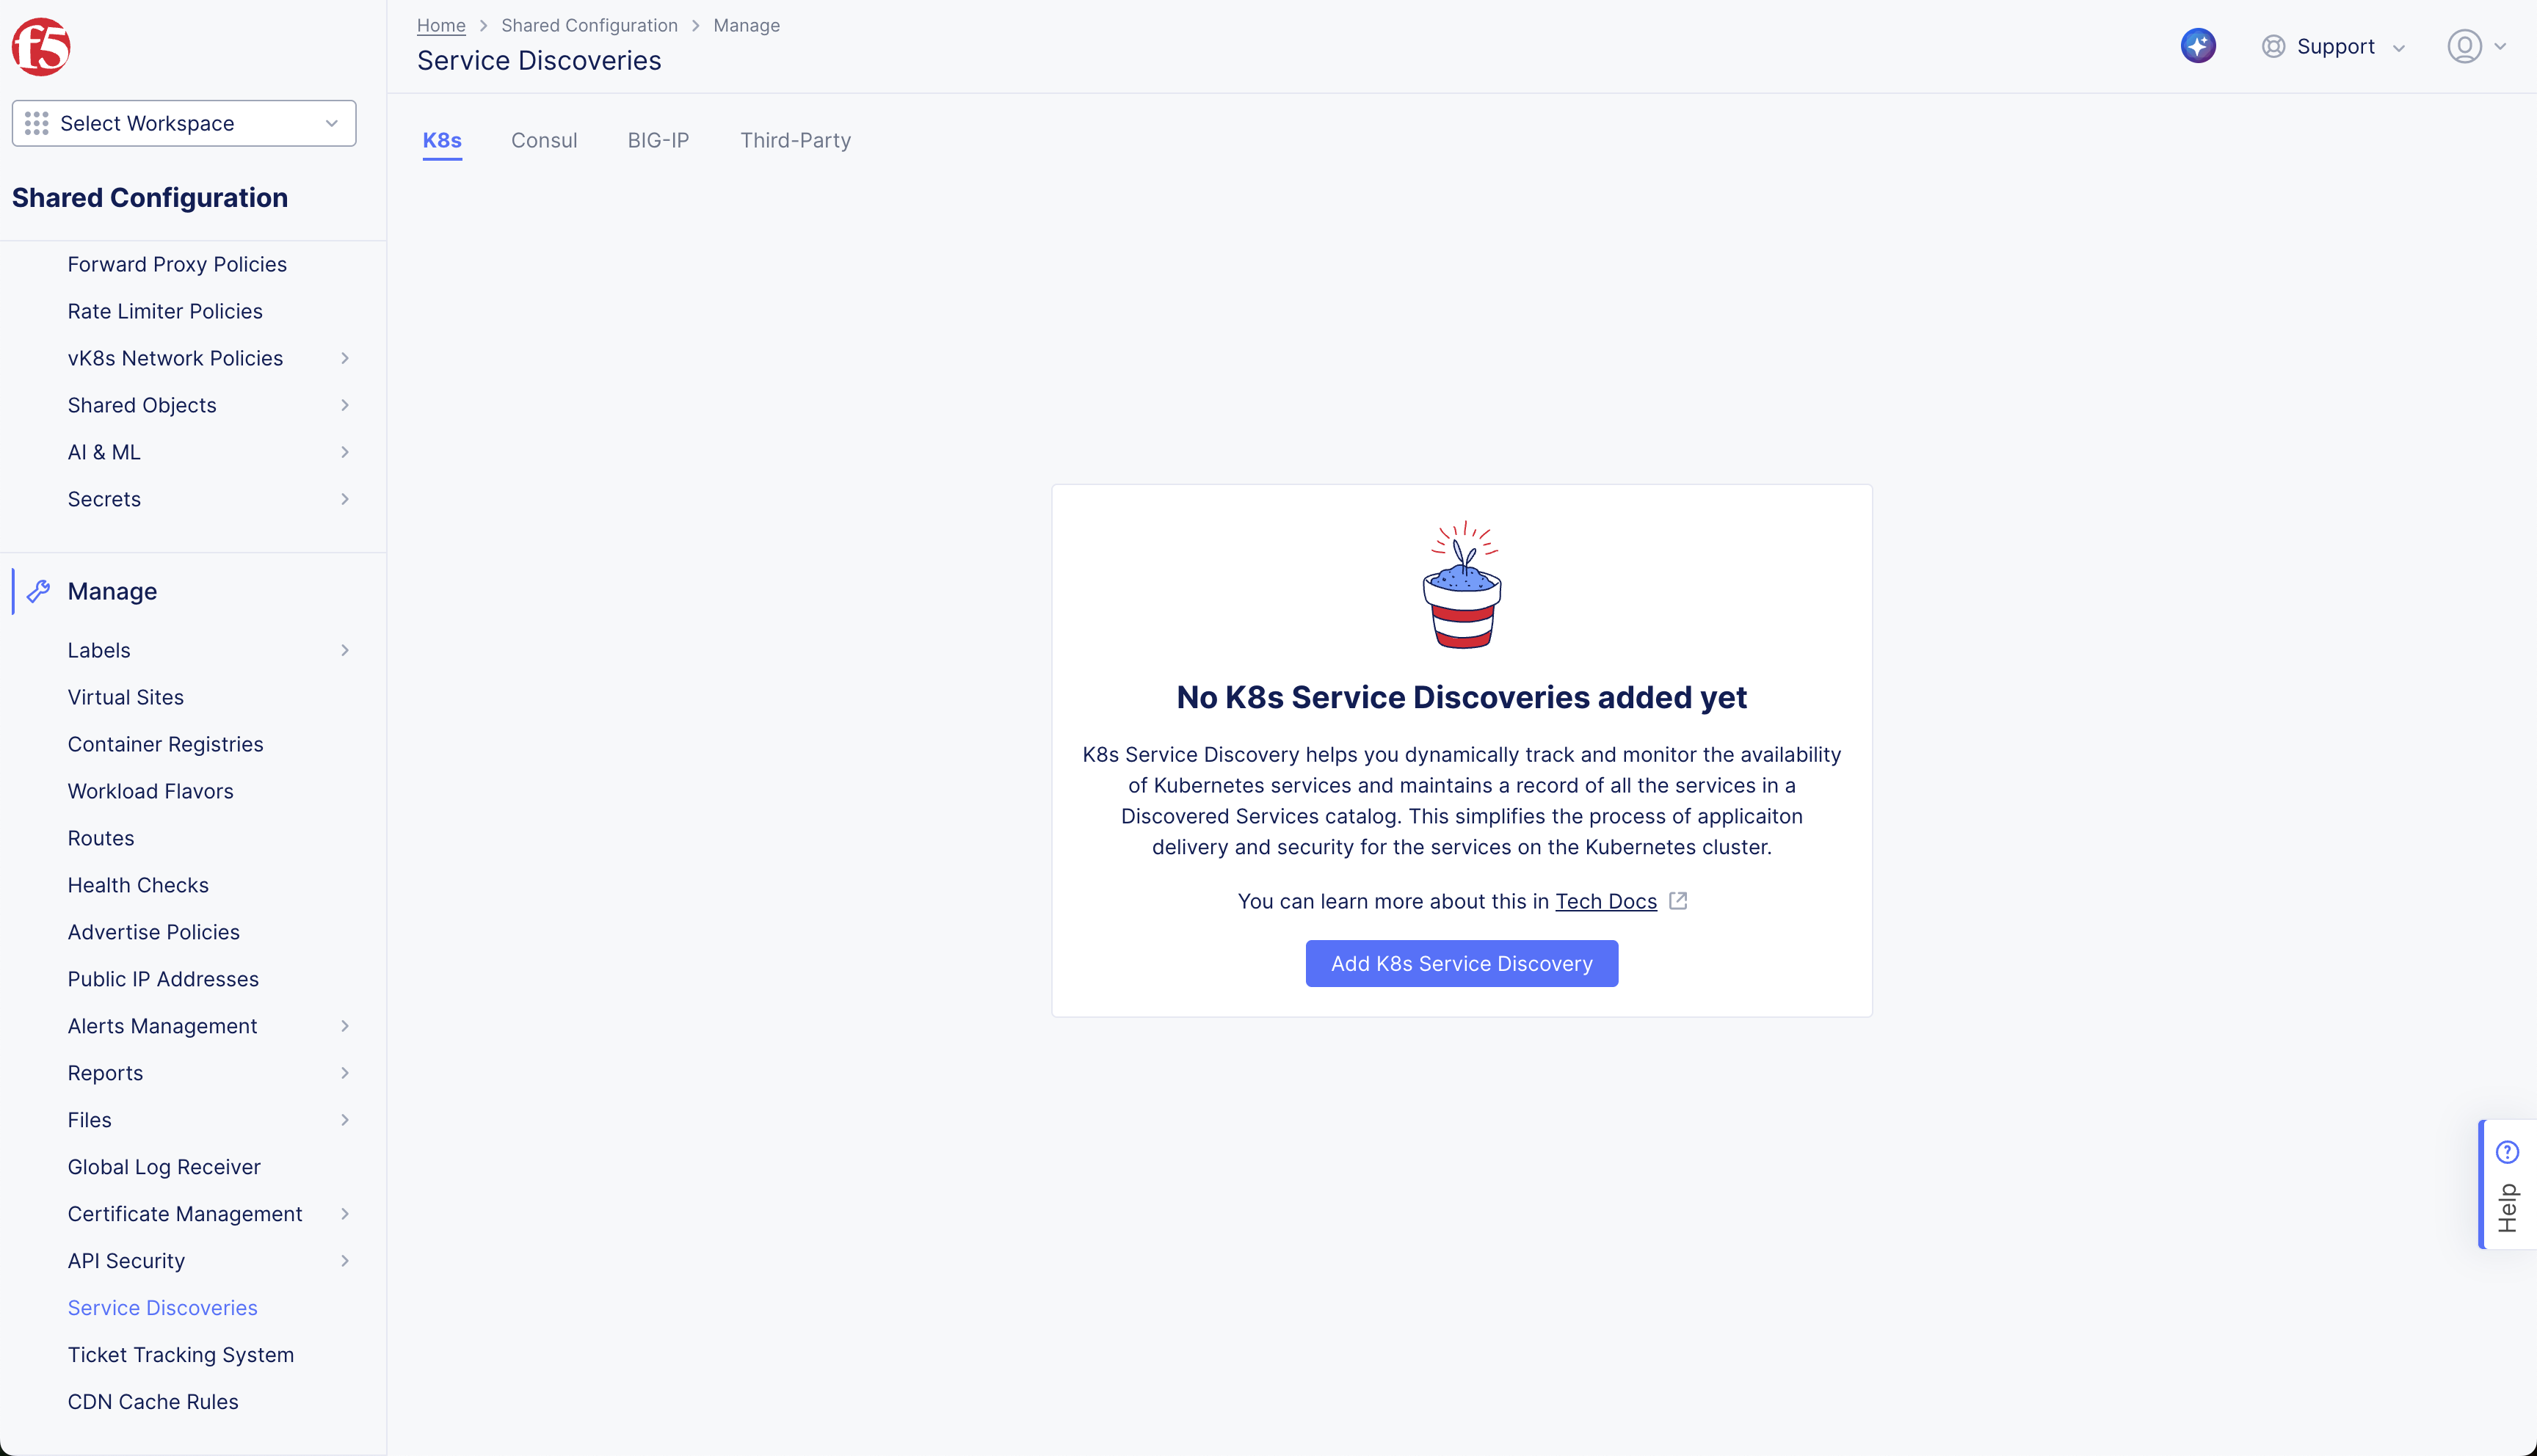
Figure: Create K8s Service Discovery
Step 2: Configure the Metadata.
-
Enter Name.
-
Optionally, Add Labels and enter a Description.
Step 3: Configure where the discovery configuration is applicable.
-
In the Virtual-Site or Site or Network dropdown, select the Site or Virtual Site that must run the discovery process.
-
In the Reference drop-down menu, select the name of the site or virtual site. The Kubernetes API server must be reachable from one of the interfaces of this site.
-
In the Network Type drop-down menu, select the network from which the API server is reachable. (For example, Site Local Inside Network).
Figure: Service Discovery Config Options
Step 4: Configure access credentials.
-
In the Access Credentials box, from the Select Kubernetes Credentials drop-down menu, select Kubeconfig or TLS parameters for HTTP REST.
-
For the Kubeconfig option, select Configure. Configure secret information, and then click Apply.
-
For the TLS parameters for HTTP REST option, enter the value for the API Server and Port.
-
Select the Configure link in the TLS parameters box.
- Enter the SNI name.
- In the Server Parameters box, configure the SNI name and Server CA Certificates.
- In the Client Parameters box, configure the Client Certificate encoded in PEM or Base64 format and the Client Private Key.
- Select Apply.
-
In the Kubernetes POD network reachability drop-down menu, select one of the following options:
- Select Kubernetes POD is isolated if CNI does not make Pods routable outside the k8s cluster.
- Select Kubernetes POD reachable if CNI makes Pods routable outside the k8s cluster.
Note: When you select the Kubernetes POD is isolated option, only NodePort type discovered services can be configured as endpoints in the Origin pool, as Pod IPs are not reachable from the CE site. When Kubernetes POD reachable is selected, ClusterIP type services can be configured as endpoints in the Origin pool, as Pod IPs are reachable from the CE site.
Figure: Configure Access Credentials
Step 5:Configure VIP Publishing
-
Select the VIP Publishing or DNS Delegation drop-down menu option in the VIP Publishing Configuration box.
- Disable VIP Publishing and DNS Delegation.
- Publish the domain to VIP mapping, and enter the Default Namespace.
- Publish the Fully Qualified Domain to VIP mapping.
- DNS Delegation > enter Subdomain > select DNS Mode drop-down menu option: Core DNS or K8s DNS.
Step 6:Configure Namespace Mapping.
- In the Mapping Preference drop-down, only Custom mapping is allowed for the shared namespace. This can be used to discover all the services from selected namespaces in the K8s cluster to the corresponding app namespaces.
For this, enter the name of the K8s Namespace (For example, ‘default’) or a regular expression to match multiple namespaces (For example, ‘prod.*’) and select the corresponding F5® Distributed Cloud Services App Namespace to which this must be mapped.

Figure: Configure Namespace Mapping
Step 7: Configure the cluster identifier.
From the Select Discovery Cluster Identifier menu, select an option:
- No cluster identifier: Default option.
- Discover cluster identifier: Enter the identifier information.
Note: It is possible for two discovered services from different clusters to share the same name and namespace. To avoid ambiguity when referencing these services in Origin configurations, it is recommended to configure the Discovery Cluster Identifier for each cluster.
Figure: Discover Cluster Identifier
Step 8: Complete creating the discovery object.
- Select Save and Exit to create the discovery object.
Verify Discovered Services
Verify that the service discovery object is created and discovered services are listed.
Step 1: Verify that the services are discovered.
-
In the Multi-Cloud App Connect workspace, navigate to Manage and select Service Discoveries.
-
Confirm the Service Discovery name (object) you created is in the list.
-
Check the Services column for the number of services discovered. For example, 2 Services.
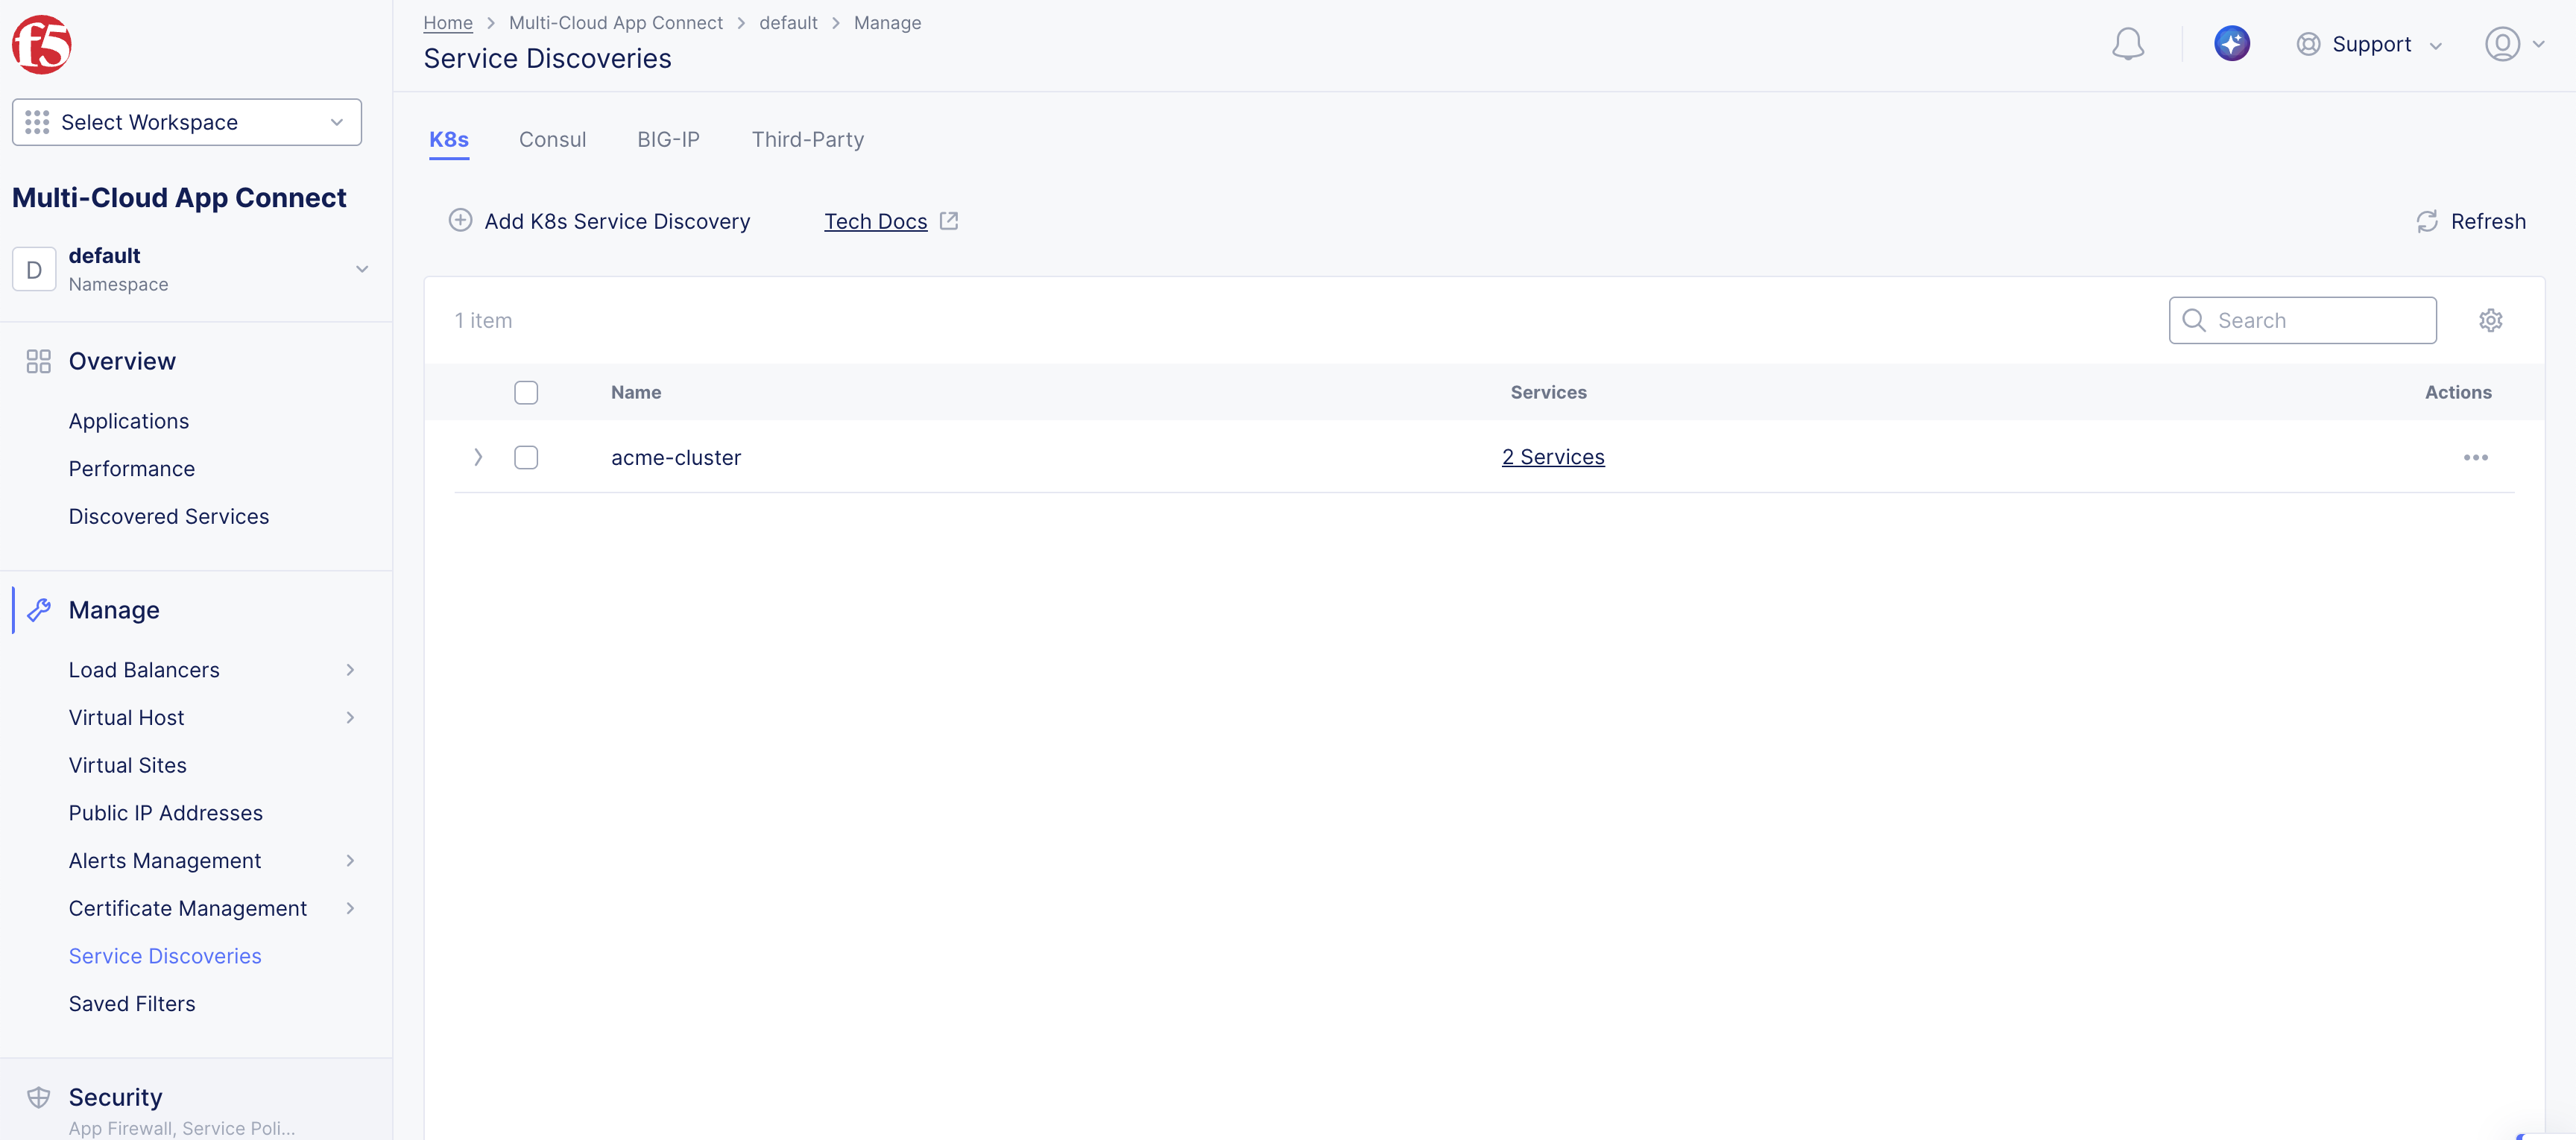
Figure: Service Discovery Created
Step 2: Check the list of services discovered.
-
In the Services column, click the link on the number of discovered service. The page is redirected to Discovered Services.
-
View the details of the discovered services
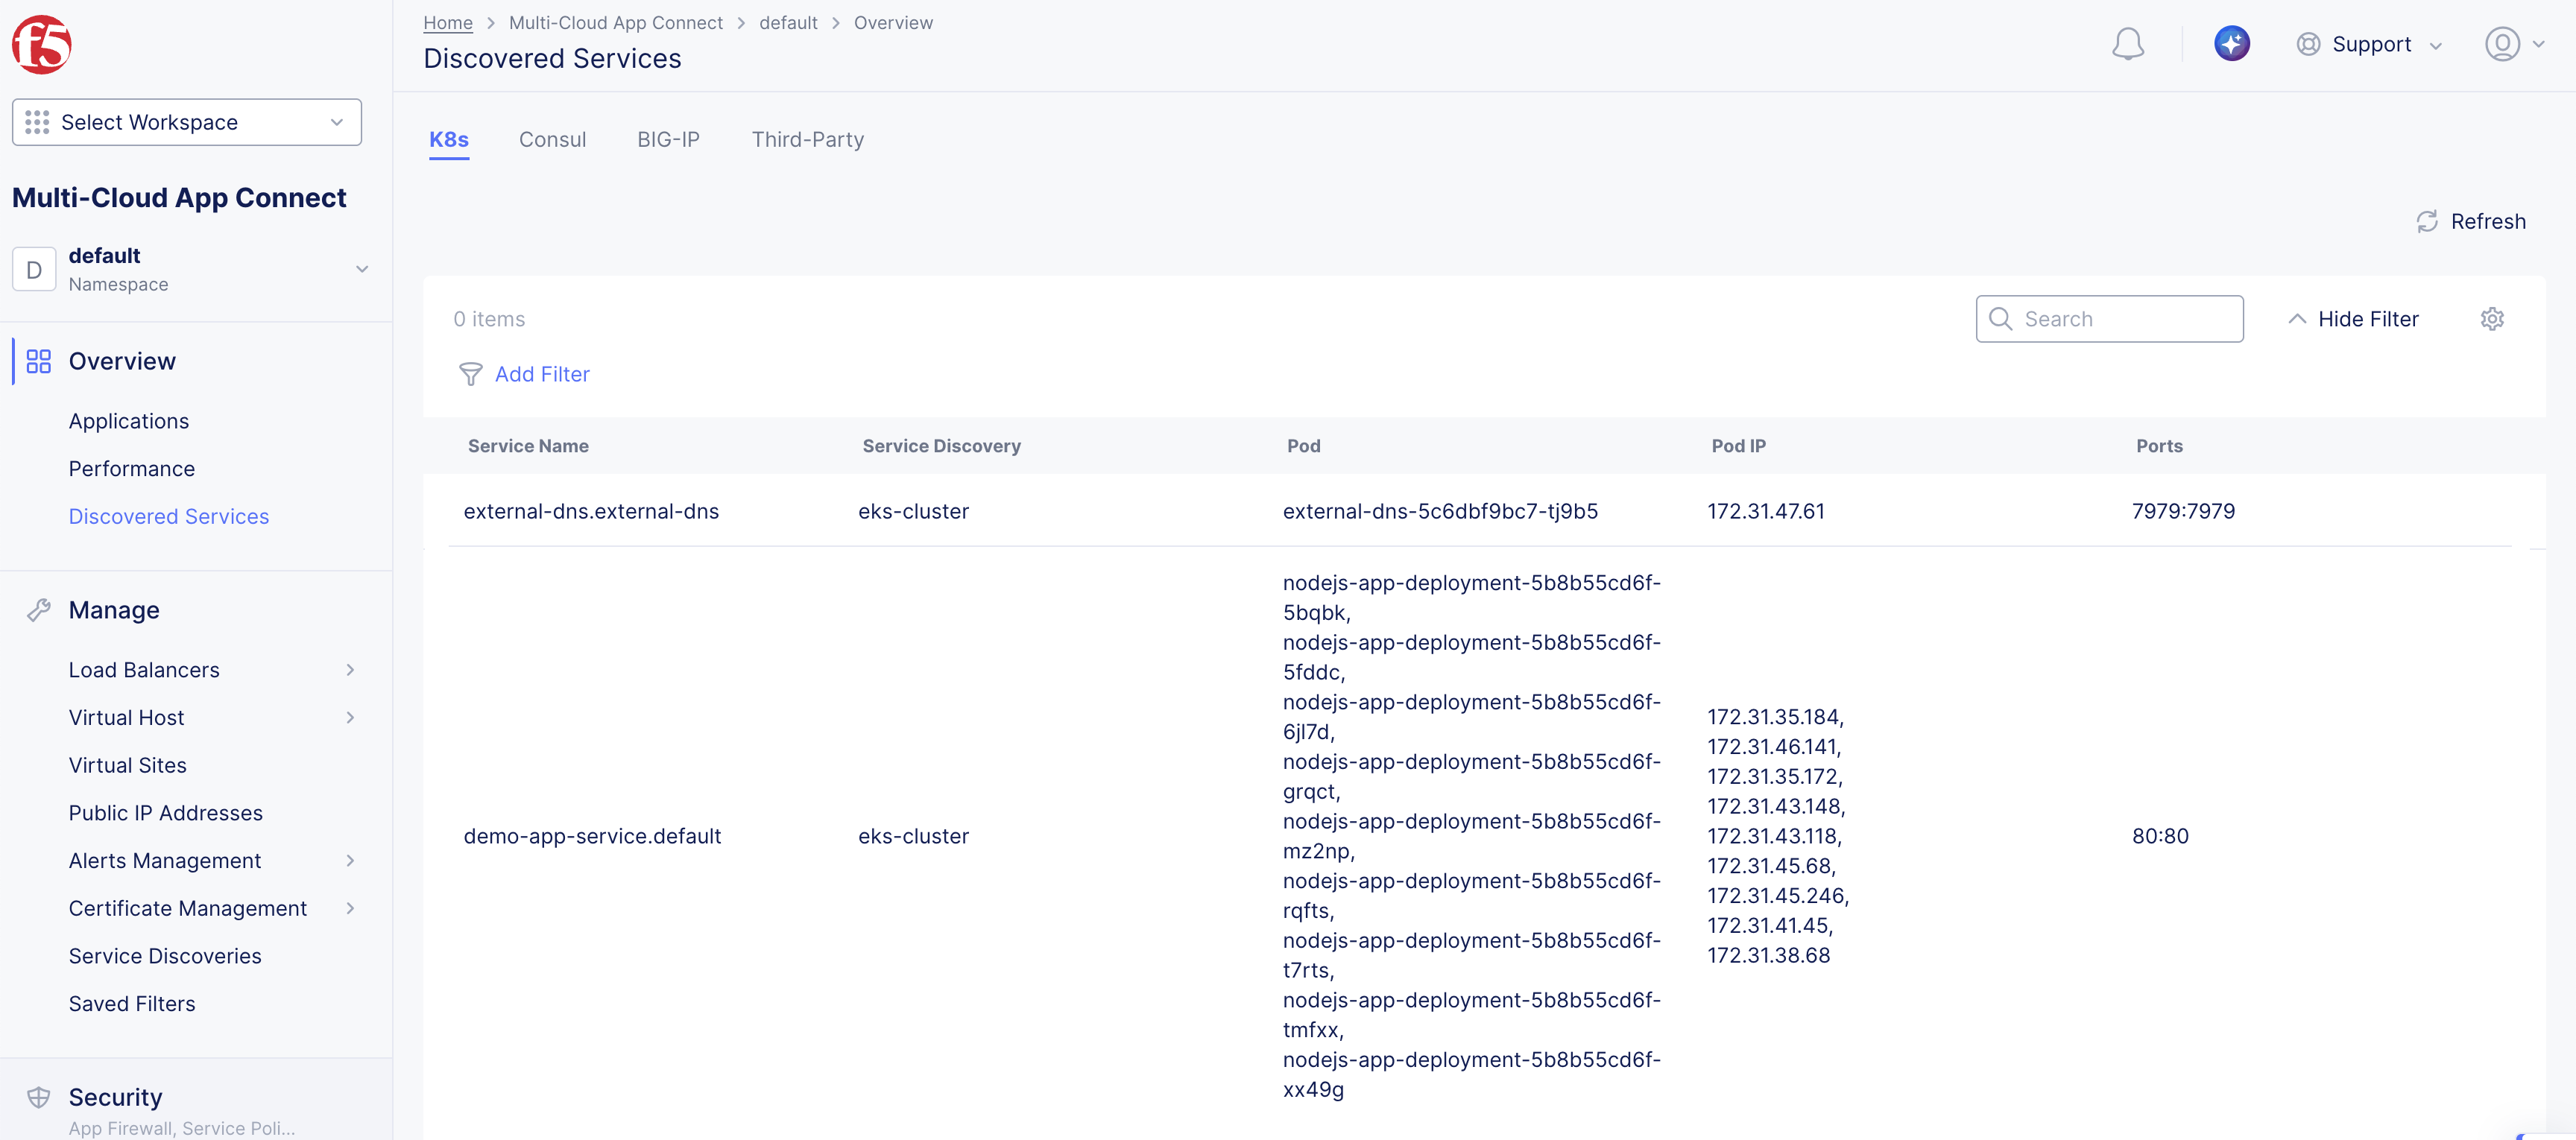
Figure: Discovered Services
Note: For a Service Discovery configured in the Shared Configuration, the value in Services column does not have a link. The discovered services are created in the mapped namespace and users can view them in the Discovered Services dashboard in the Multi-Cloud App Connect workspace when the correct app namespace is selected.
Use Discovered Services
After the service discovery object is created and the services are discovered, you can use it in Origin Pool configurations. This Origin pool object can then be used in a Load Balancer configuration to advertise the Discovered Service to any Site or the internet.
Configure Origin Pool with K8s Service Information
This chapter shows the origin pool creation with K8s service name for the origin server specification. For information, see the Origin Pools guide.
Note: The site associated with the Service Discovery object must match the site specified in the Origin Pool configuration.
Step 1: Start origin pool creation.
-
Select the Multi-Cloud App Connect workspace.
-
Change to your Application Namespace.
-
Select Manage > Load Balancers.
-
Select Origin Pools.
-
Select Add Origin Pool.
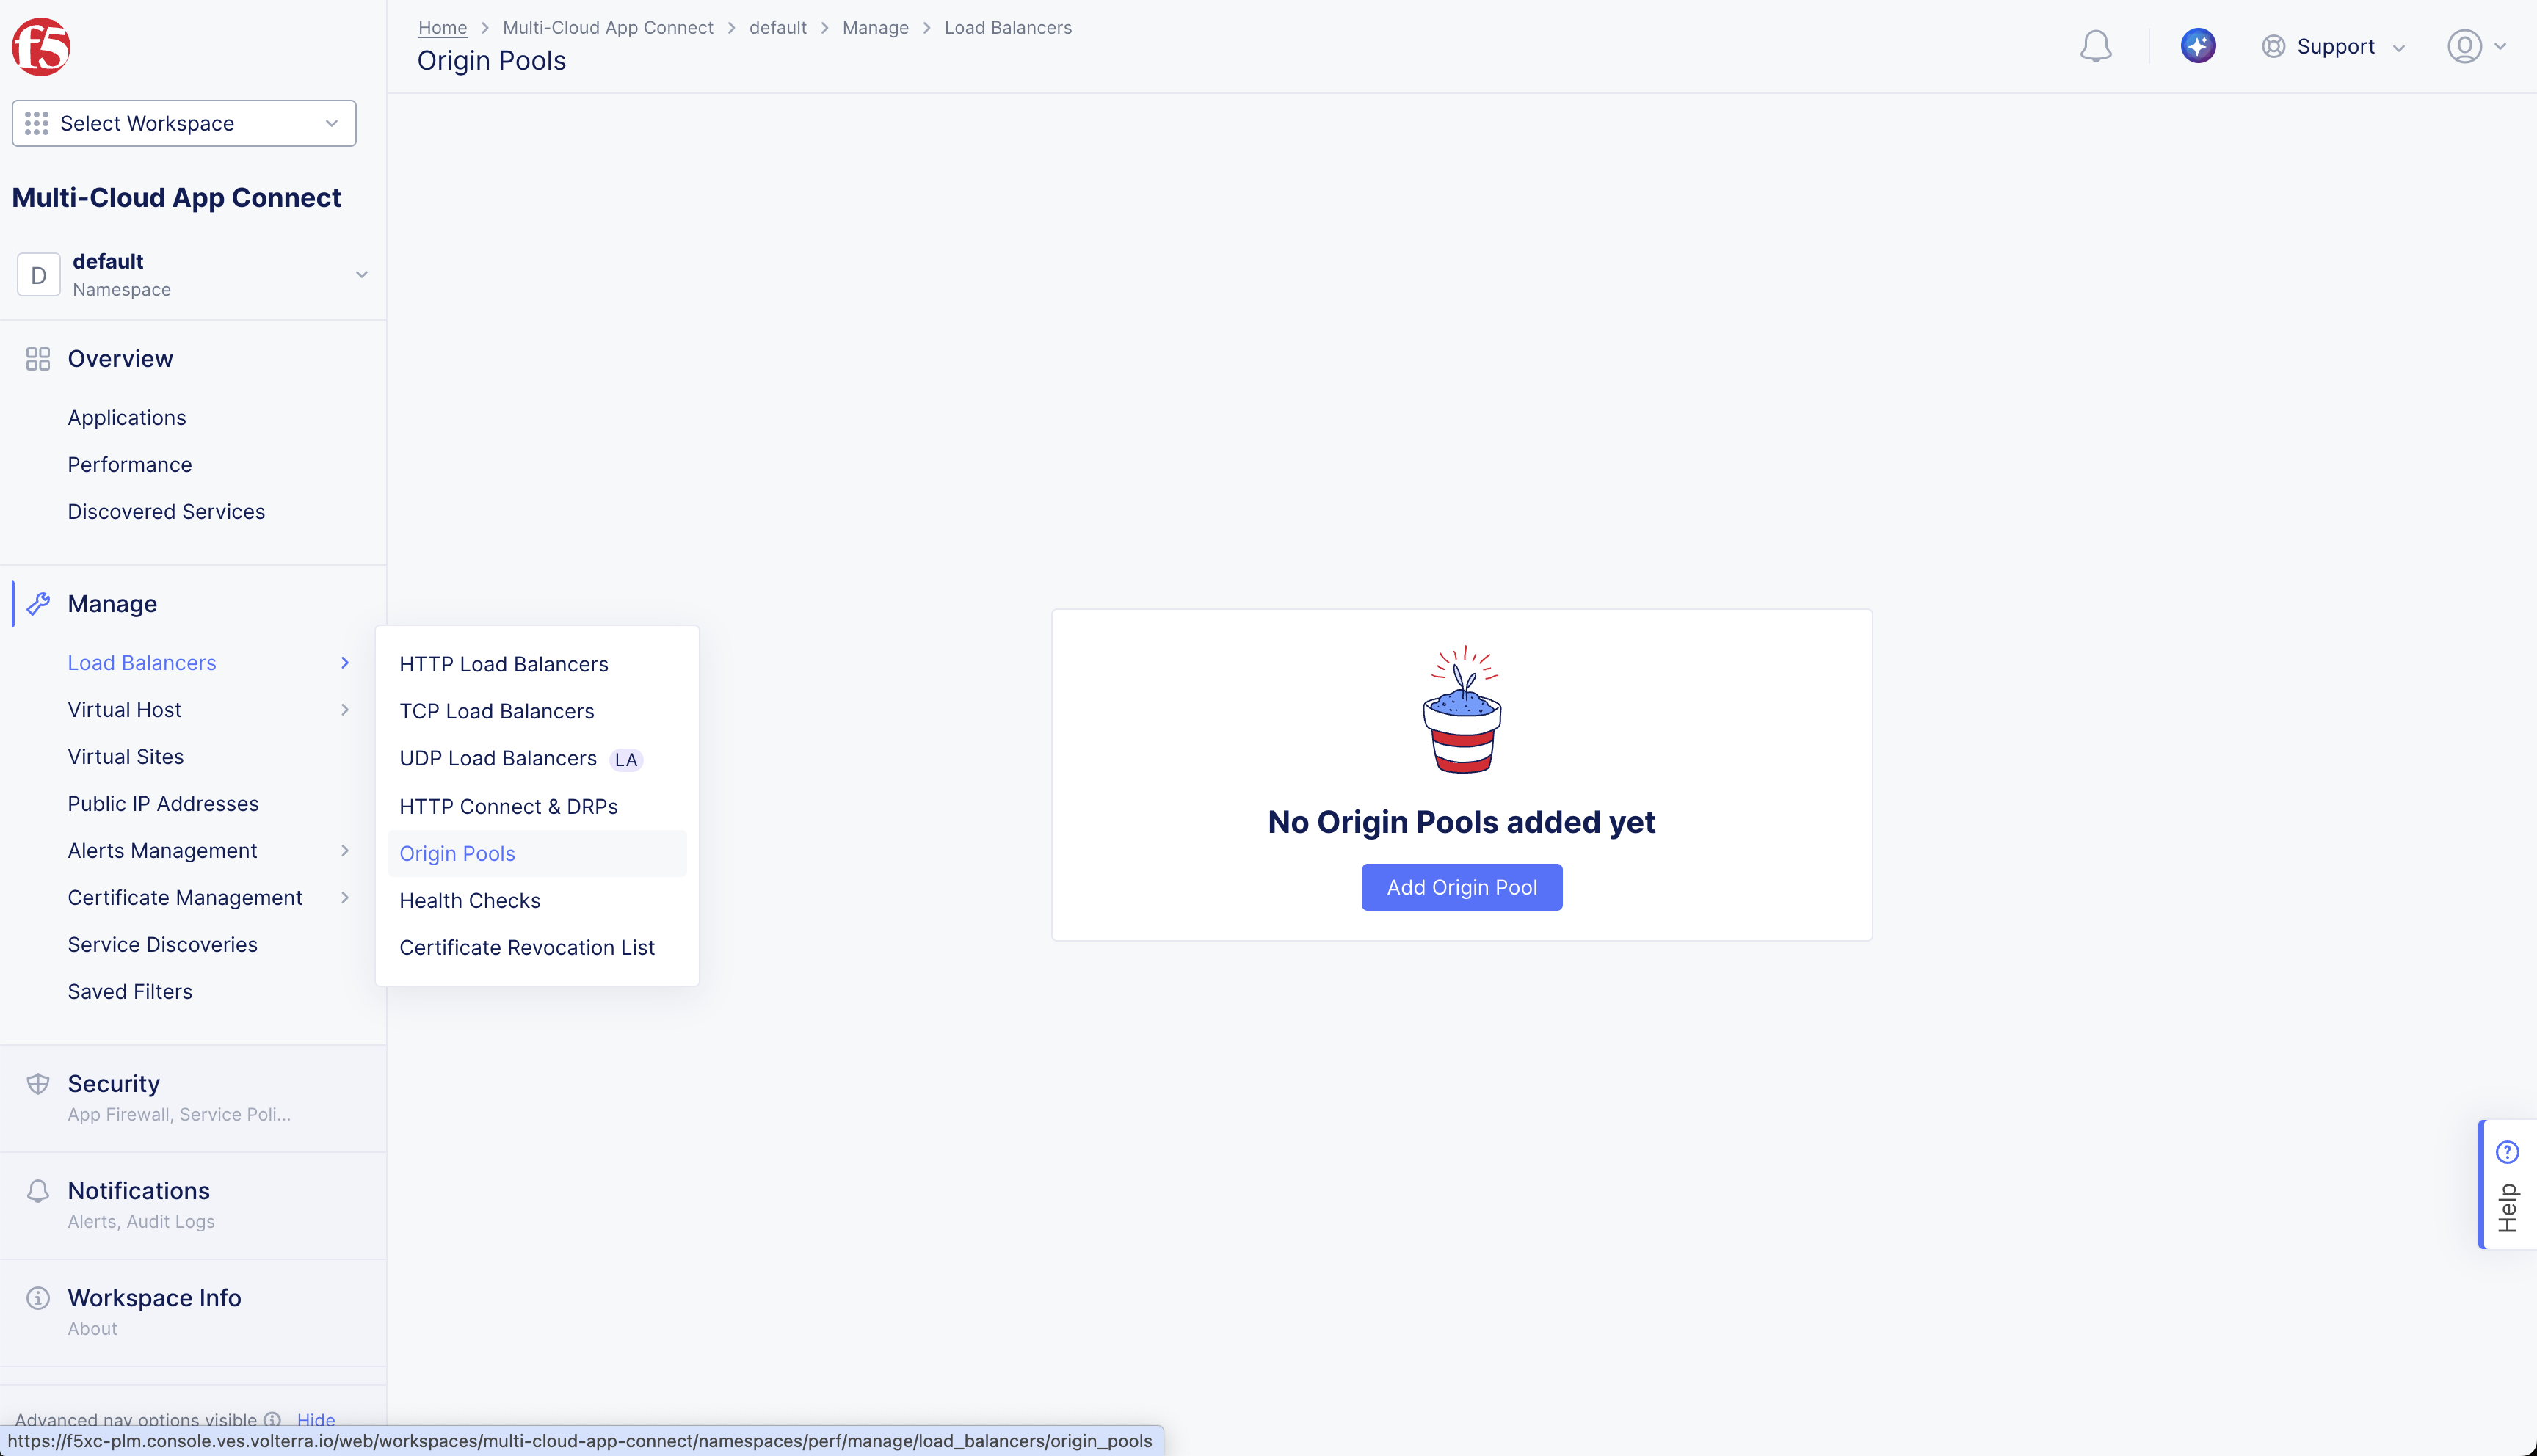
Figure: Create Origin Pool
Step 2: Configure origin server type.
-
Enter Name, enter Labels and Description as needed.
-
In the Origin Servers section, select Add Item.
-
From the Select Type of Origin Server drop-down menu, select the K8s Service Name of Origin Server on given Sites option.
-
In the Service Name field, click See Suggestions and select the name of the service you want to add.
Alternatively, you can type in the name of your service (in the k8s-namespace:cluster-identifier format) in the service-name field. For example: demo-app-service.default:demo
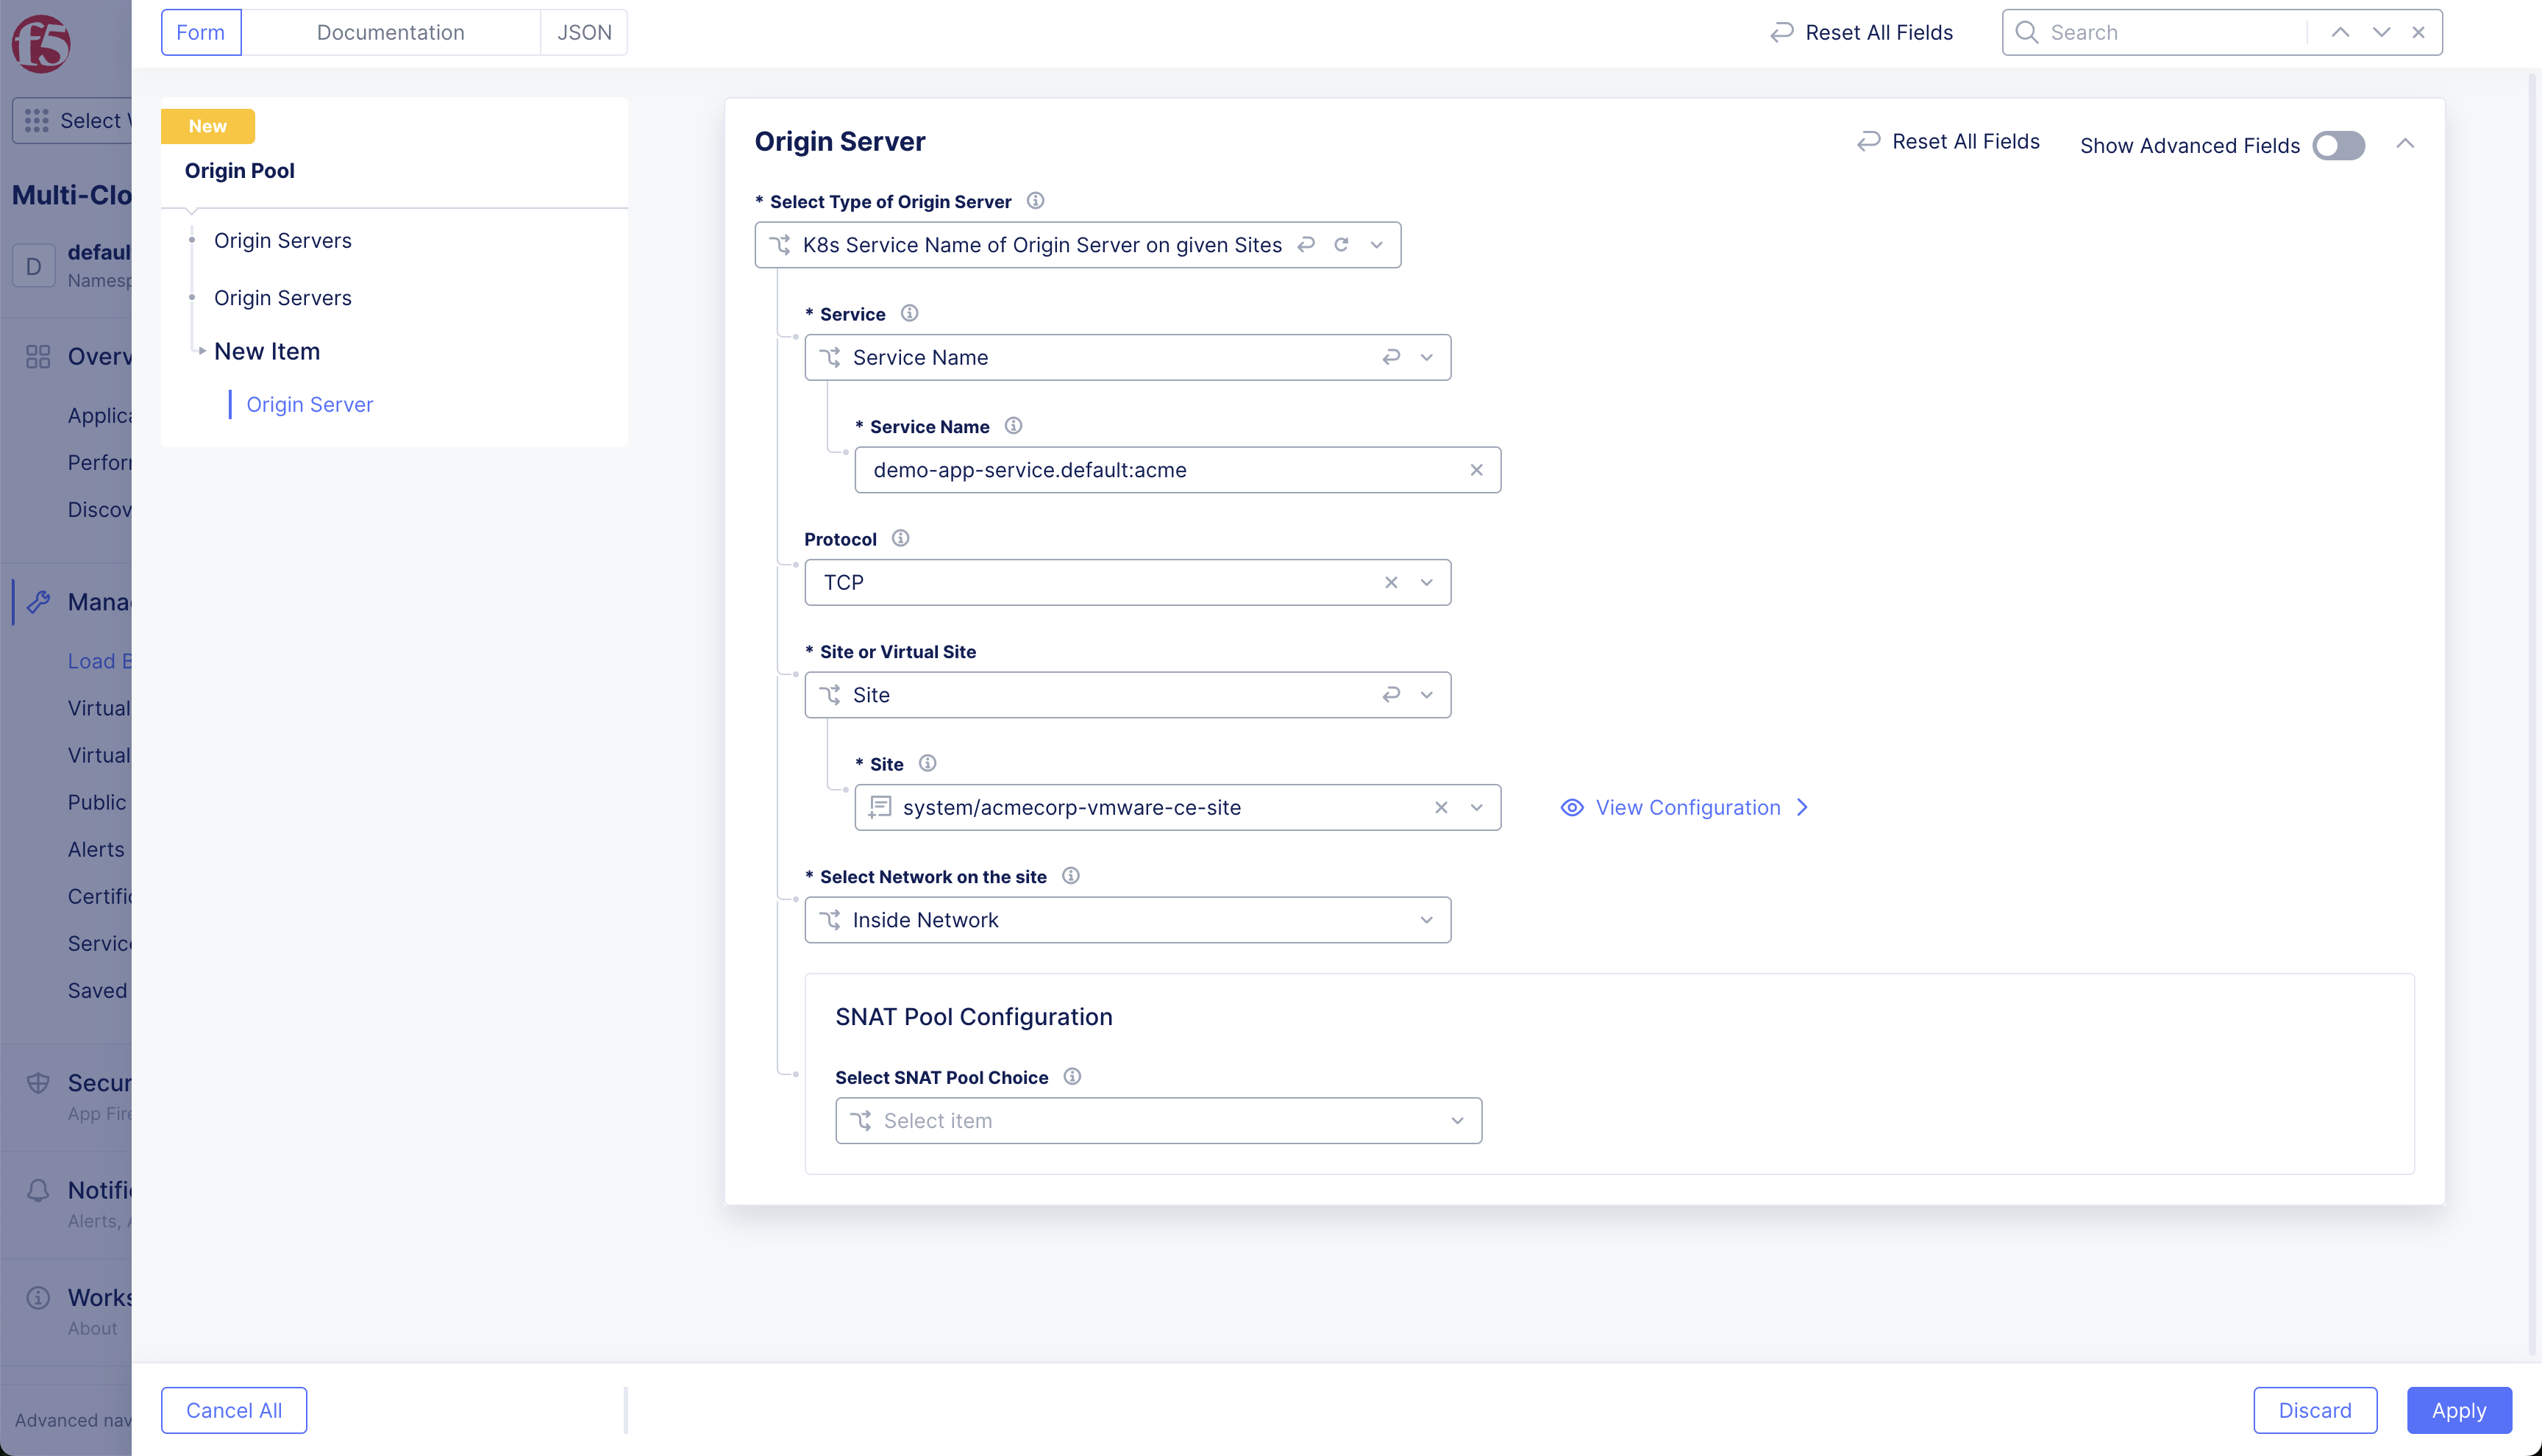
Figure: Origin Pool Name
- Select the Protocol (either TCP or UDP) from the dropdown.
Step 3: Set site or virtual site for the discovery configuration.
- Select the Site or Virtual Site, and select the name of the Site or Virtual Site from the drop-down.
- In the Select Network on the site drop-down, select the network that has reachability to the k8s cluster of the service selected in the previous step.
- Optionally configure SNAT Pool Choice.
Step 4: Complete origin pool creation.
- Click Apply to save the configuration.
Concepts
API References
On this page:
- Objective
- Prerequisites
- Configuration Workflow Updates
- Configuration Options
- K8s Cluster as a Shared Resource
- K8s Cluster as a Dedicated Resource
- Configuration Sequence
- Obtain the kubeconfig file for the K8s Cluster
- Create the K8s Service Discovery
- Create K8s Service Discovery in Shared Configuration
- Verify Discovered Services
- Use Discovered Services
- Configure Origin Pool with K8s Service Information
- Concepts
- API References