Create Virtual Site
Objective
This guide provides instructions on how to create a custom label and then apply it to create a virtual site. A virtual site provides a mechanism to perform operations on a group of sites, reducing the need to repeat the same set of operations for each site. Each label consists of a key-value pair. There are no limitations on the type of sites that can be grouped together. Both cloud and physical sites can be grouped together to create a virtual site. To learn more about virtual sites and labels, see Virtual Site and Labels, respectively.
You can use virtual sites to deploy applications, discover service endpoints, and advertise services across a number of sites selected per the site selection criteria of the virtual site.
Labels can be provided by the system (existing) or can be user-defined (custom). For more information, see Labels.
Using the instructions provided in this guide, you can create and assign custom labels to your sites and group them together to create a virtual site using a selector expression.
Prerequisites
-
An F5® Distributed Cloud Services Account. If you do not have an account, see Getting Started with Console.
-
A site deployed in an enterprise tenant. To create and deploy a site, see Site Management.
Create a Custom Label
Perform these steps to create a custom label:
Step 1: Create the custom key.
-
Click
Shared Configuration. -
Select
Manage>Label>Known Keys. -
Click
Add Known Key. -
In the form that appears, perform the following:
-
In the
Label key (Required)field, enter the name of the new custom key. -
In the
Label descriptionfield, optionally enter information to describe this new custom key. -
In the
Label valuesfield, enter a potential value that can be used with the new custom key. Click+ Add Label Valueto add more than one value. -
After you finish, click
Add Key.
-

Figure: Key-Value Creation
Step 2: Verify the custom key and value.
-
Navigate to Select
Manage>Label>Known Keysto verify all keys. -
Navigate to Select
Manage>Label>Known Labelsto verify all keys and their values.
Apply a Custom Label
Perform these steps to apply a custom label:
Step 1: Navigate to the list of sites.
- Click
Multi-Cloud Network Connect.

Figure: Console Homepage
-
Find your site and then click
.... -
Click
Manage Configuration.

Figure: List of Sites
- Click
Edit Configuration.
Step 2: Enter a value for the corresponding key.
-
Navigate to the
Labelsfield in theMetadatasection. -
Select
Add Labeland performing the following:- Enter the name of the newly created custom key and then select it.

Figure: Key Search
- Enter the name of the value to assign to the key.
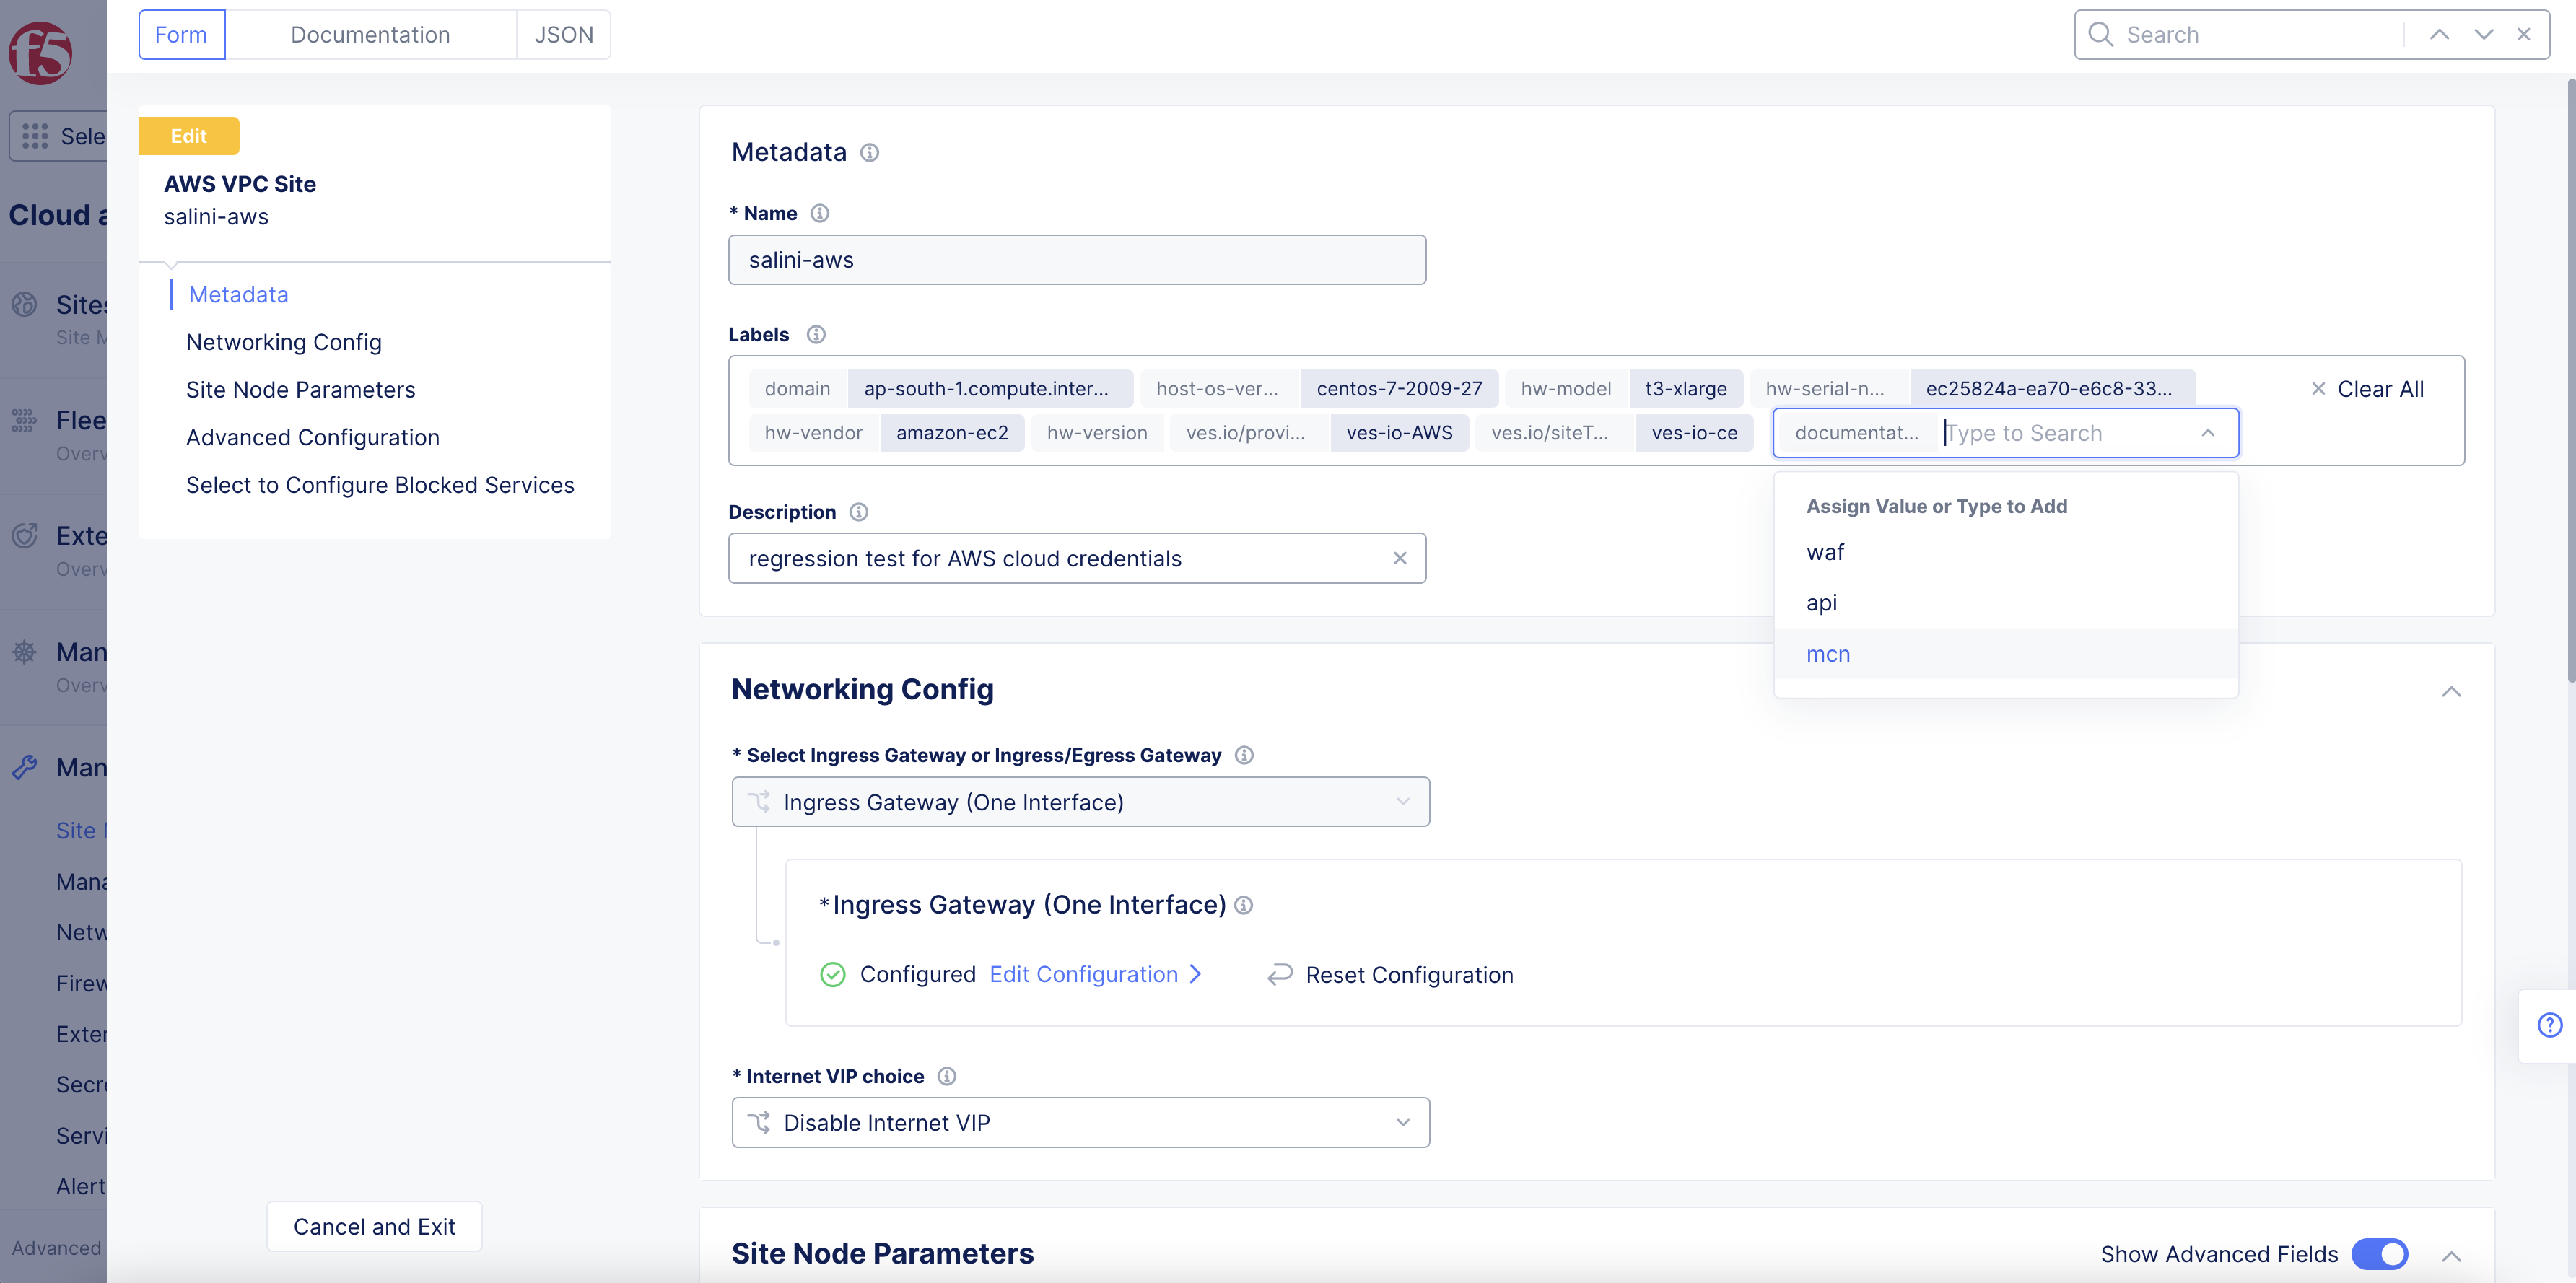
Figure: Value Search
- Click
Save and Exit.
Step 3: View the newly applied label.
-
Navigate to your site from
Site Listand expand the metadata JSON section. -
Expand
"labels"to view the newly applied site label.

Figure: JSON for Labels
Note: The
"metadata"field contains all labels associated with your site. As sites are registered, Distributed Cloud Services automatically populates some labels, such ashw-vendor,provider,hw-model, etc. You can determine the existing labels assigned to your site by checking the site schema from Console or using APIs.

Figure: JSON for Metadata
Create a Virtual Site
Create a virtual site using the selector expressions to group sites together.
Note: The steps below show how to create a virtual site in the
Distributed Appsservice. This option limits the virtual site to a specific namespace. You can also create a virtual site in theShared Configurationservice. With theShared Configurationservice option, multiple site objects across different namespaces can use the same virtual site and be grouped together.
Step 1: Start creating the virtual site.
- In Console, click
Distributed Apps.
Figure: Console Homepage
-
Navigate to your desired namespace.
-
Click
Manage>Virtual Sites. -
Click
Add Virtual Siteto load the creation form.

Figure: Add Virtual Site
Step 2: Enter the required information.
-
In the
MetadatasectionNamefield, enter a virtual site name. -
In the
Site Typesection, select a site type from the drop-down menu.
Step 3: Frame the selector expressions to group sites.
- From the
Selector Expressionfield, clickAdd Label.

Figure: Selector Expression
-
To frame the selector expression, perform the following:
- Enter the name of the custom key created previously and then select it.

Figure: Selector Expression for Key
-
Select an operator.
-
Select the custom value assigned previously.

Figure: Selector Expression for Value
Step 4: Complete creating virtual site.
Click Save and Exit.
Step 5: Verify the new virtual site.
-
In the
Distributed Appsservice, navigate toApplications>Virtual Sites. -
Confirm your virtual site is listed.