Create TCP Load Balancer
Objective
This guide provides instructions on how to create a TCP load balancer in F5® Distributed Cloud Console (Console) using guided configuration that walks you through the steps of configuring metadata to advanced configuration. This includes configuring the required objects for the virtual host. To learn more about virtual host concepts, see Virtual Host.
Using guided creation for TCP load balancer, you can create the following types of load balancers:
- TCP load balancer
- TCP load balancer with your own TLS certificate
- TCP load balancer with automatic TLS certificate (minted by F5® Distributed Cloud Services)
Using the instructions provided in this guide, you can perform the following:
- Create and advertise a TCP load balancer
- Create and advertise a TCP load balancer with your TLS certificate or with the certificate minted by Distributed Cloud Services
Note: Distributed Cloud Services support automatic certificate generation and management. You can either delegate your domain to Distributed Cloud Services or add the CNAME record to your DNS records in case you do not delegate the domain to Distributed Cloud Services. See Automatic Certificate Generation for certificates managed by Distributed Cloud Services. See Delegate Domain for more information on how to delegate your domain to Distributed Cloud Services.
Prerequisites
The following prerequisites apply:
-
An F5® Distributed Cloud Services Account. If you do not have an account, see Getting Started with Console.
-
A valid DNS domain delegated to Distributed Cloud Services. For instructions on how to delegate your domain, see Domain Delegation.
-
A Distributed Cloud Services CE site in cases of deploying your applications on CE site. If you do not have a site, create a site using the instructions included in the Site Management guides. See vK8s Deployment guides to deploy your applications on Distributed Cloud Services network cloud or edge cloud.
Configuration
The configuration option to create the TCP load balancer guides you through the steps for required configuration. This document covers each guided step and explains the required actions to be performed for each step.
Step 1: Navigate to the TCP load balancer configuration page.
-
Log into Console.
-
Click
Multi-Cloud App Connect.
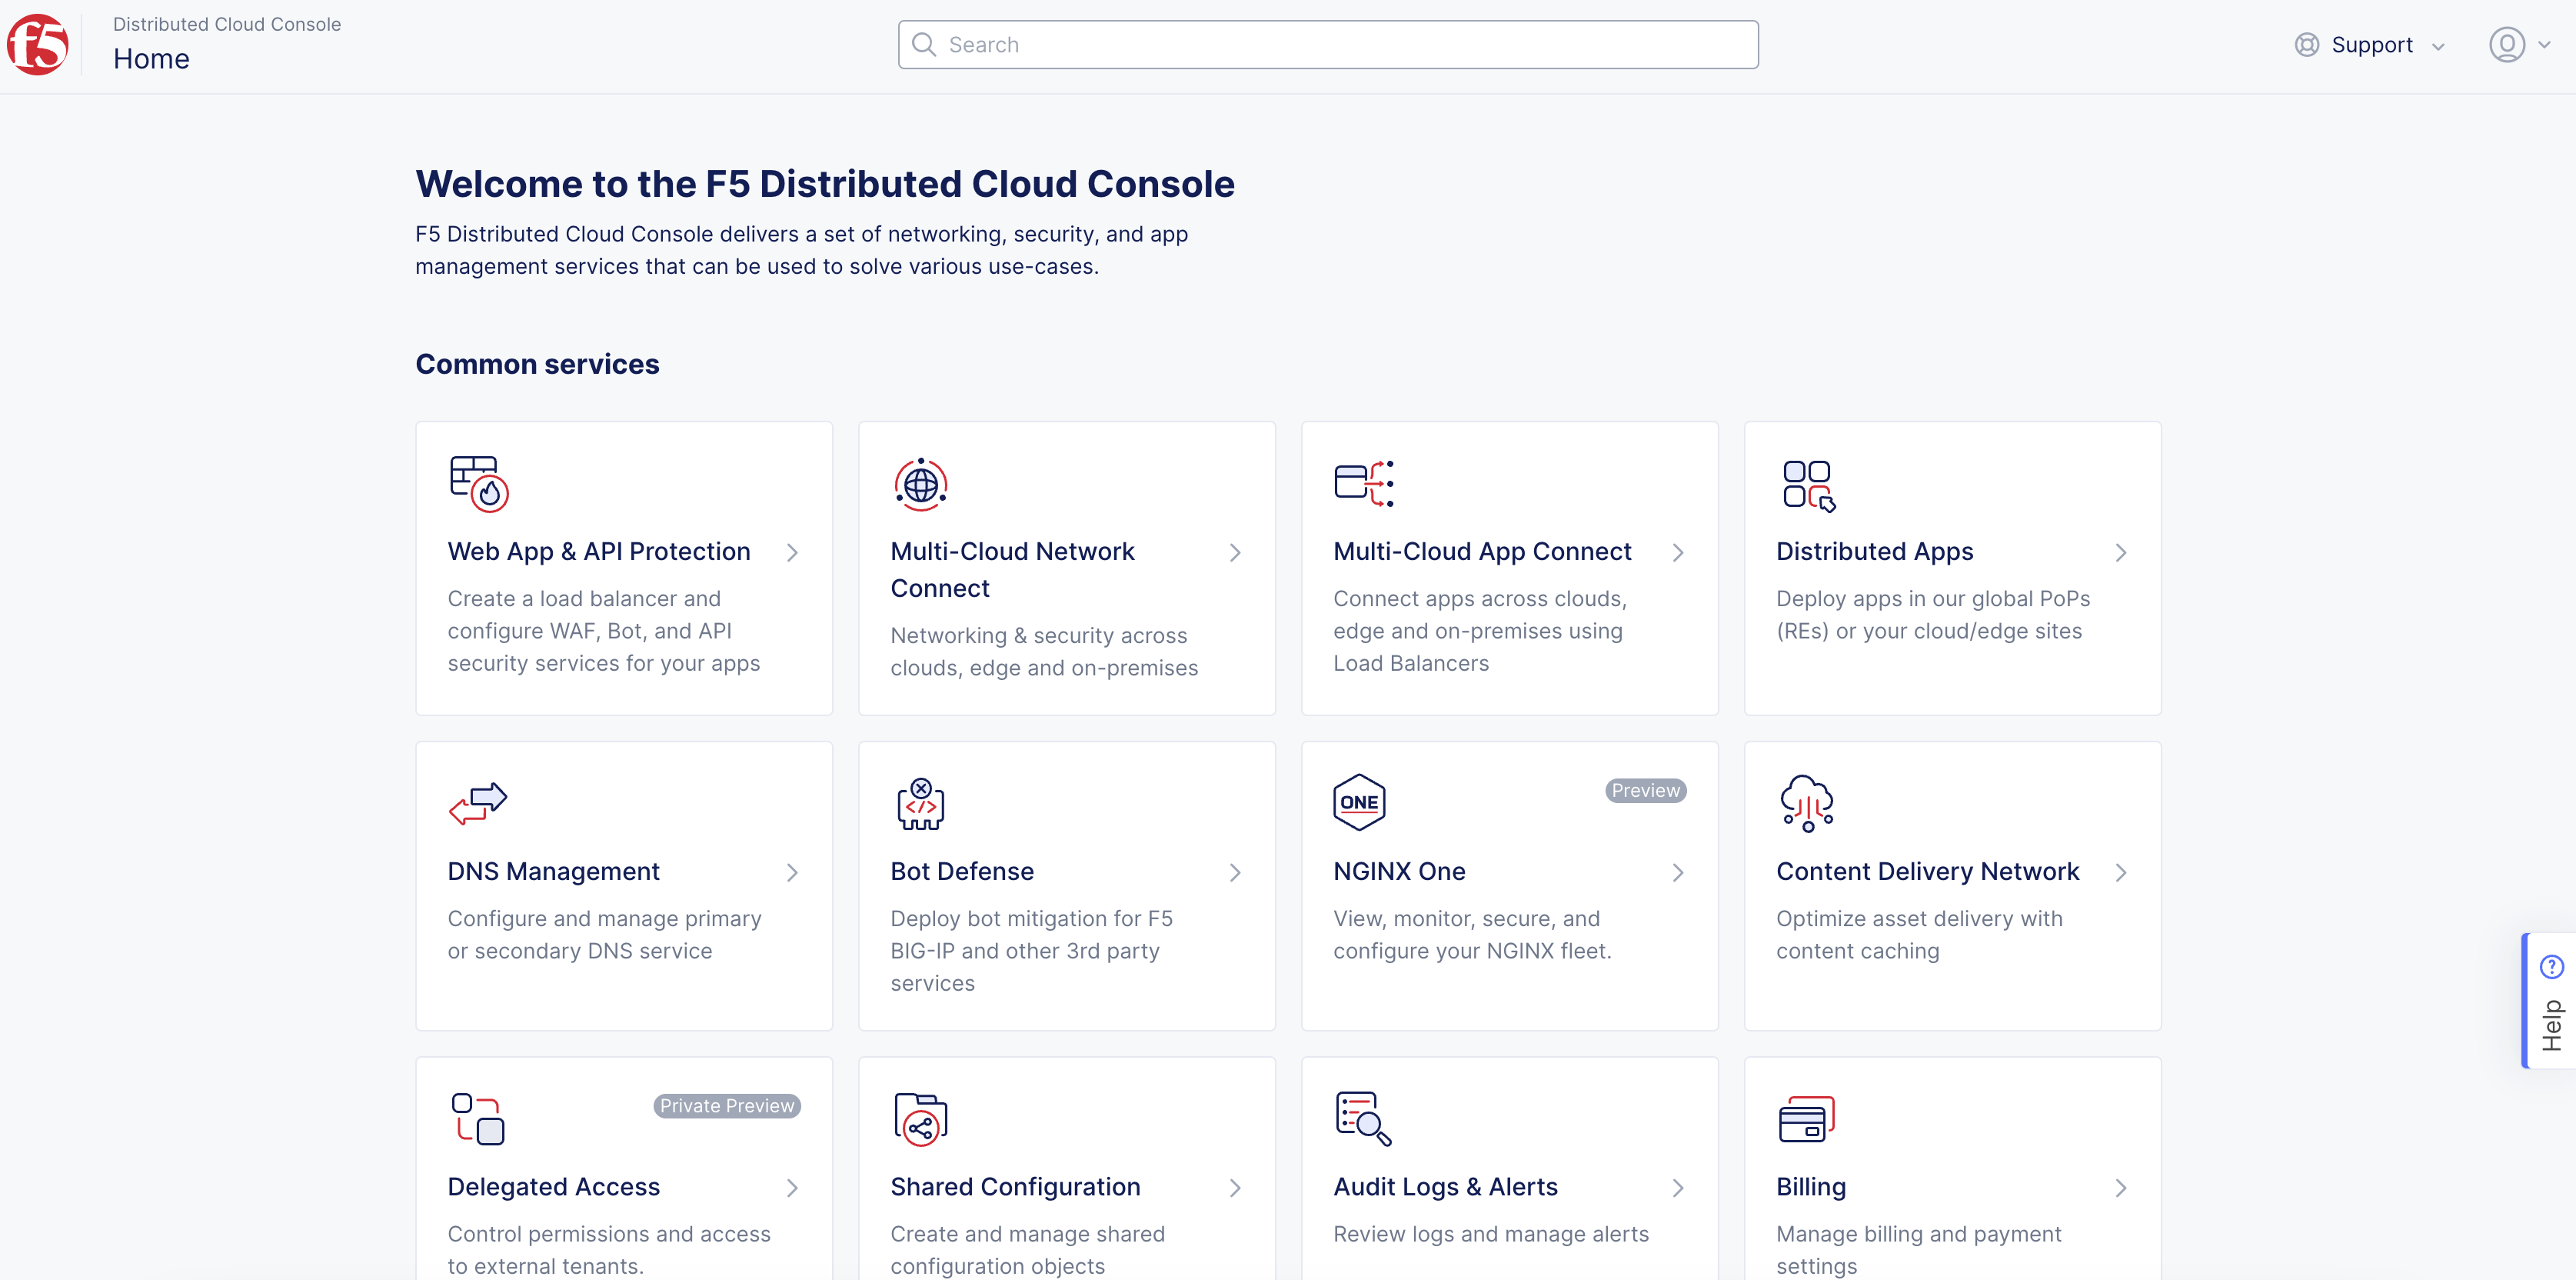
Figure: Console Homepage
-
Select your namespace from the menu.
-
Select
Manage>Load Balancers>TCP Load Balancers.
Step 2: Start load balancer creation process.
- Click
Add TCP Load Balancerto open the load balancer creation form.
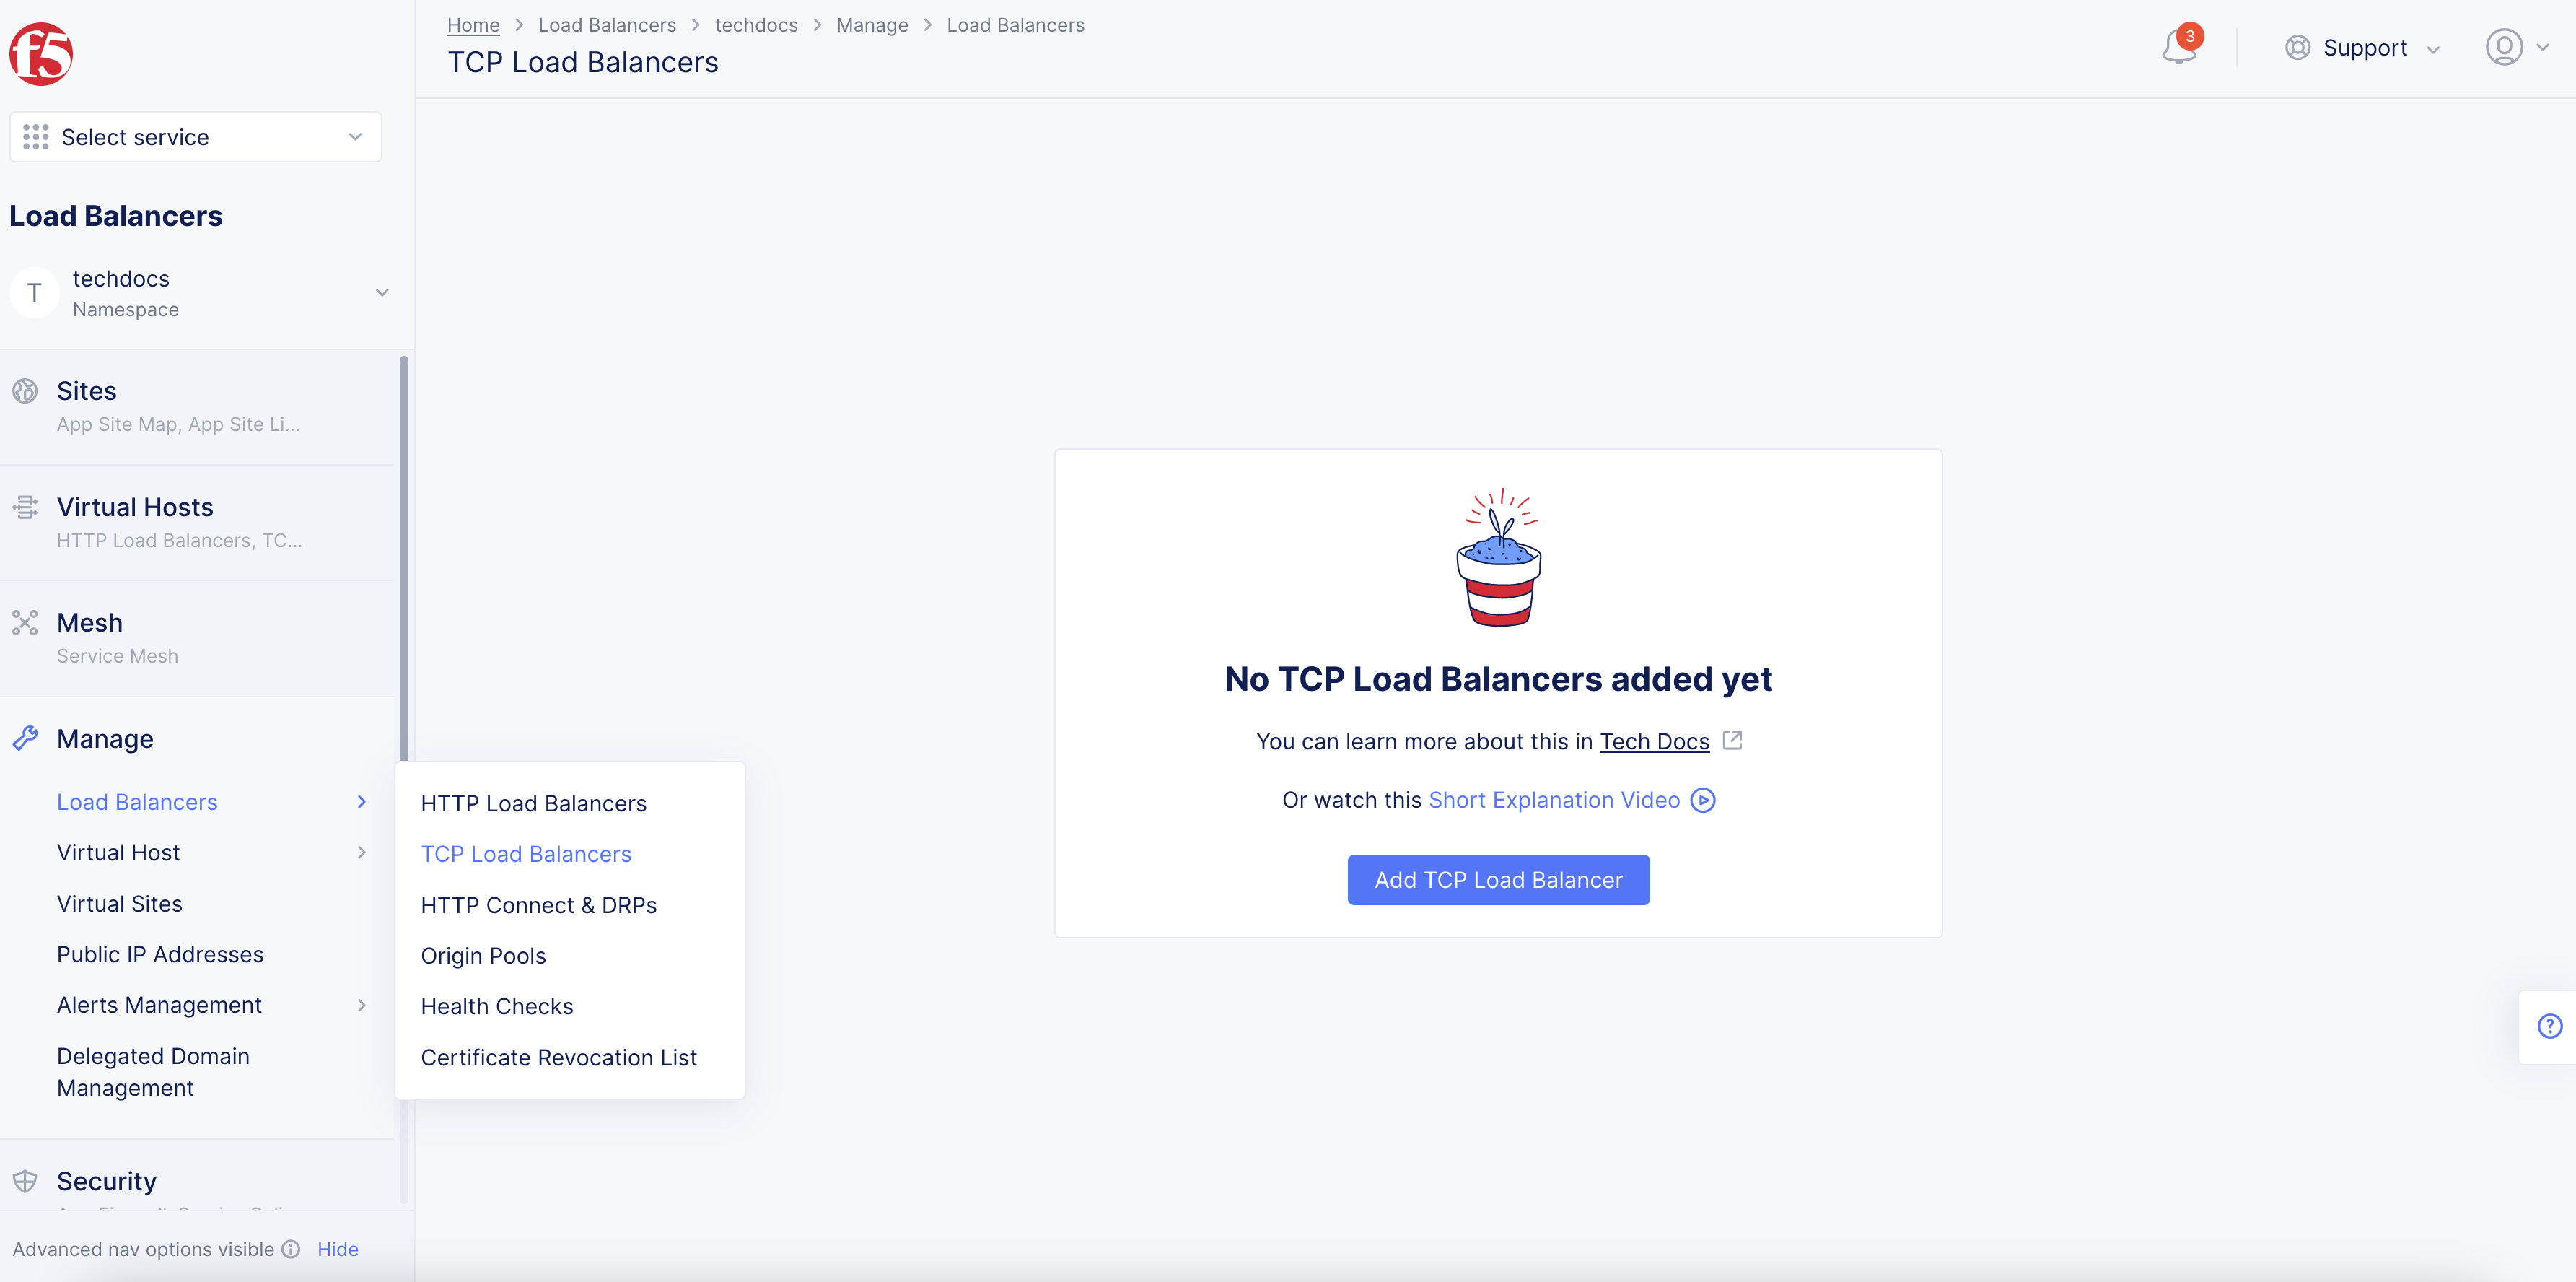
Figure: Load Creation Form
-
In the
Metadatasection, enter a name for your TCP load balancer. -
Optionally, set labels and enter a description for your TCP load balancer.
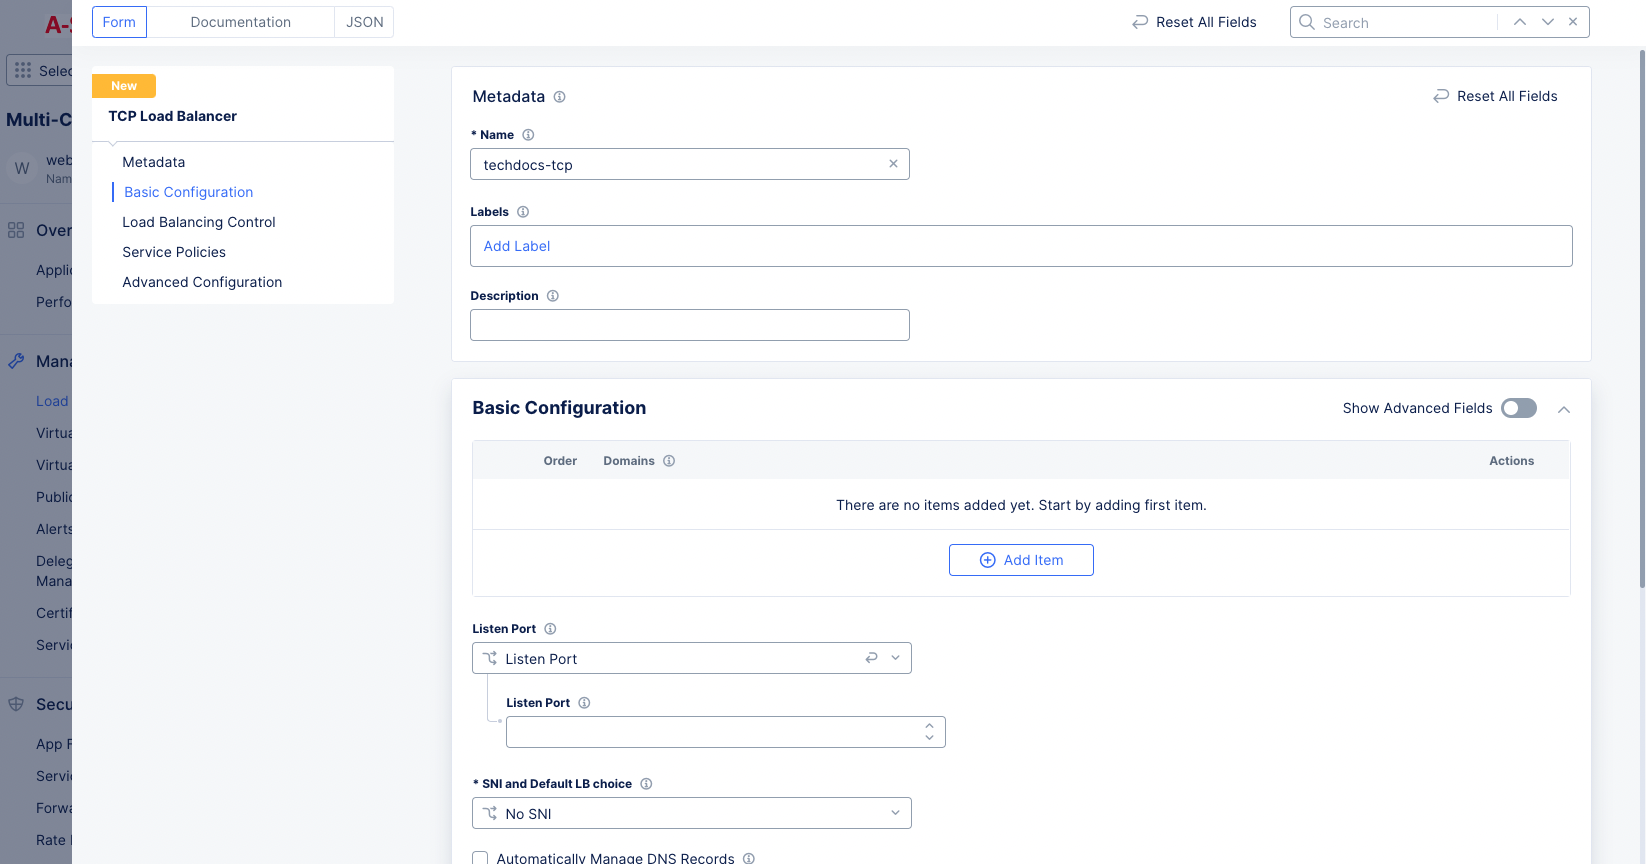
Figure: Creation Form
Step 3: Configure domain and listen port.
-
In the
Basic Configurationsection, perform the following:-
Click
Add Itemto add a domain. You can add more than one domain. -
In the
Domainsfield, enter the name of the domain to be used with this load balancer. -
In the
Listen Portfield, enter a number. This is the TCP listening port. If you require multiple ports, then enable theShow Advanced Fieldstoggle for theBasic Configurationsection, selectPort Rangesfrom theListen Portdrop-down menu, and then enter a list of non-overlapping port ranges with a maximum of 64 ports in the list, e.g.443,100-120,8080,9080-9089. -
Optionally, from the
SNI and Default LB choicemenu, select whether to enable Server Name Indication (SNI) for this load balancer. To display theSNI and Default LBoption, enable theShow Advanced Fieldsoption. -
Optionally, select
Automatically Manage DNS Recordsto have your DNS records managed by Distributed Cloud Services.
-
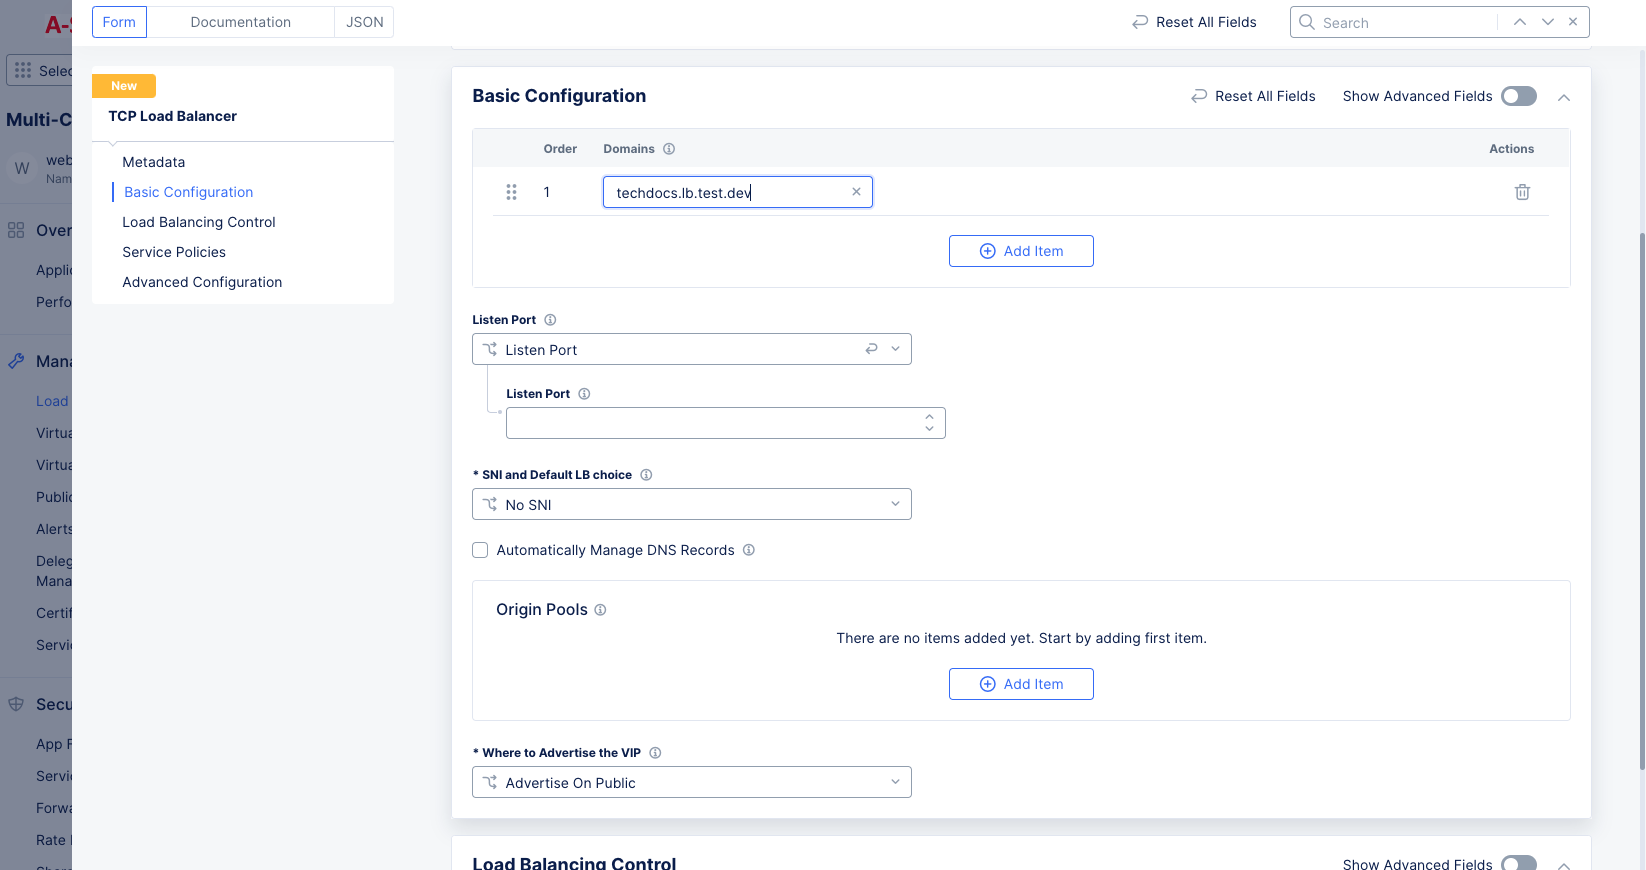
Figure: List of Domains
Step 4: Configure origin pools.
-
In the
Origin Poolsfield, perform the following:-
Click
Add Itemto open the configuration form. -
From the
Origin Pooldrop-down menu, select an existing origin pool or clickAdd Itemto create and apply a new origin pool.
-
-
Optionally, enter values for the
WeightandPriorityfields. -
Click
Apply.
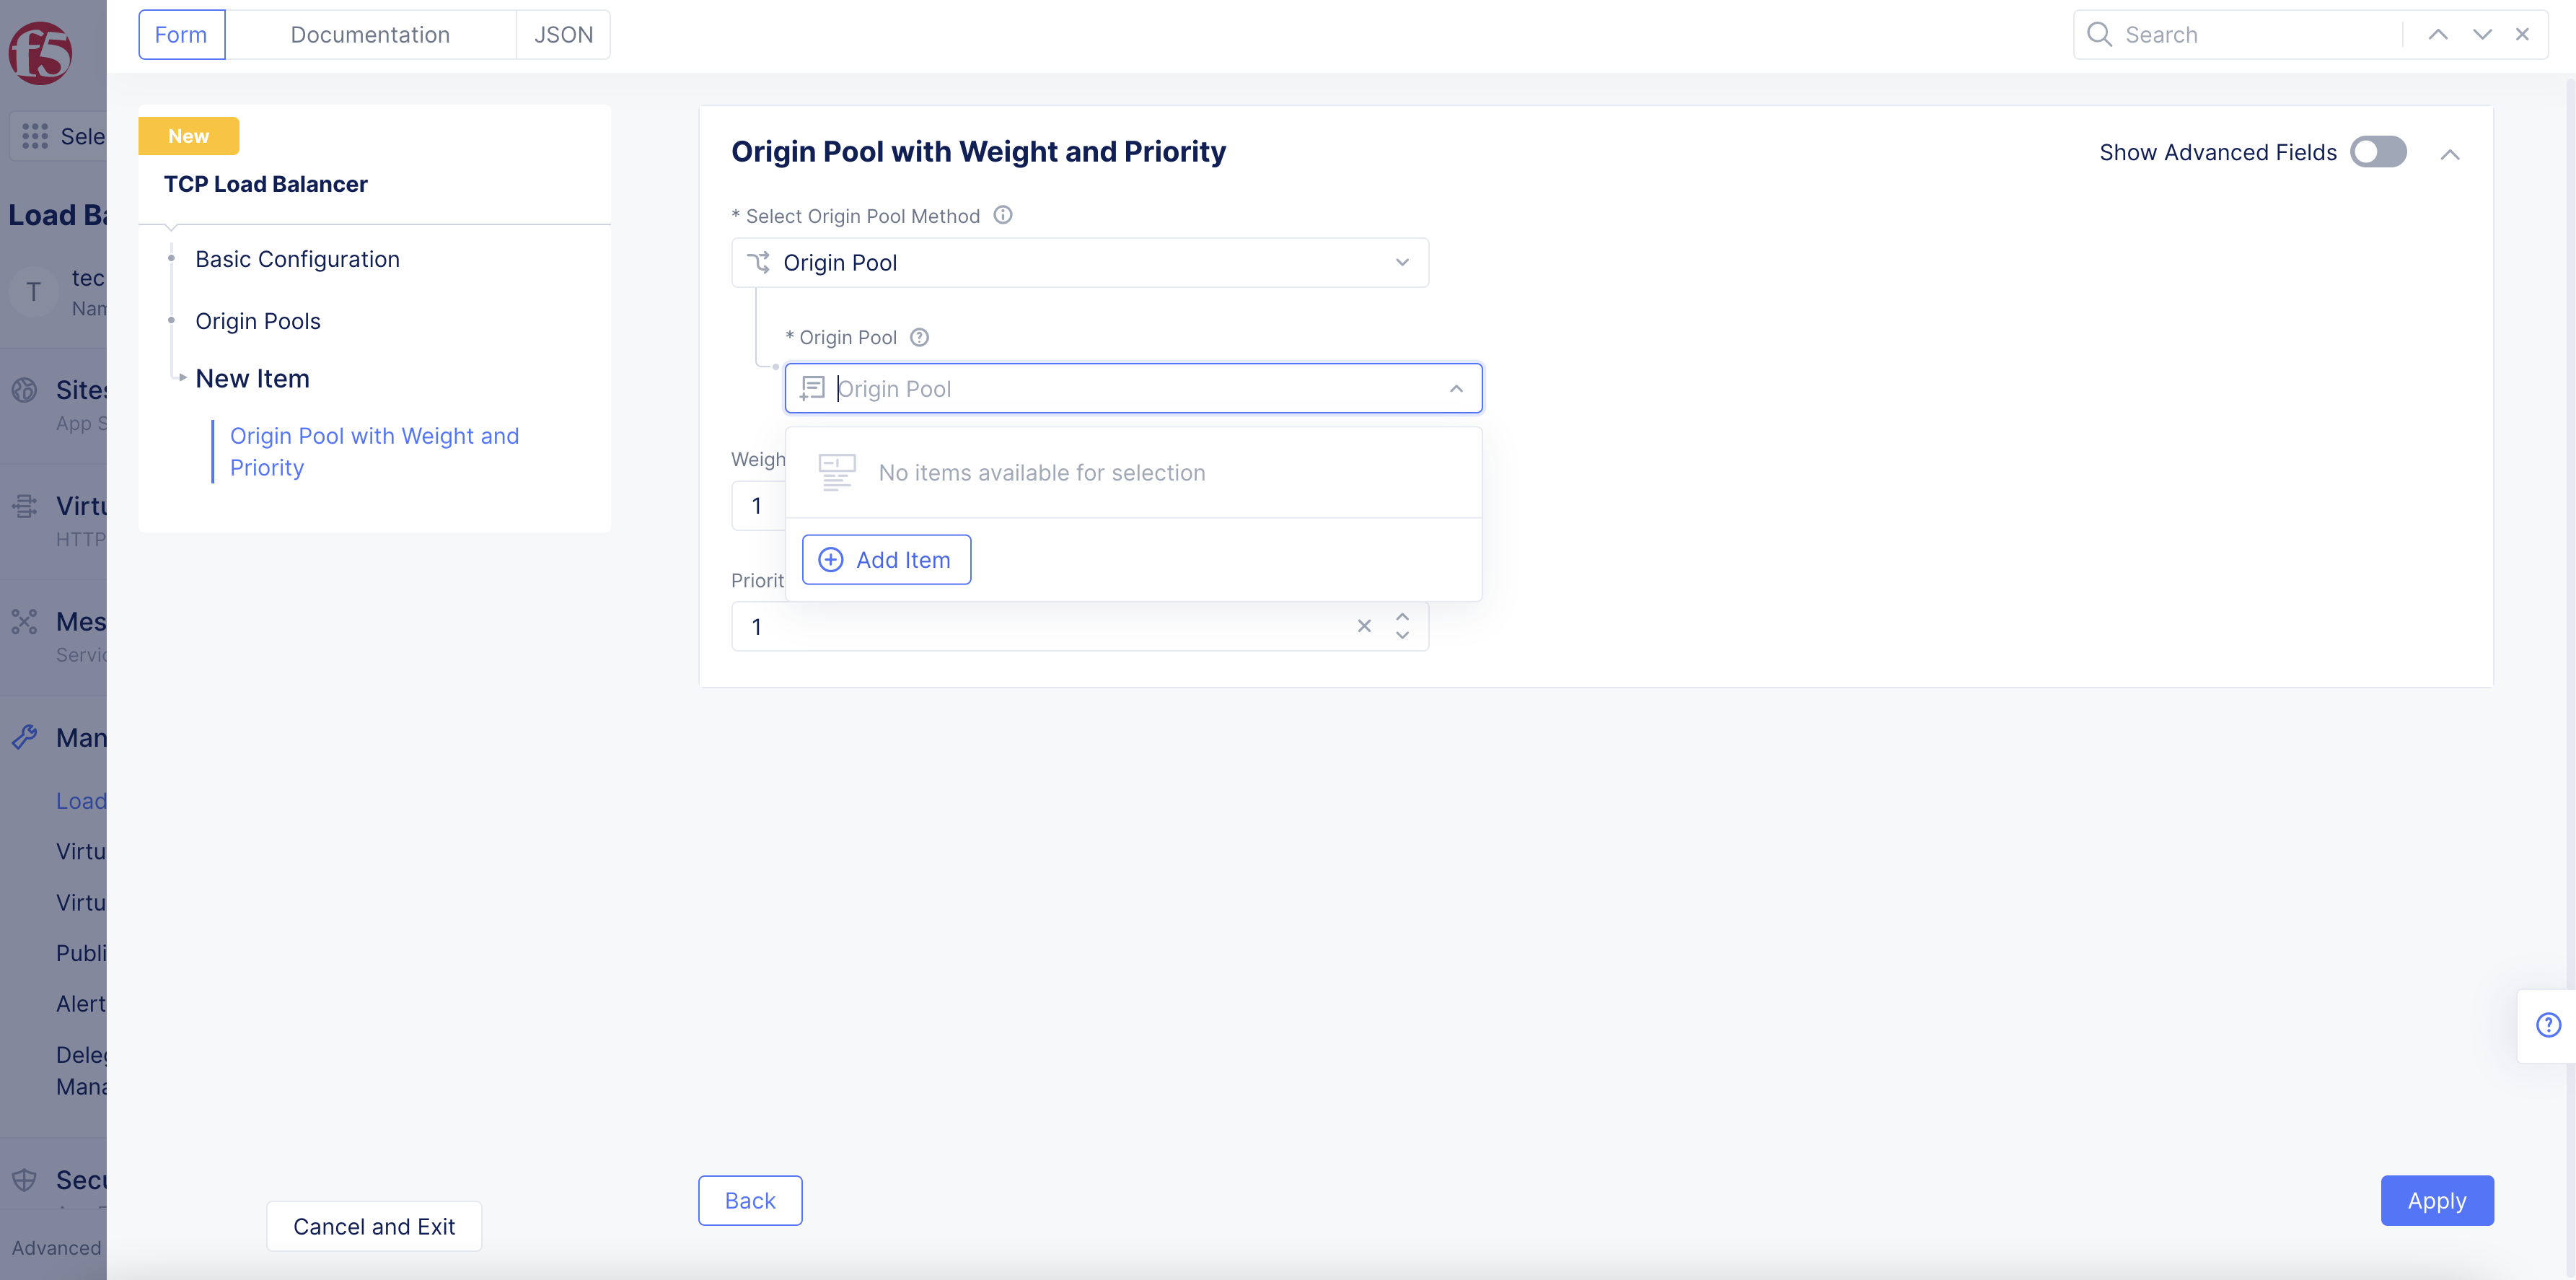
Figure: Origin Pool Configuration
Note: You can click
Add Itemto add more routes per your requirements.
Step 5: Configure VIP advertisement.
Note: In case of tenants with shared VIPs, advertising on a public network is supported only with the proxy type
TCP_PROXY_WITH_SNIand on port 443.
-
From the
Where to Advertise the VIPmenu, select an option:-
Advertise On Public: This option advertises the load balancer on a public network. Default option. -
Advertise Custom: This option enables you to configure your own advertisement policy.
-
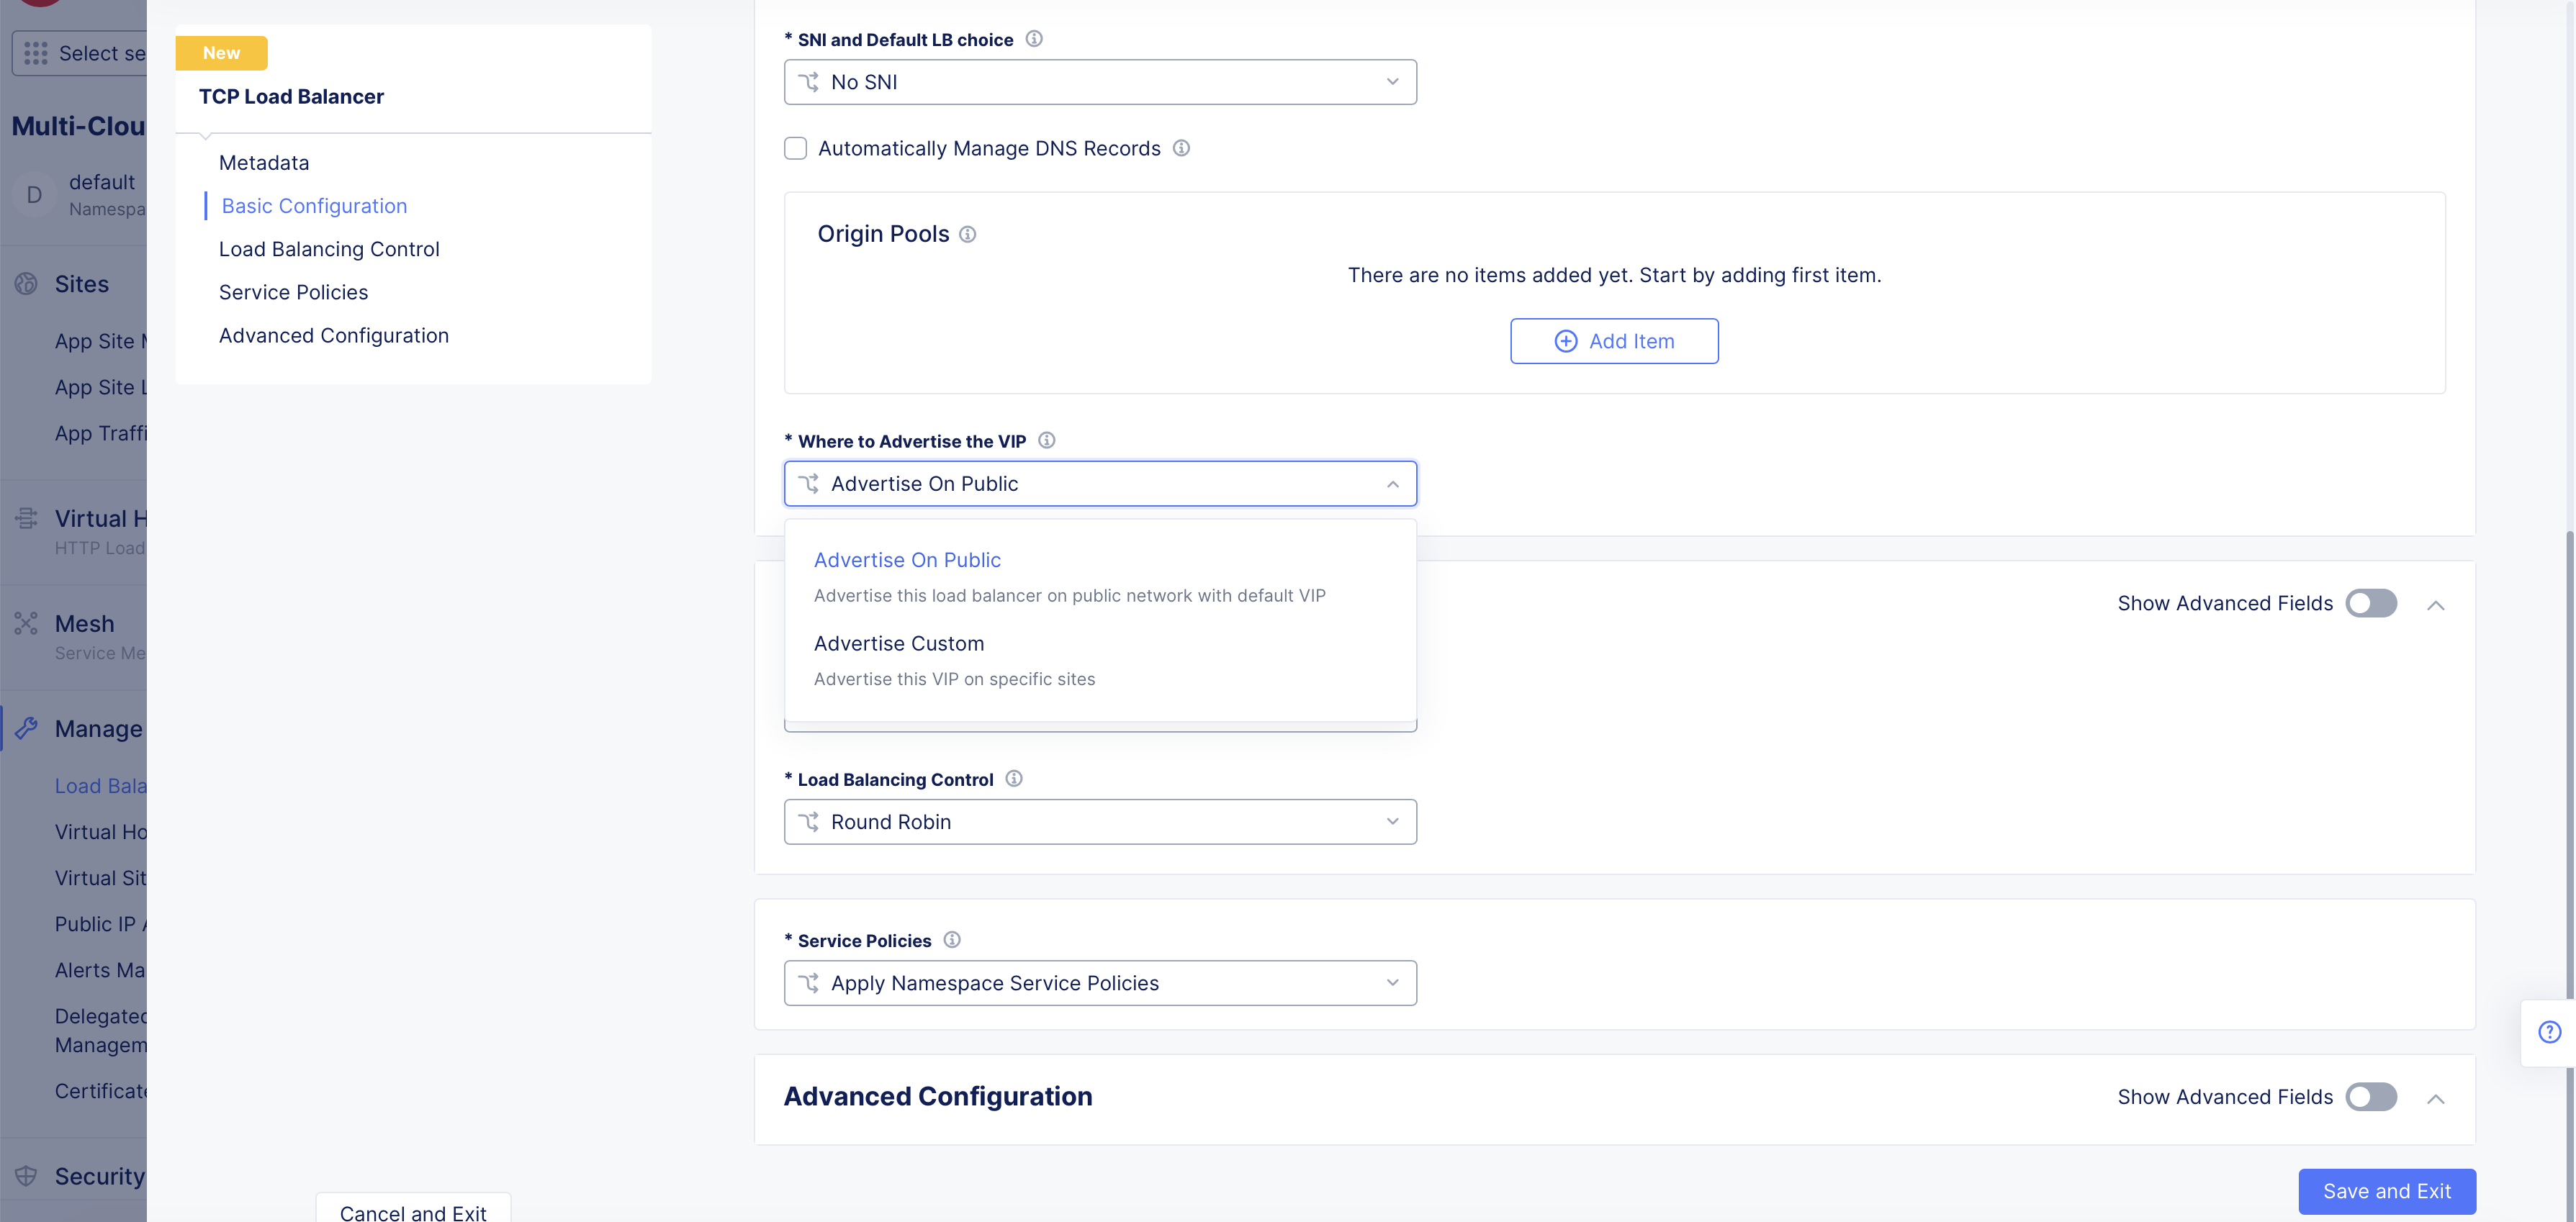
Figure: Advertise VIP
-
To configure a custom VIP:
-
Select
Advertise Custom. -
Click
Configure. -
Click
Add Item. -
From the
Select Where to Advertisemenu, select an option:-
Site -
Virtual Site -
vK8s Service Network on RE -
Virtual Network
-
-
From the
Site Networkmenu, select a network type. Or select both types in case you selectedSiteorVirtual Siteas the advertisement location. -
Select an appropriate reference object from the
Site Referencemenu. -
For
Siteonly, enableShow Advanced Fieldsand then enter an IP address in theIP Addressfield. -
Configure a TCP listener port or select the default option from the
TCP Listen Port Choicemenu. The default option sets port 80 for HTTP and port 443 for HTTPS. SelectTCP Listen Portto enter a custom port number. -
Select
Apply. -
Select
Applyagain to apply the custom advertise VIP configuration.
-
Step 6: Set the load balancing type.
In the Load Balancing Control section, configure the load balancer.
-
From the
Load Balancer Typemenu, select an option:-
TCP: This creates a standard TCP load balancer. -
TLS over TCP with Automatic Certificate: This creates the TCP load balancer with an automatic TLS certificate. If you select this option, select whether to have Distributed Cloud Services manage your DNS records withAutomatically Manage DNS Records. This option requires you to have delegated your domain to Distributed Cloud Services. -
TLS over TCP with Custom Certificate: This creates the TCP load balancer with your custom TLS certificate.
-
Note: Do not add both wildcard and top level domains (for example,
*.example.comandexample.com) if you are using an automatic certificate for different load balancers.
Note: In case of applications that use protocols, such as FTPS or Application Layer Gateway (ALG), where the protocol expects a response, the TCP load balancer using TLS is not supported. For this use case, the load balancer does not support the additional protocol specific response in the message sequence.
Automatic Certificate
Note: Domain delegation is not supported for automatic certificates for customer edge (CE) sites.
-
If you select the
TLS over TCP with Automatic Certificateoption, select a security level from theTLS Security Levelmenu. The following options are supported:-
High: This option uses TLS v1.2 with PFS ciphers and strong algorithms. -
Medium: This option uses TLS v1.0 with PFS ciphers and medium strength algorithms. -
Low: This option uses TLS v1.0 with non-PFS ciphers and weak algorithms. -
Custom: This option allows you to configure a custom security level.
-
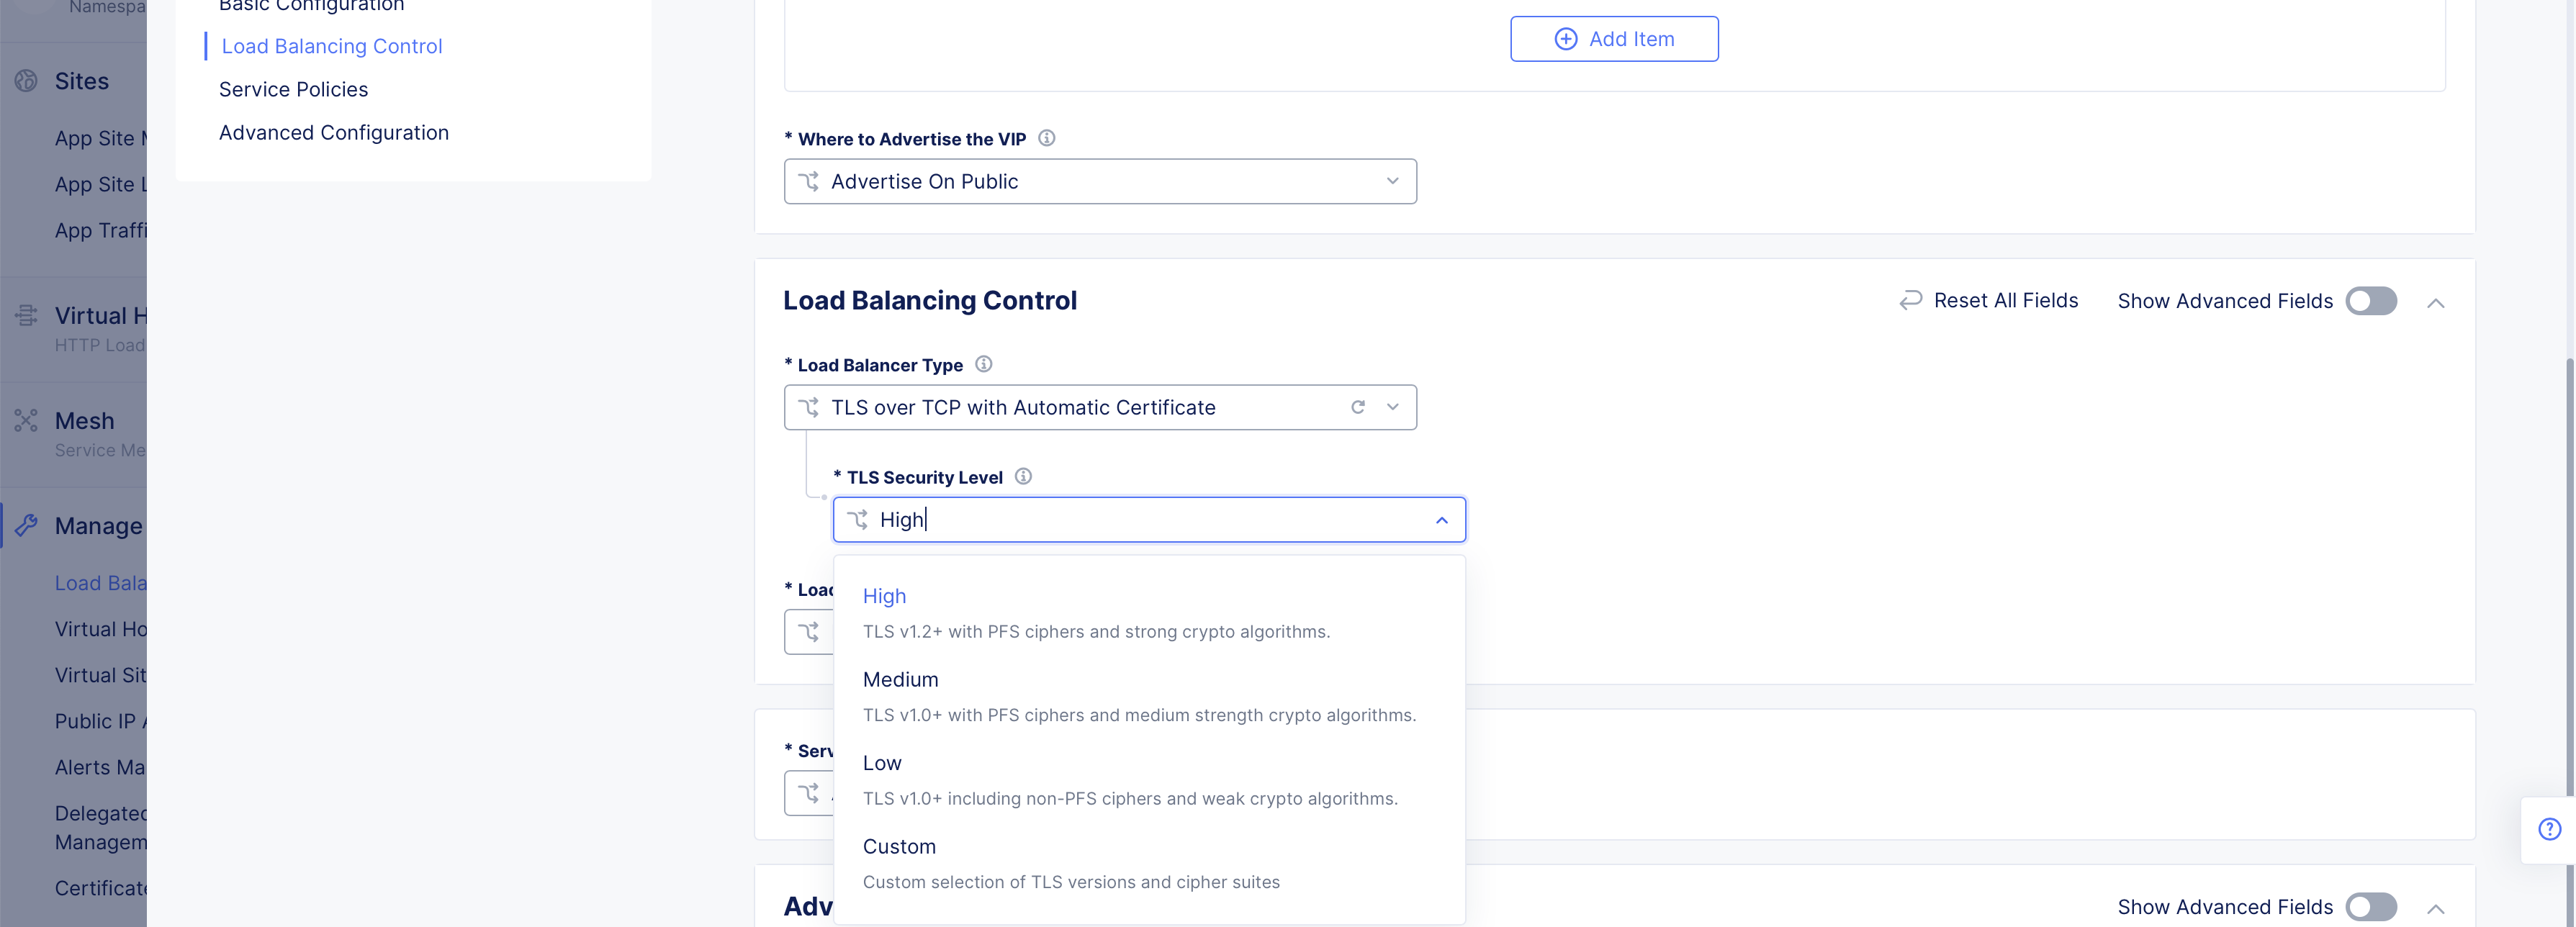
Figure: TLS Security Levels
-
For the
Customsecurity level, perform the following:-
From the
Minimum TLS versionmenu, select an option for the minimum TLS version, or you can have F5 Distributed Cloud Services choose the optimal version for you. -
From the
Maximum TLS versionmenu, select an option for the maximum TLS version, or you can have F5 Distributed Cloud Services choose the optimal version for you. -
From the
Cipher Suitesmenu, select the cipher suite. You can choose more than one suite using theAdd Itemoption.
-
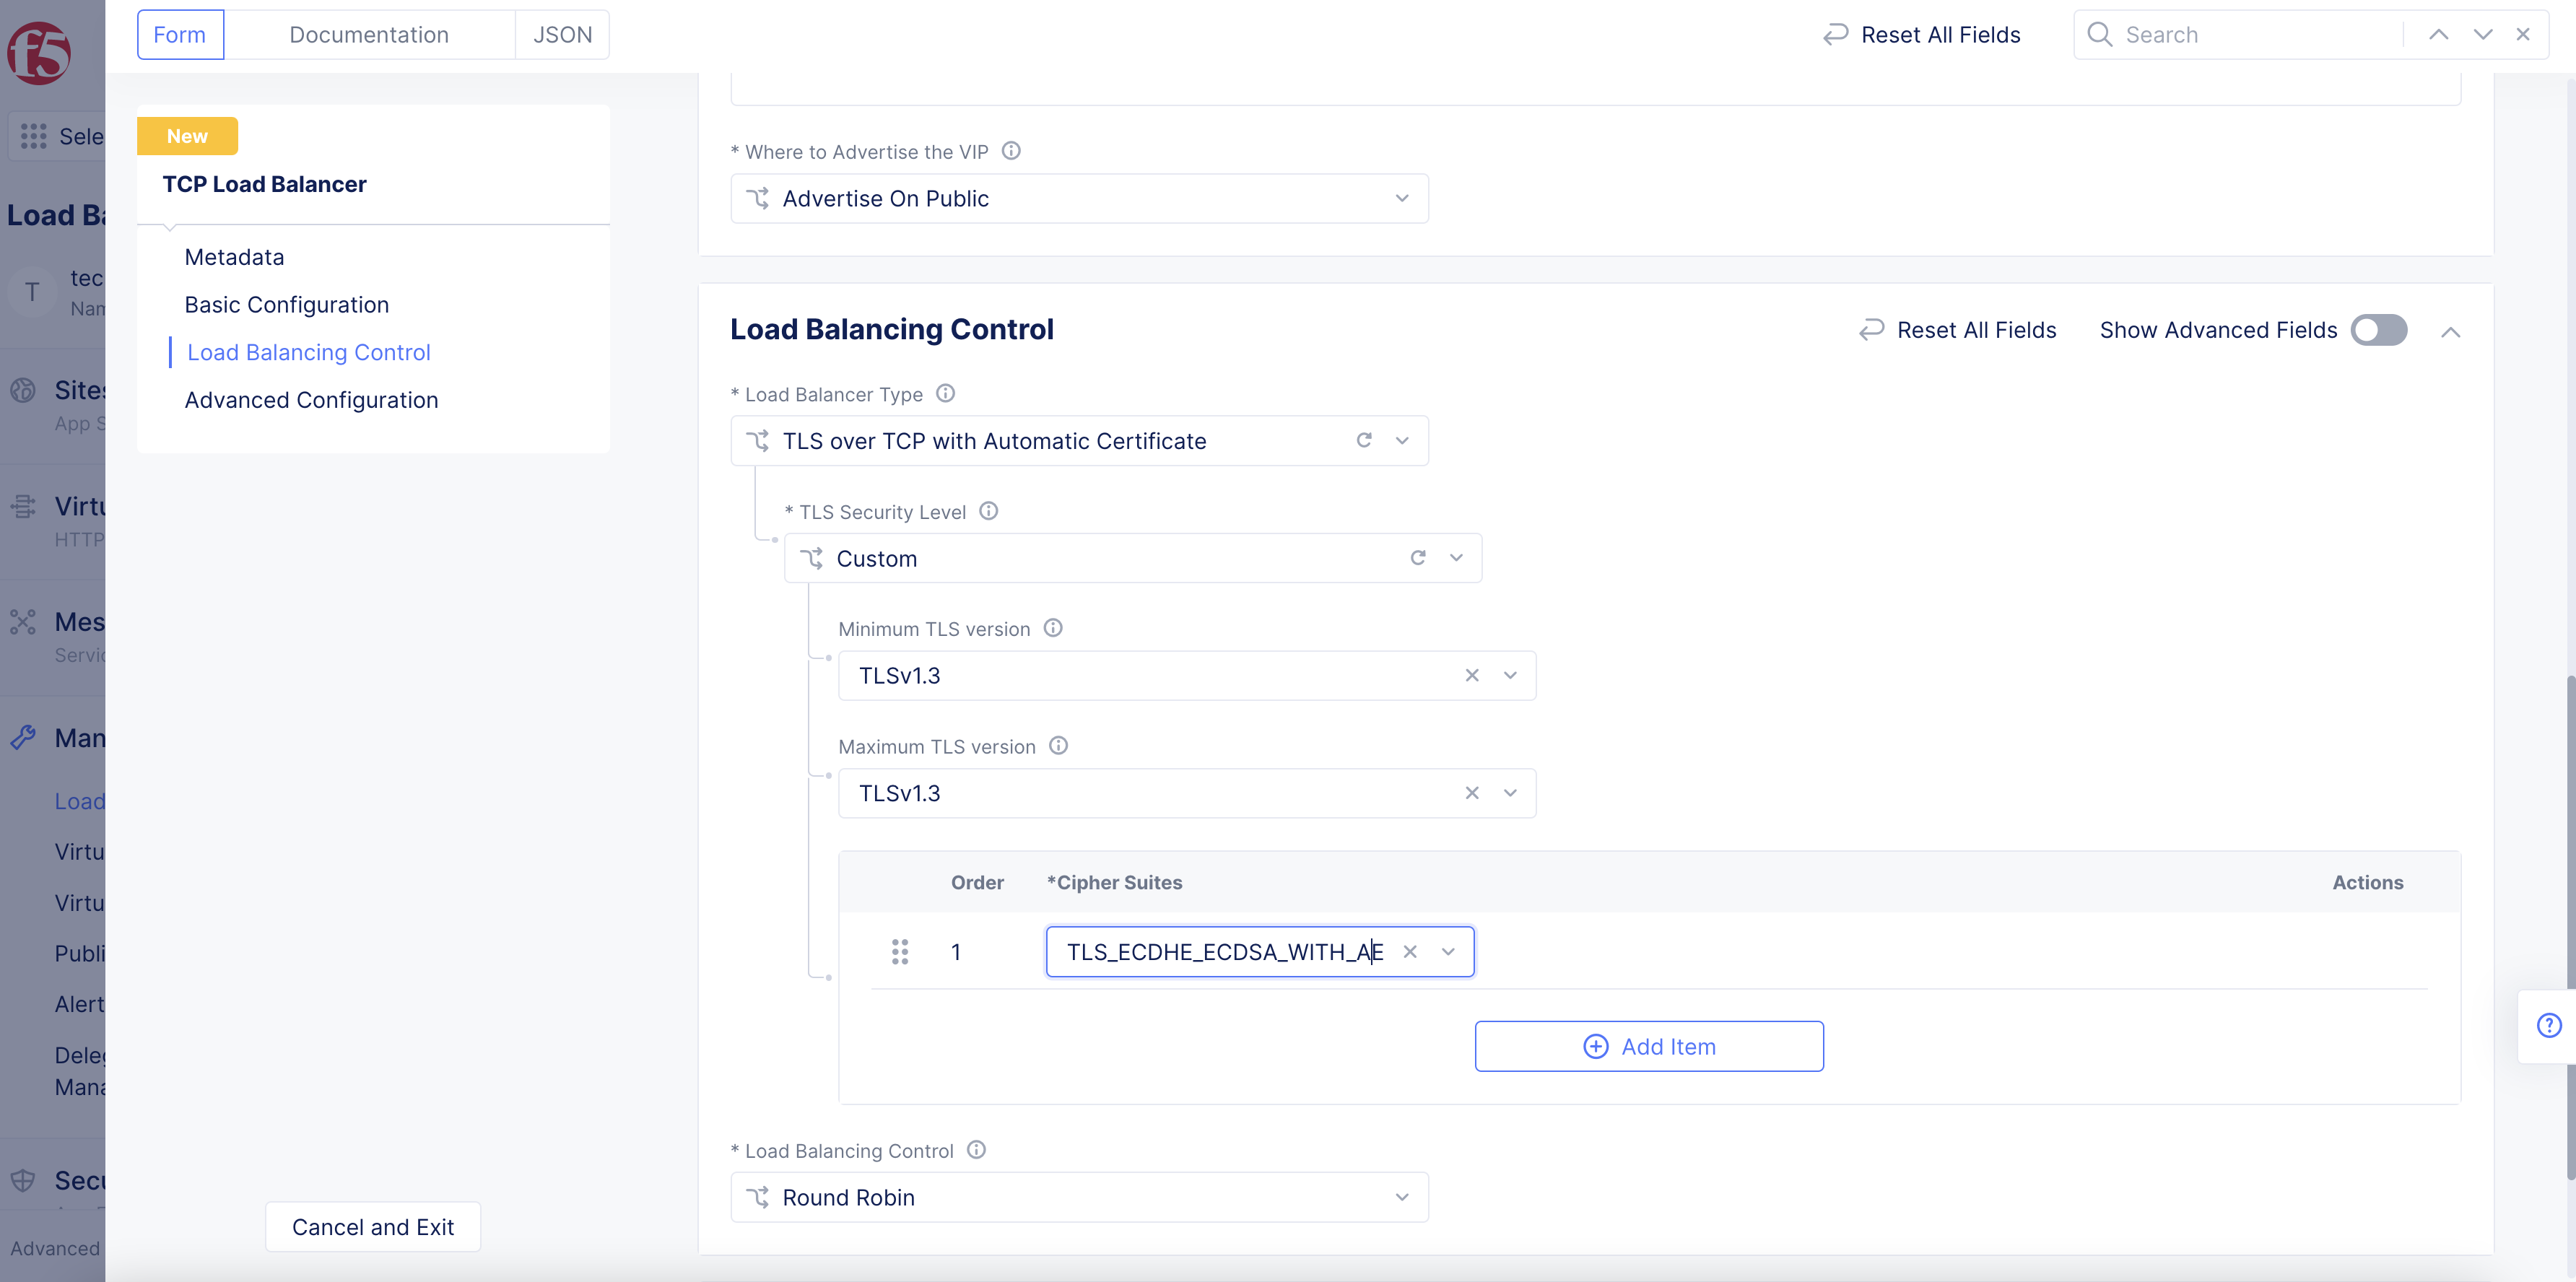
Figure: TLS Custom Security Configuration
Custom Certificate
-
If you select the
TLS over TCP with Custom Certificateoption, clickConfigure. Perform the following:-
Select a security level from the
TLS Security Levelmenu. The following options are supported: -
High: This option uses TLS v1.2 with PFS ciphers and strong algorithms. -
Medium: This option uses TLS v1.0 with PFS ciphers and medium strength algorithms. -
Low: This option uses TLS v1.0 with non-PFS ciphers and weak algorithms. -
Custom: This option allows you to configure a custom security level.
-
-
In the
TLS Certificatessection, clickAdd Item. -
For the
Certificate, enter it inPEMorBase64format. -
In the
Private Keysection, clickConfigurethe blindfold secret, and then clickApply. -
Click
Apply. -
Click
Applyto complete the TLS certificate configuration.
Step 7: Set the load balancing control.
-
From the
Load Balancing Controlmenu, select an option:-
Round Robin -
Least Active Connections -
Random -
Source IP Stickiness
-
Step 8: Configure service policies.
-
From the
Service Policiesmenu, select an option to apply the service policy. The following options are available:-
Apply Namespace Service Policies: This option applies the active service policies of the namespace to the load balancer. -
Do Not Apply Service Policies: This option does not apply any service policy. -
Apply Specified Service Policies: This option applies a specific service policy to the load balancer.
-
-
To apply a specific service policy, select
Apply Specified Service Policies, and perform the following:-
Click
Configure. -
From the
Policiespage, clickConfigure, select a service policy from the drop-down, and then clickApply. You can add more than one policy using theAdd Itembutton. -
Click
Applyin thePoliciespage.
-
Step 9: Set advanced configuration.
-
In the
Advanced Configurationsection, enable theShow Advanced Fieldsoption. -
From the
Idle Timeoutfield, set an amount for the stream. -
Optionally, configure cluster retraction:
- From the
Select Cluster retract optionmenu, select an option to specify whether the cluster is retracted or not.
- From the
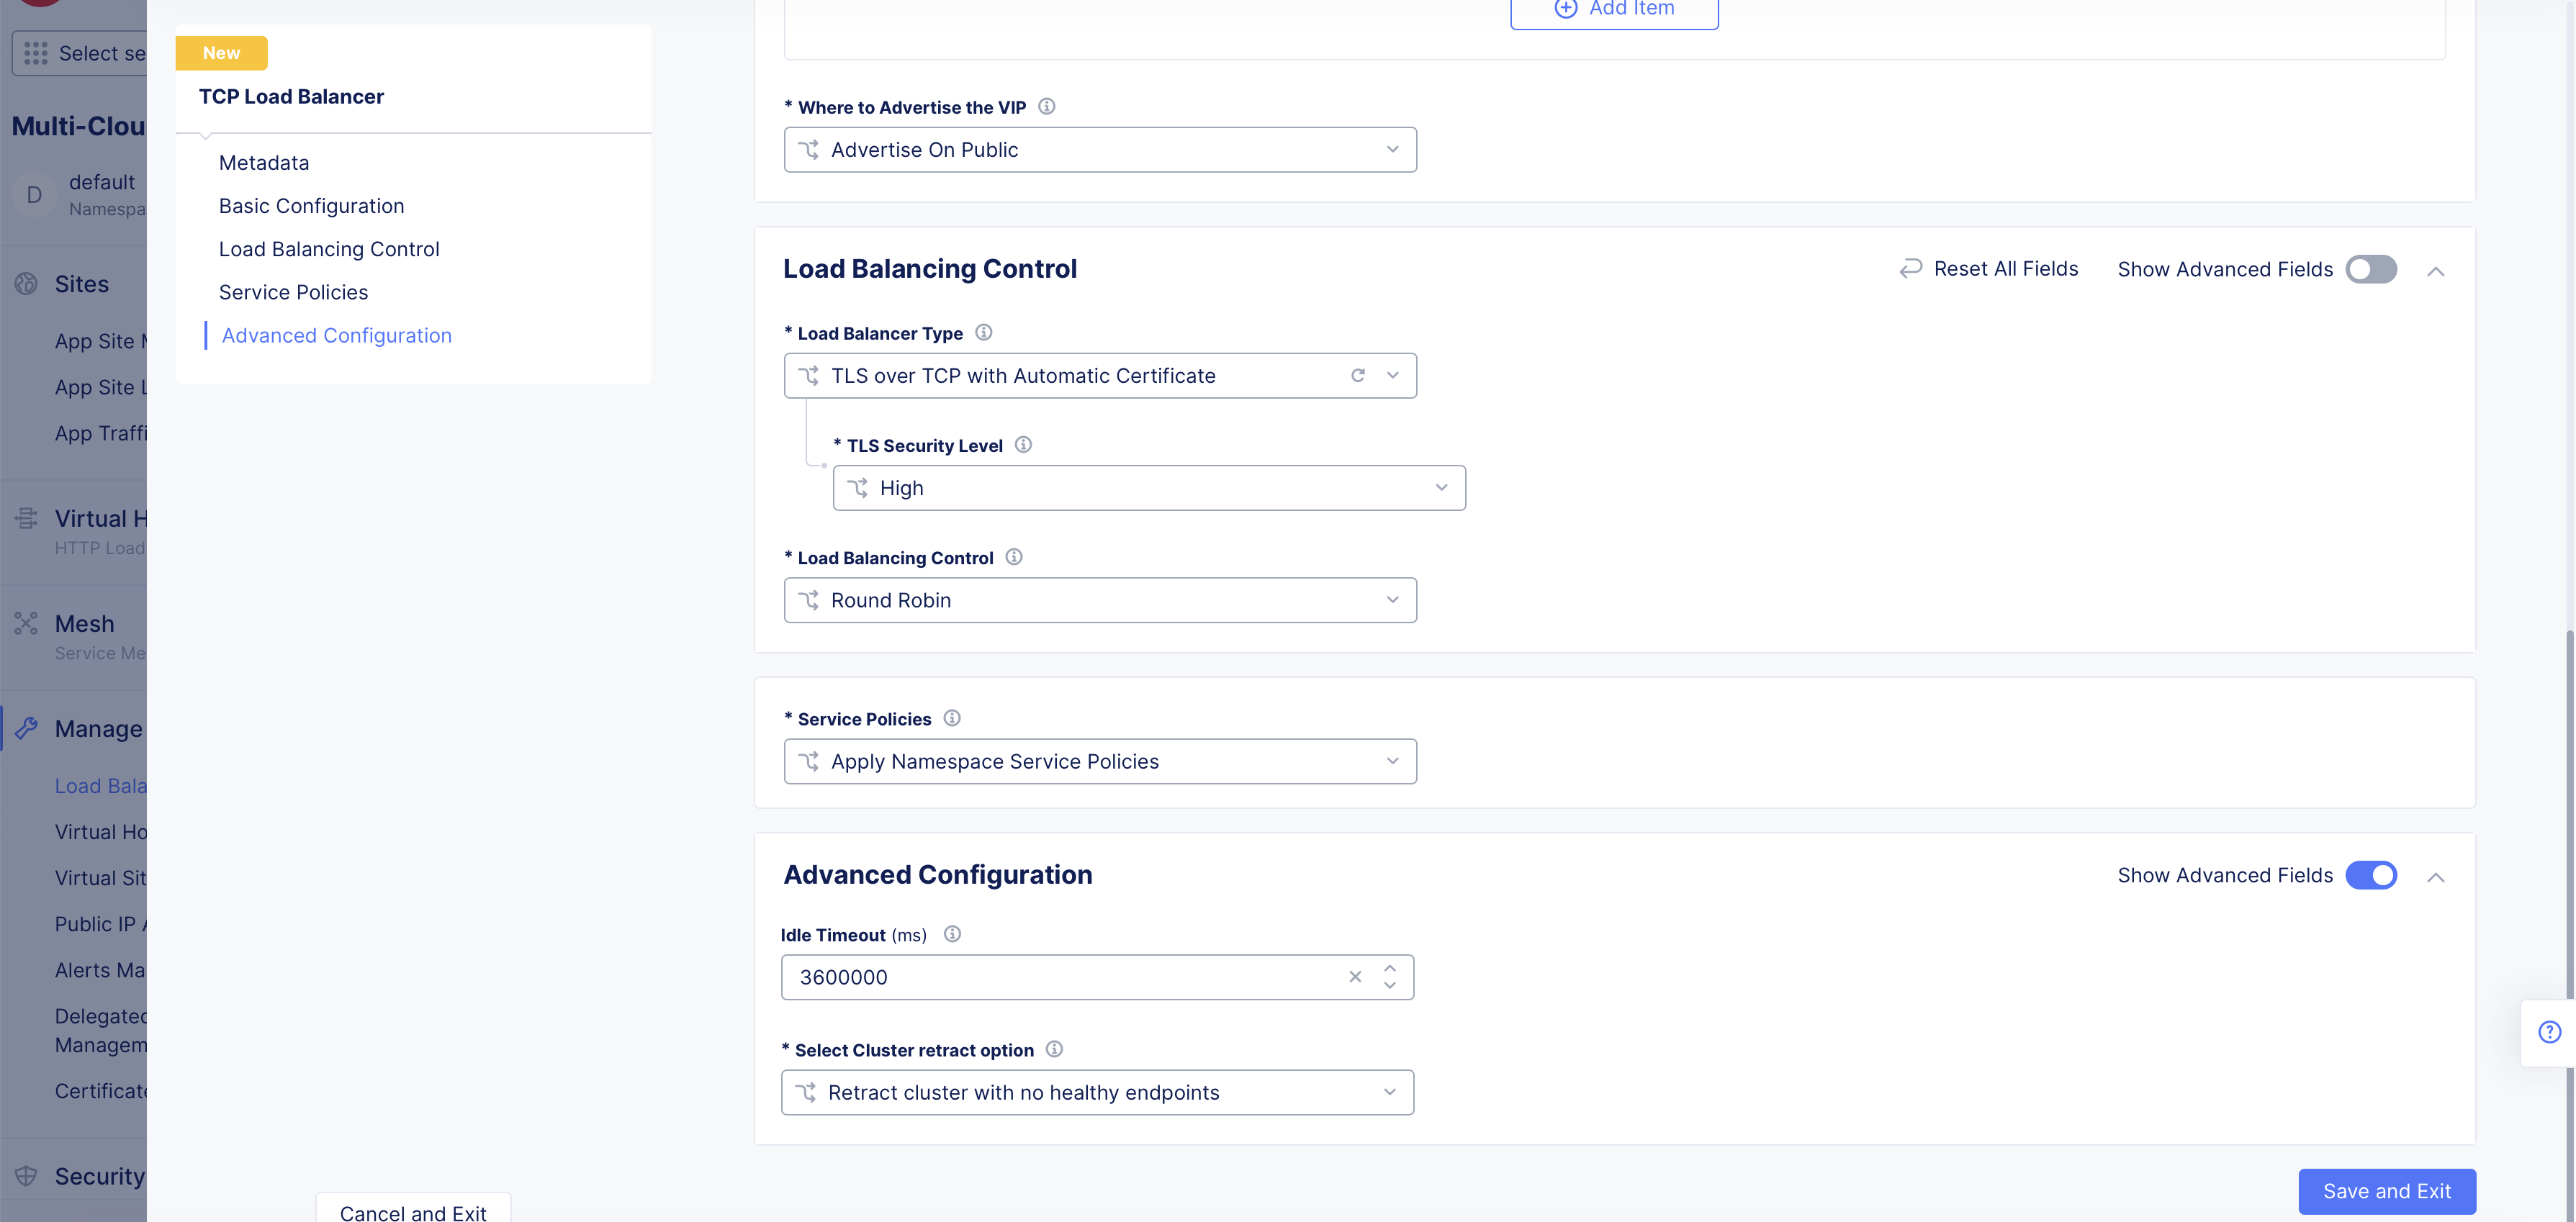
Figure: Advanced Options
Step 10: Complete creating the load balancer.
-
Click
Save and Exit. -
Verify that the requests to the configured domain are processed successfully using a terminal.
The following sample shows an example command sent for a DNS query over TCP:
dig +tcp @dns.mydistributed.cloud www.mydistributed.cloud