Create HTTP Connect
Objective
This guide provides instructions on how to create an HTTP Connect Proxy using the guided wizards in F5® Distributed Cloud Services.
An HTTP proxy operates between the sending Web server and your receiving web client. It processes the HTTP protocol line-by-line for any potentially harmful content before sending it to an internal Web client. It also acts as a buffer between your Web server and potentially harmful Web clients by enforcing HTTP RFC compliance, and preventing potential buffer overflow attacks.
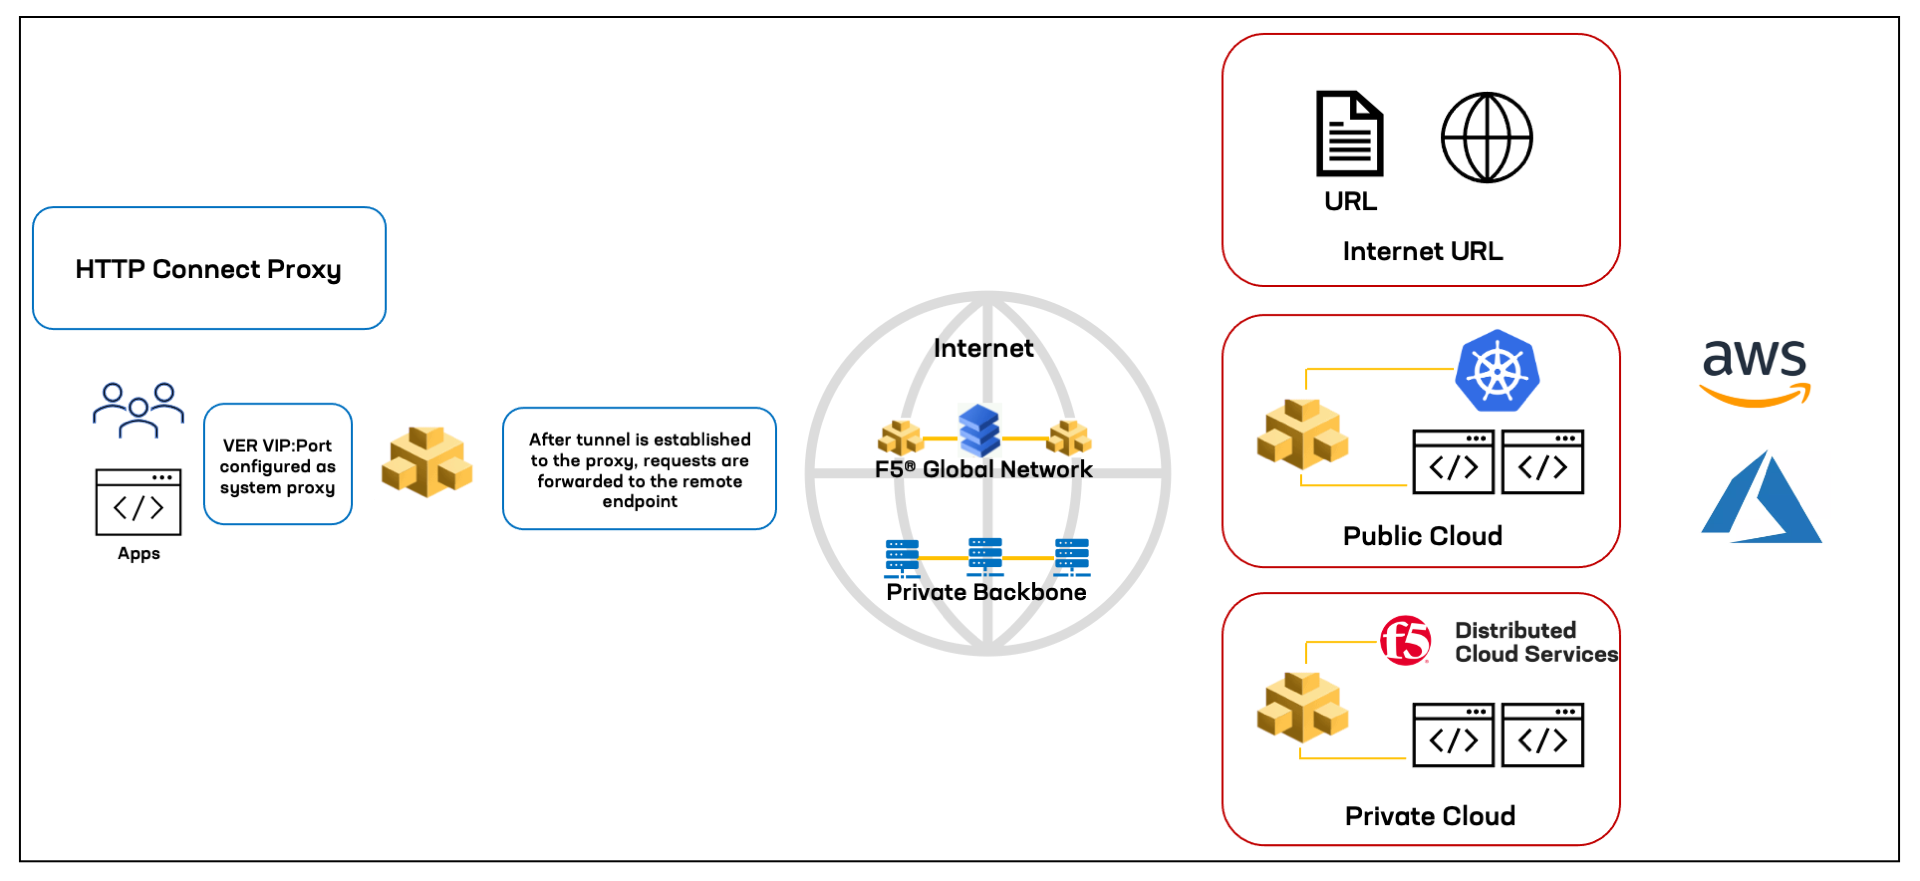
Figure: HTTP Connect Overview
Using the instructions provided in this guide, you will be able to create an HTTP Proxy using the HTTP CONNECT method.
Prerequisites
The following prerequisites apply:
- A valid Account is required. If you do not have an account, see Create an Account.
Configuration
Create HTTP Connect Proxy
This example shows HTTP set up in Multi-Cloud App Connect.
Step 1: Log into F5 Distributed Cloud Console, start HTTP Connect object creation.
Change to your application namespace in the namespace selector in the primary navigation bar.
- Open
F5 Distributed Cloud Console> selectMulti-Cloud App Connectbox.
Note: Homepage is role based, and your homepage may look different due to your role customization. Select
All Servicesdrop-down menu to discover all options. Customize Settings:Administration>Personal Management>My Account>Edit work domain & skillsbutton >Advancedbox > checkWork Domainboxes >Save changesbutton.
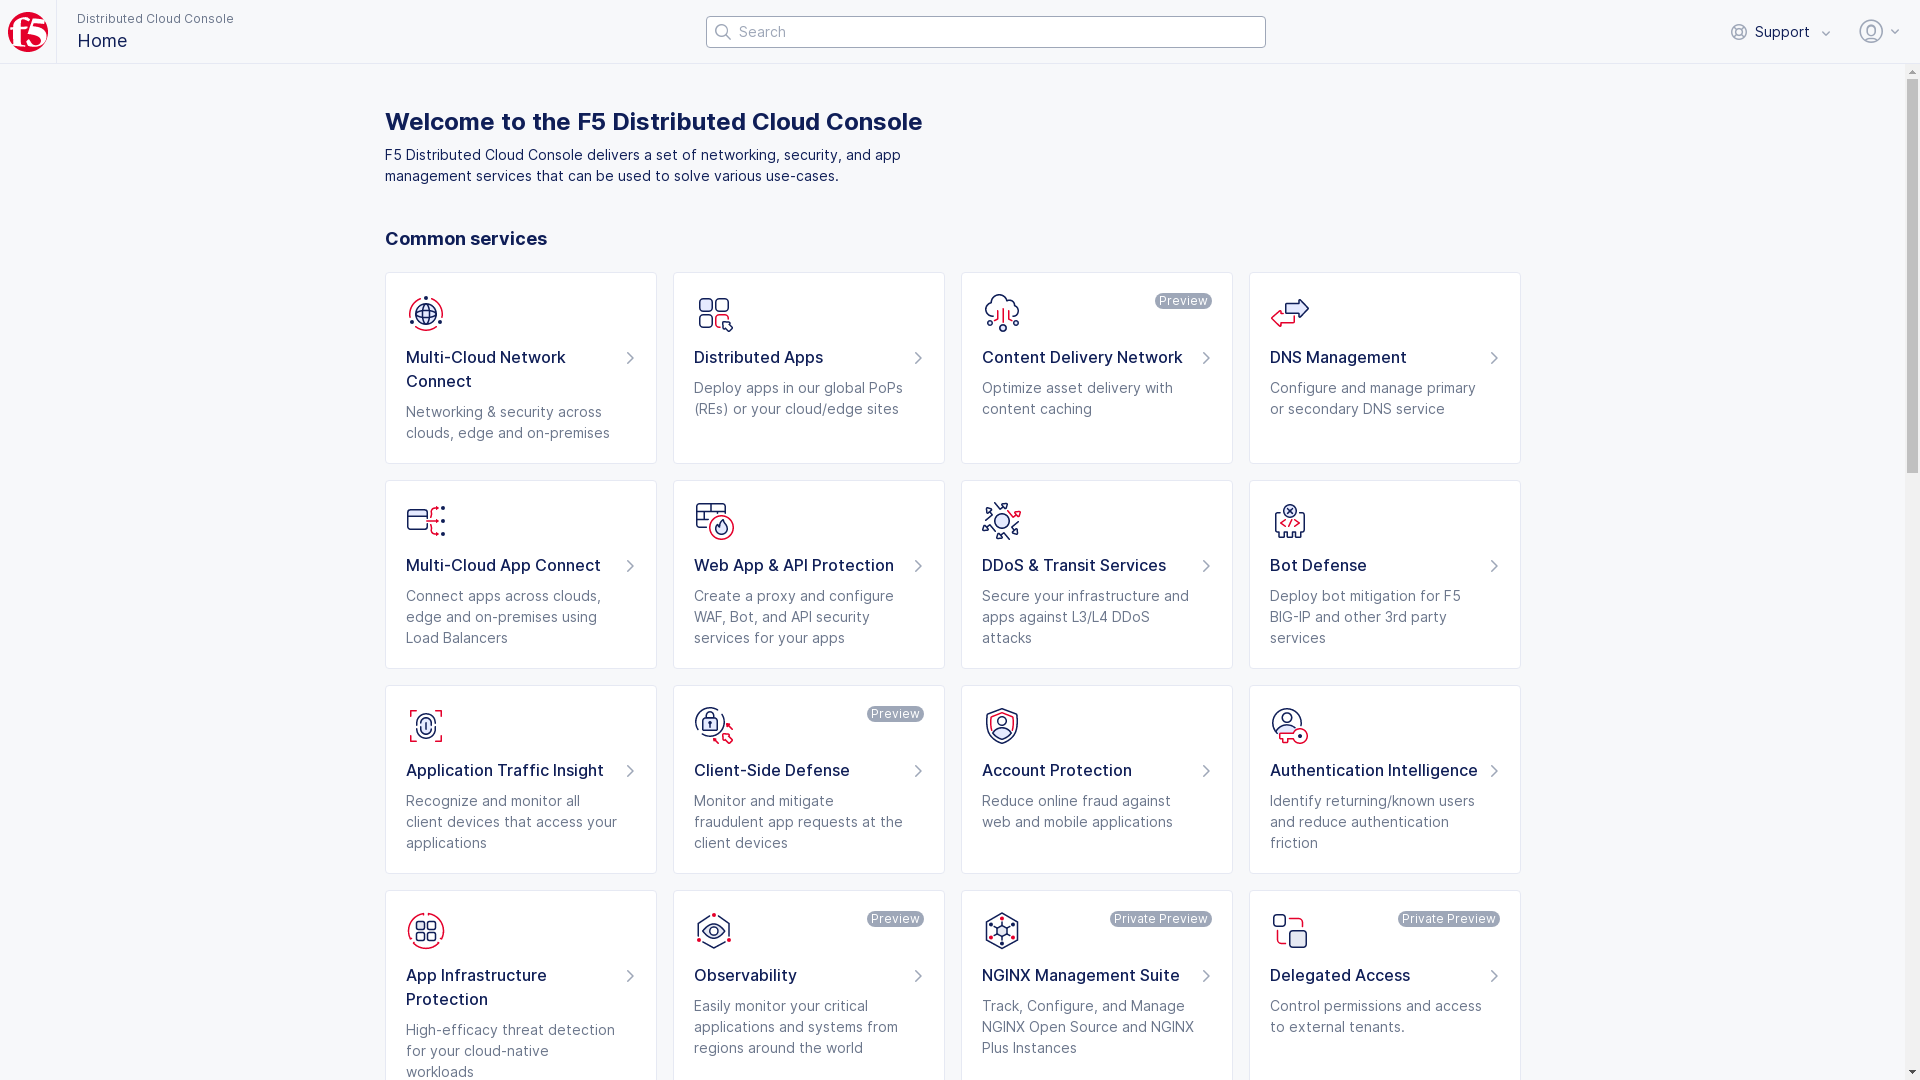
Figure: Homepage
- Select
Managein left-menu > selectLoad Balancers>HTTP Connect & DPRs.
Note: If options are not showing available, select
Showlink inAdvanced nav options visiblein bottom left corner. If needed, selectHideto minimize options from Advanced nav options mode.
- Select
Add HTTP Connect & DRPbutton.
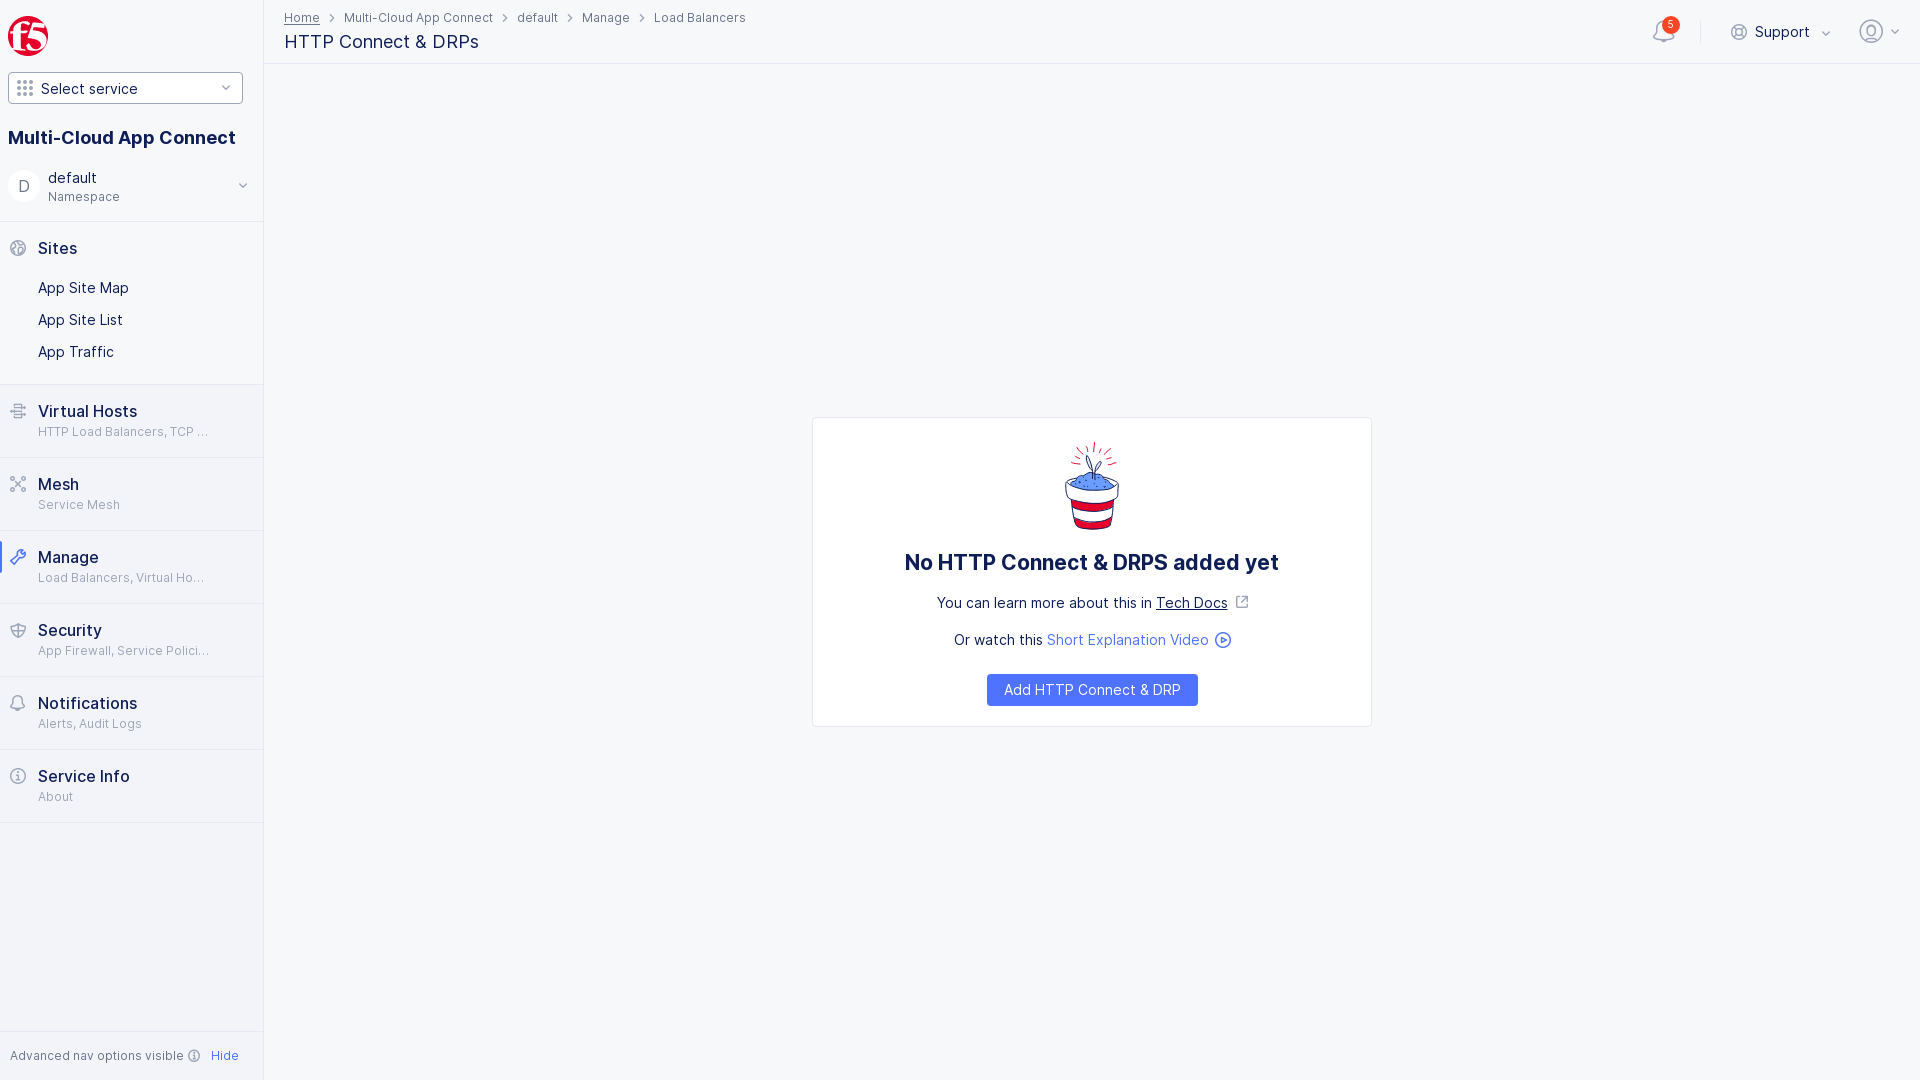
Figure: HTTP
Step 2: Configure meta data and proxy type.
-
Enter
Name. -
Enter
LabelsandDescriptionas needed. -
Toggle
Show Advanced FieldsinProxy Typebox. -
Select
Proxyin drop-down menu inHTTP Connect or Dynamic Reverse Proxy.
-
Select
HTTP Connectoption in theHTTP Connectdrop-down menu that adjusts below.HTTP Connect: Use this option for HTTP Connect proxy.
-
Toggle
Show Advanced FieldsinSites or Virtual Sitesbox. -
Select
Configurelink inAdvanced Optionsto customize as needed, new form will load. -
Configure options as needed.
- Options:
Header Options,Error Response Options,Buffer Policy,andCompression Parameters.
- Options:
-
Select
Applybutton to apply advanced options and return toHTTP Connect and DRPpage.
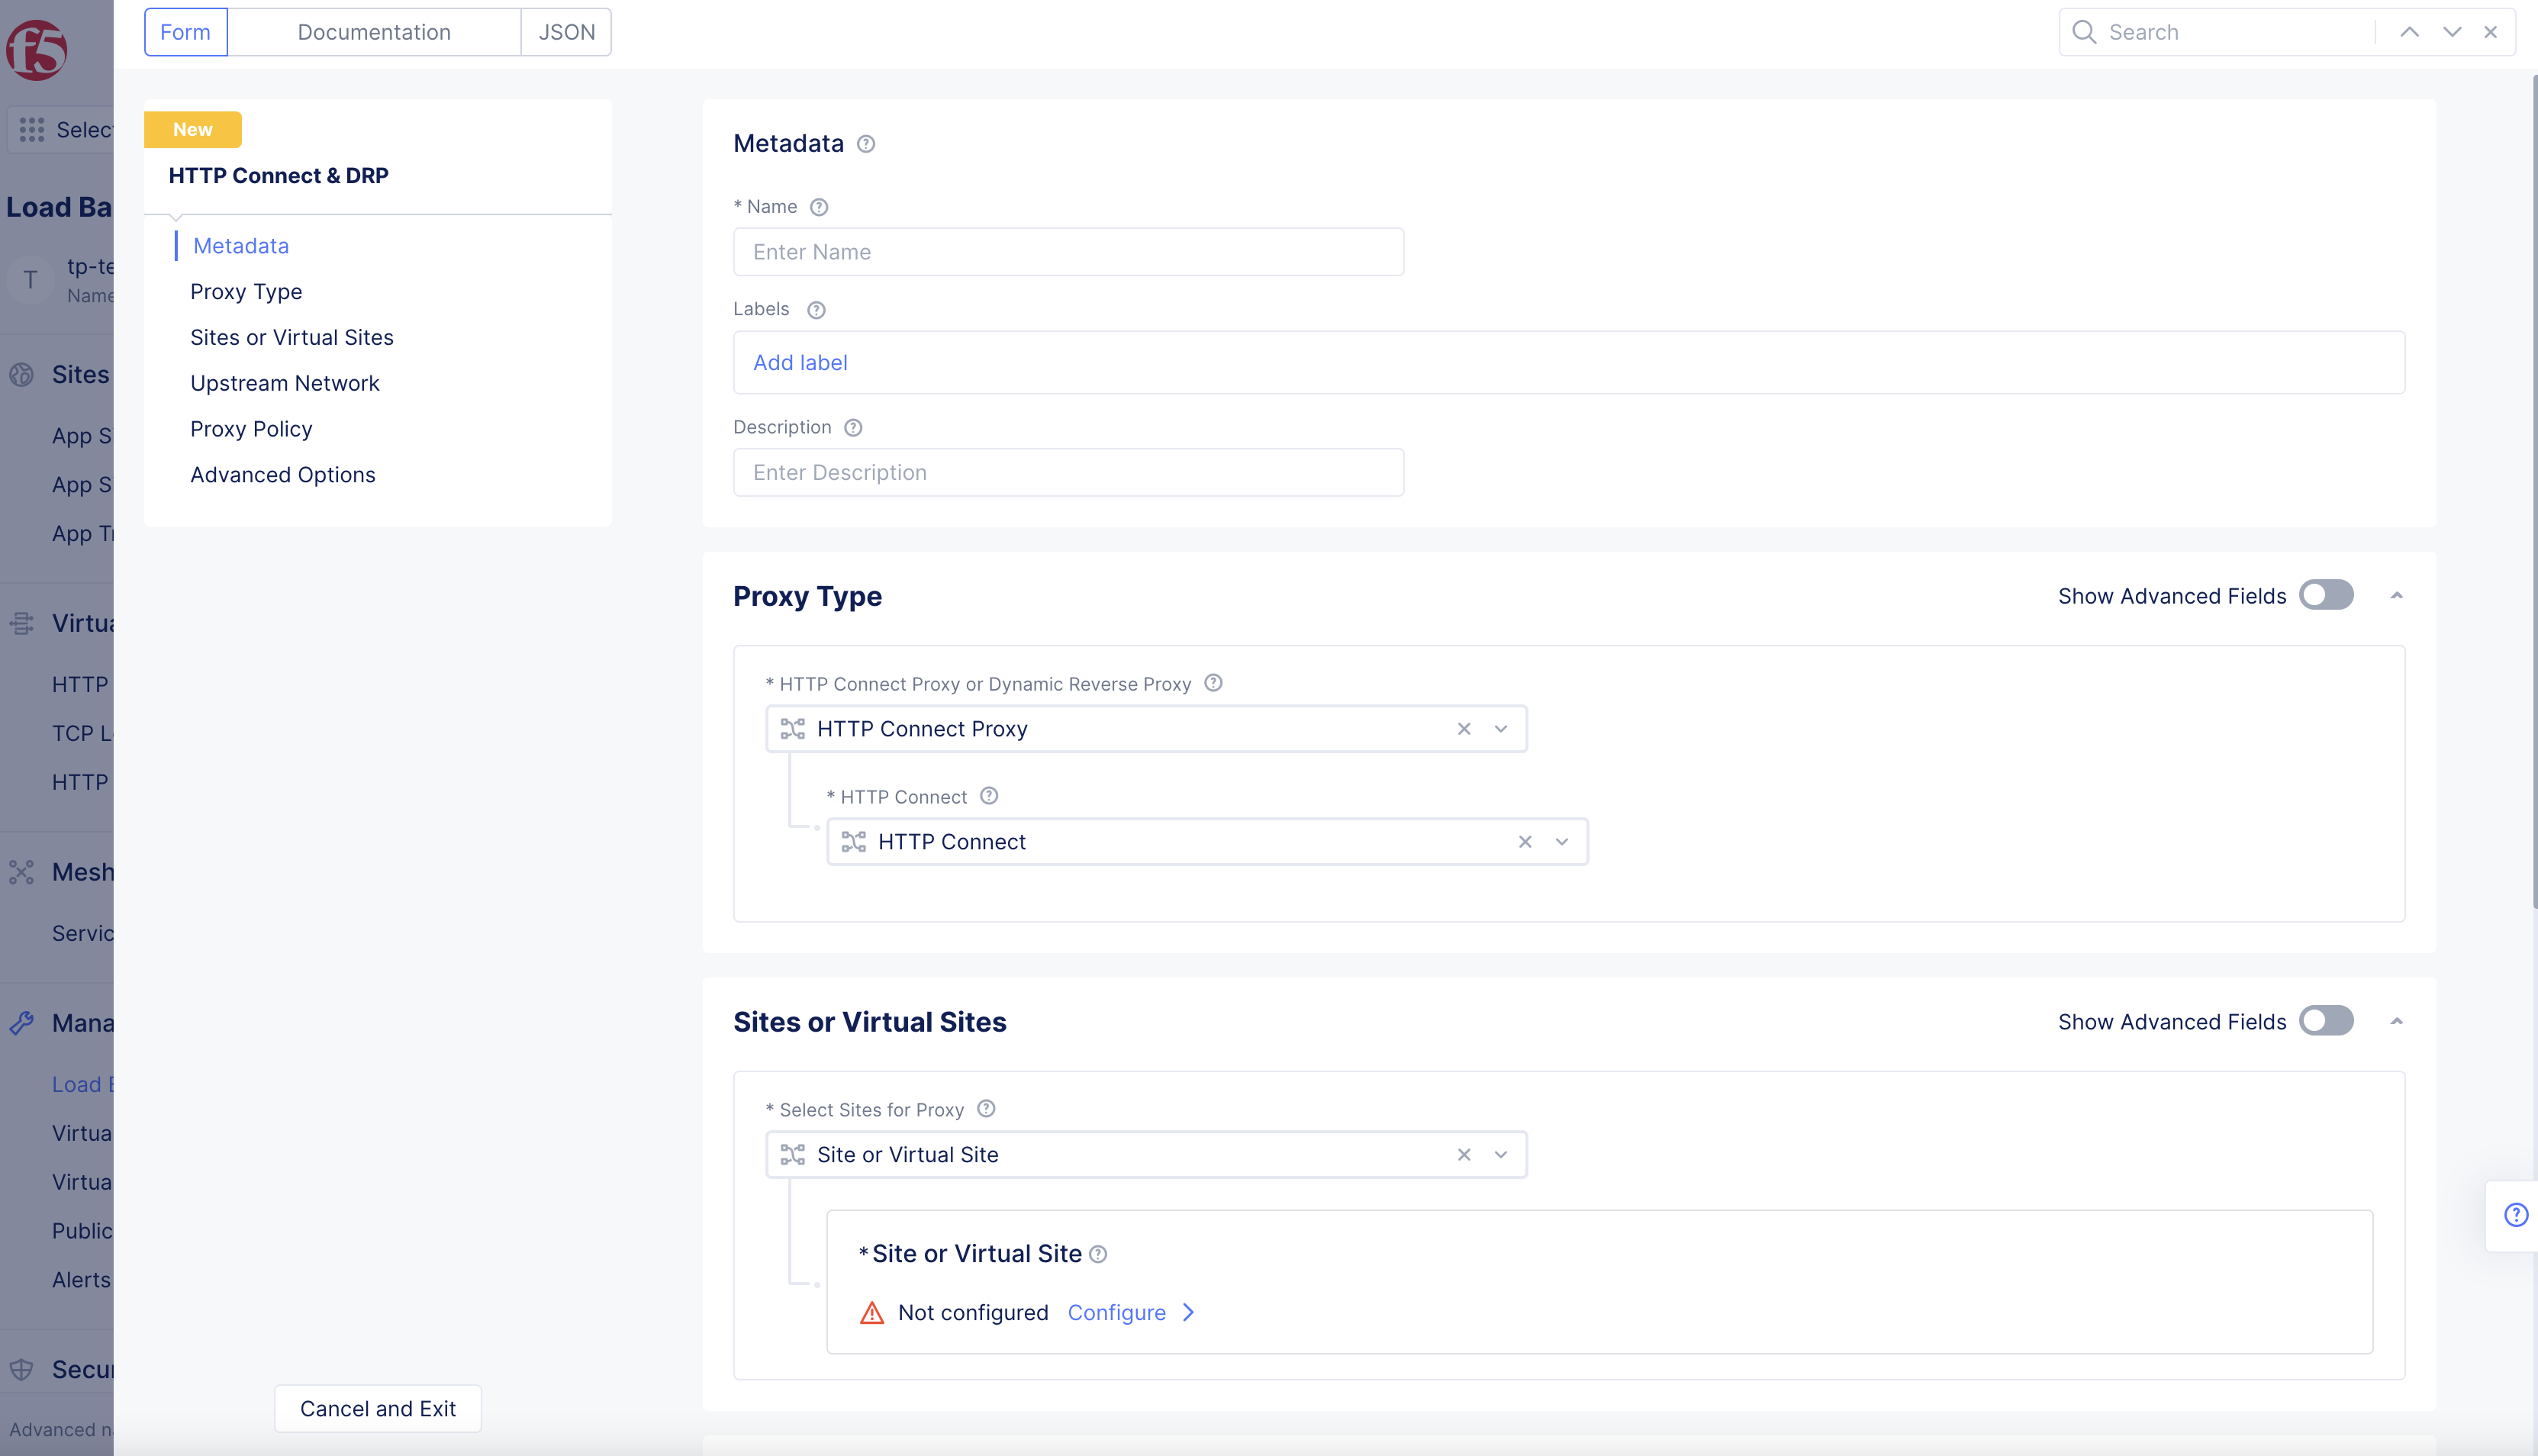
Figure: Proxy Type
Step 3: Set sites or virtual sites for proxy.
Select sites or virtual sites where you want to install this proxy.
-
Select Sites for Proxydrop-down menu hasSites or Virtual Sitespopulated by default. -
Toggle
Show Advanced FieldsinSites or Virtual Sitesbox to showDo Not Instantiateoption. -
Select
Configurelink inSite or Virtual Sitesection.
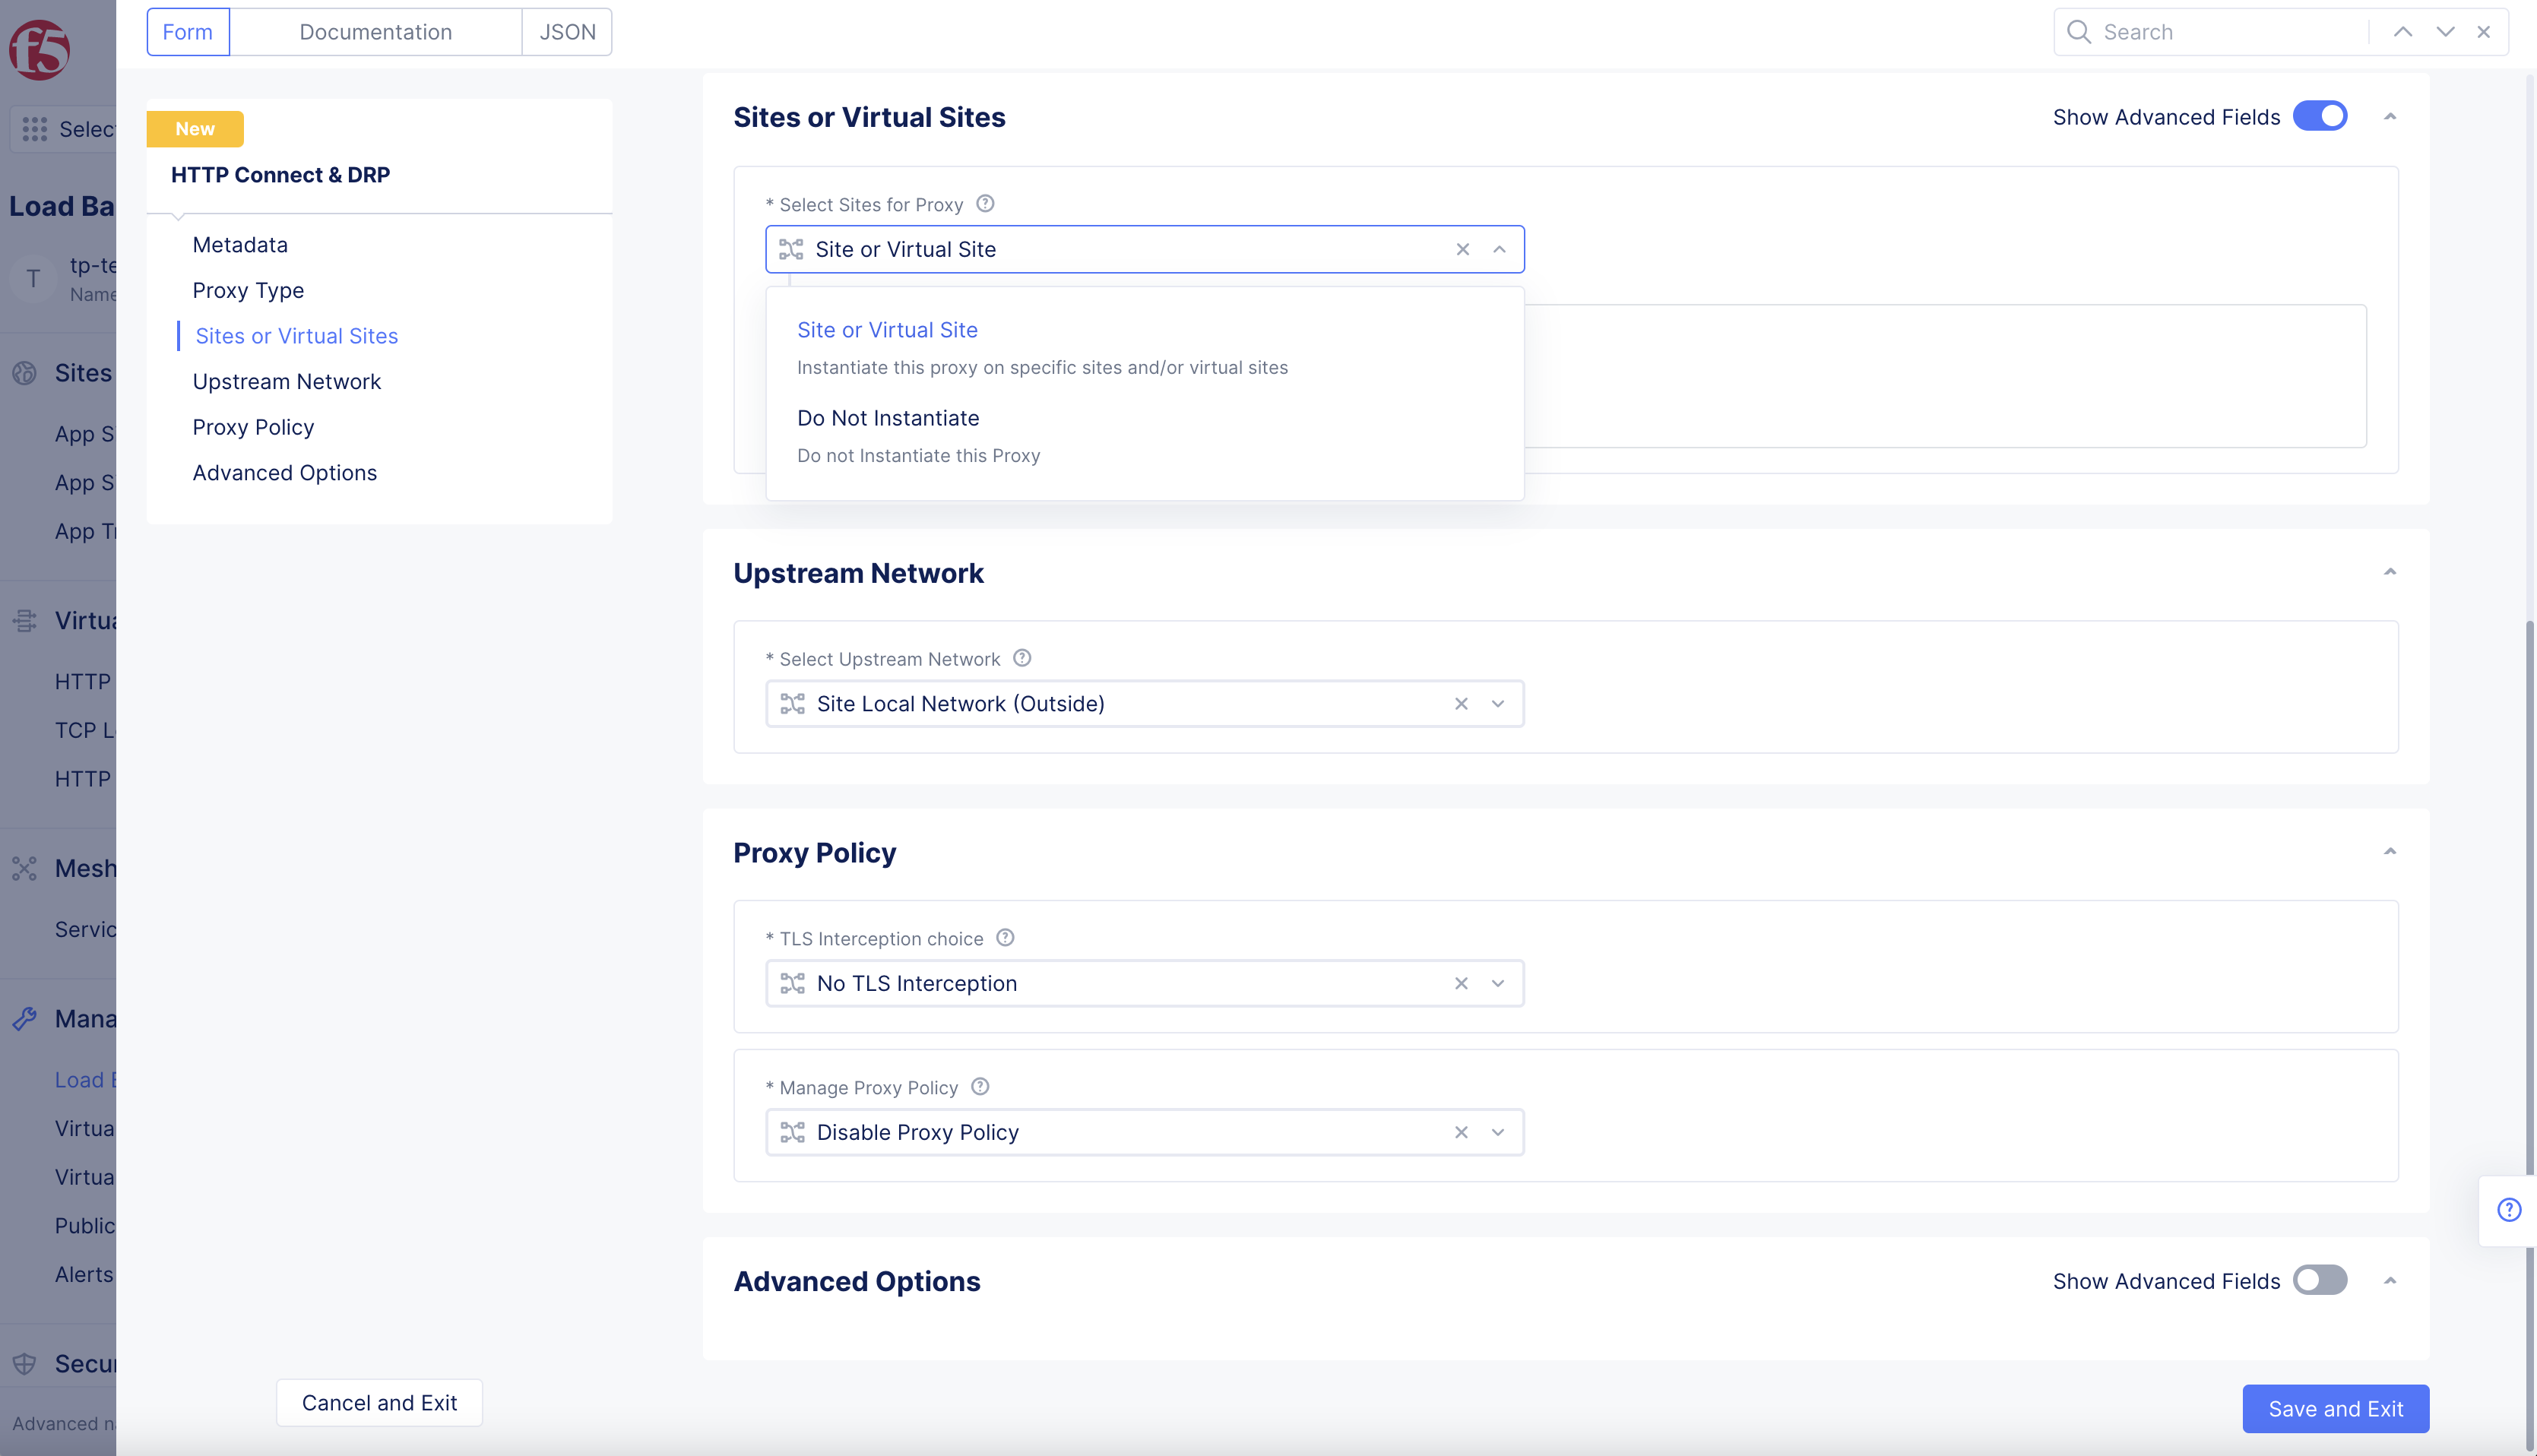
Figure: Sites or Virtual Sites Configuration
-
The
Custom Advertise VIP Configurationpage opens. -
Select
+ Add Itembutton.
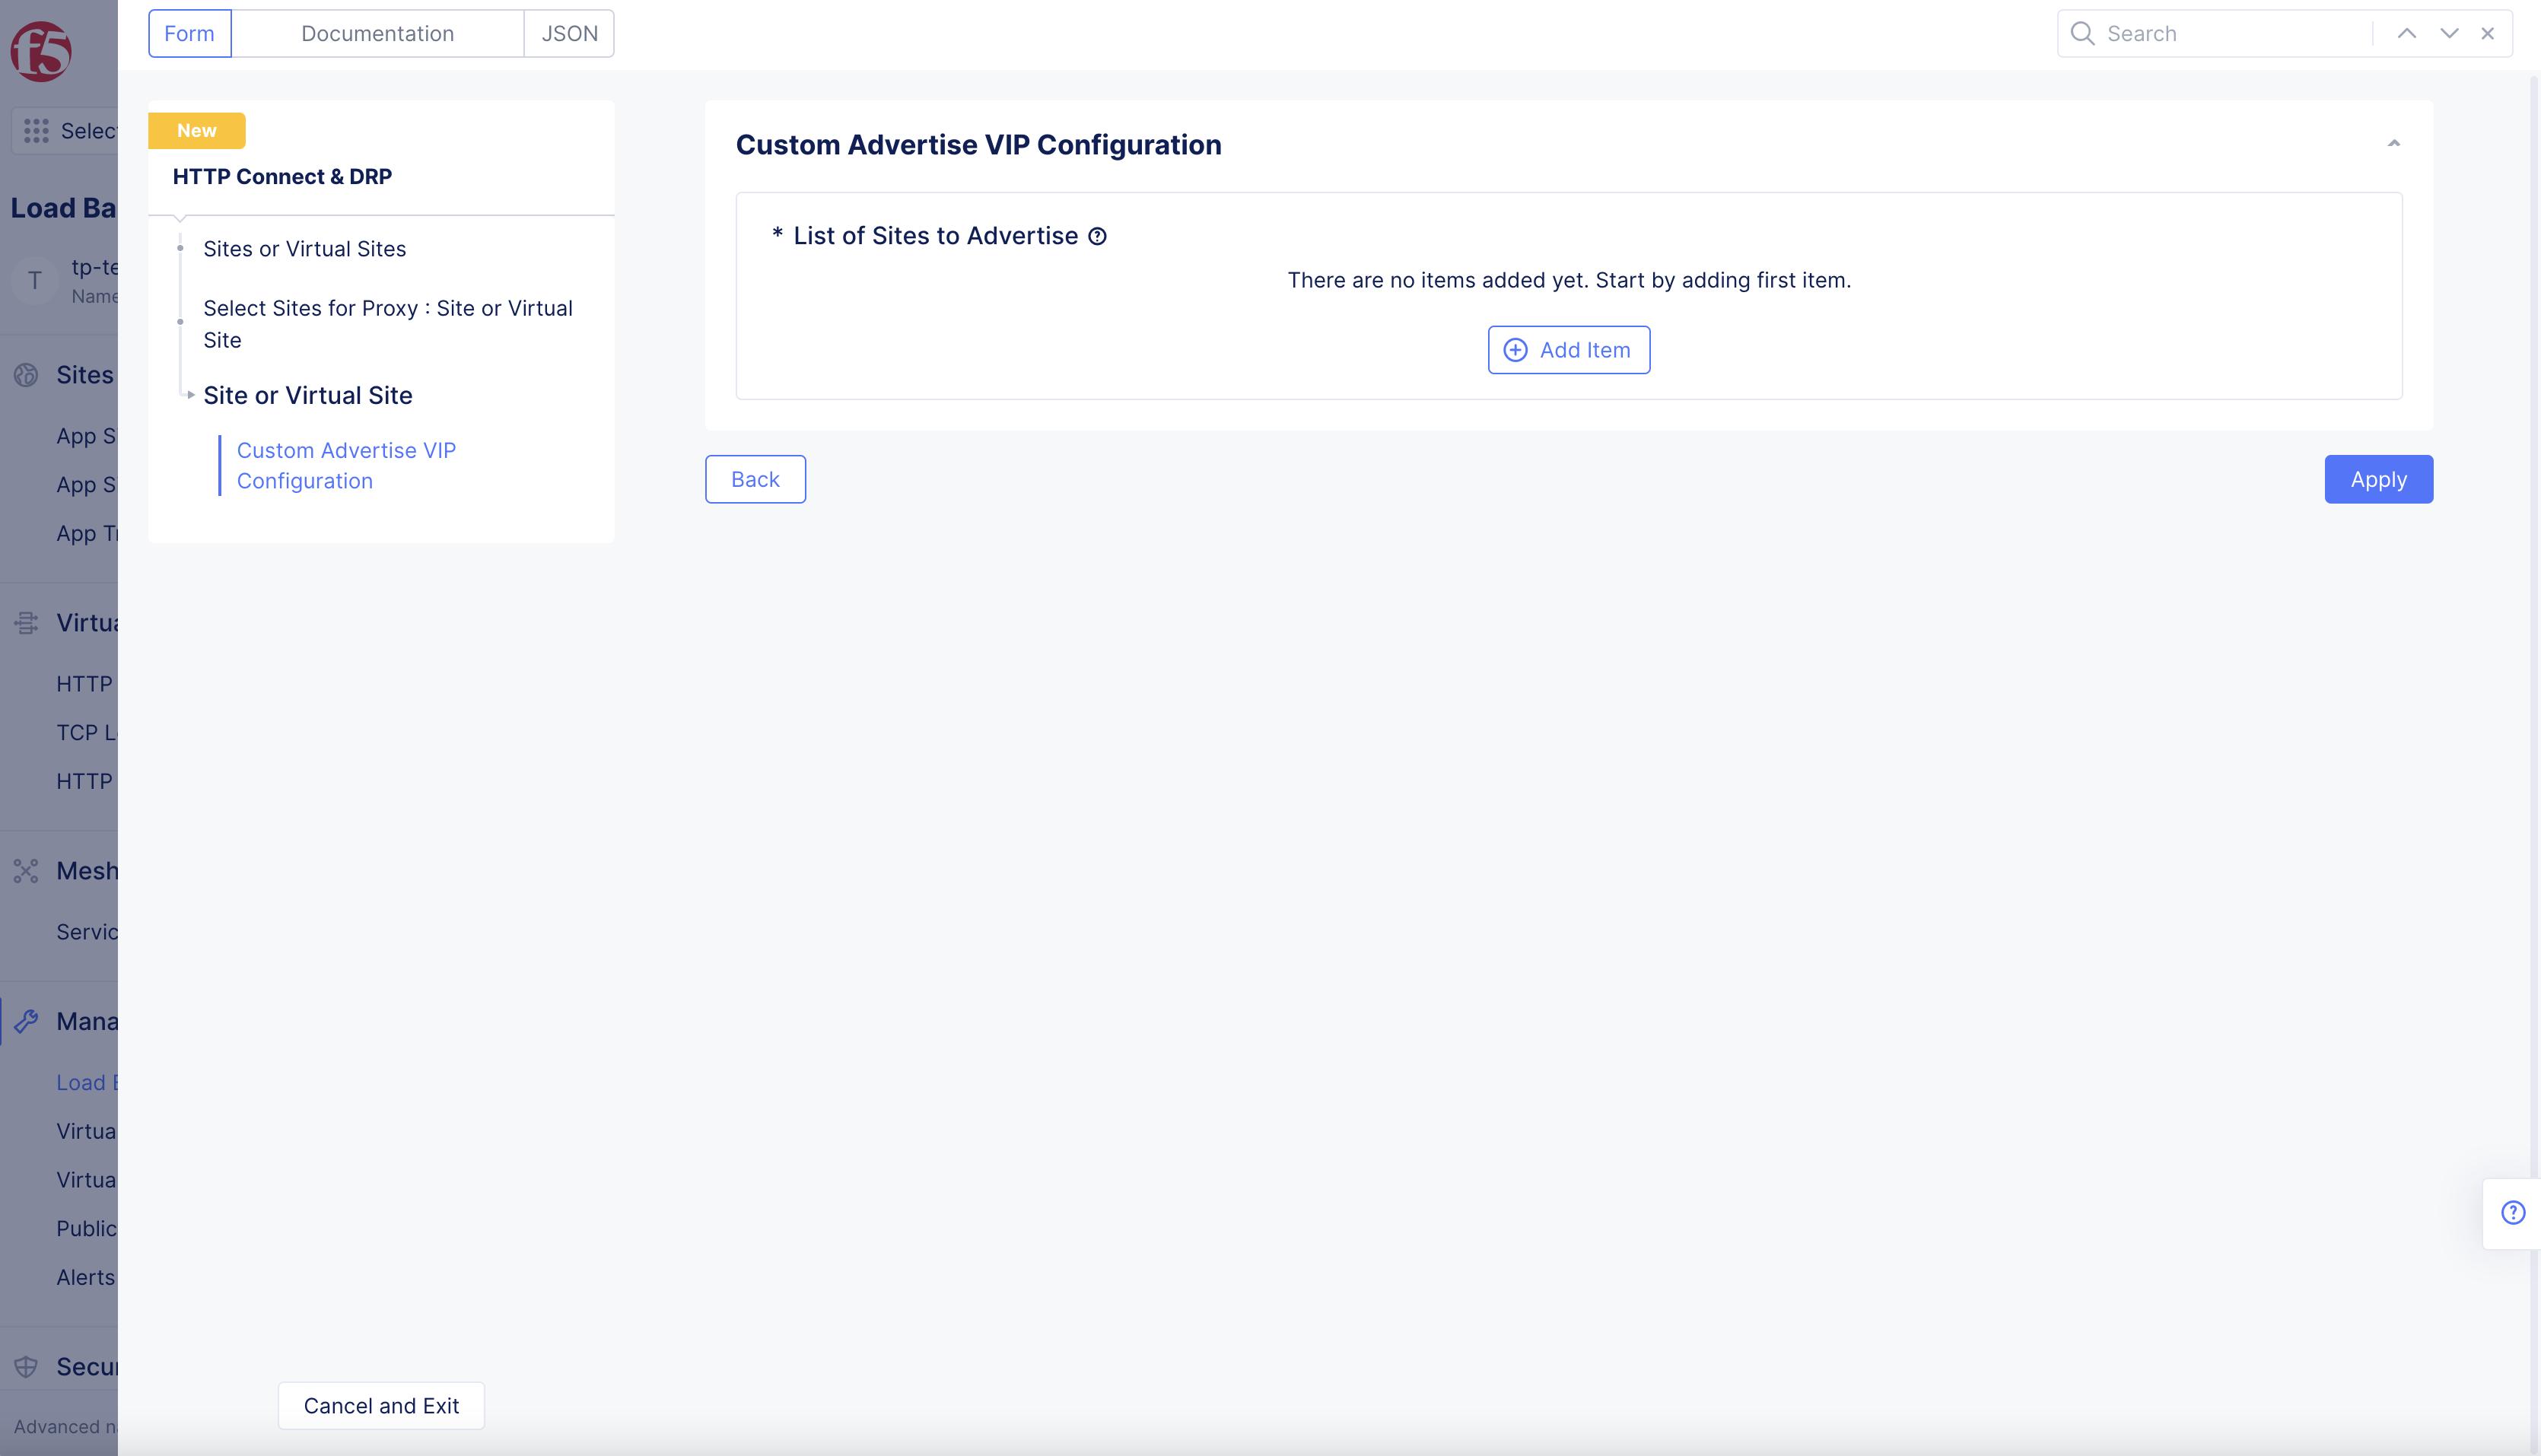
Figure: Sites or Virtual Sites Custom Advertise VIP Configuration
-
Toggle
Show Advanced Fields. -
Select Where to Advertisedrop-down menu option:-
Select
Siteto install the proxy on a site. -
Select
Virtual Siteto install the proxy on a virtual site.
-
-
Select one of the following options for the
Site Networkdrop-down menu:-
Inside and Outside Network
-
Inside Network
-
Outside Network
-
Outside Network with internet VIP
-
Inside and Outside Network with Internet VIP
-
-
Select
Virtual Site ReferenceorSite Referencedrop-down menu option.
Note: Option dependent on
Select Where to Advertiseoption selected.
Note: Select
Virtual Siteyou have created, or+ Create new Virtual Sitewith button at the bottom of pop-up menu.
Note:
IP Addressbox is only available whenSiteoption is selected.
-
TCP Listen Port Choicedrop-down menu populates withTCP Listen Portoption by default.Use Default Listen Portoption available. -
Enter port in
TCP Listen Portbox.
Note: This is the port for your HTTP Connect Proxy to listen to requests.
- Select
Applybutton.
Note: You can add more sites or virtual sites to advertise using the
Add itemoption.
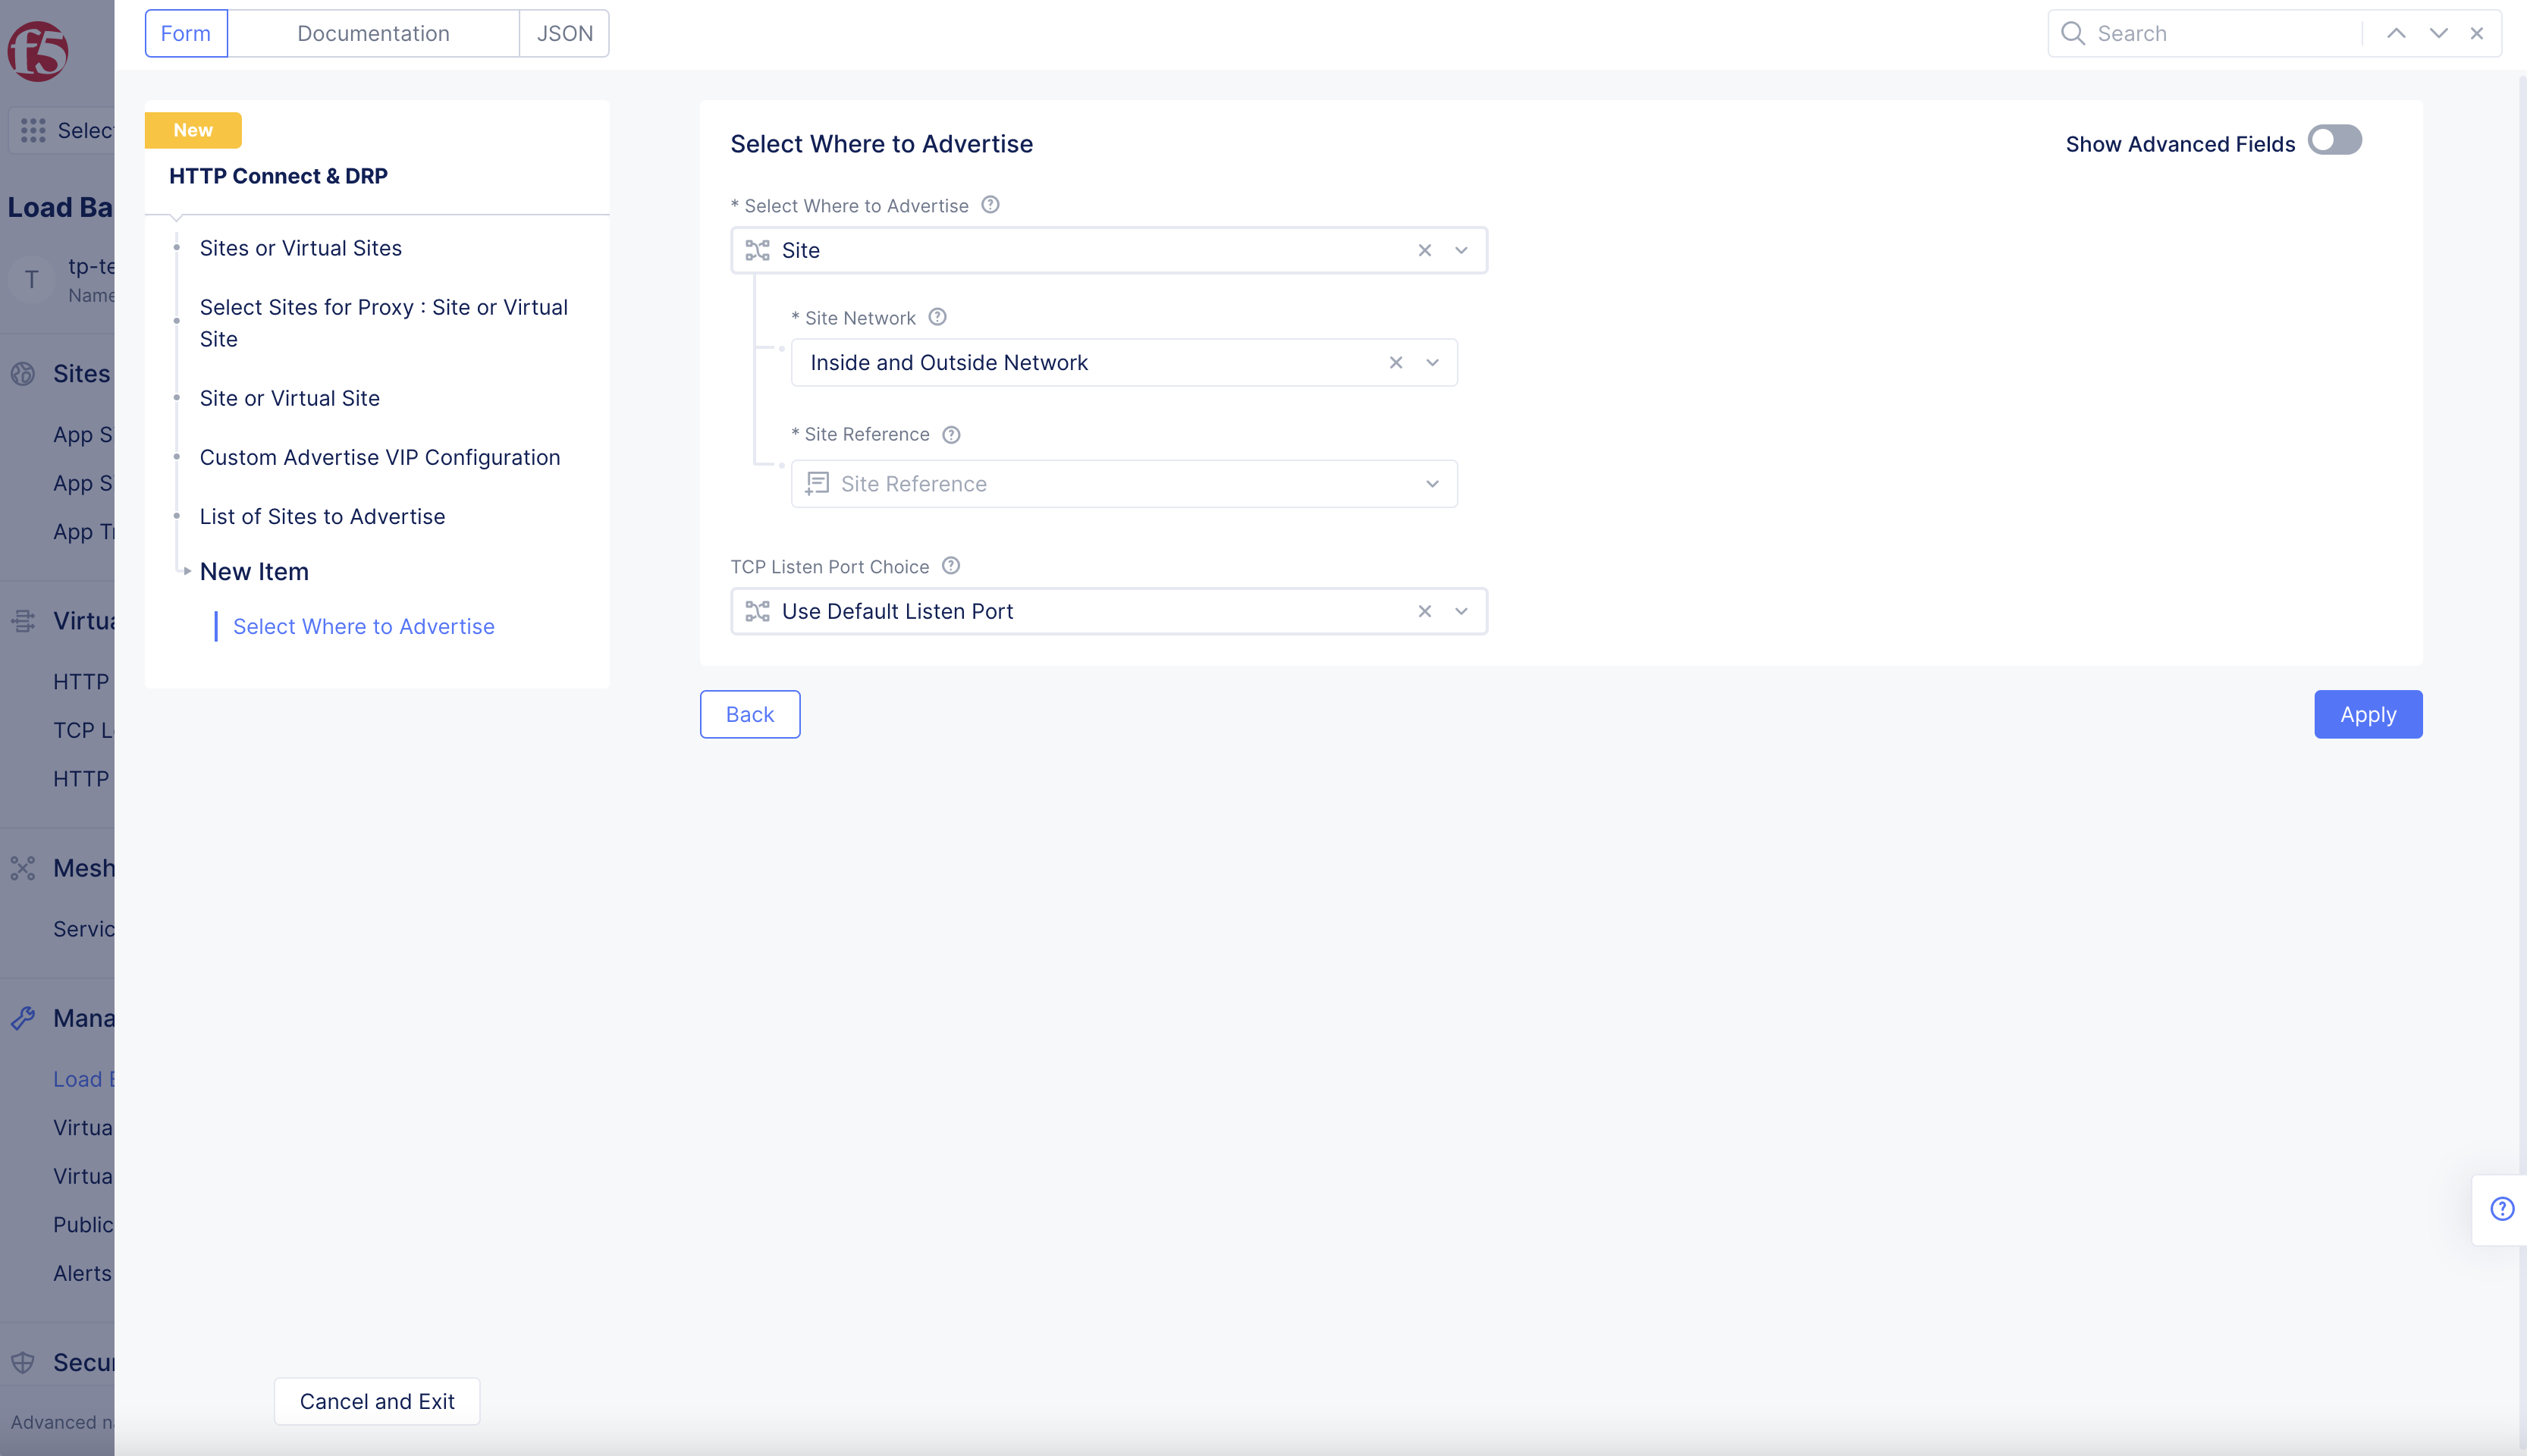
Figure: Advertise policy configuration
Step 4: Set network for upstream connections.
Select which network is going to be used to discover and send the request to your final endpoint.
-
Select Upstream Networkoption in drop-down menu inUpstream Networksection.-
Site Local Network (Outside): Real endpoint is reachable via outside interface. -
Site Local Network Inside: Real endpoint is reachable via inside interface.
-
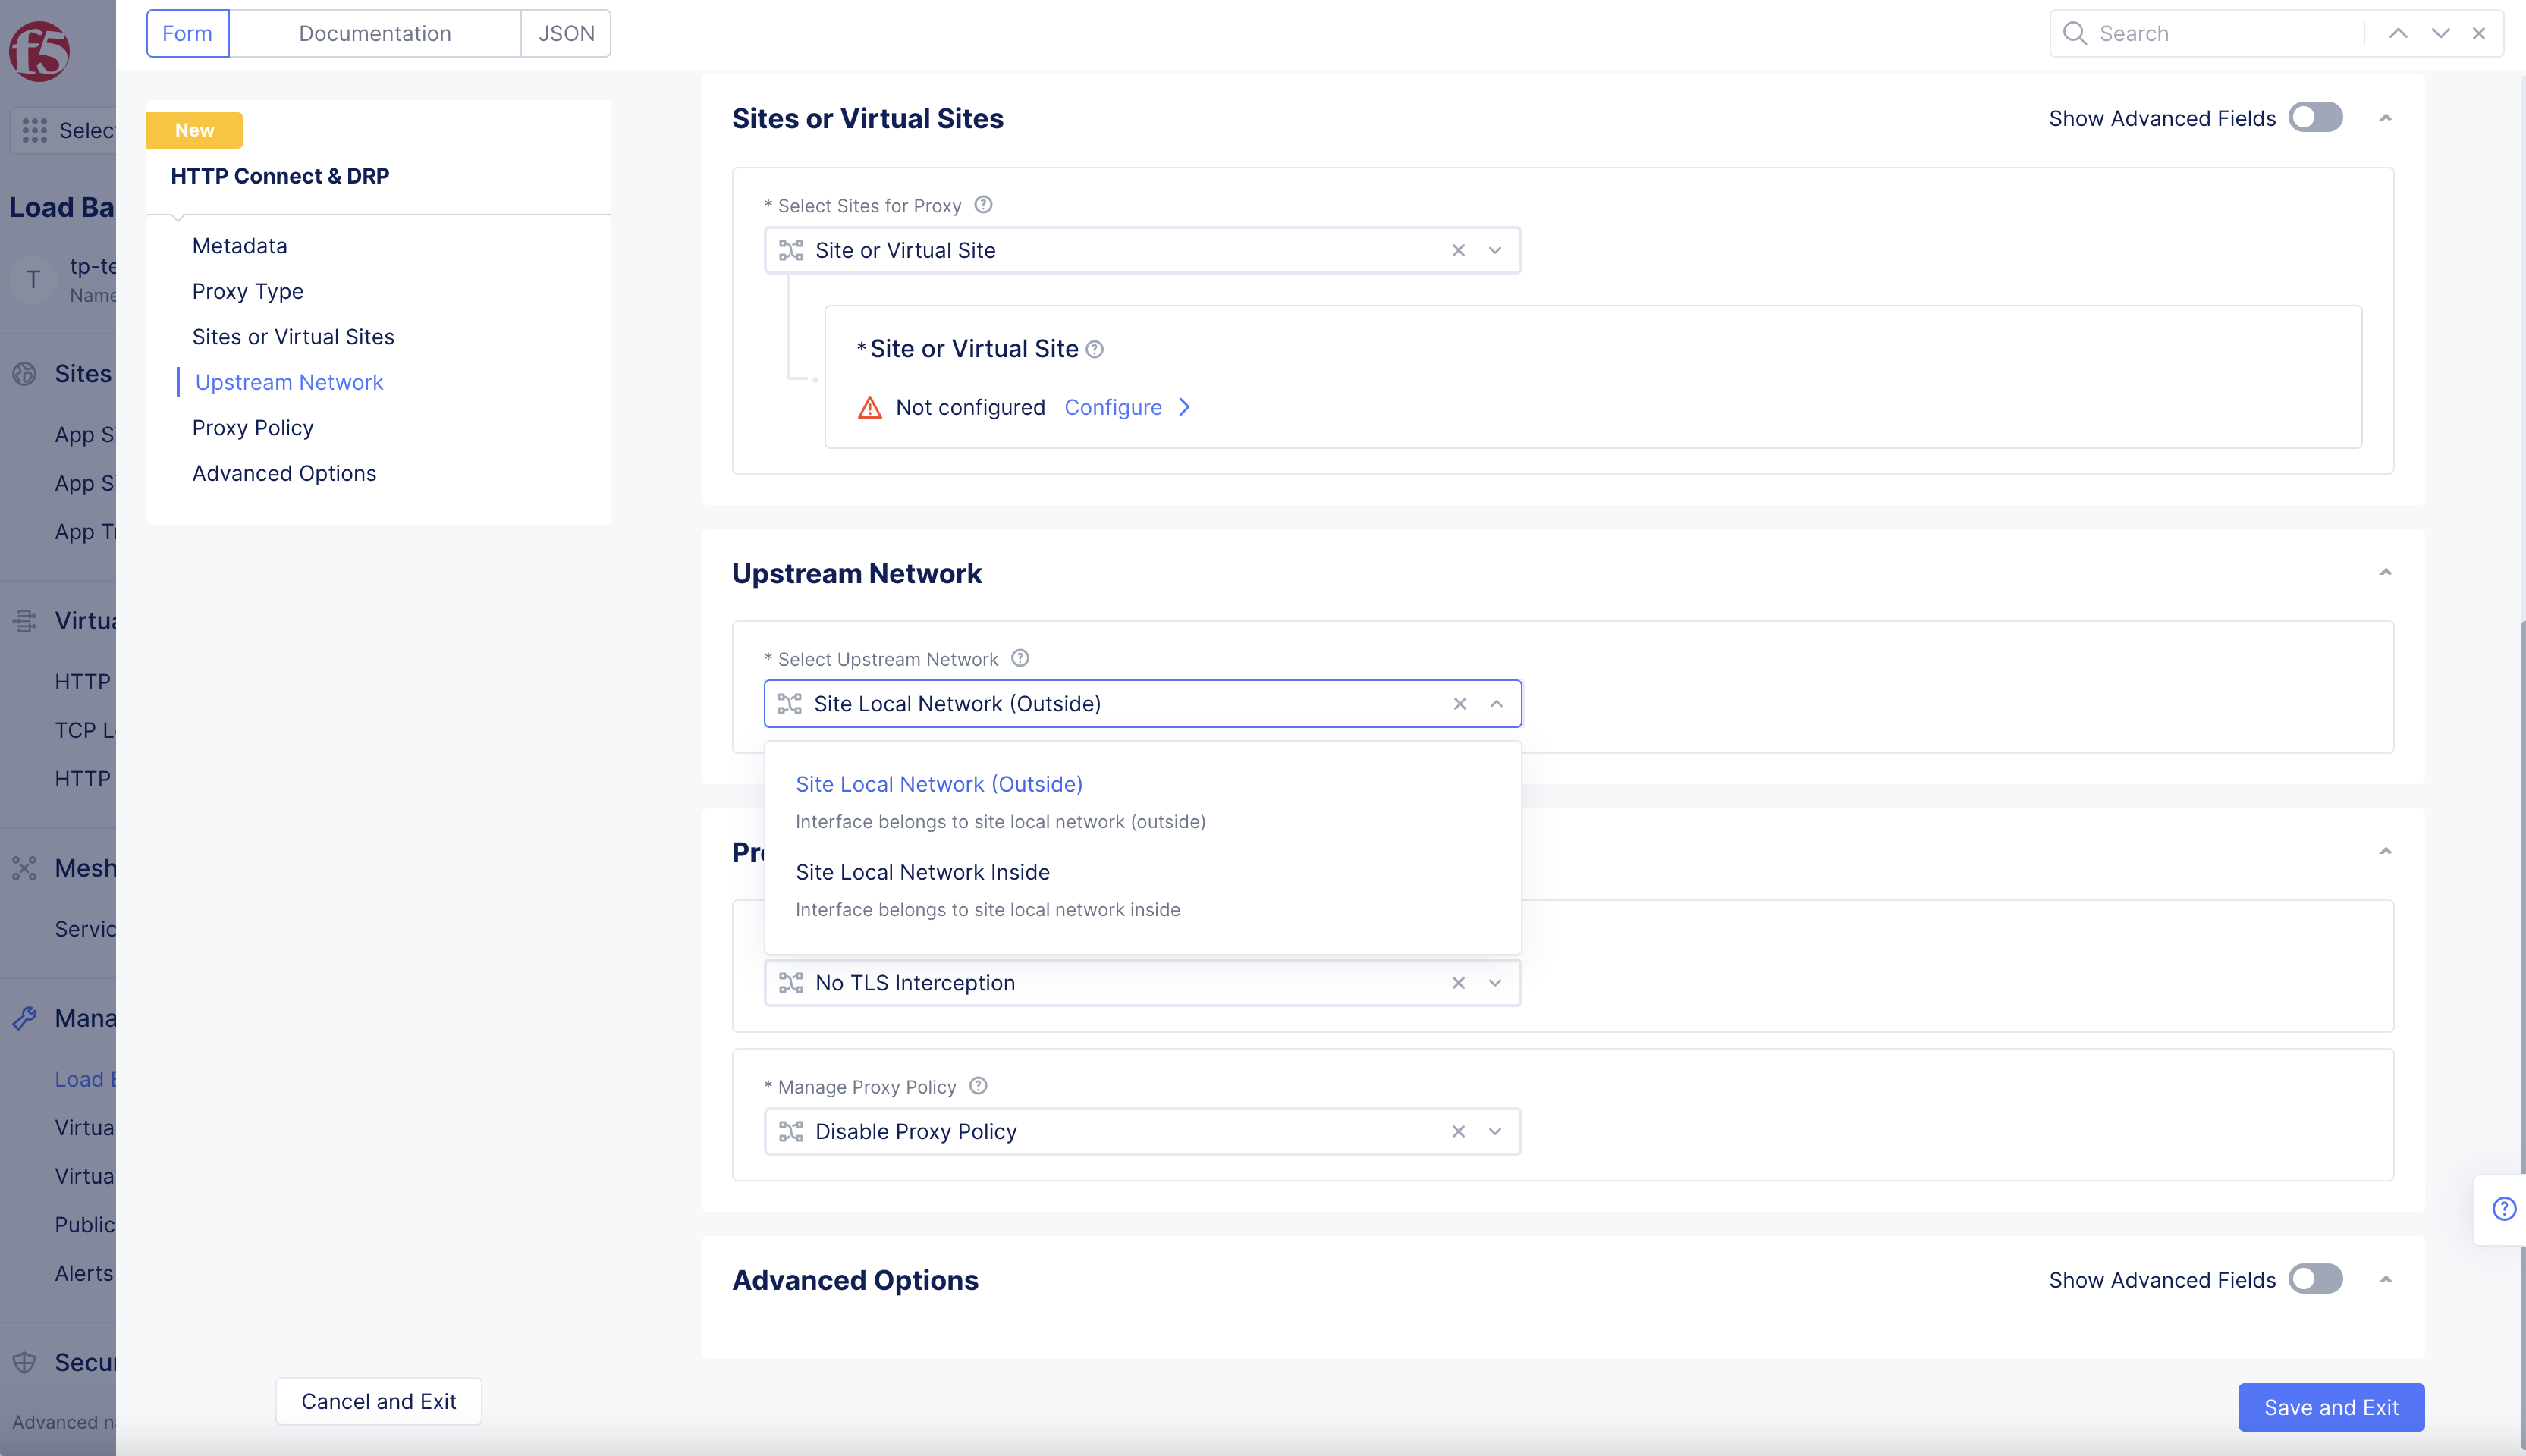
Figure: Upstream Network
Step 5: Configure proxy policy.
Configure policies for this proxy. Go to Proxy Policy section, and select an option for the Manage Proxy Policy field.
-
Select
Manage Proxy Policiesoption in drop-down menu.-
Disable Proxy Policy: With this option, no policies are installed on this proxy. -
Active Proxy Policies: To set a policy. From the options for theForward Proxy Policiesfield, select an existing forward proxy policy, or selectCreate new forward proxy policyto create and apply a new policy.
-
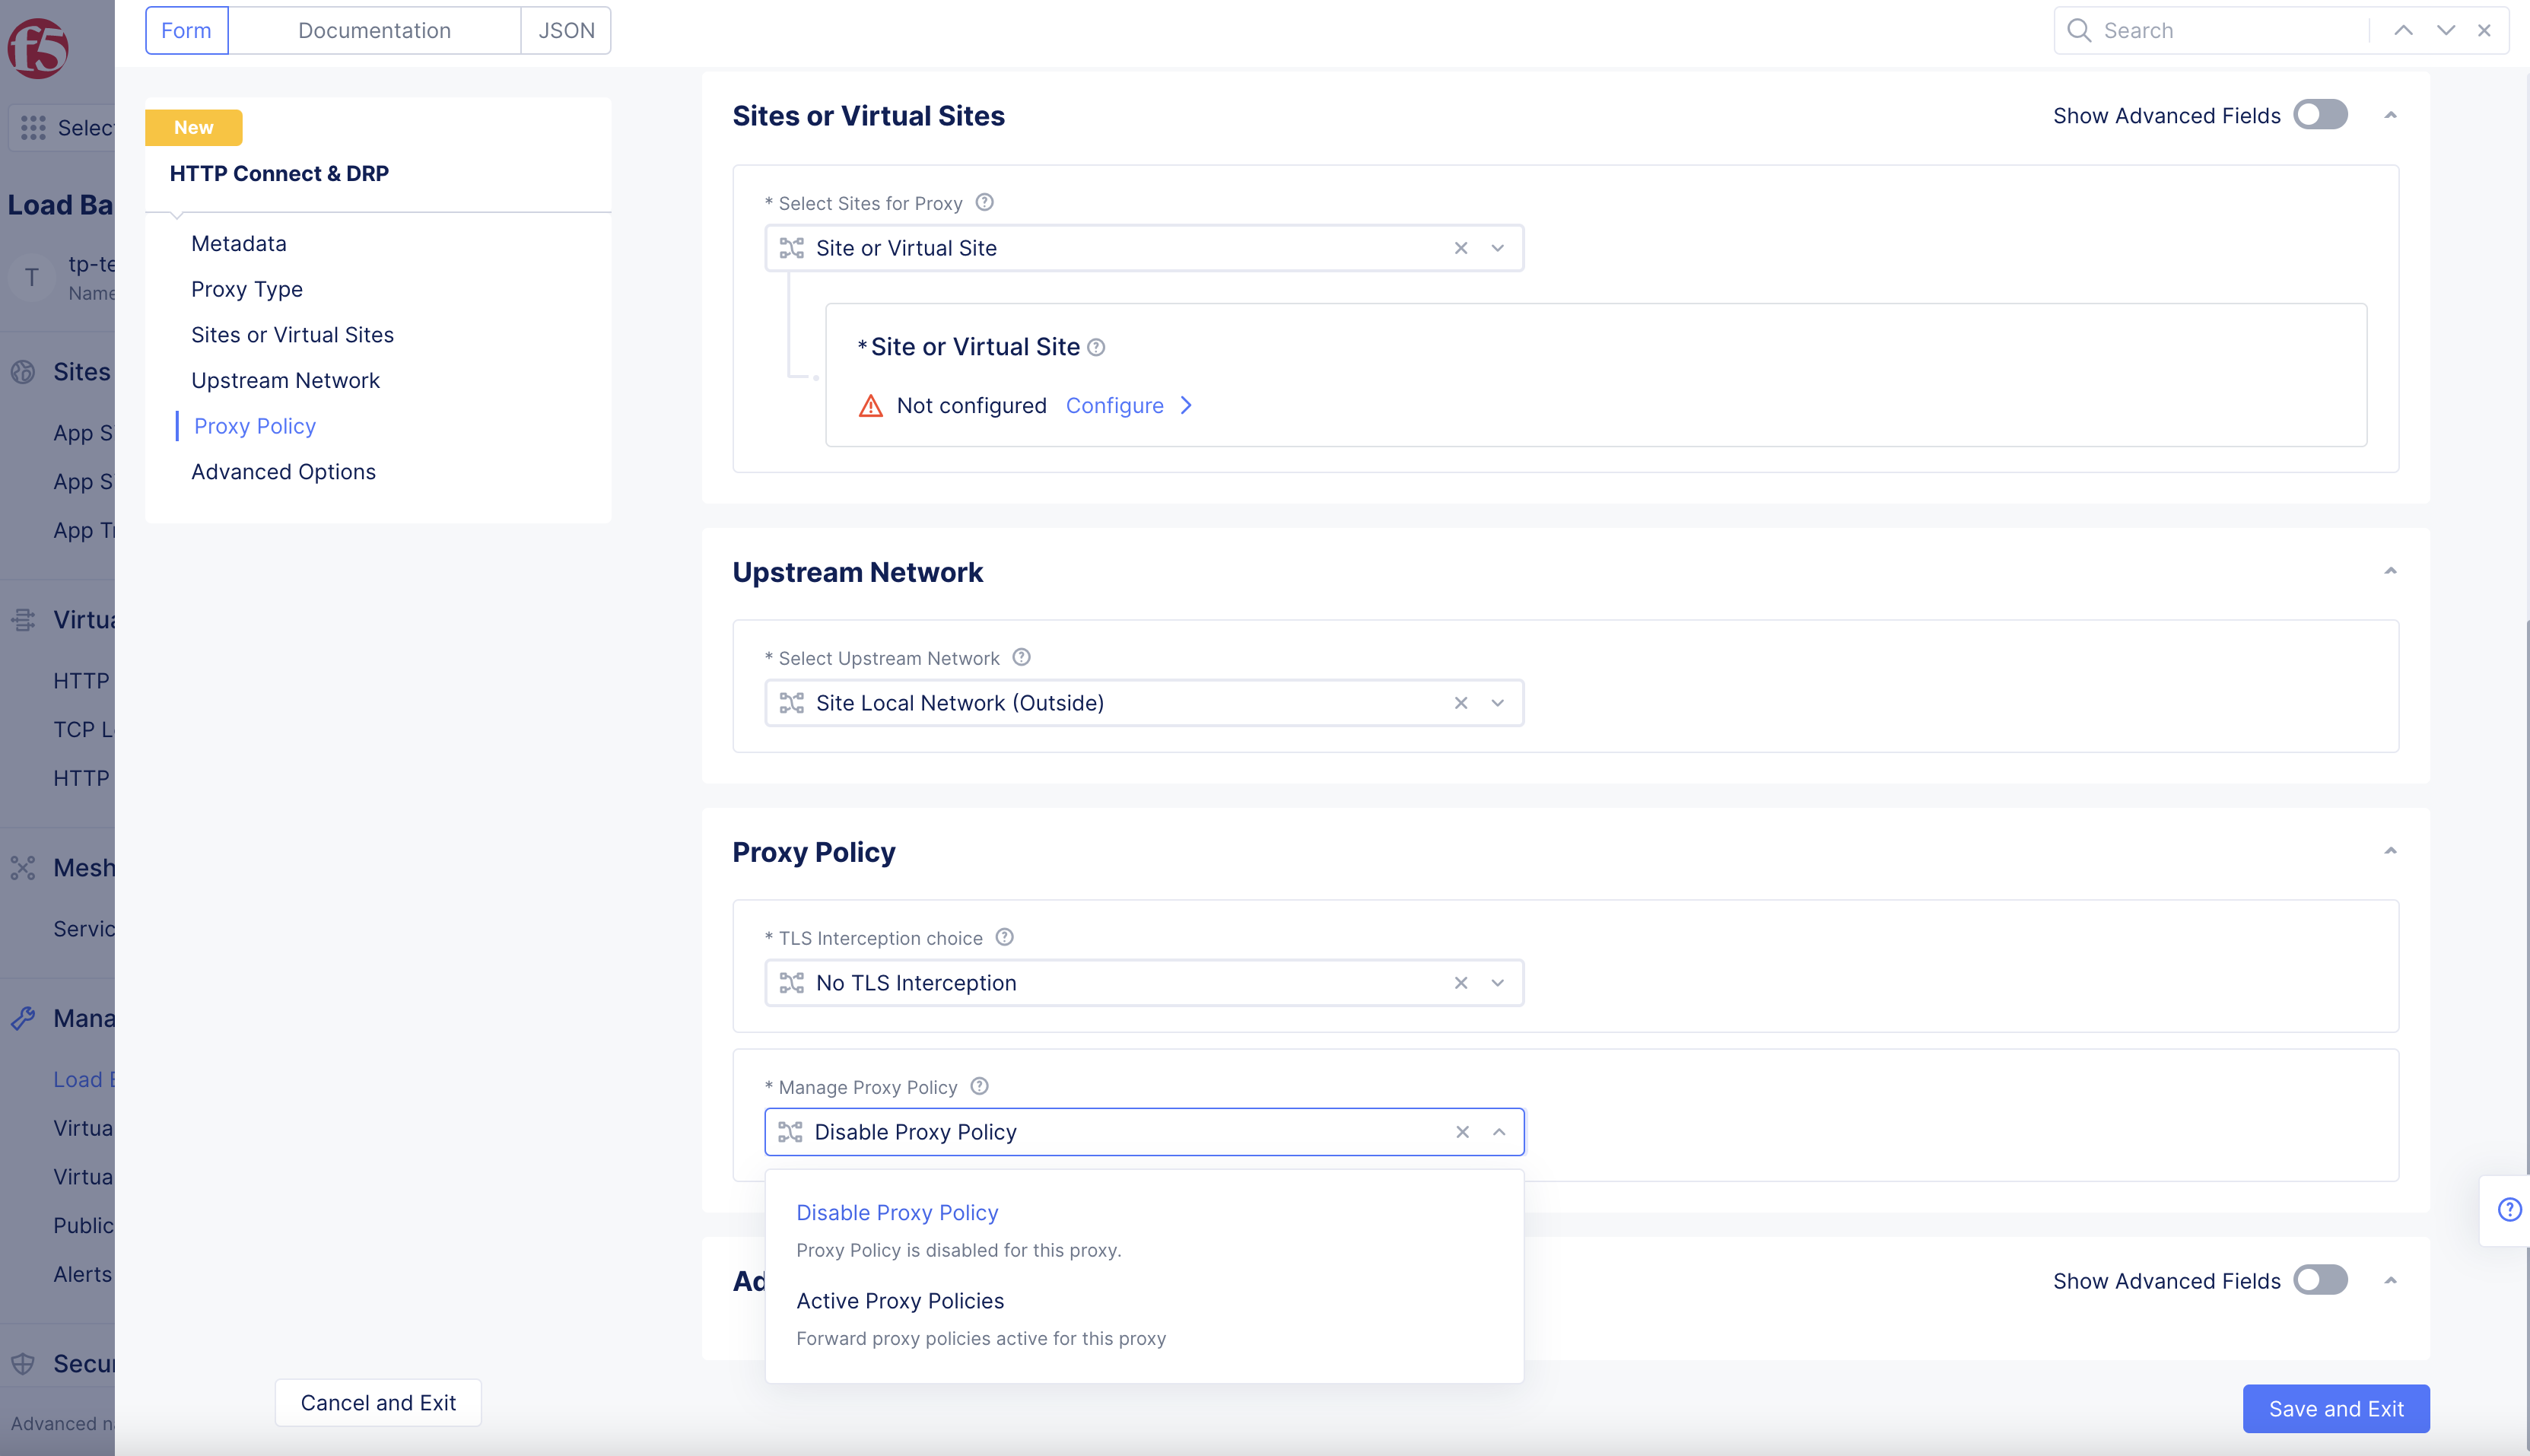
Figure: Proxy Policy
Step 6: Complete creating the HTTP Connect object.
Select Save and Exit button to complete creating the HTTP Connect object.
Step 7: Monitor HTTP Connect.
You can monitor the HTTP Connect Proxy in F5®Distributed Cloud Console.
-
Navigate to
Virtual Hosts>HTTP Connect & DRPpage in your application namespace. -
Select your HTTP Connect Proxy in the displayed list of objects.