Advertise Apps on Site Service Network
Objective
This guide provides instructions on how to advertise your apps on the vK8s site service network in F5® Distributed Cloud Services.
A vK8s site service network is an F5 internal network that is used for communication between apps running on the F5 Distributed Cloud Services sites and not intended for advertising on a public network. Using the site service network, you can advertise apps on the Customer Edge (CE) sites or Regional Edge (RE) sites.
Using the instructions provided in this guide, you can update an HTTP or TCP load balancer advertising the services on the vK8s site service network of a given set of sites or virtual sites.
Prerequisites
The following prerequisites apply:
-
A valid account is required. If you do not have an account, see Create an Account.
-
One or more sites in case you want to advertise on the CE sites. If you do not have a site, see Customer Edge Deployment documentation for instructions on deploying a site.
-
Apps deployed on F5 vK8s. If you do not have apps deployed on vK8s, see Create vK8s Object and vK8s Deployment.
Set Custom Advertisement for Load Balancer
The instructions in this guide cover advertising on the site service network for an HTTP load balancer. However, the same instructions also apply for a TCP load balancer.
Advertise policies can be viewed and managed in multiple services: Shared Configuration and Multi-Cloud App Connect.
This example shows Advertise Policies configuration in Multi-Cloud App Connect.
Step 1: Edit load balancer.
- From the F5® Distributed Cloud Console (Console) homepage, select
Multi-Cloud App Connect.
Note: Homepage is role based, and your homepage may look different due to your role customization. Select
All Servicesdrop-down menu to discover all options.
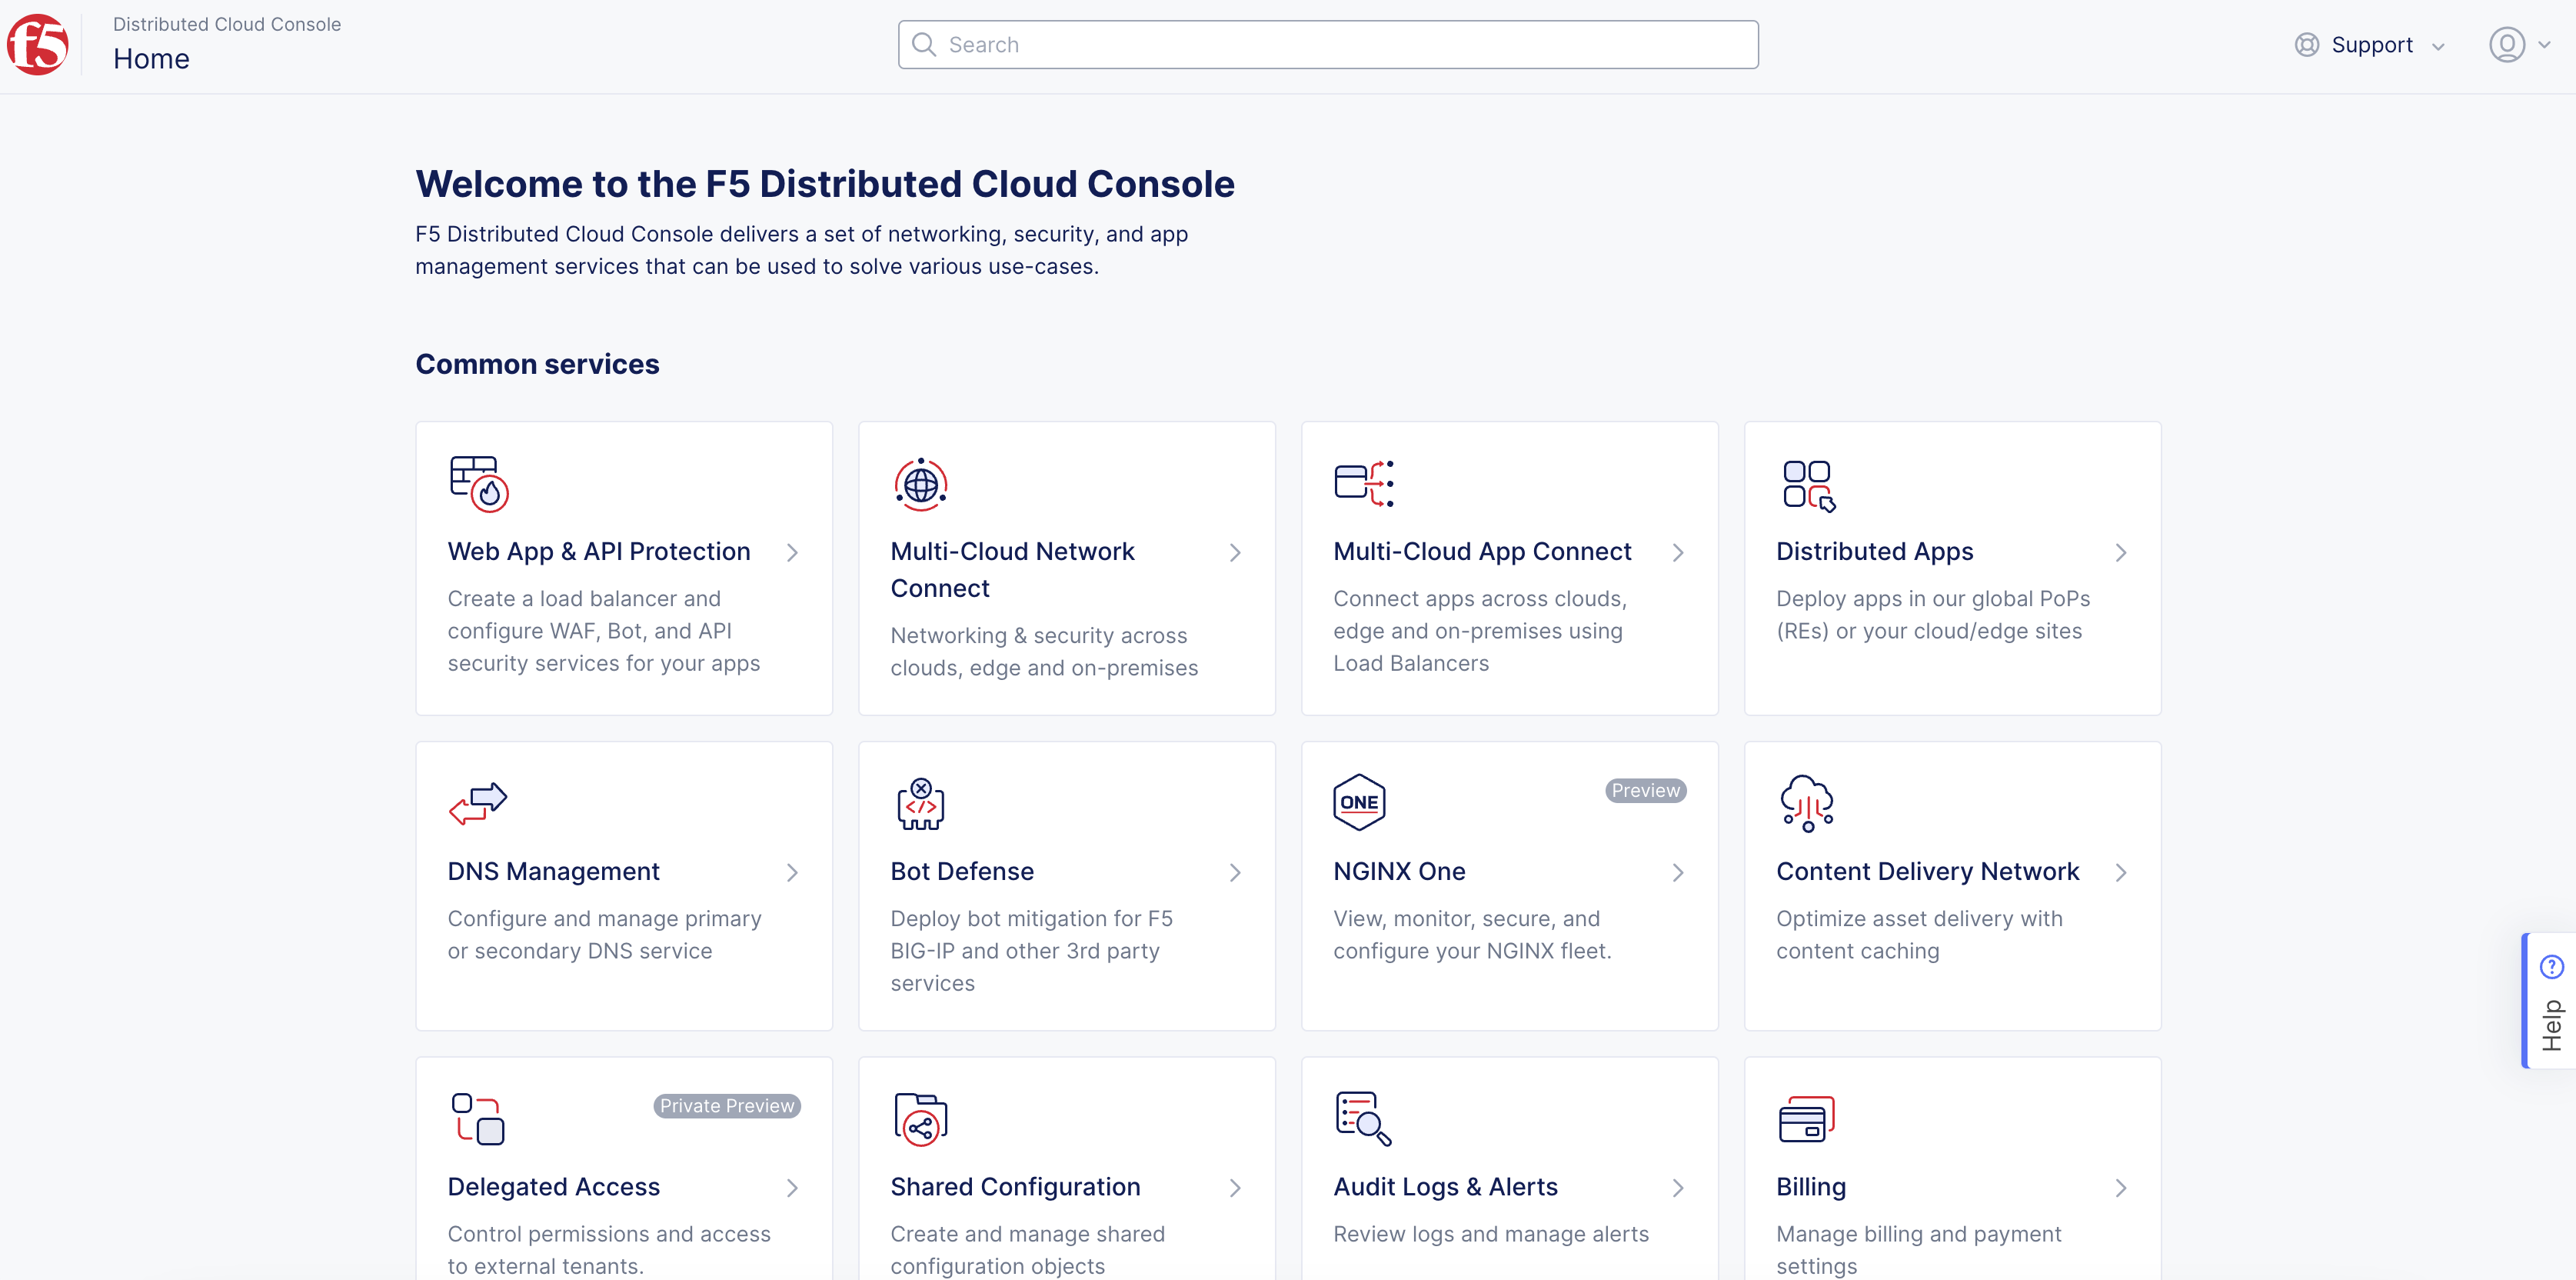
Figure: Homepage
-
Confirm
Namespacefeature is in correct namespace. Not available in all services. -
Select
Manage>Load Balancers>HTTP Load Balancers.
Note: If options are not showing available, select
Showlink inAdvanced nav options visiblein bottom left corner. If needed, selectHideto minimize options from Advanced nav options mode.
- Select
Add HTTP Load Balancerfor new configuration or select...>Manage Configuration>Edit Configurationto edit existing HTTP Load balancer.
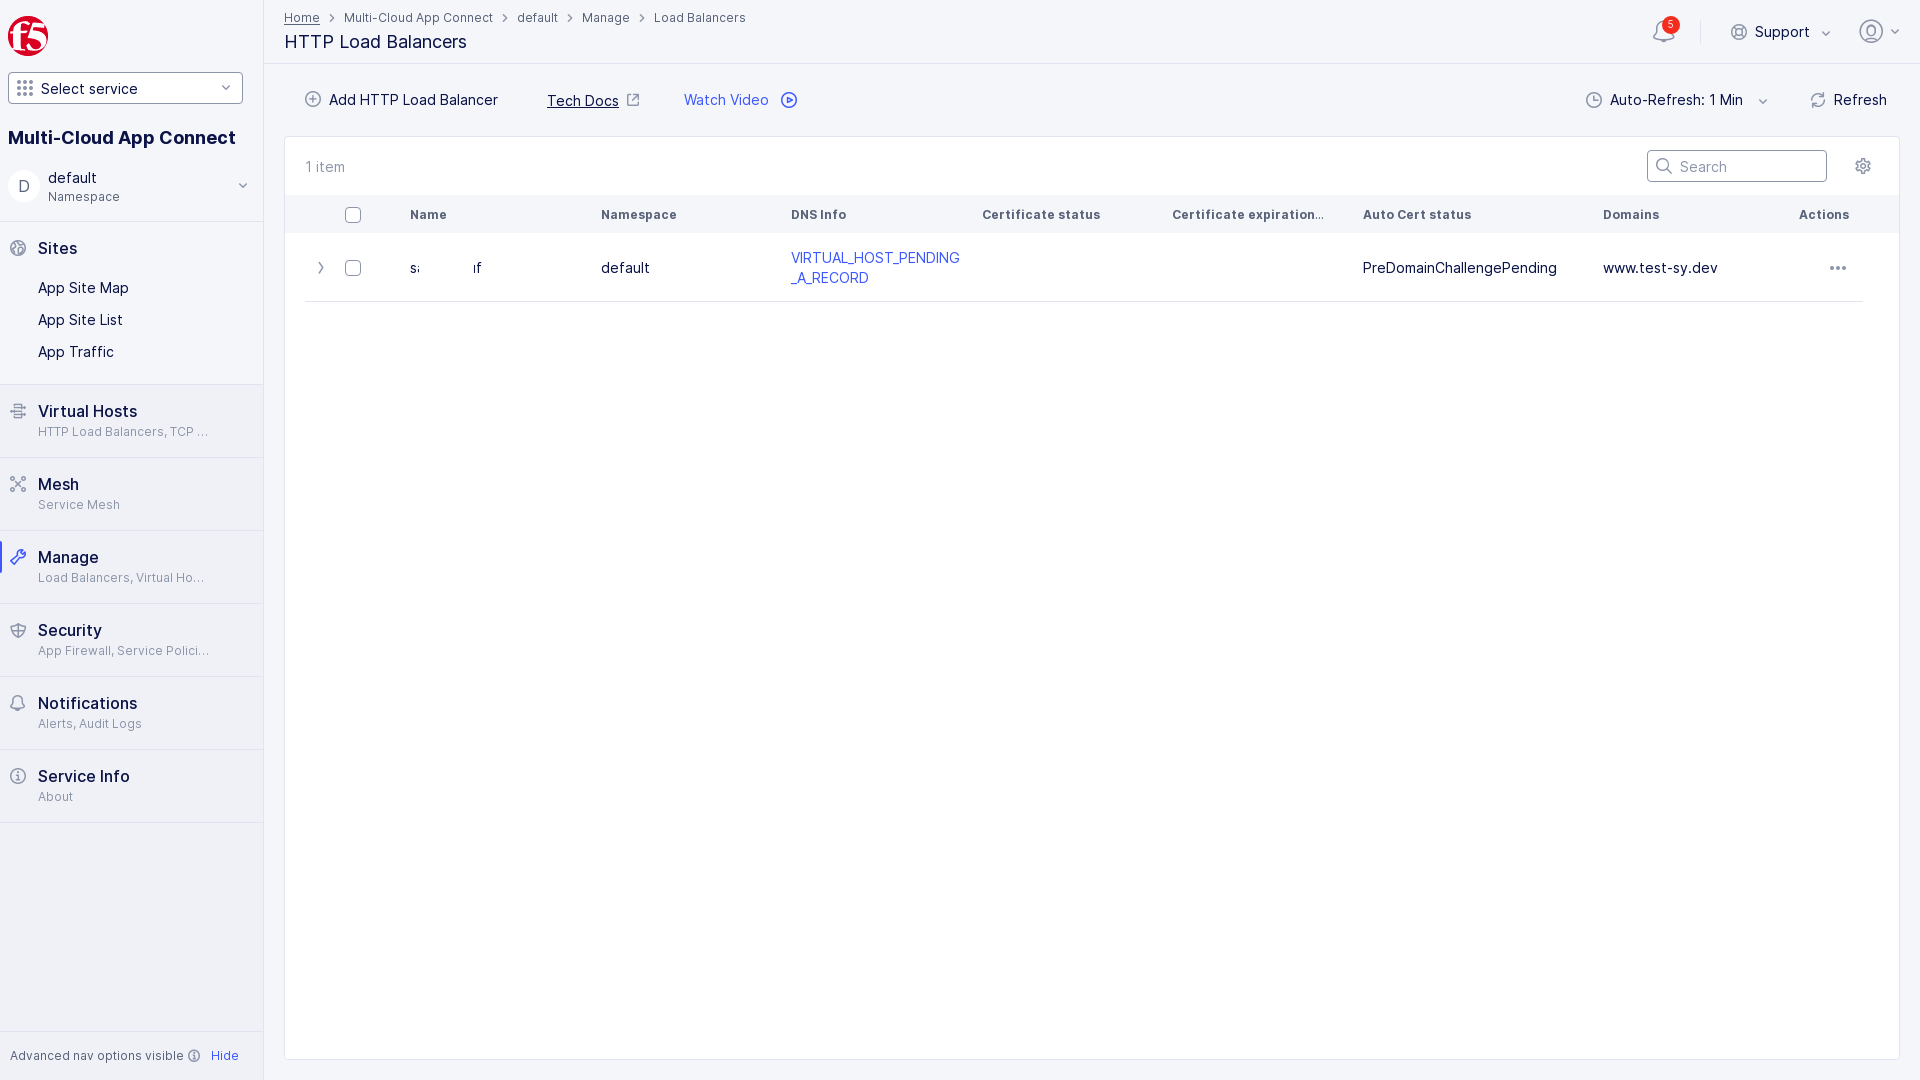
Figure: Load Balancers
Step 2: Configure advertisement.
-
In the
Other Settingssection, from theVIP Advertisementdrop-down menu, selectCustomoption. -
Select
Configure.
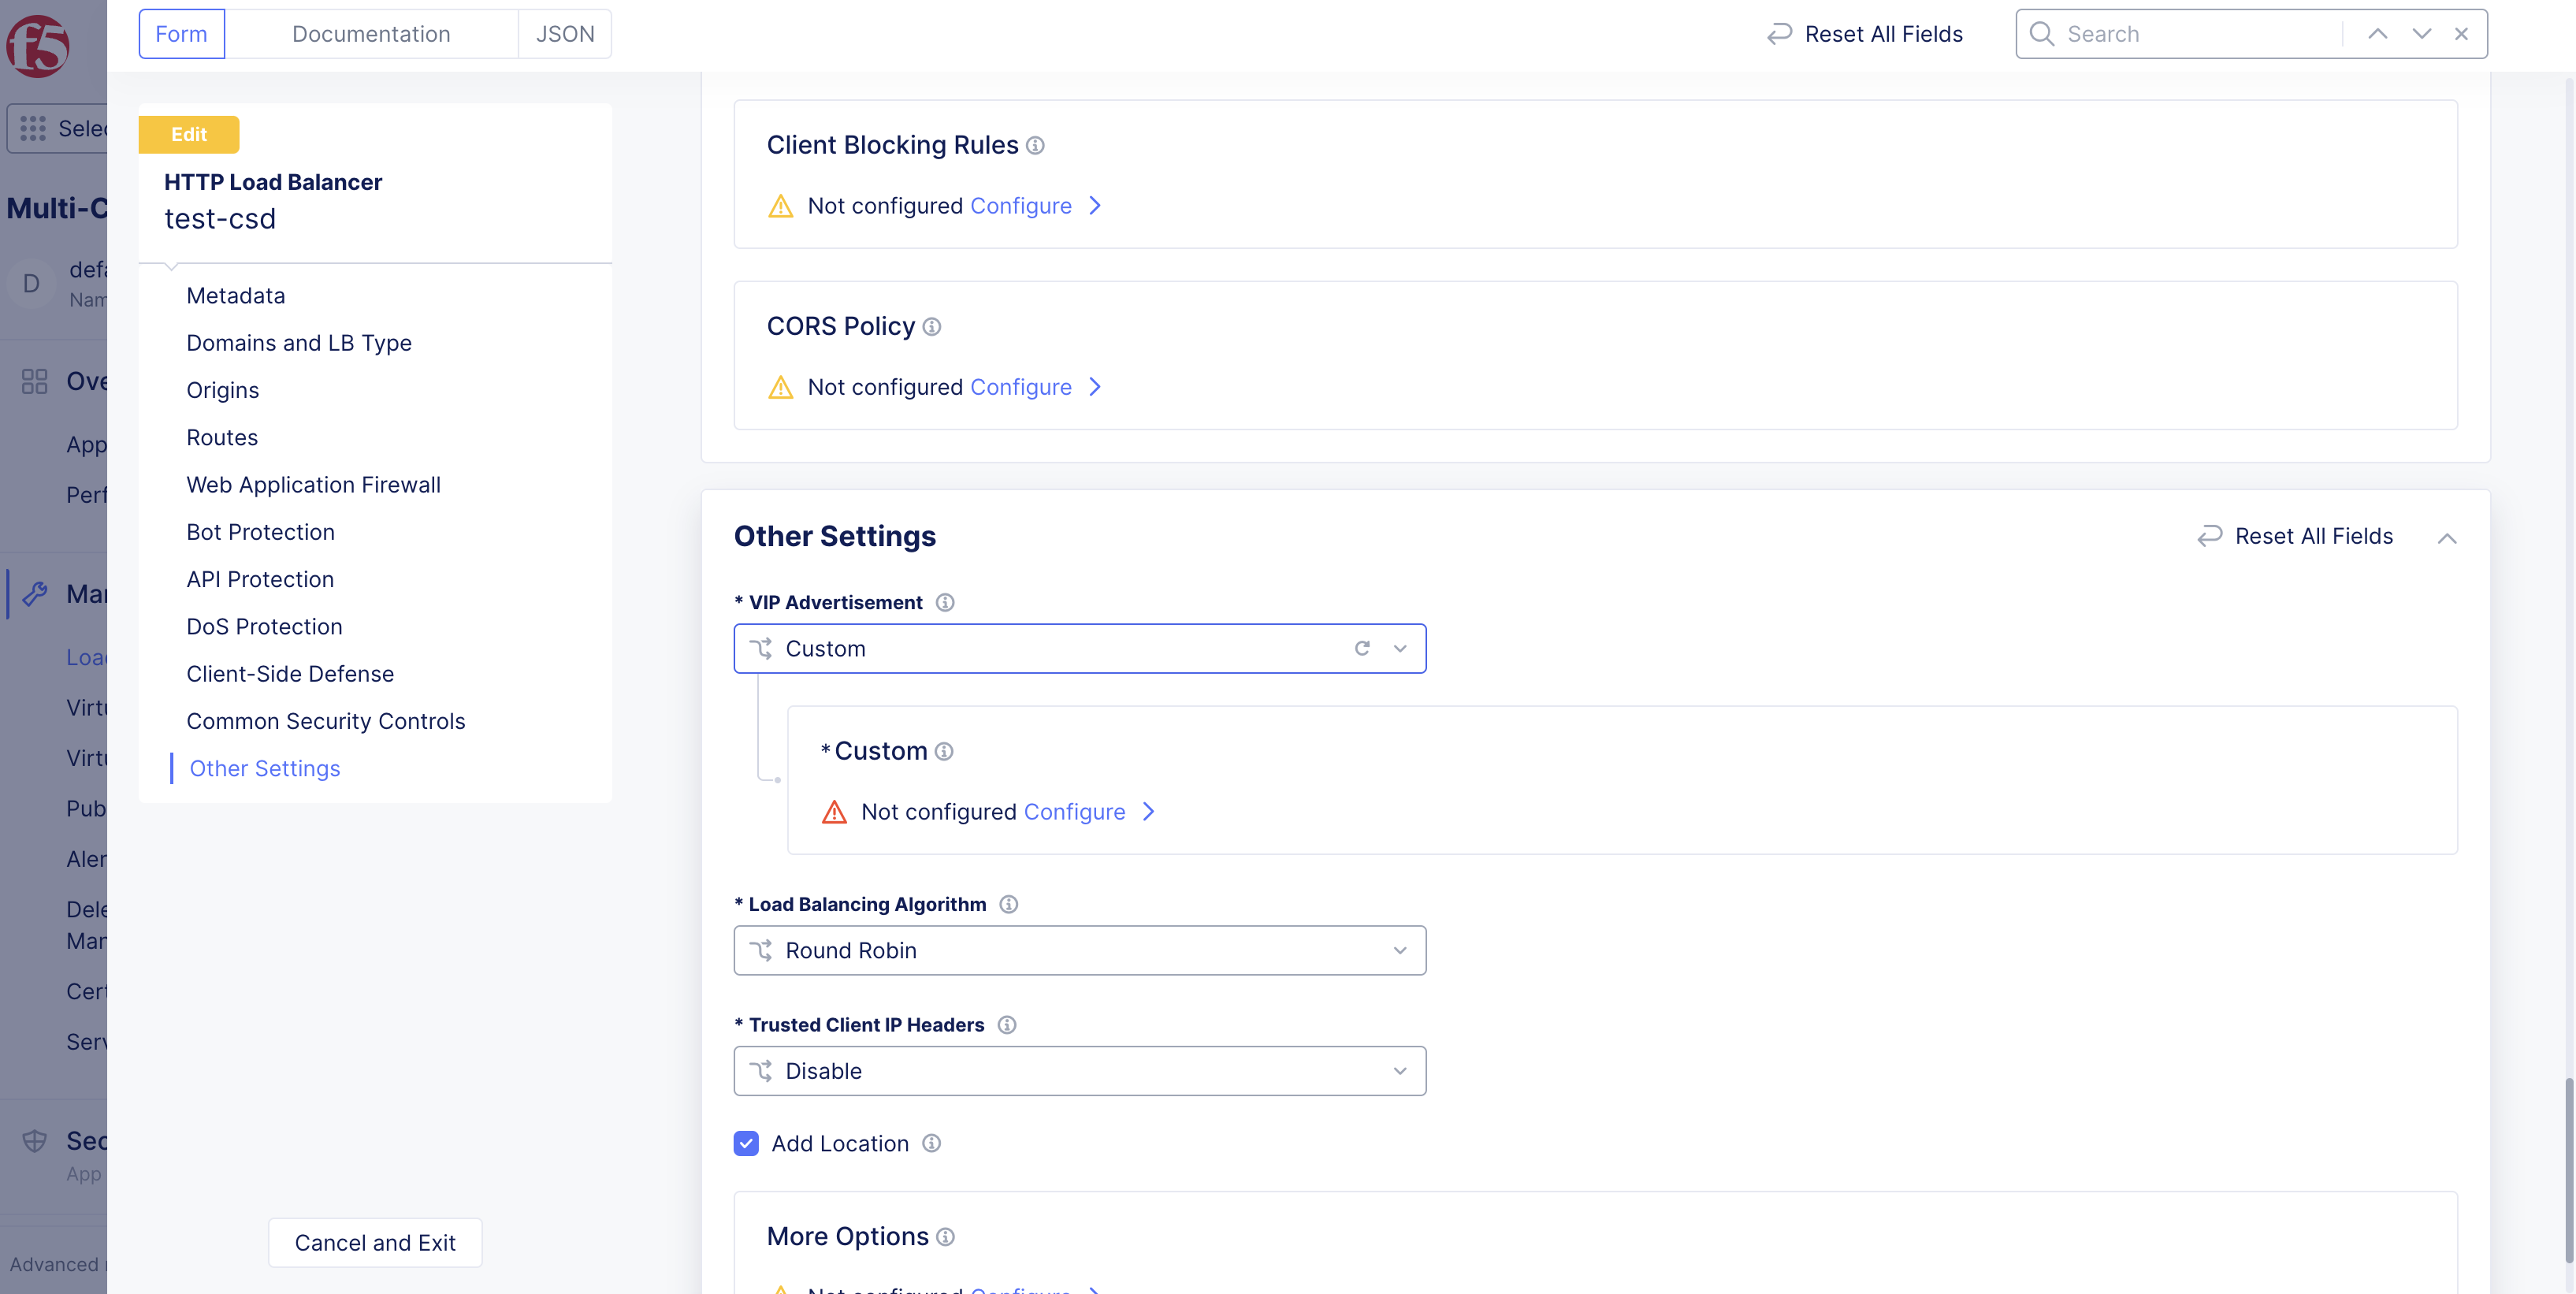
Figure: Custom Advertisement
- Select
Add Item.
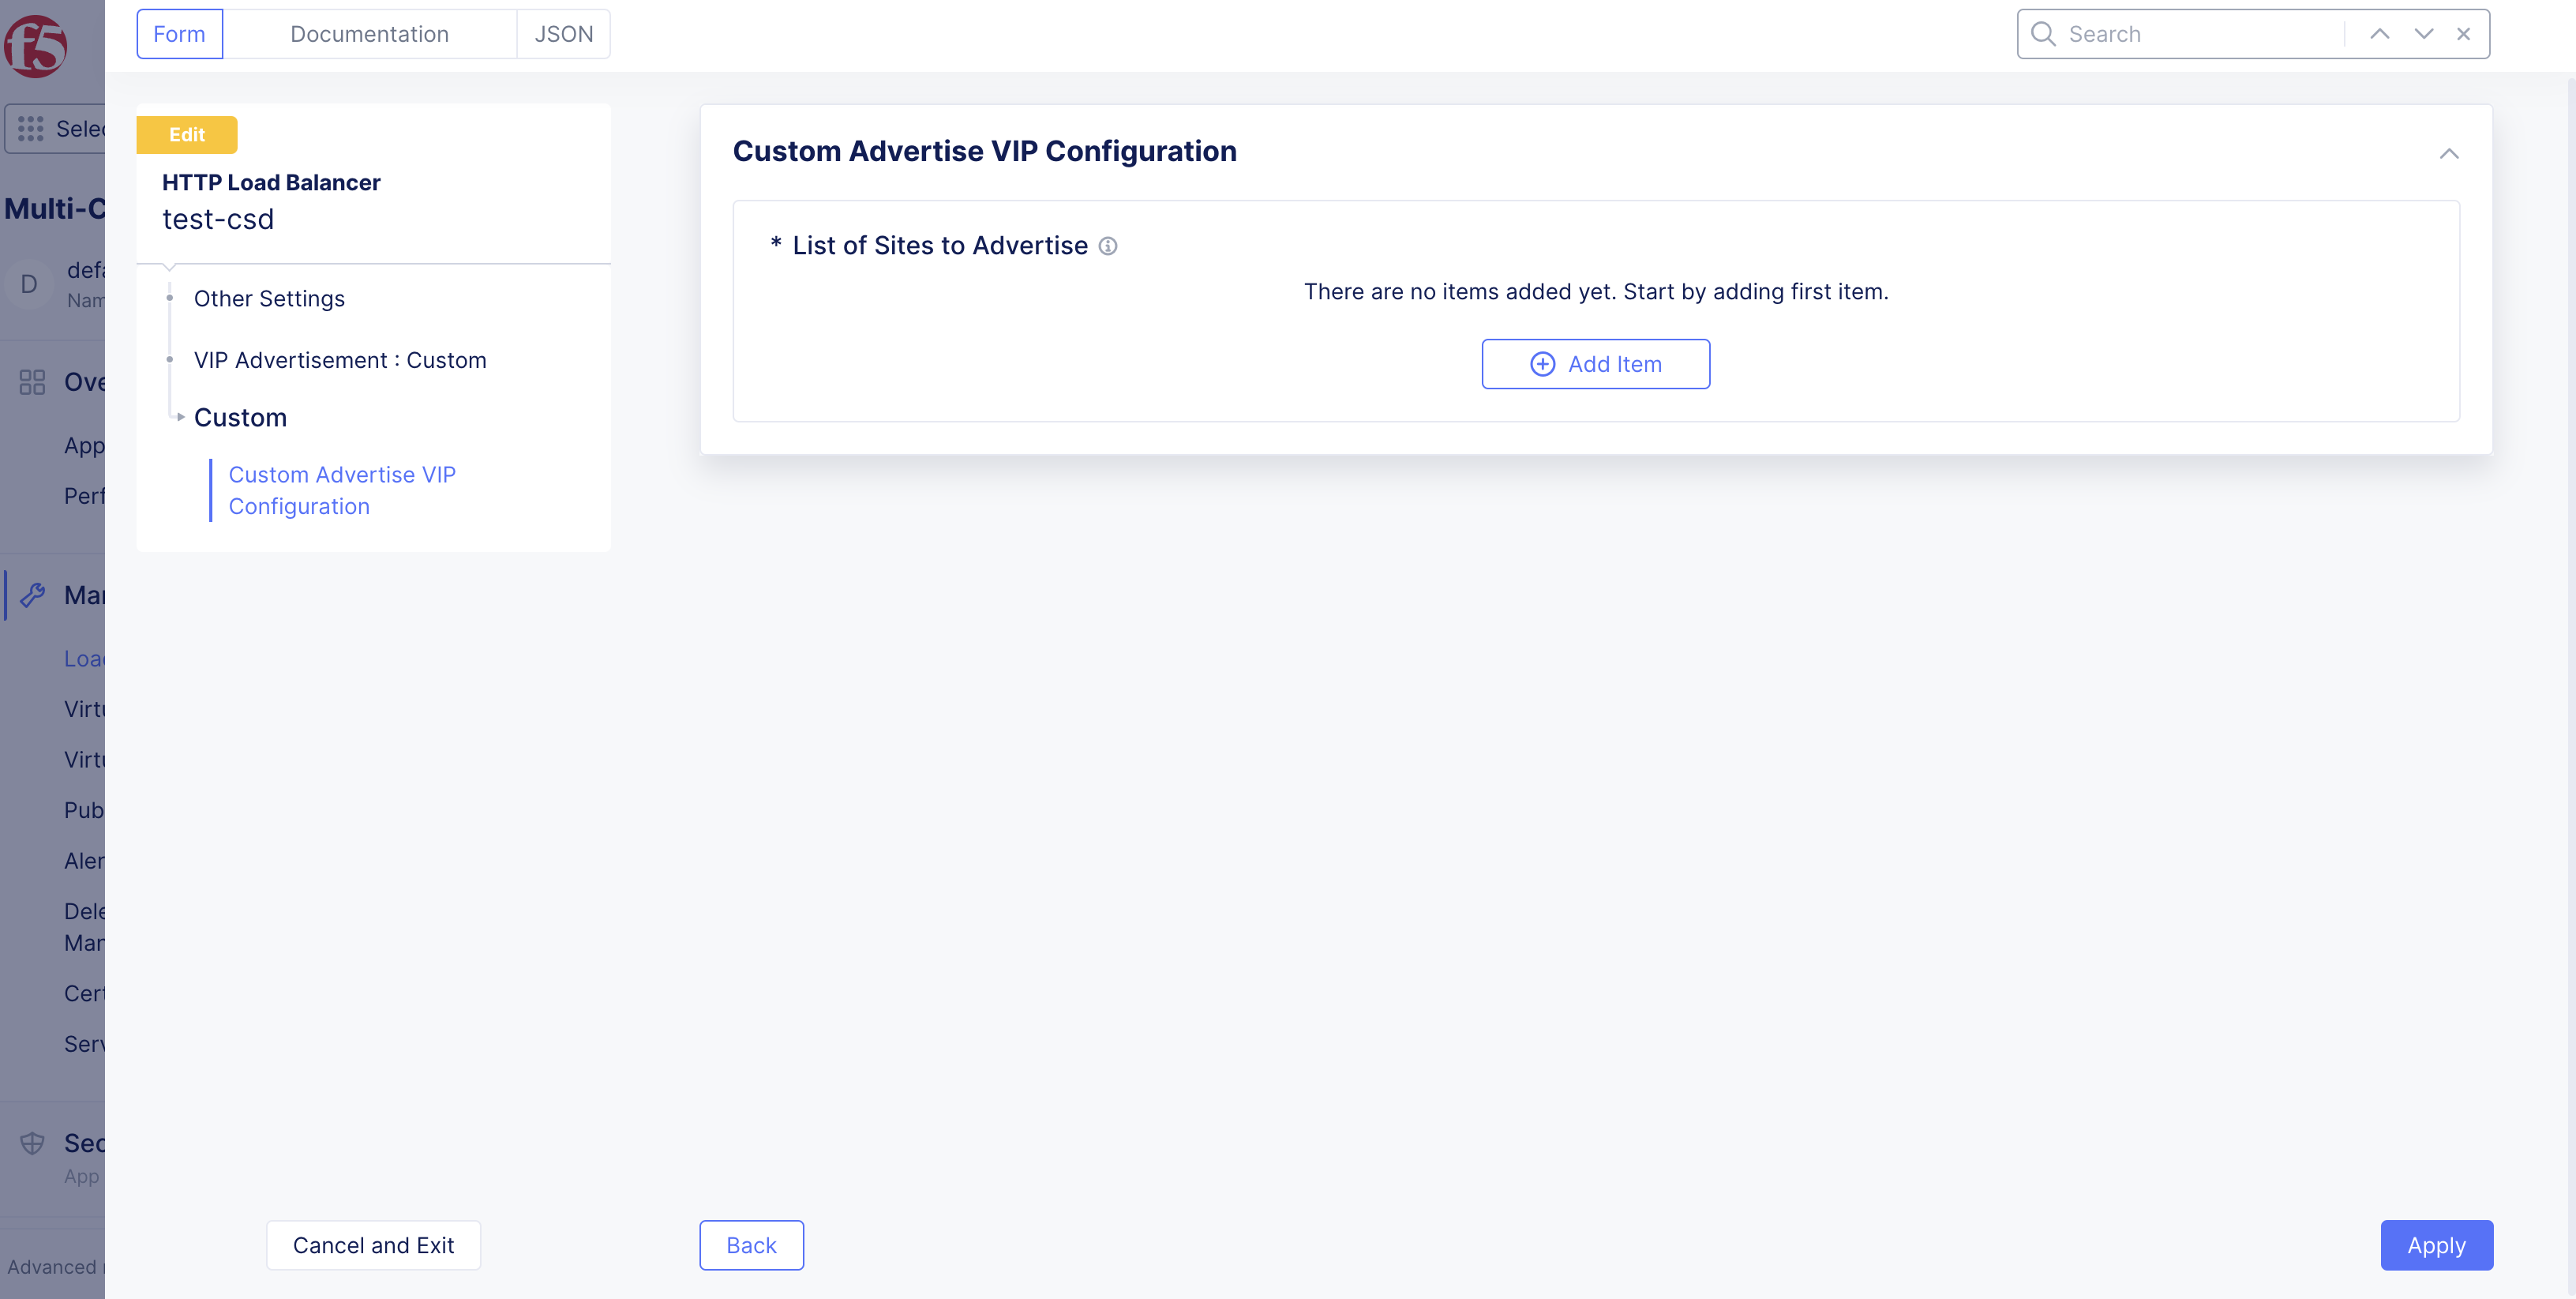
Figure: Add Item
Advertise on customer edge (CE) site(s).
-
Toggle the
Show Advanced Fieldsoption. -
From the
Select Where to Advertisedrop-down menu, selectSiteorVirtual Site. -
From the
Site Networkdrop-down menu, selectvK8s Service Network. -
Select a site or virtual site from the
Site Referencedrop-down menu. -
From the
TCP Listen Port Choicedrop-down menu, select an option. -
Select
Apply.
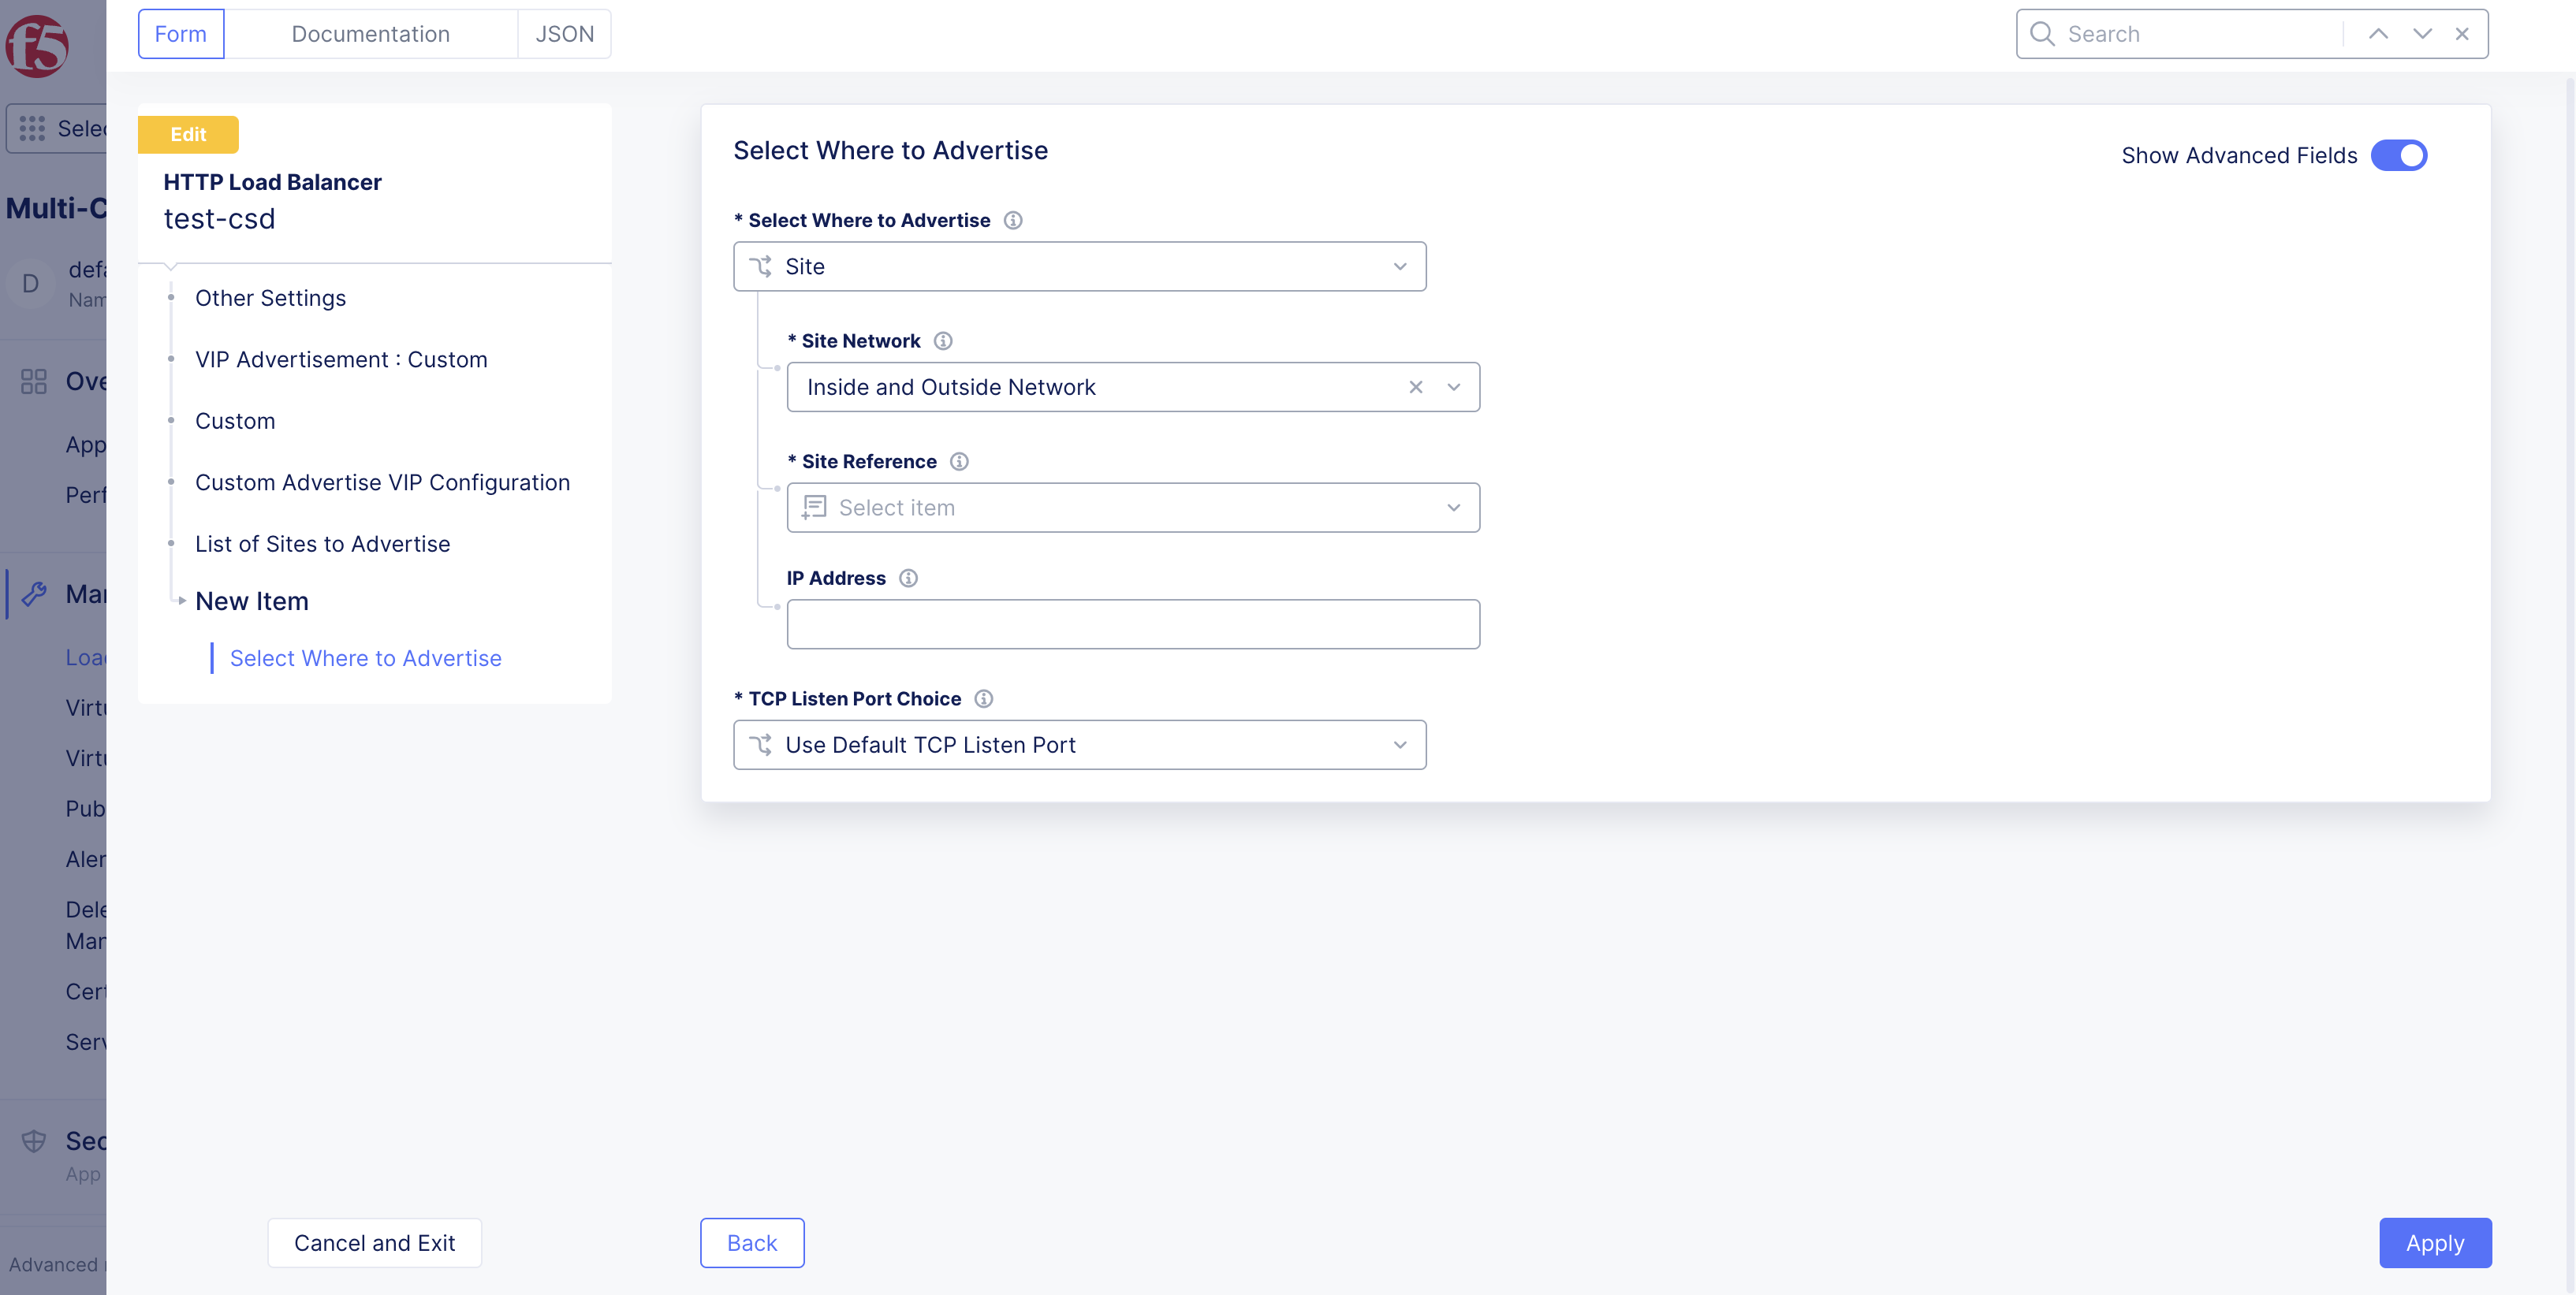
Figure: Advertise on vK8s Service Network for CE Sites
- Select
Applyto save configuration. UseAdd Itemto add another site.
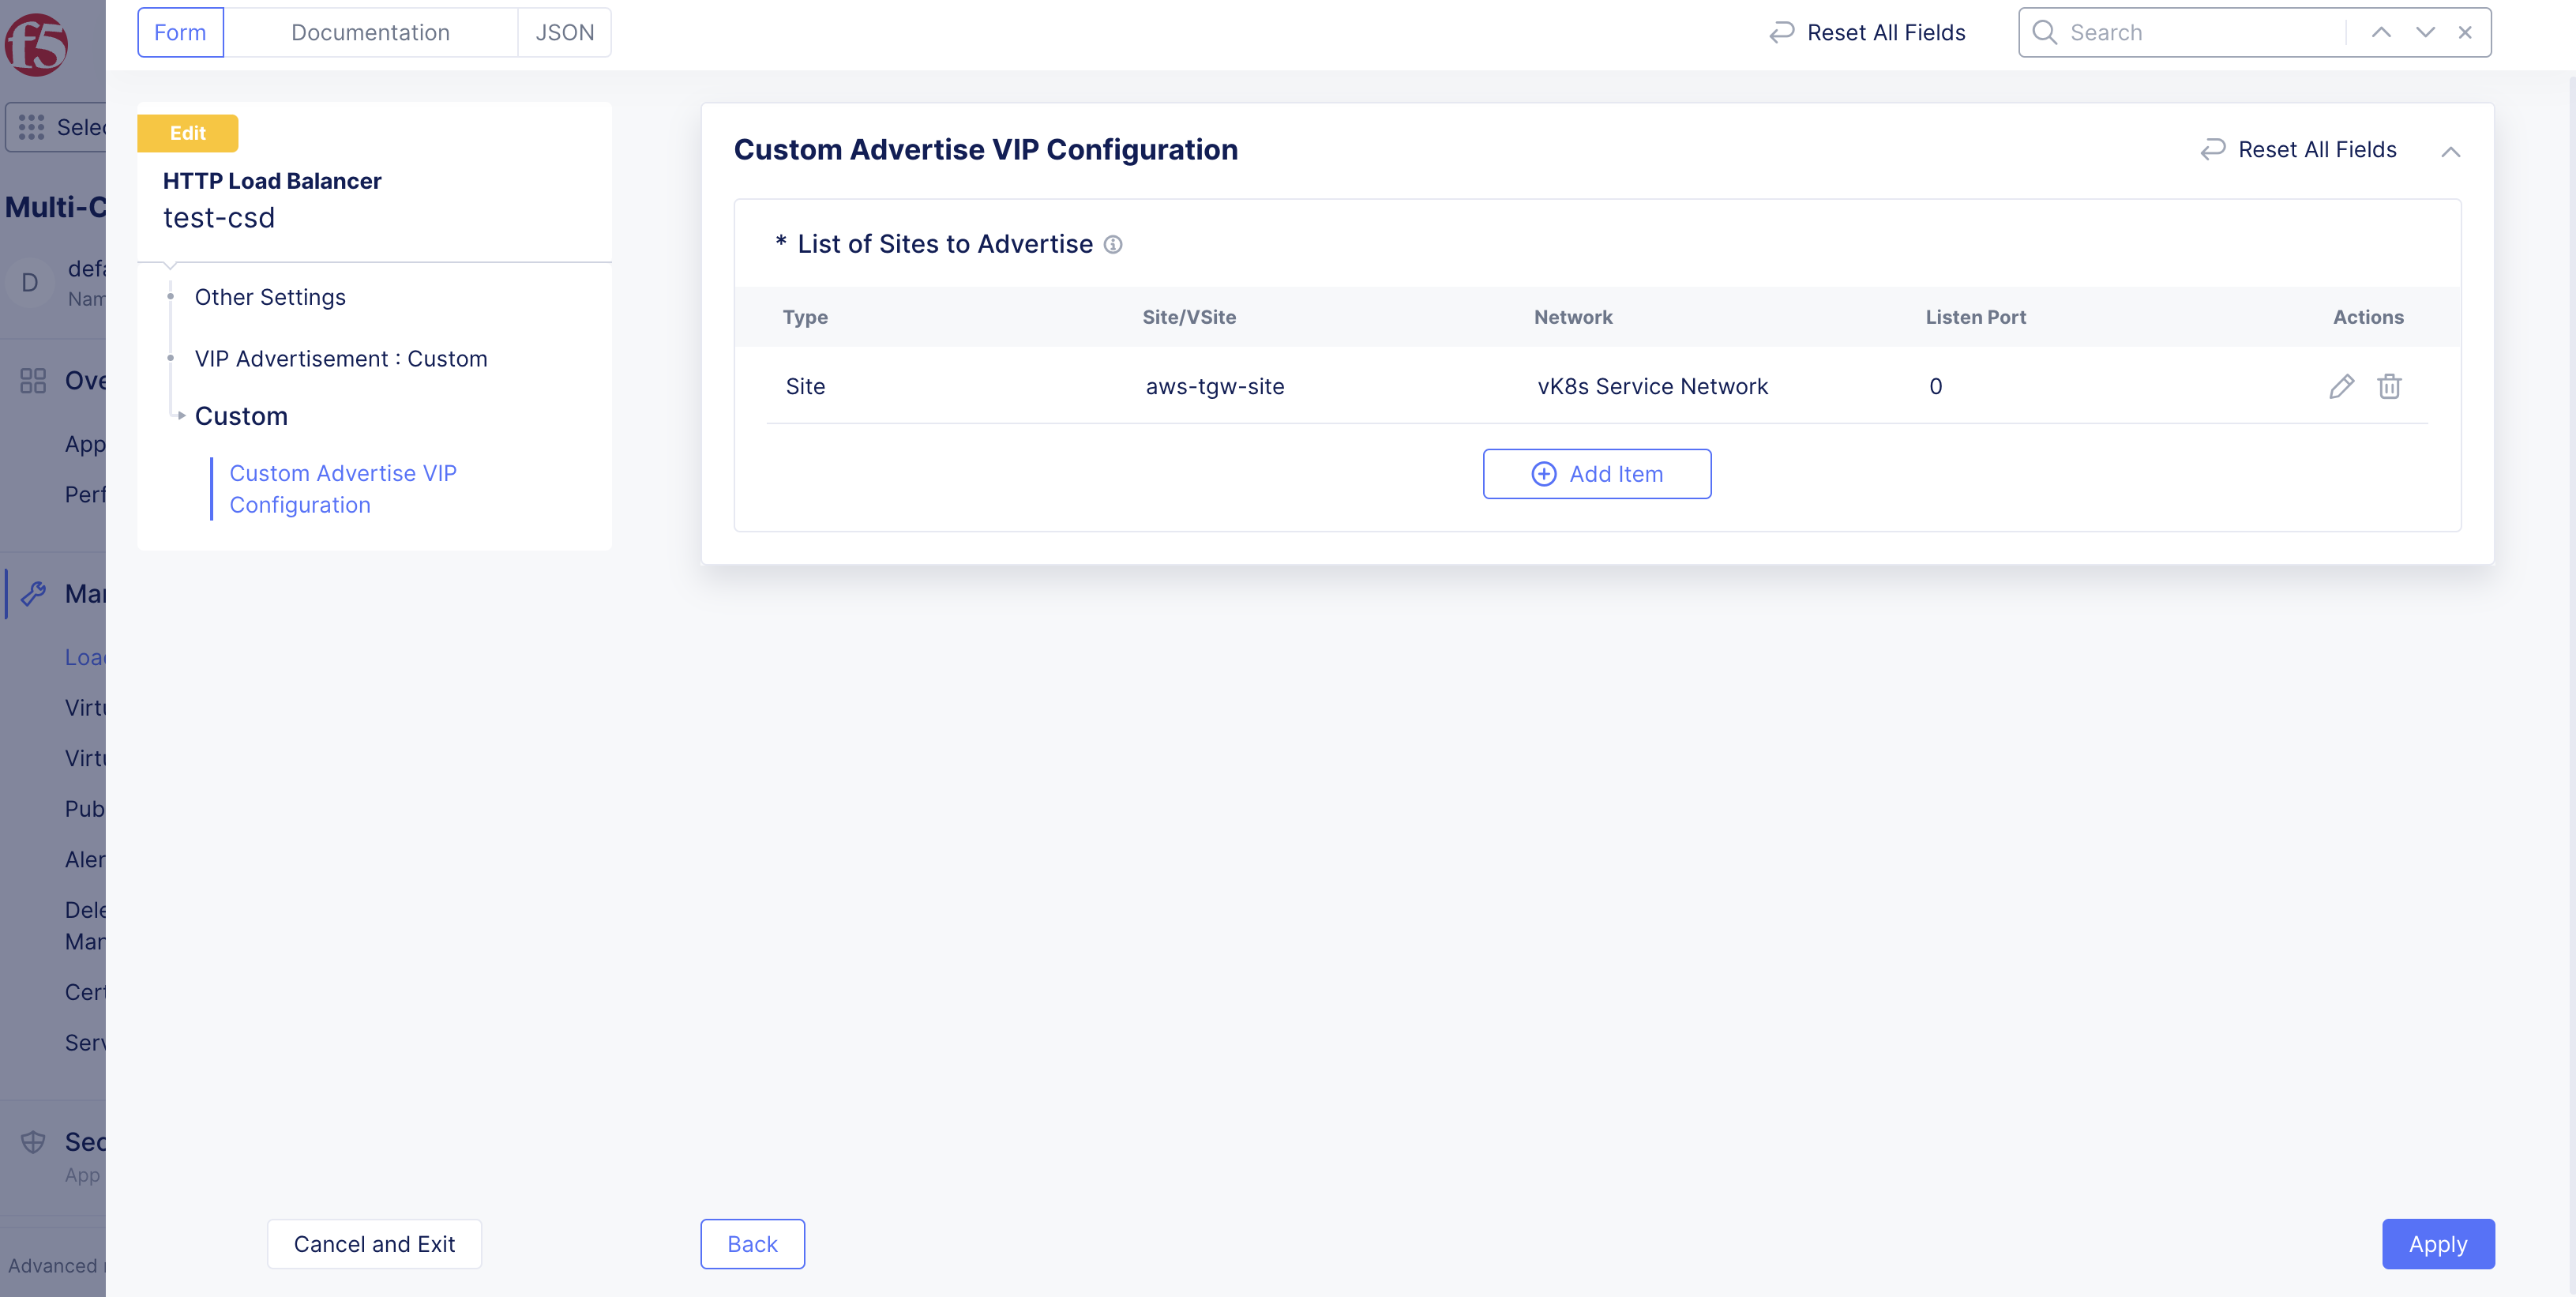
Figure: Advertise on vK8s Service Network for CE Sites
Advertise on F5 regional edge (RE) site(s).
-
Toggle the
Show Advanced Fieldsoption. -
From the
Select Where to Advertisedrop-down menu, selectvK8s Service Network on RE. -
From the
RE or RE Virtual Sitedrop-down menu, select an option:-
RE or RE Virtual Site: This option is for the physical RE sites. -
Virtual Site Reference: This option is for the virtual RE sites.
-
-
Select a physical or virtual RE site using the
RE ReferenceorVirtual Site Referencedrop-down menus. -
From the
TCP Listen Port Choicedrop-down menu, select an option. -
Select
Apply. -
Select
Applyto save configuration. UseAdd Itemto add another site.
Step 3: Save load balancer configuration.
Select Save and Exit.
Concepts
- System Overview
- Core Concepts
- Networking
- F5 Distributed Cloud - Customer Edge
- Virtual Site
- Virtual Kubernetes (vK8s)