Create and Manage Site
On This Page:
Objective
This guide provides instructions on how to create a Volterra Site in your cloud or edge location and manage the site. A Volterra site consists of one or more Volterra nodes. To know more about sites and nodes, see Volterra Site.
Using the instructions provided in this guide, you can create and manage a single-node site or multi-node site. Managing the site covers editing the site properties, performing scaling, and performing upgrades.
Note: Instructions provided in this guide are not applicable for Volterra Regional Edge (RE) sites.
Site States and Transitions
The following figure illustrates the site states and their transitions during the site life cycle:
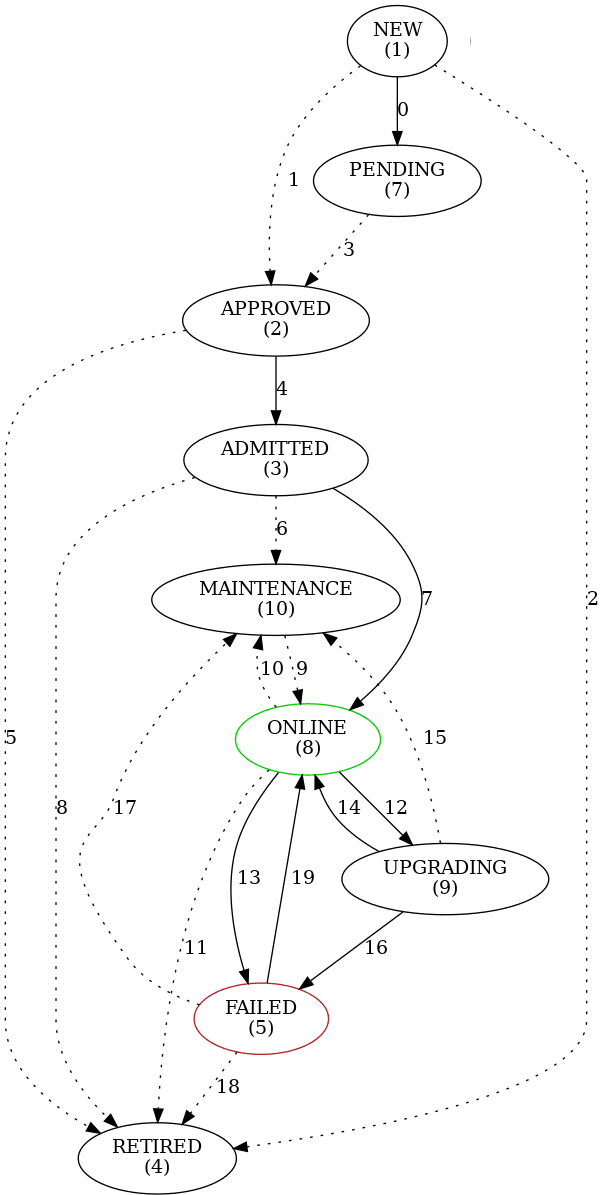
The following are the various states or statuses for a Volterra site:
- NEW - Registration request is received.
- PENDING - User action is required to approve or reject.
- APPROVED - Registration is approved and waiting for configuration to get completed.
- ADMITTED - Registration is approved and ready to connect.
- RETIRED - Registration is not valid anymore and it will be deleted.
- FAILED - Registration is failed.
- ONLINE - Registration is online.
- UPGRADING - Operating system upgrade is in progress.
- MAINTENANCE - Maintenance is in progress.
The state transitions of a site after installation for a successful bring up are as follows:
NEW -> PENDING -> APPROVED -> ADMITTED -> ONLINE
Note: User action is required for the
PENDING->APPROVEDstate change.
Prerequisites
- A valid Volterra Account is required.
Note: In case you do not have an account, see Create a Volterra Account.
- Allow traffic from and to the Volterra public IP addresses to your network and whitelist related domain names. See Firewall or Proxy Reference for the list of IP addresses and domain names.
Create Site
The following figure shows the sequence of steps in creating a Volterra Site:

Configuration Sequence
A site can be configured as a single-node or multi-node site and includes performing the following sequence of actions:
| Phase | Description |
|---|---|
| Create Site Token | Token is used to initiate site provisioning and it can be reused per tenant across namespaces. However, it is recommended to use the same token for installation of additional sites. |
| Install Volterra Nodes | Site consists of one or more Volterra Nodes. Therefore, installing at least one Volterra Node is required. |
| Accept Site Registration | Installing a node triggers site registration and requires you to approve the site from the Volterra SaaS portal. |
Create Site Token
Step 1: Navigate to the system namespace.
Select the system namespace to obtain a token. You can use an existing token or create a new one. A site can be configured as single-node or multi-node site. In case of multi-node site, use the same token for all installations.

Step 2: Generate token.
Select Manage from the configuration menu and select Site Token from the options pane. Click Add site token to create a new token. This loads the Add site token form. Enter the site name and description in the Name and Description fields respectively. Click Add site token button at the bottom of the form.

Step 3: Notedown the token.
Find the token you created or choose an existing token from the list of tokens displayed. Click the > to expand the token details in JSON format and note the value of the uid field.

Install Volterra Nodes
Step 1: Prepare site configuration data.
This data is used during the node installation. The following example shows a sample site configuration.
- Site Name: volterra-demo-site
- Latitude and longitude (co-ordinates): 41.881832, -87.623177
- Token: e305f21e-b14a-44f0-8c93-776489321819
Step 2: Install the node.
For instructions, see Install section and choose an appropriate installation guide depending on your cloud provider or edge hardware.
After installation, the site status can be inspected in the VoltConsole.
Accept Site Registration
Single-node Site
Step 1: Navigate to registrations and start registration approval.
Log in to the VoltConsole with your tenant and select Manage from the configuration menu. Select Registrations from the options pane and choose your site in the displayed list of sites. Click ✅ to load the Registration Acceptance form.

Step 2: Enter the required fields and complete registration.
Enter the site configuration parameters and click Accept.

Note: Enter all mandatory fields marked with the
*character.
Step 3: Check the site status and health.
Select Sites -> Site List and click on your site from the displayed site list to see the dashboard for your site.
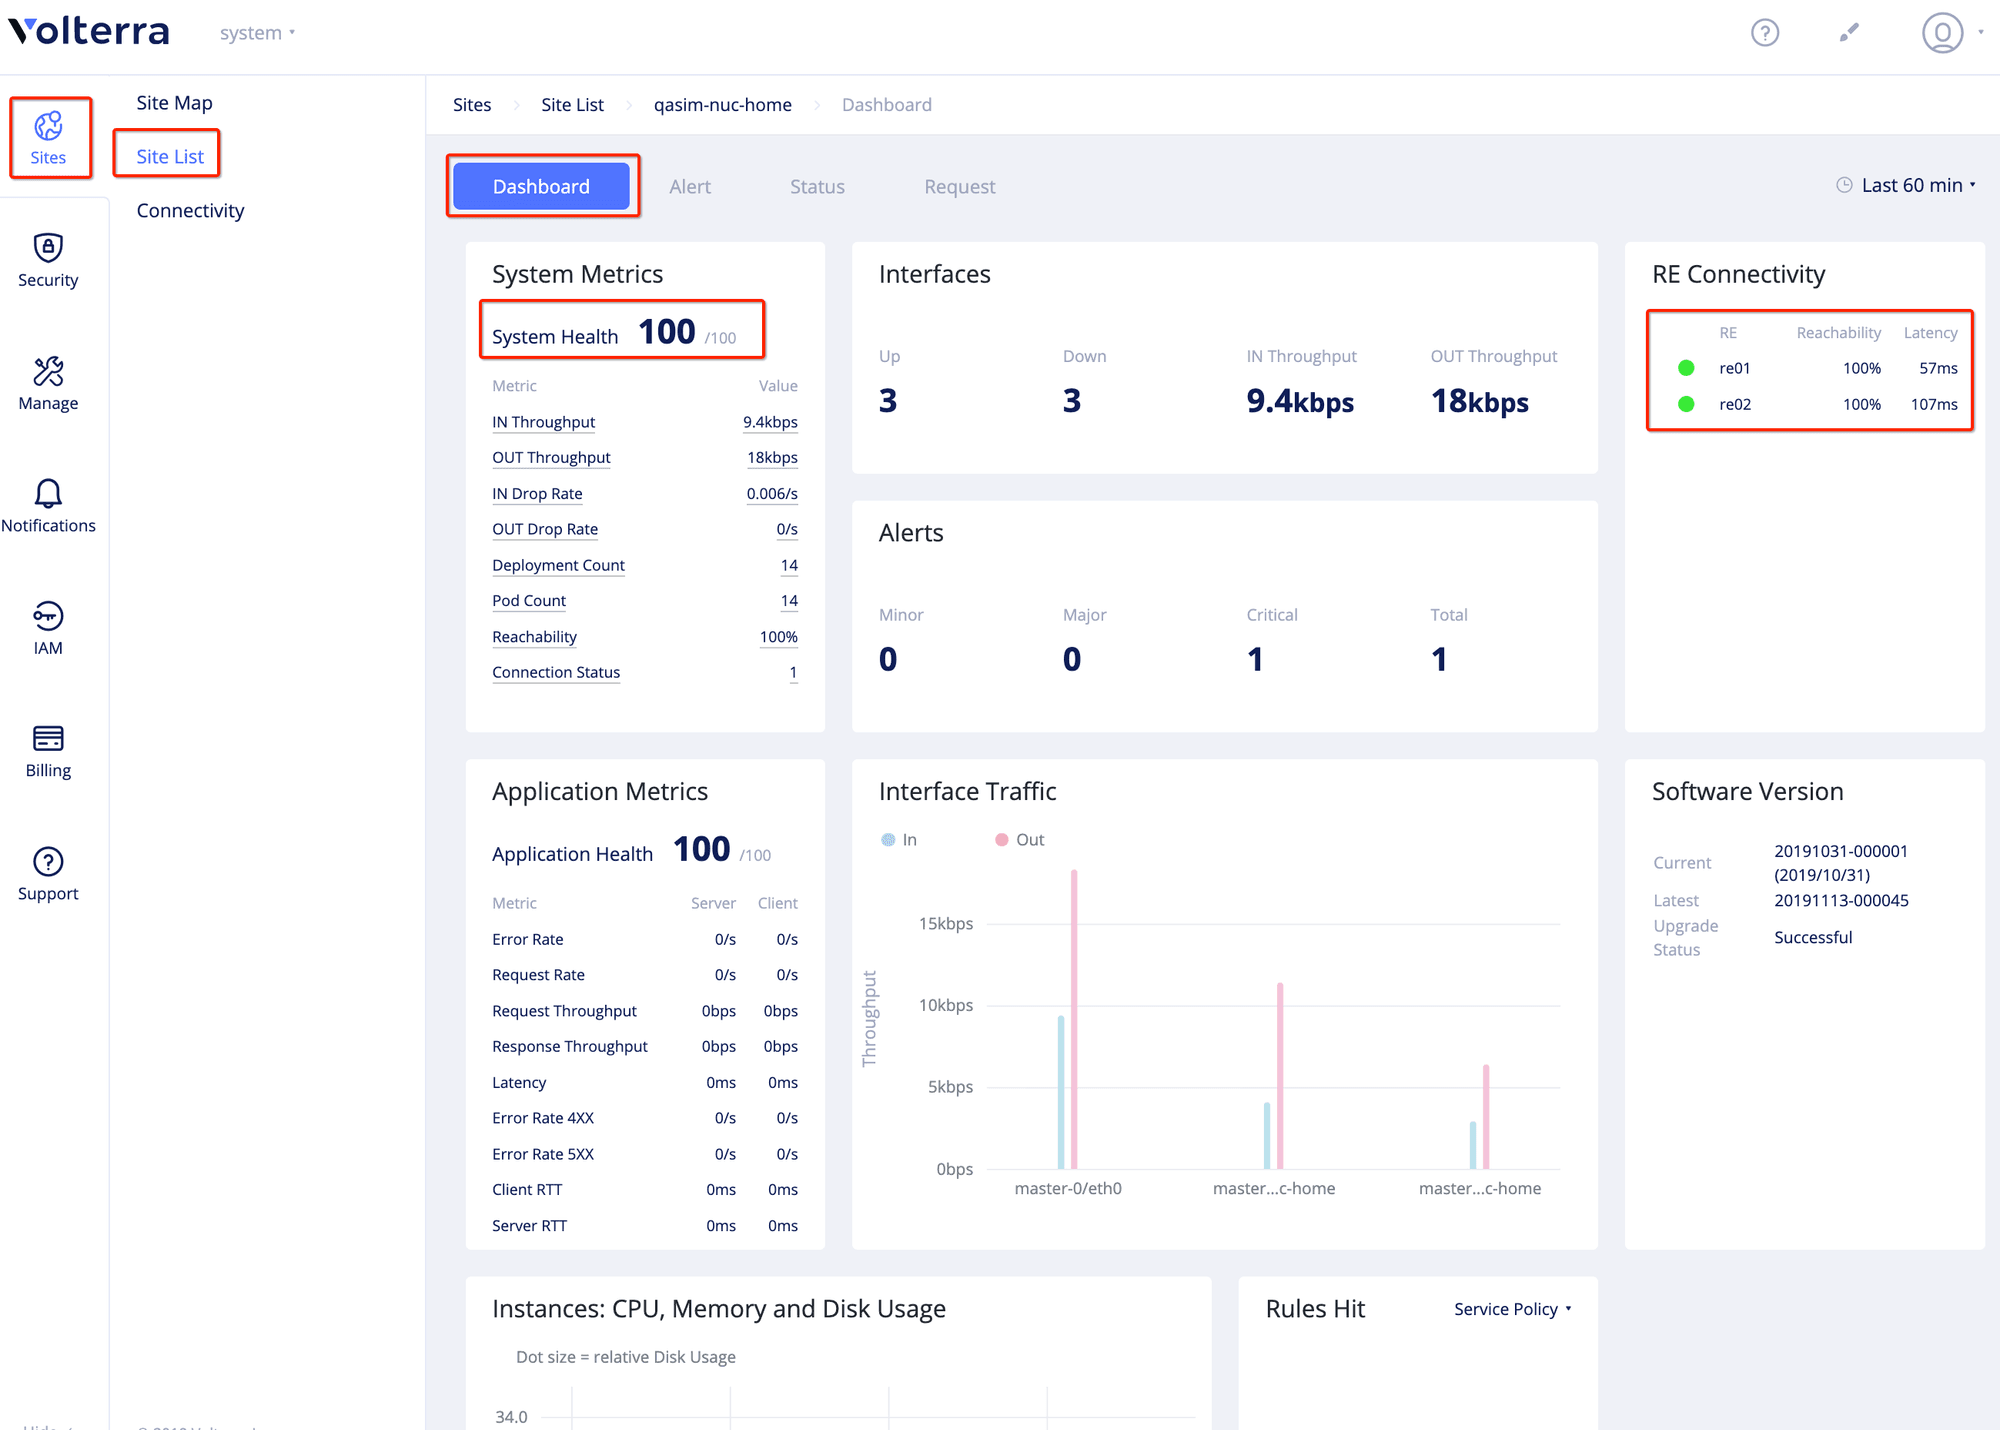
Note: After you accept the registration, it takes few minutes for the health and connectivity status to get updated in the portal. Click the
Site Statustab to verify the following (established in that order during the site bring up):
- The
Last Upgradefield hasSuccessfulvalue for theVolterra OS Statussection.- The
Last Upgradefield hasSuccessfulvalue for theVolterra Software Statussection.- The
IPSEC statusfield underRE Connectivitysection hasupvalue.
Multi-node Cluster Site
Step 1: Navigate to registrations and perform registration.
Accept registration requests from the master-0, master-1, and master-2 nodes. Enter the same values for the following parameters for all the registration requests.
- ‘Cluster name’ = ‘volterra-demo-site-mce’
- ‘Cluster size’ = ‘3’


Note: Enter all mandatory fields marked with the
*character.
Step 2:Check the site status and health
Select Sites -> Site List and click on your site from the displayed site list to see the dashboard for your site.

Note: After you accept the registration, it takes few minutes for the health and connectivity status to get updated in the portal. Click the
Site Statustab to verify the following (established in that order during the site bring up):
- The
Last Upgradefield hasSuccessfulvalue for theVolterra OS Statussection.- The
Last Upgradefield hasSuccessfulvalue for theVolterra Software Statussection.- The
IPSEC statusfield underRE Connectivitysection hasupvalue.
Edit Site
You can edit the site configuration by performing the following:
Step 1: Navigate to your site and open the site edit form.
Log in to the VoltConsole with your tenant and Select Sites -> Site List. Find the site you want to edit and click ... -> Edit. The site edit form gets loaded.

Step 2: Edit the site and apply the changes.
Set the site configuration parameters according to your requirement and click Save Changes.
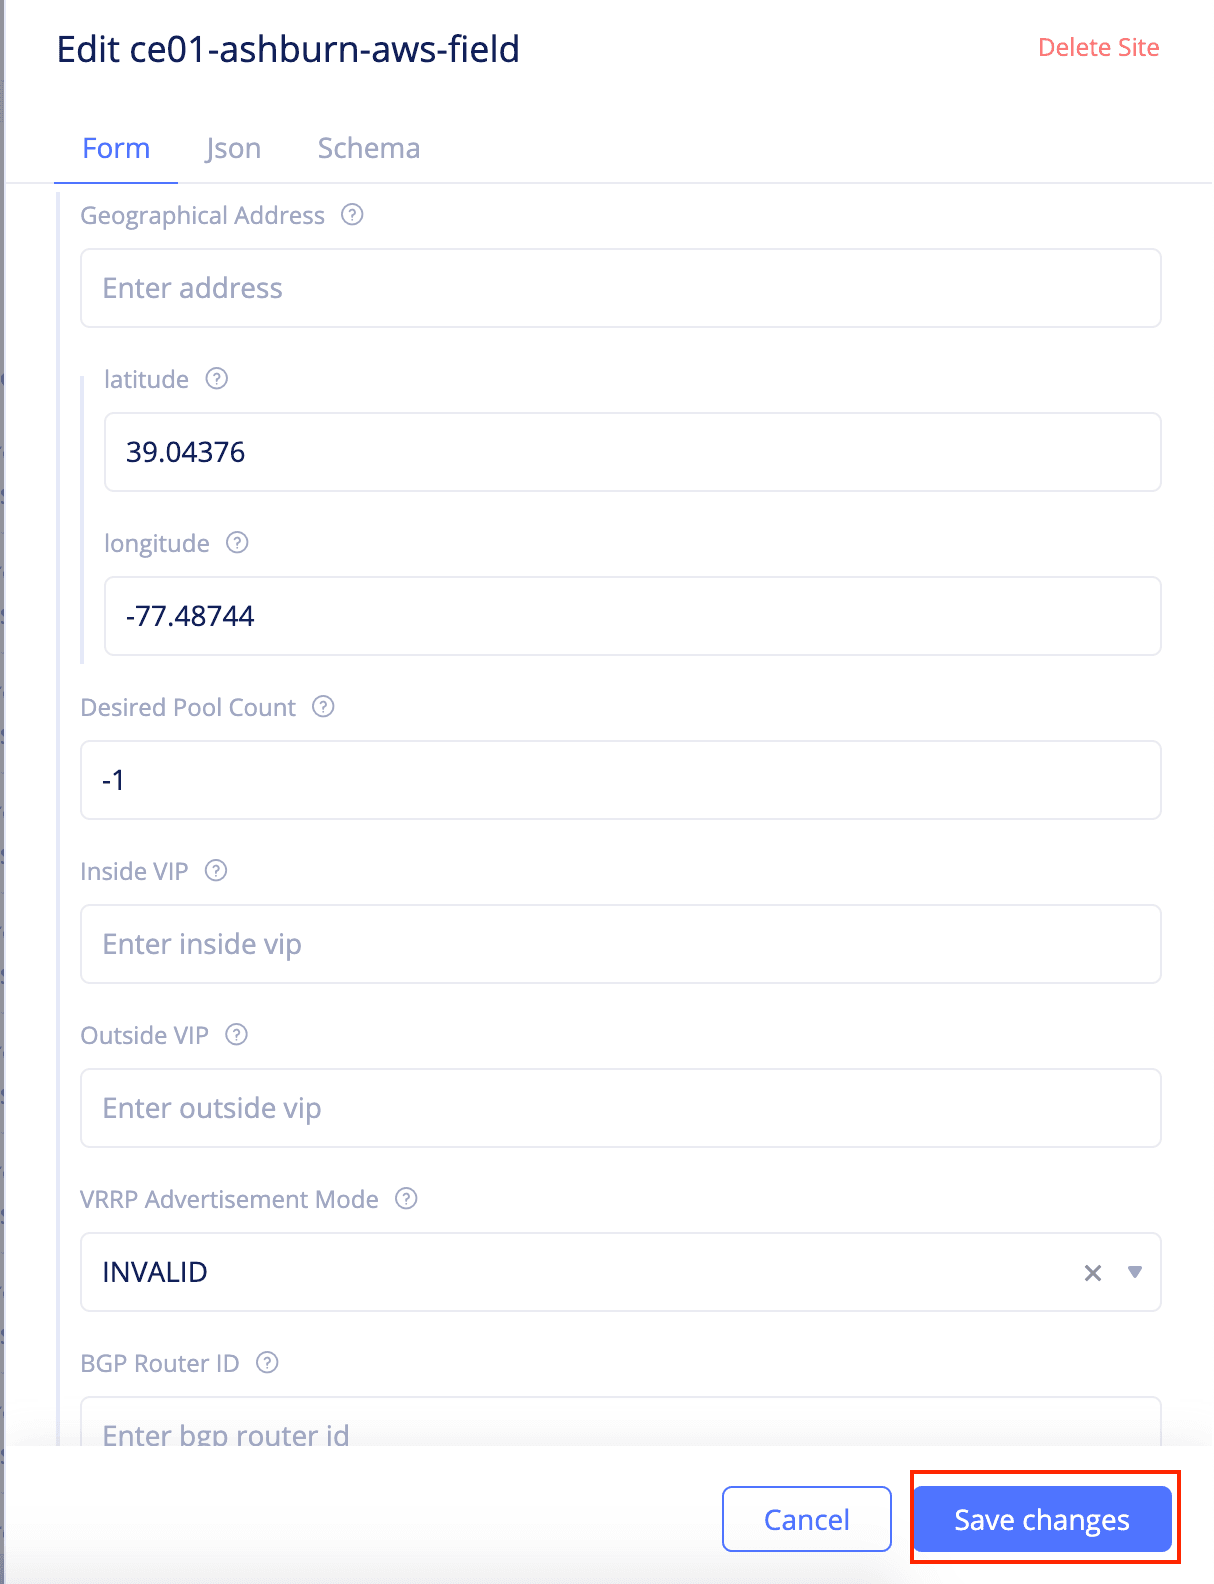
In case of configuring the VIP addresses, you must choose from the reserved addresses. The system reserves addresses as per the following mechanism of DHCP subnet Prefix Length (PL):
Table 1: Reserved VIP AddressesNote: For information on node replacement, see Replace Node.
Perform Auto-Scaling
You can also configure scaling for your sites after registering. Perform the following to setup auto-scaling.
Step 1: Navigate to your site and edit the pool count.
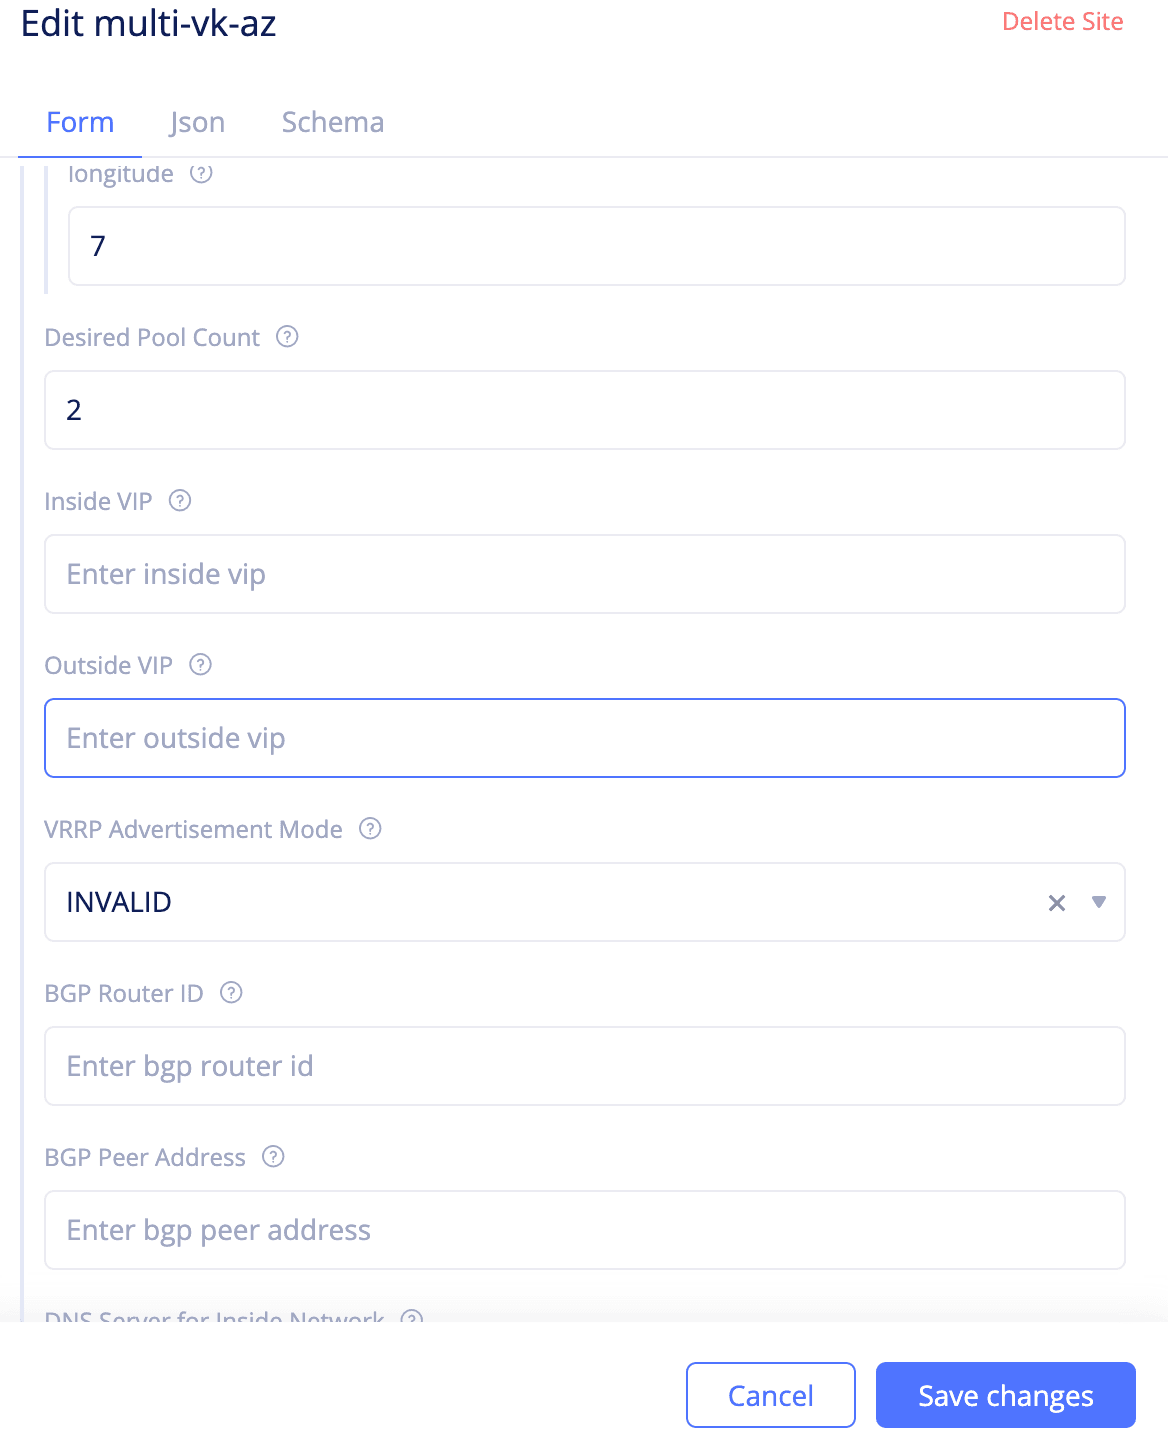
Select Sites from the configuration menu and Site List from the options pane. Locate your site, click ..., and click Edit. Enter a value in the Desired Pool Count field to set the scale. Click Save changes.
Step 2: Perform registrations for new pool nodes.
Select Manage from the configuration menu and Registrations from the Site Management in the options pane. Click the Pending Registrations tab and approve the pool nodes.
Note: Individual nodes are not visible from the site list for multi-node site. However, you can check the nodes in the
Other Registrationstab.
Upgrade Site
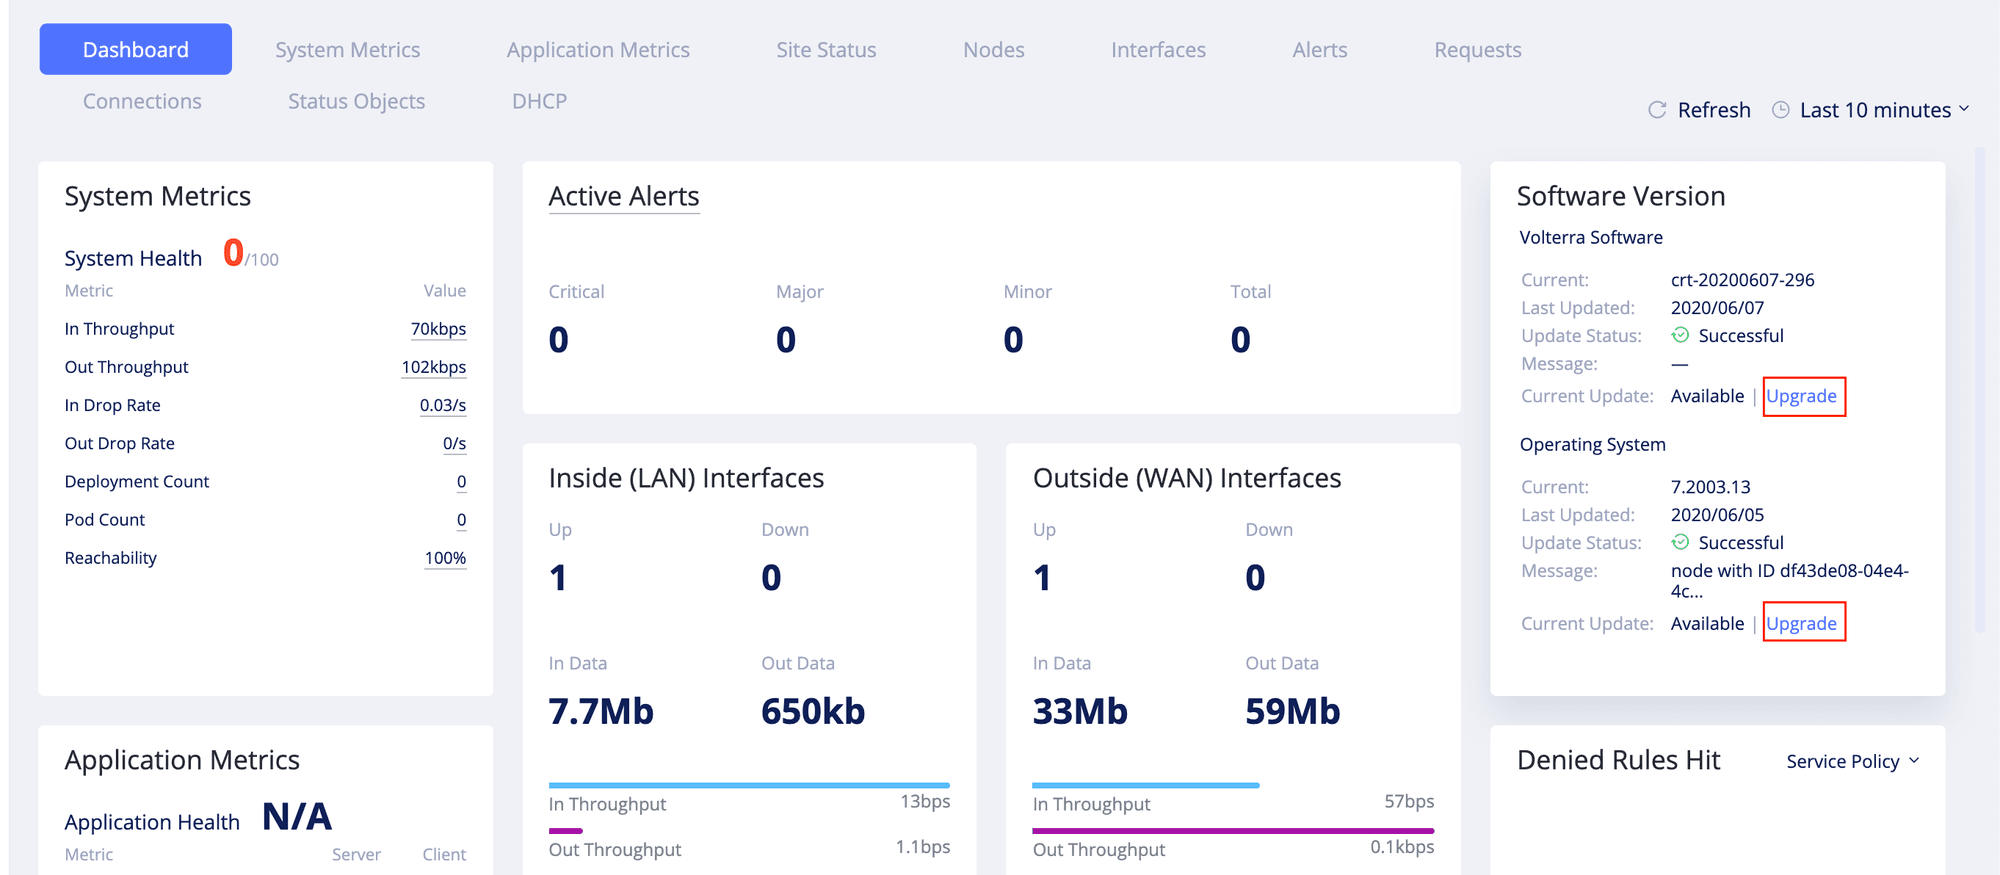
Site upgrade includes Volterra software upgrade and/or OS upgrade and you can perform this from the VoltConsole. The upgrade functionality is visible only if it is available and applicable for your site.
You can perform the software upgrade from VoltConsole using any of the following ways:
- From the
Sites->Site Listoption, clickUpgradein theSW version (Current/Status)andOS version (Current/Status)fields for your site to perform software and OS upgrades respectively. ClickUpgradein the confirmation windows to proceed.
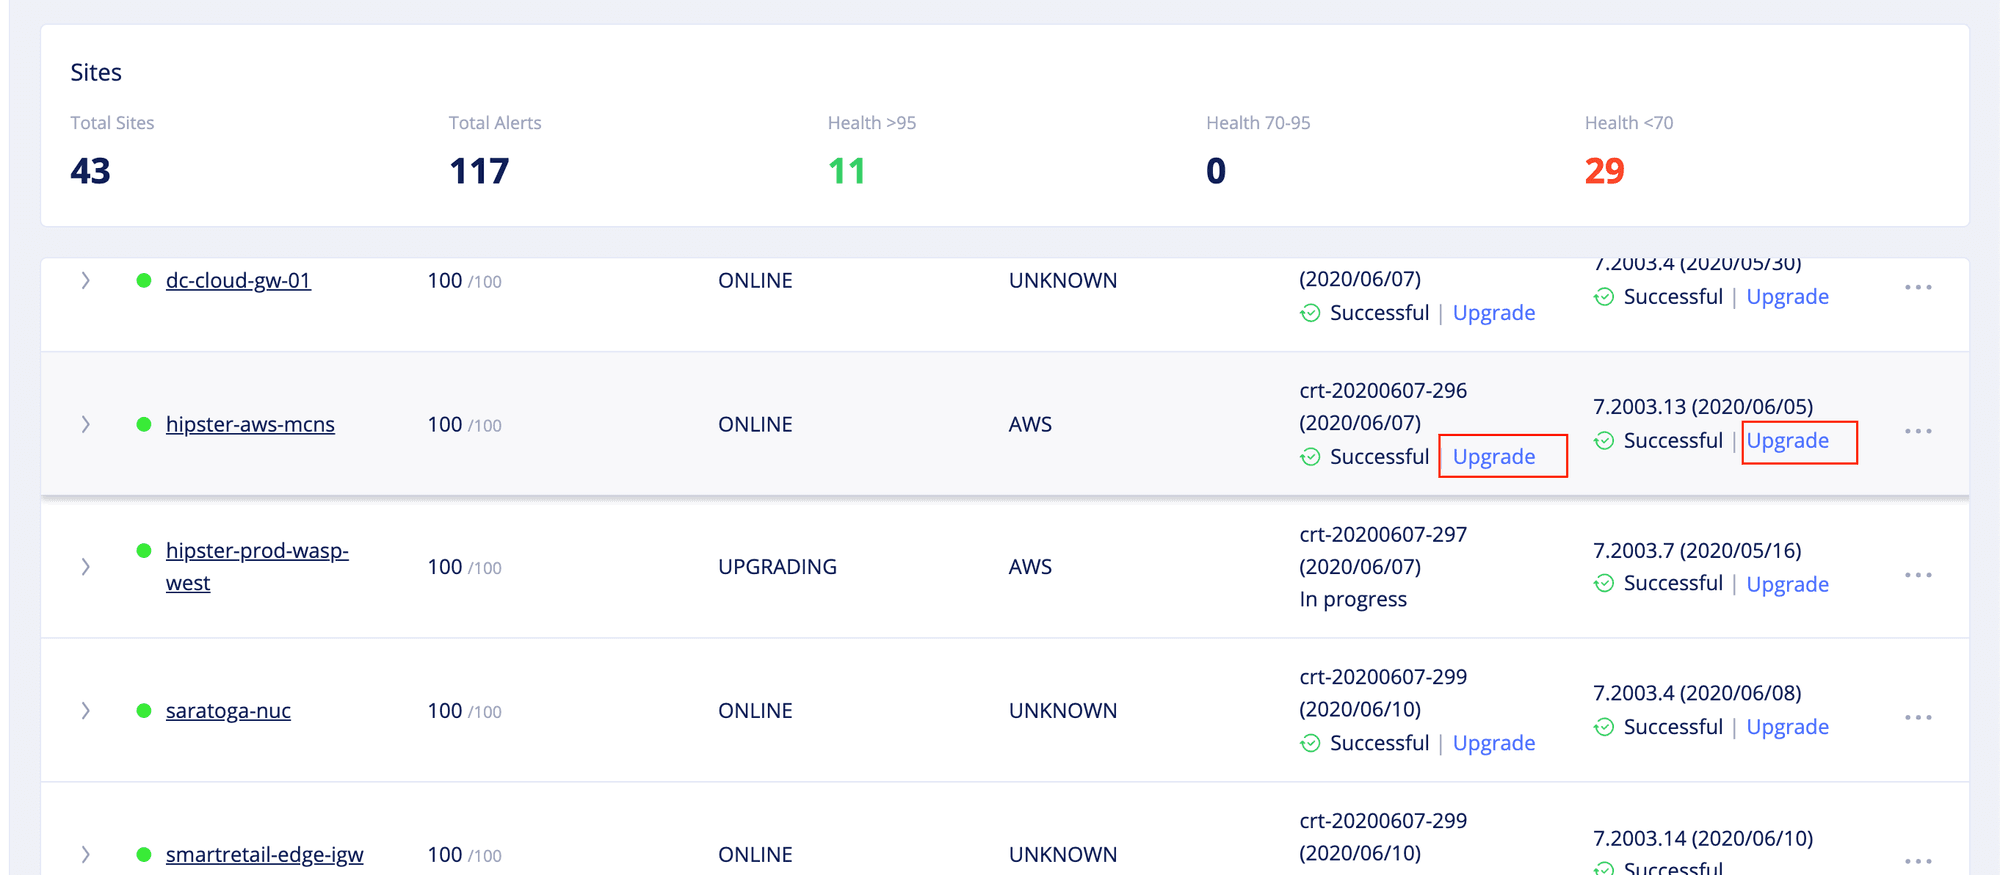
- Click on your site from the
Sites->Site Listto load the dashboard. ClickUpgradein theVolterra SoftwareandOperating Systemfields of theSoftware Versionpart of the dashboard. ClickUpgradein the confirmation windows to proceed.
- Click on your site from the
Sites->Site Listto load the dashboard and clickSite Statustab. ClickUpgradein theVolterra Software StatusandVolterra OS Statusfields. ClickUpgradein the confirmation windows to proceed.

Note: The update status is indicated in the
Update Statusfield in the site dashboard or the site status views. In the site list view, the status is indicated in theSW version (Current/Status)andOS version (Current/Status)fields. For more information on node statuses, see Node States.
Remove Site
To remove site, perform the following in the System namespace.
Step 1: Navigate to registrations and perform decomission for your site.
Select Manage from the configuration menu and Registrations from the Site Management in the options pane. Select your site from the Other Registrations tab. Click ... and Decomission for your site. Click Decomission in the confirmation window.
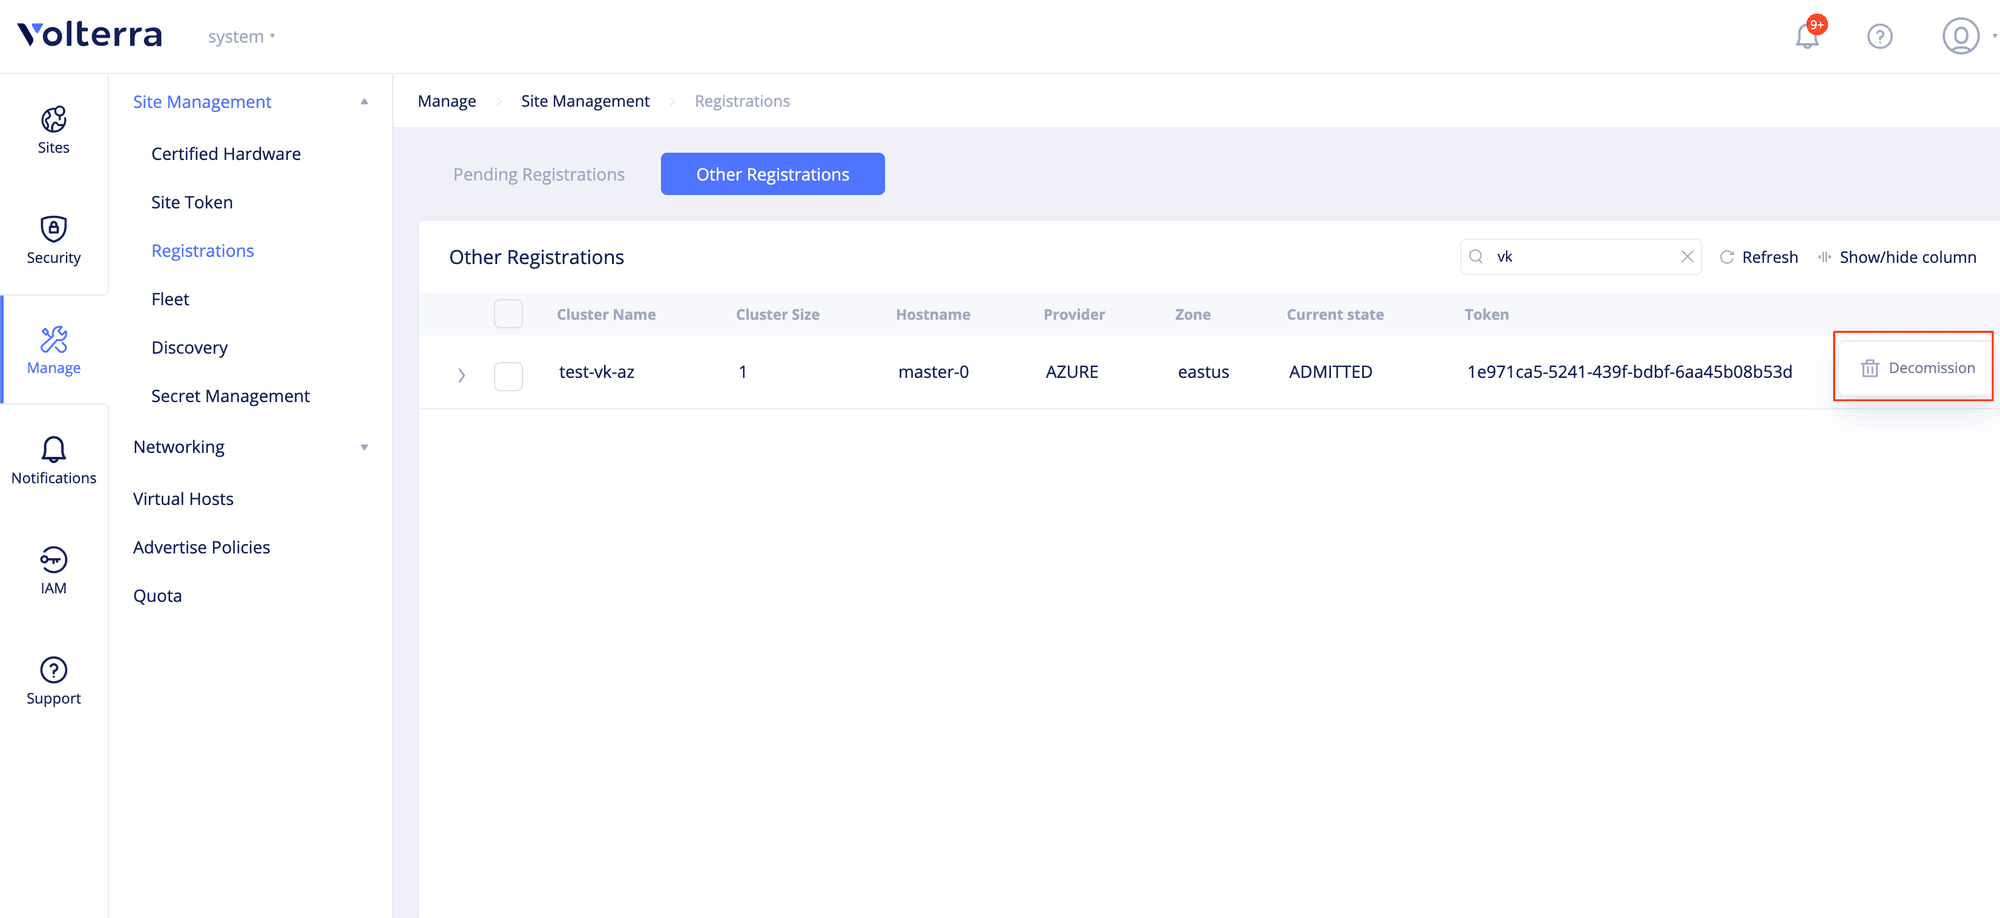
Note: In case of multi-node sites, perform this step for each of the node.
Step 2: Navigate to the site list and delete your site.
Select Sites from the configuration menu and Site List in the options pane. Select your site from the list of sites and click ... -> Edit for your site. In the edit form, click Delete Site. Click Decomission in the confirmation window.

Note: Removing the site does not delete the node in your cloud or physical locations. To remove your node from your cloud or physical device, follow the instructions provided in the Install guides.
Perform Factory Reset
You can trigger factory reset of the nodes in your site by performing the site re-registration.
Perform the following in case of factory reset:
Step 1: Navigate to registrations and perform factory reset.
Select Sites from the configuration menu and Site List in the options pane. Select your site from the list of sites and click ... -> Reregister. Click Reregister in the confirmation window.

This removes the node from the site and changes the site state to the WAITINGNODES state. Also, the factory reset starts for the node and when the reset is complete, new registration request gets created.
Note: In case of multi-node site, re-registration removes all nodes from the site and factory reset starts for all nodes.
Step 2: Approve new registration for your site.
Select Manage from the configuration menu and Registrations from the Site Management in the options pane. Select your site from the Pending Registrations tab and approve the registration.
Note: In case of multi-node sites, perform this step for each node.

