Create Azure VNET Site
On This Page:
Objective
This guide provides instructions on how to create Azure VNET and deploy sites there using the VoltConsole. For more information on Volterra site, see Volterra Site.
Volterra uses terraform to perform the site deployments. VoltConsole configuration presents option to perform automatic deployment or assisted manual deployment with guided steps. In case of assisted deployment, Volterra generates the required terraform variables that can be downloaded and used in deploying using terraform.
Using the instructions provided in this guide, you can create an Azure VNET object with single-interface or two-interface nodes in VoltConsole. You can also perform site deployment using the created VNET object.
Prerequisites
The following prerequisites apply:
- Note: If you do not have an account, see Create a Volterra Account.
-
Microsoft Azure Account.
-
Docker.
Configuration
The following video shows the Azure VNET creation and site deployment workflow:
Azure VNET creation and management requires performing the following sequence of actions:
| Phase | Description |
|---|---|
| Create Azure VNET Object | Create the VNET object in VoltConsole using the guided wizard. |
| Deploy Site | Deploy the sites configured in the VNET object using automated or assisted method. |
Create Azure VNET Object
The VoltConsole configuration to create the site object in Azure VNET guides you through the steps for required configuration. This document covers each guided step and explains the required actions to be performed for each step.
Perform the following steps:
Step 1: Log into the VoltConsole and start Azure VNET site management object creation.
- Select
Managefrom the configuration menu in thesystemnamespace. SelectSite Management->Azure VNET Sitefrom the options. ClickAdd Azure VNET Site. - Set a name for your VNET in the metadata section.
Step 2: Configure the VNET and site settings.
Go to Site Type Selection section` and perform the following:
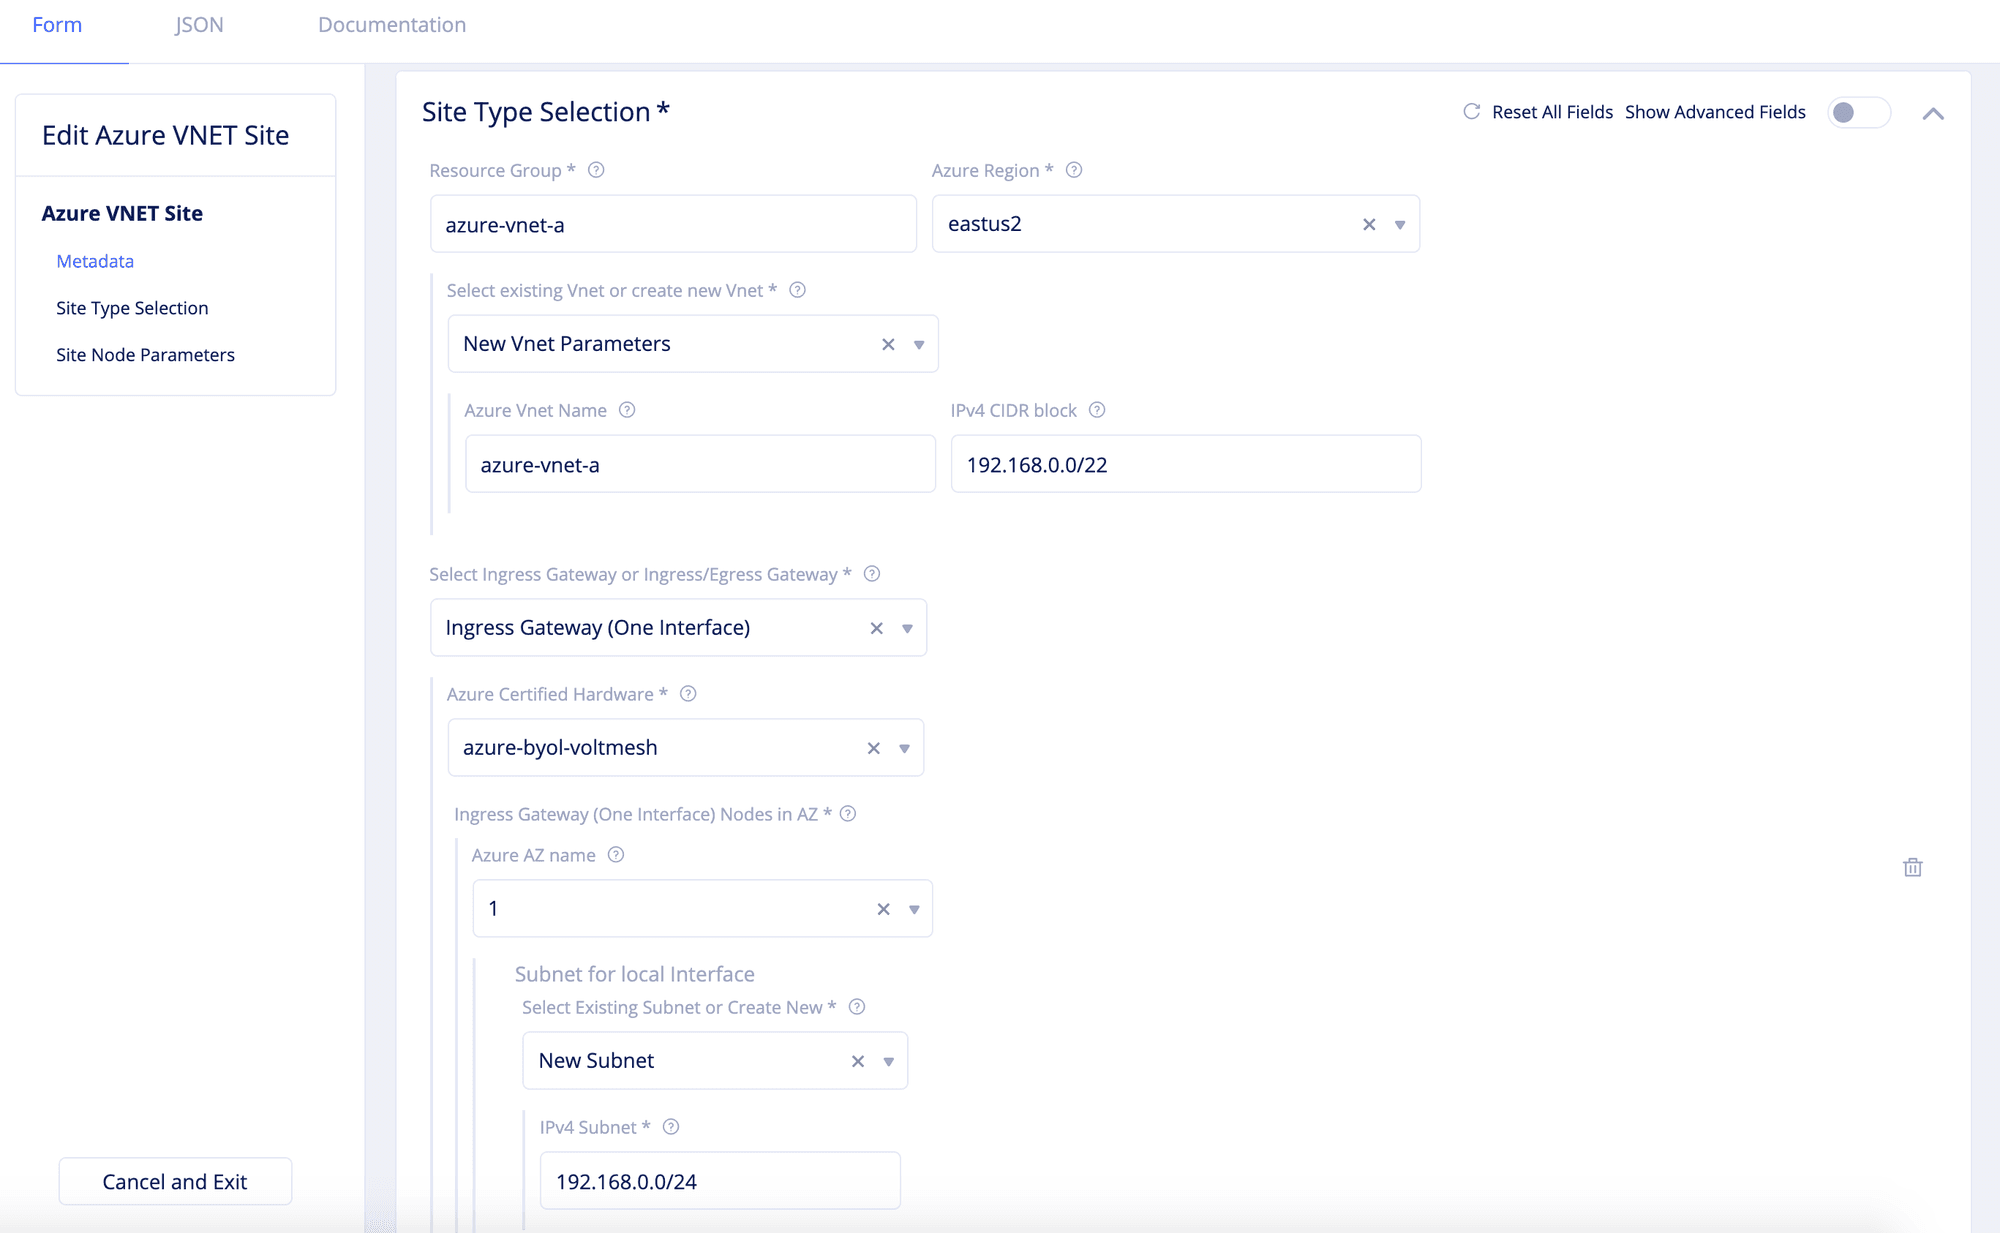
Step 2.1: Set region and configure VNET.
- Enter your Azure resource group in the
Resource Groupfield. - Select a region in the
Azure Regiondrop-down field. - Select an option for the
Select existing Vnet or create new Vnetfield and configure as per the following guidelines:- For the
New Vnet Parametersoption, enter the name in theAzure Vnet Namefield and enter the CIDR in theIPv4 CIDR blockfield. - For the
Existing Vnetoption, enter an existing resource group name and VNET name in theVnet Resource GroupandVnet Namefields respectively.
- For the

Step 2.2: Set the node configuration.
Select an option for the Select Ingress Gateway or Ingress/Egress Gateway field and perform one of the following steps accordingly.
Step 2.2.1: Configure ingress gateway site.
For the Ingress Gateway (One Interface) option, perform configuration as per the following guidelines:
- Select an option for the
Azure AZ namefield that matches the configuredAzure Region. - Select
Name of Existing SubnetorNew Subnetfor theSelect Existing Subnet or Create Newfield. Enter a subnet address in theIPv4 SubnetorSubnet NameandSubnet Resource Groupoptions accordingly.
Note: The
Azure Certified Hardwareis set toazure-byol-voltmeshby default. You can add more than one node using theAdd itemoption.
Step 2.2.2: Configure ingress/egress gateway site.
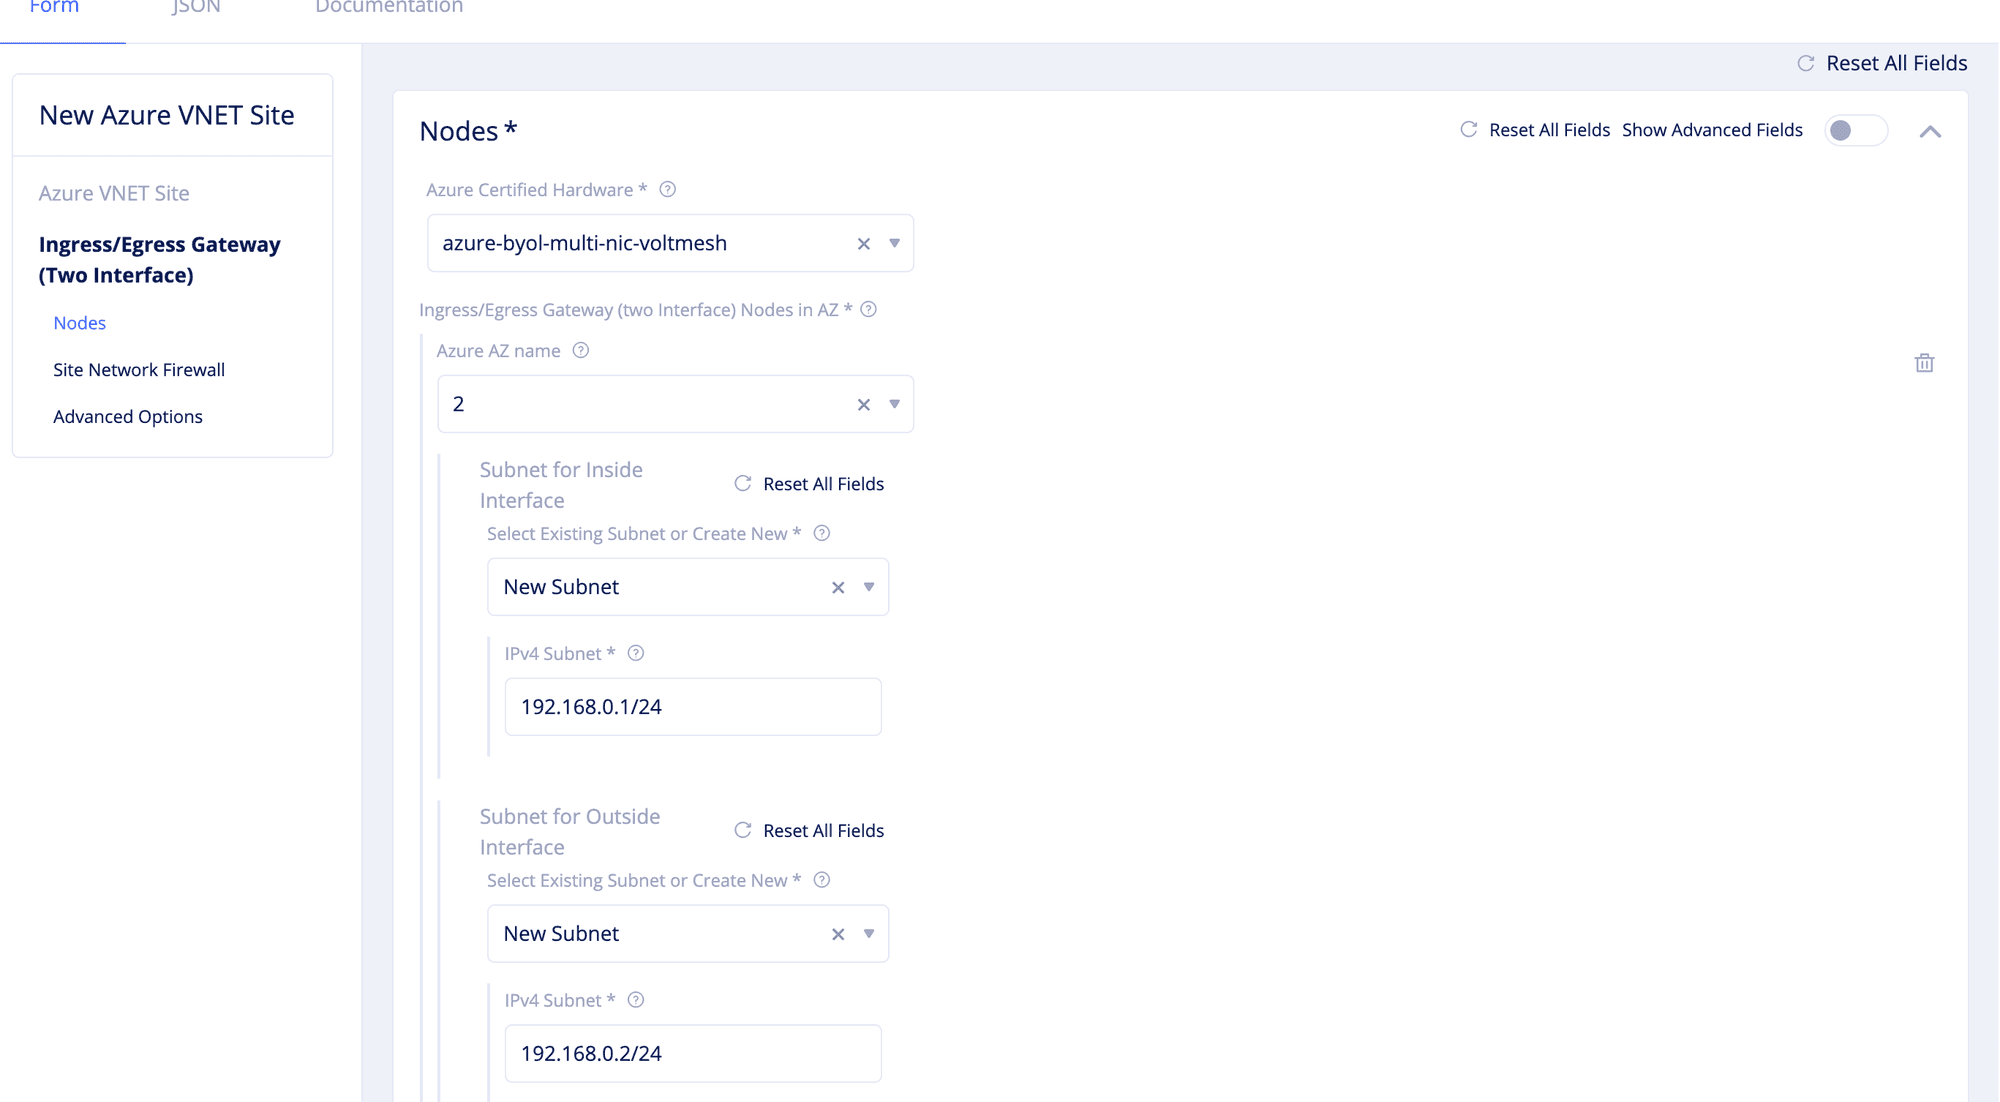
For the Ingress/Egress Gateway (Two Interface) option, click Edit to open the two-interface node configuration wizard and enter the configuration as per the following guidelines.
- Select an option for the
Azure AZ namefield that matches the configuredAzure Region. - Select
Name of Existing SubnetorNew Subnetfor theSelect Existing Subnet or Create Newfield in theSubnet for Inside Interfacesection. Enter a subnet address in theIPv4 SubnetorSubnet NameandSubnet Resource Groupoptions accordingly. - Select
Name of Existing SubnetorNew Subnetfor theSelect Existing Subnet or Create Newfield in theSubnet for Outside Interfacesection. Enter a subnet address in theIPv4 SubnetorSubnet NameandSubnet Resource Groupoptions accordingly.

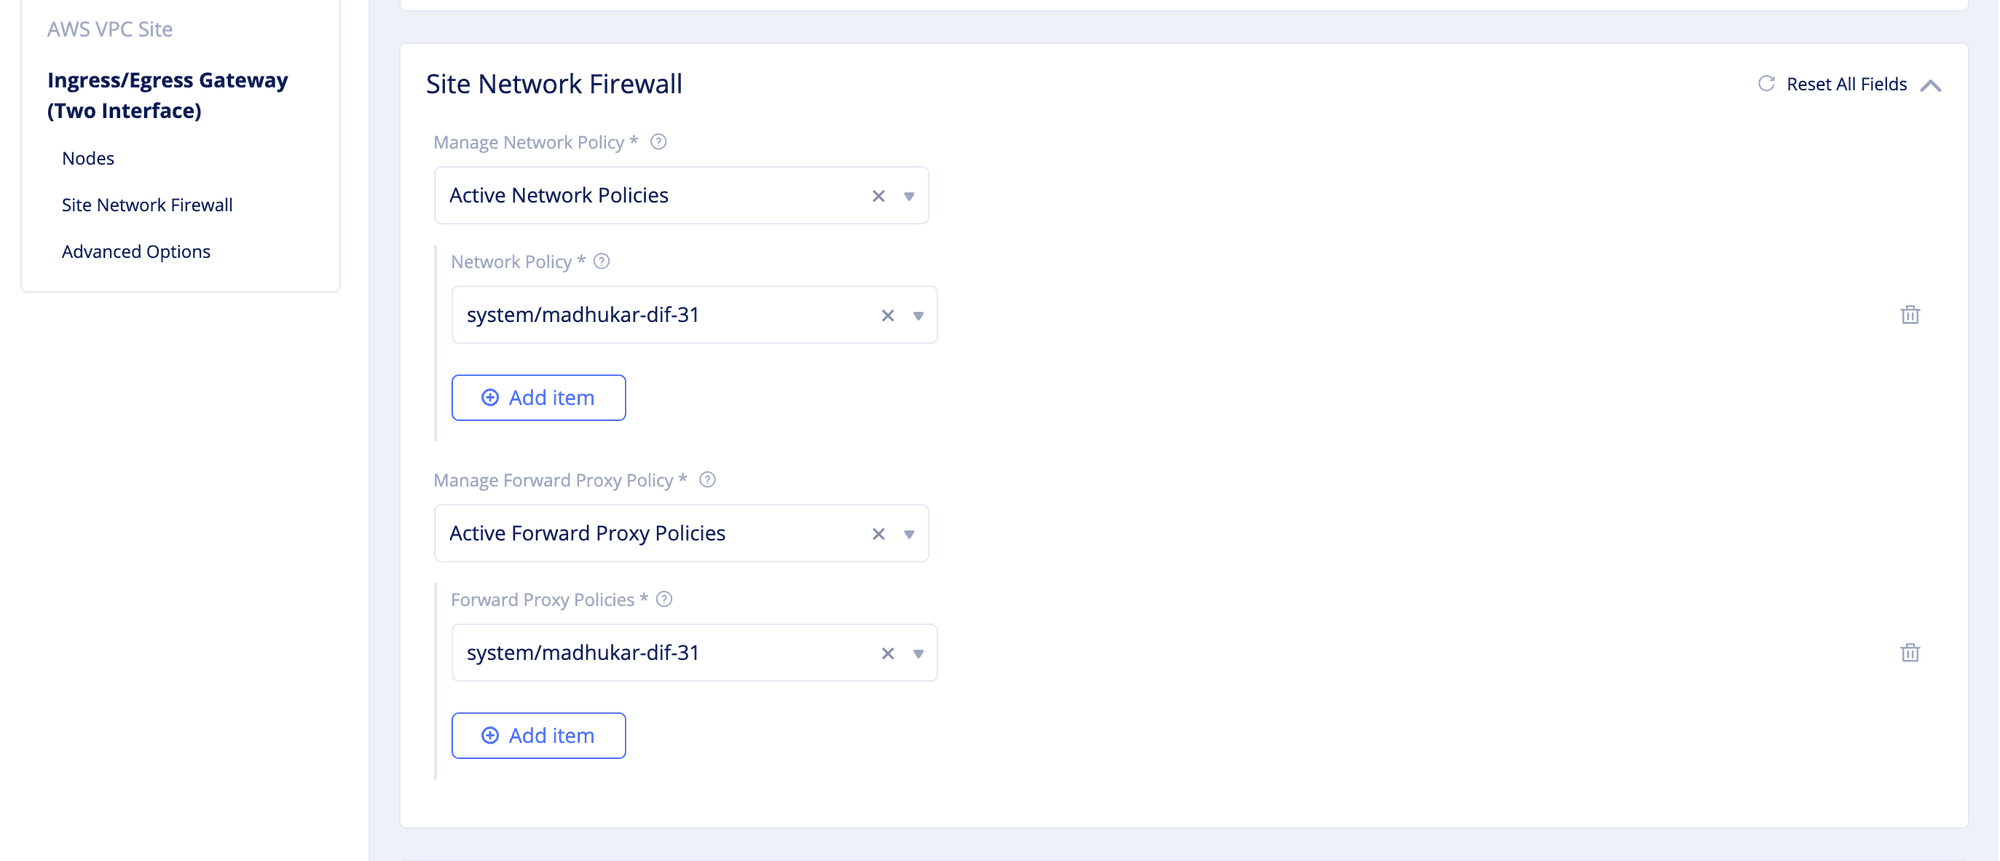
- In the
Site Network Firewallsection, optionally selectActive Network Policiesin theManage Network Policyfield. Select an existing network policy or clickCreate new network policyto create and apply a network policy. After creating the policy, clickContinueto apply. - Optionally select
Active Forward Proxy Policiesin theManage Forward Proxy Policyfield. Select an existing forward proxy policy or clickCreate new forward proxy policyto create and apply a forward proxy policy. After creating the policy, clickContinueto apply.

-
In the advanced configuration section, enable the
Show Advanced Fieldsoption. SelectManage Static Routesfor theManage Static Routes for Inside Networkfield and clickAdd itemfor theStatic route listfield. Perform one of the following steps:- Select
Simple Static Routeand enter a static route in theSimple Static Routefield. - Select
Custom Static Routeand clickConfigureunder theCustom Static Routeoption and perform the following steps:- In the
Subnetssection, select IPv4 or IPv6 option for theVersionfield. Enter a prefix and prefix length for your subnet. You can use theAdd itemoption to set more subnets. - In the
Nexthopsection, select a next-hop type for theTypefield. Select IPv4 or IPv6 for theVersionfield in theAddresssection and enter an IP address accordingly. ClickSelect interface objectin case you choose next-hop type as network interface. Select a network interface or clickAdd new network interfaceto create and apply a new network interface. ClickSelect interface objectto apply the interface. - In the
Attributessection, select supported attributes in theAttributesfield. You can select more than one from this list. - Click
Applyto add the custom route.
- In the
- Select
-
Select
Manage Static Routesfor theManage Static Routes for Outside Networkfield and clickAdd itemfor theStatic route listfield. Follow the same procedure as that of managing the static routes for inside network. -
Click
Apply.
Note: The
Azure Certified Hardwareis set toazure-byol-multi-nic-voltmeshby default. You can add more than one node using theAdd itemoption.
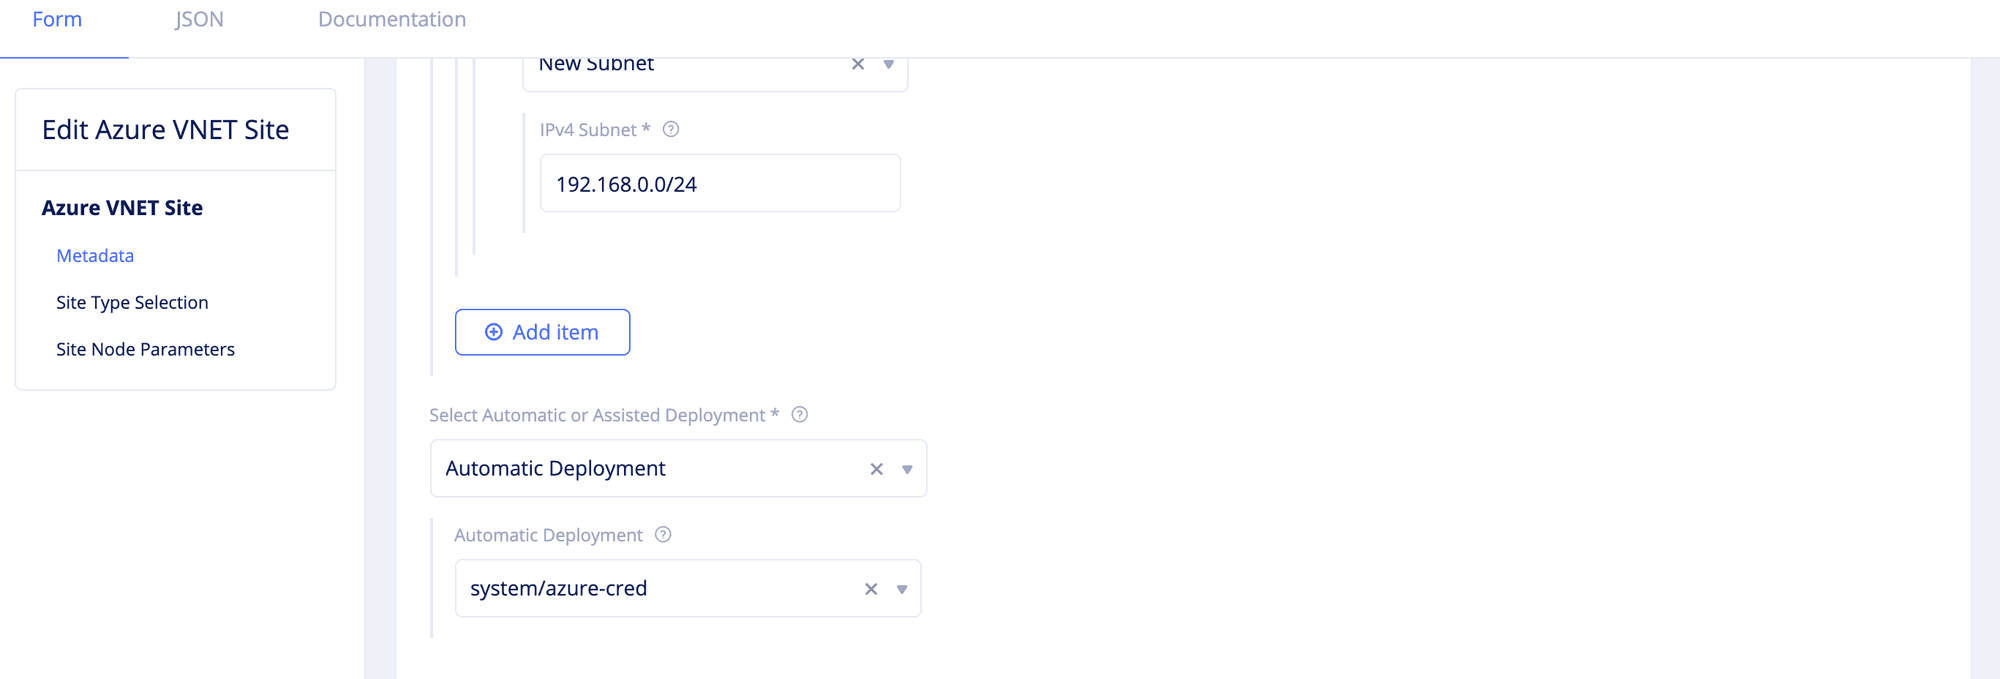
Step 2.3: Set the deployment type.
Select an option for the Select Automatic or Assisted Deployment field and perform further actions as per the following guidelines.
- For the
Automatic Deploymentoption, select an existing Azure credentials object or clickCreate new azure credoption to load new credential creation wizard. Create the new credentials as per the following guidelines:- Enter a name in the metadata section. Optionally set labels and enter a description.
- Select
Azure Client Secret for Service Principalin theSelect Cloud Credential Typefield. Enter your Azure account client ID, subscription ID, and tenant ID in theClient ID,Subscription ID, andTenant IDfields. - Click
Configureunder theClient Secretfield. - Select an option for the
Secret Info. If you selectBlindfold Secret, enter the secret in theLocationfield. If you selectClear Secret, enter the secret in theClear Secretfield in eitherASCIIorbase64(binary)formats. To encrypt your secret using Blindfold, see Blindfold your App Secrets. ClickApply. - Click
Continueto add the new credentials.

- For the
Assisted Deploymentoption, obtain the terraform parameters after this VNET object is created in VoltConsole and perform the site deployment as per the instructions for assisted deployment mentioned in the Deploy Site chapter.
Note: In the
Assisted Deploymentmode, the deployment options from VoltConsole are not available.
Step 3: Set the site node parameters.
Go to the Site Node Parameters section and enable the Show Advanced Fields option. Perform the following:
- Set the Azure machine type by selecting an option for the
Azure Machine Type for Nodefield. - Set a scaling limit for the worker nodes by configuring a value for the
Auto Scale Limitfield. This is optional. - Enter your SSH key in the
Public SSH keyfield.

Step 4: Complete the Azure VNET site object creation.
Click Continue to complete creating the Azure VNET site.
Note: The
Statusfield for the VNET object showsGenerated. You can navigate to the created Azure VNET object using theManage->Site Management->Azure VNET Siteoption.
Step 5: Optionally, perform the terraform plan activity.
-
Navigate to the created Azure VNET object using the
Manage->Site Management->Azure VNET Siteoption. -
Find your Azure VNET object and click
...->Plan (Optional)for your Azure VNET to start the action of terraform plan. This creates the execution plan for terraform.
Step 6: Download the terraform variables in case of assisted deployment.
-
Navigate to the created Azure VNET object using the
Manage->Site Management->Azure VNET Siteoption. -
Find your VNET object and click
...->Terraform Parametersfor it. -
Click
Download Paramsto download the terraform parameters.
Deploy Site
Creating the Azure VNET object in VoltConsole generates the plan and terraform objects required for deployment. You can deploy the site using automatic or assisted deployment, depending on your VNET object configuration.
Navigate to your VNET object and perform one of the following:
Automatic Deployment: Deploy the site using the automatic deployment method.
Perform this procedure in case you created the VNET object with automatic deployment option.
-
Navigate to the created Azure VNET object using the
Manage->Site Management->Azure VNET Siteoption. Find your Azure VNET object and clickApplyunder theActionscolumn. TheStatusfield for your Azure VNET object changes toApplying. -
Wait for the apply to complete and the status to change to
Applied. -
Navigate to
Sites->Sites List. Find your site from the displayed list and verify that the status isONLINE.
Note: It takes a few minutes for the site to be deployed and status to become
ONLINE.
Assisted Deployment: Deploy the site using the terraform obtained from the VNET object.
Perform this procedure in case you created the VNET object with assisted deployment option.
- Download Volterra quickstart utility.
docker pull volterraio/volt-terraform
- Run the terraform container.
          docker run --entrypoint tail --name terraform-cli -d -it \
-w /terraform/templates \
-v \${HOME}/.ssh:/root/.ssh \
volterraio/volt-terraform:latest \
-f /dev/null
- Copy the downloaded terraform variables file to the container. The following example copies to the
/var/tmpfolder on the container.
docker cp /Users/ted/Downloads/system-azure-vnet-a.json terraform-cli:/var/tmp
- Enter the terraform container.
docker exec -it terraform-cli sh
- Login to Azure using your Active Domain(AD) credentials. Enter the following command and follow the instructions displayed on the screen.
az login
- Check the default subscription and resource group.
az account list --output table
- Set a default subscription by name or
uuid.
          SUBSCRIPTION_ID=<subscription_id>
az account set -s \$SUBSCRIPTION_ID
- Verify that the correct subscription is set.
az account list --output table --query '[].{Name:name, IsDefault:isDefault}'
- Create a service principal account that has permissions to manage resources in the selected subscription. Save the output.
az ad sp create-for-rbac -n <deployment-name> --role="Contributor" --scopes="/subscriptions/\$SUBSCRIPTION_ID"
The following is a sample output of the service principal account creation.
           {
        "appId": "00000000-0000-0000-0000-000000000000",
        "displayName": "azure-cli-2017-06-05-10-41-15",
        "name": "http://azure-cli-2017-06-05-10-41-15",
        "password": "0000-0000-0000-0000-000000000000",
        "tenant": "00000000-0000-0000-0000-000000000000"
 }
Note: The following list shows the fields in the output of above command. These are required for preparing the input variables in the next step for deployment:
- The field
appIdis theclient_idvariable.- The field
passwordis theclient_secretvariable.- The field
tenantis thetenant_idvariable.
-
Edit the copied terraform parameters file and add the parameters obtained from service principal account creation.
-
Change to the VNET template directory and set the environment variable for API credentials password.
          cd /terraform/templates/views/assisted/azure-volt-node
export VES_P12_PASSWORD=<api_cred_password>
Note: See the Generate API Certificate for information on API credentials.
- Deploy the nodes by executing the terraform commands.
          terraform init
terraform apply -var-file=/var/tmp/system-azure-vnet-a.json
Note: The
terraform initcommand brings up the Azure cloud resources. When theterraform applycommand is executed, it prompts for user input to proceed. Enteryesto begin deploying the node(s) and wait for the deployment to complete.
- Navigate to
Sites->Sites List. Find your site from the displayed list and verify that the status isONLINE.
Note: It takes a few minutes for the site to be deployed and status to become
ONLINE.
Delete Site
You can delete the VNET object from the VoltConsole. Perform the following to delete the VNET object:
- Navigate to the created Azure VNET object using the
Manage->Site Management->Azure VNET Siteoption. - Find your Azure VNET object and click
...->Delete. - Click
Deletein the confirmation window.
Note: Deleting the VNET object deletes the sites and nodes from the VNET and deletes the VNET.

